warning light OLDSMOBILE SILHOUETTE 1998 Owners Manual
[x] Cancel search | Manufacturer: OLDSMOBILE, Model Year: 1998, Model line: SILHOUETTE, Model: OLDSMOBILE SILHOUETTE 1998Pages: 444, PDF Size: 23.2 MB
Page 11 of 444
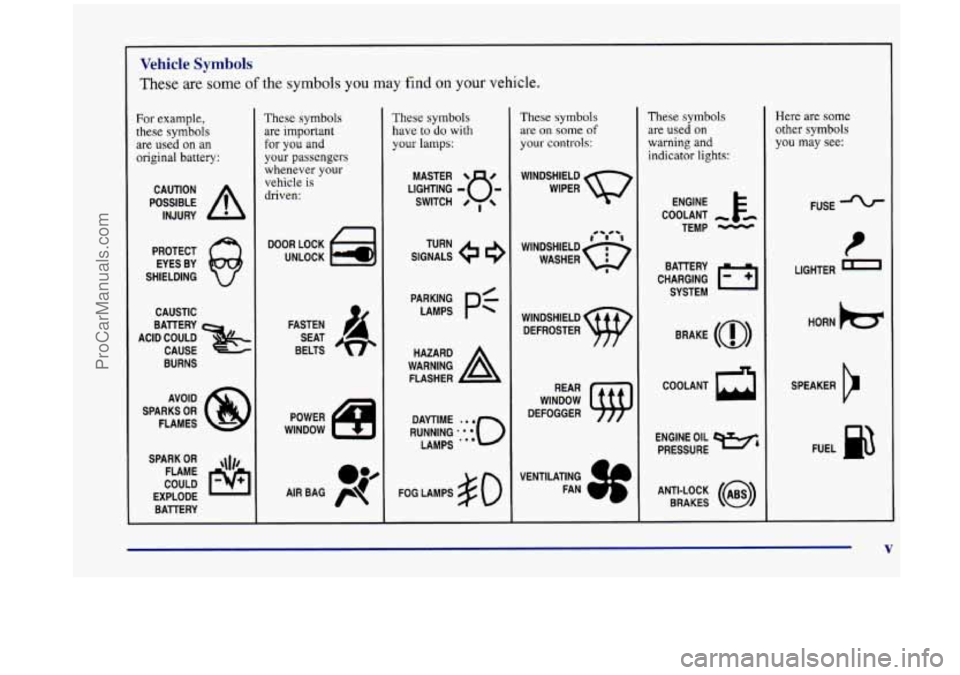
Vehicle Symbols
These are some of the symbols you may find on your vehicle.
For example,
these symbols are used on an
original battery:
POSSIBLE A
CAUTION
INJURY
PROTECT EYES BY
SHIELDING
CAUSTIC
ACID COULD BAllERY
CAUSE
BURNS
AVOID
SPARKS
OR
FLAMES
SPARK
OR ,\I/,
COULD FLAME
EXPLODE BAllERY
These symbols
are important
for you and
your passengers
whenever
your
vehicle is
driven:
DOOR LOCK
UNLOCK
FASTEN SEAT
BELTS
These symbols
have to do with
your lamps:
SIGNALS e
TURN
WARNING
A
HAZARD
FLASHER
FOG LAMPS
$0
These symbols
are on some of
your controls:
WINDSHIELD
WIPER
WINDSHIELD DEFROSTER
WINDOW
DEFOGGER
These symbols
are used on
warning and indicator lights:
ENGINE E*
COOLANT
TEMP
-
CHARGING I-1
BATTERY
SYSTEM
BRAKE
(a)
COOLANT a
ENGINE OIL e,
PRESSURE
ANTI-LOCK
(@)
BRAKES
Here are some other symbols you may see:
FUSE
LIGHTER
m
HORN )cr
SPEAKER
b
FUEL e3
ProCarManuals.com
Page 103 of 444
Section 2 Features and Controls
Here you can learn about the many standard and optional features on your vehicle, and information on starting,
shifting and braking. Also explained are the instrument panel and the warning systems that tell you if everything is
working properly
-- and what to do if you have a problem.
2-2
2-4
2-8
2-13
2-
14
2-15
2-20
2-22
2-23
2-25
2-26
2-27
2-29
2-30
2-34 2-35
2-37 Keys
Door Locks
Remote Lock Control (Option)
Switchbanks
Sliding Door
Power Sliding Door (Option)
Liftgate
Theft
Content Theft-Deterrent (Option)
New Vehicle “Break-In”
Ignition Positions
Starting Your Engine
Engine Coolant Heater
(If Equipped)
Automatic Transaxle Operation
Parking Brake
Shifting Into PARK
(P)
Shifting Out of PARK (P)
2-38
2-38
2-39
2-40
2-50
2-52
2-59
2-6
1
2-64
2-65
2-78
2-78
2-8
1
2-82
2-86 2-99 Parking Over Things
That Burn
Engine Exhaust
Running Your Engine While You’re Parked
Locks and Lighting Choices
Windows
Turn SignalMultifunction Lever
Exterior Lamps
Interior Lamps
Mirrors Storage Compartments
Sun Visors
Accessory Inflator System (Option)
Accessory Power Outlet
Instrument Panel
Warning Lights, Gages and Indicators
Driver Information Center (DIC) (Option)
2-1
ProCarManuals.com
Page 123 of 444
NOTICE:
Be sure there are no overhead obstructions, such
as a garage door, before you open the liftgate.
You could slam the liftgate into something and
break the glass.
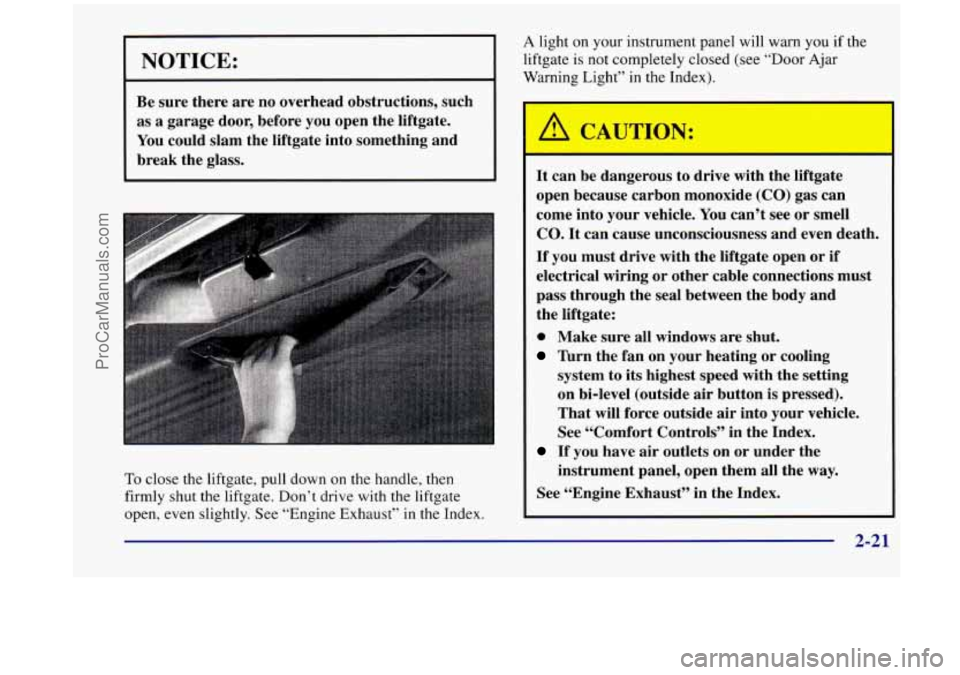
To close the liftgate, pull down on the handle, then
firmly shut the liftgate. Don’t drive with the liftgate
open, even slightly. See “Engine Exhaust”
in the Index.
A light on your instrument panel will warn you if the
liftgate
is not completely closed (see “Door Ajar
Warning Light” in the Index).
It can be dangerous to drive with the liftgate open because carbon monoxide
(CO) gas can
come into your vehicle. You can’t see or smell
CO. It can cause unconsciousness and even death.
If you must drive with the liftgate open or if
electrical wiring or other cable connections must
pass through the seal between the body and
the liftgate:
0 Make sure all windows are shut.
Turn the fan on your heating or cooling
system to its highest speed
with the setting
on bi-level (outside air button is pressed).
That will force outside air into your vehicle.
See “Comfort Controls” in the Index.
If you have air outlets on or under the
instrument panel, open them all the
way.
See ‘(Engine Exhaust” in the Index.
2-21
ProCarManuals.com
Page 128 of 444
Ignition Positions
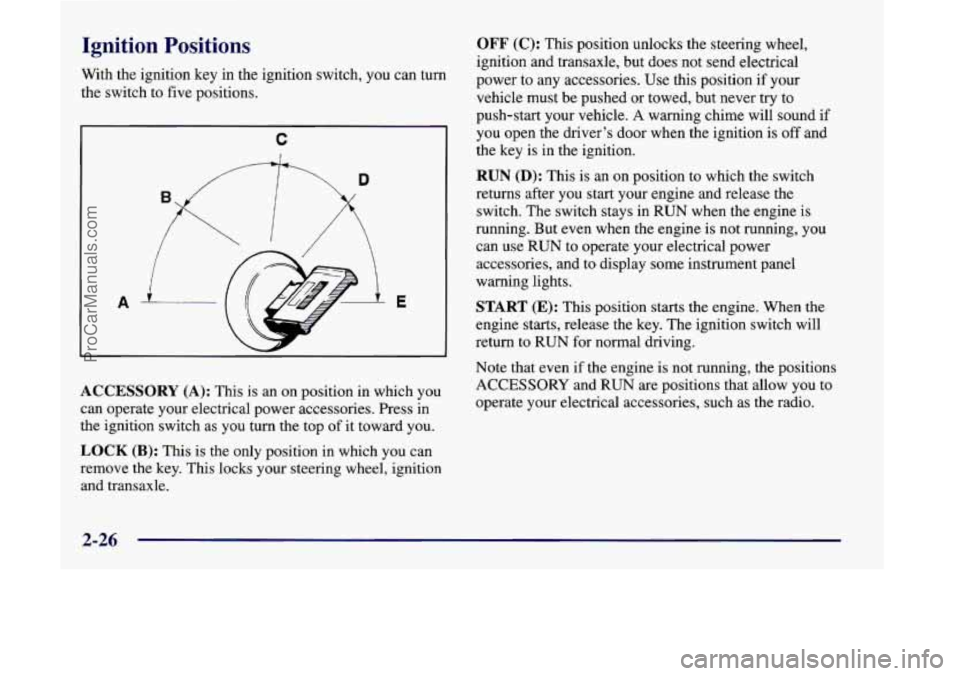
With the ignition key in the ignition switch, you can turn
the switch to five positions.
C
ACCESSORY (A): This is an on position in which you
can operate your electrical power accessories. Press in
the ignition switch as you turn the top
of it toward you.
LOCK (B): This is the only position in which you can
remove the key. This locks your steering wheel, ignition
and transaxle.
OFF (C): This position unlocks the steering wheel,
ignition and transaxle, but does not send electrical
power to any accessories. Use this position if your
vehicle must be pushed or towed, but never try to
push-start your vehicle.
A warning chime will sound if
you open the driver’s door when the ignition is off and
the key is in the ignition.
RUN (D): This is an on position to which the switch
returns after you start your engine and release the
switch.
The switch stays in RUN when the engine is
running. But
even when the engine is not running, you
can use RUN to operate your electrical power
accessories, and to display some instrument panel
warning lights.
START (E): This position starts the engine. When the
engine starts, release the key. The ignition switch will
return to RUN for normal driving.
Note that even
if the engine is not running, the positions
ACCESSORY and RUN are positions that allow you to
operate your electrical accessories, such as the radio.
2-26
ProCarManuals.com
Page 136 of 444
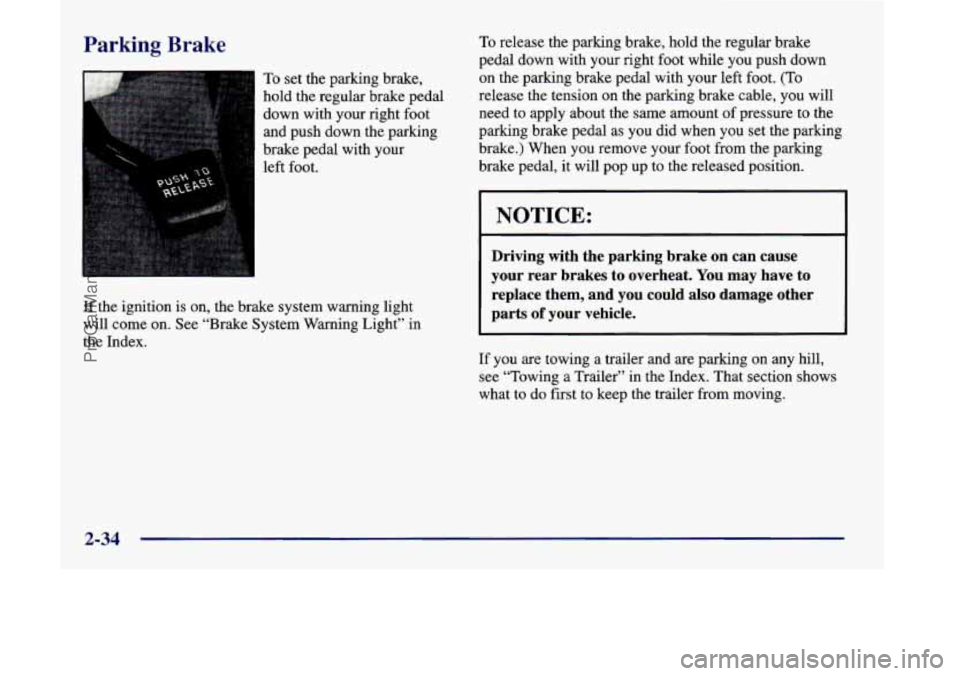
Parking Brake
To set the parking brake,
hold the regular brake pedal
down with your right foot
and push down the parking
brake pedal with your
left foot.
If the ignition is on, the brake system warning light
will come on. See “Brake System Warning Light” in
the Index.
To release the parking brake, hold the regular brake
pedal down with your right foot while you push down
on the parking brake pedal with your left foot.
(To
release the tension on the parking brake cable, you will
need to apply about the same amount of pressure to the
parking brake pedal as you did when you set the parking
brake.) When you remove your foot from the parking
brake pedal,
it will pop up to the released position.
NOTICE:
Driving with the parking brake on can cause
your rear brakes to overheat. You may have to
replace them, and you could also damage other
parts
of your vehicle.
If you are towing a trailer and are parking on any hill,
see “Towing a Trailer” in the Index. That section shows
what to do first to keep the trailer from moving.
2-34
ProCarManuals.com
Page 161 of 444
Exterior Lamps
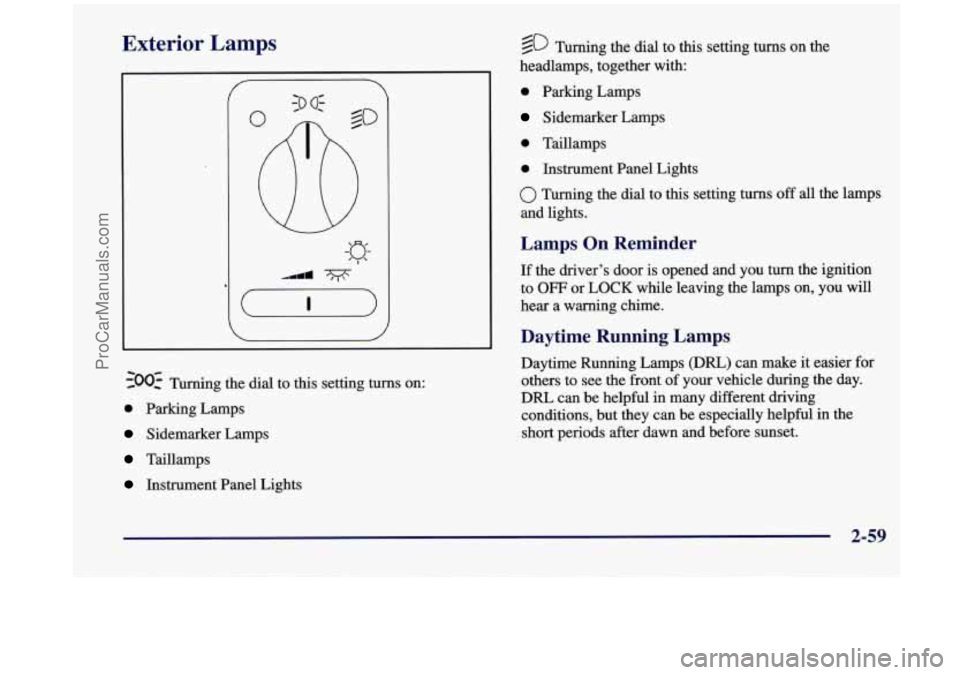
500: Turning the dial to this setting turns on:
0 Parking Lamps
Sidemarker Lamps
Taillamps
Instrument Panel Lights
@ Turning the dial to this setting turns on the
headlamps, together with:
. Parking Lmps
Sidemarker Lamps
0 Taillamps
0 Instrument Panel Lights
0 Turning the dial to this setting turns off all the lamps
and lights.
Lamps On Reminder
If the driver’s door is opened and you turn the ignition
to
OFF or LOCK while leaving the lamps on, you will
hear a warning chime.
Daytime Running Lamps
Daytime Running Lamps (DRL) can make it easier for
others to see the front
of your vehicle during the day.
DlU can be helpful
in many different driving
conditions, but they can be especially helpful in the
short periods after dawn and before sunset.
2-59
ProCarManuals.com
Page 185 of 444
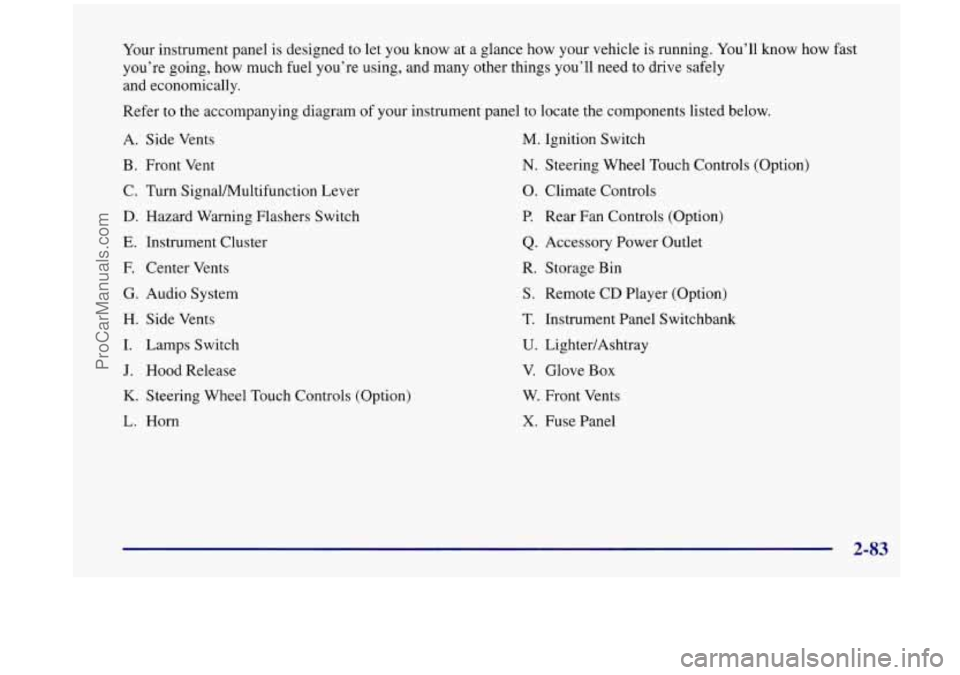
Your instrument panel is designed to let you know at a glance how your vehicle is running. You’ll know how fast
you’re going, how much fuel you’re using, and many other things you’ll need to drive safely
and economically.
Refer to the accompanying diagram of your instrument panel to locate the components listed below.
A. Side Vents
B. Front Vent
C. Turn SignalMultifunction Lever
D. Hazard Warning Flashers Switch
E. Instrument Cluster
F. Center Vents
G. Audio System
H. Side Vents
I. Lamps Switch
J. Hood Release
K. Steering Wheel Touch Controls (Option)
L. Horn
M. Ignition Switch
N. Steering Wheel Touch Controls (Option)
0. Climate Controls
P. Rear Fan Controls (Option)
Q. Accessory Power Outlet
R. Storage Bin
S. Remote CD Player (Option)
T. Instrument Panel Switchbank
U. LightedAshtray
V. Glove Box
W. Front Vents
X, Fuse Panel
2-83
ProCarManuals.com
Page 186 of 444
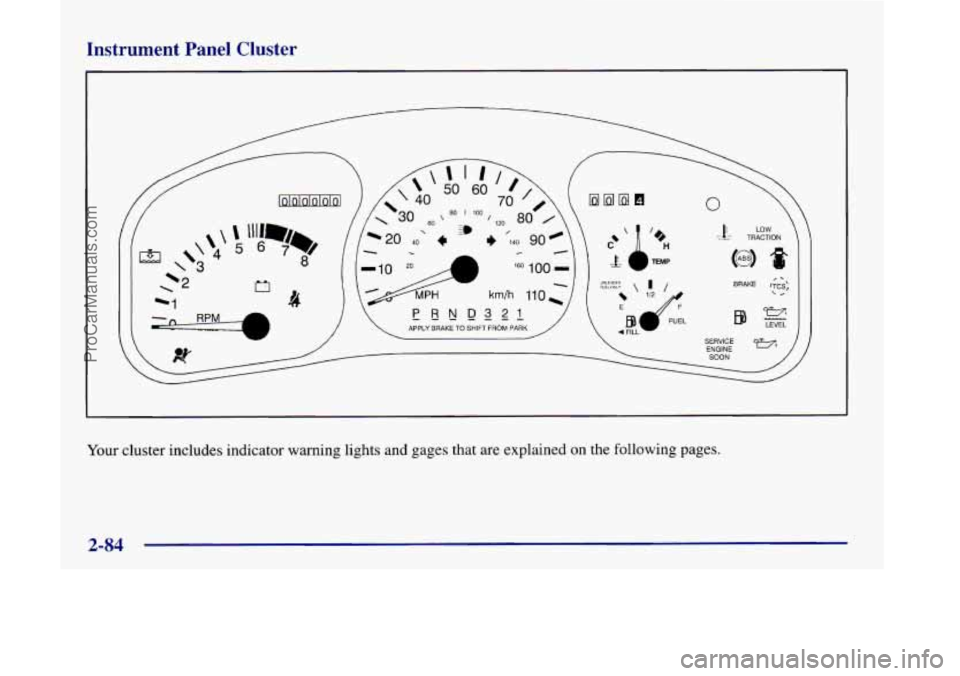
Instrument Panel Cluster
LOW Tk TRACTION
SERVICE ENGINE SOON /
1
Your cluster includes indicator warning lights and gages that are explained on the following pages.
2-84
ProCarManuals.com
Page 188 of 444
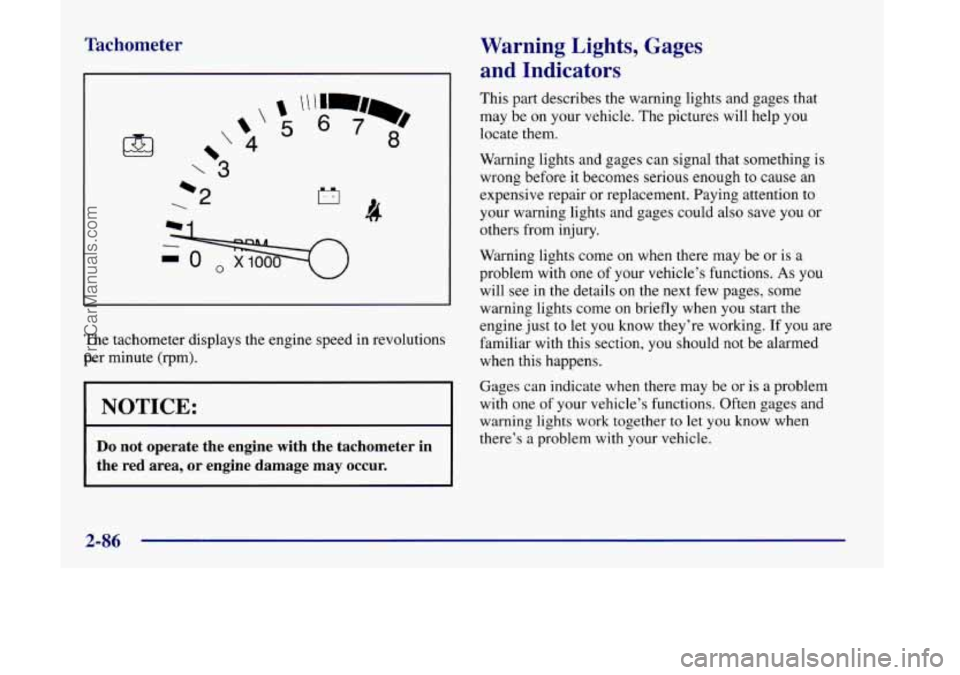
Tachometer
‘ -3
*2 I-;1
R
-0 77
The tachometer displays the engine speed in revolutions
per minute (rpm).
I NOTICE: I
Do not operate the engine with the tachometer in
the red area, or engine damage may occur.
Warning Lights, Gages
and Indicators
This part describes the warning lights and gages that
may be
on your vehicle. The pictures will help you
locate them.
Warning lights and gages can signal that something is
wrong before it becomes serious enough to cause an
expensive repair or replacement. Paying attention to
your warning lights and gages could also save you or
others from injury.
Warning lights come on when there may be or is a
problem with one
of your vehicle’s functions. As you
will see in the details on the next few pages, some
warning lights come on briefly when you start the
engine just to let you know they’re working.
If you are
familiar with this section, you should not be alarmed
when this happens.
Gages can indicate when there may be or is a problem
with one of your vehicle’s functions. Often gages and
warning lights work together
to let you know when
there’s a problem with your vehicle.
2-86
ProCarManuals.com
Page 189 of 444
When one of the warning lights comes on and stays on
when you are driving, or when one of the gages shows
there may be a problem, check the section that tells you
what to do about it. Please follow this manual’s advice.
Waiting to do repairs can be costly
-- and even
dangerous.
So please get to know your warning lights
and gages. They’re a big help.
Safety Belt Reminder Light
When the key is turned to RUN or START, a chime will
come on for about eight seconds to remind people to
fasten their safety belts.
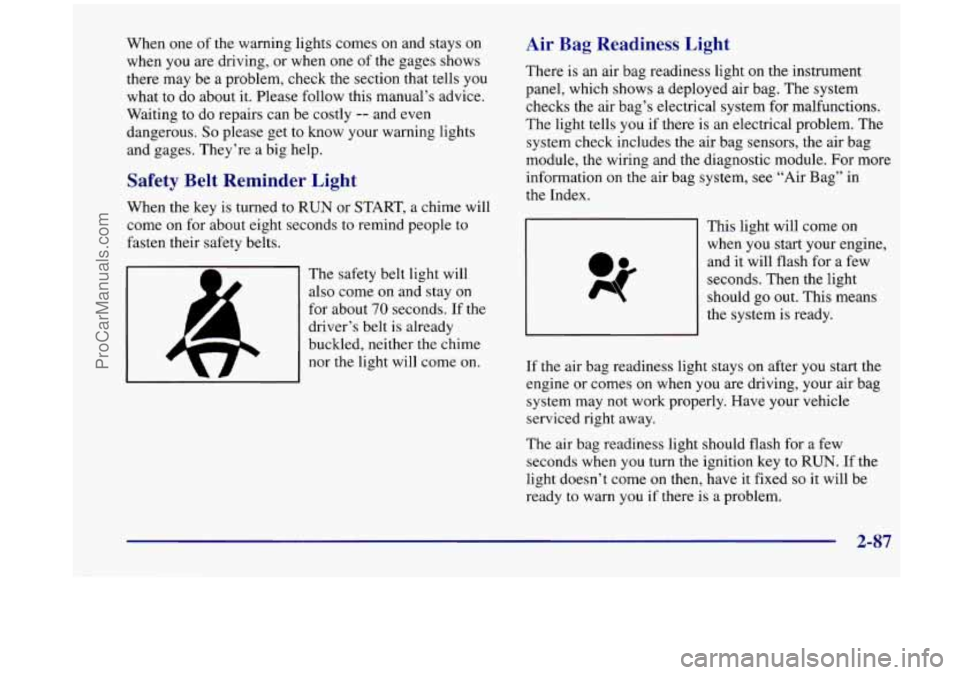
The safety belt light will
also come on and stay on
for about
70 seconds. If the
driver’s belt is already
buckled, neither the chime
nor the light will come on.
Air Bag Readiness Light
There is an air bag readiness light on the instrument
panel, which shows a deployed air bag. The system
checks the air bag’s electrical system for malfunctions.
The light tells
you if there is an electrical problem. The
system check includes the air bag sensors, the air bag
module, the wiring and the diagnostic module. For more
information on the air bag system, see “Air Bag” in
the Index.
This light will come on
when you start your engine,
and it will flash for a few
seconds. Then the light
should go out. This means
the system
is ready.
If the air bag readiness light stays on after you
start the
engine or comes
on when you are driving, your air bag
system may not work properly. Have your vehicle
serviced right away.
The air bag readiness light should flash for a few
seconds when you turn the ignition key to
RUN. If the
light doesn’t come on then, have it fixed
so it will be
ready
to warn you if there is a problem.
2-87
ProCarManuals.com