lock OLDSMOBILE SILHOUETTE 2003 Owner's Manual
[x] Cancel search | Manufacturer: OLDSMOBILE, Model Year: 2003, Model line: SILHOUETTE, Model: OLDSMOBILE SILHOUETTE 2003Pages: 466, PDF Size: 21.55 MB
Page 79 of 466
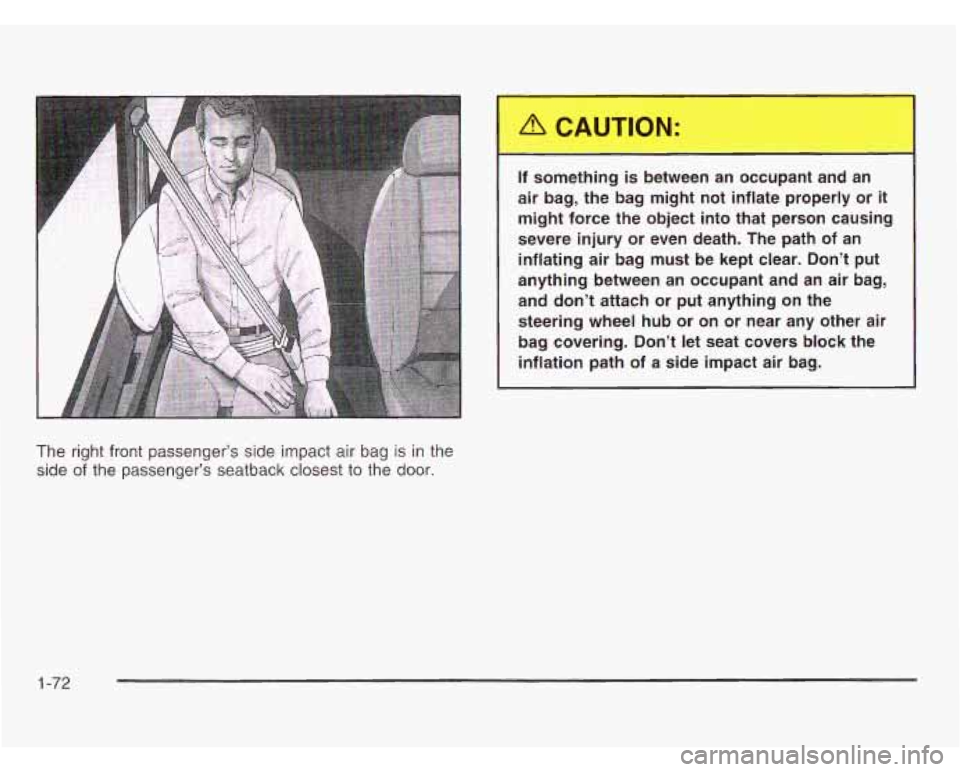
If something is between an occupant and an
air bag, the bag might not inflate properly or
it
might force the object into that person causing
severe injury or even death. The path of an
inflating air bag must be kept clear. Don’t put
anything between an occupant and an air bag,
and don’t attach or put anything on the
steering wheel hub or on or near any other air
bag covering. Don’t let seat covers block the
inflation path
of a side impact air bag.
The right front passenger’s side impact air bag is in the
side
of the passenger’s seatback closest to the door.
1-72
Page 86 of 466

Section 2 Features and Controls
Keys ..................................................
Remote Keyless Entry System ............
Remote Keyless Entry System Operatior
Doors and Locks
................................
Door Locks .......................................
1
............ 2.3
............ 2.5
........... 2.6
............ 2.9
............ 2.9
Power Door Locks
........................................ 2-10
Last Door Closed Locking
.............................. 2-1 1
Programmable Automatic Door Locks
.............. 2.12
Lockout Protection
........................................ 2.13
Leaving Your Vehicle
.................................... 2.13
Dual Sliding Doors
.
Power Sliding Door
Liftgate
.................
Windows .................
Power Windows .....
Power Rear Quarter
...................................... 2.13
PSD)
.............................. 2.16
...................................... 2.22
...................................... 2.24
...................................... 2.25
Windows
........................ 2.26
Sun Visors
................................................... 2-26
Content Theft-Deterrent
. . .................... 2.27
PASS-Key@
Ill ................... ............ 2.29
PASS-Key@
Ill Operation .... 2.30
Theft-Deterrent Systems
.................................. 2.27 Starting
and Operating
Your Vehicle ................ 2.32
Ignition Positions
.............. .......... 2-32
New Vehicle Break-In
.................................... 2.32
Starting Your Engine
..................................... 2-34
Engine Coolant Heater
.................................. 2-35
Automatic Transaxle Operation
....................... 2-36
Parking Brake
.............................................. 2-39
Shifting Into Park (P)
..................................... 2-40
Shifting Out of Park (P)
................................. 2-42
Parking Over Things That Burn
....................... 2-43
Engine Exhaust
............................................ 2-43
Running Your Engine While You Are Parked
....... 2-44
Mirrors
........................................................... 2-45
Manual Rearview Mirror
................ .......... 2-45
Outside Power Mirrors
................................... 2-45
Outside Convex Mirror
................................... 2-46
Outside Heated Mirrors
.................................. 2-46
Onstar@ System
............................................. 2-47
HomeLink@ Transmitter
................................... 2-49
Programming the HomeLink Transmitter
........... 2-50
2-1
Page 87 of 466
Section 2 Features and Controls
Storage Areas ................................................ 2.54
Glove
Box ................................................... 2.54
Cupholder(s)
................................................ 2.54
Compact Overhead Console
........................ 2.54
Overhead Console
................. ................ 2.55
Front Seat Storage Net
...... ................... 2.55
Luggage Carrier
........................................... 2.56
Rear Storage Area
........................................ 2.58
Convenience Net
.......................................... 2.59
Convenience Center
...................................... 2.60 Vehicle Personalization
.................................
Entering
Programming Mode ........................
Delayed Illumination and
Exit Lighting
...........................................
Automatic Door Locks .................................
Last Door Locking and Lockout Deterrent .......
Remote Driver Unlock Control ......................
Remote Lock and Unlock Confirmation ...........
Content Theft-Deterrent System ....................
Arming and Disarming the Content
Theft-Deterrent System
.............................
Memory Seat .............................................
Exiting Programming Mode ...........................
. 2.62
. 2.63
. 2.63
. 2.64
. 2.65
. 2.66
. 2.67
. 2.69
. 2.70
. 2.71
. 2.72
2-2
Page 89 of 466
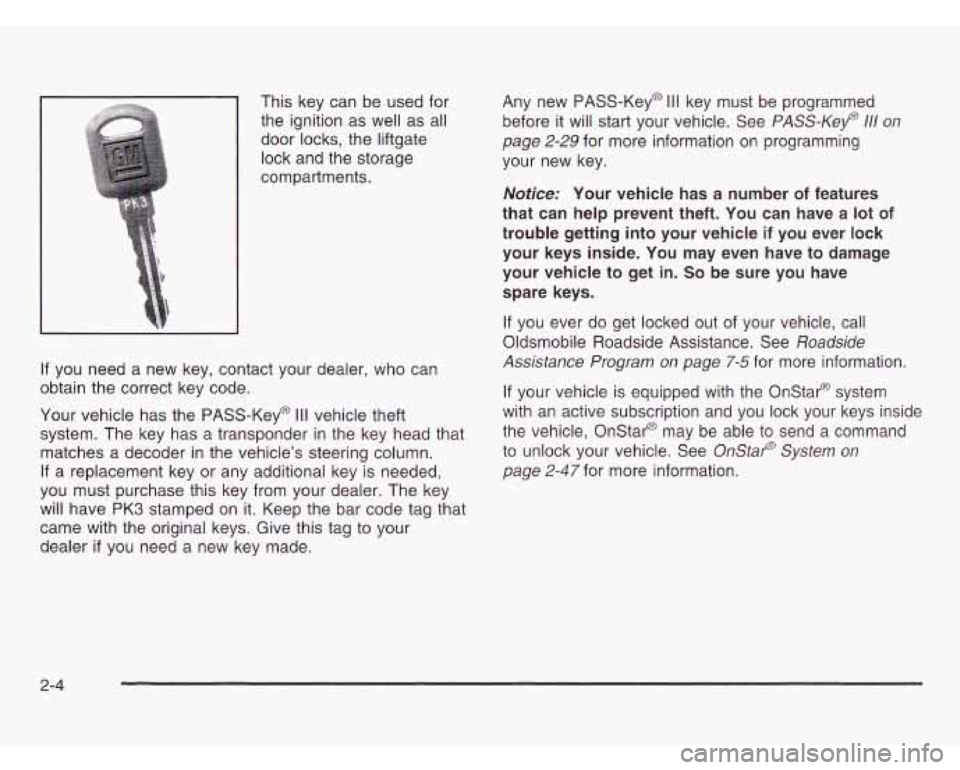
This key can be used for
the ignition as well as all
door locks, the liftgate
lock and the storage
compartments.
If you need a new key, contact your dealer, who can
obtain the correct key code.
Your vehicle has the PASS-Key@
Ill vehicle theft
system. The key has a transponder in the key head that
matches a decoder in the vehicle’s steering column.
If a replacement key or any additional key is needed,
you must purchase this key from your dealer. The key
will have PK3 stamped on it. Keep the bar code tag that
came with the original keys. Give this tag to your dealer
if you need a new key made. Any new PASS-Key@
Ill key must be programmed
before it will start your vehicle. See
PASS-Kep 111 on
page 2-29
for more information on programming
your new key.
Notice: Your vehicle has a number of features
that can help prevent theft. You can have a
lot of
trouble getting into your vehicle if you ever lock
your keys inside. You may even have to damage
your vehicle to get in.
So be sure you have
spare keys.
If you ever do get locked out of your vehicle, call
Oldsmobile Roadside Assistance. See
Roadside
Assistance Program on page 7-5
for more information.
If your vehicle is equipped with the Onstar@ system
with an active subscription and you lock your keys inside
the vehicle, Onstar@ may be able to send a command
to unlock your vehicle. See
OnStap System on
page 2-47
for more information.
2-4
Page 90 of 466
Remote Keyless Entry System
If equipped, the keyless entry system operates on a
radio frequency subject to Federal Communications
Commission (FCC) Rules and with Industry Canada.
This device complies with Part
15 of the FCC Rules.
Operation is subject to the following two conditions:
1. This device may not cause interference, and
2. This device must accept any interference received,
including interference that may cause undesired
operation of the device.
This device complies with
RSS-210 of Industry Canada.
Operation is subject to the following two conditions:
1. This device may not cause interference, and
2. This device must accept any interference received,
including interference that may cause undesired
operation of the device.
Changes or modifications to this system by other than
an authorized service facility could void authorization to
use this equipment. At
times you may notice a decrease in range. This is
normal for any remote keyless entry system.
If the
transmitter does not work or
if you have to stand closer
to your vehicle for the transmitter to work, try this:
e
e
e
e
Check the distance. You may be too far from your
vehicle. You may need to stand closer during
rainy or snowy weather.
Check the location. Other vehicles or objects may
be blocking the signal. Take a few steps to the
left or right, hold the transmitter higher, and
try again.
Check to determine
if battery replacement is
necessary. See
"Battery Replacement" under
Remote Keyless Entry System Operation on
page
2-6.
If you are still having trouble, see your dealer or
a qualified technician for service.
Page 91 of 466
Remote Keyless Entry System
Operation
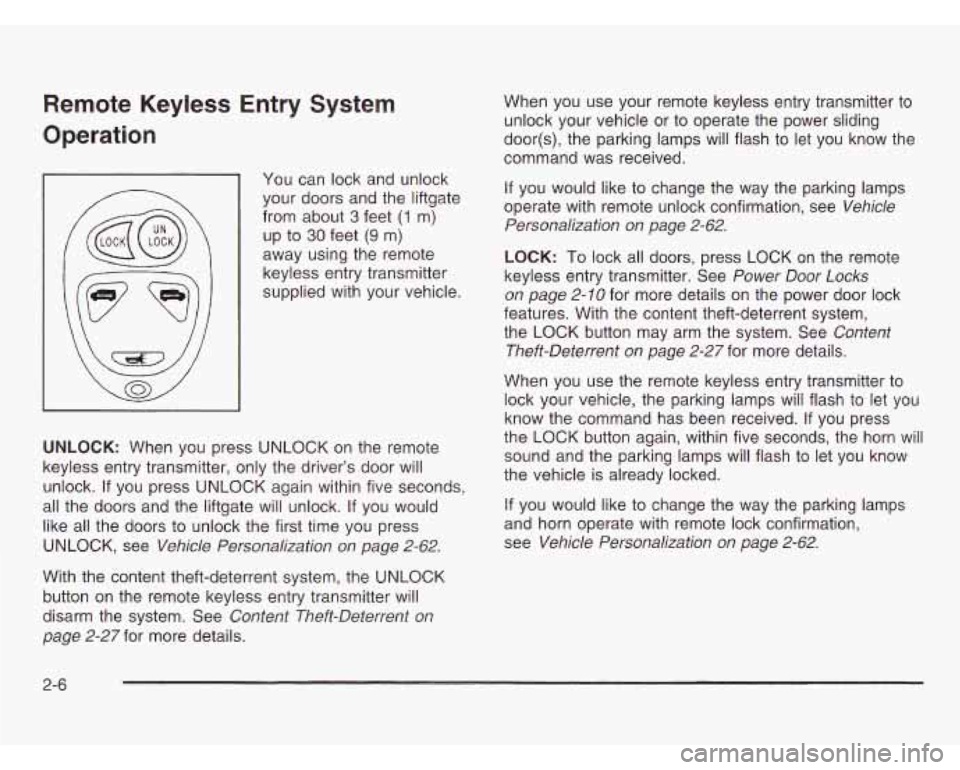
You can lock and unlock
your doors and the liftgate
from about
3 feet (1 m)
up to
30 feet (9 m)
away using the remote
keyless entry transmitter
supplied with your vehicle.
UNLOCK: When you press UNLOCK on the remote
keyless entry transmitter, only the driver’s door will
unlock. If you press UNLOCK again within five seconds,
all the doors and the liftgate will unlock.
If you would
like all the doors to unlock the first time you press
UNLOCK, see
Vehicle Personalization on page 2-62.
With the content theft-deterrent system, the UNLOCK
button on the remote keyless entry transmitter will
disarm the system. See
Content Theft-Deterrent on
page
2-27 for more details. When
you use your remote keyless entry transmitter to
unlock your vehicle or to operate the power sliding
door(s), the parking lamps will flash to let you know the
command was received.
If you would like to change the way the parking lamps
operate with remote unlock confirmation, see
Vehicle
Personalization on page 2-62.
LOCK: To lock all doors, press LOCK on the remote
keyless entry transmitter. See
Power Door Locks
on page 2-10 for more details on the power door lock
features. With the content theft-deterrent system,
the LOCK button may arm the system. See
Content
Theft-Deterrent on page 2-27
for more details.
When you use the remote keyless entry transmitter to
lock your vehicle, the parking lamps will flash to let you
know the command has been received. If you press
the LOCK button again, within five seconds, the horn will
sound and the parking lamps will flash to let you know
the vehicle is already locked.
If you would like to change the way the parking lamps
and horn operate with remote lock confirmation,
see
Vehicle Personalization on page 2-62.
2-6
Page 92 of 466
Remote Alarm
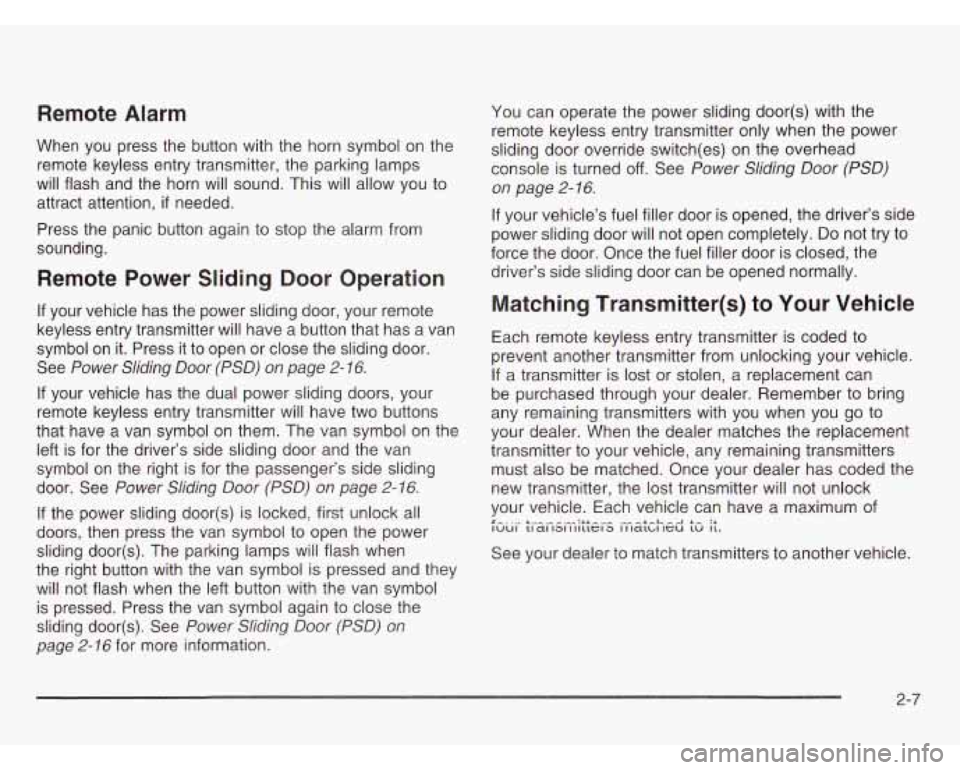
When you press the button with the horn symbol on the
remote keyless entry transmitter, the parking lamps
will flash and the horn
will sound. This will allow you to
attract attention,
if needed.
Press the panic button again to stop the alarm from
sounding.
Remote Power Sliding Door Operation
If your vehicle has the power sliding door, your remote
keyless entry transmitter will have a button that has a van
symbol on it. Press it to open or close the sliding door.
See
Power Sliding Door (PSD) on page 2- 16.
If your vehicle has the dual power sliding doors, your
remote keyless entry transmitter will have two buttons
that have a van symbol on them. The van symbol on the
left is for the driver’s side sliding door and the van
symbol on the right is for the passenger’s side sliding
door. See
Power Sliding Door (PSD) on page 2-16.
If the power sliding door(s) is locked, first unlock all
doors, then press the van symbol to open the power
sliding door(s). The parking lamps will flash when
the right button with the van symbol is pressed and they
will not flash when the left button with the van symbol
is pressed. Press the van symbol again to close the
sliding door(s). See
Power Sliding Door (PSD) on
page 2- 16 for more information. You
can operate the power sliding door(s) with the
remote keyless entry transmitter only when the power
sliding door override switch(es) on the overhead
console is turned
off. See Power Sliding Door (PSD)
on page
2- 16.
If your vehicle’s fuel filler door is opened, the driver’s side
power sliding door will not open completely.
Do not try to
force the door. Once the fuel filler door is closed, the
driver’s side sliding door can be opened normally.
Matching Transmitter(s) to Your Vehicle
Each remote keyless entry transmitter is coded to
prevent another transmitter from unlocking your vehicle.
If a transmitter is lost or stolen, a replacement can
be purchased through your dealer. Remember to bring
any remaining transmitters with you when you go to
your dealer. When the dealer matches the replacement
transmitter to your vehicle, any remaining transmitters
must also be matched. Once your dealer has coded the
new transmitter, the lost transmitter will not unlock
your vehicle. Each vehicle can have a maximum of
+^..I .L .----- :.LL--- --L-L^--I I- :A IUUI LI a1 131 I IILLGI 3 I I I~LCII IGU LV 11.
See your dealer to match transmitters to another vehicle.
2-7
Page 93 of 466
Battery Replacement
Under normal use, the battery in your remote keyless
entry transmitter should last about three years.
You can tell the battery is weak if the transmitter won’t
work at the normal range in any location.
If you have
to get close to your vehicle before the transmitter works,
it’s probably time to change the battery.
Notice: When replacing the battery, use care not to
touch any of the circuitry. Static from your body
transferred to these surfaces may damage the
transmitter.
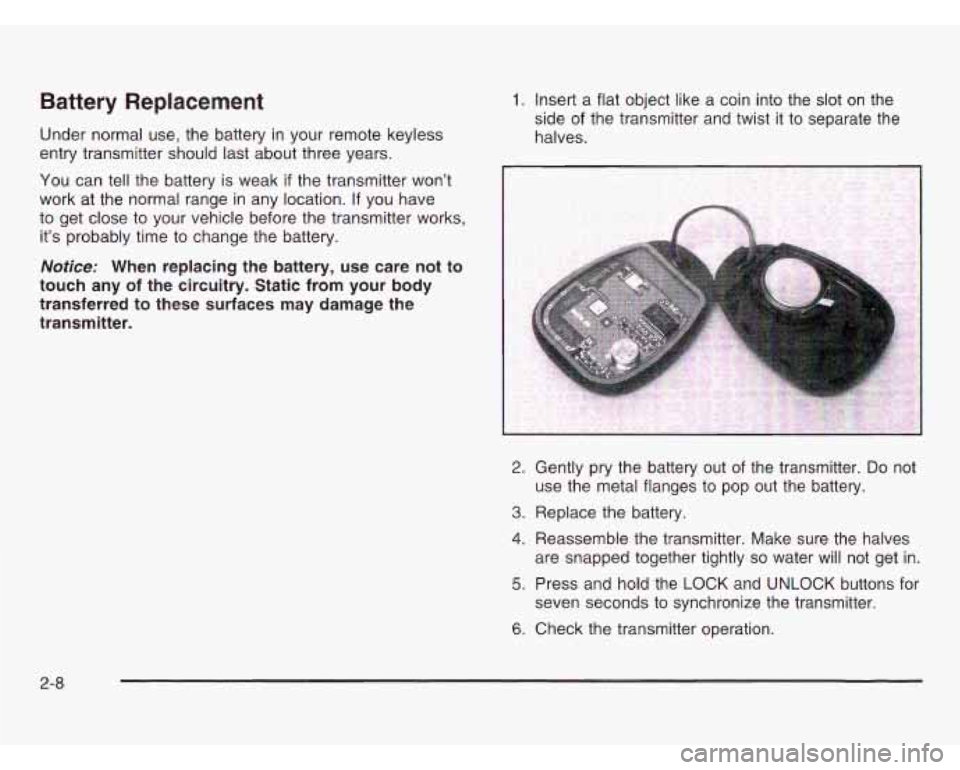
1. Insert a flat object like a coin into the slot on the
side of the transmitter and twist
it to separate the
halves.
2. Gently pry the battery out of the transmitter. Do not
3. Replace the battery.
4. Reassemble the transmitter. Make sure the halves
use the
metal flanges to pop out the battery.
are snapped together tightly
so water will not get in.
5. Press and hold the LOCK and UNLOCK buttons for
6. Check the transmitter operation.
seven seconds
to synchronize the transmitter.
2-8
Page 94 of 466
Doors and Locks
pAAu Locks
I
U xked doors can be angerous.
Passengers - especially children - can
easily open the doors and fall out of a moving vehicle. When a door
is locked,
the handle won't open
it. You increase the
chance
of being thrown out of the vehicle
in a crash if the doors aren't locked.
So,
wear safety belts properly and lock the
doors whenever you drive.
vehicles may be unable to get out. A child
can be overcome by extreme heat and can
from heat stroke. Always lock your vehicle
whenever you leave
it.
CAUTION: (Continued)
Young children who get into unlocked
s~ffer nnrmannnt inilwinc ~r pgn +~fh P" *."-s---.- "-'1-' ---
Outsiders can easily enter through an
unlocked door when you slow down or
stop your vehicle. Locking your doors can
help prevent this from happening.
There are several ways to lock and unlock your vehicle.
From the outside, use your key or the remote keyless
entry transmitter.
To unlock either front door from the outside .with the
key, insert the key and turn it toward the front of
the vehicle. If your vehicle has power door locks,
you can unlock all of the doors and the liftgate by
inserting the key, turning it toward the front of the
vehicle and holding it there for one second.
To lock
either front door from the outside with your key insert the
vehicle has power door locks, all of the doors will unlock
when you insert the key and turn it toward the rear of
the vehicle.
key 2nd turn it tn?ncxc! the re2r e! the ?/ehIc!e. !f yxrr
2-9
Page 95 of 466
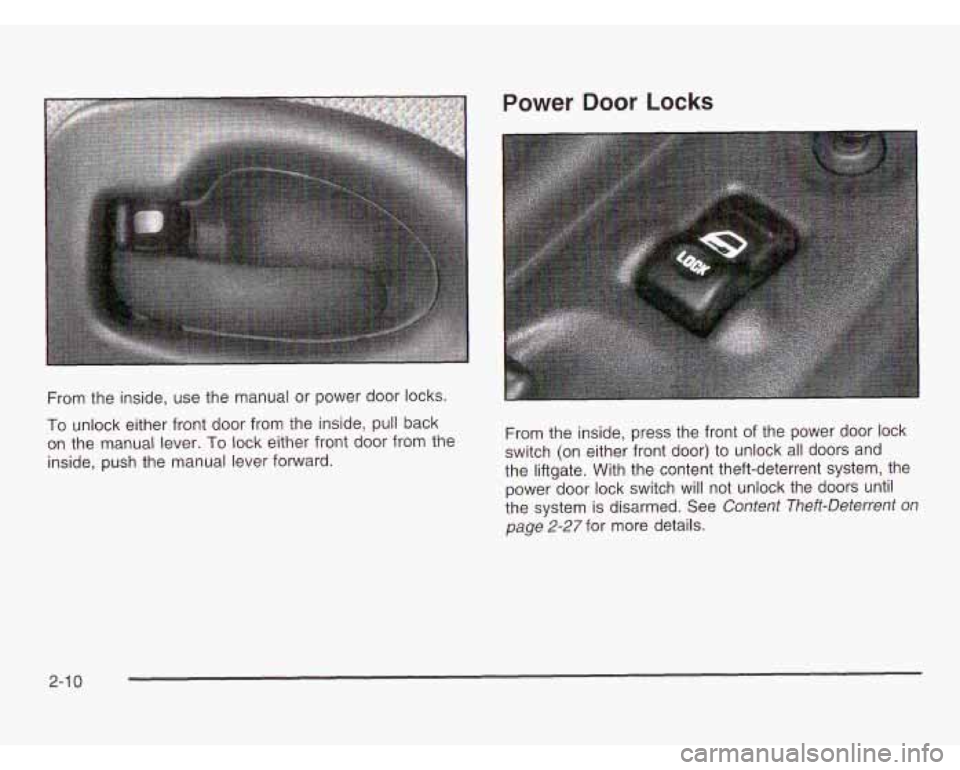
Power Door Locks
From the inside, use the manual or power door locks.
To unlock either front door from the inside, pull back
on the manual lever.
To lock either front door from the
inside, push the manual lever forward. From the inside,
press the front of the power door lock
switch (on either front door) to unlock all doors and
the liftgate. With the content theft-deterrent system, the
power door lock switch will not unlock the doors until
the system
is disarmed. See Content Theft-Deterrent on
page 2-27 for more details.
2-1 0