lock OPEL AMPERA E 2017.5 Manual user
[x] Cancel search | Manufacturer: OPEL, Model Year: 2017.5, Model line: AMPERA E, Model: OPEL AMPERA E 2017.5Pages: 265, PDF Size: 6.24 MB
Page 33 of 265

Keys, doors and windows31message is displayed in the Driver
Information Centre after switching on
the vehicle.
Vehicle messages 3 90.
Immobiliser The system whether the vehicle is
allowed to be started with the key
being used.
The immobiliser is activated
automatically after the electronic key
has been removed from the vehicle.
If control indicator d flashes when the
vehicle is on, there is a fault in the
system; the propulsion system cannot
be started. Switch off the vehicle and
repeat the start attempt.
If control indicator d continues
flashing, attempt to start the
propulsion system using the spare
key and seek the assistance of a
workshop.
Note
Radio Frequency Identification
(RFID) tags may cause interference with the key. Do not have it placednear the key when starting the
vehicle.Note
The immobiliser does not lock the doors. You should always lock the
vehicle after leaving it and switch on the anti-theft alarm system 3 20,
3 29.
Control indicator d 3 81.Exterior mirrors
Convex shape
The shape of the mirror makes
objects appear smaller, which will affect the ability to estimate
distances.
Side blind zone alert 3 181.
Electric adjustment
Press í or ì to select the relevant
exterior mirror. Then press the control
pad to adjust the respective mirror.
Press í or ì again to deselect the
mirror.
Page 36 of 265
34Keys, doors and windows9Warning
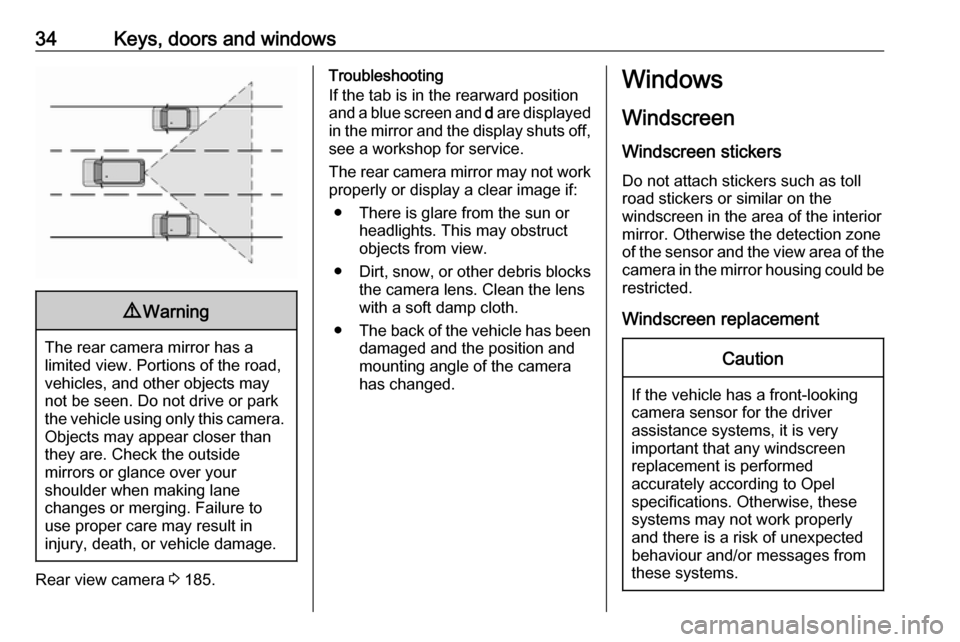
The rear camera mirror has a
limited view. Portions of the road,
vehicles, and other objects may
not be seen. Do not drive or park
the vehicle using only this camera. Objects may appear closer thanthey are. Check the outside
mirrors or glance over your
shoulder when making lane
changes or merging. Failure to
use proper care may result in
injury, death, or vehicle damage.
Rear view camera 3 185.
Troubleshooting
If the tab is in the rearward position and a blue screen and d are displayed
in the mirror and the display shuts off, see a workshop for service.
The rear camera mirror may not work properly or display a clear image if:
● There is glare from the sun or headlights. This may obstruct
objects from view.
● Dirt, snow, or other debris blocks
the camera lens. Clean the lens
with a soft damp cloth.
● The back of the vehicle has been
damaged and the position and
mounting angle of the camera
has changed.Windows
Windscreen Windscreen stickers
Do not attach stickers such as toll
road stickers or similar on the
windscreen in the area of the interior
mirror. Otherwise the detection zone
of the sensor and the view area of the camera in the mirror housing could be
restricted.
Windscreen replacementCaution
If the vehicle has a front-looking
camera sensor for the driver
assistance systems, it is very
important that any windscreen
replacement is performed
accurately according to Opel
specifications. Otherwise, these
systems may not work properly
and there is a risk of unexpected
behaviour and/or messages from
these systems.
Page 41 of 265
Seats, restraints39Head restraints on rear seats
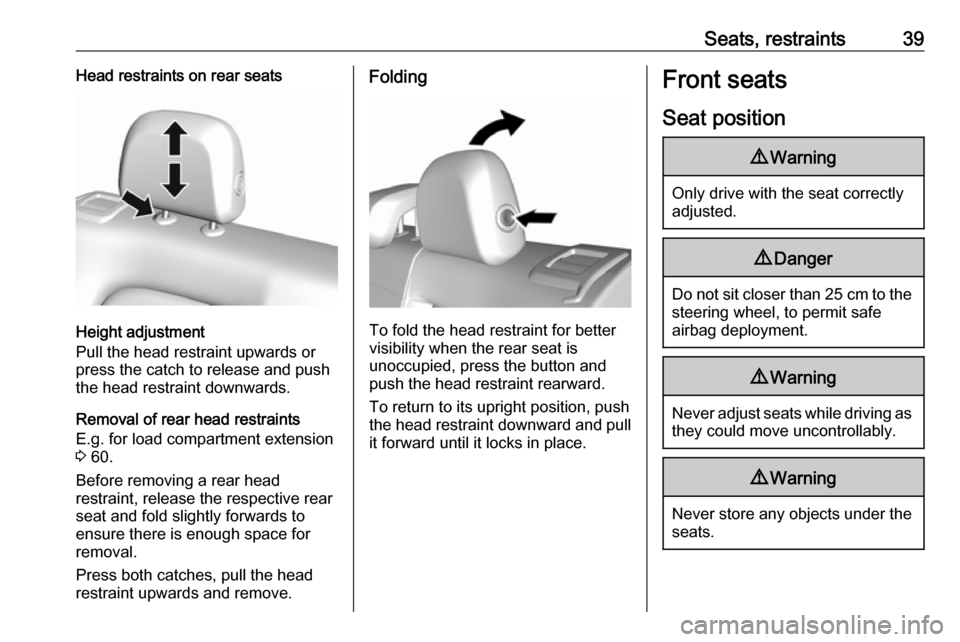
Height adjustment
Pull the head restraint upwards or
press the catch to release and push the head restraint downwards.
Removal of rear head restraints
E.g. for load compartment extension
3 60.
Before removing a rear head
restraint, release the respective rear
seat and fold slightly forwards to
ensure there is enough space for
removal.
Press both catches, pull the head restraint upwards and remove.
Folding
To fold the head restraint for better
visibility when the rear seat is
unoccupied, press the button and
push the head restraint rearward.
To return to its upright position, pushthe head restraint downward and pull
it forward until it locks in place.
Front seats
Seat position9 Warning
Only drive with the seat correctly
adjusted.
9 Danger
Do not sit closer than 25 cm to the
steering wheel, to permit safe
airbag deployment.
9 Warning
Never adjust seats while driving as
they could move uncontrollably.
9 Warning
Never store any objects under the
seats.
Page 42 of 265
40Seats, restraints
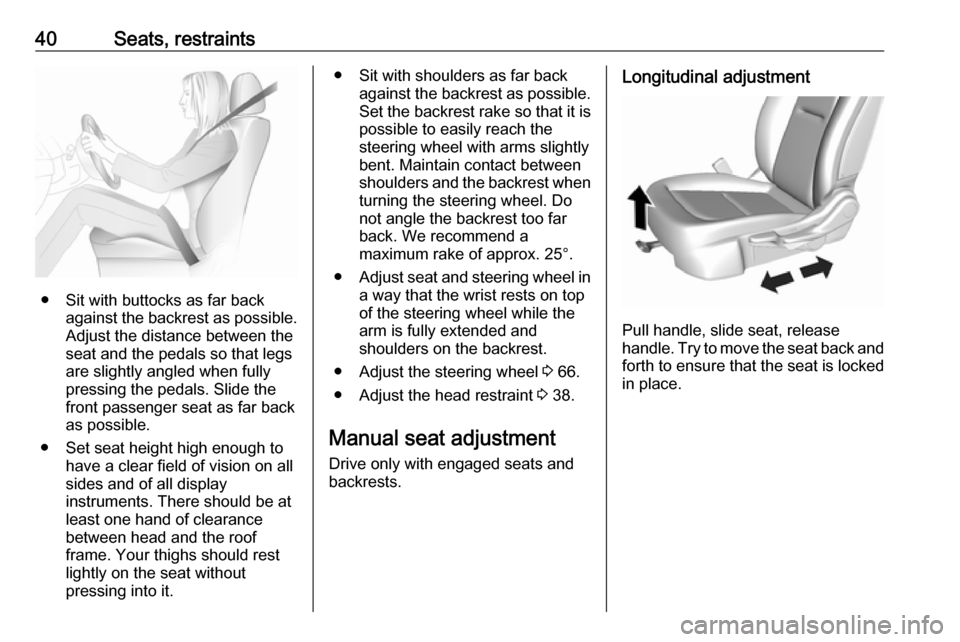
● Sit with buttocks as far backagainst the backrest as possible.
Adjust the distance between the
seat and the pedals so that legs
are slightly angled when fully
pressing the pedals. Slide the
front passenger seat as far back
as possible.
● Set seat height high enough to have a clear field of vision on all
sides and of all display
instruments. There should be at
least one hand of clearance
between head and the roof
frame. Your thighs should rest
lightly on the seat without
pressing into it.
● Sit with shoulders as far back against the backrest as possible.
Set the backrest rake so that it is possible to easily reach the
steering wheel with arms slightly
bent. Maintain contact between
shoulders and the backrest when
turning the steering wheel. Do
not angle the backrest too far
back. We recommend a
maximum rake of approx. 25°.
● Adjust seat and steering wheel in
a way that the wrist rests on top
of the steering wheel while the
arm is fully extended and
shoulders on the backrest.
● Adjust the steering wheel 3 66.
● Adjust the head restraint 3 38.
Manual seat adjustment Drive only with engaged seats and
backrests.Longitudinal adjustment
Pull handle, slide seat, release
handle. Try to move the seat back and forth to ensure that the seat is locked
in place.
Page 45 of 265
Seats, restraints43Rear seats
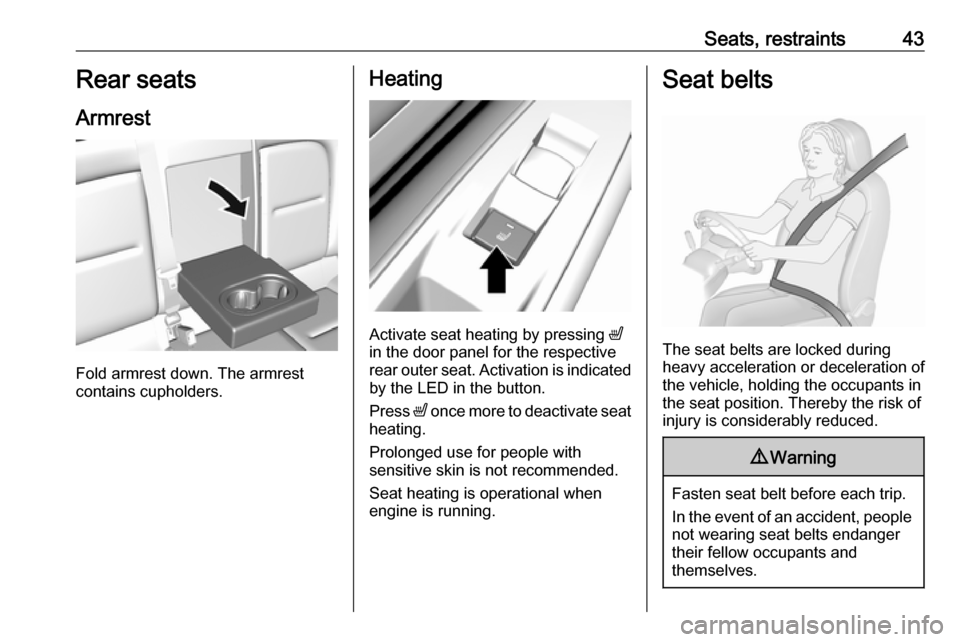
Armrest
Fold armrest down. The armrest
contains cupholders.
Heating
Activate seat heating by pressing ß
in the door panel for the respective
rear outer seat. Activation is indicated
by the LED in the button.
Press ß once more to deactivate seat
heating.
Prolonged use for people with
sensitive skin is not recommended.
Seat heating is operational when
engine is running.
Seat belts
The seat belts are locked during
heavy acceleration or deceleration of
the vehicle, holding the occupants in
the seat position. Thereby the risk of
injury is considerably reduced.
9 Warning
Fasten seat belt before each trip.
In the event of an accident, people
not wearing seat belts endanger their fellow occupants and
themselves.
Page 62 of 265
60StorageLoad compartmentLoad compartment extension
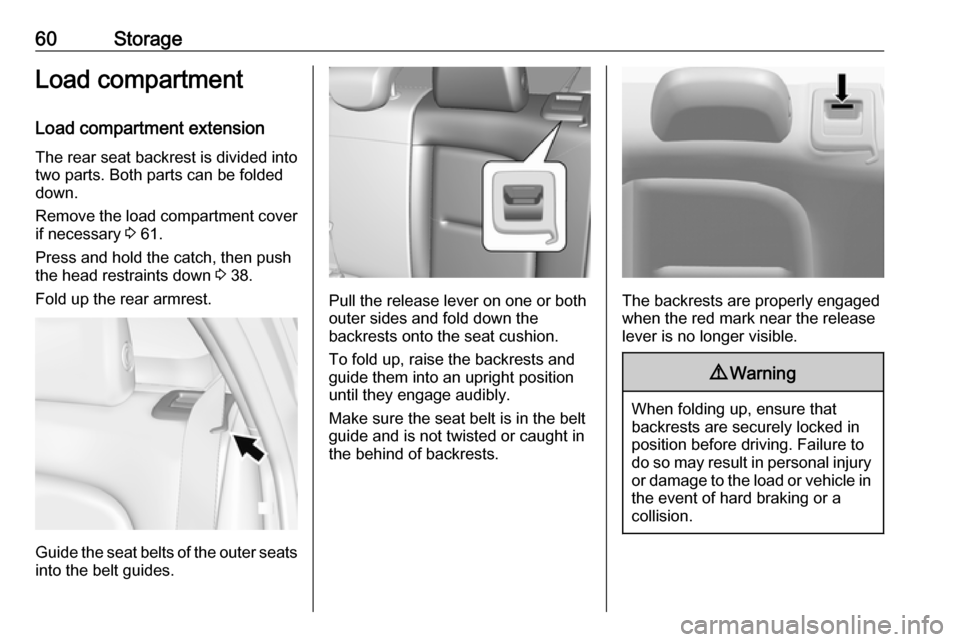
The rear seat backrest is divided into
two parts. Both parts can be folded
down.
Remove the load compartment cover if necessary 3 61.
Press and hold the catch, then push
the head restraints down 3 38.
Fold up the rear armrest.
Guide the seat belts of the outer seats
into the belt guides.
Pull the release lever on one or both
outer sides and fold down the
backrests onto the seat cushion.
To fold up, raise the backrests and
guide them into an upright position
until they engage audibly.
Make sure the seat belt is in the belt guide and is not twisted or caught in
the behind of backrests.The backrests are properly engaged
when the red mark near the release
lever is no longer visible.
9 Warning
When folding up, ensure that
backrests are securely locked in
position before driving. Failure to
do so may result in personal injury or damage to the load or vehicle in the event of hard braking or a
collision.
Page 63 of 265
Storage61
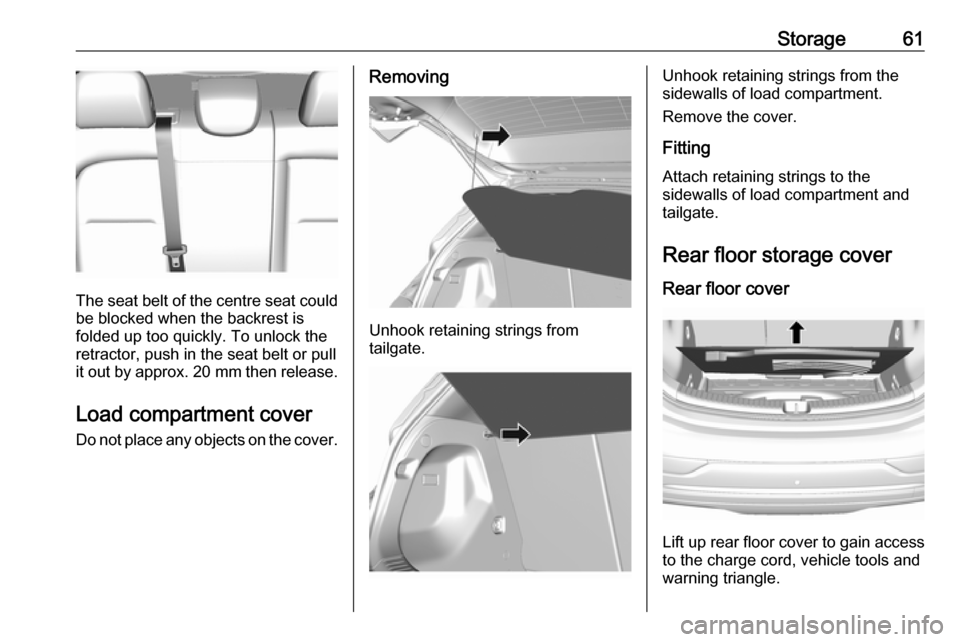
The seat belt of the centre seat couldbe blocked when the backrest is
folded up too quickly. To unlock the
retractor, push in the seat belt or pull
it out by approx. 20 mm then release.
Load compartment cover
Do not place any objects on the cover.
Removing
Unhook retaining strings from
tailgate.
Unhook retaining strings from the
sidewalls of load compartment.
Remove the cover.
Fitting Attach retaining strings to the
sidewalls of load compartment and
tailgate.
Rear floor storage cover Rear floor cover
Lift up rear floor cover to gain access
to the charge cord, vehicle tools and
warning triangle.
Page 67 of 265

Instruments and controls65Instruments and
controlsControls ....................................... 66
Steering wheel adjustment ........66
Steering wheel controls .............66
Heated steering wheel ...............66
Horn ........................................... 67
Pedestrian safety alert ...............67
Windscreen wiper/washer .........67
Rear window wiper/washer .......68
Outside temperature ..................69
Clock ......................................... 69
Power outlets ............................. 70
Inductive charging .....................71
Warning lights, gauges and indi‐ cators ........................................... 73
Instrument cluster ......................73
Speedometer ............................. 75
Odometer .................................. 75
Battery gauge ............................ 75
Driving efficiency gauge ............75
Power indicator gauge ...............77
Regenerative braking ................77
Total vehicle range ....................78
Service display .......................... 78
Control indicators ......................78Turn signal................................. 78
Seat belt reminder .....................78
Airbag and belt tensioners .........79
Airbag deactivation ....................79
Charging system .......................79
Service vehicle soon .................80
Brake system ............................. 80
Electric parking brake ................80
Electric parking brake fault ........80
Antilock brake system (ABS) .....80
Sport mode ................................ 81
Lane keep assist .......................81
Electronic Stability Control off ...81
Electronic Stability Control and Traction Control system ...........81
Traction Control system off .......81
Tyre pressure monitoring system ...................................... 81
Immobiliser ................................ 81
Vehicle ready ............................. 82
Exterior light .............................. 82
High beam ................................. 82
High beam assist .......................82
Rear fog light ............................. 82
Cruise control ............................ 82
Vehicle detected ahead .............82
Pedestrian detection ..................82
Speed limiter ............................. 82
Traffic sign assistant ..................82
Door open .................................. 83Information displays.....................83
Driver Information Centre ..........83
Info display ................................ 86
Vehicle messages ........................90
Warning chimes .........................91
Battery voltage .......................... 91
Vehicle personalisation ................92
Telematics service .......................95
OnStar ....................................... 95
Page 68 of 265

66Instruments and controlsControlsSteering wheel adjustment
Unlock lever, adjust steering wheel,
then engage lever and ensure it is
fully locked.
Do not adjust steering wheel unless
vehicle is stationary and steering
wheel lock has been released.
Steering wheel controls
Driver Information Centre, some
driver assistance systems,
Infotainment system and a connected
mobile phone can be operated via the controls on the steering wheel.
Driver Information Centre 3 83.
Driver assistance systems 3 164.
Further information is available in the
Infotainment section 3 108.
Heated steering wheel
Activate heating by pressing A.
Activation is indicated by the LED in
the button.
Page 71 of 265
Instruments and controls69Activation or deactivation of this
function can be changed in the menu Settings in the Info display.
Vehicle personalisation 3 92.
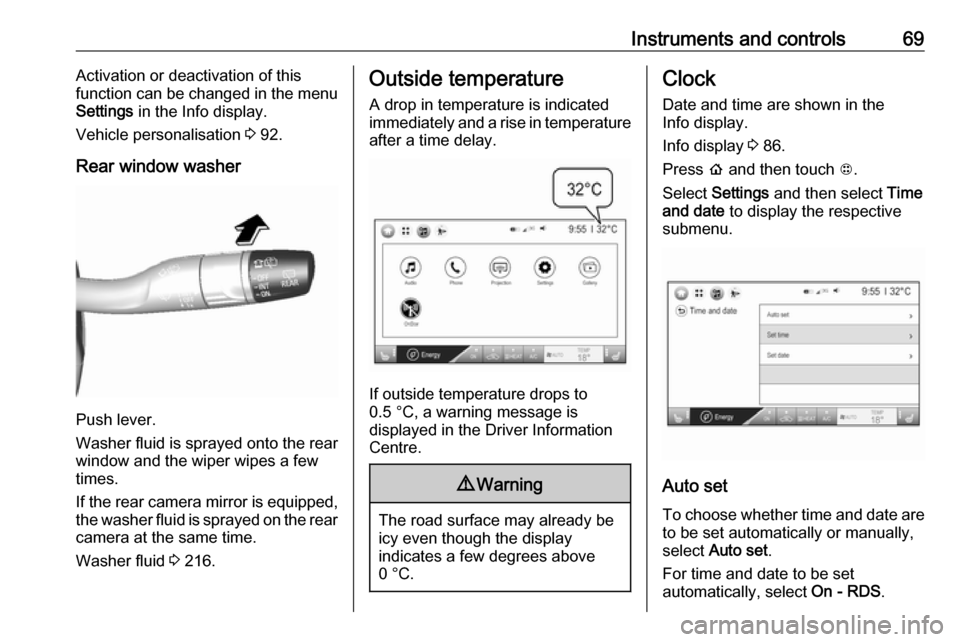
Rear window washer
Push lever.
Washer fluid is sprayed onto the rear
window and the wiper wipes a few
times.
If the rear camera mirror is equipped,
the washer fluid is sprayed on the rear camera at the same time.
Washer fluid 3 216.
Outside temperature
A drop in temperature is indicated
immediately and a rise in temperature
after a time delay.
If outside temperature drops to
0.5 °C, a warning message is
displayed in the Driver Information
Centre.
9 Warning
The road surface may already be
icy even though the display
indicates a few degrees above
0 °C.
Clock
Date and time are shown in the
Info display.
Info display 3 86.
Press p and then touch 1.
Select Settings and then select Time
and date to display the respective
submenu.
Auto set
To choose whether time and date are to be set automatically or manually,
select Auto set .
For time and date to be set
automatically, select On - RDS.