light OPEL AMPERA E 2017.5 Manual user
[x] Cancel search | Manufacturer: OPEL, Model Year: 2017.5, Model line: AMPERA E, Model: OPEL AMPERA E 2017.5Pages: 265, PDF Size: 6.24 MB
Page 102 of 265

100LightingAutomatic light control
When the automatic light control
function is switched on and the
vehicle is switched on, the system
switches between daytime running
lights and headlights automatically
depending on the external lighting
conditions.
Daytime running light 3 102.
Automatic headlight activation During poor lighting conditions
headlights are switched on.
Additionally, headlights, parking
lights and other exterior lights are
switched on if the windscreen wipers
have been activated. The transition
time for the lights coming on varies
based on wiper speed. When the
wipers are not operating, these lights
turn off. Move the exterior light control
to m or 8 to disable this feature.
Note
Do not cover the light sensor
otherwise the AUTO mode will not
operate properly.
Tunnel detection
When a tunnel is entered headlights
are switched on.
High beamPush lever to switch from low to high
beam.
Pull lever to deactivate high beam.
High beam assist This feature allows the high beam to
function as main driving light at night.
The camera in the windscreen
detects the lights of oncoming or
preceding vehicles. High beam can
be triggered or faded out particularly
according to the traffic situation. This
gives the best light distribution
without dazzling other road users.
Once activated, high beam assist remains active and switches high
beam on and off depending on
surrounding conditions. The latest
setting of the high beam assist will
remain after the vehicle is switched
on again.
Activation
Activate high beam assist by pressing f once. High beam is switched on
automatically at a speed above
Page 103 of 265

Lighting10150 km/h. High beam is switched off at
a speed below 35 km/h, but high beam assist remains active.
The green control indicator f
illuminates continuously when the
high beam assist is activated, the blue one 7 illuminates when high beam is
on.
Control indicator f 3 82, 7 3 82.
Pushing indicator lever once switches on manual high beam without high
beam assist.
High beam assist switches
automatically to low beam when:
● Driving in urban areas.
● Reverse parking function is active.
● Rear fog light is switched on.
If there are no restrictions detected,
the system switches back to high
beam.
Deactivation
If high beam assist is active and high
beam is on, press f once or pull
indicator lever once to deactivate high
beam assist.If high beam assist is active and high
beam is off, press f once to
deactivate high beam assist.
Pushing the indicator lever to activate manual high beam will also
deactivate high beam assist.
Headlight flash in conjunction with
high beam assist
Headlight flash by pulling indicatorlever once will not deactivate highbeam assist when high beam is off.
Headlight flash by pulling indicator lever once deactivates high beam
assist when high beam is on.
Fault in headlight system
When the system detects a failure in
the headlight system, it selects a
preset position to avoid dazzling of
oncoming traffic. A warning is
displayed in the Driver Information
Centre.
Headlight flash
To activate the headlight flash, pull
lever.
Pulling lever deactivates high beam.Headlight range adjustment
Manual headlight range
adjustment
To adapt headlight range to the
vehicle load to prevent dazzling: turn
thumb wheel ? to required position.
0:front seats occupied1:all seats occupied2:all seats occupied and load
compartment laden3:driver's seat occupied and load
compartment laden
Page 104 of 265

102LightingDaytime running lights
Daytime running lights increase
visibility of the vehicle during daylight.
While the daytime running light isactive, the tail lights and the sidelights
are switched off.
Please remember that the low beam
should be switched on when required.
Hazard warning flashers
Operated by pressing ¨.
In the event of an accident with airbag
deployment, the hazard warning
flashers are activated automatically.
Turn and lane-change
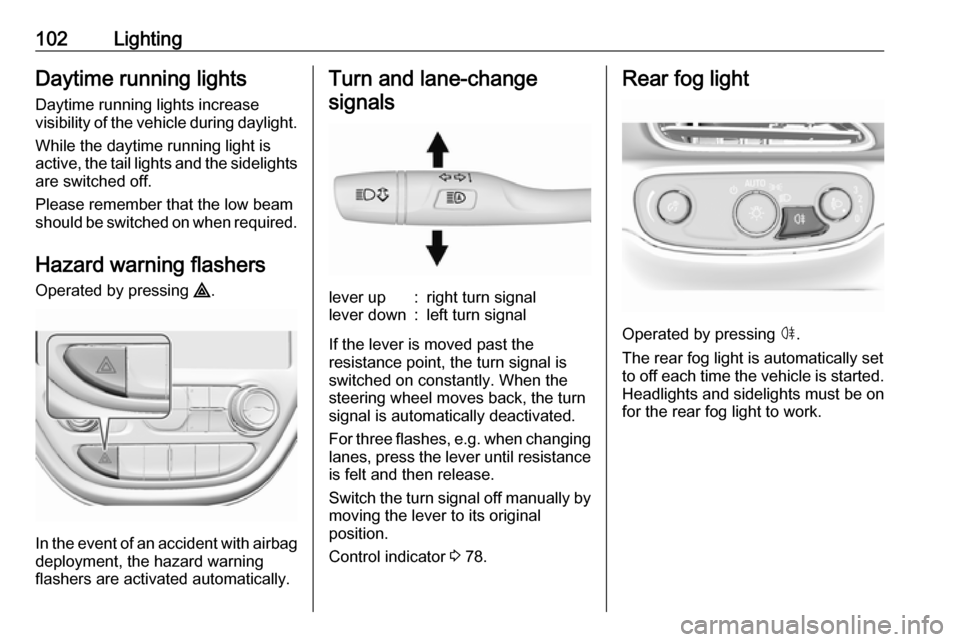
signalslever up:right turn signallever down:left turn signal
If the lever is moved past the
resistance point, the turn signal is
switched on constantly. When the
steering wheel moves back, the turn
signal is automatically deactivated.
For three flashes, e.g. when changing
lanes, press the lever until resistance
is felt and then release.
Switch the turn signal off manually by moving the lever to its original
position.
Control indicator 3 78.
Rear fog light
Operated by pressing ø.
The rear fog light is automatically set
to off each time the vehicle is started.
Headlights and sidelights must be on
for the rear fog light to work.
Page 105 of 265

Lighting103Parking lights
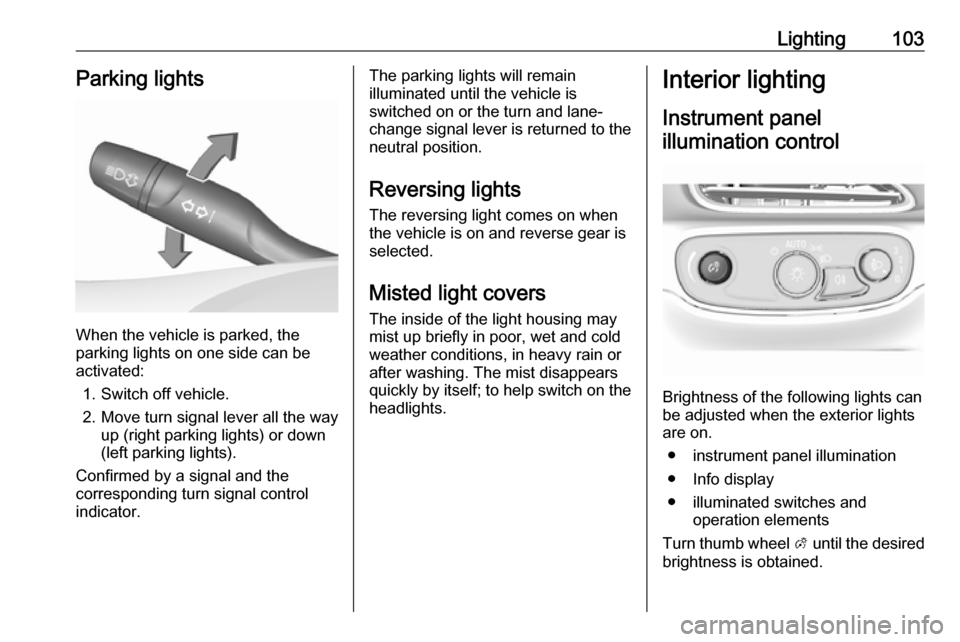
When the vehicle is parked, the
parking lights on one side can be
activated:
1. Switch off vehicle.
2. Move turn signal lever all the way up (right parking lights) or down
(left parking lights).
Confirmed by a signal and the
corresponding turn signal control
indicator.
The parking lights will remain
illuminated until the vehicle is
switched on or the turn and lane-
change signal lever is returned to the
neutral position.
Reversing lights
The reversing light comes on when
the vehicle is on and reverse gear is
selected.
Misted light covers
The inside of the light housing may
mist up briefly in poor, wet and cold weather conditions, in heavy rain or
after washing. The mist disappears
quickly by itself; to help switch on the
headlights.Interior lighting
Instrument panelillumination control
Brightness of the following lights can
be adjusted when the exterior lights
are on.
● instrument panel illumination
● Info display
● illuminated switches and operation elements
Turn thumb wheel A until the desired
brightness is obtained.
Page 106 of 265

104LightingInterior lights
Front courtesy light
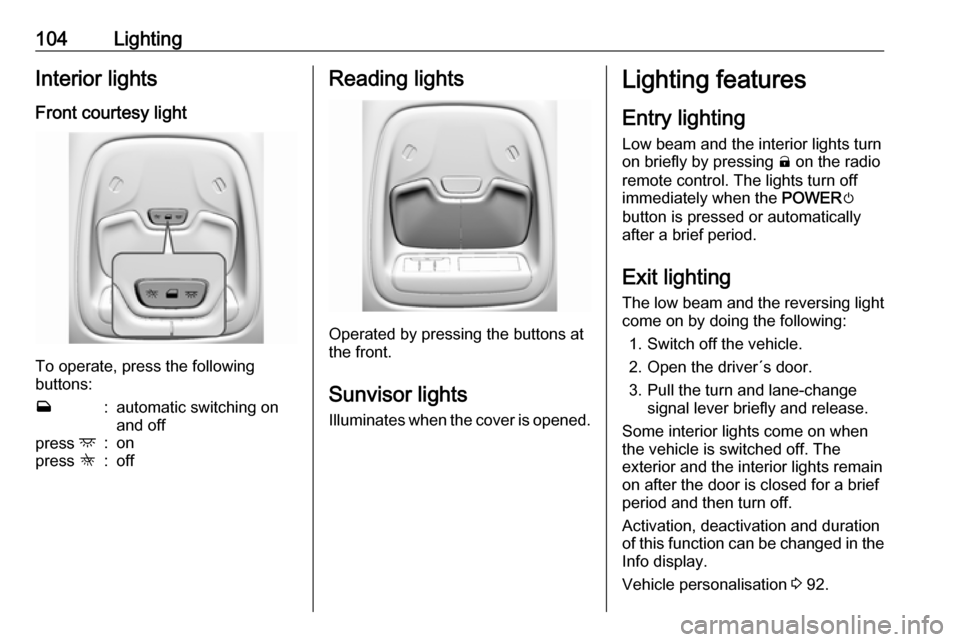
To operate, press the following
buttons:
w:automatic switching on
and offpress d:onpress K:offReading lights
Operated by pressing the buttons at
the front.
Sunvisor lights
Illuminates when the cover is opened.
Lighting features
Entry lighting Low beam and the interior lights turn
on briefly by pressing ( on the radio
remote control. The lights turn off
immediately when the POWERm
button is pressed or automatically
after a brief period.
Exit lighting The low beam and the reversing light
come on by doing the following:
1. Switch off the vehicle.
2. Open the driver´s door.
3. Pull the turn and lane-change signal lever briefly and release.
Some interior lights come on when
the vehicle is switched off. The
exterior and the interior lights remain
on after the door is closed for a brief
period and then turn off.
Activation, deactivation and duration
of this function can be changed in the
Info display.
Vehicle personalisation 3 92.
Page 107 of 265

Lighting105Battery discharge protection
Vehicle battery state of charge
function
The vehicle battery saver feature is
designed to protect the vehicle's 12-
volt battery. If any interior light is left
on and the vehicle is switched off, the vehicle battery discharge protection
system automatically turns the lights
off after approx. ten minutes.
If the exterior lights are left on, they
turn off when the vehicle is switched
off. If the sidelights are switched on
when the vehicle is switched off, the
sidelights remain on until they are
manually switched off.
Page 153 of 265

Driving and operating151
2.With the vehicle in P or N depress
the brake pedal and press
POWER m.
To switch off the vehicle, press
POWER m again. Remove the
electronic key from the centre
console.
This option is intended for
emergencies only. Replace the
electronic key battery as soon as
possible 3 19.
For unlocking or locking the doors,
see fault in radio remote control unit
or electronic key system 3 20.
Retained power off
The following electronic systems can
work until the driver's door is opened
or for ten minutes after the vehicle is
switched off:
● power windows
● Infotainment system
● power outlets
Starting and stopping the
vehicle
Move the shift lever into P or N. The
propulsion system does not start in
any other position.
Note
Do not try into shift to P if the vehicle
is moving, as the electric drive unit
could be damaged. Shift into P only
if the vehicle is stationary.
The radio remote control must be in
the vehicle. Depress the brake pedal, then press and release POWERm.
If the radio remote control is not in the vehicle or something is interfering
with the transmitter, a message is
displayed in the Driver Information
Centre.
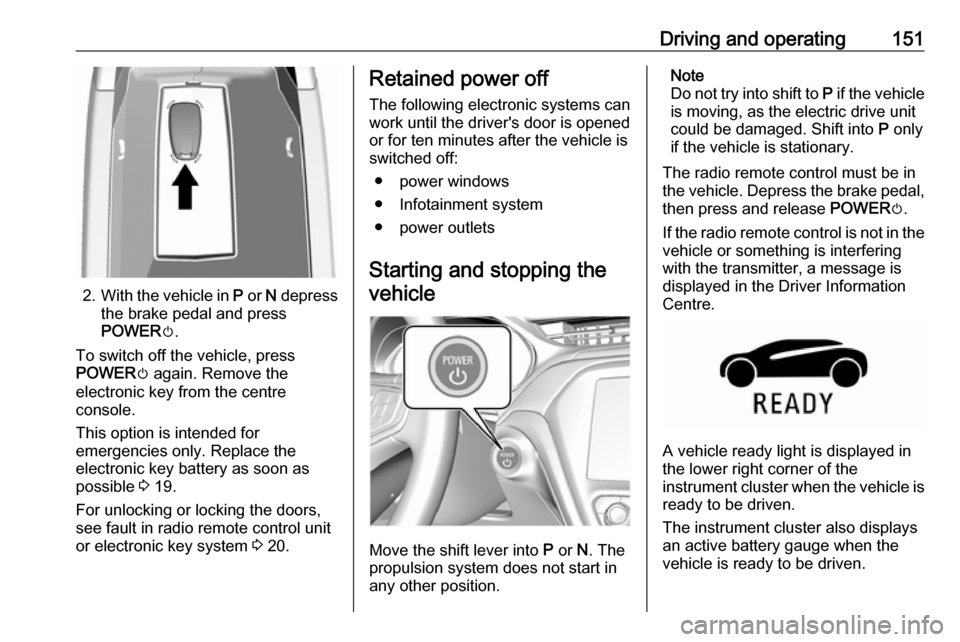
A vehicle ready light is displayed in
the lower right corner of the
instrument cluster when the vehicle is ready to be driven.
The instrument cluster also displays an active battery gauge when the
vehicle is ready to be driven.
Page 163 of 265

Driving and operating161Regeneration on demand
Regeneration on demand allows
increased deceleration by pressing
and holding the steering wheel
paddle. It works in D (Drive) and L
(Low). The accelerator pedal must be mostly released for it to work.
If regenerative braking is active, the regenerative active icon with arrowsis shown as green. Regenerative
braking 3 77.
Cruise control will switch off and the
brake lights may come on when this
feature is activated.
If the vehicle is in D (Drive) and is
brought to a complete stop while the regenerative braking paddle is held,
the vehicle will not creep forward
when the paddle is released. The
accelerator pedal must be pressed to
move the vehicle forward. Refer to
"One-pedal driving” in Electric drive
unit 3 155.
If the vehicle is on a steep gradient,
the brake pedal will be required to
hold the vehicle.
The brake controller applies the
hydraulic brakes using a pump. You
may hear the pump during some
braking manoeuvres, such as rapid
brake application or during
regenerative braking as the vehicle
comes to a stop. This is normal
operation.
Hill Top ReserveHill Top Reserve enables you to
maximise regenerative braking
efficiency when driving from a higher
elevation immediately after charging.
When switched on, this feature will
stop the charging process before thehigh voltage battery is full, allowing space for energy from regenerative
braking.
This feature also integrates with the Location-based charging feature,
allowing you to configure the system
so it is enabled when you are at home ( On – home only ) or away (On – away
only ). See "Location based charging"
in Programmable charging 3 197.
Page 169 of 265

Driving and operating167Resume limit speedPress RES/+ . The stored speed limit
will be obtained.
Switching off
Press L, the speed limit indication
extinguishes in the Driver Information Centre. The stored speed is deleted.
By pressing m to activate cruise
control or adaptive cruise control,
speed limiter is also deactivated and
the stored speed is deleted.
By switching off the vehicle, speed
limiter is also deactivated, but the
speed limit will be stored for next
speed limiter activation.
Forward collision alert
The forward collision alert may help to avoid or reduce the harm caused by
front-end crashes.
The forward collision alert uses the
front camera system in the
windscreen to detect a vehicle
directly ahead, in your path, within a
distance of approx. 60 metres.
A vehicle ahead is indicated by the
control indicator A.
If a vehicle directly ahead is
approached too quickly, a warning
chime is sounded.
Additionally, the driver is notified by a flashing red LED stripe which is
projected on the windscreen in the
driver's field of view.
A precondition is that forward collision
alert is not deactivated in the vehicle
personalisation 3 92.
Activation
Forward collision alert operates
automatically above 8 km/h, if it is not deactivated in the vehicle
personalisation menu.
Alerting the driver
The vehicle ahead control indicator
A illuminates green in the instrument
cluster when the system has detected
a vehicle in the driving path.
The control indicator A changes to
yellow when the distance to a
preceding moving vehicle gets too
small or when approaching another
vehicle too rapidly.Caution
The colour lighting of this control
indicator does not correspond to
local traffic laws on following
distance. The driver bears full
responsibility for maintaining safe
following distance according to
applicable traffic rules, weather
and road conditions etc. at all
times.
When the time to a potential collision
with a vehicle in front gets too small
and a collision is imminent, the driver
is notified by a flashing red LED stripe which is projected on the windscreen
in the driver's field of view.
Page 172 of 265

170Driving and operatingsupplemental use only to reduce
the vehicle speed before a
collision.
The system may not react to
animals. After a sudden lane
change, the system needs a
certain time to detect the next
preceding vehicle.
The driver must always be ready
to take action and apply the brakes and steer to avoid collisions.
Functionality
If equipped only with front camera the
active emergency braking operates in a forward gear above walking speed
up to 80 km/h.
A precondition is that the system is not deactivated in the vehicle
personalisation menu 3 92.
The system includes: ● brake preparation system
● emergency automatic braking
● forward looking brake assist ● front pedestrian protection system
Brake preparation system
When approaching a vehicle ahead
or a pedestrian so quickly that a
collision is likely, the brake
preparation system slightly
pressurises the brakes. This reduces
the response time, when a manual or automatic braking is requested.
The brake system is prepared so that braking can occur more rapidly.
If equipped only with front camera the
system operates up to a speed of
80 km/h.
Emergency automatic braking
After activation of brake preparation
system and just before the imminent
collision, this function automatically
applies limited braking to reduce the
impact speed of the collision or
prevent a crash.
Depending on the situation, the
vehicle may automatically brake
moderately or hard. This front
automatic braking can only occur if a
vehicle ahead is detected, indicated
by the vehicle ahead indicator A
3 167. On vehicles with frontpedestrian protection, automatic
braking can also occur when a
pedestrian ahead is detected,
indicated by the pedestrian ahead
indicator 7.
The system operates up to a speed of 80 km/h.
Below a speed of 40 km/h the system
can apply full braking.
Emergency automatic braking may slow the vehicle to a complete stop to try to avoid a potential crash. If this
happens, emergency automatic
braking may engage the electric
parking brake to hold the vehicle at a
stop. To release, push the electric
parking brake switch or firmly depress
the accelerator pedal.9 Warning
Emergency automatic braking is
an emergency crash preparation
feature and is not designed to
avoid crashes. Do not rely on the
system to brake the vehicle.
Emergency automatic braking will