light OPEL AMPERA E 2017.5 Manual user
[x] Cancel search | Manufacturer: OPEL, Model Year: 2017.5, Model line: AMPERA E, Model: OPEL AMPERA E 2017.5Pages: 265, PDF Size: 6.24 MB
Page 3 of 265

Introduction.................................... 2
In brief ............................................ 4
Keys, doors and windows ............16
Seats, restraints ........................... 38
Storage ........................................ 58
Instruments and controls .............65
Lighting ........................................ 99
Infotainment system ...................106
Climate control ........................... 142
Driving and operating .................148
Vehicle care ............................... 210
Service and maintenance ..........243
Technical data ........................... 246
Customer information ................251
Index .......................................... 256Contents
Page 11 of 265

In brief91Power windows .....................35
2 Exterior mirrors .....................31
3 Central locking system ..........20
4 Side air vents ...................... 145
5 Turn and lane-change
signals, headlight flash,
low/high beam, high beam
assist ................................... 102
Exit lighting ......................... 104
Parking lights ...................... 103
6 Regen on Demand .............160
7 Cruise control .....................164
Speed limiter ....................... 165
Forward collision alert .........167
Heated steering wheel ..........66
8 Instruments .......................... 75
Driver Information Centre ...... 83
9 Forward collision alert
indicator ............................. 167
Front pedestrian alert ..........172
10 Buttons for Driver
Information Centre ................8311Windscreen wiper and
washer, rear wiper and
washer ................................. 67
12 Centre air vents .................. 145
13 Info display ........................... 86
14 Anti-theft alarm system
status LED ........................... 29
Light sensor ........................ 100
Charging status indicator ....204
15 Glovebox .............................. 58
16 Climate control system ........ 142
17 Hazard warning flashers ....102
Sport mode ........................ 154
Traction Control system .....162
Electronic Stability Control . 163
Parking assist/Advanced
parking assist .....................174
Lane keep assist ................191
18 Power outlet .......................... 70
19 Shift lever ........................... 155
20 USB port
21 Controls for Info display
operation .............................. 86
22 Parking brake ......................15923Power button ....................... 149
24 Steering wheel adjustment ..66
25 Horn ..................................... 67
26 Bonnet release lever ..........213
27 Fuse box ............................ 227
28 Light switch .......................... 99
Headlight range
adjustment ......................... 101
Rear fog lights ....................102
Instrument illumination .......103
Page 12 of 265
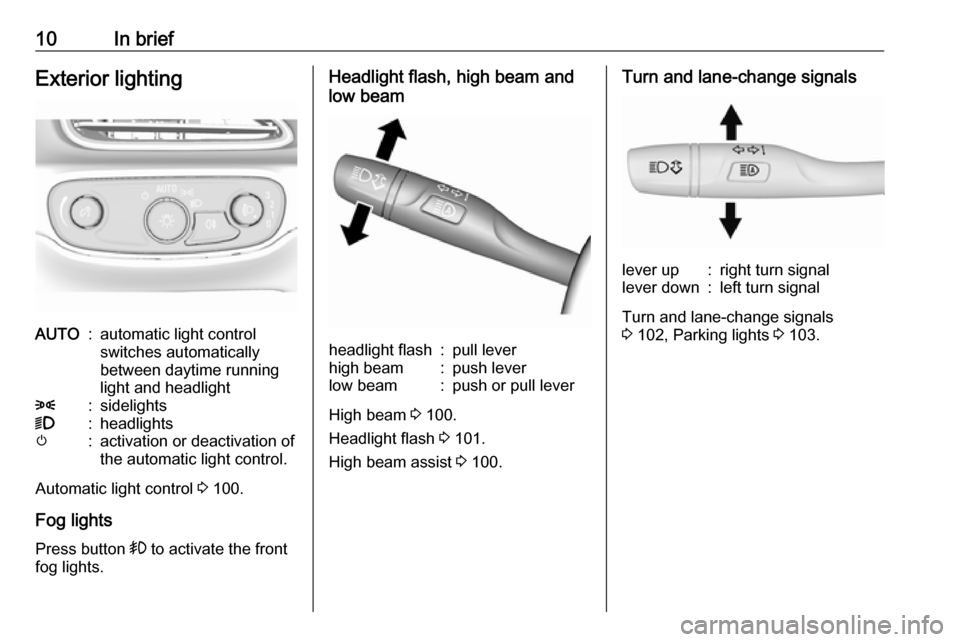
10In briefExterior lightingAUTO:automatic light control
switches automatically
between daytime running
light and headlight8:sidelights9:headlightsm:activation or deactivation of
the automatic light control.
Automatic light control 3 100.
Fog lights
Press button > to activate the front
fog lights.
Headlight flash, high beam and
low beamheadlight flash:pull leverhigh beam:push leverlow beam:push or pull lever
High beam 3 100.
Headlight flash 3 101.
High beam assist 3 100.
Turn and lane-change signalslever up:right turn signallever down:left turn signal
Turn and lane-change signals
3 102, Parking lights 3 103.
Page 16 of 265

14In briefElectric drive unitP:ParkR:ReverseN:NeutralD:DriveL:Low
The shift lever can only be moved out
of P when the vehicle is on, the brake
pedal is applied first, and then the
shift lever button is pressed.
Electric drive unit 3 154.
Starting off
Check before starting off ● Tyre pressure and condition 3 231, 3 250.
● Fluid levels 3 214.
● All windows, mirrors, exterior lighting and number plates are
free from dirt, snow and ice and
are operational.
● Proper position of mirrors, seats, and seat belts 3 31, 3 39,
3 44.
● Brake function at low speed, particularly if the brakes are wet.
Starting the vehicle ● Depress brake pedal and press POWER m. When the vehicle
ready light 4 illuminates in the
instrument cluster, the vehicle is
ready to be driven.
Press POWER m once more.
Release button after starting
procedure begins.● Move the steering wheel slightly to release the steering wheel
lock.
● Do not operate accelerator pedal.
Starting and stopping the vehicle
3 151.
Page 19 of 265
Keys, doors and windows17Radio remote control
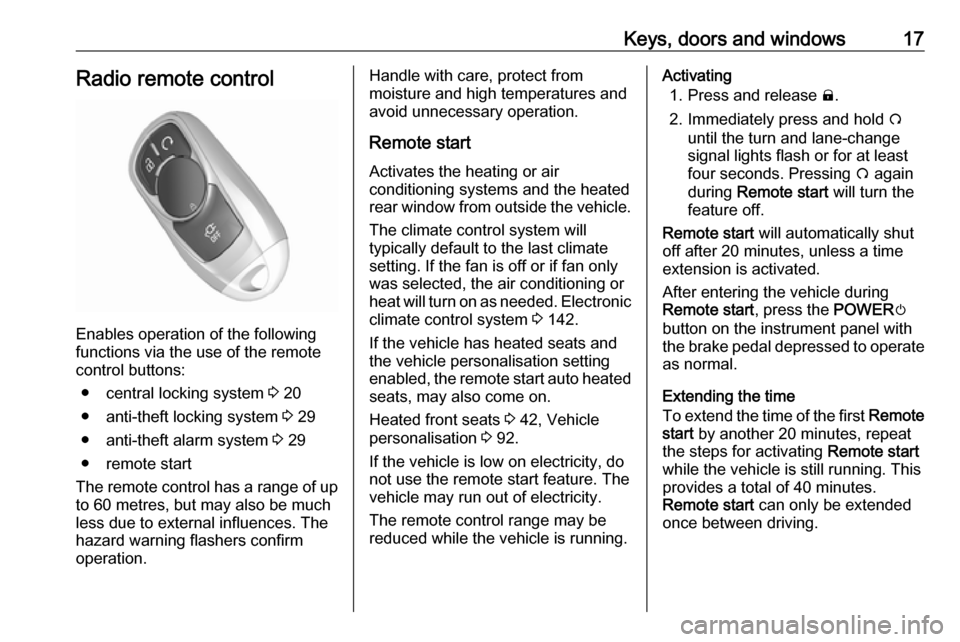
Enables operation of the following
functions via the use of the remote control buttons:
● central locking system 3 20
● anti-theft locking system 3 29
● anti-theft alarm system 3 29
● remote start
The remote control has a range of up
to 60 metres, but may also be much
less due to external influences. The
hazard warning flashers confirm
operation.
Handle with care, protect from
moisture and high temperatures and
avoid unnecessary operation.
Remote start
Activates the heating or air
conditioning systems and the heated
rear window from outside the vehicle.
The climate control system will
typically default to the last climate
setting. If the fan is off or if fan only
was selected, the air conditioning or
heat will turn on as needed. Electronic
climate control system 3 142.
If the vehicle has heated seats and the vehicle personalisation setting
enabled, the remote start auto heated seats, may also come on.
Heated front seats 3 42, Vehicle
personalisation 3 92.
If the vehicle is low on electricity, do
not use the remote start feature. The
vehicle may run out of electricity.
The remote control range may be
reduced while the vehicle is running.Activating
1. Press and release ).
2. Immediately press and hold O
until the turn and lane-change
signal lights flash or for at least
four seconds. Pressing O again
during Remote start will turn the
feature off.
Remote start will automatically shut
off after 20 minutes, unless a time
extension is activated.
After entering the vehicle during
Remote start , press the POWERm
button on the instrument panel with
the brake pedal depressed to operate
as normal.
Extending the time
To extend the time of the first Remote
start by another 20 minutes, repeat
the steps for activating Remote start
while the vehicle is still running. This
provides a total of 40 minutes.
Remote start can only be extended
once between driving.
Page 20 of 265
18Keys, doors and windowsCancelling remote start
To cancel Remote start , do any of the
following:
● Aim the radio remote control at the vehicle and press and hold
O until the sidelights turn off.
● Turn on the hazard warning flashers.
● Press the POWERm button on
the instrument panel with the
brake pedal depressed, then
press the POWERm button again
to switch off the vehicle.
Conditions in which remote start will
not work
● An open bonnet.
● Vehicle propulsion system fault conditions.
● High voltage battery fault conditions.
● The shift lever is not in P (Park).Conditions in which Remote start may
be cancelled include:
● Vehicle propulsion system or high voltage battery fault
conditions.
● Electric drive unit coolant temperature is too high.
Replacing battery in radio remote
control
Replace the battery as soon as the
range reduces.
Batteries do not belong in household
waste. They must be disposed of at
an appropriate recycling collection
point.
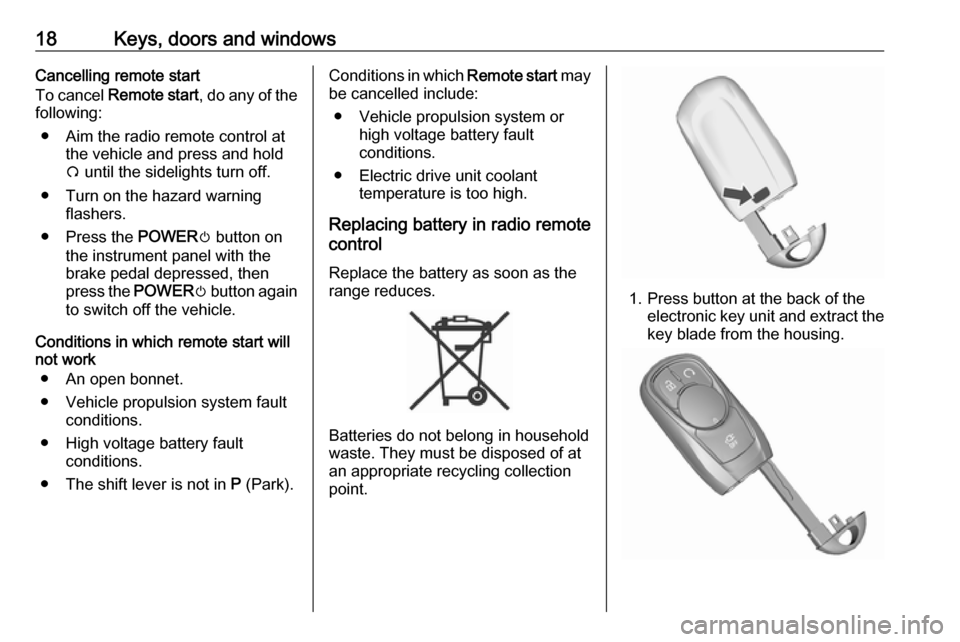
1. Press button at the back of the electronic key unit and extract thekey blade from the housing.
Page 22 of 265

20Keys, doors and windowsBattery replacement, in Radio remotecontrol 3 17.
Electronic key synchronisation
The electronic key synchronises itself automatically during every starting
procedure.
Fault
If the central locking cannot be
operated or the propulsion system
cannot be started, the cause may be
one of the following:
● Fault in electronic key.
● Electronic key is out of reception range.
● The battery voltage is too low.
● Overload of the central locking system by operating at frequent
intervals, the power supply is
interrupted for a short time.
● Interference from higher-power radio waves from other sources.
To rectify the cause of the fault,
change the position of the electronic
key.
Manual unlocking 3 20.Memorised settings
Whenever the vehicle is switched off, the following settings are
automatically memorised by the
electronic key:
● automatic climate control
● lighting
● Infotainment system
● central locking system
● comfort settings
The saved settings are automatically
used the next time the vehicle is
switched on with the memorised
electronic key 3 19.
A precondition is that Personalisation
by driver is activated in the personal
settings of the Info display. This must
be set for each electronic key which is
used. The status change is available
only after locking and unlocking the
vehicle.
Vehicle personalisation 3 92.
Central locking system
Unlocks and locks doors, load
compartment and charge port door.A pull on an interior door handle
unlocks the respective door. Pulling the handle once more opens the door.
Note
In the event of an accident in which
airbags or belt pretensioners are
deployed, the vehicle is
automatically unlocked.
Note
A short time after unlocking with the
remote control the doors are locked
automatically if no door has been
opened. A precondition is that the
setting is activated in the vehicle
personalisation 3 92.
Page 28 of 265
26Keys, doors and windowsPassive lockingOn vehicles with electronic key
system, this feature locks the vehicle
automatically after several seconds if
an electronic key has been
recognised previously inside the
vehicle, all doors have then been
closed and the electronic key does
not remain within the vehicle.
If the electronic key remains in the
vehicle or the vehicle is not off,
passive locking will not be permitted.
If there have been two or more
electronic keys in the vehicle and the
vehicle was on once, the feature locks the vehicle if just one electronic key is
taken out of the vehicle.
To prevent passive locking of the
vehicle e.g. when passengers remain in the vehicle, the system must be
disabled.
To disable the system, press the
central locking button ( for a few
seconds while one door is open. The function remains disabled until the
central locking button ) is pressed or
the vehicle is switched on.Activation or deactivation of passive
locking can be set in the menu
Settings , I Vehicle in the Info display.
Info display 3 86.
Vehicle personalisation 3 92.
The setting can be saved for the
electronic key being used 3 20.
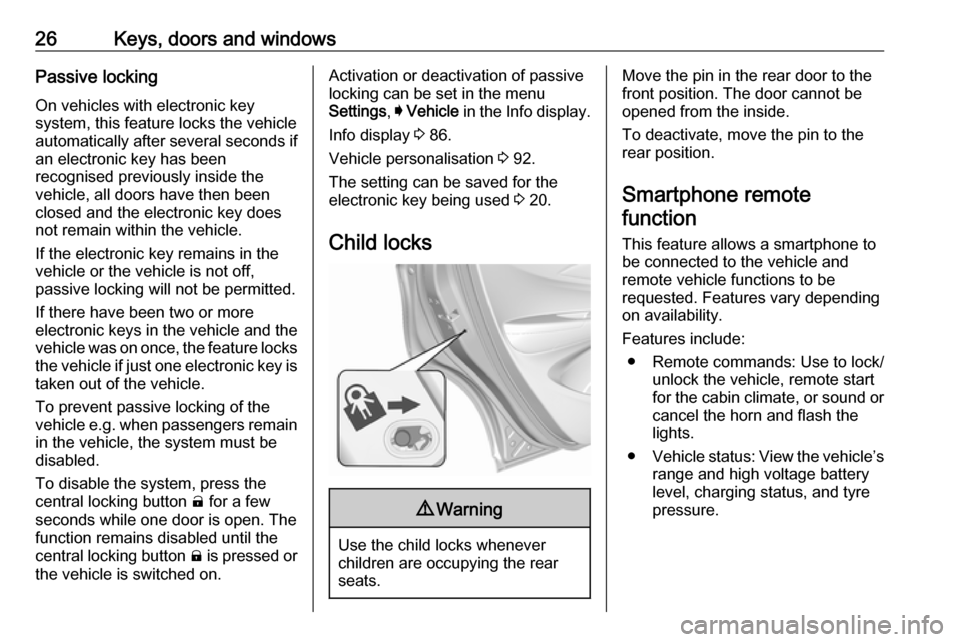
Child locks9 Warning
Use the child locks whenever
children are occupying the rear
seats.
Move the pin in the rear door to the front position. The door cannot be
opened from the inside.
To deactivate, move the pin to the
rear position.
Smartphone remote
function
This feature allows a smartphone to
be connected to the vehicle and
remote vehicle functions to be
requested. Features vary depending
on availability.
Features include: ● Remote commands: Use to lock/ unlock the vehicle, remote start
for the cabin climate, or sound or cancel the horn and flash the
lights.
● Vehicle status: View the vehicle’s
range and high voltage battery
level, charging status, and tyre
pressure.
Page 29 of 265

Keys, doors and windows27● Welcome lighting: Request lightwhen approaching the vehicle.
● Location services: Save the parked location or start
navigation at the vehicle’s GPS
coordinates.Setup function ● KeyPass setup
● Managing priority setting ● Modifying priority setting
● RevocationActive remote function ● Door lock/unlock
● Remote start/stop
● Panic alarm activation/ termination
● Remote charge termination
● High voltage charge functions ● Temporary charging override
update
● Change the charging mode permanently
● Update departure time schedule●High voltage priority charging
activation and deactivation
● Select charge level/limit preference screen
● Vehicle locator
● Routing /available mileagePassive function
Approach detection/welcome lightingVisual display for vehicle information ● Low high voltage battery indication
● Tyre pressure
● Remote engine start status
● Odometer reading
● Rear closure ajar switch status
● Electric parking brake status
● Bonnet status
● High voltage battery state of charge status
● GPS signal for end of trip
● Charge mode status ● Available mileage
● Charge start and end times status● Full week of time baseddelayed charging status
● Disable rate based and delayed charging status
● High voltage charging system fault (unable to
charge)
● High voltage charger power level
● High voltage battery charge cord connected indication
● Charge complete
● Usable state of charge
● High voltage depletion mode range
● High voltage battery state of charge status
Pairing A smartphone must be paired to the
KeyPass module and then it must be
connected to the vehicle before it can
be used.
Page 32 of 265
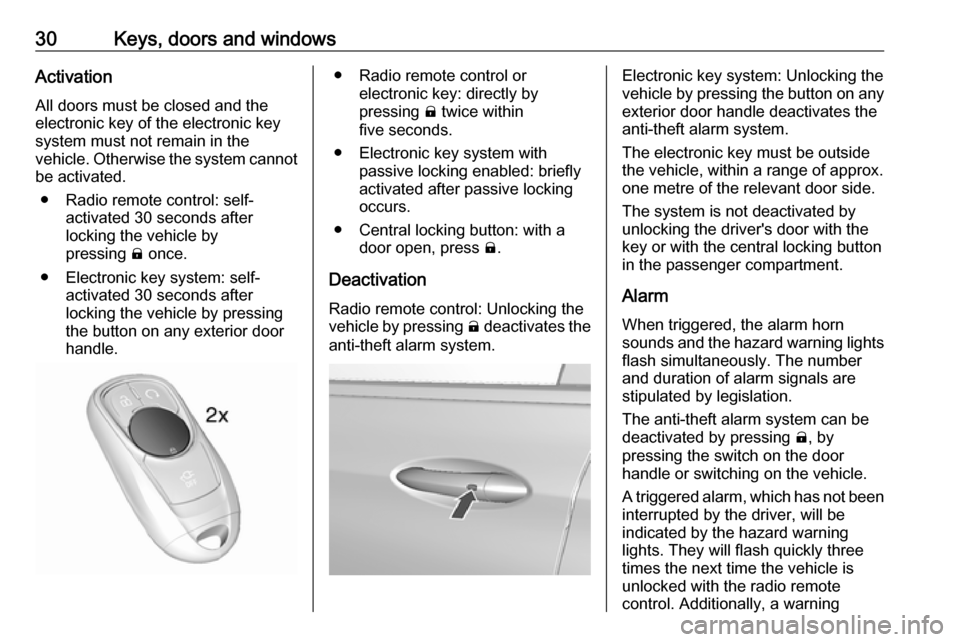
30Keys, doors and windowsActivationAll doors must be closed and the
electronic key of the electronic key
system must not remain in the
vehicle. Otherwise the system cannot
be activated.
● Radio remote control: self- activated 30 seconds after
locking the vehicle by
pressing ) once.
● Electronic key system: self- activated 30 seconds after
locking the vehicle by pressing the button on any exterior door
handle.● Radio remote control or electronic key: directly by
pressing ) twice within
five seconds.
● Electronic key system with passive locking enabled: briefly
activated after passive locking
occurs.
● Central locking button: with a door open, press ).
Deactivation Radio remote control: Unlocking the
vehicle by pressing ( deactivates the
anti-theft alarm system.Electronic key system: Unlocking the
vehicle by pressing the button on any exterior door handle deactivates the
anti-theft alarm system.
The electronic key must be outside
the vehicle, within a range of approx. one metre of the relevant door side.
The system is not deactivated by
unlocking the driver's door with the
key or with the central locking button
in the passenger compartment.
Alarm When triggered, the alarm horn
sounds and the hazard warning lights flash simultaneously. The number
and duration of alarm signals are
stipulated by legislation.
The anti-theft alarm system can be
deactivated by pressing (, by
pressing the switch on the door
handle or switching on the vehicle.
A triggered alarm, which has not been
interrupted by the driver, will be
indicated by the hazard warning
lights. They will flash quickly three
times the next time the vehicle is
unlocked with the radio remote
control. Additionally, a warning