wheel OPEL ANTARA 2017.5 Manual user
[x] Cancel search | Manufacturer: OPEL, Model Year: 2017.5, Model line: ANTARA, Model: OPEL ANTARA 2017.5Pages: 225, PDF Size: 6.2 MB
Page 109 of 225

Lighting107With low beam switched on, adapt
headlight range to suit vehicle load.
Correct adjustment of the headlight
range reduces dazzle for other road
users.
Vehicles without automatic level
control system
Turn thumb wheel ? to required
position:0:front seats occupied1:all seats occupied2:all seats occupied and load
compartment laden3:driver's seat occupied and load
compartment laden
Vehicles with automatic level control
system
Turn thumb wheel to required
position:
0:front seats occupied1:all seats occupied1:all seats occupied and load
compartment laden2:driver's seat occupied and load
compartment laden
Automatic level control 3 147.
Automatic headlight range
adjustment
On vehicles with Xenon headlights,
the headlight range is adjusted
automatically based on vehicle load.
If control indicator q illuminates in the
instrument cluster while driving, a
fault has occurred. Have the cause of
the fault remedied immediately by a
workshop.
Control indicator q for Automatic
headlight levelling system 3 90.
Headlights when driving abroad
The asymmetrical headlight beam
extends visibility at the edge of the
road on the passenger side.
However, when driving in countries
where traffic drives on the opposite
side of the road, have the headlights adjusted to prevent dazzling of
oncoming traffic. Seek the assistance
of a workshop.Daytime running lights
Daytime running lights increase
visibility of the vehicle during daylight.
They are switched on automatically
when ignition is on.
Automatic light control 3 106.
Hazard warning flashers
Operated by pressing ¨.
In the event of an accident with airbag
deployment the hazard warning
flashers are activated automatically.
Page 110 of 225
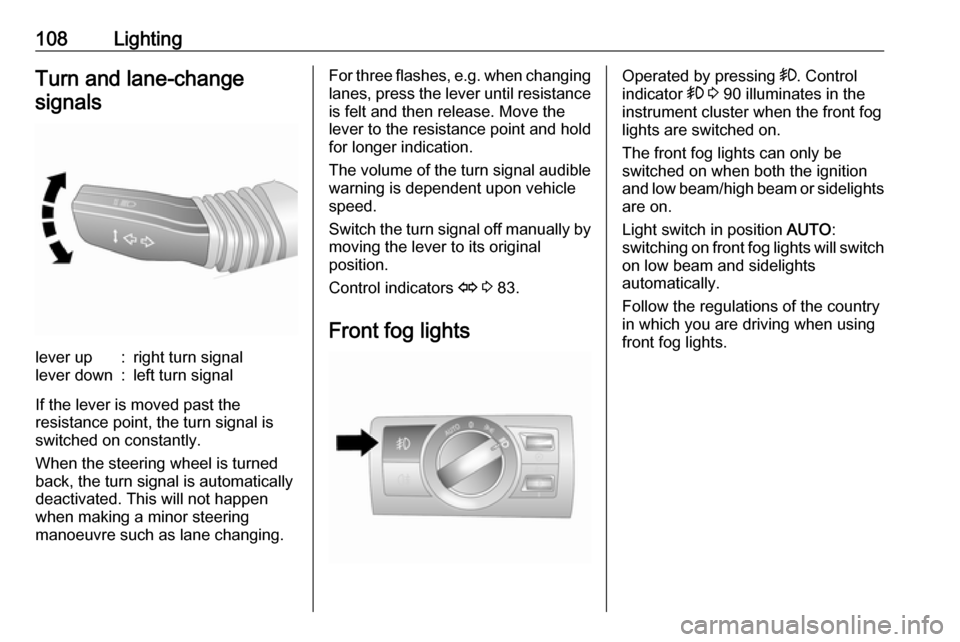
108LightingTurn and lane-changesignalslever up:right turn signallever down:left turn signal
If the lever is moved past the
resistance point, the turn signal is
switched on constantly.
When the steering wheel is turned
back, the turn signal is automatically
deactivated. This will not happen
when making a minor steering
manoeuvre such as lane changing.
For three flashes, e.g. when changing
lanes, press the lever until resistance is felt and then release. Move the
lever to the resistance point and hold for longer indication.
The volume of the turn signal audible
warning is dependent upon vehicle
speed.
Switch the turn signal off manually by moving the lever to its original
position.
Control indicators O 3 83.
Front fog lightsOperated by pressing >. Control
indicator > 3 90 illuminates in the
instrument cluster when the front fog
lights are switched on.
The front fog lights can only be
switched on when both the ignition
and low beam/high beam or sidelights are on.
Light switch in position AUTO:
switching on front fog lights will switch
on low beam and sidelights
automatically.
Follow the regulations of the country
in which you are driving when using
front fog lights.
Page 112 of 225
110LightingInterior lightingInstrument panelillumination control
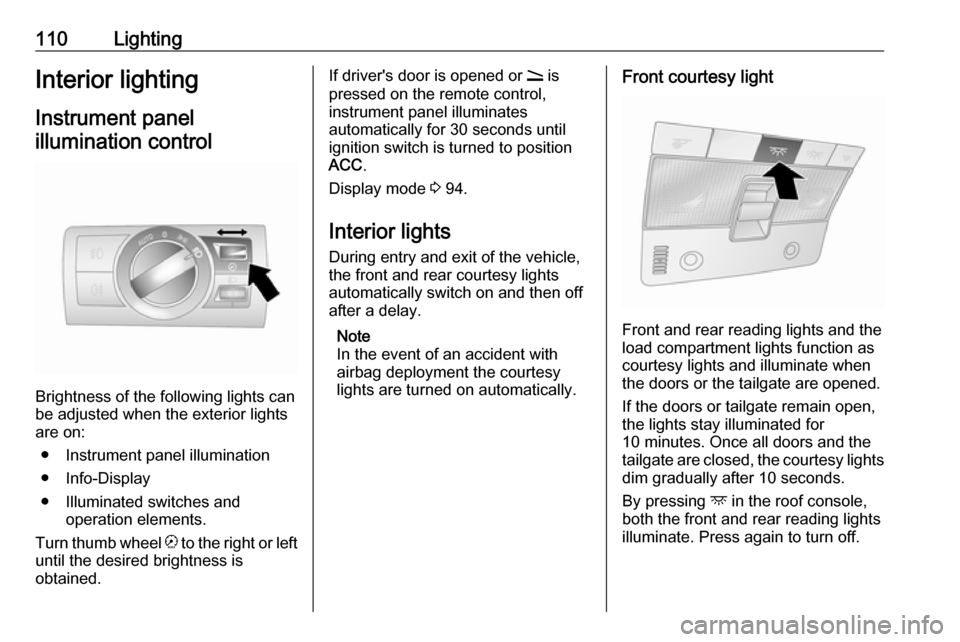
Brightness of the following lights can
be adjusted when the exterior lights
are on:
● Instrument panel illumination
● Info-Display
● Illuminated switches and operation elements.
Turn thumb wheel k to the right or left
until the desired brightness is obtained.
If driver's door is opened or q is
pressed on the remote control,
instrument panel illuminates
automatically for 30 seconds until
ignition switch is turned to position ACC .
Display mode 3 94.
Interior lights
During entry and exit of the vehicle,
the front and rear courtesy lights
automatically switch on and then off
after a delay.
Note
In the event of an accident with
airbag deployment the courtesy
lights are turned on automatically.Front courtesy light
Front and rear reading lights and the
load compartment lights function as
courtesy lights and illuminate when
the doors or the tailgate are opened.
If the doors or tailgate remain open, the lights stay illuminated for
10 minutes. Once all doors and the tailgate are closed, the courtesy lights dim gradually after 10 seconds.
By pressing d in the roof console,
both the front and rear reading lights
illuminate. Press again to turn off.
Page 121 of 225

Climate control1199Warning
The exchange of fresh air is
reduced in air recirculation mode.
In operation without cooling the air humidity increases, so the
windows may mist up from inside.
The quality of the passenger
compartment air deteriorates,
which may cause the vehicle
occupants to feel drowsy.
Demisting and defrosting
● Press V. Activation is indicated
by illumination of the LED in the
button.
● Set fan to the desired speed.
Air recirculation mode 4 is
automatically switched off.
Cooling A/C switches on.
● Switch on heated rear window RÜ .
To switch off window demisting and defrosting, press V again,
press AUTO , adjust fan speed or air
distribution switch.
Activated demisting and defrosting
may inhibit autostops. Stop-start
system 3 126.Air vents
Adjustable air vents At least one air vent must be open
while the cooling A/C is on.
To open and close the vents, turn the
horizontal adjuster wheel to the left or right.
Open air vents when air distribution switch is set to M or L.
The air supply is increased by
switching on the fan.
Control the air temperature at the side
air vents by adjusting the temperature
control switch.
Page 124 of 225
122Driving and operatingDriving and
operatingDriving hints ............................... 122
Driving economically ...............122
Control of the vehicle ...............123
Steering ................................... 124
Starting and operating ...............124
New vehicle running-in ............124
Ignition switch positions ...........125
Starting the engine ..................125
Overrun cut-off ........................ 126
Stop-start system ....................126
Parking .................................... 128
Engine exhaust .......................... 129
Diesel particle filter ..................129
Catalytic converter ...................130
AdBlue ..................................... 131
Automatic transmission ..............136
Transmission display ...............136
Selector lever .......................... 136
Sport mode .............................. 137
Manual mode ........................... 138
Electronic driving programmes 138
Fault ........................................ 138
Interruption of power supply ....139Manual transmission ..................139
Drive systems ............................ 140
All-wheel drive ......................... 140
Brakes ........................................ 142
Antilock brake system .............142
Parking brake .......................... 143
Brake assist ............................. 144
Hill start assist ......................... 144
Ride control systems .................145
Electronic Stability Control ......145
Descent control system ...........146
Automatic level control ............147
Driver assistance systems .........147
Cruise control .......................... 147
Parking assist .......................... 148
Fuel ............................................ 150
Fuel for diesel engines ............150
Refuelling ................................ 150
Fuel consumption - CO 2-
Emissions ............................... 151
Trailer hitch ................................ 152
General information .................152
Driving characteristics and
towing tips .............................. 152
Trailer towing ........................... 153
Towing equipment ...................153
Trailer stability assist ...............155Driving hints
Driving economically Fuel economy mode
Fuel economy mode is a function that optimises fuel consumption. It affects,
e.g., engine power and torque,
acceleration and gear shift indication.
Manual transmissionActivation
Press s on the instrument panel;
LED in the button illuminates to
indicate activation.
Page 126 of 225

124Driving and operatingPedals
To ensure the pedal travel is
uninhibited, there must be no mats in
the area of the pedals.
SteeringCaution
Never leave the steering wheel on
full lock when the vehicle is
stationary, as this may damage
the power steering pump.
If power steering assist is lost
because the engine stops or due to a system malfunction, the vehicle can
be steered but may require increased
effort.
Electric power steering Electric power steering does not havepower steering fluid. Regular
maintenance is not required.
Note
If the steering wheel is turned until it
reaches the end of its travel, and is
held in that position for an extended
period of time, power steering assist
may be reduced. If used for an
extended period of time, power
steering assist may be reduced.
Normal use of the power steering
assist should return when the
system cools down.
If power steering assist is lost due to
a system malfunction, the vehicle can
be steered but may require increased
effort. Seek the assistance of a
workshop.
Control indicator 2 3 86.Starting and operating
New vehicle running-in Do not brake unnecessarily hard for
the first few journeys.
During the first drive, smoke may
occur because of wax and oil
evaporating off the exhaust system. Park the vehicle in the open for a
while after the first drive and avoid
inhaling the fumes.
During the running-in period fuel and
engine oil consumption may be
higher and the cleaning process of the diesel particle filter may take
place more often. Autostop may be
inhibited to allow for charging of the
battery.
Diesel particle filter 3 129.
Page 127 of 225
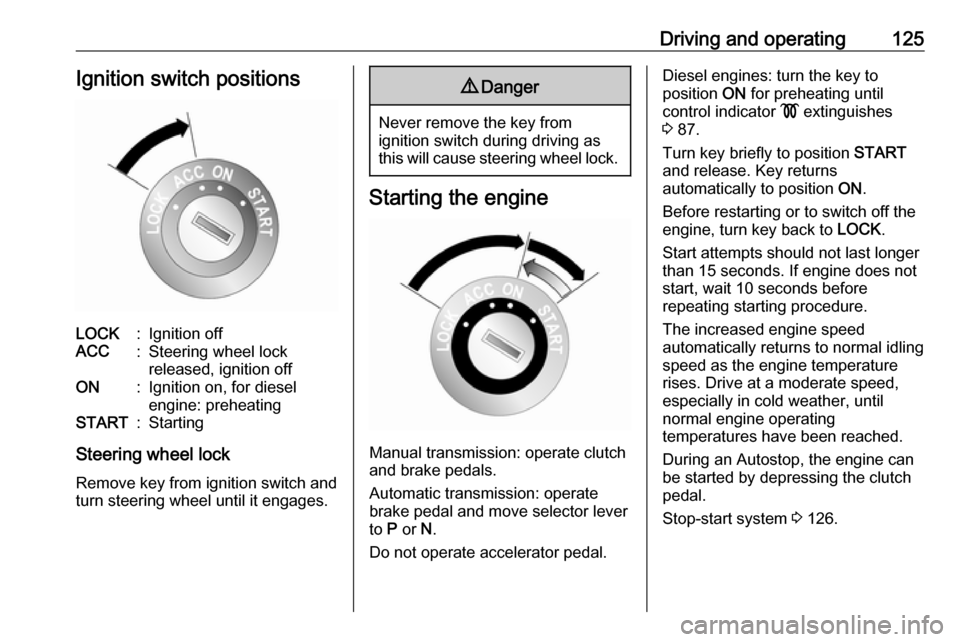
Driving and operating125Ignition switch positionsLOCK:Ignition offACC:Steering wheel lock
released, ignition offON:Ignition on, for diesel
engine: preheatingSTART:Starting
Steering wheel lock
Remove key from ignition switch and
turn steering wheel until it engages.
9 Danger
Never remove the key from
ignition switch during driving as
this will cause steering wheel lock.
Starting the engine
Manual transmission: operate clutch
and brake pedals.
Automatic transmission: operate
brake pedal and move selector lever
to P or N.
Do not operate accelerator pedal.
Diesel engines: turn the key to
position ON for preheating until
control indicator ! extinguishes
3 87.
Turn key briefly to position START
and release. Key returns
automatically to position ON.
Before restarting or to switch off the engine, turn key back to LOCK.
Start attempts should not last longer
than 15 seconds. If engine does not
start, wait 10 seconds before
repeating starting procedure.
The increased engine speed
automatically returns to normal idling
speed as the engine temperature
rises. Drive at a moderate speed,
especially in cold weather, until
normal engine operating
temperatures have been reached.
During an Autostop, the engine can
be started by depressing the clutch
pedal.
Stop-start system 3 126.
Page 130 of 225

128Driving and operatingIf the selector lever is shifted out of
neutral before depressing the clutch
first, control indicator - illuminates.
Control indicator - 3 90.
Restart of the engine by the stop- start system
The selector lever must be in neutral to enable an automatic restart.
If one of the following conditions occurs during an Autostop, the
engine will be restarted automatically
by the stop-start system.
● The stop-start system is manually deactivated
● the bonnet is opened
● the driver's seat belt is unfastened and the driver's door
is opened
● the engine temperature is too low
● the charging level of the vehicle battery is below a defined level
● the brake vacuum is not sufficient
● the vehicle is driven at least at walking speed
● the defrosting function is activated● the climate control systemrequests an engine start
● the air conditioning is manually switched on
If an electrical accessory, e.g. a
portable CD player, is connected to
the power outlet, a brief power drop
during restart might be noticeable.
Parking9 Warning
● Do not park the vehicle on an
easily ignitable surface. The
high temperature of the
exhaust system could ignite the
surface.
● Always apply the electrical parking brake.
Pull switch m.
The electric parking brake is
applied when control indicator
m illuminates 3 85.
For maximum force, e.g.
parking with a trailer or on
inclines, pull switch m twice.
● Switch off the engine.
● If the vehicle is on a level surface or uphill slope, engage
first gear or move the selector
lever to P before removing the
ignition key. On an uphill slope, turn the front wheels away from
the kerb.
If the vehicle is on a downhill
slope, engage reverse gear or
move the selector lever to P
before removing the ignition
key. Turn the front wheels
towards the kerb.
● Close windows and sunroof.
● Turn the ignition key to position
LOCK , push key into ignition
switch and remove.
For vehicles with automatic
transmission, depress foot
brake and shift into P before
pushing key into ignition switch and removing.
Turn the steering wheel until
the steering wheel lock is felt to
engage.
Page 138 of 225
136Driving and operatingAutomatic transmission
The automatic transmission permits
automatic gearshifting (automatic
mode) or manual gearshifting
(manual mode).
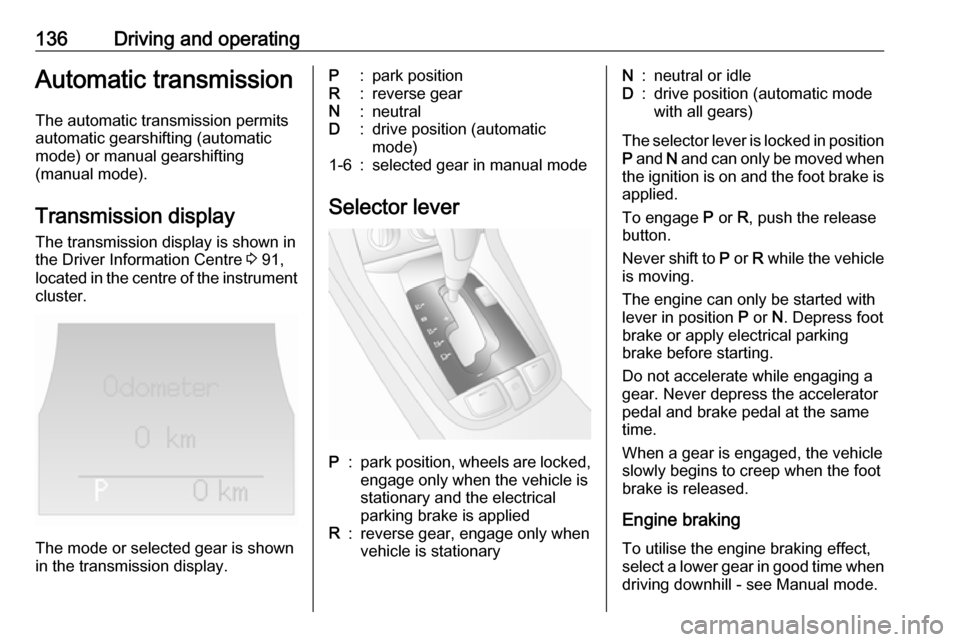
Transmission display
The transmission display is shown in
the Driver Information Centre 3 91,
located in the centre of the instrument
cluster.
The mode or selected gear is shown
in the transmission display.
P:park positionR:reverse gearN:neutralD:drive position (automatic
mode)1-6:selected gear in manual mode
Selector lever
P:park position, wheels are locked, engage only when the vehicle is
stationary and the electrical
parking brake is appliedR:reverse gear, engage only when
vehicle is stationaryN:neutral or idleD:drive position (automatic mode
with all gears)
The selector lever is locked in position
P and N and can only be moved when
the ignition is on and the foot brake is applied.
To engage P or R, push the release
button.
Never shift to P or R while the vehicle
is moving.
The engine can only be started with
lever in position P or N. Depress foot
brake or apply electrical parking
brake before starting.
Do not accelerate while engaging a
gear. Never depress the accelerator
pedal and brake pedal at the same
time.
When a gear is engaged, the vehicle
slowly begins to creep when the foot
brake is released.
Engine braking To utilise the engine braking effect,
select a lower gear in good time when
driving downhill - see Manual mode.
Page 142 of 225

140Driving and operatingCaution
It is not advisable to drive with thehand resting on the selector lever.
Fuel economy mode 3 122.
Drive systems
All-wheel drive
All-wheel drive is an active-on-
demand system that engages
automatically, with no action required
by the driver. Depending on the
driving environment, the vehicle
switches between two-wheel drive
and four-wheel drive, to give the vehicle more traction and stability
when necessary.
If the front wheels begin to slip, the
rear wheels will automatically begin to drive the vehicle as required. More
torque is transferred to the wheels
that have the most traction, so the
vehicle has optimum grip at all times. There may be a slight engagement
noise during hard use.
As well as enabling the vehicle to be
driven off-road, this system also
enables the vehicle to be driven on
normal roads without incurring
excessive tyre and drivetrain wear or
causing poor control.Ensure tyres (including the spare) are
inflated to the correct pressure
3 212 and are suitable for the
prevailing road conditions. For
optimum system performance, the
vehicle's tyres should not have
varying degrees of wear.
If control indicator B flashes in the
instrument cluster during driving, All-
wheel drive is temporarily disabled. If B flashes continuously, there is a fault
in the system; seek the assistance of
a workshop.
All-wheel drive control indicator B
3 86.
On-road driving
The increased traction of All-wheel
drive vehicles offers greater driving
control in adverse road conditions,
particularly heavy snow and ice.
However, All-wheel drive vehicles are not "skid-proof" and do not decrease
stopping distances.
All-wheel drive vehicles have a higher
centre of gravity than conventional vehicles. Always approach curves at
an appropriate driving speed. Do not
attempt to go as fast through turns as