lock OPEL ANTARA 2017.5 Owner's Guide
[x] Cancel search | Manufacturer: OPEL, Model Year: 2017.5, Model line: ANTARA, Model: OPEL ANTARA 2017.5Pages: 225, PDF Size: 6.2 MB
Page 73 of 225

Instruments and controls71Instruments and
controlsControls ....................................... 72
Steering wheel adjustment ........72
Steering wheel controls .............72
Horn ........................................... 72
Windscreen wiper/washer .........73
Rear window wiper/washer .......74
Outside temperature ..................75
Clock ......................................... 75
Power outlets ............................. 77
Warning lights, gauges and indi‐ cators ........................................... 78
Instrument cluster ......................78
Speedometer ............................. 78
Odometer .................................. 78
Trip odometer ............................ 79
Tachometer ............................... 79
Fuel gauge ................................ 79
Service display .......................... 80
Transmission display .................80
Control indicators ......................80
Turn signal ................................. 83
Seat belt reminder .....................83
Airbag and belt tensioners .........83
Airbag deactivation ....................83Charging system .......................84
Malfunction indicator light ..........84
Service vehicle soon .................84
Brake system ............................. 85
Electrical parking brake .............85
Electrical parking brake fault .....85
Antilock brake system (ABS) .....85
Upshift ....................................... 86
All wheel drive ........................... 86
Sport mode ................................ 86
Descent control system .............86
Power steering .......................... 86
Ultrasonic parking assist ...........87
Electronic Stability Control ........87
Electronic Stability Control off ...87
Engine coolant temperature ......87
Preheating ................................. 87
Diesel particle filter ....................88
AdBlue ....................................... 88
Tyre pressure monitoring system ...................................... 88
Engine oil pressure ....................88
Change engine oil .....................89
Low engine oil level ...................89
Fuel economy mode ..................89
Low fuel ..................................... 89
Drain fuel filter ........................... 90
Immobiliser ................................ 90
Reduced engine power .............90
Apply footbrake ......................... 90High beam................................. 90
Automatic headlight levelling system ...................................... 90
Fog light ..................................... 90
Rear fog light ............................. 91
Cruise control ............................ 91
Speed warning .......................... 91
Trailer indicator .......................... 91
Door open .................................. 91
Anti-theft alarm system ..............91
Information displays .....................91
Driver Information Centre ..........91
Board-Info-Display .....................92
Graphic-Info-Display, Colour- Info-Display .............................. 94
Vehicle messages ........................99
Warning chimes .........................99
Tyre pressure ............................ 99
Trip computer ............................. 100
Trip computer in Board-Info- Display .................................... 100
Trip computer in Graphic-Info- Display or Colour-Info-
Display .................................... 102
Page 74 of 225

72Instruments and controlsControlsSteering wheel adjustment
Unlock lever, adjust steering wheel,
then engage lever and ensure it is
fully locked.
Do not adjust steering wheel unless
vehicle is stationary and steering
wheel lock has been released.
Steering wheel controls
The Infotainment system and a
connected mobile phone can be
operated via the controls on the
steering wheel.
Further information is available in the
Infotainment manual.
Horn
Press j.
Page 77 of 225

Instruments and controls75To activate rear window washer
system, press and hold button on end
of lever. Washer fluid is sprayed onto
rear window and the wiper wipes a
few times when the button is
released.
Do not use if the windscreen is frozen.
Switch off in car washes.
Outside temperature
A drop in temperature is indicated
immediately and a rise in temperature
after a time delay.
If outside temperature drops to 3 °C,
the symbol : illuminates in the
Board-Info-Display as a warning for
icy road conditions. : remains
illuminated until outside temperature
reaches at least 5 °C.
In vehicles with Graphic-Info-Display
or Colour-Info-Display, a message
appears on the display as a warning for icy road conditions. There is no
message below -5 °C.
9 Warning
The road surface may already be
icy even though the display
indicates a few degrees above
0 °C.
Clock
Date and time are shown in the
Info-Display.
Board-Info-Display 3 92.
Page 78 of 225

76Instruments and controls
Graphic-Info-Display,
Colour-Info-Display 3 94.
Automatic time synchronisation
Board-Info-Display
The RDS (Radio Data System) signalof most VHF transmitters
automatically sets the time, identified
by } in the display.
Some RDS transmitters do not send
a correct time signal. In such cases,
switch off automatic time
synchronisation and set the time
manually.
Deactivate ( Clock Sync.Off ) or
activate ( Clock Sync.On ) automatic
time synchronisation with the arrow
buttons on the Infotainment system.
To set date and time manually, select
the menu item for time and date
setting from the Settings menu and
make the desired setting. The value ready for modification is marked with
arrows. Use the arrow buttons to
make the required setting. The setting
is saved when the menu item is
exited.
To correct time with the help of RDS,
select the menu item for time
synchronisation from the Settings
menu and make the desired setting.
Board-Info-Display 3 92.
Graphic-Info-Display, Colour-Info-
Display
Page 79 of 225

Instruments and controls77With the navigation system, date and
time are set automatically upon
receipt of a GPS satellite signal. If the
displayed time does not match local
time, it can be corrected manually or
automatically by receiving an RDS
time signal.
Some RDS transmitters do not send
a correct time signal. In such cases,
switch off automatic time
synchronisation and set the time
manually.
To set date and time manually, select
menu item Time, Date from the
Settings menu. The menu is
displayed. Select the menu items
required and make the desired
setting.
To correct time with the help of RDS,
select menu item Synchron. clock
automatical. from the Time, Date
menu. The box in front of Synchron.
clock automatical. will be checked.
Graphic-Info-Display,
Colour-Info-Display 3 94.Power outlets
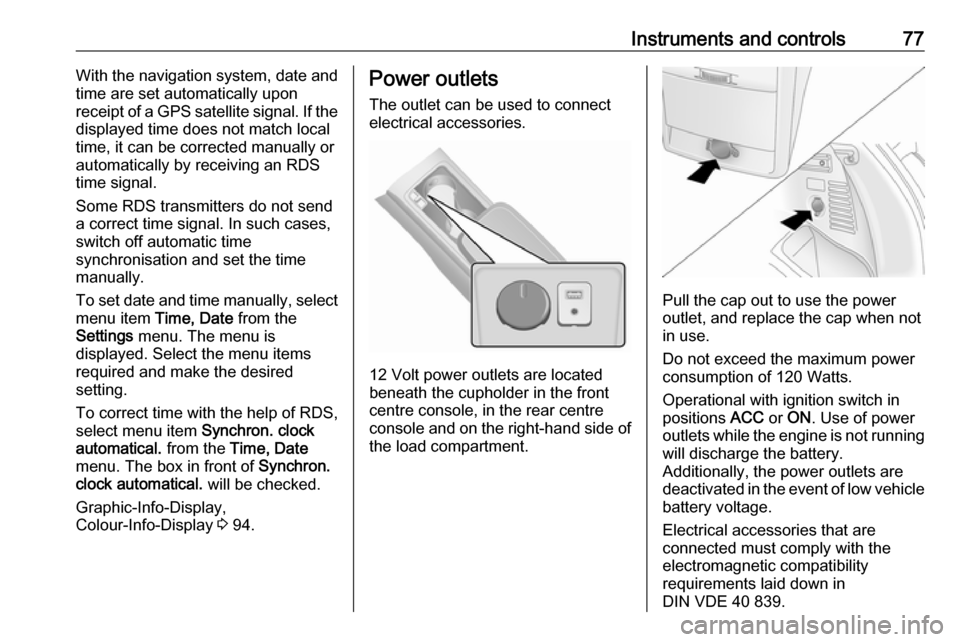
The outlet can be used to connect electrical accessories.
12 Volt power outlets are located
beneath the cupholder in the front
centre console, in the rear centre
console and on the right-hand side of
the load compartment.
Pull the cap out to use the power
outlet, and replace the cap when not in use.
Do not exceed the maximum power
consumption of 120 Watts.
Operational with ignition switch in
positions ACC or ON . Use of power
outlets while the engine is not running will discharge the battery.
Additionally, the power outlets are
deactivated in the event of low vehicle
battery voltage.
Electrical accessories that are
connected must comply with the
electromagnetic compatibility
requirements laid down in
DIN VDE 40 839.
Page 84 of 225

82Instruments and controlsOverviewOTurn signal 3 83XDriver's seat belt reminder
3 83kFront passenger seat belt
reminder 3 83vAirbag and belt tensioners
3 83*Airbag activation 3 83pCharging system 3 84ZMalfunction indicator light
3 84gService vehicle soon 3 84RBrake system 3 85mElectrical parking brake
3 85pElectrical parking brake fault
3 85uAntilock brake system (ABS)
3 85[Upshift 3 86BAll wheel drive 3 86SSport mode 3 86uDescent control system
3 862Power steering 3 86rUltrasonic parking assist
3 87RElectronic Stability Control
3 87tElectronic Stability Control
off 3 87WEngine coolant temperature
3 87!Preheating 3 87%Diesel particle filter 3 88YAdBlue 3 88wTyre pressure monitoring
system 3 88IEngine oil pressure 3 88¢Change engine oil 3 89SLow engine oil level 3 89sFuel economy mode 3 89YLow fuel 3 89UDrain fuel filter 3 90dImmobiliser 3 90#Reduced engine power
3 90-Apply footbrake 3 90CHigh beam 3 90qAutomatic headlight levelling
system 3 90>Fog light 3 90øRear fog light 3 91mCruise control 3 91àSpeed warning 3 91áTrailer indicator 3 91
Page 87 of 225

Instruments and controls85Have the cause of the fault eliminated
by a workshop.
Brake system
R illuminates red.
Illuminates when the ignition is
switched on and extinguishes shortly
after the engine starts. If it does not
illuminate, stop and seek the
assistance of a workshop.
Control indicator R illuminates if the
electrical parking brake is applied and
extinguishes when it is released
3 143.
If it stays lit while the engine is
running, the brakes do not operate as normal, or leaks are found in the
brake system, do not attempt to drive
the vehicle. Have the vehicle towed to a workshop for inspection and repair.9 Warning
Stop. Do not continue your
journey. Consult a workshop.
Illuminates when engine is running if
the fluid level for brake hydraulics is
too low 3 162.
Brake system 3 142.
Electrical parking brake
m illuminates or flashes red.
When the engine is started, m
illuminates briefly. If it does not
illuminate, seek the assistance of a
workshop.
Illuminates
Electrical parking brake is applied
3 143.
Flashes
Electrical parking brake is not fully
applied or released.
Switch on ignition, depress brake
pedal and attempt to reset the system by first releasing and then re-applying
the electrical parking brake.
If m remains flashing, do not drive
and seek the assistance of a
workshop.Electrical parking brake
fault
p illuminates yellow.
When the ignition is switched on, p
illuminates briefly. If it does not
illuminate, seek the assistance of a
workshop.
Illuminates
Electrical parking brake is operating
with degraded performance 3 143.9 Warning
Have the cause of the fault
remedied immediately by a
workshop.
Antilock brake system
(ABS)
u illuminates yellow.
Illuminates for a few seconds after the ignition is switched on. The system is
ready for operation when the control
indicator extinguishes.
Page 88 of 225

86Instruments and controlsIf the control indicator does not
illuminate when the ignition is
switched on, stays lit or illuminates
during driving, there is a fault in the
ABS. The brake system remains
operational but without ABS
regulation.
If control indicator u illuminates
during driving along with brake
system control indicator R, there is a
serious fault in the brake system.
Have the system checked
immediately by a workshop.
Antilock brake system 3 142.
Upshift
[ illuminates green.
Upshifting is recommended for fuel
saving purposes.
All wheel drive
B illuminates or flashes yellow.
Illuminates briefly when the ignition is switched on. If it does not illuminate,
seek the assistance of a workshop.Flashes briefly when the engine is
running
The system is temporarily disabled.
Flashes continuously when the
engine is running
System fault. Seek the assistance of
a workshop immediately.
All wheel drive 3 140.
Sport mode
S illuminates green.
Illuminates when Sport mode is
switched on 3 137.
Descent control system u illuminates yellow and/or green.
Both the yellow and green control
indicators illuminate briefly when the
ignition is switched on.
Green
Illuminates when system is ready for
operation.Flashes during driving when system is in operation, after pressing the u
button.
Yellow
Flashes to indicate system is not
ready for conditions to operate.
Illuminates to indicate there is a fault
in the system.
If it flashes or illuminates during
driving, friction material needs to cool down: drive the vehicle without
braking as much as possible.
Descent control system 3 146.
Power steering
2 illuminates yellow.
When the ignition is switched on, 2
illuminates briefly. If it does not
illuminate, stays lit or illuminates
during driving, there is a fault in the
system. Seek the assistance of a
workshop.
Power steering 3 124.
Page 91 of 225

Instruments and controls89Illuminates when the engine is
runningCaution
Engine lubrication may be
interrupted. This may result in
damage to the engine and/or
locking of the drive wheels.
1. Depress clutch.
2. Select neutral gear, set selector lever to N.
3. Move out of the flow of traffic as quickly as possible without
impeding other vehicles.
4. Switch off ignition.
9 Warning
When the engine is off,
considerably more force is needed
to brake and steer. During an
Autostop the brake servo unit will still be operational.
Do not remove key until vehicle is
stationary, otherwise the steeringwheel lock could engage
unexpectedly.
Check oil level before seeking the
assistance of a workshop 3 159.
Change engine oil
¢ illuminates yellow.
When the engine is started, ¢
illuminates briefly. If it does not
illuminate, seek the assistance of a
workshop.
The engine oil life monitor lets you know when to change the oil. Control
indicator ¢ illuminates to indicate
that engine oil life has been
diminished and the oil needs
changing.
Based on driving conditions, the
interval at which an oil change will be indicated can vary considerably.
Change oil within 1000 km. Engine
power may be decreased.
Once the engine oil has been
changed 3 159, the engine oil life
monitor needs to be reset. Seek the assistance of a workshop.
Low engine oil level
S illuminates yellow.
When the ignition is switched on, S
illuminates briefly. If it does not
illuminate, seek the assistance of a
workshop.
Illuminates during driving
Oil level is low: top up oil to specified
level 3 159.
Fuel economy mode s illuminates green.
Depending on version, s
illuminates when fuel economy mode
is switched on 3 122.
Low fuel Y illuminates yellow.
Page 94 of 225

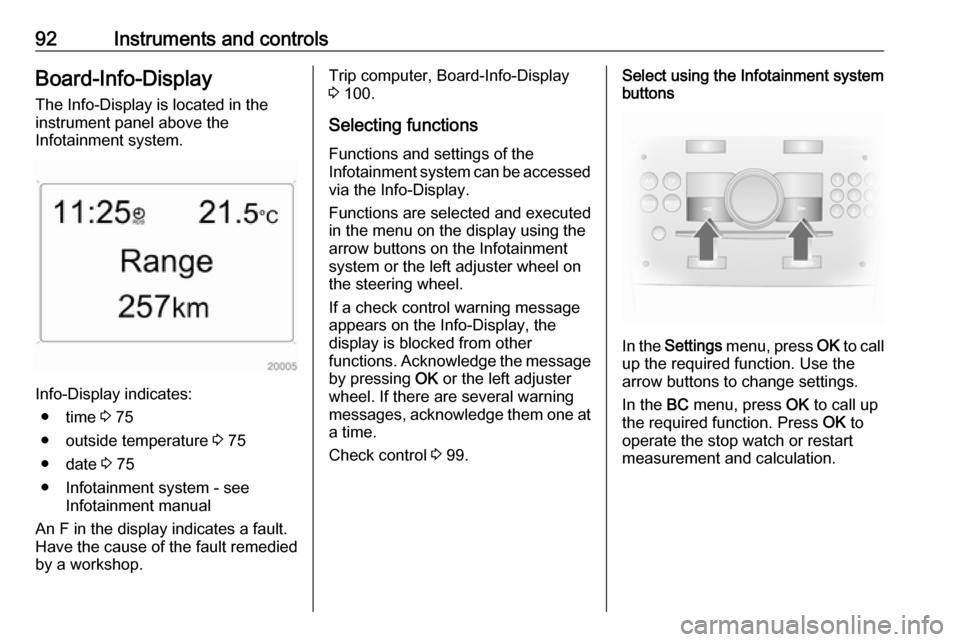
92Instruments and controlsBoard-Info-DisplayThe Info-Display is located in the
instrument panel above the
Infotainment system.
Info-Display indicates:
● time 3 75
● outside temperature 3 75
● date 3 75
● Infotainment system - see Infotainment manual
An F in the display indicates a fault.
Have the cause of the fault remedied
by a workshop.
Trip computer, Board-Info-Display
3 100.
Selecting functions Functions and settings of the
Infotainment system can be accessed
via the Info-Display.
Functions are selected and executed
in the menu on the display using the
arrow buttons on the Infotainment
system or the left adjuster wheel on
the steering wheel.
If a check control warning message
appears on the Info-Display, the
display is blocked from other
functions. Acknowledge the message by pressing OK or the left adjuster
wheel. If there are several warning
messages, acknowledge them one at a time.
Check control 3 99.Select using the Infotainment system
buttons
In the Settings menu, press OK to call
up the required function. Use the arrow buttons to change settings.
In the BC menu, press OK to call up
the required function. Press OK to
operate the stop watch or restart
measurement and calculation.