windows OPEL COMBO 2010 Owner's Manual
[x] Cancel search | Manufacturer: OPEL, Model Year: 2010, Model line: COMBO, Model: OPEL COMBO 2010Pages: 212, PDF Size: 2.49 MB
Page 42 of 212
36 Keys, doors, windows
Picture no: 18105s.tif
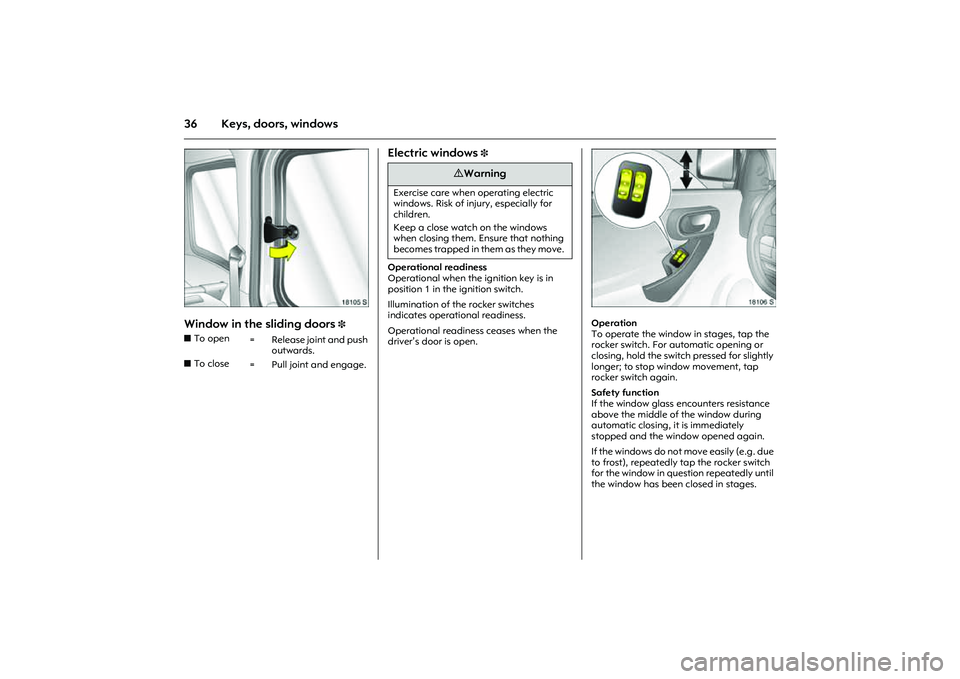
Window in the sliding doors
3 Electric windows
3
Operational readiness
Operational when the ignition key is in
position 1 in the ignition switch.
Illumination of the rocker switches
indicates operational readiness.
Operational readiness ceases when the
driver’s door is open.
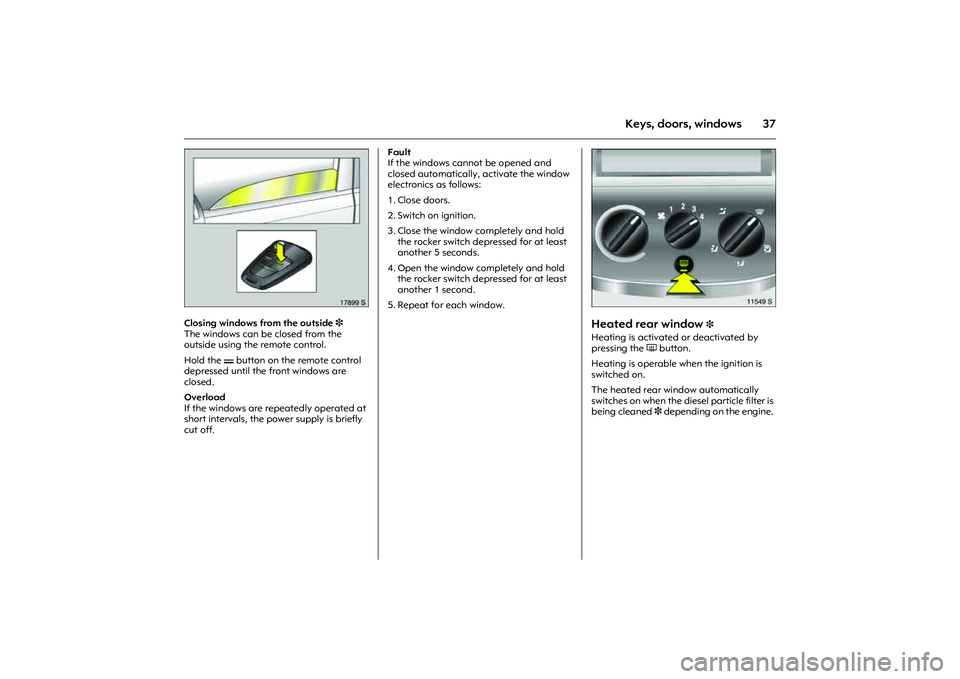
Picture no: 18106s.tif
Operation
To operate the window in stages, tap the
rocker switch. For automatic opening or
closing, hold the switch pressed for slightly
longer; to stop window movement, tap
rocker switch again.
Safety function
If the window glass encounters resistance
above the middle of the window during
automatic closing, it is immediately
stopped and the window opened again.
If the windows do not move easily (e.g. due
to frost), repeatedly tap the rocker switch
for the window in question repeatedly until
the window has been closed in stages. zTo open
= Release joint and push
outwards.
zTo close
= Pull joint and engage.
9 Warning
Exercise care when operating electric
windows. Risk of injury, especially for
children.
Keep a close watch on the windows
when closing them. Ensure that nothing
becomes trapped in them as they move.
Page 43 of 212
37
Keys, doors, windows
Picture no: 17899s.tif
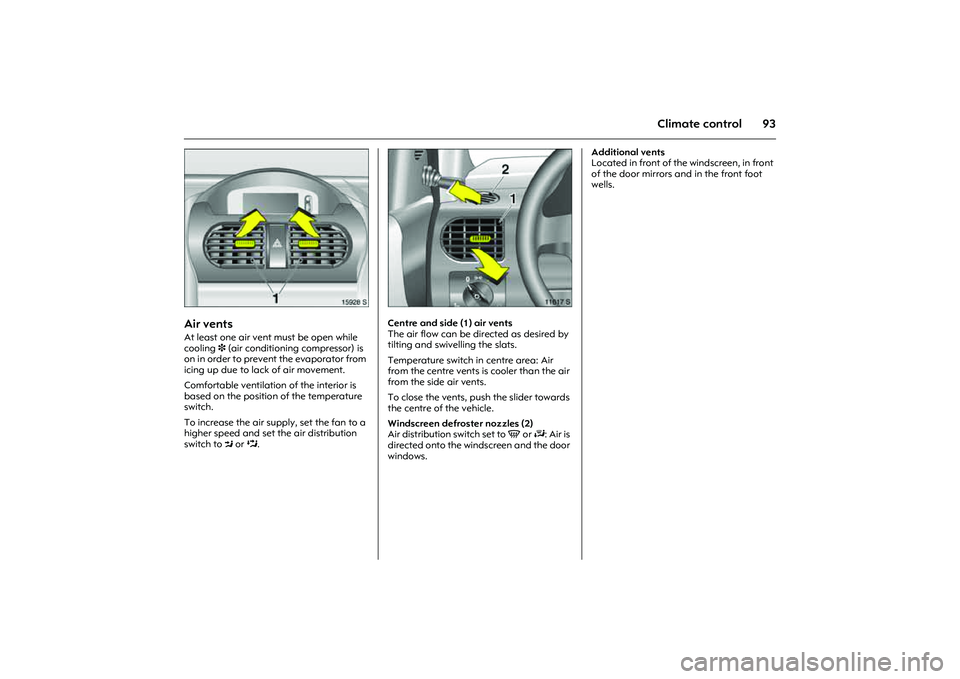
Closing windows from the outside 3
The windows can be closed from the
outside using the remote control.
Hold the p button on the remote control
depressed until the front windows are
closed.
Overload
If the windows are repeatedly operated at
short intervals, the power supply is briefly
cut off. Fault
If the windows cannot be opened and
closed automatically, activate the window
electronics as follows:
1. Close doors.
2. Switch on ignition.
3. Close the window completely and hold
the rocker switch depressed for at least
another 5 seconds.
4. Open the window completely and hold
the rocker switch depressed for at least
another 1 second.
5. Repeat for each window.
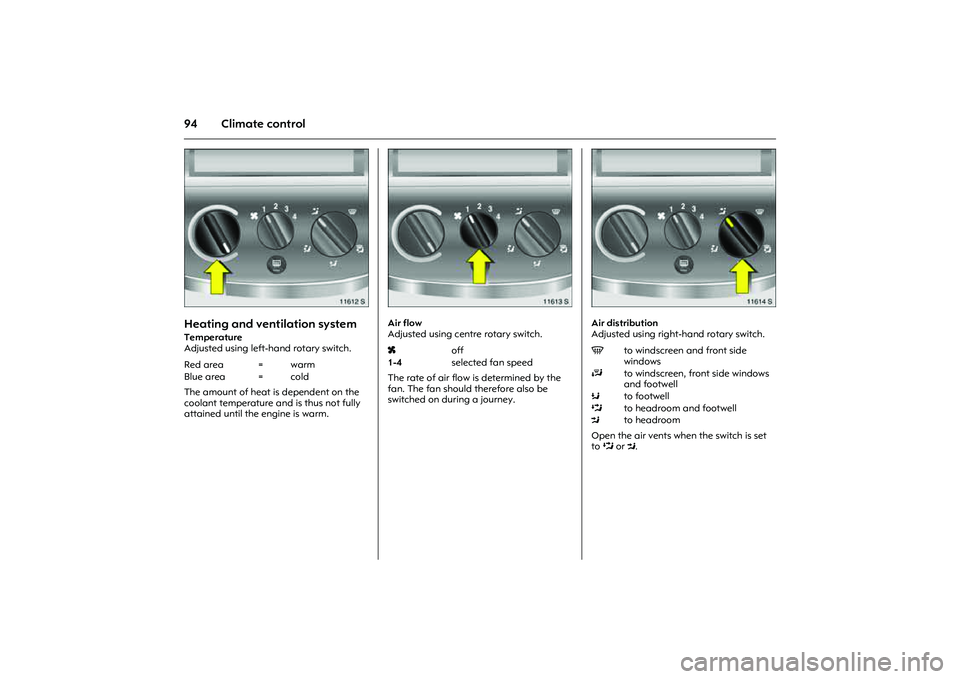
Picture no: 11549s.tif
Heated rear window
3
Heating is activated or deactivated by
pressing the Ü button.
Heating is operable when the ignition is
switched on.
The heated rear window automatically
switches on when the diesel particle filter is
being cleaned 3 depending on the engine.
Page 99 of 212
93
Climate control
Picture no: 15928s.tif
Air vents At least one air vent must be open while
cooling 3 (air conditioning compressor) is
on in order to prevent the evaporator from
icing up due to lack of air movement.
Comfortable ventilation of the interior is
based on the position of the temperature
switch.
To increase the air supply, set the fan to a
higher speed and set the air distribution
switch to M or L.
Picture no: 11617s.tif
Centre and side (1) air vents
The air flow can be directed as desired by
tilting and swivelling the slats.
Temperature switch in centre area: Air
from the centre vents is cooler than the air
from the side air vents.
To close the vents, push the slider towards
the centre of the vehicle.
Windscreen defroster nozzles (2)
Air distribution switch set to V or J: Air is
directed onto the windscreen and the door
windows. Additional vents
Located in front of the windscreen, in front
of the door mirrors and in the front foot
wells.
Page 100 of 212
94 Climate control
Picture no: 11612s.tif
Heating and ventilation systemTemperature
Adjusted using left-hand rotary switch.
The amount of heat is dependent on the
coolant temperature and is thus not fully
attained until the engine is warm.
Picture no: 11613s.tif
Air flow
Adjusted using centre rotary switch.
The rate of air flow is determined by the
fan. The fan should therefore also be
switched on during a journey.
Picture no: 11614s.tif
Air distribution
Adjusted using right-hand rotary switch.
Open the air vents when the switch is set
toL or M. Red area = warm
Blue area = cold
xoff
1-4selected fan speed
Vto windscreen and front side
windows
Jto windscreen, front side windows
and footwell
Kto footwell
Lto headroom and footwell
Mto headroom
Page 102 of 212
96 Climate control
Picture no: 16489s.tif
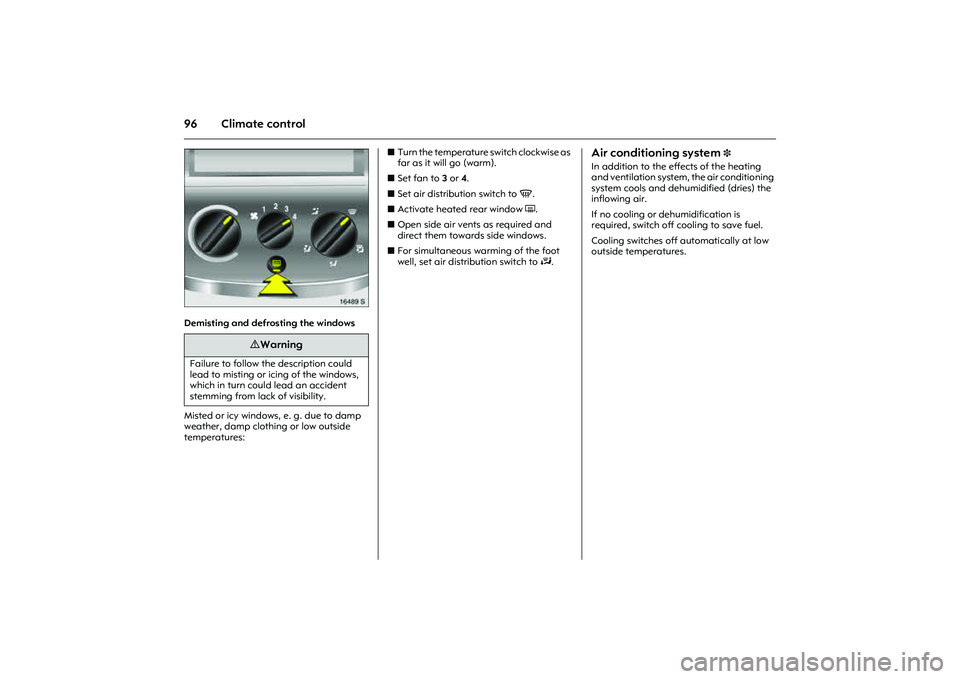
Demisting and defrosting the windows
Misted or icy windows, e. g. due to damp
weather, damp clothing or low outside
temperatures:zTurn the temperature switch clockwise as
far as it will go (warm).
zSet fan to 3 or 4.
zSet air distribution switch to V.
zActivate heated rear window Ü.
zOpen side air vents as required and
direct them towards side windows.
zFor simultaneous warming of the foot
well, set air distribution switch to J.
Air conditioning system
3
In addition to the effects of the heating
and ventilation system, the air conditioning
system cools and dehumidified (dries) the
inflowing air.
If no cooling or dehumidification is
required, switch off cooling to save fuel.
Cooling switches off automatically at low
outside temperatures.
9 Warning
Failure to follow the description could
lead to misting or icing of the windows,
which in turn could lead an accident
stemming from lack of visibility.
Page 103 of 212
97
Climate control
Picture no: 13203s.tif
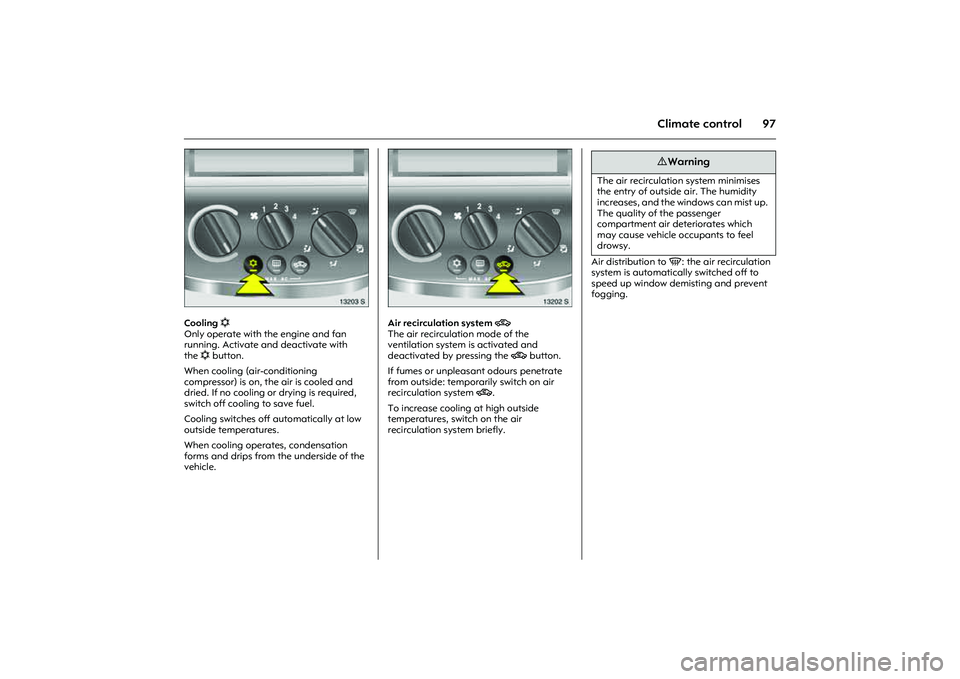
Cooling n
Only operate with the engine and fan
running. Activate and deactivate with
then button.
When cooling (air-conditioning
compressor) is on, the air is cooled and
dried. If no cooling or drying is required,
switch off cooling to save fuel.
Cooling switches off automatically at low
outside temperatures.
When cooling operates, condensation
forms and drips from the underside of the
vehicle.
Picture no: 13202s.tif
Air recirculation system 4
The air recirculation mode of the
ventilation system is activated and
deactivated by pressing the 4 button.
If fumes or unpleasant odours penetrate
from outside: temporarily switch on air
recirculation system 4.
To increase cooling at high outside
temperatures, switch on the air
recirculation system briefly.Air distribution to V: the air recirculation
system is automatically switched off to
speed up window demisting and prevent
fogging.
9 Warning
The air recirculation system minimises
the entry of outside air. The humidity
increases, and the windows can mist up.
The quality of the passenger
compartment air deteriorates which
may cause vehicle occupants to feel
drowsy.
Page 104 of 212
98 Climate control
Picture no: 11624s.tif
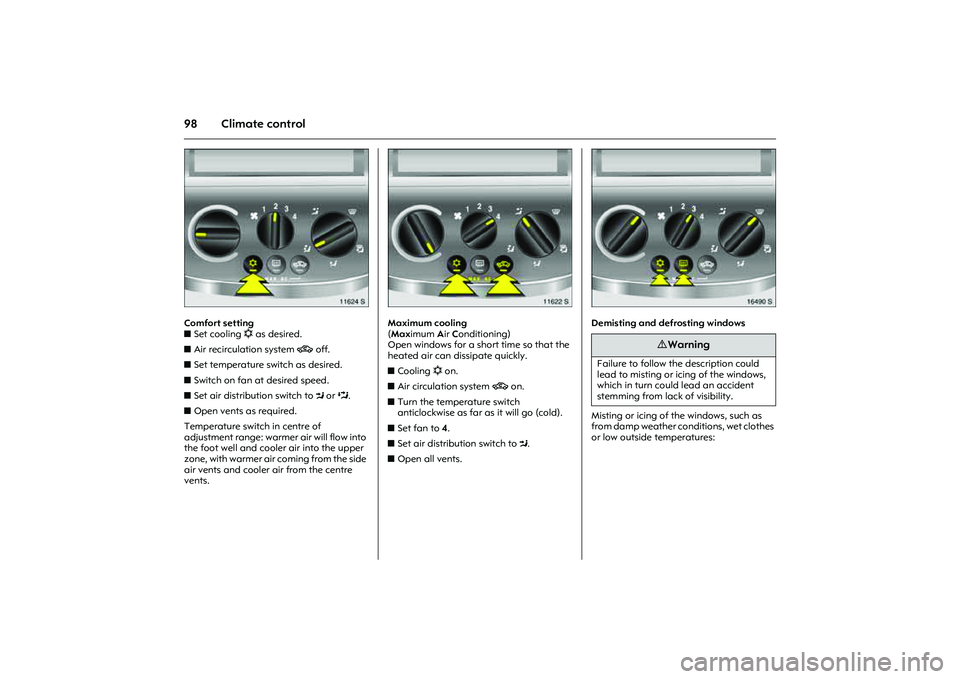
Comfort setting
zSet cooling n as desired.
zAir recirculation system 4 off.
zSet temperature switch as desired.
zSwitch on fan at desired speed.
zSet air distribution switch to M or L.
zOpen vents as required.
Temperature switch in centre of
adjustment range: warmer air will flow into
the foot well and cooler air into the upper
zone, with warmer air coming from the side
air vents and cooler air from the centre
vents.
Picture no: 11622s.tif
Maximum cooling
(Maximum Air Conditioning)
Open windows for a short time so that the
heated air can dissipate quickly.
zCooling n on.
zAir circulation system 4 on.
zTurn the temperature switch
anticlockwise as far as it will go (cold).
zSet fan to 4.
zSet air distribution switch to M.
zOpen all vents.
Picture no: 16490s.tif
Demisting and defrosting windows
Misting or icing of the windows, such as
from damp weather conditions, wet clothes
or low outside temperatures:
9 Warning
Failure to follow the description could
lead to misting or icing of the windows,
which in turn could lead an accident
stemming from lack of visibility.
Page 105 of 212
99
Climate control
zCooling n on, the air conditioning
compressor automatically switches off in
low outdoor temperatures (ice
formation),
zTurn the temperature switch clockwise.
zSet fan to 3 or 4.
zAir distribution switch to V, air
recirculation system 4 switches off
automatically.
– or –
If there is still moisture in the system after
previous air conditioning operation, the
windows may mist up. To prevent this,
set air distribution to K before starting
engine and set to V approx. 5 seconds
after starting.
zActivate heated rear window Ü.
zOpen side air vents as required and
direct them towards side windows.
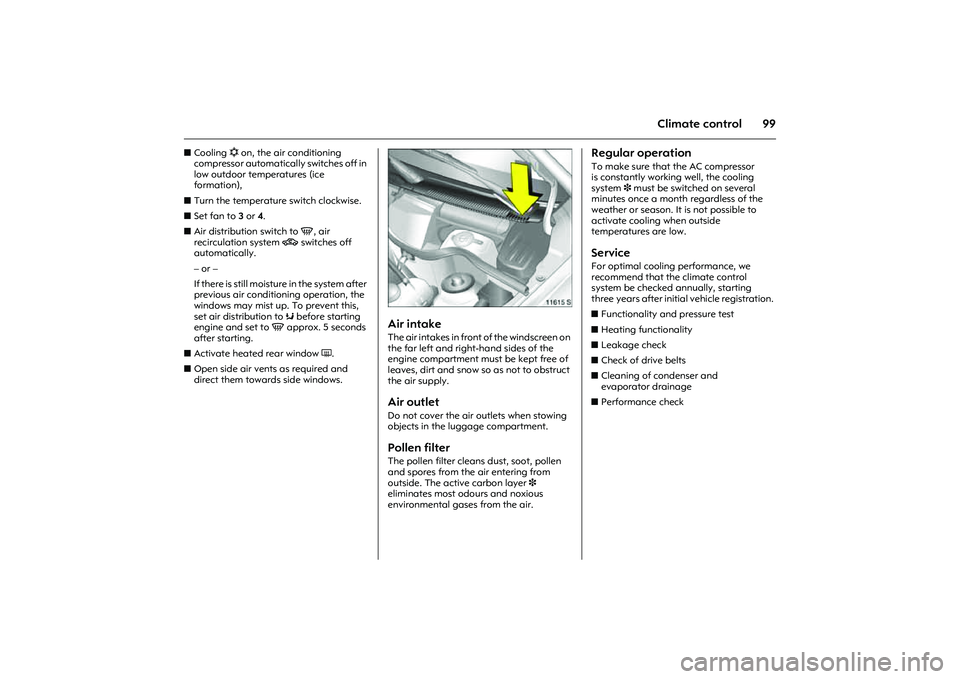
Picture no: 11615s.tif
Air intake The air intakes in front of the windscreen on
the far left and right-hand sides of the
engine compartment must be kept free of
leaves, dirt and snow so as not to obstruct
the air supply. Air outletDo not cover the air outlets when stowing
objects in the luggage compartment. Pollen filter The pollen filter cleans dust, soot, pollen
and spores from the air entering from
outside. The active carbon layer 3
eliminates most odours and noxious
environmental gases from the air.
Regular operationTo make sure that the AC compressor
is constantly working well, the cooling
system3 must be switched on several
minutes once a month regardless of the
weather or season. It is not possible to
activate cooling when outside
temperatures are low. Service For optimal cooling performance, we
recommend that the climate control
system be checked annually, starting
three years after initial vehicle registration.
zFunctionality and pressure test
zHeating functionality
zLeakage check
zCheck of drive belts
zCleaning of condenser and
evaporator drainage
zPerformance check
Page 122 of 212

116 Driving and operation
Picture no: 11718s.tif
Control indicator
A
for engine electronics
Illuminates for a few seconds when ignition
is switched on.
If it comes on when the engine is running,
there is a fault in the engine or transmission
electronics. The electronics switch to the
emergency running programme, fuel
consumption may increase and the
driveability of the vehicle may be affected.
In some cases the fault can be remedied by
switching the engine off and starting it
again. If the control indicator continues to
illuminate whilst the engine is running,
contact a workshop for assistance in
remedying the cause of the fault. If it illuminates briefly, but does not recur, it
is of no significance.
If A illuminates, there may be water in the
diesel fuel filter 3. Have the fuel filter
checked for water residue by a workshop
3177.
I f i t f l a s h e s a f t e r t h e i g n i t i o n i s s w i t c h e d o n ,
there is a fault in the immobiliser system.
The engine cannot be started 321.
Engine exhaust Diesel particle filter 3
The diesel particle filter system filters
harmful soot particles out of the exhaust
gases. The system includes a self-cleaning
function that run automatically during
driving. The filter is cleaned by burning off
the soot particles at high temperature. This
process takes place automatically under
set driving conditions and may take up to
25 minutes. Fuel consumption may be
higher during this period. The emission of
smells and smoke during this process is
normal.
9 Warning
Engine exhaust gases contain poisonous
carbon monoxide, which is colourless
and odourless and could be fatal if
inhaled.
If exhaust gases penetrate the vehicle,
open windows and contact a workshop
for assistance.
Avoid driving with an open tailgate.
Otherwise, exhaust gases could get into
the interior.
Page 138 of 212
132 Self-help, vehicle care
Picture no: 18109s.tif
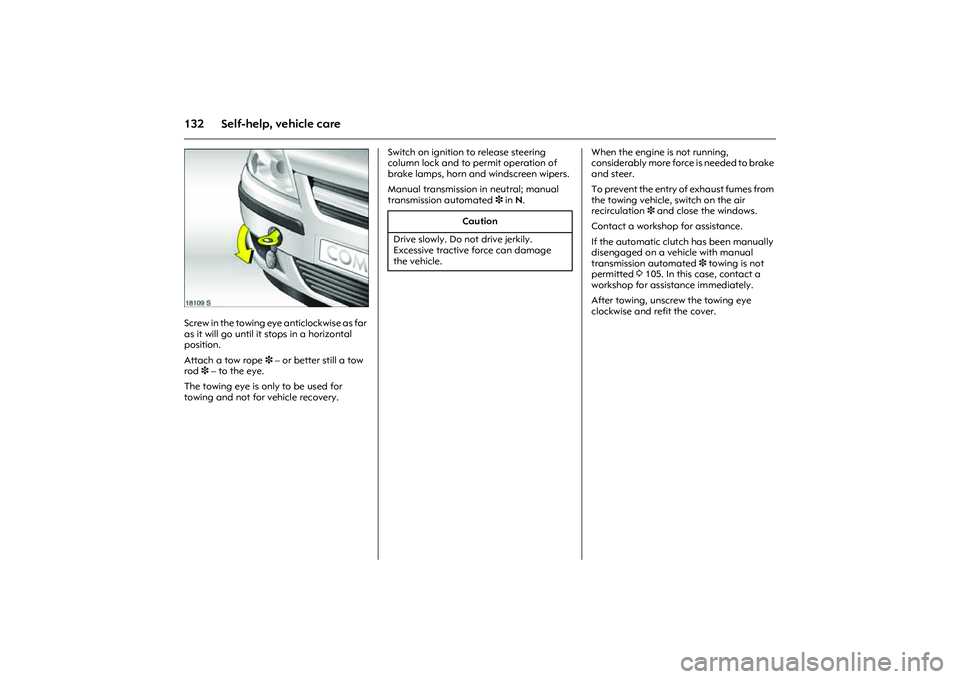
Screw in the towing eye anticlockwise as far
as it will go until it stops in a horizontal
position.
Attach a tow rope 3 – or better still a tow
rod3 – to the eye.
The towing eye is only to be used for
towing and not for vehicle recovery. Switch on ignition to release steering
column lock and to permit operation of
brake lamps, horn and windscreen wipers.
Manual transmission in neutral; manual
transmission automated 3 in N. When the engine is not running,
considerably more force is needed to brake
and steer.
To prevent the entry of exhaust fumes from
the towing vehicle, switch on the air
recirculation 3 and close the windows.
Contact a workshop for assistance.
If the automatic clutch has been manually
disengaged on a vehicle with manual
transmission automated 3 towing is not
permitted 3105. In this case, contact a
workshop for assistance immediately.
After towing, unscrew the towing eye
clockwise and refit the cover.
Caution
Drive slowly. Do not drive jerkily.
Excessive tractive force can damage
the vehicle.