windows OPEL COMBO 2010 Owners Manual
[x] Cancel search | Manufacturer: OPEL, Model Year: 2010, Model line: COMBO, Model: OPEL COMBO 2010Pages: 212, PDF Size: 2.49 MB
Page 7 of 212

Contents
In Brief ........................................................ 2
Keys, doors, windows ............................. 20
Seats, Interior .......................................... 38
Instruments ............................................. 66
Lighting ................................................... 84
Infotainment system .............................. 90
Climate control ....................................... 92
Driving and operation ......................... 100
Self-help, vehicle care .......................... 128
Opel Service, maintenance .................. 164
Technical data ..................................... 182
Index ...................................................... 198
Page 20 of 212
14 In Brief
Picture no: 14057h.tif
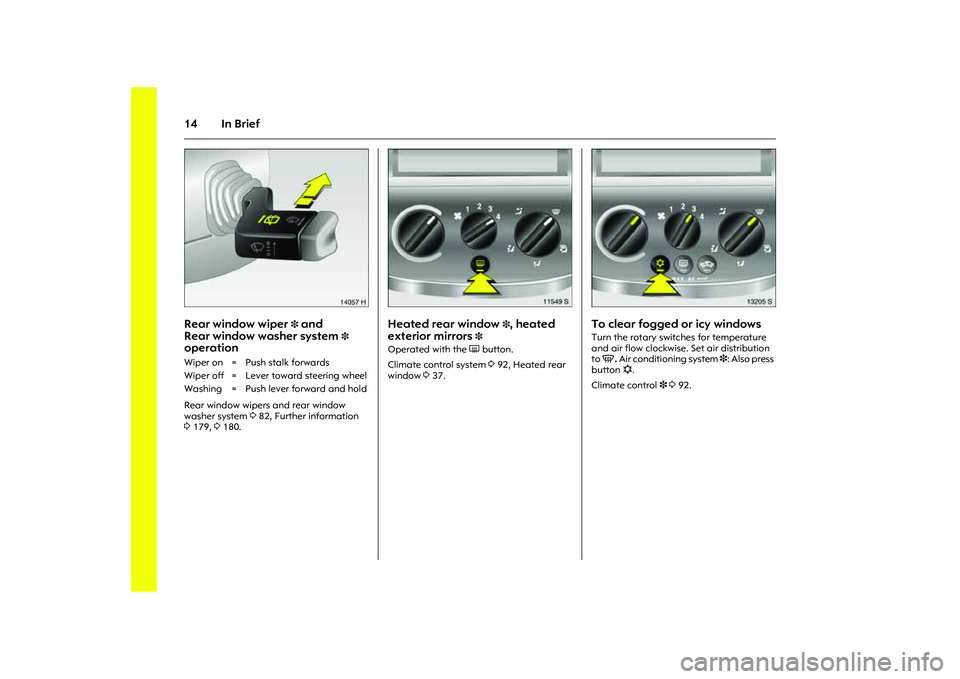
Rear window wiper
3 and
Rear window washer system
3
operation Rear window wipers and rear window
washer system 382, Further information
3179, 3180.
Picture no: 11549s.tif
Heated rear window
3, heated
exterior mirrors
3
Operated with the Ü button.
Climate control system 392, Heated rear
window 337.
Picture no: 13205s.tif
To clear fogged or icy windows Turn the rotary switches for temperature
and air flow clockwise. Set air distribution
to V. Air conditioning system 3: Also press
button n.
Climate control 3 392. Wiper on = Push stalk forwards
Wiper off = Lever toward steering wheel
Washing = Push lever forward and hold
Page 21 of 212
15
In Brief
Picture no: 15120s.tif
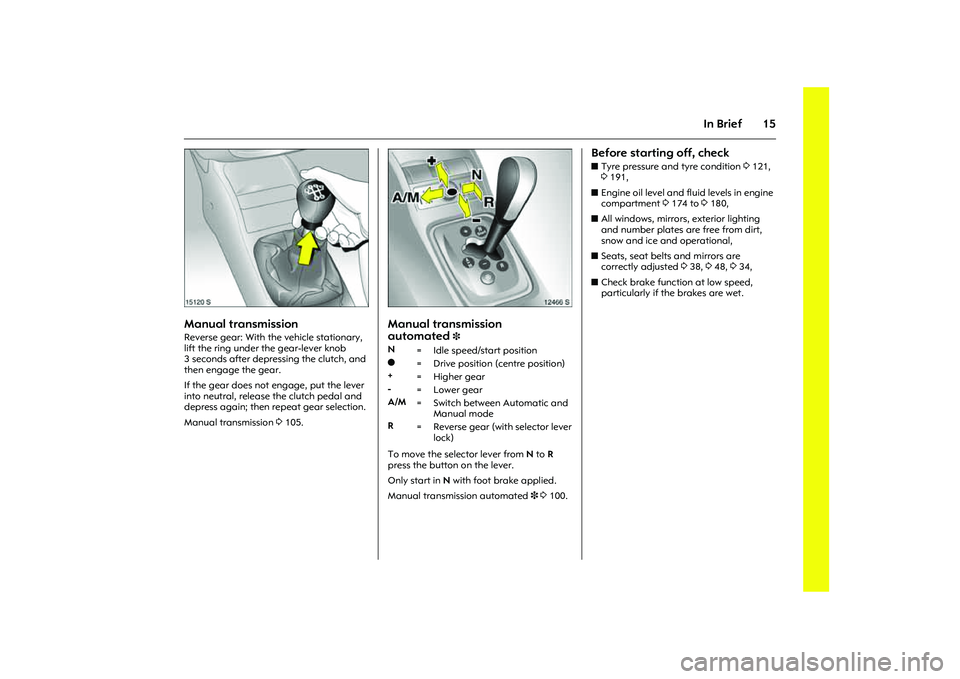
Manual transmission Reverse gear: With the vehicle stationary,
lift the ring under the gear-lever knob
3 seconds after depressing the clutch, and
then engage the gear.
If the gear does not engage, put the lever
into neutral, release the clutch pedal and
depress again; then repeat gear selection.
Manual transmission 3105.
Picture no: 12466s.tif
Manual transmission
automated
3
To move the selector lever from N to R
press the button on the lever.
Only start in N with foot brake applied.
Manual transmission automated 3 3100.
Before starting off, check zTyre pressure and tyre condition 3121,
3191,
zEngine oil level and fluid levels in engine
compartment 3174 to 3180,
zAll windows, mirrors, exterior lighting
and number plates are free from dirt,
snow and ice and operational,
zSeats, seat belts and mirrors are
correctly adjusted 338, 348, 334,
zCheck brake function at low speed,
particularly if the brakes are wet.
N
= Idle speed/start position
o
= Drive position (centre position)
+
=Higher gear
-
= Lower gear
A/M
= Switch between Automatic and
Manual mode
R
= Reverse gear (with selector lever
lock)
Page 23 of 212
17
In Brief
Parking the vehicle zAlways apply handbrake firmly without
operating the release button, and apply
as firmly as possible on a downhill or
uphill slope.
zSwitch off the engine and ignition by
turning the ignition key to 0 and
removing it. Turn the steering wheel until
you can feel its lock engage (anti-theft
protection).
On vehicles with manual transmission
automated3, control indicator R
flashes for a few seconds after the
ignition is switched off if the hand brake
has not been applied.
zIf the vehicle is parked on a level surface
or an uphill slope, with a manual
gearbox select first gear or with manual
transmission automated 3 move the
selector lever to the centre position
before switching off the ignition. Also
turn the front wheels away from the kerb
if the vehicle is on an uphill slope.
If the vehicle is on a downhill slope, with
manual gearbox or manual transmission
automated 3 select reverse gear before
switching off the ignition. Also turn the
front wheels towards the kerb. zLock the vehicle with the key in the lock
or the p button on the remote control.
Activate the anti-theft locking system 3
and anti-theft alarm system 3 by
pressing the p button twice.
Advice when parkingzDo not park vehicle on easily ignitable
surfaces as the hot exhaust system
temperatures could cause the surface to
ignite.
zClose windows.
zThe engine cooling fans may run after
the engine has been switched off, 3174.
Locking doors 322, Remote control 3 323,
Central locking system 3 324, Anti-theft
alarm system 3 331, Vehicle
decommissioning 3181.
Interesting functions
Page 26 of 212

20 Keys, doors, windowsKeys, doors,
windows
Replacement keys The key number is specified in the
Car Pass3.
The key is part of the electronic
immobiliser.
Locks 322, 3162.
Picture no: 15760t.tif
Key with retractable key blade
3
Press button to extend. To retract, press
button and audibly engage key blade. Car Pass The Car Pass contains safety-related
vehicle data and should therefore be kept
in a safe place.
When the car is taken to a workshop, the
Car Pass data is needed in order to
perform certain operations. Replacement keys ............................... 20
Key with retractable key blade 3...... 20
Car Pass................................................ 20
Electronic immobiliser.......................... 21
Mechanical unlocking or locking of
individual doors................................. 22
Remote control 3................................. 23
Central locking system 3.................... 24
Fault in the remote control ................. 26
Malfunction in central locking system 26
Sliding doors 3..................................... 27
Child safety locks 3............................. 27
Tailgate 3............................................ 28
Leaf doors 3........................................ 29
Anti-theft alarm system 3.................. 31
Exterior mirrors..................................... 34
Interior mirror ....................................... 35
Manual window operation,
front doors ......................................... 35
Window in the sliding doors 3............ 36
Electric windows3............................... 36
Heated rear window 3........................ 37
Page 27 of 212
21
Keys, doors, windows
Picture no: 15761t.tif
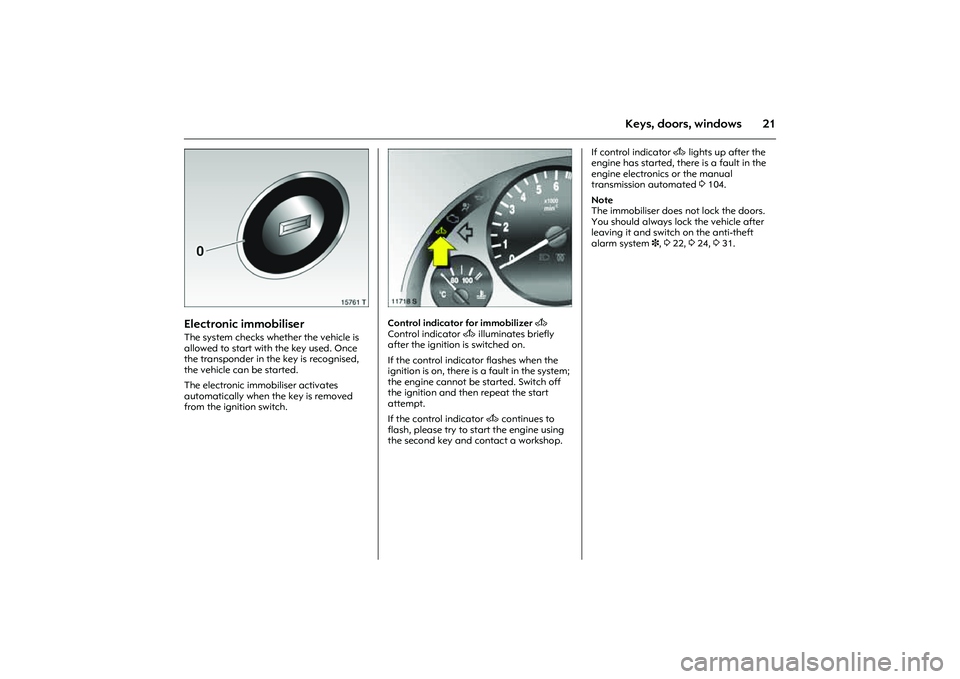
Electronic immobiliser The system checks whether the vehicle is
allowed to start with the key used. Once
the transponder in the key is recognised,
the vehicle can be started.
The electronic immobiliser activates
automatically when the key is removed
from the ignition switch.
Picture no: 11718s.tif
Control indicator for immobilizer A
Control indicator A illuminates briefly
after the ignition is switched on.
If the control indicator flashes when the
ignition is on, there is a fault in the system;
the engine cannot be started. Switch off
the ignition and then repeat the start
attempt.
If the control indicator A continues to
flash, please try to start the engine using
the second key and contact a workshop. If control indicator A lights up after the
engine has started, there is a fault in the
engine electronics or the manual
transmission automated 3104.
Note
The immobiliser does not lock the doors.
You should always lock the vehicle after
leaving it and switch on the anti-theft
alarm system 3, 322, 324, 331.
Page 28 of 212

22 Keys, doors, windows
Picture no: 18115s.tif
Mechanical unlocking or locking
of individual doors(versions without remote control 3 and
central locking system 3)
Front doors and sliding doors 3
To unlockTurn key in lock towards front of vehicle as
far as it will go. Return key to the vertical
position and remove. Pull door handle.
To lockWith door or sliding door closed, turn key
towards rear of vehicle as far as it will go.
Turn key back to vertical position and
remove.
Operating from the insidePull or press the interior lock button.
Picture no: 18093s.tif
Tailgate 3
To unlockTurn key in lock to horizontal position and
remove. Press button.
To lockWith tailgate closed, turn key in lock to
vertical position and remove.
Picture no: 18095s.tif
Leaf door 3
To unlockTurn key in lock to vertical position and
remove. Pull door handle.
To lockClose first left and then right leaf door. Turn
key in lock to horizontal position and
remove.
Page 29 of 212
23
Keys, doors, windows
Picture no: 15330t.tif
Remote control
3
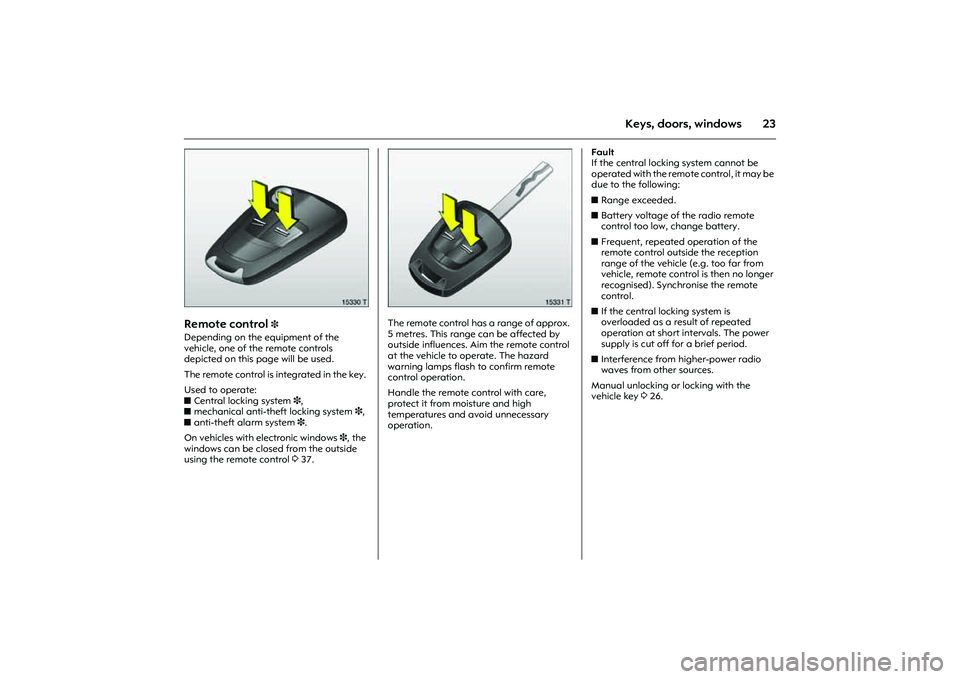
Depending on the equipment of the
vehicle, one of the remote controls
depicted on this page will be used.
The remote control is integrated in the key.
Used to operate:
zCentral locking system 3,
zmechanical anti-theft locking system 3,
zanti-theft alarm system 3.
On vehicles with electronic windows 3, the
windows can be closed from the outside
using the remote control 337.
Picture no: 15331t.tif
The remote control has a range of approx.
5 metres. This range can be affected by
outside influences. Aim the remote control
at the vehicle to operate. The hazard
warning lamps flash to confirm remote
control operation.
Handle the remote control with care,
protect it from moisture and high
temperatures and avoid unnecessary
operation. Fault
If the central locking system cannot be
operated with the remote control, it may be
due to the following:
zRange exceeded.
zBattery voltage of the radio remote
control too low, change battery.
zFrequent, repeated operation of the
remote control outside the reception
range of the vehicle (e.g. too far from
vehicle, remote control is then no longer
recognised). Synchronise the remote
control.
zIf the central locking system is
overloaded as a result of repeated
operation at short intervals. The power
supply is cut off for a brief period.
zInterference from higher-power radio
waves from other sources.
Manual unlocking or locking with the
vehicle key 326.
Page 30 of 212
24 Keys, doors, windows
Picture no: 15332t.tif
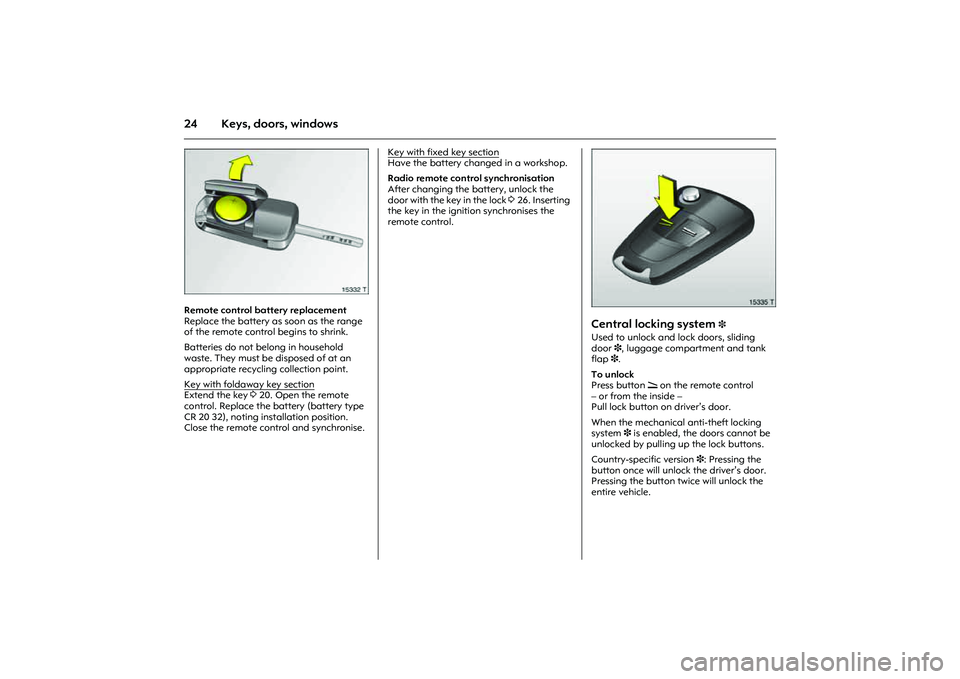
Remote control battery replacement
Replace the battery as soon as the range
of the remote control begins to shrink.
Batteries do not belong in household
waste. They must be disposed of at an
appropriate recycling collection point.
Key with foldaway key sectionExtend the key 320. Open the remote
control. Replace the battery (battery type
CR 20 32), noting installation position.
Close the remote control and synchronise. Key with fixed key section
Have the battery changed in a workshop.
Radio remote control synchronisation
After changing the battery, unlock the
door with the key in the lock 326. Inserting
the key in the ignition synchronises the
remote control.
Picture no: 15335t.tif
Central locking system
3
Used to unlock and lock doors, sliding
door3, luggage compartment and tank
flap 3.
To unlock
Press button q on the remote control
– or from the inside –
Pull lock button on driver’s door.
When the mechanical anti-theft locking
system 3 is enabled, the doors cannot be
unlocked by pulling up the lock buttons.
Country-specific version 3: Pressing the
button once will unlock the driver’s door.
Pressing the button twice will unlock the
entire vehicle.
Page 31 of 212
25
Keys, doors, windows
Picture no: 15333t.tif
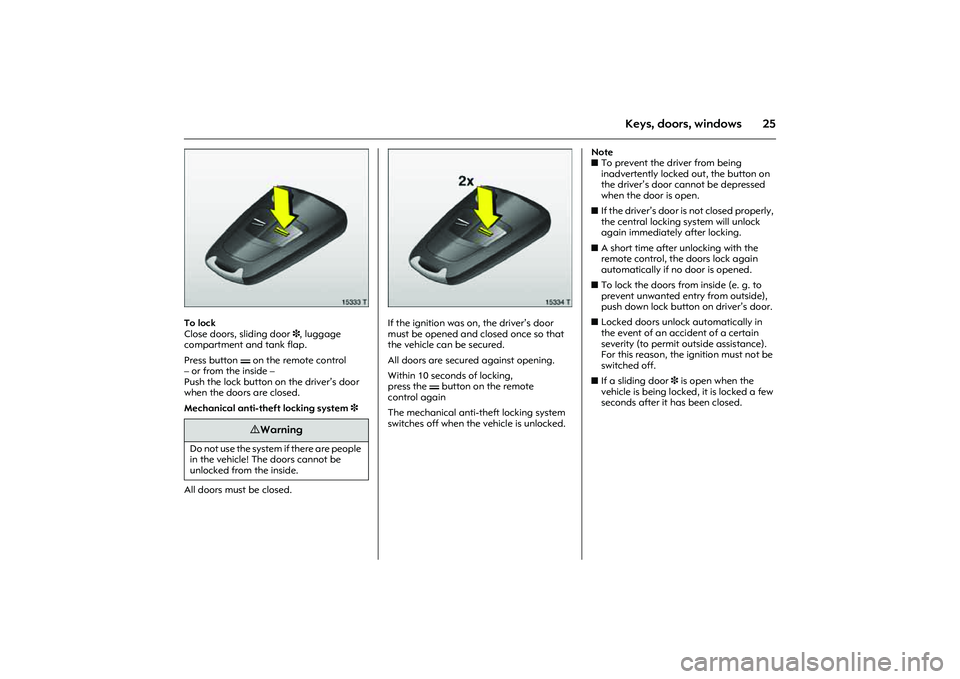
To lock
Close doors, sliding door 3, luggage
compartment and tank flap.
Press button p on the remote control
– or from the inside –
Push the lock button on the driver’s door
when the doors are closed.
Mechanical anti-theft locking system 3
All doors must be closed.
Picture no: 15334t.tif
If the ignition was on, the driver’s door
must be opened and closed once so that
the vehicle can be secured.
All doors are secured against opening.
Within 10 seconds of locking,
press the p button on the remote
control again
The mechanical anti-theft locking system
switches off when the vehicle is unlocked. Note
zTo prevent the driver from being
inadvertently locked out, the button on
the driver’s door cannot be depressed
when the door is open.
zIf the driver’s door is not closed properly,
the central locking system will unlock
again immediately after locking.
zA short time after unlocking with the
remote control, the doors lock again
automatically if no door is opened.
zTo lock the doors from inside (e. g. to
prevent unwanted entry from outside),
push down lock button on driver’s door.
zLocked doors unlock automatically in
the event of an accident of a certain
severity (to permit outside assistance).
For this reason, the ignition must not be
switched off.
zIf a sliding door 3 is open when the
vehicle is being locked, it is locked a few
seconds after it has been closed.
9 Warning
Do not use the system if there are people
in the vehicle! The doors cannot be
unlocked from the inside.