key OPEL CORSA E 2019 Manual user
[x] Cancel search | Manufacturer: OPEL, Model Year: 2019, Model line: CORSA E, Model: OPEL CORSA E 2019Pages: 231, PDF Size: 6.87 MB
Page 100 of 231
98Instruments and controlsRestart prevention
By sending remote signals, OnStar can prevent the vehicle from
restarting once it has been turned off.
On-demand diagnostics
At any time e.g. if the vehicle displays a vehicle message, press Z to
contact an advisor and ask to
complete a real-time diagnostic check
to directly determine the issue.
Depending on the results, the advisor
will provide further support.
Diagnostic report
The vehicle automatically transmits
diagnostic data to OnStar which
sends a monthly email report to you
and your preferred workshop.
Note
The workshop notification function
can be disabled in your account.
The report contains the status of key
operating systems of the vehicle like
engine, transmission, airbags, ABS,
and other major systems. It also
provides information on possiblemaintenance items and tyre pressure (only with tyre pressure monitoring
system).
To look at the information in greater detail, select the link within the email and log in to your account.
Destination download
A desired destination can be directly
downloaded to the navigation system.
Press Z to call an advisor and
describe the destination or point of interest.
The advisor can look up any address
or point of interest and directly send
the destination to the built-in
navigation system.
OnStar settings
OnStar PIN
To have full access to all OnStar
services, a four-digit PIN is required. The PIN has to be personalised when first talking to an advisor.
To change the PIN, press Z to call an
advisor.Account data
An OnStar subscriber has an account
where all the data is stored. To
request a change of the account
information, press Z and talk to an
advisor or log in to your account.
If the OnStar service is used on
another vehicle, press Z and request
that the account be transferred to the
new vehicle.
Note
In any case, if the vehicle is disposed of, sold or otherwise transferred,
immediately inform OnStar about
the changes and terminate the
OnStar service on this vehicle.
Vehicle location
The vehicle location is transmitted to
OnStar when service is requested or
triggered. A message on the Info Display informs about this
transmission.
To activate or deactivate the
transmission of the vehicle location,
press and hold j until an audio
message is heard.
Page 104 of 231
102LightingHigh beam
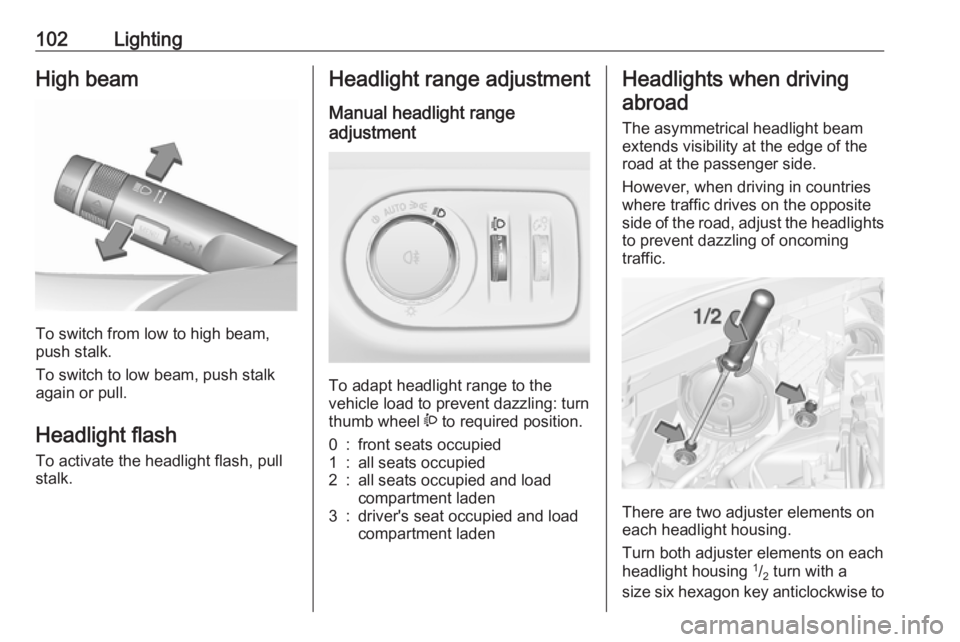
To switch from low to high beam,
push stalk.
To switch to low beam, push stalk again or pull.
Headlight flash To activate the headlight flash, pull
stalk.
Headlight range adjustment
Manual headlight range
adjustment
To adapt headlight range to the
vehicle load to prevent dazzling: turn
thumb wheel ? to required position.
0:front seats occupied1:all seats occupied2:all seats occupied and load
compartment laden3:driver's seat occupied and load
compartment ladenHeadlights when driving
abroad
The asymmetrical headlight beam
extends visibility at the edge of the
road at the passenger side.
However, when driving in countries
where traffic drives on the opposite
side of the road, adjust the headlights to prevent dazzling of oncoming
traffic.
There are two adjuster elements on
each headlight housing.
Turn both adjuster elements on each headlight housing 1
/2 turn with a
size six hexagon key anticlockwise to
Page 105 of 231
Lighting103set to right-hand traffic mode.
Therefore, insert the key in the guide as shown in the illustration.
Alternatively, a Phillips head
screwdriver size three can be used for
setting.
To reset to left-hand traffic mode, turn
adjuster elements 1
/2 turn clockwise.
Daytime running lights Daytime running light increases
visibility of the vehicle during daylight.
They are switched on automatically
when ignition is on.
Versions with automatic light control
The system switches automatically
between daytime running light and
headlights, depending on the lighting
conditions and information given by
the rain sensor system.
Automatic light control 3 101.
Xenon lighting system Xenon lighting system includes:● xenon headlights for low and high
beam
● corner lighting
● reversing function
Xenon headlights Xenon headlights for low and high
beam ensure better visibility under all
conditions.
Operation is the same as for halogen headlights.
Light switch 3 100.
High beam 3 102.
Headlight flash 3 102.
Headlight range adjustment 3 102.
Headlights when driving abroad
3 102.
Automatic light control 3 101.
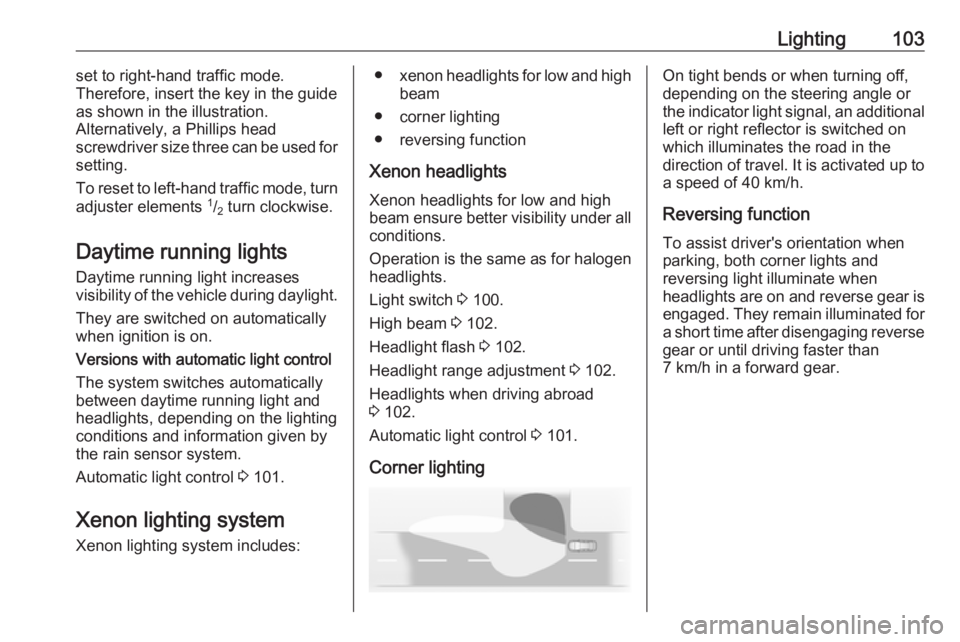
Corner lightingOn tight bends or when turning off,
depending on the steering angle or
the indicator light signal, an additional left or right reflector is switched on
which illuminates the road in the
direction of travel. It is activated up to
a speed of 40 km/h.
Reversing function
To assist driver's orientation when
parking, both corner lights and
reversing light illuminate when
headlights are on and reverse gear is
engaged. They remain illuminated for
a short time after disengaging reverse gear or until driving faster than
7 km/h in a forward gear.
Page 109 of 231
Lighting107Note
In the event of an accident with
airbag deployment, the courtesy lights are turned on automatically.
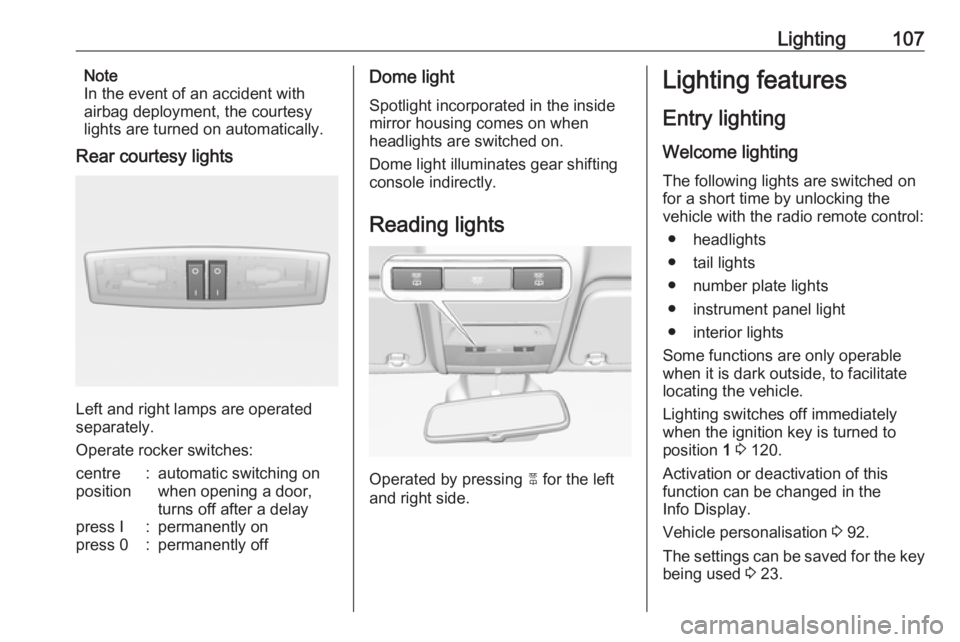
Rear courtesy lights
Left and right lamps are operated
separately.
Operate rocker switches:
centre
position:automatic switching on
when opening a door,
turns off after a delaypress I:permanently onpress 0:permanently offDome light
Spotlight incorporated in the inside
mirror housing comes on when
headlights are switched on.
Dome light illuminates gear shifting
console indirectly.
Reading lights
Operated by pressing 2 for the left
and right side.
Lighting features
Entry lighting
Welcome lighting
The following lights are switched on
for a short time by unlocking the
vehicle with the radio remote control:
● headlights
● tail lights
● number plate lights
● instrument panel light
● interior lights
Some functions are only operable
when it is dark outside, to facilitate locating the vehicle.
Lighting switches off immediately
when the ignition key is turned to
position 1 3 120.
Activation or deactivation of this
function can be changed in the
Info Display.
Vehicle personalisation 3 92.
The settings can be saved for the key being used 3 23.
Page 110 of 231
108LightingThe following lights will additionally
switch on when the driver's door is
opened:
● illumination of all switches
● Driver Information Centre
Exit lighting
The following lights switch on if the
key is removed from the ignition
switch:
● interior lights
● instrument panel light (only when
it is dark)
They will switch off automatically after
a delay and will be activated again if
the driver's door is opened.
Path lighting Headlights, tail lights and number
plate lights illuminate the surrounding area for an adjustable time after
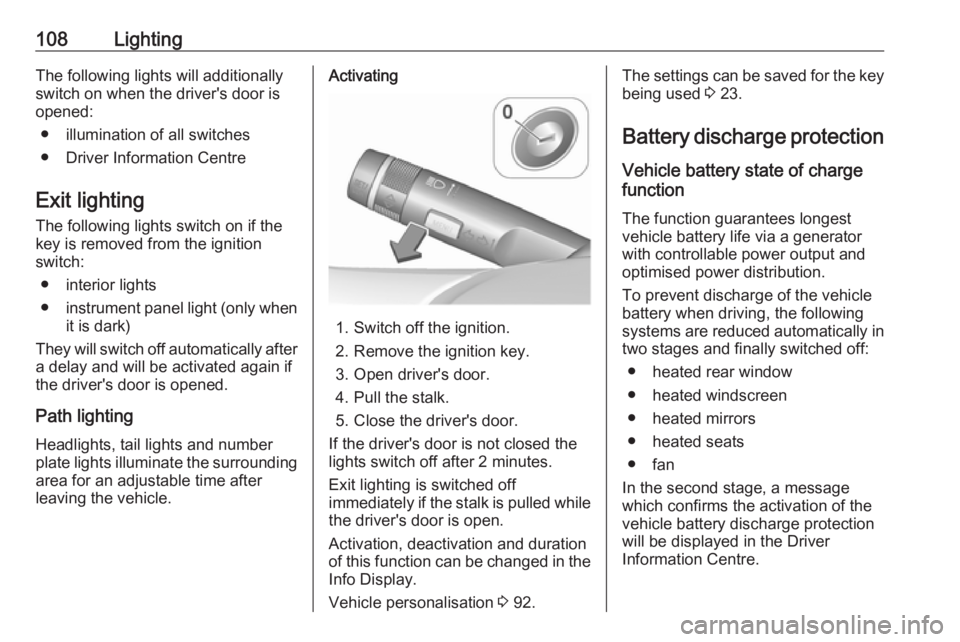
leaving the vehicle.Activating
1. Switch off the ignition.
2. Remove the ignition key.
3. Open driver's door.
4. Pull the stalk.
5. Close the driver's door.
If the driver's door is not closed the
lights switch off after 2 minutes.
Exit lighting is switched off
immediately if the stalk is pulled while
the driver's door is open.
Activation, deactivation and duration
of this function can be changed in the Info Display.
Vehicle personalisation 3 92.
The settings can be saved for the key
being used 3 23.
Battery discharge protection Vehicle battery state of charge
function
The function guarantees longest
vehicle battery life via a generator with controllable power output and
optimised power distribution.
To prevent discharge of the vehicle
battery when driving, the following
systems are reduced automatically in two stages and finally switched off:
● heated rear window
● heated windscreen
● heated mirrors
● heated seats
● fan
In the second stage, a message
which confirms the activation of the
vehicle battery discharge protection
will be displayed in the Driver
Information Centre.
Page 122 of 231
120Driving and operatingUse only floor mats, which fit properly
and are fixed by the retainers on the
driver side.
Driving downhill
Engage a gear when driving downhill to ensure that sufficient brake
pressure is available.Starting and operating
New vehicle running-in
Do not brake unnecessarily hard for
the first few journeys.
During the first drive, smoke may
occur because of wax and oil
evaporating off the exhaust system. Park the vehicle in the open for a
while after the first drive and avoid
inhaling the fumes.
During the running-in period, fuel and engine oil consumption may be
higher.
Additionally, the cleaning process of
the exhaust filter may take place more
often.
Exhaust filter 3 125.
Autostop may be inhibited to allow for charging of the vehicle battery.
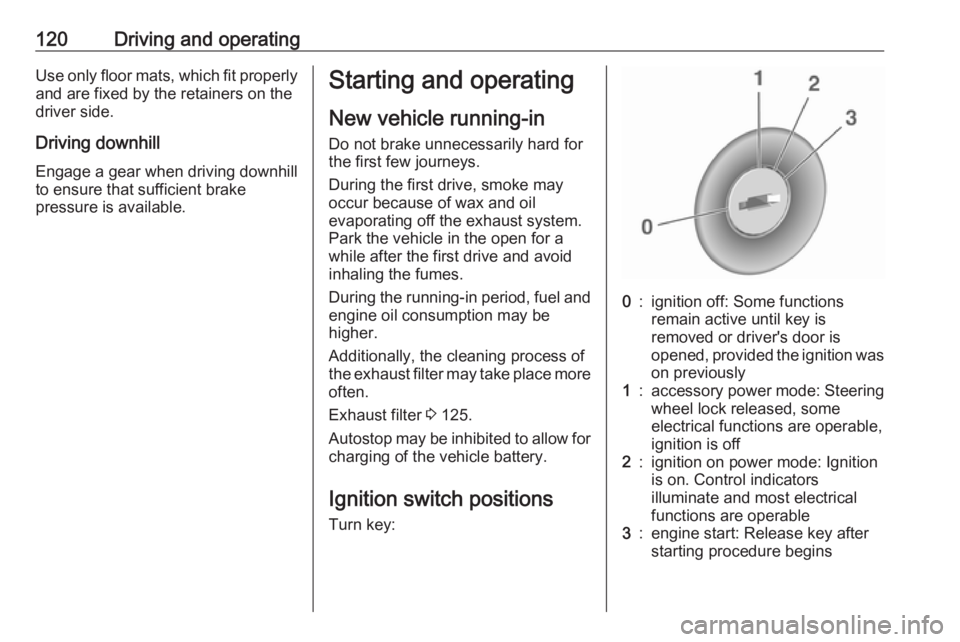
Ignition switch positions Turn key:0:ignition off: Some functions
remain active until key is
removed or driver's door is
opened, provided the ignition was on previously1:accessory power mode: Steering
wheel lock released, some
electrical functions are operable,
ignition is off2:ignition on power mode: Ignition
is on. Control indicators
illuminate and most electrical
functions are operable3:engine start: Release key after
starting procedure begins
Page 123 of 231
Driving and operating121Steering wheel lockRemove key from ignition switch and
turn steering wheel until it engages.
Retained power off The following electronic systems are
operable until the driver's door is
opened or at the latest for
10 minutes after the ignition is
switched off:
● power windows
● power outlets
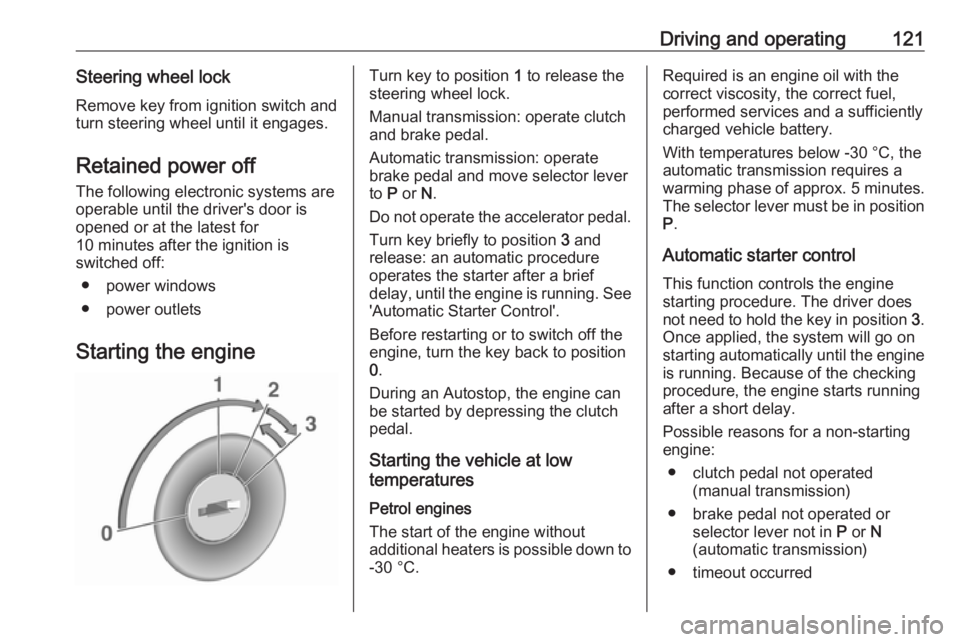
Starting the engineTurn key to position 1 to release the
steering wheel lock.
Manual transmission: operate clutch
and brake pedal.
Automatic transmission: operate
brake pedal and move selector lever
to P or N.
Do not operate the accelerator pedal. Turn key briefly to position 3 and
release: an automatic procedure operates the starter after a brief
delay, until the engine is running. See
'Automatic Starter Control'.
Before restarting or to switch off the
engine, turn the key back to position
0 .
During an Autostop, the engine can
be started by depressing the clutch
pedal.
Starting the vehicle at low
temperatures
Petrol engines
The start of the engine without
additional heaters is possible down to -30 °C.Required is an engine oil with the
correct viscosity, the correct fuel,
performed services and a sufficiently
charged vehicle battery.
With temperatures below -30 °C, the
automatic transmission requires a
warming phase of approx. 5 minutes.
The selector lever must be in position
P .
Automatic starter control This function controls the engine
starting procedure. The driver does
not need to hold the key in position 3.
Once applied, the system will go on starting automatically until the engine
is running. Because of the checking
procedure, the engine starts running
after a short delay.
Possible reasons for a non-starting
engine:
● clutch pedal not operated (manual transmission)
● brake pedal not operated or selector lever not in P or N
(automatic transmission)
● timeout occurred
Page 126 of 231
124Driving and operating● The charging level of the vehiclebattery is below a defined level.
● The brake vacuum is not sufficient.
● The vehicle is driven at least at walking speed.
● The climate control system requests an engine start.
● The air conditioning is manually switched on.
If the bonnet is not fully closed, a
warning message is displayed in the
Driver Information Centre.
If an electrical accessory, e.g. a
portable CD player, is connected to
the power outlet, a brief power drop during restart might be noticeable.
Parking9 Warning
● Do not park the vehicle on an
easily ignitable surface. The
high temperature of the
exhaust system could ignite the
surface.
● Always apply the parking brake. Activate the manual
parking brake without pressing the release button. Apply as
firmly as possible on a downhill slope or uphill slope. Depress
brake pedal at the same time to
reduce operating force.
● Switch off the engine.
● If the vehicle is on a level surface or uphill slope, engage
first gear or set the selector
lever to position P before
removing the ignition key. On
an uphill slope, turn the front
wheels away from the kerb.
If the vehicle is on a downhill
slope, engage reverse gear or
set the selector lever to position
P before removing the ignition
key. Turn the front wheels
towards the kerb.
● Close the windows.
● Remove the ignition key from the ignition switch. Turn the
steering wheel until thesteering wheel lock is felt to
engage.
For vehicles with automatic
transmission, the key can only
be removed when the selector
lever is in position P.
● Lock the vehicle.
● Activate the anti-theft alarm system.
● The engine cooling fans may run
after the engine has been
switched off 3 158.
Caution
After running at high engine
speeds or with high engine loads,
operate the engine briefly at a low load or run in neutral for
approx. 30 seconds before
switching off, in order to protect
the turbocharger.
Page 130 of 231

128Driving and operatingThe engine can only be started with
the lever in position P or N. When
position N is selected, press the brake
pedal or apply the parking brake
before starting.
Do not accelerate while engaging a
gear. Never depress the accelerator
pedal and brake pedal at the same
time.
When a gear is engaged, the vehicle
slowly begins to creep when the
brake is released.
Engine braking To utilise the engine braking effect,select a lower gear in good time when
driving downhill, see manual mode.
Rocking the vehicle
Rocking the vehicle is only
permissible if the vehicle is stuck in
sand, mud or snow. Move the selector
lever between D and R in a repeat
pattern. Do not race the engine and
avoid sudden acceleration.Parking
Apply the parking brake and engage
P .
The ignition key can only be removed
when the selector lever is in position
P .
Manual mode
Move selector lever to position M.
Press < on the selector lever to shift
to a higher gear.
Press ] on the selector lever to shift
to a lower gear.
If a higher gear is selected when
vehicle speed is too low, or a lower
gear when vehicle speed is too high,
the shift is not executed. This can
cause a message in the Driver
Information Centre.
In manual mode, no automatic
shifting to a higher gear takes place
at high engine revolutions.
Gear shift indication
The symbol R with a number beside
it is indicated when gearshifting is
recommended for fuel saving
reasons.
Shift indication appears only in
manual mode.
Electronic driving programmes
● The automatic neutral shift function automatically shifts to
idling when the vehicle is stopped
with a forward gear engaged and the brake pedal is pressed.
Page 131 of 231
Driving and operating129● Special programmesautomatically adapt the shifting
points when driving up inclines or down hills.
● When starting off in snowy or icy conditions or on other slippery
surfaces, the electronic
transmission control selects a
higher gear automatically.
Kickdown
Pressing down the accelerator pedal
beyond the kickdown detent will lead
to maximum acceleration
independent of selected driving
mode. The transmission shifts to a
lower gear depending on engine
speed.
Fault
In the event of a fault, control indicator
g illuminates. Additionally, a
message is displayed in the Driver
Information Centre.
Vehicle messages 3 89.
The transmission no longer shifts automatically. Continued travel is
possible with manual shifting.Only the highest gear is available.
Depending on the fault, second gear
may also be available in manual
mode. Shift only when the vehicle is
at a standstill.
Have the cause of the fault remedied
by a workshop.
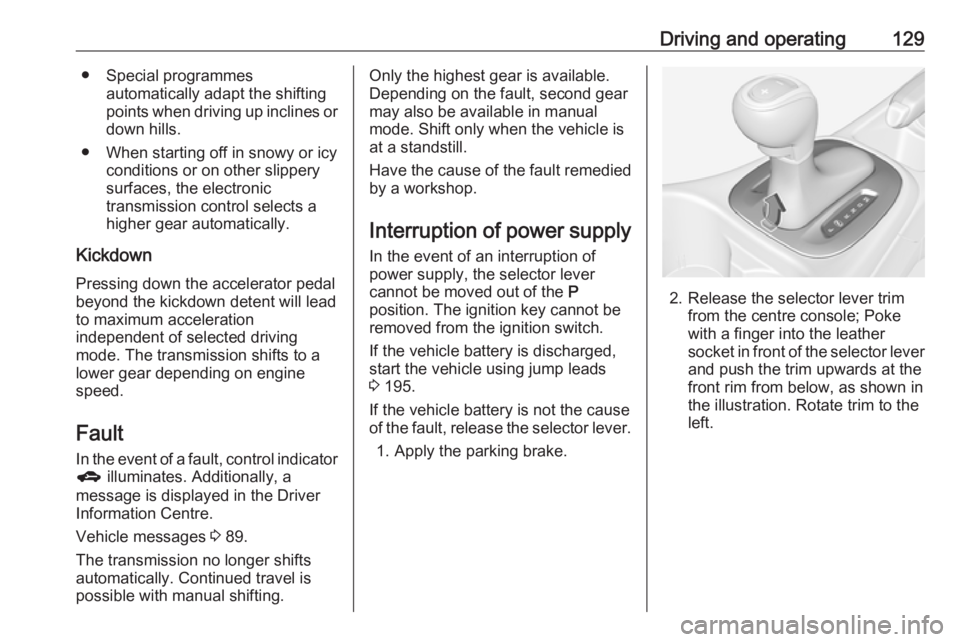
Interruption of power supply In the event of an interruption of
power supply, the selector lever
cannot be moved out of the P
position. The ignition key cannot be
removed from the ignition switch.
If the vehicle battery is discharged,
start the vehicle using jump leads
3 195.
If the vehicle battery is not the cause
of the fault, release the selector lever.
1. Apply the parking brake.
2. Release the selector lever trim from the centre console; Poke
with a finger into the leather
socket in front of the selector lever and push the trim upwards at the
front rim from below, as shown in
the illustration. Rotate trim to the
left.