clock OPEL GRANDLAND X 2018 Infotainment system
[x] Cancel search | Manufacturer: OPEL, Model Year: 2018, Model line: GRANDLAND X, Model: OPEL GRANDLAND X 2018Pages: 265, PDF Size: 7.5 MB
Page 82 of 265
80Instruments and controlsInstruments and
controlsControls ....................................... 81
Steering wheel adjustment ........81
Steering wheel controls .............81
Heated steering wheel ...............81
Horn ........................................... 82
Windscreen wiper/washer .........82
Rear window wiper/washer .......84
Outside temperature ..................84
Clock ......................................... 85
Power outlets ............................. 86
Inductive charging .....................87
Cigarette lighter ......................... 88
Ashtrays .................................... 88
Warning lights, gauges and indi‐ cators ........................................... 89
Instrument cluster ......................89
Speedometer ............................. 91
Odometer .................................. 92
Trip odometer ............................ 92
Tachometer ............................... 92
Fuel gauge ................................ 93
Engine coolant temperature gauge ....................................... 93
Service display .......................... 93Control indicators ......................94
Turn signal ................................. 95
Seat belt reminder .....................95
Airbag and belt tensioners .........95
Airbag deactivation ....................96
Charging system .......................96
Malfunction indicator light ..........96
Stop engine ............................... 96
System check ............................ 97
Brake and clutch system ...........97
Electric parking brake ................97
Electric parking brake fault ........97
Antilock brake system (ABS) .....97
Gear shifting .............................. 98
Lane departure warning ............98
Lane keep assist .......................98
Electronic Stability Control and Traction Control system ...........98
Engine coolant temperature ......98
Preheating ................................. 99
Diesel particle filter ....................99
AdBlue ....................................... 99
Deflation detection system ........99
Engine oil pressure ....................99
Low fuel ................................... 100
Autostop .................................. 100
Exterior light ............................ 100
High beam ............................... 100
High beam assist .....................100
LED headlights ........................ 100Fog light................................... 100
Rear fog light ........................... 100
Rain sensor ............................. 100
Cruise control .......................... 101
Adaptive cruise control ............101
Vehicle detected ahead ...........101
Speed limiter ........................... 101
Door open ................................ 101
Information displays ...................101
Driver Information Centre ........101
Info display .............................. 103
Vehicle messages ......................105
Warning chimes .......................105
Battery voltage ........................ 106
Vehicle personalisation ..............106
Telematics service .....................110
OnStar ..................................... 110
Page 87 of 265
Instruments and controls859Warning
The road surface may already be
icy even though the display
indicates a few degrees above
0 °C.
Clock
Date and time are shown in the Info-
Display.
Info-Display 3 103.
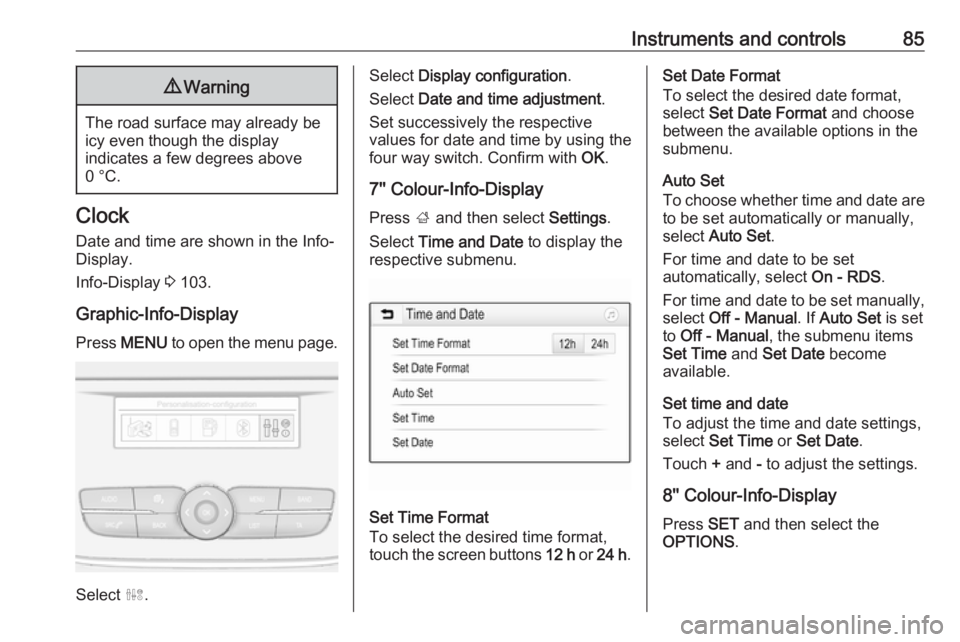
Graphic-Info-Display Press MENU to open the menu page.
Select ˆ.
Select Display configuration .
Select Date and time adjustment .
Set successively the respective
values for date and time by using the
four way switch. Confirm with OK.
7'' Colour-Info-Display
Press ; and then select Settings.
Select Time and Date to display the
respective submenu.
Set Time Format
To select the desired time format,
touch the screen buttons 12 h or 24 h .
Set Date Format
To select the desired date format,
select Set Date Format and choose
between the available options in the
submenu.
Auto Set
To choose whether time and date are
to be set automatically or manually,
select Auto Set .
For time and date to be set
automatically, select On - RDS.
For time and date to be set manually, select Off - Manual . If Auto Set is set
to Off - Manual , the submenu items
Set Time and Set Date become
available.
Set time and date
To adjust the time and date settings, select Set Time or Set Date .
Touch + and - to adjust the settings.
8'' Colour-Info-Display
Press SET and then select the
OPTIONS .
Page 132 of 265
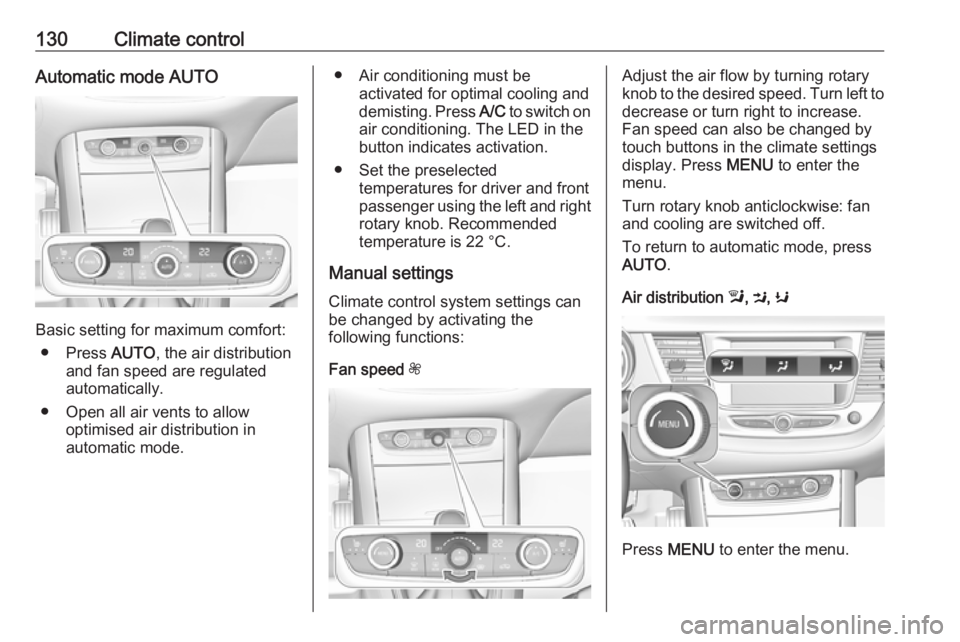
130Climate controlAutomatic mode AUTO
Basic setting for maximum comfort:● Press AUTO, the air distribution
and fan speed are regulated
automatically.
● Open all air vents to allow optimised air distribution in
automatic mode.
● Air conditioning must be activated for optimal cooling and
demisting. Press A/C to switch on
air conditioning. The LED in the
button indicates activation.
● Set the preselected temperatures for driver and front
passenger using the left and right rotary knob. Recommended
temperature is 22 °C.
Manual settings Climate control system settings canbe changed by activating the
following functions:
Fan speed ZAdjust the air flow by turning rotary
knob to the desired speed. Turn left to decrease or turn right to increase.
Fan speed can also be changed by touch buttons in the climate settings
display. Press MENU to enter the
menu.
Turn rotary knob anticlockwise: fan and cooling are switched off.
To return to automatic mode, press
AUTO .
Air distribution l, M , K
Press MENU to enter the menu.
Page 135 of 265
Climate control133Note
If à is pressed while the engine is
running, an Autostop will be inhibited
until à is pressed again.
If à is pressed while the engine is in
an Autostop, the engine will restart
automatically.
Stop-start system 3 141.
Deactivation of Electronic climate
control system
Cooling, fan and automatic mode can
be switched off by turning rotary knob
AUTO anticlockwise.
Activation by switching on the fan or
pressing AUTO.
Auxiliary heater Air heater
Quickheat is an electric auxiliary air
heater which automatically warms up
the passenger compartment more
quickly.Air vents
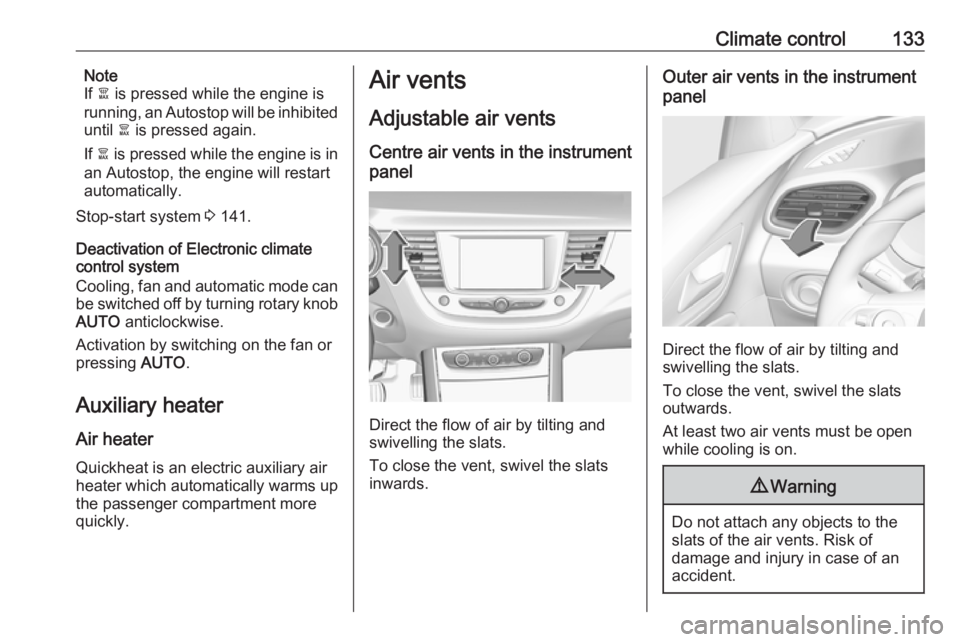
Adjustable air vents Centre air vents in the instrument
panel
Direct the flow of air by tilting and
swivelling the slats.
To close the vent, swivel the slats
inwards.
Outer air vents in the instrument
panel
Direct the flow of air by tilting and
swivelling the slats.
To close the vent, swivel the slats
outwards.
At least two air vents must be open
while cooling is on.
9 Warning
Do not attach any objects to the
slats of the air vents. Risk of
damage and injury in case of an
accident.
Page 150 of 265
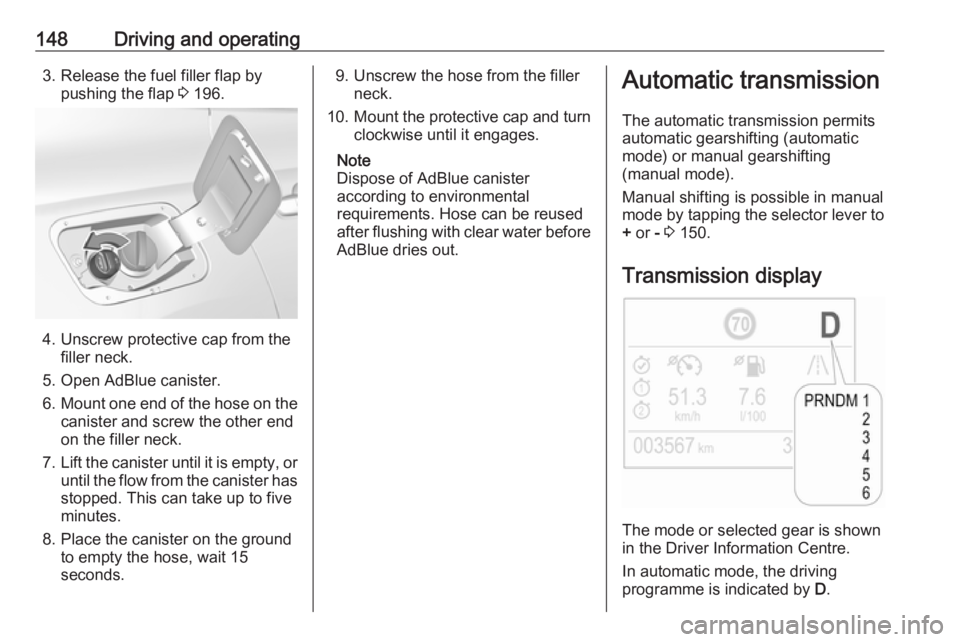
148Driving and operating3. Release the fuel filler flap bypushing the flap 3 196.
4. Unscrew protective cap from the
filler neck.
5. Open AdBlue canister.
6. Mount one end of the hose on the
canister and screw the other end
on the filler neck.
7. Lift the canister until it is empty, or
until the flow from the canister has stopped. This can take up to five
minutes.
8. Place the canister on the ground to empty the hose, wait 15
seconds.
9. Unscrew the hose from the filler neck.
10. Mount the protective cap and turn
clockwise until it engages.
Note
Dispose of AdBlue canister
according to environmental
requirements. Hose can be reused
after flushing with clear water before
AdBlue dries out.Automatic transmission
The automatic transmission permits
automatic gearshifting (automatic
mode) or manual gearshifting
(manual mode).
Manual shifting is possible in manual
mode by tapping the selector lever to + or - 3 150.
Transmission display
The mode or selected gear is shown
in the Driver Information Centre.
In automatic mode, the driving
programme is indicated by D.
Page 199 of 265
Driving and operating197
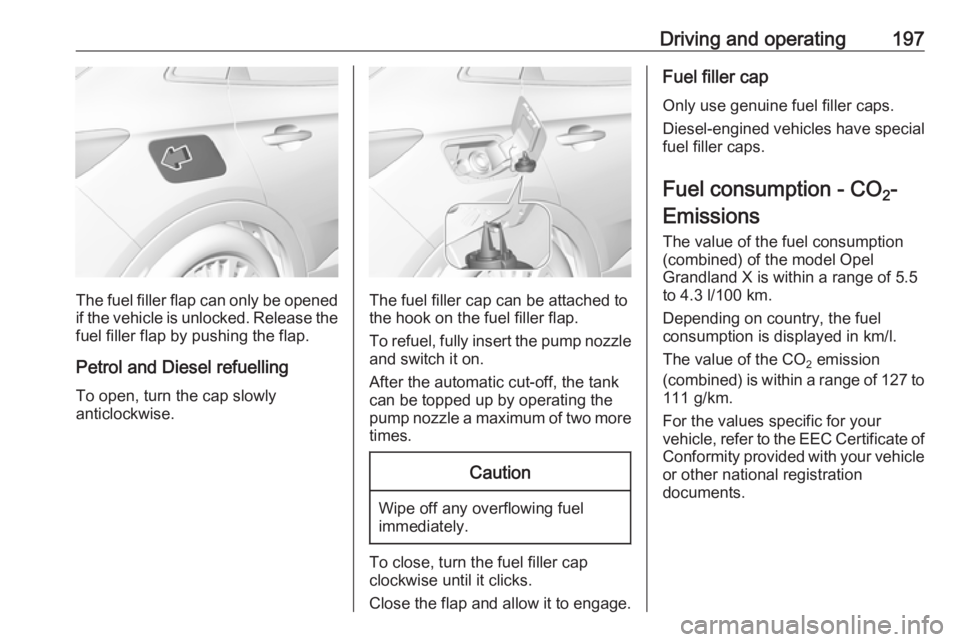
The fuel filler flap can only be opened
if the vehicle is unlocked. Release the
fuel filler flap by pushing the flap.
Petrol and Diesel refuelling To open, turn the cap slowly
anticlockwise.The fuel filler cap can be attached to the hook on the fuel filler flap.
To refuel, fully insert the pump nozzle
and switch it on.
After the automatic cut-off, the tank can be topped up by operating the
pump nozzle a maximum of two more
times.
Caution
Wipe off any overflowing fuel
immediately.
To close, turn the fuel filler cap
clockwise until it clicks.
Close the flap and allow it to engage.
Fuel filler cap
Only use genuine fuel filler caps.
Diesel-engined vehicles have special fuel filler caps.
Fuel consumption - CO 2-
Emissions
The value of the fuel consumption
(combined) of the model Opel
Grandland X is within a range of 5.5
to 4.3 l/100 km.
Depending on country, the fuel
consumption is displayed in km/l.
The value of the CO 2 emission
(combined) is within a range of 127 to
111 g/km.
For the values specific for your
vehicle, refer to the EEC Certificate of Conformity provided with your vehicle
or other national registration
documents.
Page 203 of 265
Driving and operating201
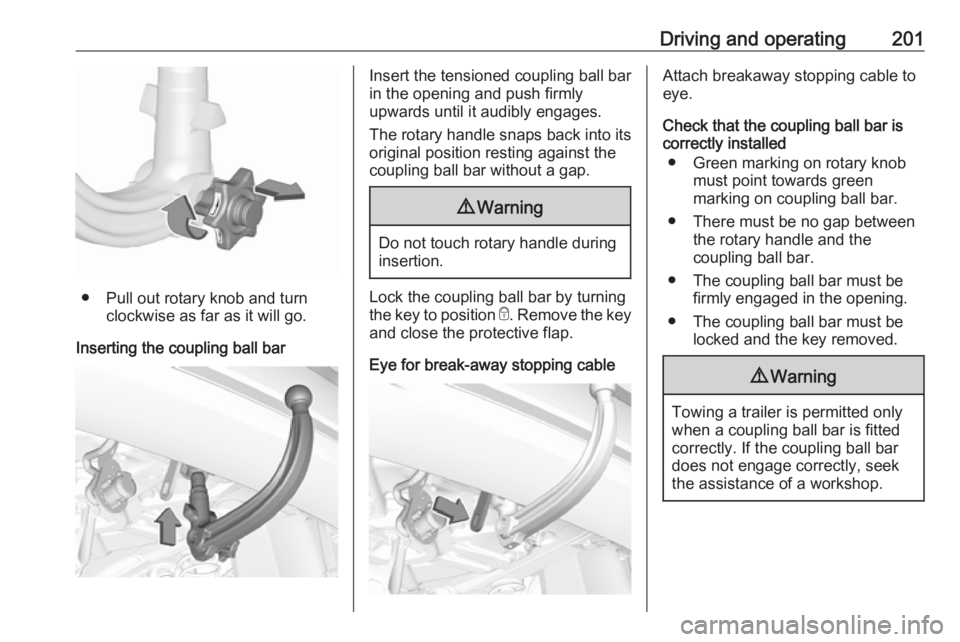
● Pull out rotary knob and turnclockwise as far as it will go.
Inserting the coupling ball bar
Insert the tensioned coupling ball bar
in the opening and push firmly
upwards until it audibly engages.
The rotary handle snaps back into its
original position resting against the
coupling ball bar without a gap.9 Warning
Do not touch rotary handle during
insertion.
Lock the coupling ball bar by turning
the key to position e. Remove the key
and close the protective flap.
Eye for break-away stopping cable
Attach breakaway stopping cable to
eye.
Check that the coupling ball bar is correctly installed
● Green marking on rotary knob must point towards green
marking on coupling ball bar.
● There must be no gap between the rotary handle and the
coupling ball bar.
● The coupling ball bar must be firmly engaged in the opening.
● The coupling ball bar must be locked and the key removed.9Warning
Towing a trailer is permitted only
when a coupling ball bar is fitted correctly. If the coupling ball bardoes not engage correctly, seekthe assistance of a workshop.
Page 204 of 265
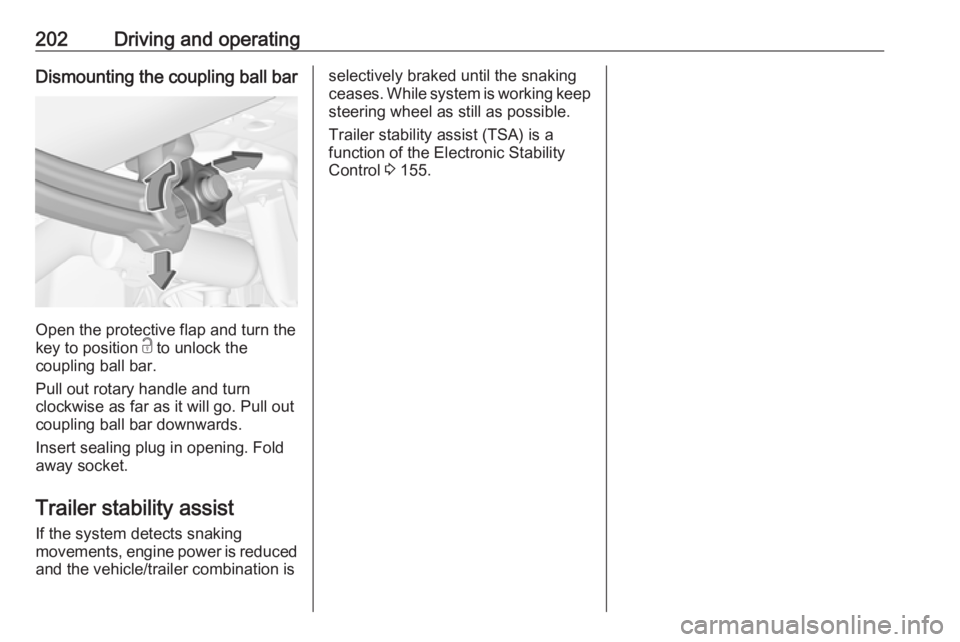
202Driving and operatingDismounting the coupling ball bar
Open the protective flap and turn the
key to position c to unlock the
coupling ball bar.
Pull out rotary handle and turn
clockwise as far as it will go. Pull out coupling ball bar downwards.
Insert sealing plug in opening. Fold away socket.
Trailer stability assist
If the system detects snaking
movements, engine power is reduced
and the vehicle/trailer combination is
selectively braked until the snaking ceases. While system is working keep steering wheel as still as possible.
Trailer stability assist (TSA) is a
function of the Electronic Stability
Control 3 155.
Page 215 of 265
Vehicle care213Tail lights
Tail lights, daytime running lights and
centre high-mounted brake light are
designed as LEDs. In case of failure, have LEDs replaced by a workshop.
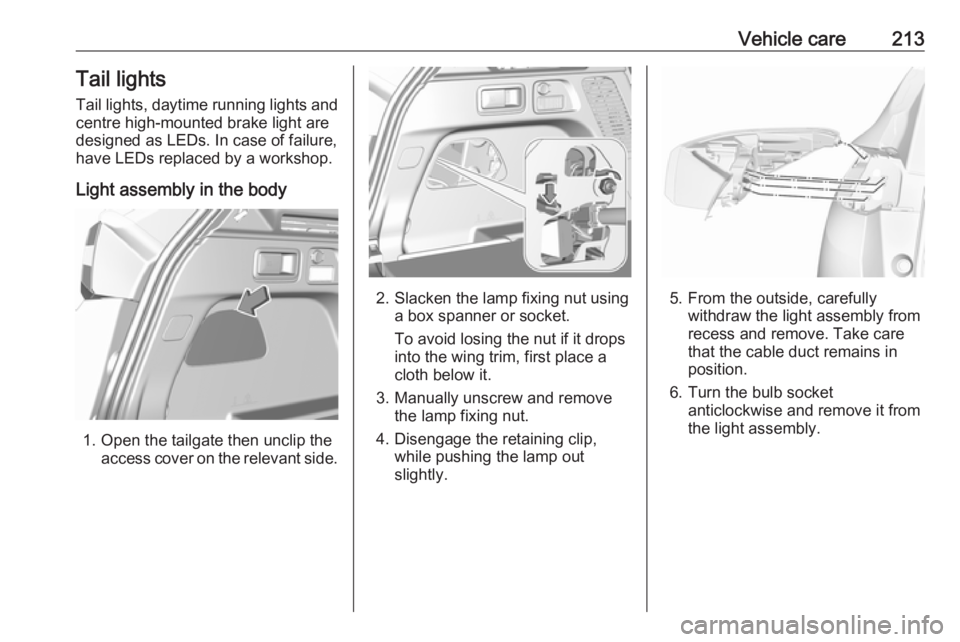
Light assembly in the body
1. Open the tailgate then unclip the access cover on the relevant side.
2. Slacken the lamp fixing nut usinga box spanner or socket.
To avoid losing the nut if it drops
into the wing trim, first place a
cloth below it.
3. Manually unscrew and remove the lamp fixing nut.
4. Disengage the retaining clip, while pushing the lamp out
slightly.5. From the outside, carefully withdraw the light assembly from
recess and remove. Take care
that the cable duct remains in
position.
6. Turn the bulb socket anticlockwise and remove it from
the light assembly.
Page 217 of 265
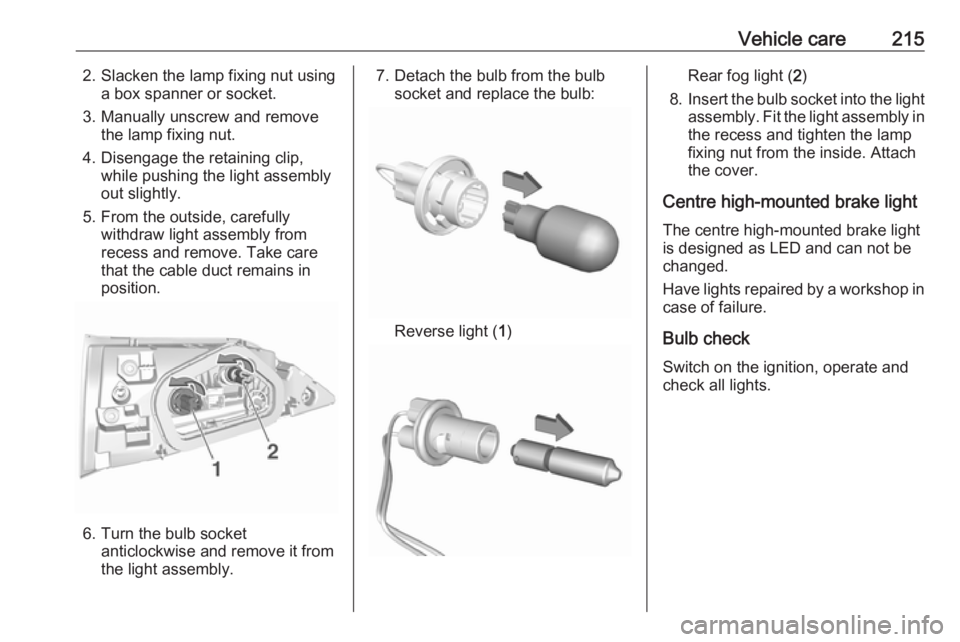
Vehicle care2152. Slacken the lamp fixing nut usinga box spanner or socket.
3. Manually unscrew and remove the lamp fixing nut.
4. Disengage the retaining clip, while pushing the light assembly
out slightly.
5. From the outside, carefully withdraw light assembly from
recess and remove. Take care
that the cable duct remains in
position.
6. Turn the bulb socket anticlockwise and remove it from
the light assembly.
7. Detach the bulb from the bulb socket and replace the bulb:
Reverse light ( 1)
Rear fog light ( 2)
8. Insert the bulb socket into the light
assembly. Fit the light assembly in the recess and tighten the lamp
fixing nut from the inside. Attach
the cover.
Centre high-mounted brake light The centre high-mounted brake light
is designed as LED and can not be
changed.
Have lights repaired by a workshop in
case of failure.
Bulb check
Switch on the ignition, operate and
check all lights.