check engine OPEL GT 2012 Owners Manual
[x] Cancel search | Manufacturer: OPEL, Model Year: 2012, Model line: GT, Model: OPEL GT 2012Pages: 190, PDF Size: 2.46 MB
Page 16 of 190
16 In brief
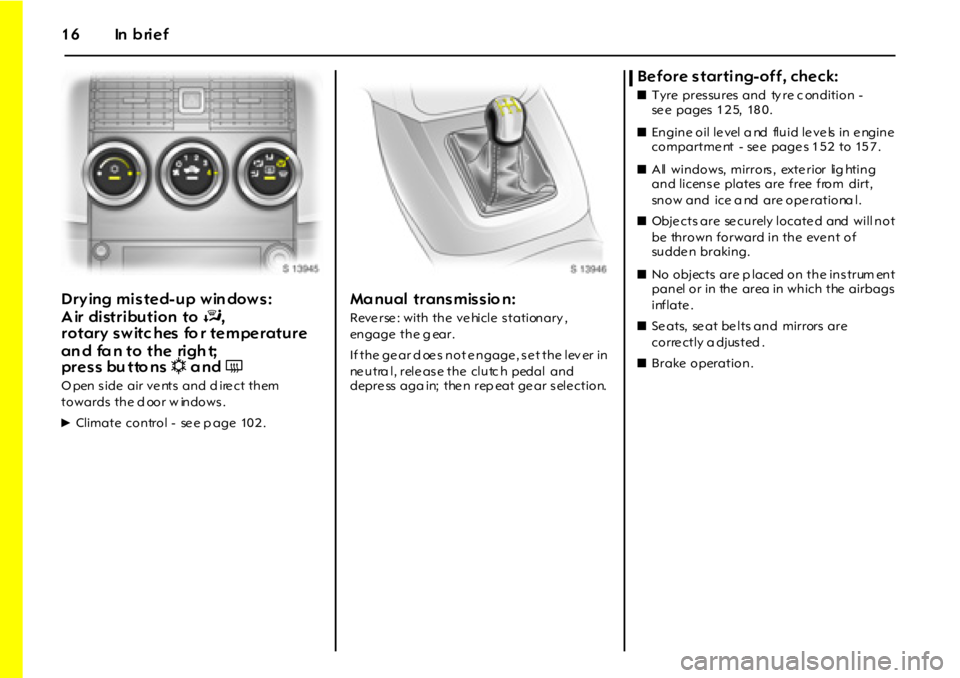
Drying misted-up win dows:
Air distribution to J,
rotary switc hes fo r temperature
an d fa n to the righ t;
pr e s s bu tto nsn and Ü
Open side air vents and d irect them
towards the d oor w indows.
6Climate control - se e p age 10 2 .
Manual transmissio n:
Reverse: with the vehicle stationary,
engage the g ear.
If the ge ar d oe s not e ngage , s e t the lev er in
ne utra l, rele as e the clutc h pedal and
depre ss aga in; the n rep eat ge ar s ele ction.
Before starting-off, check:
zTyre pressures and ty re c ondition -
se e pages 1 2 5, 18 0 .
zEngine oil le vel a nd fluid le ve ls in e ngine
compartme nt - se e page s 1 5 2 to 15 7 .
zAll windows, mirrors, exte rior lig hting
and licens e plates are free from dirt,
snow and ice a nd are ope rationa l.
zObje cts are se curely locate d and will not
be thrown forward in the eve nt of
sudde n braking.
zNo o bj ect s a r e p l a ced o n t h e i n s t r um en t
panel or in the area in which the airbags
inflate .
zSe ats, se at be lts and mirrors are
corre ctly a djus ted .
zB r a ke o p er a t i o n .
Page 57 of 190
57Instru men ts, c ontrols
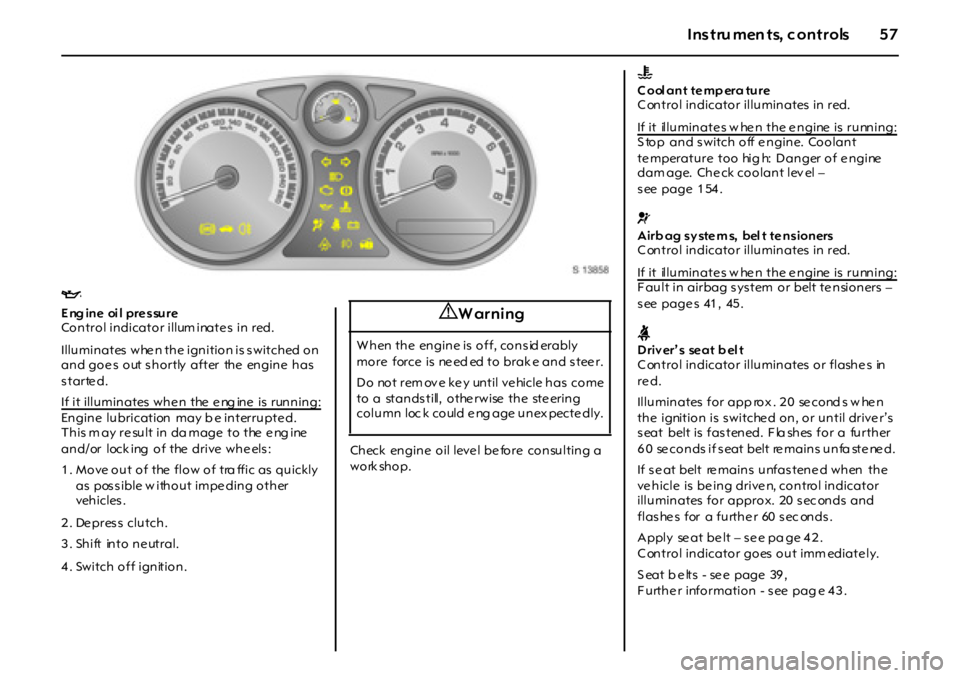
IEngine oil pressure
Control indicator illum inate s in red.
Illuminates whe n the ignition is switched on
and goe s out s hortly after the engine has
started.
If it illuminates whe n the e ng ine is running:
Engine lubrication may b e interrupte d.
This m ay re sult in da mage to the e ng ine
and/ or lock ing of the drive whe els :
1. Move out of the flow of tra ffic as quickly
as pos s ible w ithout impe ding other
veh icles .
2 . De pres s clutch.
3. Shift into ne utral.
4 . Switch off ignition.Check engine oil level before consulting a
work shop.
9 Warning
W h en t h e en g i n e i s o f f , co n s id er a bl y
m o r e f or ce i s ne ed ed t o br a k e a n d s t ee r .
D o no t r em ov e k e y un t i l v e hi c l e h a s c o m e
to a standstill, othe rwise the ste ering
column loc k could e ng age unex pecte dly.
W
C ool ant te mp era ture
C ontrol indicator illuminates in red.
If it illuminate s w he n the e ngine is running:
S top and switch off engine. Coolant
te mperature too hig h: Danger of e ngine
dam age. Che ck coolant lev el –
s ee page 1 54 .
vA i r b a g s y st e m s, b el t t e n s i o n er s
C ontrol indicator illuminates in red.
If it illuminate s w he n the e ngine is running:
F ault in airbag s ys tem or belt te nsioners –
s ee page s 41 , 45 .
XDriv er’ s seat b el t
C ontrol indicator illuminates or flashe s in
re d.
Il l u m i n a t es f o r a p p ro x . 2 0 se c o nd s w he n
the ignition is s witche d on, or until drive r’s
seat belt is fastened. Fla shes for a further
6 0 se conds if s eat belt re mains unfa ste ne d.
If seat belt remains unfastened when the
ve hicle is be ing drive n, control indicator
illuminates for approx. 20 s ec onds and
flashe s for a furthe r 60 sec onds.
Apply se at be lt – s e e pa ge 4 2 .
C ontrol indicator goes out imm ediate ly.
S eat b e lts - se e page 39 ,
F urthe r information - s ee pag e 4 3 .
Page 113 of 190

11 3Dr i vi ng and o pe r ati on
O ve rrun
zThe fuel s upply is automatically shut off
during ov errun, e. g. whe n the ve hicle is
being drive n down long gradie nts or
whe n braking – s ee page 1 11 .
zTo enable the ove rrun cut-off to take
effect a nd sav e fue l, during overrun do
not ac cele ra te and do not declutch.
Corr ect ge ar sel ec tion
zHigh revs increas e engine w ear and fue l
consumption.
zDo not race your engine. Avoid d riv ing at
high e ngine s pee ds .
Dr i v in g w i t h a n ey e o n t h e t a ch om et e r
save s fuel. I f pos sib le , drive a t low rev s in
each ge ar and a t a consta nt s pe ed.
Driv e in top g ear as m uch a s p os s ible,
shift up as s oon as pos s ib le and do not
shift down until the e ngine is no longe r
running truly . High speed
zT h e f a s t er t h e sp ee d, t h e h i g h e r t he f u el
consump tion and the noise level. Driv ing
at full throttle use s up a gre at de al of fue l
and g enerates excessive noise and high
e miss ion leve ls.
zSlightly relea sing the acce le rator ped al
res ults in distinct fuel s avings with no
major los s of spe ed.
Drive at no more tha n around thre e
quarters of max imum spe ed and you will
use up to 50% less fue l, without losing a
gre at de al of time.
Ty re pre ssure
zInade quate ty re p re s sure, leading to
higher road res istance , cos ts m one y in
two wa ys: more fue l and increa se d tyre
we ar.
zRe gular checks (e very 14 d ays ) pay off.
Ele ctri cal lo a ds
zThe power cons um ption of e lectrical
equip ment increa ses fuel consumption.
zSw itch off ad ditional c ons umers (e. g.
air conditioning, heate d re ar window)
when they are no longer required. Re pai r and m ainte nance
zImprope r repairs or adjus tm ent and
maintenance work can increase fuel
consumption. Do not carry out w ork on
the eng ine yourself.
You ma y infring e environmental la ws out
of ignorance by not d isposing of
materials prope rly.
Appropriate parts might not b e re cycle d.
Contact with some of the mate ria ls
involved may pose a health hazard.
zWe re com mend that repair and
maintenance be entrusted to your O pel
Se rv ice Partner.
E xtr em e d riving conditions
zDriv ing up s te ep gradie nts , cornering,
driving on poor roads and winte r driving
all increas e fue l consumption.
Fue l consumption increa se s dramatically
i n ur b a n t ra ff i c a nd a t w i n t er
tempe ratures, e spe cially on short trip s
w h en t h e e n g i ne o p er a t i n g t e m p e ra tu r e
is not reached.
zFollow the hints given above to keep
consumption to a m inimum under suc h
cond itions .
Page 123 of 190
12 3Dr i vi ng and o pe r ati on
Brak e assist
Powerful application of the brake peda l
automatically applies max imum brak ing
force a mplification to a chie ve the s horte st
pos sible braking d is tance unde r full
braking (brak e a ss ist).
M a i n t a i n s t ea dy p r es s ur e o n t h e br a k e
pe dal for as long as full-on brak ing is
to continue . W hen the brake ped al is
rele as ed, the max imum brak e force
amp lification is take n away.Foot b rake
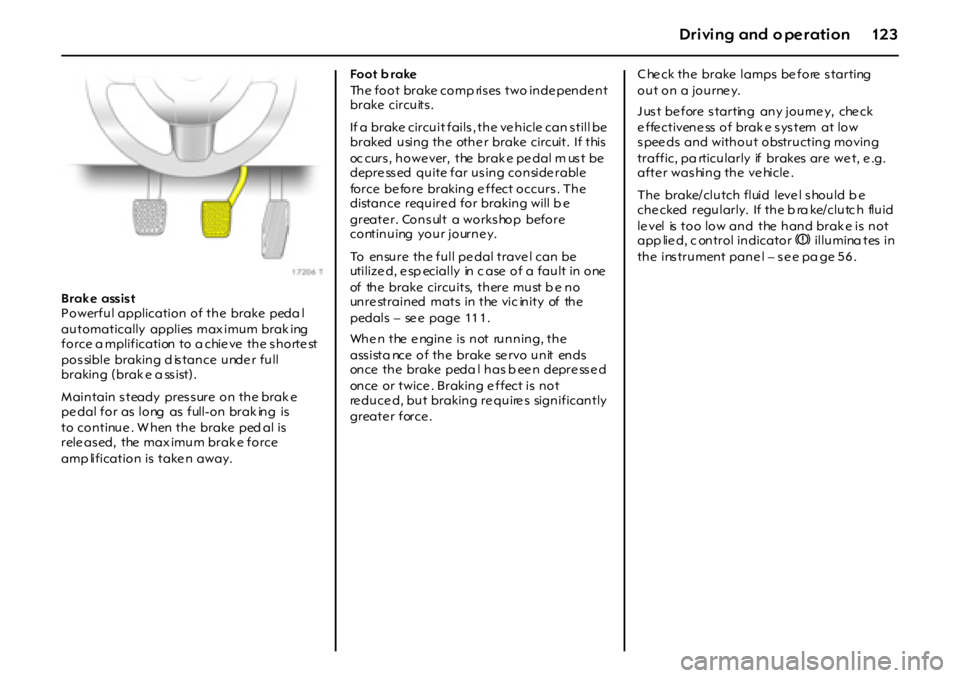
The foot brake comp rises two independent
brake circuits .
If a brake circuit fails , the ve hicle can s till be
braked using the othe r brake circuit. If this
oc curs , howe ver, the brak e pe dal m us t be
depre ss ed quite far us ing conside rable
force be fore braking e ffect occurs. The
distance require d for braking will b e
greate r. Consult a workshop before
continuing your journey.
To ensure the full pe dal trave l can be
utilize d, e sp ecially in c ase of a fault in one
of the brake circuits, there must be no
unre strained mats in the vic inity of the
pedals – se e page 11 1 .
When the engine is not running, the
a ss i st a nce o f t h e br a ke se r vo u n it en ds
once the brake peda l has b ee n depre ss e d
once or twice . Braking e ffect is not
re duce d, but braking re quire s significantly
greate r force .Check the brake lamps before starting
out on a journey.
Just before starting any journey, check
effectiveness of brak e system at low
s pee ds and without obstructing moving
traffic, pa rticularly if brakes are we t, e .g.
afte r was hing the ve hicle .
The brake/ clutch fluid leve l s hould b e
che cked regularly. If the b ra ke/clutc h fluid
level is too low and the hand brak e is not
app lie d, c ontrol indicatorR illumina tes in
the ins trument pane l – s e e pa ge 5 6 .
Page 138 of 190
138 Self-help, vehicle care
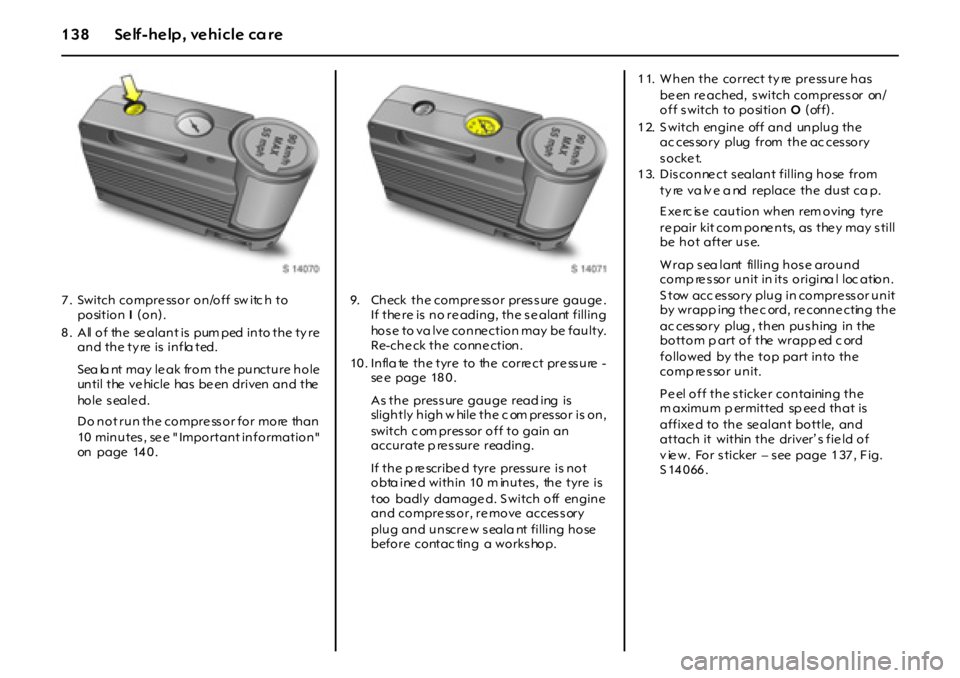
7 . Switch compre ss or on/off sw itc h to
position I(on).
8 . All of the se alant is pum ped into the ty re
and the ty re is infla ted.
Sea la nt may le ak from the puncture hole
un t i l t he v e hi c l e ha s b e en d r i v en a n d t he
ho l e s ea l e d .
Do not run the compressor for more than
10 minutes, see " Important information"
on page 14 0 .9. Check the compre ss or pres s ure gauge .
If the re is no re ading, the s e alant filling
hose to va lve conne ction may be faulty.
Re-che ck the conne ction.
10. Infla te the tyre to the corre ct pre ssure -
se e page 18 0 .
As the pres s ure gauge read ing is
slightly high w hile the c om pres sor is on,
switch c om pres sor off to gain an
accurate p re ssure reading.
If the p re scribe d tyre pressure is not
obta ine d within 10 m inutes , the tyre is
too badly damage d. S witch off engine
and compre ssor, re move accessory
plug and unscre w s eala nt filling hose
before contac ting a works hop.
11. When the correct ty re pressure has
be en re ached, switch compressor on/
off switch to position O(off).
1 2. S witch engine off and unplug the
ac ces sory plug from the ac ces sory
socket.
1 3. Dis conne ct s ealant filling hose from
ty re va lv e a nd replace the dust ca p.
E x e rc is e c a u t i o n w h en r em o v i ng t y r e
re pair kit com pone nts, as the y may s till
be hot after use.
W rap s ea lant filling hos e around
comp re s sor unit in its origina l loc ation.
S tow acc essory plug in compressor unit
by wrapp ing the c ord, re conne cting the
ac ces sory plug , then pus hing in the
bottom p art of the wrapp ed c ord
followed by the top part into the
comp ressor unit.
P e el o f f t h e s t i cke r co n t a i ni n g t h e
m aximum p ermitted sp ee d that is
affixe d to the se alant bottle, and
attach it within the driver’ s fie ld of
v ie w. For s ticker – s ee page 1 37 , F ig.
S14066.
Page 152 of 190
152 Self-help, vehicle care
Op el genuine p arts an d
ac ce ss or ie s
We recommend that you use " Opel
ge nuine parts and acce ss ories " and
convers ion parts rele ase d e xpres s ly for
your vehicle ty pe. These parts have
undergone spe cial te sts to e stablish the ir
reliab ility , safe ty and spe cific suitability for
Opel v ehicles. Desp ite continuous market
monitoring, we ca nnot a ss es s or guarante e
these attribute s for other p roducts, e ve n if
they have bee n granted approval by the
rele vant authoritie s or in some other form.
"O pel genuine pa rts and a cces s orie s" and
approve d conve rsion parts can be
obtained from your Op el S ervice Partne r,
who can provide comp rehensive advice
about pe rmitted te chnic al changes and
e ns ure that the part is installe d correctly.
A note on safety
To avoid injury from moving p arts a nd
cables conducting ignition volta ge, only
carry out engine comp artm ent che cks (e .g.
checking b ra ke/clutc h fluid or engine oil
leve l) when the ignition is s witche d off.N eve r carry out any repairs or adjustment
and m aintenance work on the vehicle
y ours elf. This es pe cially applie s to the
eng ine, chassis a nd safety p arts. You may,
out of ignorance, infringe the provisions of
the law and, by not pe rforming the work
properly, you may endanger yourself a nd
other road use rs.
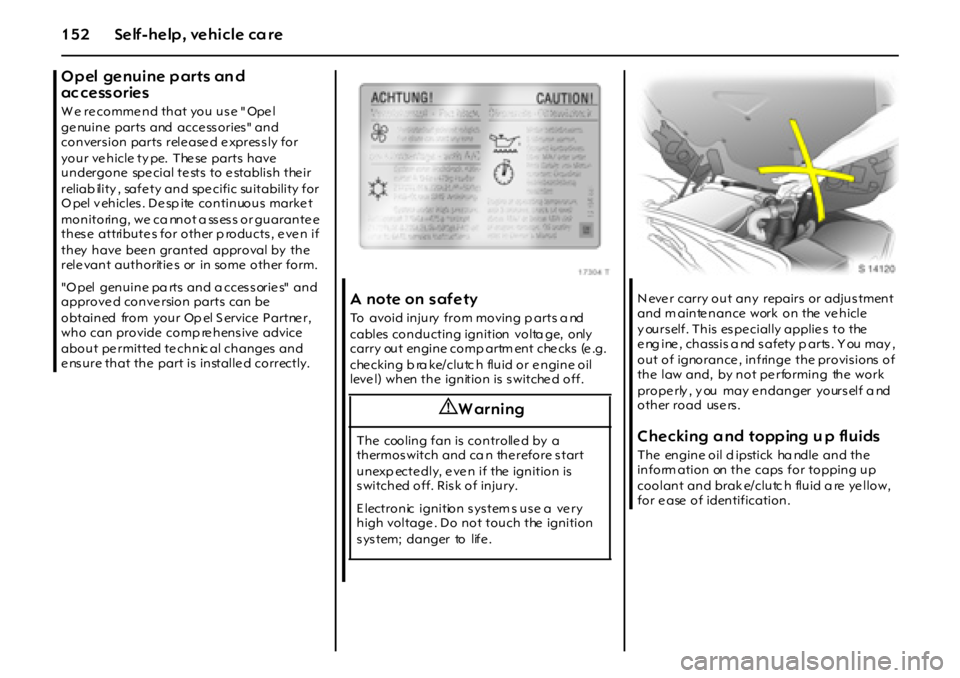
C he cki ng a nd topp ing u p fl ui ds
T h e en g i n e o i l d i p st i ck ha ndl e a n d t h e
inform ation on the caps for topping up
coolant and brak e/ clutc h fluid a re ye llow,
for e ase of identification.
9 Warning
The cooling fan is controlle d by a
t h er m o s w i t ch a n d ca n th e r ef o r e s t a r t
unexp ectedly, even if the ignition is
switched off. Risk of injury.
E l ect r o n ic i g n i t io n s ys t em s u s e a ve r y
high voltage. Do not touch the ignition
system; danger to life.
Page 153 of 190
15 3Self-help, vehicle care
Engine oil
Information on engine oils is available in
the c hap ter "S ervice , Ma inte nanc e" on
page 1 65 .
E ng ine oi l le ve l and consum ption
Ev er y en g i n e co ns u m es e n g i ne o i l f o r
t ec hn i ca l r e a s on s . T h e en g i n e oi l
consump tion cannot be assessed until a
fairly long dis tance has be en driv en, a nd
m a y be a bo ve t h e sp e ci f i ed va l u e w h en t h e
ve hic le is first b eing drive n (run-in pe riod ).
Frequent d riv ing at high revs increases
engine oil consumption.
Be fore em barking on a long journe y, it is
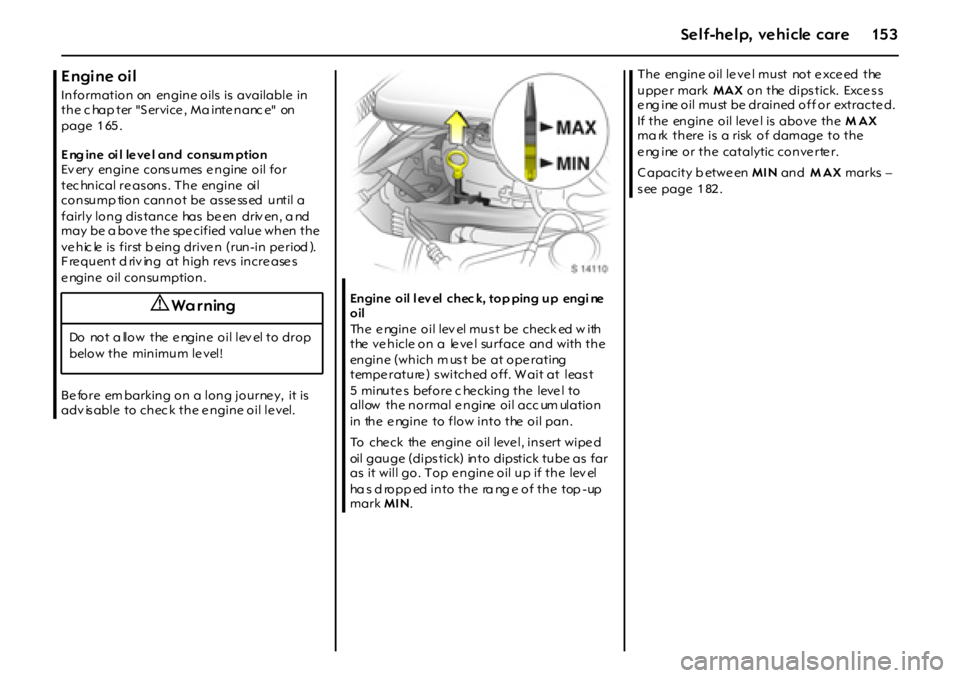
adv isable to chec k the e ngine oil le vel.Engine oil l ev el chec k, top ping up engi ne
oil
The e ngine oil lev el mus t be check ed w ith
the ve hicle on a le ve l surface and with the
engine (which m us t be at ope rating
tempe rature ) s witched off. W ait at leas t
5 minute s before c he cking the leve l to
allow the normal e ngine oil acc um ulation
in the e ngine to flow into the oil pan.
To che ck the engine oil leve l, ins ert wipe d
oil gauge (dips tick) into dipstick tube as far
as it will go. Top e ngine oil up if the lev el
ha s d ropp ed into the ra ng e of the top -up
mark MI N.T h e en g i n e o i l l e ve l m u st no t e xce ed t he
uppe r mark MAX on the dipstick. Exce ss
e ng ine oil must be drained off or extracte d.
If the engine oil leve l is above the MAX
ma rk there is a risk of damage to the
e ng ine or the catalytic conve rte r.
C apacity b etwe en MI N and MAX marks –
s ee page 1 82 .
9 Wa r ning
Do not a llow the e ngine oil lev el to drop
below the minimum le vel!
Page 160 of 190

160 Self-help, vehicle care
Vehicle decomm issioning
O bse rve na tional re gulations.
If the vehicle is decomm issioned for several
months, the follow ing work must be ca rried
out by a workshop in orde r to pre vent
dam age.
zWash and preserve the vehicle –
see pa ge 161.
zCh eck p r es er v a t io n i n e n g i ne
com partment a nd on unde rbody a nd
make good where nec essary .
zCl ea n a nd p r es er v e r u bbe r s ea l s o n
bonne t and doors.
zChange engine oil – se e page 15 4 .
zCheck antifre eze and c orros ion
prote ction – s ee page 1 55 .
zCheck the coolant lev el, top up with
antifree ze if nece ss ary – s ee page 1 55 .
zEm p t y w i n d sc re en w a sh e r sy st e m .
zInc rease tyre pressures to value specified
for full load – se e page 18 0 .Ve h ic le s to r a g e
zPark v ehicle in a dry, well ventilated
place . E ngage firs t or re vers e gear. Use
chocks or the like to prevent the vehicle
from rolling .
zDo not apply hand brake .
zDis conne ct battery by dise ngaging
neg ativ e te rminal from ve hicle e lectrical
s ys tem – s ee page 1 59 .
Vehicle recommissioning
O bse rve national re gulations .
Perform the following work before
recommissioning the vehicle:
zConnect ba tte ry – se e page 15 9 .
zCheck tyre pressure s and correct if
ne ce ss ary – se e page 18 0 .
zFill up w inds cre en was her s ys tem –
se e page 72 .
zCheck engine oil leve l – se e p age 15 3 .
zCheck the coolant le vel; top up with
antifre eze if nece s sary – s ee page 1 55 .
F it the lice nse plate if nece ss ary.
Page 164 of 190

164 Self-help, vehicle care
Locks
The locks are lubrica te d with a high-grade
lock cy lind er gre ase at the factory. O pe l
L oc k Cy lind er Gre ase pre vents the locks
f r o m f r ee z i ng up . On l y u s e d e - i c i ng a g en t s
in eme rgencie s, a s they hav e a de greas ing
e ffe ct and will im pair the function of the
locks. After using a de-icing agent, have
the lock s re -grease d by a workshop.
E ng ine compar tme nt
Areas of the engine compartme nt that are
painted in the same colour as the vehicle
must be looked after lik e any other p ainted
surface.
It is adv isable to was h th e e n gin e
compartme nt be fore and afte r winte r and
pre se rve it with wax. Cove r alternator and
brake /clutch fluid res e rv oir with plastic
sheets before washing the engine.
W hen was hing the e ngine with a s te am-je t
cle ane r, do not d ire ct the ste am-jet a t
components of the Anti-lock Brake System
(ABS), a ir conditioning syste m, climate
control sy ste m or the b elt drive and its
components . Prote ctive wax that has be en ap plied is
also re move d during the e ngine wash. F or
this reas on, have the e ngine, brak e s ys te m
components in the engine compartment,
axle com pone nts with ste ering, body parts
and cavitie s thoroughly pre se rved by a
work shop using protective wax .
An engine w ash ca n be p erformed in the
spring in orde r to remov e dirt that has
adhere d to the e ngine comp artment,
whic h may also have a high s alt content.
Check protectiv e w ax la yer and ma ke good
if necessary.
D o no t u s e hi g h - p r e ss u r e j e t cl ea ne r s.Underbod y
Your v ehicle ha s a durable protective
coating in the whee l arches (includ ing the
longitudinal mem bers ), which provide s
pe rmanent prote ction a nd need s no
s p e c ia l m a i n t e n a n c e .
O n ve hi cl e s w h ic h a r e w a sh ed f r equ e nt l y
in automatic ca r washe s with unde rbody
was hing facility, the protective coating
ma y be impaire d by dirt-diss olving
a dd i ti v es , s o ch eck t h e u n der b od y a f t er
was hing and have it wax ed if ne ce ss ary.
Be fore the sta rt of the cold we ather se ason,
che ck the c oa ting and, if ne ces s ary, have it
re stored to perfe ct condition.
C aution – com mercially available bitumen/
rubbe r m aterials can damage the coating .
We recommend that you have underbody
work carrie d out by a workshop, who
knows the p rescrib ed materials and has
experience in the use thereof.
The underbody should be washed
following the e nd of the cold weathe r
s eas on to remov e any dirt adhering to the
underbody since this may also contain salt.
Check p rotective wax coa ting and, if
nec essary , have it restored to perfec t
condition.
Page 166 of 190

166 Service, maintenanc e
Euro pean service schedule
(Opel GT - Z 20 NHH)
⊕Add it iona l o per at ions.
o Und er extreme o peratin g cond itions a nd if req uired by country-sp ecific co nditio ns, the in terva ls are red uced.
S ervice operations
by y ear 1)
km ( x 1000)1)
miles ( x 1000)1)
1)Wh ic h e v e r o cc u r s fi rs t.
1
30
202
60
403
90
604
120
805
150
1006
180
120
C ontrols , lighting , s igna lling equipme nt and airbags : v isual che ck
s tee ring lock and ignition lock: che ckxxxxxx
Re mote control batte ries: re place Eve ry 2 y ears
Windsc reen w ipers, windscreen washer system: check, correct x x x x x x
C oolant le ve l and antifree ze: check, correct
Hoses: check for tightness and secure seatingxxxxxx
Brak e fluid le vel: check, correct x x x
Batte ry te rmina ls: check for sec ure connections a nd battery ey e x x x x x x
Pollen filter: replacexxx
oM o re o f ten f o r wh en du s t, s an d o r po llen is in th e air A gree me nt w ith c us to mer
Air cleaner element: replace
Every 4 yea rs/60 000 k m/40 000 miles
⊕Spark plugs: replace Every 4 yea rs/60 000 k m/40 000 miles
Ribb ed V -be lt: vis ual check x x x
⊕Re place Every 10 years/150 000 km/100 000 miles
Powe r ste ering s ys tem: check for leaks . F luid le vel: check, correct x x x x x x
E ngine oil and oil filter: replac e
2)
2)En gine oil life monitor may indica te a n earlier engine o il an d oil filter ch ang e is neces sary. See p ag es 63, 69, 15 1.
xxxxxx
Parking b ra ke: check and adjus t
W hee l mounting and s us pe ns ion front and re ar, b rake line s, brake pres s ure
hoses, fuel lines a nd exhaust system: visual checkxxx