warning OPEL INSIGNIA 2014 Manual user
[x] Cancel search | Manufacturer: OPEL, Model Year: 2014, Model line: INSIGNIA, Model: OPEL INSIGNIA 2014Pages: 321, PDF Size: 8.95 MB
Page 59 of 321

Seats, restraints57
Adjust the height so that the belt lies
across the shoulder. It must not lie across the throat or upper arm.
Do not adjust while driving.
Removing
To release belt, press red button on
belt buckle.
Insignia OPC
Feed seat belt through belt mount on backrest after releasing.
Seat belts on the rear seats The seat belt for the rear centre seat
can only be withdrawn from the
retractor if the backrest is in the rear
position.
Using the seat belt while
pregnant9 Warning
The lap belt must be positioned as
low as possible across the pelvis
to prevent pressure on the
abdomen.
Page 60 of 321
58Seats, restraintsAirbag systemThe airbag system consists of a
number of individual systems
depending on the scope of
equipment.
When triggered the airbags inflate
within milliseconds. They also deflate
so quickly that it is often unnoticeable during the collision.9 Warning
If handled improperly the airbag
systems can be triggered in an
explosive manner.
Note
The airbag systems and belt
pretensioner control electronics are
located in the centre console area.
Do not put any magnetic objects in
this area.
Do not stick anything on the airbag
covers and do not cover them with
other materials.
Each airbag is triggered only once.
Have deployed airbags replaced by
a workshop. Furthermore, it might be necessary to have the steering
wheel, the instrument panel, parts of
the panelling, the door seals,
handles and the seats replaced.
Do not make any modifications to
the airbag system as this will
invalidate the vehicle type approval.
When the airbags inflate, escaping
hot gases may cause burns.
Control indicator v for airbag systems
3 101.
Front airbag system
The front airbag system consists of
one airbag in the steering wheel and
one in the instrument panel on the
front passenger side. These can be
identified by the word AIRBAG.
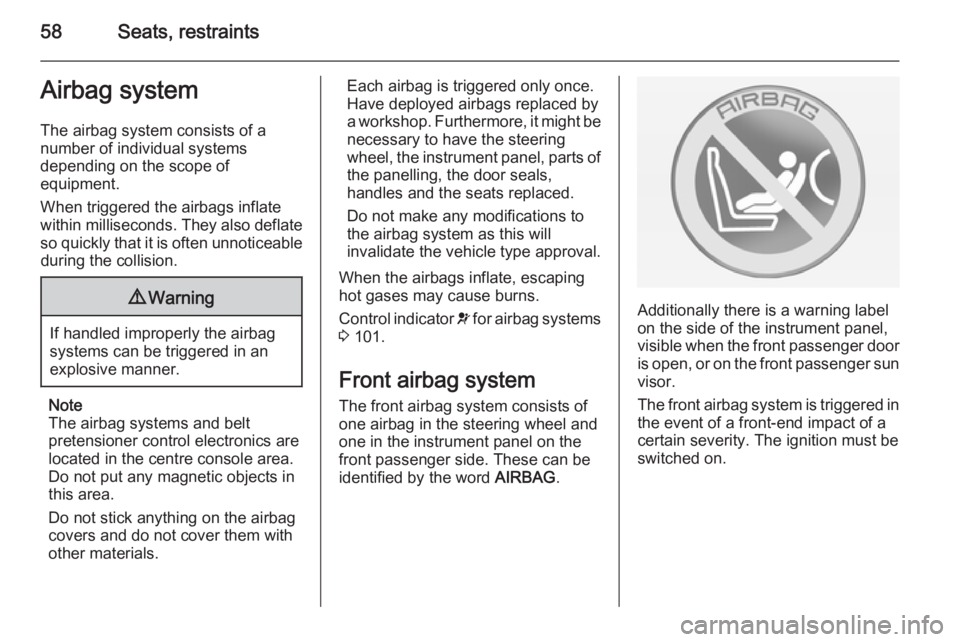
Additionally there is a warning label
on the side of the instrument panel,
visible when the front passenger door is open, or on the front passenger sun
visor.
The front airbag system is triggered in
the event of a front-end impact of a
certain severity. The ignition must be
switched on.
Page 61 of 321
Seats, restraints59
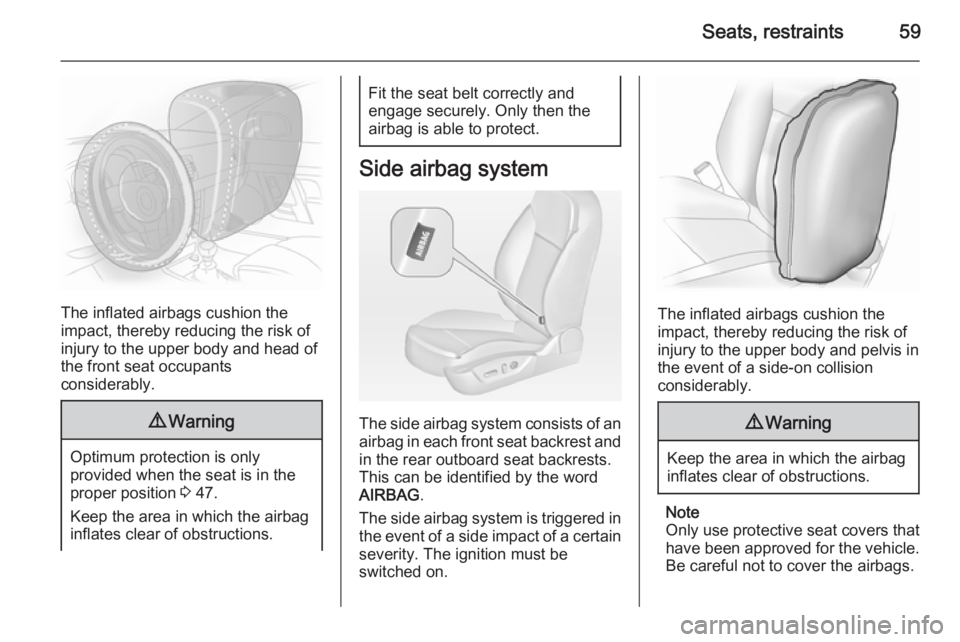
The inflated airbags cushion the
impact, thereby reducing the risk of
injury to the upper body and head of
the front seat occupants
considerably.
9 Warning
Optimum protection is only
provided when the seat is in the
proper position 3 47.
Keep the area in which the airbag
inflates clear of obstructions.
Fit the seat belt correctly and
engage securely. Only then the
airbag is able to protect.
Side airbag system
The side airbag system consists of an
airbag in each front seat backrest and in the rear outboard seat backrests.
This can be identified by the word
AIRBAG .
The side airbag system is triggered in
the event of a side impact of a certain severity. The ignition must be
switched on.
The inflated airbags cushion the
impact, thereby reducing the risk of
injury to the upper body and pelvis in
the event of a side-on collision
considerably.
9 Warning
Keep the area in which the airbag
inflates clear of obstructions.
Note
Only use protective seat covers that
have been approved for the vehicle.Be careful not to cover the airbags.
Page 62 of 321
60Seats, restraintsCurtain airbag system
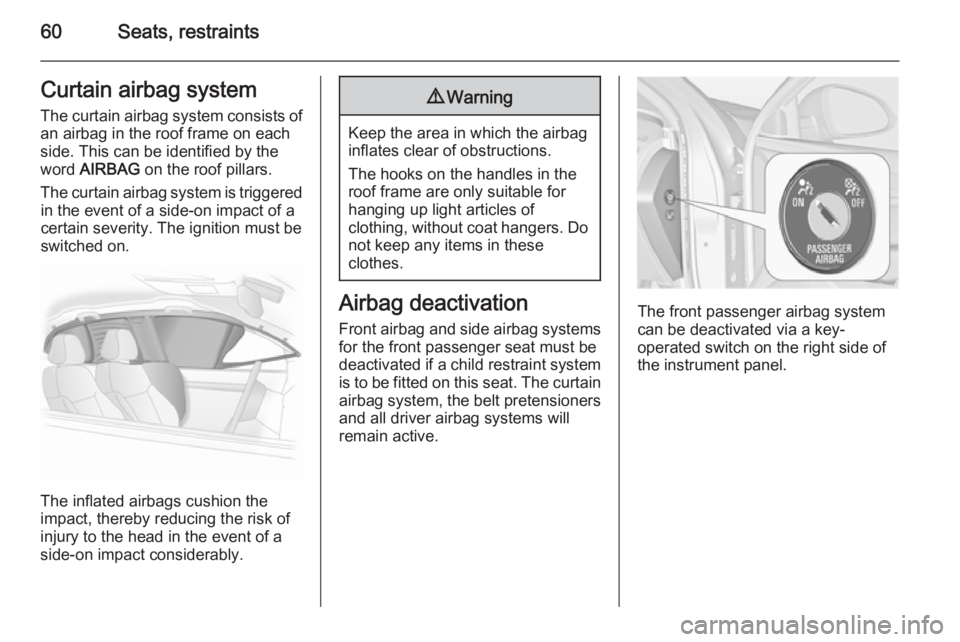
The curtain airbag system consists of an airbag in the roof frame on each
side. This can be identified by the
word AIRBAG on the roof pillars.
The curtain airbag system is triggered in the event of a side-on impact of a
certain severity. The ignition must be
switched on.
The inflated airbags cushion the
impact, thereby reducing the risk of
injury to the head in the event of a
side-on impact considerably.
9 Warning
Keep the area in which the airbag
inflates clear of obstructions.
The hooks on the handles in the
roof frame are only suitable for
hanging up light articles of
clothing, without coat hangers. Do not keep any items in these
clothes.
Airbag deactivation
Front airbag and side airbag systems for the front passenger seat must be
deactivated if a child restraint system
is to be fitted on this seat. The curtain
airbag system, the belt pretensioners and all driver airbag systems will
remain active.The front passenger airbag system
can be deactivated via a key-
operated switch on the right side of the instrument panel.
Page 69 of 321
Storage67StorageStorage compartments................67
Load compartment .......................69
Roof rack system .........................79
Loading information .....................80Storage compartments9Warning
Do not store heavy or sharp
objects in the storage
compartments. Otherwise, the
storage compartment lid could
open and vehicle occupants could be injured by objects being thrown
around in the event of hard
braking, a sudden change in
direction or an accident.
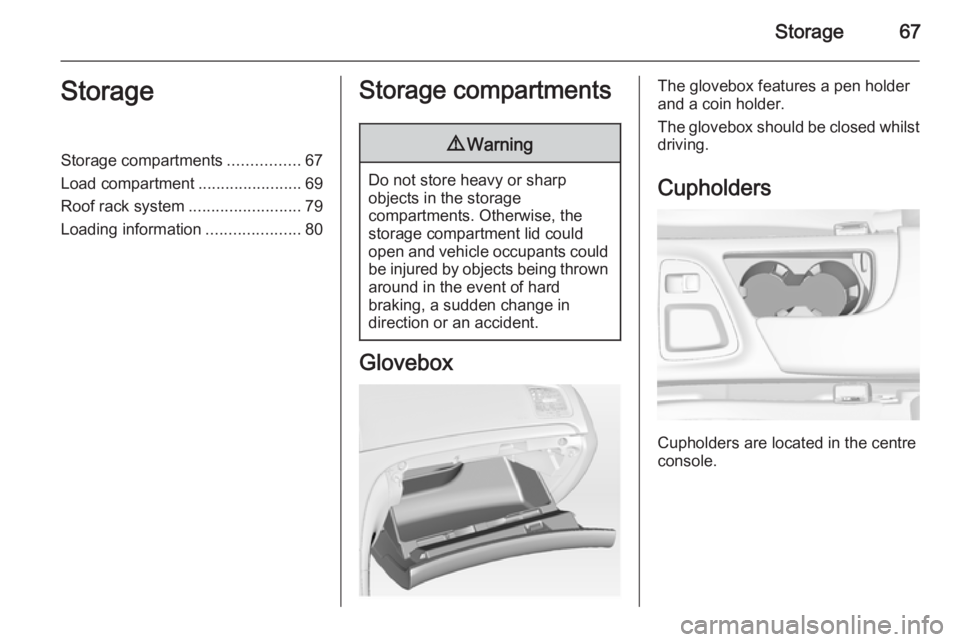
Glovebox
The glovebox features a pen holder
and a coin holder.
The glovebox should be closed whilst driving.
Cupholders
Cupholders are located in the centre
console.
Page 71 of 321
Storage69Load compartment
Folding down rear seat
backrests
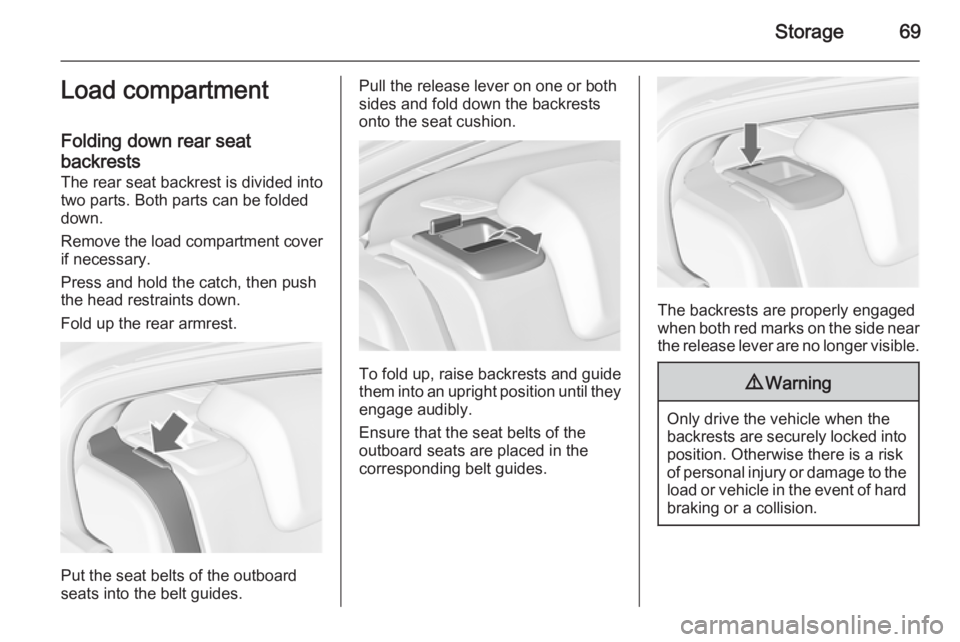
The rear seat backrest is divided into
two parts. Both parts can be folded
down.
Remove the load compartment cover if necessary.
Press and hold the catch, then push
the head restraints down.
Fold up the rear armrest.
Put the seat belts of the outboard
seats into the belt guides.
Pull the release lever on one or both
sides and fold down the backrests
onto the seat cushion.
To fold up, raise backrests and guide them into an upright position until they
engage audibly.
Ensure that the seat belts of the
outboard seats are placed in the corresponding belt guides.
The backrests are properly engaged
when both red marks on the side near the release lever are no longer visible.
9 Warning
Only drive the vehicle when the
backrests are securely locked into position. Otherwise there is a risk
of personal injury or damage to the
load or vehicle in the event of hard braking or a collision.
Page 75 of 321
Storage73
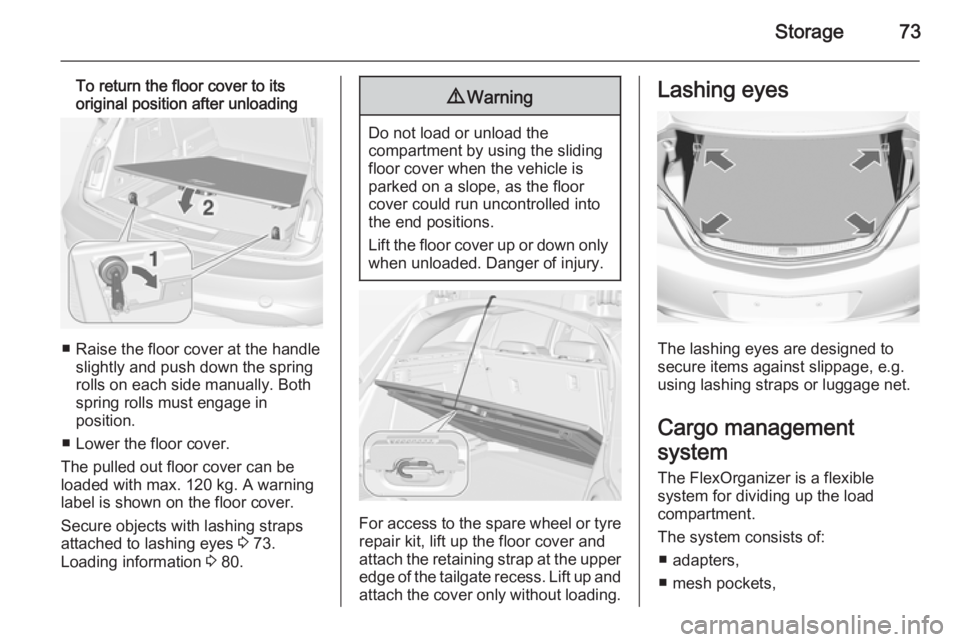
To return the floor cover to its
original position after unloading
Ō¢Ā Raise the floor cover at the handle slightly and push down the spring
rolls on each side manually. Both
spring rolls must engage in
position.
Ō¢Ā Lower the floor cover.
The pulled out floor cover can be
loaded with max. 120 kg. A warning
label is shown on the floor cover.
Secure objects with lashing straps
attached to lashing eyes 3 73.
Loading information 3 80.
9
Warning
Do not load or unload the
compartment by using the sliding
floor cover when the vehicle is
parked on a slope, as the floor
cover could run uncontrolled into the end positions.
Lift the floor cover up or down only
when unloaded. Danger of injury.
For access to the spare wheel or tyre repair kit, lift up the floor cover and
attach the retaining strap at the upper
edge of the tailgate recess. Lift up and
attach the cover only without loading.
Lashing eyes
The lashing eyes are designed to
secure items against slippage, e.g.
using lashing straps or luggage net.
Cargo management
system
The FlexOrganizer is a flexible
system for dividing up the load
compartment.
The system consists of:
Ō¢Ā adapters,
Ō¢Ā mesh pockets,
Page 80 of 321
78Storage
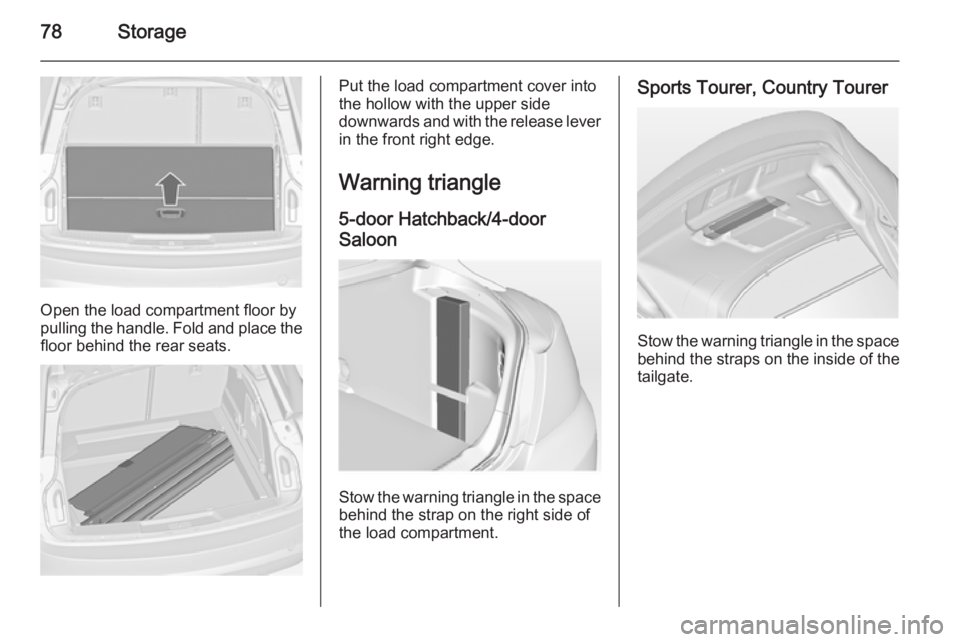
Open the load compartment floor by
pulling the handle. Fold and place the floor behind the rear seats.
Put the load compartment cover into
the hollow with the upper side
downwards and with the release lever in the front right edge.
Warning triangle 5-door Hatchback/4-door
Saloon
Stow the warning triangle in the space
behind the strap on the right side of
the load compartment.
Sports Tourer, Country Tourer
Stow the warning triangle in the space
behind the straps on the inside of the
tailgate.
Page 83 of 321
Storage819Warning
Always make sure that the load in
the vehicle is securely stowed.
Otherwise objects can be thrown
around inside the vehicle and
cause personal injury or damage
to the load or car.
Ō¢Ā The payload is the difference between the permitted gross
vehicle weight (see identification
plate 3 264) and the EC kerb
weight.
To calculate the payload, enter the
data for your vehicle in the Weights
table at the front of this manual.
The EC kerb weight includes
weights for the driver (68 kg),
luggage (7 kg) and all fluids (tank
90 % full).
Optional equipment and
accessories increase the kerb
weight.
Ō¢Ā Driving with a roof load increases the sensitivity of the vehicle to
cross-winds and has a detrimental
effect on vehicle handling due to
the vehicle's higher centre of
gravity. Distribute the load evenly
and secure it properly with retaining
straps. Adjust the tyre pressure and vehicle speed according to the load
conditions. Check and retighten the straps frequently.
Do not drive faster than 120 km/h.
The permissible roof load is
100 kg. The roof load is the
combined weight of the roof rack
and the load.
Page 84 of 321
82Instruments and controlsInstruments and
controlsControls ....................................... 82
Warning lights, gauges and indiŌĆÉ
cators ........................................... 91
Information displays ...................107
Vehicle messages ...................... 116
Vehicle personalisation ..............118Controls
Steering wheel adjustment
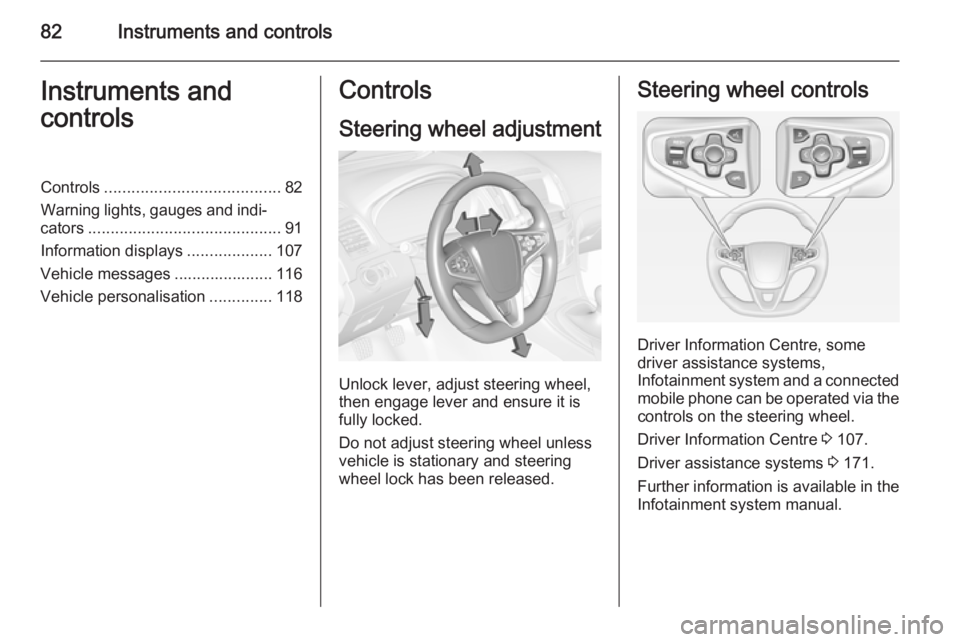
Unlock lever, adjust steering wheel,
then engage lever and ensure it is fully locked.
Do not adjust steering wheel unless
vehicle is stationary and steering
wheel lock has been released.
Steering wheel controls
Driver Information Centre, some
driver assistance systems,
Infotainment system and a connected
mobile phone can be operated via the controls on the steering wheel.
Driver Information Centre 3 107.
Driver assistance systems 3 171.
Further information is available in the
Infotainment system manual.