warning light OPEL INSIGNIA 2014 Manual user
[x] Cancel search | Manufacturer: OPEL, Model Year: 2014, Model line: INSIGNIA, Model: OPEL INSIGNIA 2014Pages: 321, PDF Size: 8.95 MB
Page 152 of 321
150Driving and operating
Ignition on power mode: press and
hold Engine Start/Stop button for
6 seconds without operating clutch or brake pedal. The green LED in the
button illuminates, diesel engine is
preheating. Control indicators light up
and the most electrical functions are
operable.
Engine start: operate clutch pedal
(manual transmission) or brake pedal (automatic transmission) and press
Engine Start/Stop button once more.
Release button after starting
procedure begins.
Ignition off: press Engine Start/Stop
button briefly in each mode or when
engine is running. Some functions
remain active until driver's door is
opened, if ignition was on before.
Steering wheel lock
The steering wheel lock activates
automatically when:
■ the vehicle is stationary and
■ the ignition has been switched off and
■ the driver's door is opened.To release steering wheel lock, open
and close driver's door and switch on accessory mode or start the engine
directly.9 Warning
If the vehicle battery is discharged,
the vehicle must not be towed,
tow-started or jump-started as the
steering wheel lock cannot be
disengaged.
Emergency operation on
vehicles with electronic key
system
If either the electronic key fails or the
battery of the electronic key is weak,
the Driver Information Centre may
display No Remote Detected or
Replace Battery in Remote Key when
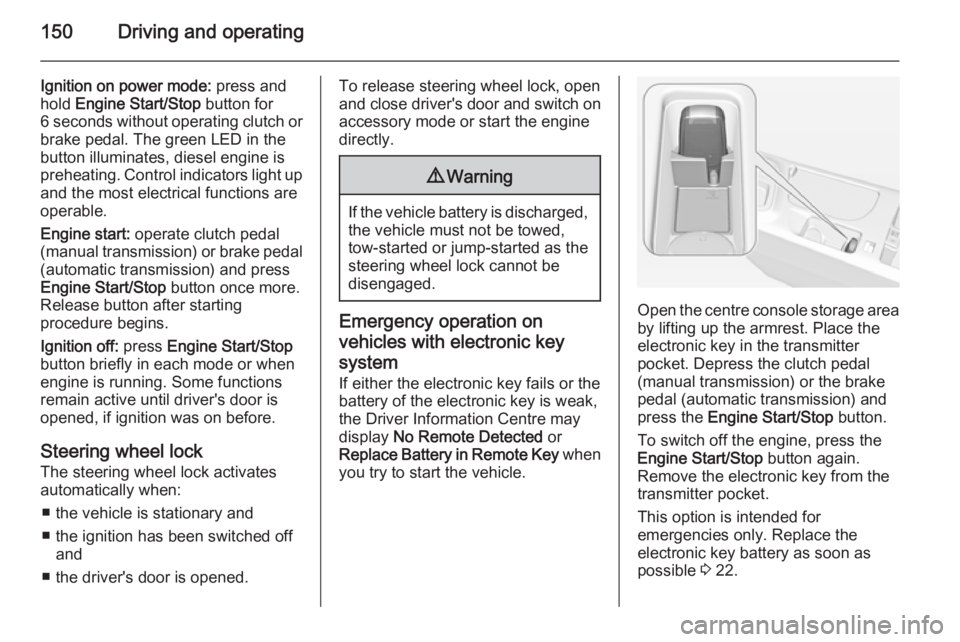
you try to start the vehicle.Open the centre console storage area by lifting up the armrest. Place the
electronic key in the transmitter
pocket. Depress the clutch pedal
(manual transmission) or the brake
pedal (automatic transmission) and
press the Engine Start/Stop button.
To switch off the engine, press the Engine Start/Stop button again.
Remove the electronic key from the
transmitter pocket.
This option is intended for
emergencies only. Replace the
electronic key battery as soon as
possible 3 22.
Page 166 of 321
164Driving and operating
Fault9Warning
If there is a fault in the ABS, the
wheels may be liable to lock due
to braking that is heavier than
normal. The advantages of ABS are no longer available. During
hard braking, the vehicle can no longer be steered and may
swerve.
Have the cause of the fault remedied
by a workshop.
Parking brake
Manual parking brake
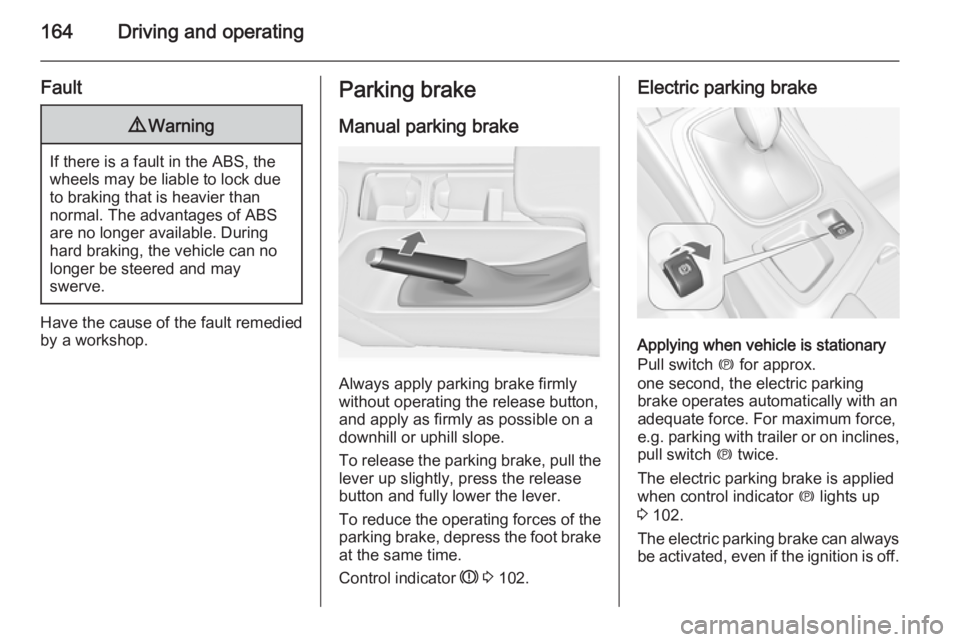
Always apply parking brake firmly
without operating the release button,
and apply as firmly as possible on a
downhill or uphill slope.
To release the parking brake, pull the lever up slightly, press the release
button and fully lower the lever.
To reduce the operating forces of the
parking brake, depress the foot brake
at the same time.
Control indicator R 3 102.
Electric parking brake
Applying when vehicle is stationary
Pull switch m for approx.
one second, the electric parking
brake operates automatically with an adequate force. For maximum force,
e.g. parking with trailer or on inclines,
pull switch m twice.
The electric parking brake is applied
when control indicator m lights up
3 102.
The electric parking brake can always
be activated, even if the ignition is off.
Page 176 of 321
174Driving and operating
vehicle speed increases or decreasesto follow the vehicle in front, but willnot exceed the set speed. It may
apply limited braking with activated
brake lights.
The adaptive cruise control can store
and maintain speeds over approx.
25 km/h and brakes automatically to
follow a slower vehicle driving ahead
to a minimum speed of 15 km/h. On vehicles with automatic transmission
the system brakes to a stop.
Adaptive cruise control uses a radar
sensor to detect the vehicles ahead.
If no vehicle is detected in the driving path, the adaptive cruise control will
behave like a traditional cruise
control.
For safety reasons, the system
cannot be activated before the brake
pedal has been depressed once
since switching on ignition. Activation
in first gear is not possible.
Adaptive cruise control is mainly
advised to be used on long straight
roads like highways or country roads
with steady traffic. Do not use the
system if it is not advisable to
maintain a constant speed.
Control indicator A 3 106, m 3 106,
C 3 106.9 Warning
The complete driver attention is
always required while driving with adaptive cruise control. The driver stays fully in control of the vehicle
because the brake pedal, the
accelerator pedal and the cancel
switch have priority over any
adaptive cruise control operation.
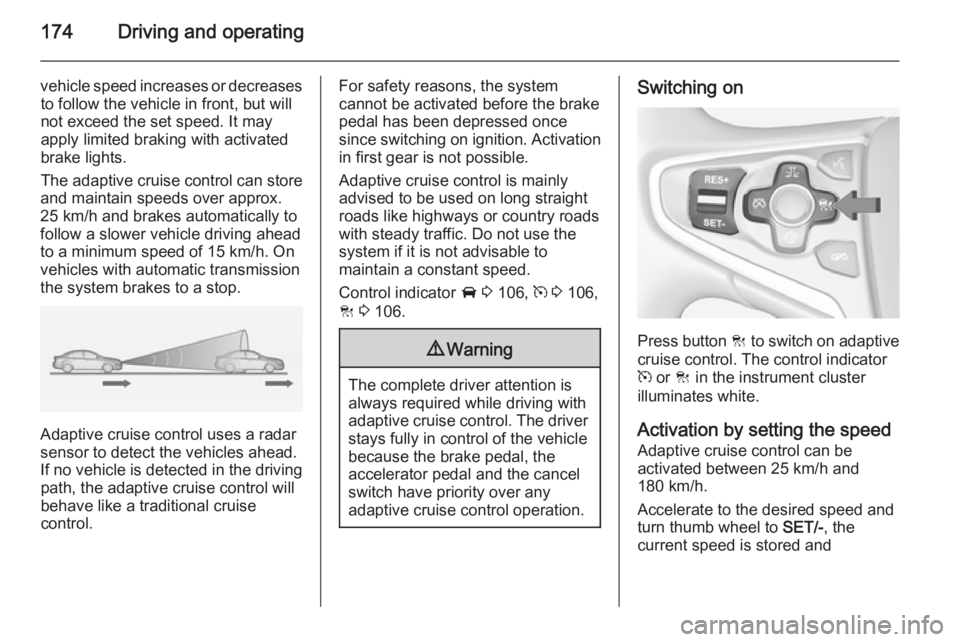
Switching on
Press button C to switch on adaptive
cruise control. The control indicator
m or C in the instrument cluster
illuminates white.
Activation by setting the speed Adaptive cruise control can be
activated between 25 km/h and
180 km/h.
Accelerate to the desired speed and
turn thumb wheel to SET/-, the
current speed is stored and
Page 187 of 321
Driving and operating185
If there is no vehicle ahead or the
vehicle ahead is out of range, two
dashes will be displayed: -.- s.
If Adaptive cruise control is active,
this page shows the following
distance setting instead 3 173.
Active Emergency Braking Active emergency braking can help to reduce the damage from crashes with vehicles and obstacles directly
ahead, when a collision can no longer
be avoided either by manual braking
or by steering. Before the active
emergency braking applies, the driver is warned by the forward collision
alert 3 181.
The feature uses various inputs (e.g.
radar sensor, brake pressure, vehicle speed) to calculate the probability of
a frontal collision.
Active emergency braking operates automatically above walking speed, provided that Auto Collision
Preparation setting is not deactivated
in the vehicle personalisation menu
3 118.The system includes:
■ Brake preparation system
■ Emergency automatic braking
■ Forward looking brake assist9 Warning
This system is not intended to
replace the driver responsibility for driving the vehicle and looking
ahead. Its function is limited to
supplemental use only. The driver must continue to apply the brake
pedal as the driving situation
dictates.
Brake preparation system
When approaching a vehicle ahead
so quickly that a collision is likely, the brake preparation system slightly
pressurises the brakes. This reduces
the response time, when a manual or automatic braking is requested.
The brake system is prepared so that braking can occur more rapidly.
Emergency automatic braking
After the brake preparation and just
before the imminent collision, this
function automatically applies limited
braking to reduce the impact speed of
the collision.
Forward looking brake assist
In addition to the brake preparation
system and emergency automatic
braking, the forward looking brake
assist function makes the brake assist more sensitive. Therefore,
depressing the brake pedal slightly
results in immediate hard braking.
This function helps the driver brake
quicker and harder before the
imminent collision.9 Warning
Active emergency braking is not
designed to apply hard
autonomous braking or to
automatically avoid a collision. It is designed to reduce the vehicle
speed before a collision. It may not
react for stopped vehicles,
Page 197 of 321
Driving and operating1959Warning
The rear view camera does not
replace driver vision. Note that
objects that are outside the
camera's field of view and the
advanced parking assist sensors,
e.g. below the bumper or
underneath the vehicle, are not
displayed.
Do not reverse the vehicle by only looking at the Info-Display and
check the surrounding behind and
around the vehicle before
reversing.
Activation
Rear view camera is automatically
activated when reverse gear is
engaged.
Functionality
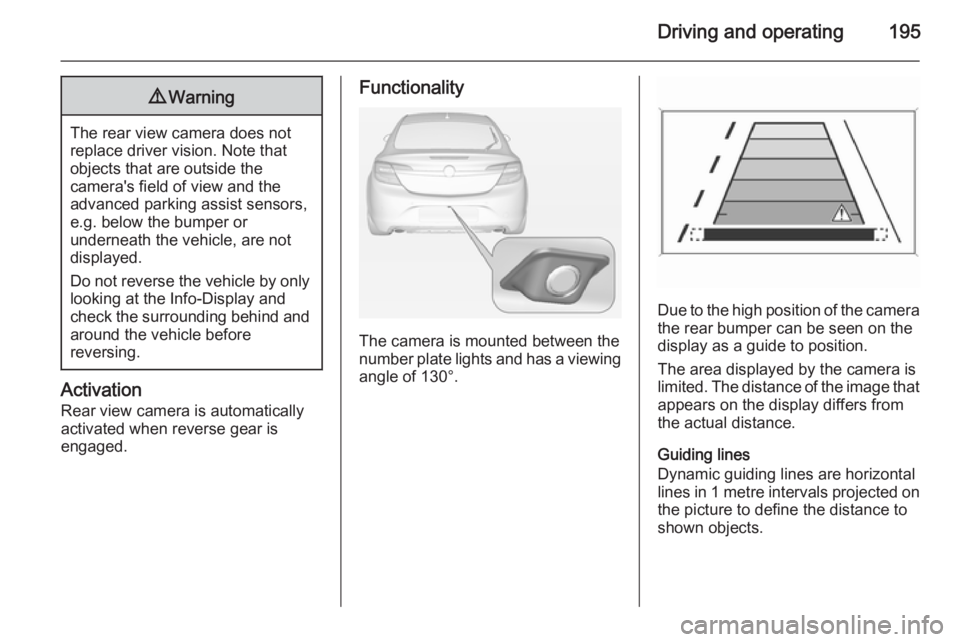
The camera is mounted between the
number plate lights and has a viewing angle of 130°.
Due to the high position of the camera
the rear bumper can be seen on the
display as a guide to position.
The area displayed by the camera is
limited. The distance of the image that
appears on the display differs from
the actual distance.
Guiding lines
Dynamic guiding lines are horizontal
lines in 1 metre intervals projected on
the picture to define the distance to
shown objects.
Page 198 of 321
196Driving and operating
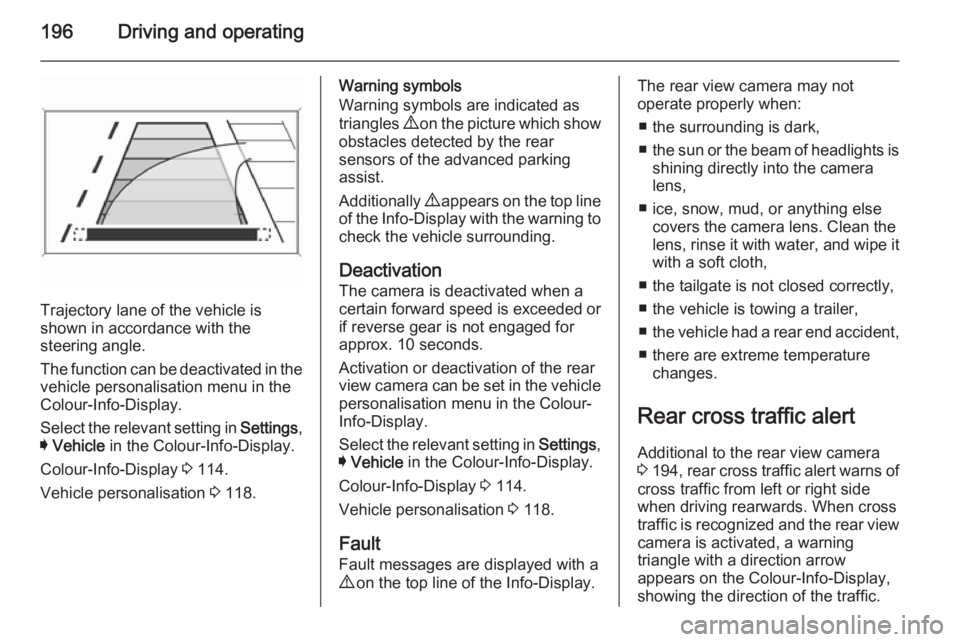
Trajectory lane of the vehicle is
shown in accordance with the
steering angle.
The function can be deactivated in the
vehicle personalisation menu in the
Colour-Info-Display.
Select the relevant setting in Settings,
I Vehicle in the Colour-Info-Display.
Colour-Info-Display 3 114.
Vehicle personalisation 3 118.
Warning symbols
Warning symbols are indicated as
triangles 9 on the picture which show
obstacles detected by the rear
sensors of the advanced parking
assist.
Additionally 9 appears on the top line
of the Info-Display with the warning to
check the vehicle surrounding.
Deactivation The camera is deactivated when a
certain forward speed is exceeded or
if reverse gear is not engaged for
approx. 10 seconds.
Activation or deactivation of the rear
view camera can be set in the vehicle
personalisation menu in the Colour-
Info-Display.
Select the relevant setting in Settings,
I Vehicle in the Colour-Info-Display.
Colour-Info-Display 3 114.
Vehicle personalisation 3 118.
Fault
Fault messages are displayed with a
9 on the top line of the Info-Display.The rear view camera may not
operate properly when:
■ the surrounding is dark,
■ the sun or the beam of headlights is
shining directly into the camera
lens,
■ ice, snow, mud, or anything else covers the camera lens. Clean the
lens, rinse it with water, and wipe it
with a soft cloth,
■ the tailgate is not closed correctly,
■ the vehicle is towing a trailer,
■ the vehicle had a rear end accident,
■ there are extreme temperature changes.
Rear cross traffic alert Additional to the rear view camera
3 194 , rear cross traffic alert warns of
cross traffic from left or right side
when driving rearwards. When cross
traffic is recognized and the rear view
camera is activated, a warning
triangle with a direction arrow
appears on the Colour-Info-Display,
showing the direction of the traffic.
Page 200 of 321
198Driving and operating
■the vehicle had a rear end accident,
■ there are extreme temperature changes.
Traffic sign assistant Functionality
The traffic sign assistant system
detects designated traffic signs via a
front camera and displays them in the
Driver Information Centre.
Traffic signs, which will be detected,
are:
Limit- and no passing signs ■ speed limit
■ no passing
■ end of speed limit
■ end of no passingRoad signs
beginning and end of:
■ motorways
■ A-roads
■ play streetsAdd on signs ■ additional hints to traffic signs
■ restriction of trailer towing
■ wet warning
■ ice warning
■ direction arrows
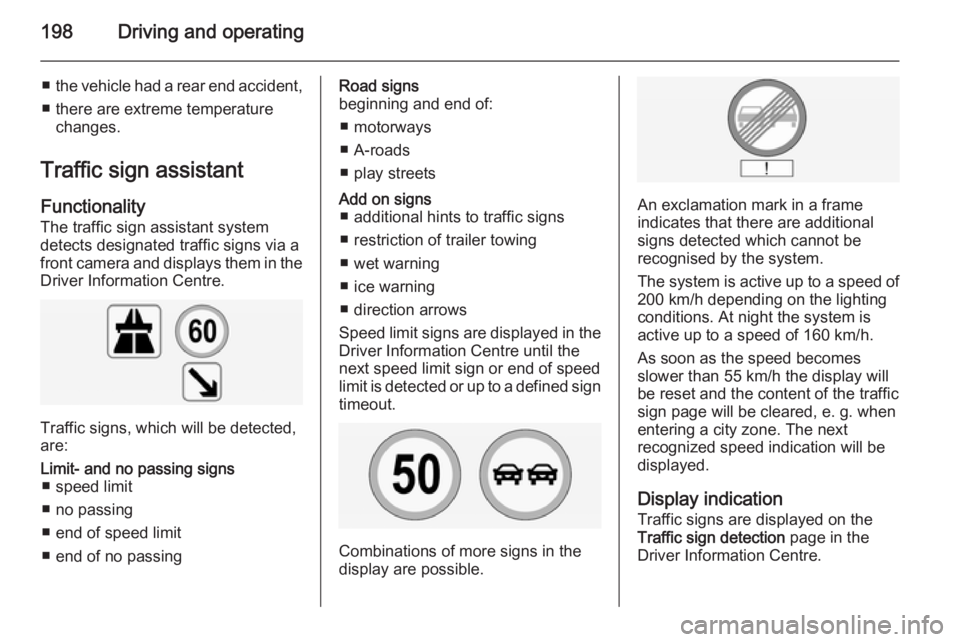
Speed limit signs are displayed in the
Driver Information Centre until the
next speed limit sign or end of speed
limit is detected or up to a defined sign timeout.
Combinations of more signs in the
display are possible.
An exclamation mark in a frame
indicates that there are additional
signs detected which cannot be
recognised by the system.
The system is active up to a speed of
200 km/h depending on the lighting
conditions. At night the system is
active up to a speed of 160 km/h.
As soon as the speed becomes
slower than 55 km/h the display will
be reset and the content of the traffic
sign page will be cleared, e. g. when
entering a city zone. The next
recognized speed indication will be
displayed.
Display indication Traffic signs are displayed on the
Traffic sign detection page in the
Driver Information Centre.
Page 204 of 321
202Driving and operating
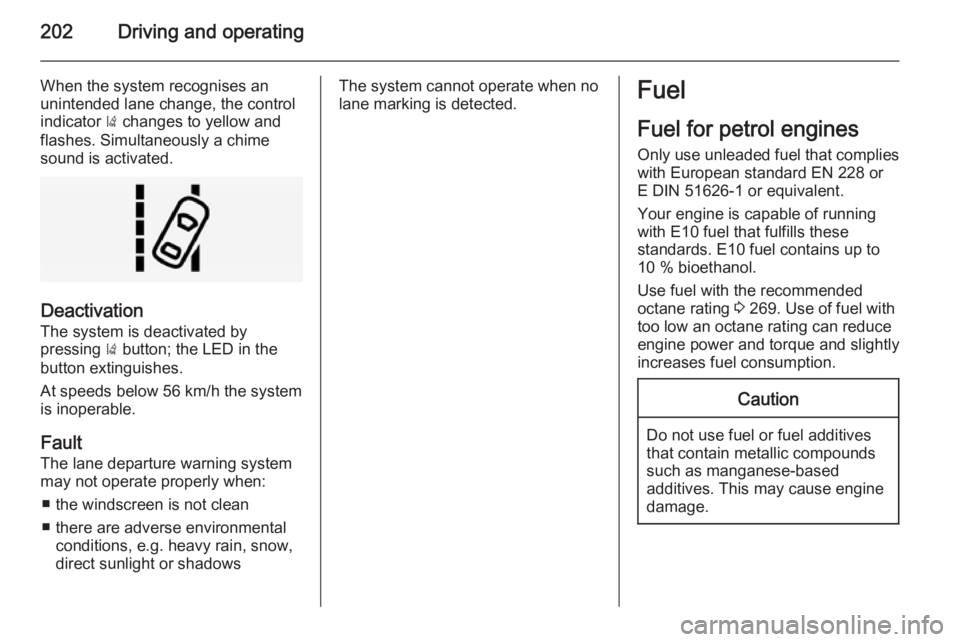
When the system recognises an
unintended lane change, the control indicator ) changes to yellow and
flashes. Simultaneously a chime
sound is activated.
Deactivation
The system is deactivated by
pressing ) button; the LED in the
button extinguishes.
At speeds below 56 km/h the system is inoperable.
Fault
The lane departure warning system
may not operate properly when:
■ the windscreen is not clean
■ there are adverse environmental conditions, e.g. heavy rain, snow,
direct sunlight or shadows
The system cannot operate when no
lane marking is detected.Fuel
Fuel for petrol engines
Only use unleaded fuel that complies
with European standard EN 228 or
E DIN 51626-1 or equivalent.
Your engine is capable of running
with E10 fuel that fulfills these
standards. E10 fuel contains up to
10 % bioethanol.
Use fuel with the recommended
octane rating 3 269. Use of fuel with
too low an octane rating can reduce
engine power and torque and slightly increases fuel consumption.Caution
Do not use fuel or fuel additives
that contain metallic compounds
such as manganese-based
additives. This may cause engine
damage.
Page 206 of 321
204Driving and operating
Press the LPG button to switch
between petrol and liquid gas
operation as soon as the required
parameters (coolant temperature,
gas temperature and minimum
engine speed) have been reached.
The requirements are usually fulfilled
after around 60 seconds (depending
on exterior temperature) and the first
firm press on the accelerator. The
LED status shows the current
operating mode.1 off=petrol operation1 illumi‐
nates=liquid gas operation1 flashes=no switching is
possible, one type
of fuel is empty
As soon as the liquid gas tank is
empty, petrol operation is
automatically engaged until the
ignition is switched off.
Every six months, run the petrol tank
down until control indicator i or Y
illuminates, then refuel. This helps
maintain fuel quality and system
function for petrol operation.
Fill the tank completely at regular
intervals to prevent corrosion in the
tank.
Faults and remedies
If gas mode is not possible, check the following:
■ Is there enough liquid gas present?
■ Is there enough petrol present for starting?
Due to extreme temperatures in
combination with the gas
composition, it may take slightly
longer before the system switches
from petrol to gas mode.
In extreme situations, the system may
also switch back to petrol mode if the
minimum requirements are not
fulfilled.
Seek the assistance of a workshop in the event of all other faults.Caution
Repairs and adjustments may onlybe made by trained specialists in
order to maintain the safety and
warranty on the LPG system.
Liquid gas is given a particular odour
(odorised) so that any leaks can be
detected easily.
9 Warning
If you smell gas in the vehicle or in
the immediate vicinity, switch to petrol mode immediately. No
smoking. No naked flames or
ignition sources.
If the gas odour persists, do not start
the engine. If possible, close the
manual shut-off valve on the
multivalve. The multivalve is located
on the liquid gas tank in the load
compartment, underneath the rear
floor cover.
Page 244 of 321
242Vehicle care
System status and pressure warningsare displayed by a message with the
corresponding tyre flashing in the
Driver Information Centre.
A detected low tyre pressure
condition is indicated by the control
indicator w 3 104.
If w lights up, stop as soon as
possible and inflate the tyres as
recommended 3 289.
After inflating driving may be required
to update the tyre pressure values in
the Driver Information Centre. During
this time w may light up.
If w lights up at lower temperatures
and extinguishes after some driving,
this could be an indicator for getting
low pressure. Check tyre pressure.
Vehicle messages 3 116.
If the tyre pressure must be reduced
or increased, switch off ignition.
Only mount wheels with pressure
sensors, otherwise the tyre pressure
will not be displayed and w
illuminates continuously.
A spare wheel or temporary spare
wheel is not equipped with pressure
sensors. The tyre pressure
monitoring system is not operational
for these wheels. Control indicator w
illuminates. For the further three
wheels the system remains
operational.
The use of commercially available
liquid tyre repair kits can impair the
function of the system. Factory
approved repair kits can be used.
External high-power radio equipment
could disrupt the tyre pressure
monitoring system.
Each time the tyres are replaced tyre
pressure monitoring system sensors
must be dismounted and serviced.
For the screwed sensor replace valve
core and sealing ring, for clipped
sensor replace complete valve stem.Vehicle loading status
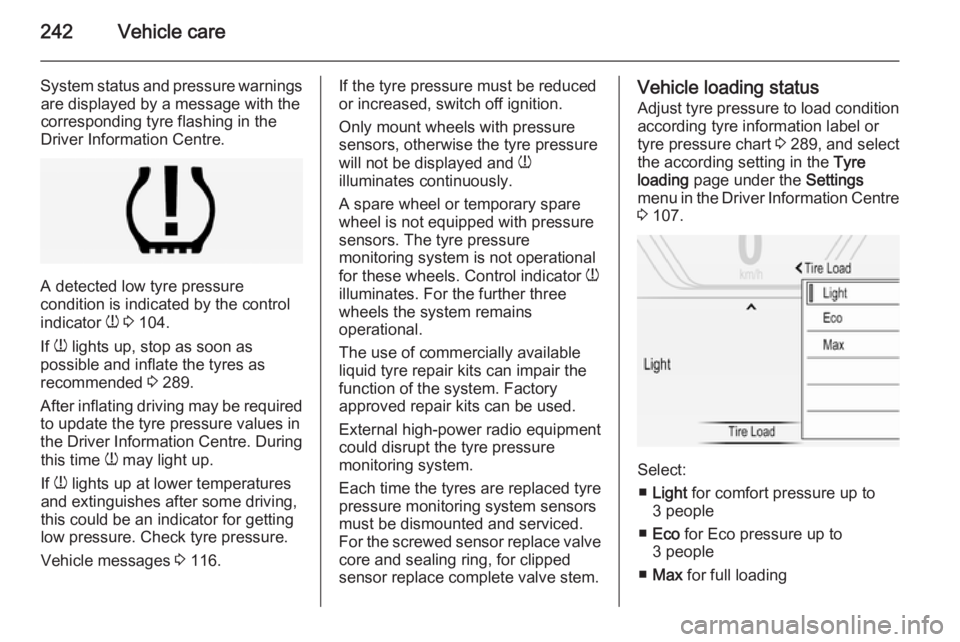
Adjust tyre pressure to load condition according tyre information label or
tyre pressure chart 3 289, and select
the according setting in the Tyre
loading page under the Settings
menu in the Driver Information Centre 3 107.
Select:
■ Light for comfort pressure up to
3 people
■ Eco for Eco pressure up to
3 people
■ Max for full loading