tow OPEL ZAFIRA 2009 Owners Manual
[x] Cancel search | Manufacturer: OPEL, Model Year: 2009, Model line: ZAFIRA, Model: OPEL ZAFIRA 2009Pages: 228, PDF Size: 7.3 MB
Page 18 of 228

18
In brief
Starting engine with Start/Stop
button The electronic key must be in the
vehicle interior. Operate clutch and
brake,
automatic transmission in P or
N , do not accelerate, for diesel
engine, press the button briefly to
start preheating, move the steering
wheel slightly to release the steering
wheel lock, wait until control
indicator ! goes out and then press
button for 1 second and release when
the engine is running.
Open&Start system 3 29. Parking
■
Always apply hand brake withoutpressing release button. Apply as
firmly as possible on a downhill
slope or uphill slope. Operate foot
brake at same time to reduce
operating force.
■ Switch off the engine and ignition. Turn the ignition key to 0 and
remove or, with the vehicle
stationary, press the Start/Stop
button and open the driver's door.
Turn the steering wheel until the
steering wheel lock is felt to
engage.
For vehicles with automatic
transmission, the key can only be
removed when the selector lever is
in the P position. If P is not engaged
or the hand brake is not applied, "P"
flashes for a few seconds in the
transmission display.
■ If the vehicle is on a level surface or uphill slope, engage first gear or set
the selector lever to P before
switching off the ignition. On an
uphill slope, turn the front wheels
away from the kerb. If the vehicle is on a downhill slope,
engage reverse gear or set the
selector
lever to P before switching
off the ignition. Turn the front
wheels towards the kerb.
■ Lock the vehicle with button p on
the remote control or with the
sensor in a front door handle.
To activate the anti-theft locking
system and the anti-theft alarm
system, press button p twice or
touch the sensor in a front door
handle twice.
■ Do not park the vehicle on an easy flammable surface. The high
temperature of the exhaust system
could ignite the surface.
■ On vehicles with manual transmission automated, control
indicator R flashes for a few
seconds after the ignition is
switched off if the hand brake has
not been applied 3 100.
■ Close windows.
■ The engine cooling fans may run after the engine has been switched
off 3 155.
Page 30 of 228

30
Keys, doors and windows
If the ignition has been switched off
and the vehicle is stationary, the
steering wheel lock activates
automatically when the driver’s door
is opened or closed.
Control indicator 0 3 92.
Note
Do not put the electronic key in the
load compartment or in front of the
Info-Display.
The
sensor fields in the door handles
must be kept clean to ensure
unrestricted functionality.
If the battery is discharged, the
vehicle must not be towed, tow-
started or bump-started as the
steering column lock cannot be
disengaged. Radio remote control
The electronic key also has a radio
remote control feature. Emergency operation
If the radio remote control also fails,
the driver's door can be locked or
unlocked with the emergency key
contained
in the electronic key: press
locking mechanism on underside and
remove cap by applying gentle
pressure to the cap. Push emergency
key towards the outside over the
detent and remove.
Page 51 of 228

Seats, restraints
51
Folding down outboard
backrests of second row Remove the luggage compartment
cover as required
3 69.
Slide head restraints down 3 44.
Place seat belt buckles in seat
cushion pockets.
Press
the release lever down, set the
backrest to a vertical position or
angled forward or fold it to the seat
cushion and engage.
To move upright, push release lever
down and latch backrest in required
position. Folding down middle backrest in
second row
Slide the head restraint all the way
down 3 44.
Place seat belt buckles in seat
cushion pockets.
Pull the handle on the back, set the
backrest to a vertical position or fold
to the seat cushion and engage.
To
restore, pull the handle, straighten
and engage in required position. The centre seat backrest can be used
as
an armrest when folded down, and
contains drink holders and stowage
compartments.
Third row seats 9
Warning When the seats are being set up
or folded, keep hands away from
hinge area.
Page 53 of 228

Seats, restraints
53
Slide the seat rearward until it is
upright and audibly engages. Support
the top of the backrest with your hand.
Slide the second seat row to the
required position and engage.
Seat belts 3 55.
Stow the load compartment cover by
installing it behind the third row of
seats 3 69.
Stowing seats
Remove the load compartment cover
3 69.
Push the lever forward and slide the
second seat row forward to the mark.
Press the catch to release and slide
the head restraints of the third seat
row all the way down. Guide the seat belts through the belt
holders and insert the latch plates in
the holders. From the load compartment, press
the button on the top of the backrest
and lower the backrest. Using the
handle on the seat, pull rearwards
and
upwards and then swing the seat
forwards until it is lowered into the
vehicle floor. Hold the seat by the
handle during the entire procedure. Push belt buckles into recess in floor
and close cover.
Install
the rear floor storage cover and
load compartment cover 3 70,
3 69.
Slide the second row of seats to the
required position and engage.
Page 63 of 228

Seats, restraints
63
Child restraint installation locations
Permissible options for fitting a child safety seat
Weight and age class 1) On front passenger
seat On outboard
seats in the
second row On centre seat
in the second
row On the seats
in the third
row
Group 0: up to 10 kg or approx. 10 months
Group 0+: up to 13 kg or approx. 2 years
B
1
, + U, + U X
Group I: 9 to 18 kg or approx. 8 months to 4 years
B
2
, + U, +, ++ U UF
Group II: 15 to 25 kg or approx. 3 to 7 years
Group III: 22 to 36 kg or approx. 6 to 12 years
X U U UF
B
1
= Limited, only with seat occupancy recognition and Opel child restraint system with transponders.
If the child restraint system is being secured using a three-point seat belt, move seat height adjustment to uppermost
position. Move front passenger seat as far back as possible and move front passenger seat belt anchorage point to
lowest position.
B 2
= Limited, only with seat occupancy recognition and Opel child restraint system with transponders.
If
the child restraint system is being secured using a three-point seat belt, move seat height adjustment to uppermost
position. Move front passenger seat as far back as possible so that vehicle safety belt runs from anchorage point
towards the front.
U = Universal suitability in conjunction with three-point seat belt.
UF = Can be used universally for child restraint systems facing the front in combination with a three-point seat belt.
+ = Vehicle seat available with ISOFIX attachments. When attaching using ISOFIX, only the ISOFIX child restraint systems permitted for the vehicle may be used.
1) We recommend the use of each system until the child reaches the upper weight limit.
Page 69 of 228
Storage
69
Load compartment
Stowage in the load
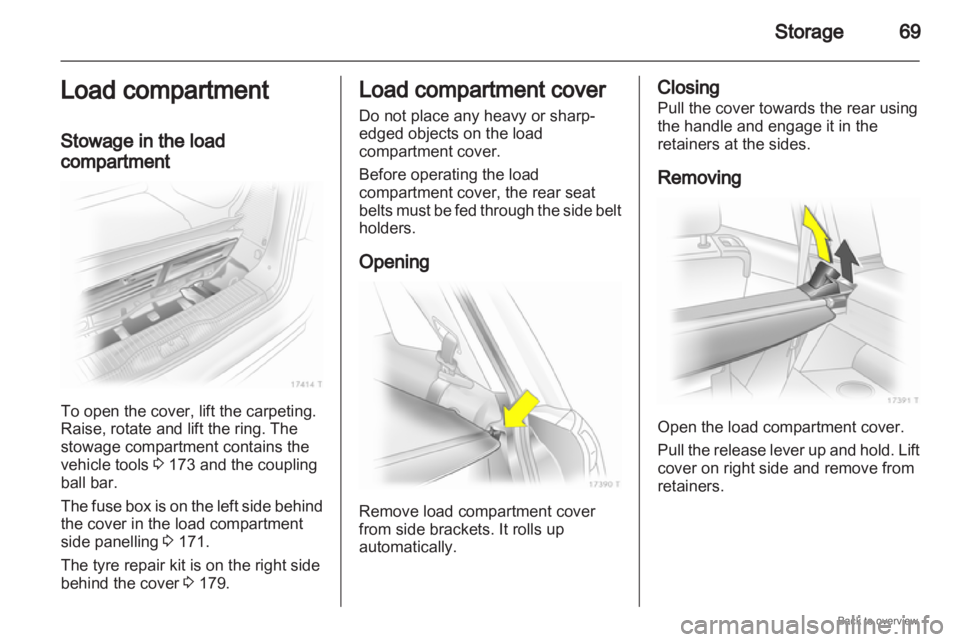
compartment To open the cover, lift the carpeting.
Raise, rotate and lift the ring. The
stowage compartment contains the
vehicle tools
3 173 and the coupling
ball bar.
The
fuse box is on the left side behind
the cover in the load compartment
side panelling 3 171.
The tyre repair kit is on the right side
behind the cover 3 179. Load compartment cover
Do not place any heavy or sharp-
edged objects on the load
compartment cover.
Before operating the load
compartment cover, the rear seat
belts
must be fed through the side belt
holders.
Opening Remove load compartment cover
from side brackets. It rolls up
automatically. Closing
Pull the cover towards the rear using
the handle and engage it in the
retainers at the sides.
Removing
Open the load compartment cover.
Pull
the release lever up and hold. Lift
cover on right side and remove from
retainers.
Page 70 of 228
70
Storage
Installation
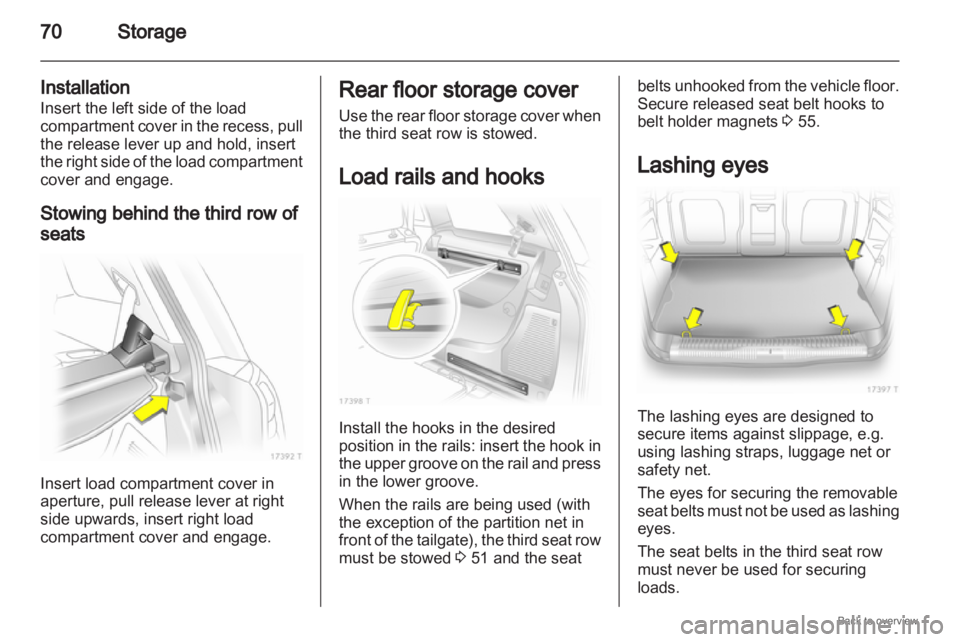
Insert the left side of the load
compartment cover in the recess, pull
the release lever up and hold, insert
the right side of the load compartment
cover and engage.
Stowing behind the third row of
seats Insert load compartment cover in
aperture, pull release lever at right
side upwards, insert right load
compartment cover and engage. Rear floor storage cover
Use
the rear floor storage cover when
the third seat row is stowed.
Load rails and hooks Install the hooks in the desired
position
in the rails: insert the hook in
the upper groove on the rail and press
in the lower groove.
When the rails are being used (with
the exception of the partition net in
front of the tailgate), the third seat row
must be stowed 3 51 and the seat belts unhooked from the vehicle floor.
Secure released seat belt hooks to
belt holder magnets
3 55.
Lashing eyes The lashing eyes are designed to
secure items against slippage, e.g.
using lashing straps, luggage net or
safety net.
The eyes for securing the removable
seat
belts must not be used as lashing
eyes.
The seat belts in the third seat row
must never be used for securing
loads.
Page 73 of 228
Storage
73
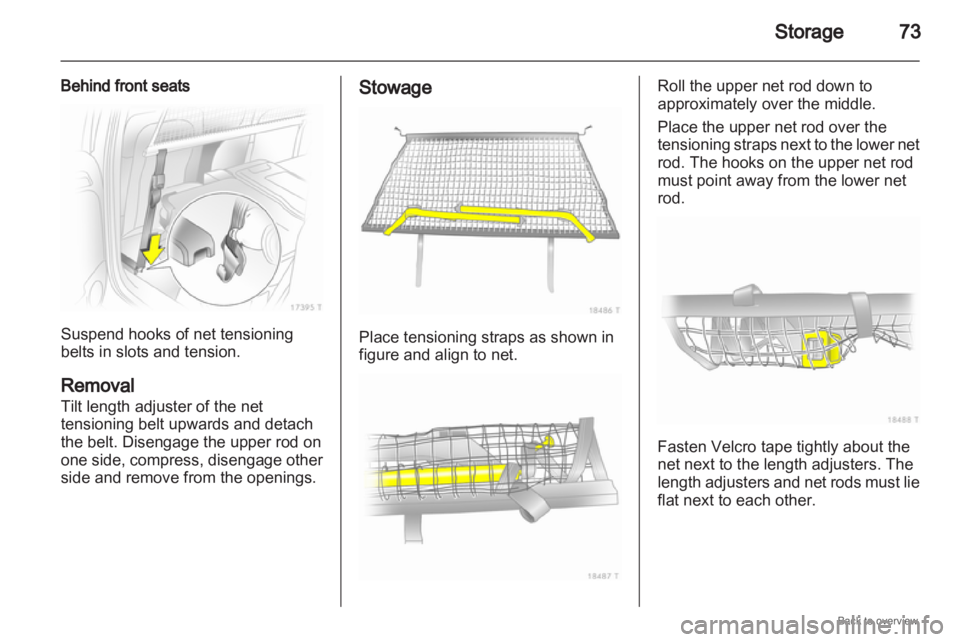
Behind front seats Suspend hooks of net tensioning
belts in slots and tension.
Removal
Tilt length adjuster of the net
tensioning belt upwards and detach
the belt. Disengage the upper rod on
one
side, compress, disengage other
side and remove from the openings. Stowage
Place tensioning straps as shown in
figure and align to net. Roll the upper net rod down to
approximately over the middle.
Place the upper net rod over the
tensioning
straps next to the lower net
rod. The hooks on the upper net rod
must point away from the lower net
rod. Fasten Velcro tape tightly about the
net next to the length adjusters. The
length
adjusters and net rods must lie
flat next to each other.
Page 74 of 228
74
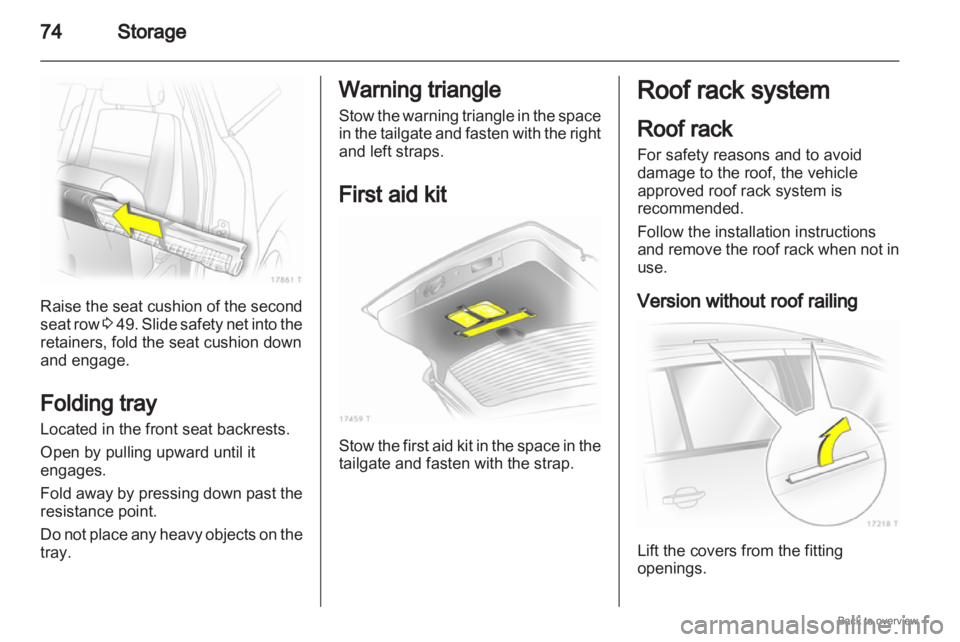
StorageRaise the seat cushion of the second
seat
row 3 49. Slide safety net into the
retainers, fold the seat cushion down
and engage.
Folding tray
Located in the front seat backrests.
Open by pulling upward until it
engages.
Fold away by pressing down past the
resistance point.
Do not place any heavy objects on the
tray. Warning triangle
Stow
the warning triangle in the space
in the tailgate and fasten with the right
and left straps.
First aid kit Stow the first aid kit in the space in the
tailgate and fasten with the strap. Roof rack system
Roof rack
For safety reasons and to avoid
damage to the roof, the vehicle
approved roof rack system is
recommended.
Follow the installation instructions
and
remove the roof rack when not in
use.
Version without roof railing Lift the covers from the fitting
openings.
Page 85 of 228
Instruments and controls
85
If the natural gas tanks are not
refuelled, the system must be
manually switched to petrol operation
before the engine is started up again.
This will prevent damage to the
catalytic converter (overheating
caused by irregular fuel supply).
If the selector switch is operated
several times within a short time
a switchover block is activated. The
engine remains in the current
operating mode. The block remains
active until the ignition is switched off.
A slight loss of power and torque can
be expected in petrol operation. You
must therefore adapt your driving
style (e.g. during overtaking
manoeuvres) and vehicle loads (e.g.
towing loads) accordingly.
Every six months run the petrol tank
down until control indicator Y
illuminates and refuel. This is
necessary to maintain fuel quality as
well as system function necessary for
petrol operation.
Fill the tank completely at regular
intervals to prevent corrosion in the
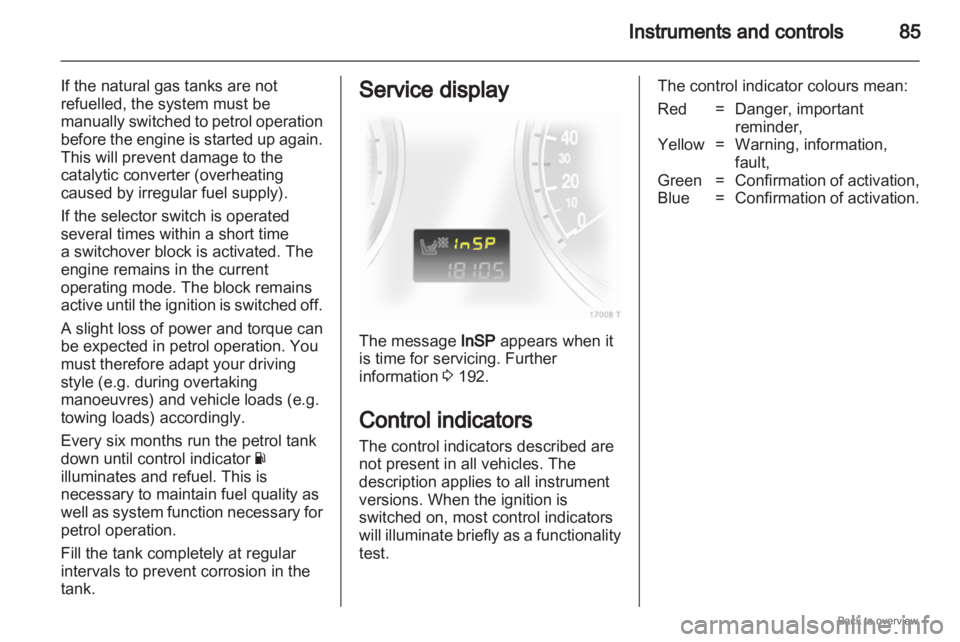
tank. Service display
The message InSP appears when it
is time for servicing. Further
information
3 192.
Control indicators
The control indicators described are
not present in all vehicles. The
description applies to all instrument
versions. When the ignition is
switched on, most control indicators
will
illuminate briefly as a functionality
test. The control indicator colours mean:
Red = Danger, important
reminder,
Yellow = Warning, information, fault,
Green = Confirmation of activation,
Blue = Confirmation of activation.