PEUGEOT 106 2001 Service Manual
Manufacturer: PEUGEOT, Model Year: 2001, Model line: 106, Model: PEUGEOT 106 2001Pages: 107, PDF Size: 2.92 MB
Page 41 of 107
YOUR 106 IN DETAIL43
EON system
This connects stations which are part of the same network. It enables broadcasting of traffic information or a PTY programme from a station which is part of the same network as the station to which you are listening.
This service is available when you have selected the TA traffic information programme or the PTY function.
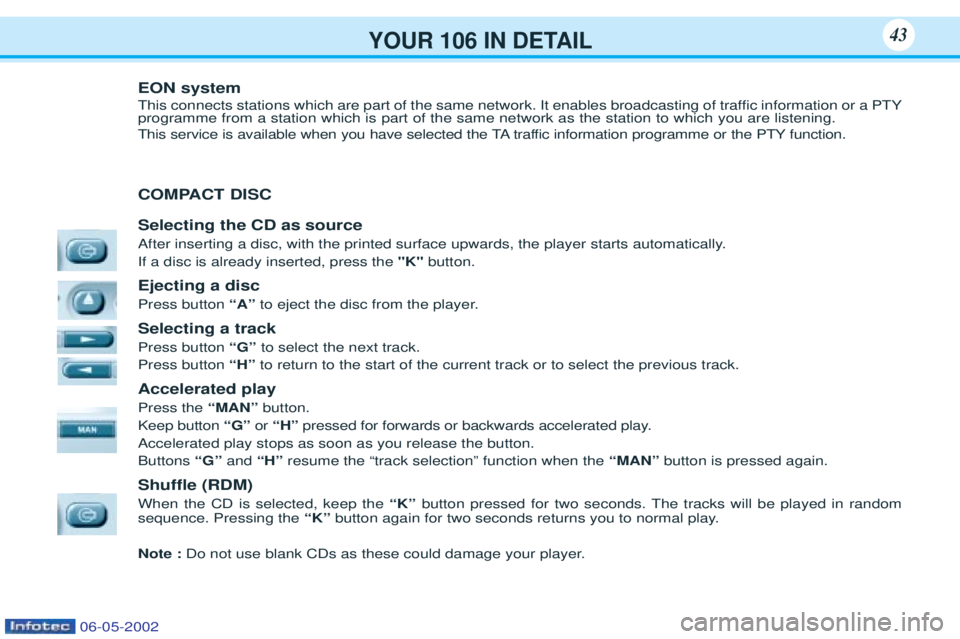
COMPACT DISC Selecting the CD as source
After inserting a disc, with the printed surface upwards, the player starts automatically. If a disc is already inserted, press the"K"button.
Ejecting a disc Press button “A”to eject the disc from the player.
Selecting a trackPress button “G” to select the next track.
Press button “H”to return to the start of the current track or to select the previous track.
Accelerated playPress the “MAN”button.
Keep button “G” or “H” pressed for forwards or backwards accelerated play.
Accelerated play stops as soon as you release the button. Buttons “G”and“H” resume the Òtrack selectionÓ function when the “MAN”button is pressed again.
Shuffle (RDM) When the CD is selected, keep the “K”button pressed for two seconds. The tracks will be played in random
sequence. Pressing the “K”button again for two seconds returns you to normal play.
Note : Do not use blank CDs as these could damage your player.
06-05-2002
Page 42 of 107
YOUR 106 IN DETAIL43
EON system
This connects stations which are part of the same network. It enables broadcasting of traffic information or a PTY programme from a station which is part of the same network as the station to which you are listening.
This service is available when you have selected the TA traffic information programme or the PTY function.
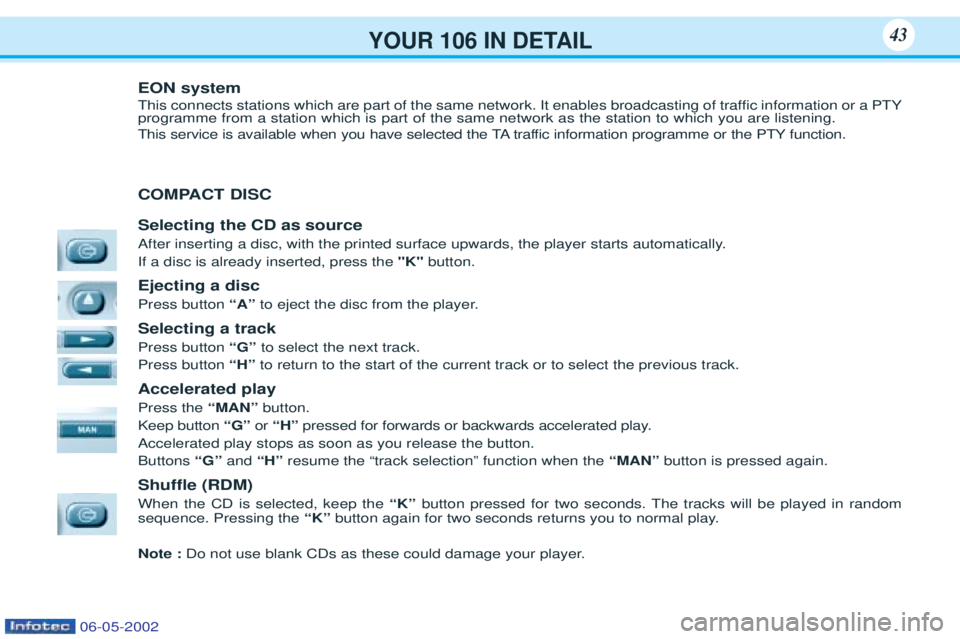
COMPACT DISC Selecting the CD as source
After inserting a disc, with the printed surface upwards, the player starts automatically. If a disc is already inserted, press the"K"button.
Ejecting a disc Press button “A”to eject the disc from the player.
Selecting a trackPress button “G” to select the next track.
Press button “H”to return to the start of the current track or to select the previous track.
Accelerated playPress the “MAN”button.
Keep button “G” or “H” pressed for forwards or backwards accelerated play.
Accelerated play stops as soon as you release the button. Buttons “G”and“H” resume the Òtrack selectionÓ function when the “MAN”button is pressed again.
Shuffle (RDM) When the CD is selected, keep the “K”button pressed for two seconds. The tracks will be played in random
sequence. Pressing the “K”button again for two seconds returns you to normal play.
Note : Do not use blank CDs as these could damage your player.
06-05-2002
Page 43 of 107
YOUR 106 IN DETAIL44
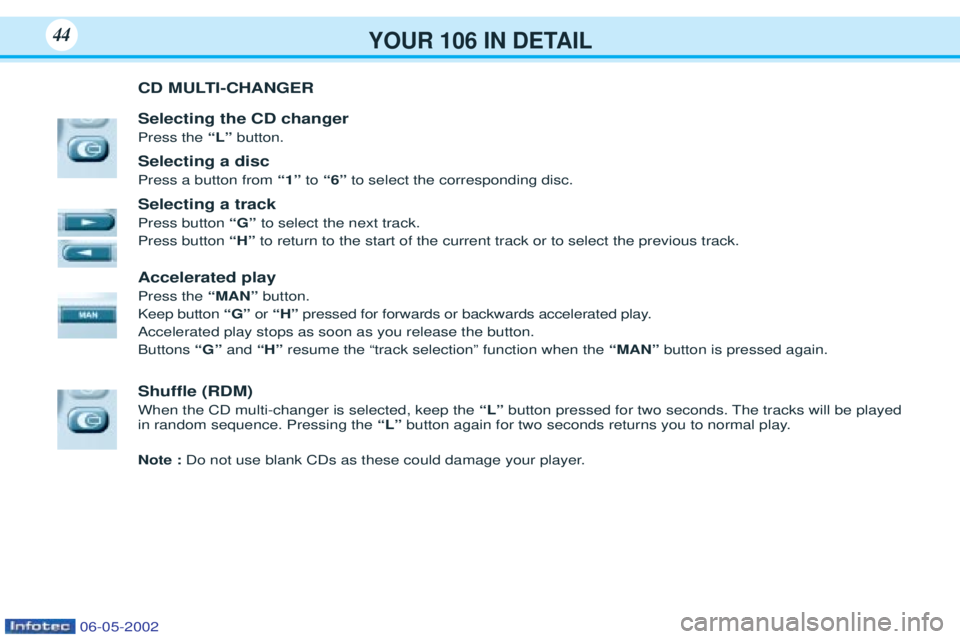
CD MULTI-CHANGER Selecting the CD changer Press the “L” button.
Selecting a discPress a button from “1”to“6” to select the corresponding disc.
Selecting a trackPress button “G”to select the next track.
Press button “H”to return to the start of the current track or to select the previous track.
Accelerated playPress the “MAN”button.
Keep button “G”or “H” pressed for forwards or backwards accelerated play.
Accelerated play stops as soon as you release the button. Buttons “G”and“H” resume the Òtrack selectionÓ function when the “MAN”button is pressed again.
Shuffle (RDM) When the CD multi-changer is selected, keep the “L” button pressed for two seconds. The tracks will be played
in random sequence. Pressing the “L” button again for two seconds returns you to normal play.
Note : Do not use blank CDs as these could damage your player.
06-05-2002
Page 44 of 107
YOUR 106 IN DETAIL45
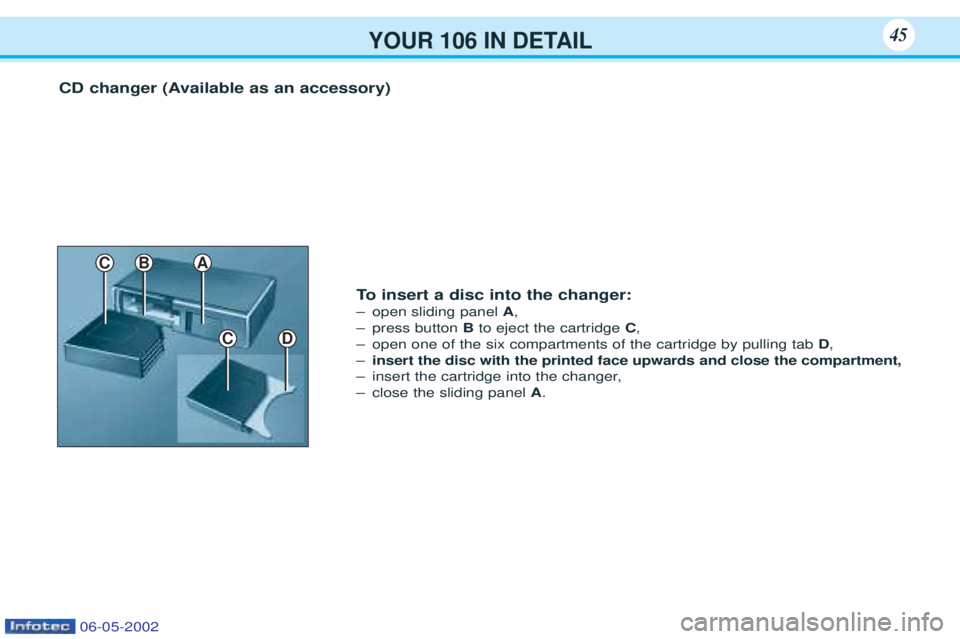
CD changer (Available as an accessory)
CD
C
To insert a disc into the changer:
Ð open sliding panel A,
Ð press button Bto eject the cartridge C,
Ð open one of the six compartments of the cartridge by pulling tab D,
Ð insert the disc with the printed face upwards and close the compartment,
Ð insert the cartridge into the changer,
Ð close the sliding panel A.
BA
06-05-2002
Page 45 of 107
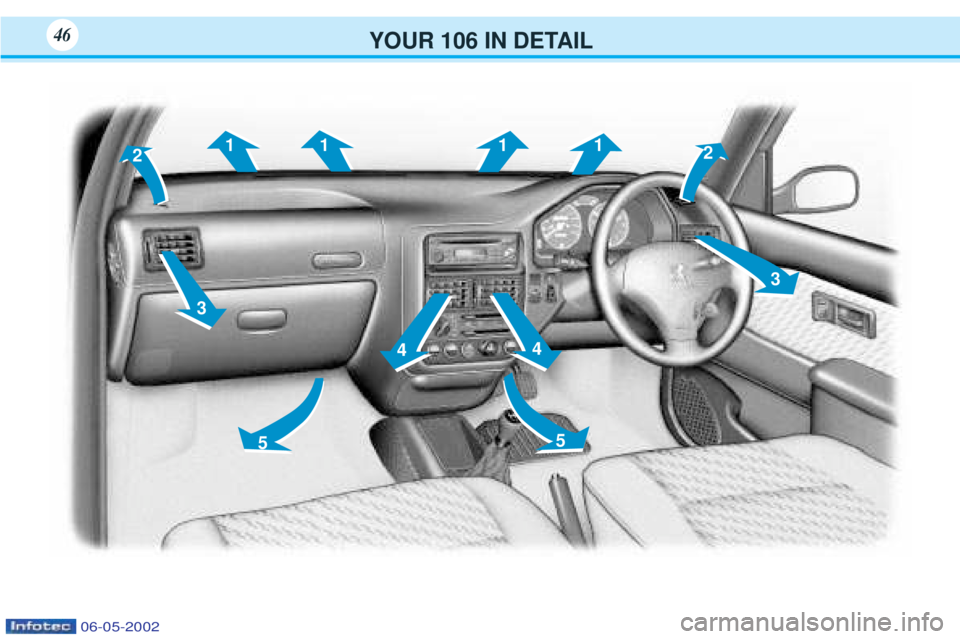
YOUR 106 IN DETAIL46
21
3 4
5 5
4
3
11
1
2
06-05-2002
Page 46 of 107
YOUR 106 IN DETAIL47
VENTILATION 1-Windscreen de-icing/demisting vents.
2- Front windows de-icing/demisting vents.
3- Side vents.
4- Centre vents.
5- Air outlet to front passengersÕ footwell
Recommendations for use - Adjust the airßow to ensure sufÞcient renewal of air in the passenger compartment.
- Select the air distribution setting that is best suited to your requirements and the climatic conditions.
- Select a temperature setting and adjust it gradually to obtain maximum comfort.
06-05-2002
Page 47 of 107
YOUR 106 IN DETAIL48
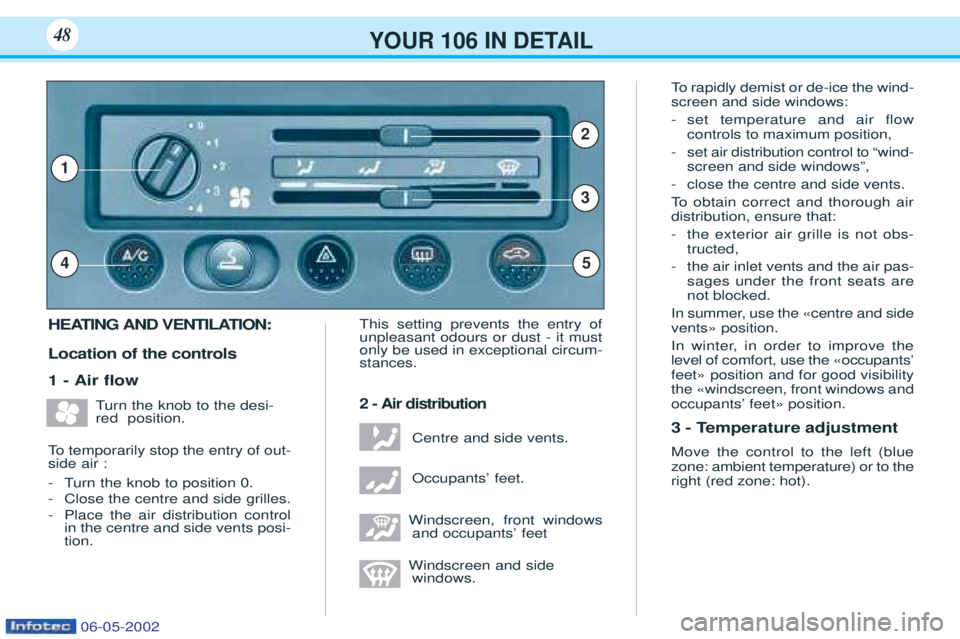
HEATING AND VENTILATION: Location of the controls 1 - Air flow
T urn the knob to the desi-
red position.
To temporarily stop the entry of out-
side air : -T urn the knob to position 0.
- Close the centre and side grilles.
- Place the air distribution control in the centre and side vents posi-tion. This setting prevents the entry ofunpleasant odours or dust - it mustonly be used in exceptional circum-stances.
2 - Air distribution
Centre and side vents. OccupantsÕ feet.
Windscreen, front windows and occupantsÕ feet
Windscreen and side windows. To
rapidly demist or de-ice the wind-
screen and side windows: - set temperature and air flow controls to maximum position,
- set air distribution control to Òwind-screen and side windowsÓ,
- close the centre and side vents.
To obtain correct and thorough air
distribution, ensure that: - the exterior air grille is not obs- tructed,
- the air inlet vents and the air pas-sages under the front seats arenot blocked.
In summer, use the Çcentre and sideventsÈ position.
In winter, in order to improve the level of comfort, use the ÇoccupantsÕfeetÈ position and for good visibilitythe Çwindscreen, front windows andoccupantsÕ feetÈ position.
3 - Temperature adjustment Move the control to the left (blue zone: ambient temperature) or to theright (red zone: hot).
54
1
3
2
06-05-2002
Page 48 of 107
YOUR 106 IN DETAIL
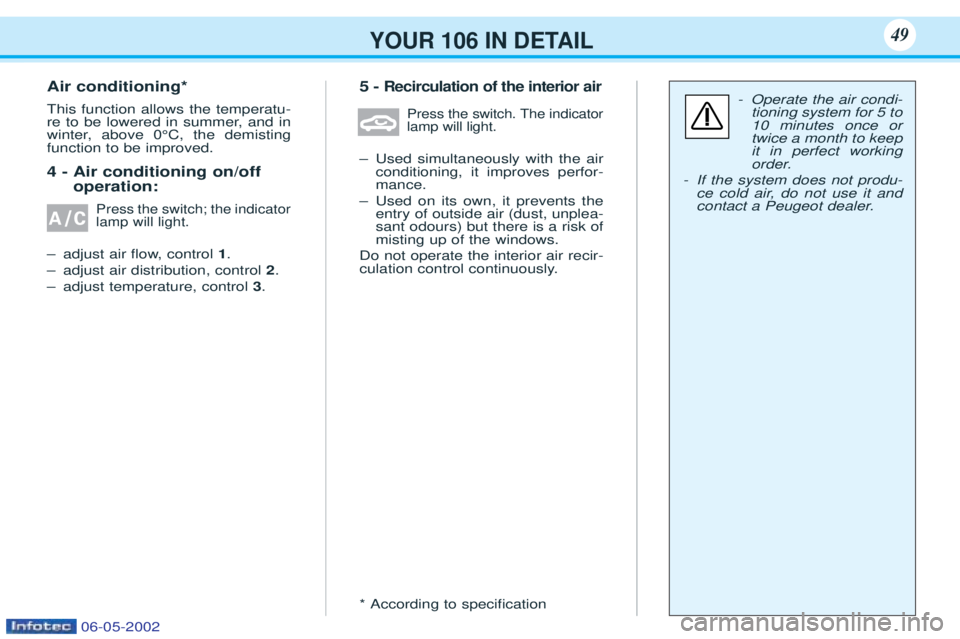
Air conditioning* This function allows the temperatu-
re to be lowered in summer, and in
winter, above 0¡C, the demistingfunction to be improved. 4 - Air conditioning on/offoperation:
Press the switch; the indicator lamp will light.
Ðadjust air ßow, control 1.
Ð adjust air distribution, control 2.
Ð adjust temperature, control 3. 5 -
Recirculation of the interior air
Press the switch. The indicatorlamp will light.
Ð
Used simultaneously with the airconditioning, it improves perfor-mance.
Ð Used on its own, it prevents theentry of outside air (dust, unplea-sant odours) but there is a risk ofmisting up of the windows.
Do not operate the interior air recir-
culation control continuously. * According to speciÞcation
49
- Operate the air condi-
tioning system for 5 to 10 minutes once ortwice a month to keepit in perfect working
order.
- If the system does not produ-
ce cold air, do not use it and
contact a Peugeot dealer.
06-05-2002
Page 49 of 107
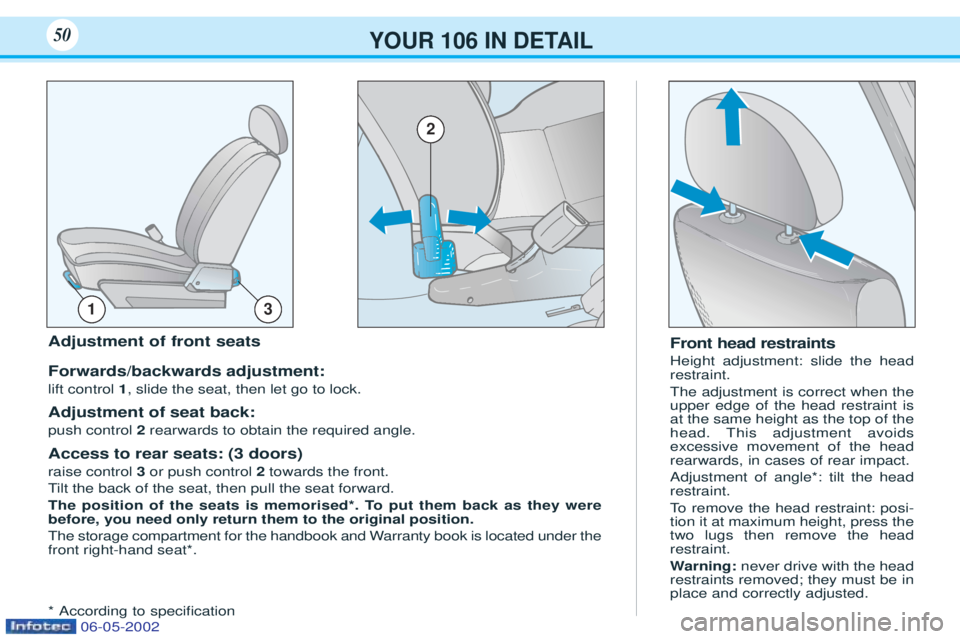
YOUR 106 IN DETAIL50
Front head restraints Height adjustment: slide the head restraint. The adjustment is correct when the upper edge of the head restraint isat the same height as the top of thehead. This adjustment avoidsexcessive movement of the headrearwards, in cases of rear impact. Adjustment of angle*: tilt the head restraint.
To remove the head restraint: posi-
tion it at maximum height, press the two lugs then remove the headrestraint. W arning: never drive with the head
restraints removed; they must be in place and correctly adjusted.Adjustment of front seats Forwards/backwards adjustment: lift control 1, slide the seat, then let go to lock.
Adjustment of seat back:push control 2rearwards to obtain the required angle.
Access to rear seats: (3 doors)raise control 3or push control 2towards the front.
T ilt the back of the seat, then pull the seat forward.
The position of the seats is memorised*. To put them back as they were before, you need only return them to the original position.
The storage compartment for the handbook and Warranty book is located under the front right-hand seat*. * According to speciÞcation
13
2
06-05-2002
Page 50 of 107
YOUR 106 IN DETAIL51
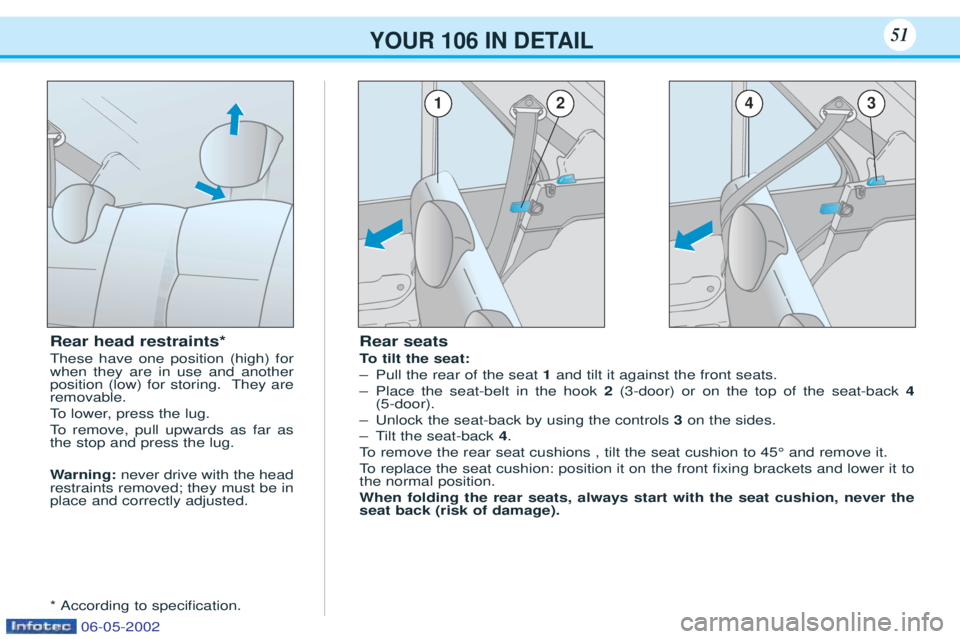
Rear seats
To tilt the seat:
Ð Pull the rear of the seat 1and tilt it against the front seats.
Ð Place the seat-belt in the hook 2(3-door) or on the top of the seat-back 4
(5-door).
Ð Unlock the seat-back by using the controls 3on the sides.
ÐT ilt the seat-back 4.
To remove the rear seat cushions , tilt the seat cushion to 45¡ and remove it.
To replace the seat cushion: position it on the front Þxing brackets and lower it to
the normal position. When folding the rear seats, always start with the seat cushion, never the seat back (risk of damage).
2134
Rear head restraints* These have one position (high) for when they are in use and anotherposition (low) for storing. They areremovable.
To lower, press the lug.
To remove, pull upwards as far as
the stop and press the lug. W arning: never drive with the head
restraints removed; they must be in place and correctly adjusted. * According to speciÞcation.
06-05-2002