ESP PEUGEOT 108 2018 Owner's Manual
[x] Cancel search | Manufacturer: PEUGEOT, Model Year: 2018, Model line: 108, Model: PEUGEOT 108 2018Pages: 180, PDF Size: 7.14 MB
Page 102 of 180
100
Take care when working under the bonnet,
as certain areas of the engine may be
extremely hot (risk of burns) and the
cooling fan could start at any time (even
with the ignition off).
Used products
Avoid prolonged contact of used oil or
fluids with the skin.
Most of these fluids are harmful to health
or indeed very corrosive.Do not discard used oil or fluids into
sewers or onto the ground.
Take used oil to a
PEUGEOT dealer
or a
qualified workshop and dispose
of in the containers reser ved for this
purpose.
Engine oil level
The check is carried out either
using the oil level indicator on the
instrument panel when the ignition is
switched on, for vehicles equipped
with an electric gauge, or using the
dipstick. To ensure that the reading is correct, your
vehicle must be parked on a
level sur face
with the engine stopped for more than
30
minutes.
It is normal to top up the oil level between
two ser vices (or oil changes). PEUGEOT
recommends that you check the level, and top
up, if necessary, every 3,000 miles (5,000 km).
Checking using the dipstick
The location of the dipstick is shown in the
corresponding underbonnet layout view.
F
T
ake the dipstick by its coloured grip and
pull it out completely.
F
W
ipe the end of the dipstick using a clean
non-fluffy cloth.
F
R
efit the dipstick and push fully down, then
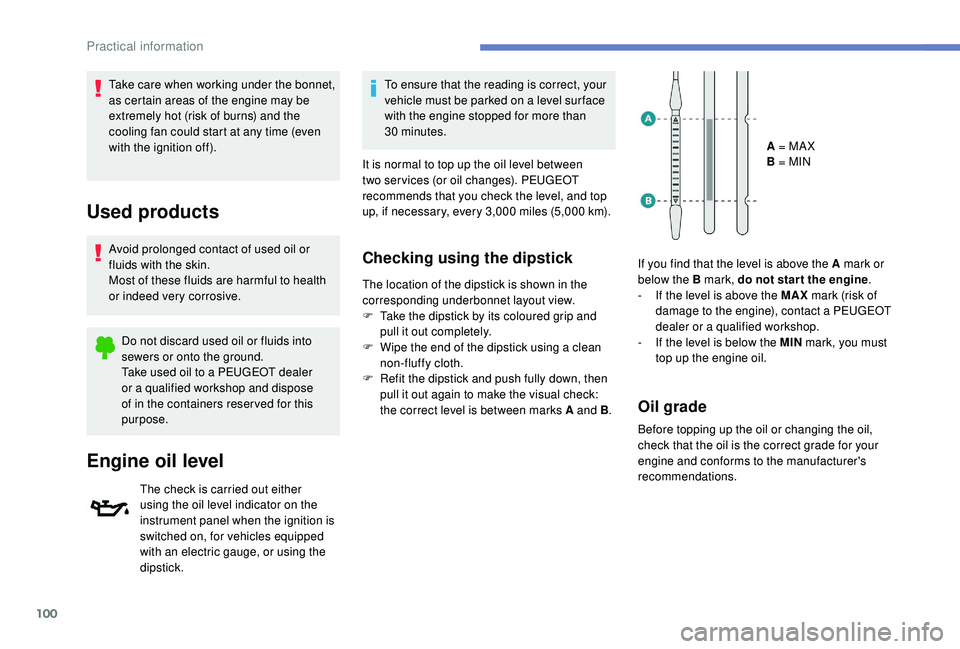
pull it out again to make the visual check:
the correct level is between marks A and B .A = MA X
B = MIN
If you find that the level is above the A mark or
below the B mark, do not star t the engine .
- I f the level is above the MAX mark (risk of
damage to the engine), contact a
PEUGEOT
dealer or a
qualified workshop.
-
I
f the level is below the MIN mark, you must
top up the engine oil.
Oil grade
Before topping up the oil or changing the oil,
check that the oil is the correct grade for your
engine and conforms to the manufacturer's
recommendations.
Practical information
Page 103 of 180
101
Topping up the engine oil level
The location of the oil filler cap is shown in the
corresponding underbonnet layout view.
F
U
nscrew the oil filler cap to access the filler
opening.
F
A
dd oil in small quantities, avoiding any
spills on engine components (risk of fire).
F
W
ait a few minutes before checking the
level again using the dipstick.
F
A
dd more oil if necessary.
F
A
fter checking the level, carefully refit the oil
filler cap and the dipstick in its tube.
Engine oil change
In order to maintain the reliability of the engine
and emissions control system, never use
additives in the engine oil.
Brake fluid level
The fluid level should be close to the
"MA X" mark. If it is not, check the
brake pad wear.
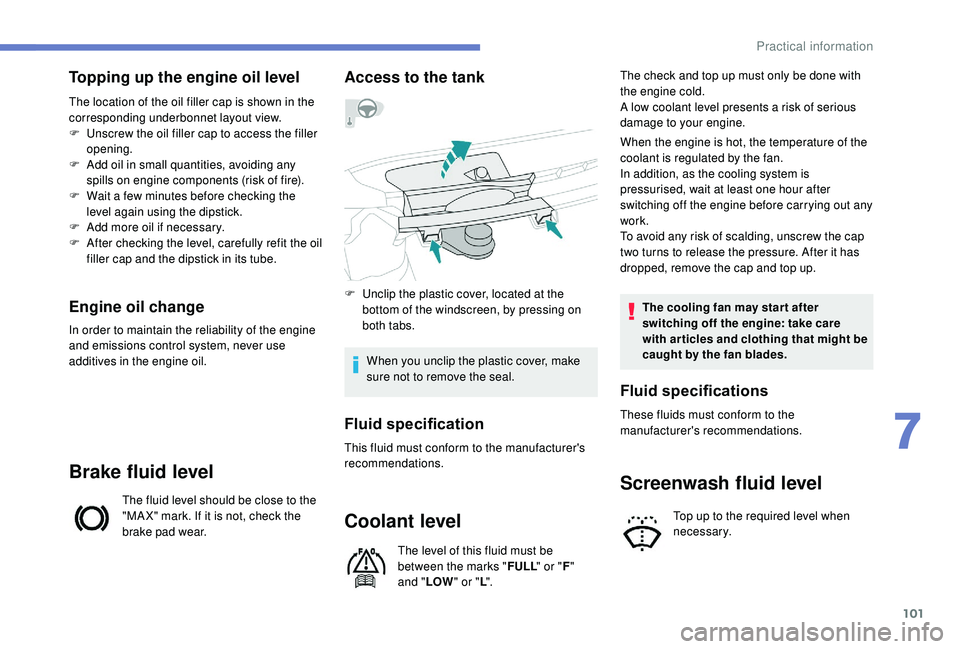
Access to the tank
F Unclip the plastic cover, located at the bottom of the windscreen, by pressing on
both tabs.
When you unclip the plastic cover, make
sure not to remove the seal.
Fluid specification
This fluid must conform to the manufacturer's
recommendations.
Coolant level
The level of this fluid must be
between the marks " FULL" or "F"
and " LOW " or "L". The check and top up must only be done with
the engine cold.
A low coolant level presents a
risk of serious
damage to your engine.
When the engine is hot, the temperature of the
coolant is regulated by the fan.
In addition, as the cooling system is
pressurised, wait at least one hour after
switching off the engine before carrying out any
work.
To avoid any risk of scalding, unscrew the cap
two turns to release the pressure. After it has
dropped, remove the cap and top up.
The cooling fan may star t after
switching off the engine: take care
with articles and clothing that might be
caught by the fan blades.
Screenwash fluid level
Top up to the required level when
necessary.
Fluid specifications
These fluids must conform to the
manufacturer's recommendations.
7
Practical information
Page 104 of 180
102
Checks
Unless otherwise indicated, check these
components in accordance with the
manufacturer's service schedule.
Other wise, have them checked by a PEUGEOT
dealer or a
qualified workshop.
12 V battery
The battery does not require any
maintenance.
However, check regularly that the
terminals are correctly tightened
(versions without quick release terminals)
and that the connections are clean.
For more information on the precautions
to take before starting work on the 12 V
battery , refer to the corresponding
section.
Air filter
Depending on the environment
(e.g. dusty atmosphere) and the
use of the vehicle (e.g. city driving),
replace it twice as often if
necessary .
Passenger compartment
filter
Depending on the environment
(e.g. dusty atmosphere) and the
use of the vehicle (e.g. city driving),
replace it twice as often if
necessary. A clogged passenger compartment
filter may have an adverse effect on
the per formance of the air conditioning
system and generate undesirable odours.
Oil filter
Change the oil filter each time the
engine oil is changed.
Manual gearbox
The gearbox does not require any
maintenance (no oil change).
Clutch
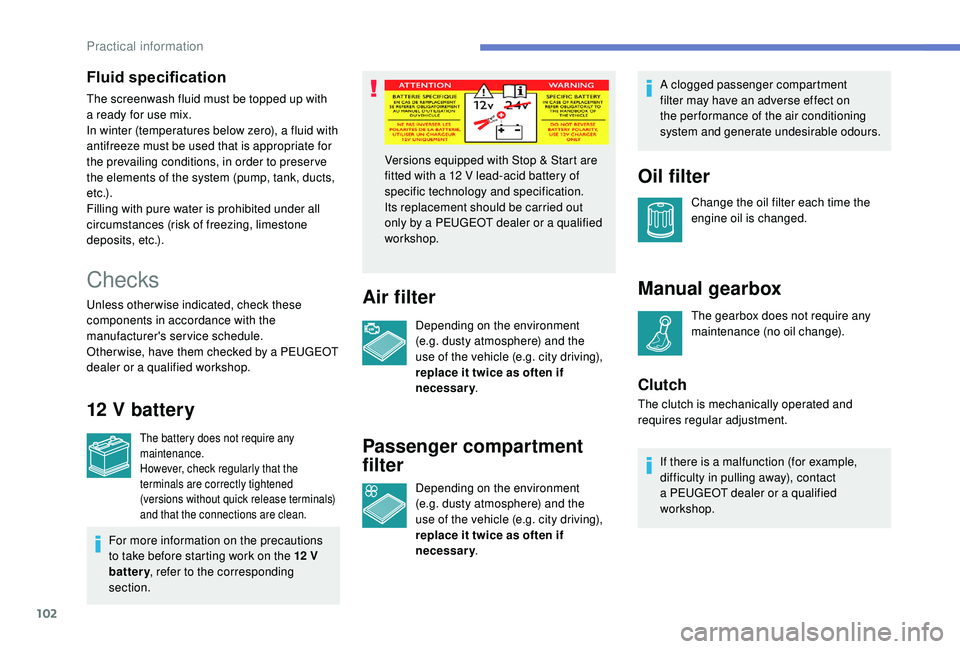
Versions equipped with Stop & Start are
fitted with a
12 V lead-acid battery of
specific technology and specification.
Its replacement should be carried out
only by a
PEUGEOT dealer or a qualified
workshop.
The clutch is mechanically operated and
requires regular adjustment.If there is a
malfunction (for example,
difficulty in pulling away), contact
a
PEUGEOT dealer or a qualified
workshop.
Fluid specification
The screenwash fluid must be topped up with
a ready for use mix.
In winter (temperatures below zero), a fluid with
antifreeze must be used that is appropriate for
the prevailing conditions, in order to preser ve
the elements of the system (pump, tank, ducts,
e t c .) .
Filling with pure water is prohibited under all
circumstances (risk of freezing, limestone
deposits, etc.).
Practical information
Page 109 of 180
107
If a pressure of 2 bars is not reached after
7 minutes, this indicates that the tyre is not
repairable; contact a
PEUGEOT dealer or
a
qualified workshop for assistance.
F
O
nce the correct pressure is reached, put
the switch to the " O" position.
F
R
emove the kit then stow it. Do not drive more than 120
mph
(200 km/h) with the repaired tyre; see
a PEUGEOT dealer or a qualified
workshop to change the tyre.
Tyre under-inflation detection After a tyre repair, the warning
lamp will remain on until the
system is reset.
For more information on Tyre under-
inflation detection , refer to the
corresponding section.
Should the pressure of one or more tyres
be adjusted, it is necessary to reinitialise
the under-inflation detection system.
For more information on Tyre under-
inflation detection , refer to the
corresponding section.
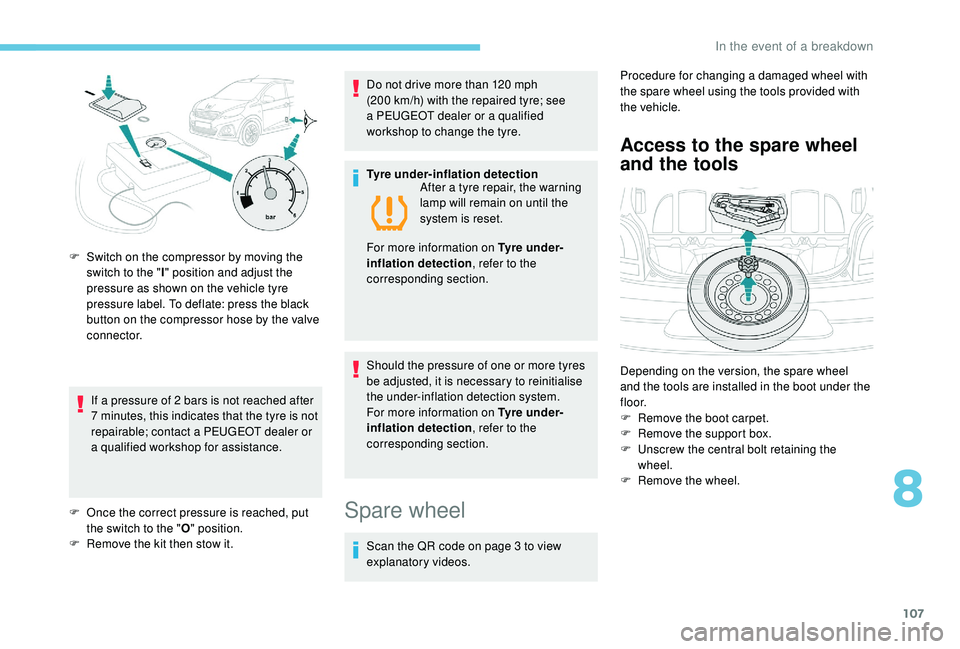
F
S
witch on the compressor by moving the
switch to the " I" position and adjust the
pressure as shown on the vehicle tyre
pressure label. To deflate: press the black
button on the compressor hose by the valve
connector.
Spare wheel
Scan the QR code on page 3 to view
e xplanatory videos. Procedure for changing a
damaged wheel with
the spare wheel using the tools provided with
the vehicle.
Access to the spare wheel
and the tools
Depending on the version, the spare wheel
and the tools are installed in the boot under the
f l o o r.
F
R
emove the boot carpet.
F
R
emove the support box.
F
U
nscrew the central bolt retaining the
wheel.
F
R
emove the wheel.
8
In the event of a breakdown
Page 110 of 180
108
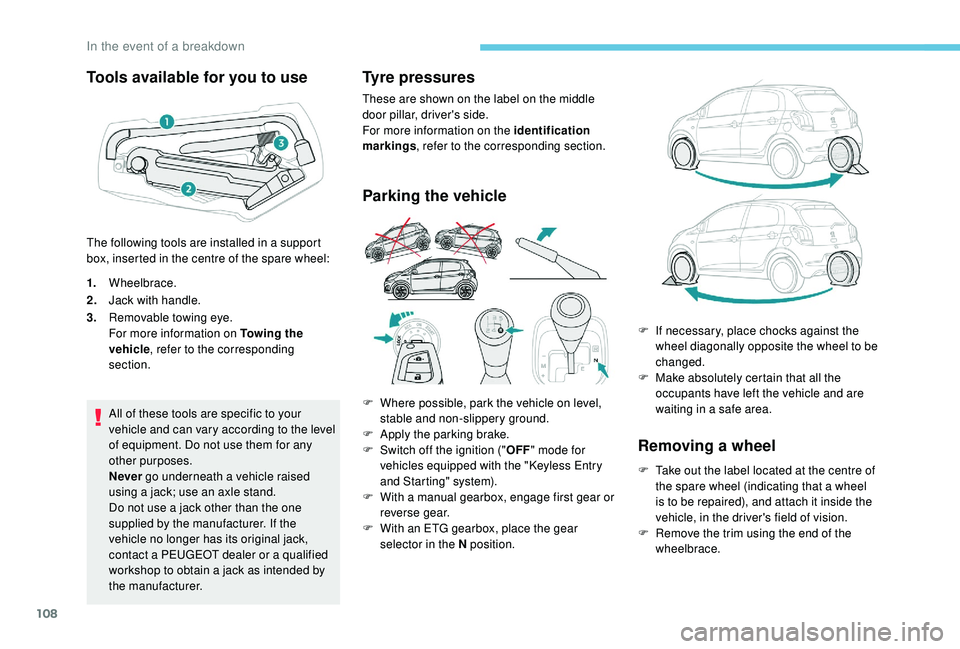
Tools available for you to use
1.Wheelbrace.
2. Jack with handle.
3. Removable towing eye.
For more information on Towing the
vehicle , refer to the corresponding
section.
All of these tools are specific to your
vehicle and can vary according to the level
of equipment. Do not use them for any
other purposes.
Never go underneath a
vehicle raised
using a
jack; use an axle stand.
Do not use a
jack other than the one
supplied by the manufacturer. If the
vehicle no longer has its original jack,
contact a
PEUGEOT dealer or a qualified
workshop to obtain a
jack as intended by
the manufacturer.
Tyre pressures
These are shown on the label on the middle
door pillar, driver's side.
For more information on the identification
markings , refer to the corresponding section.
Parking the vehicle
Removing a wheel
F Take out the label located at the centre of the spare wheel (indicating that a wheel
is to be repaired), and attach it inside the
vehicle, in the driver's field of vision.
F
R
emove the trim using the end of the
wheelbrace.
The following tools are installed in a
support
box, inserted in the centre of the spare wheel:
F
W
here possible, park the vehicle on level,
stable and non-slippery ground.
F
A
pply the parking brake.
F
S
witch off the ignition ("
OFF" mode for
vehicles equipped with the " K
eyless Entry
and Starting" system).
F
W
ith a
manual gearbox, engage first gear or
reverse gear.
F
W
ith an ETG gearbox, place the gear
selector in the N position. F
I
f necessary, place chocks against the
wheel diagonally opposite the wheel to be
changed.
F
M
ake absolutely certain that all the
occupants have left the vehicle and are
waiting in a safe area.
In the event of a breakdown
Page 117 of 180
115
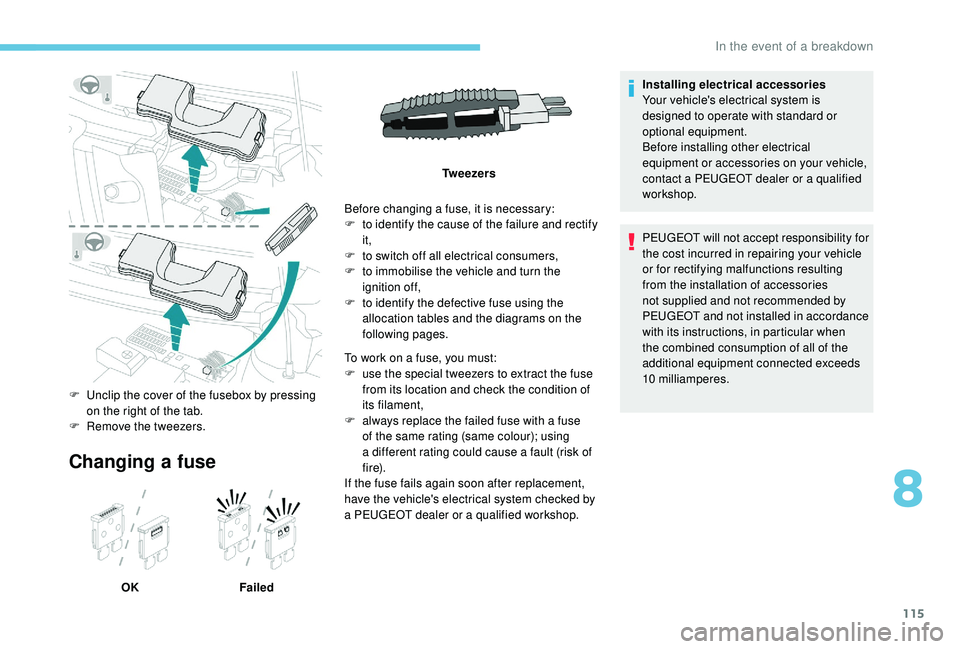
Changing a fuse
OK FailedBefore changing a
fuse, it is necessary:
F
t
o identify the cause of the failure and rectify
it,
F
t
o switch off all electrical consumers,
F
t
o immobilise the vehicle and turn the
ignition off,
F
t
o identify the defective fuse using the
allocation tables and the diagrams on the
following pages.
F
U
nclip the cover of the fusebox by pressing
on the right of the tab.
F
R
emove the tweezers. Tw e e z e r s
To work on a fuse, you must:
F
u
se the special tweezers to extract the fuse
from its location and check the condition of
its filament,
F
a
lways replace the failed fuse with a fuse
of the same rating (same colour); using
a different rating could cause a fault (risk of
f i r e).
If the fuse fails again soon after replacement,
have the vehicle's electrical system checked by
a PEUGEOT dealer or a qualified workshop.Installing electrical accessories
Your vehicle's electrical system is
designed to operate with standard or
optional equipment.
Before installing other electrical
equipment or accessories on your vehicle,
contact a
PEUGEOT dealer or a qualified
workshop.
PEUGEOT will not accept responsibility for
the cost incurred in repairing your vehicle
or for rectifying malfunctions resulting
from the installation of accessories
not supplied and not recommended by
PEUGEOT and not installed in accordance
with its instructions, in particular when
the combined consumption of all of the
additional equipment connected exceeds
10
milliamperes.
8
In the event of a breakdown
Page 127 of 180
125
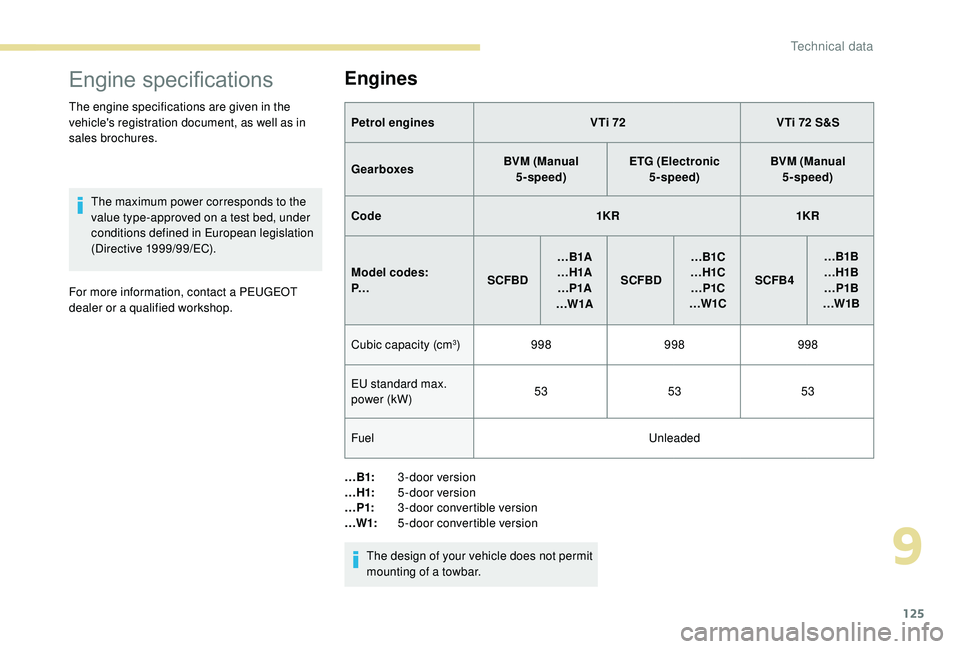
Engine specifications
The engine specifications are given in the
vehicle's registration document, as well as in
sales brochures.The maximum power corresponds to the
value type-approved on a
test bed, under
conditions defined in European legislation
(Directive 1999/99/EC).
For more information, contact a
PEUGEOT
dealer or a
qualified workshop.
Engines
Petrol engines VTi 72VTi 72 S&S
Gearboxes BVM (Manual
5-speed) ETG (Electronic
5-speed) BVM (Manual
5-speed)
Code 1KR1KR
Model codes:
P… SCFBD…B1A
…H1A …P1A
…W1A SCFBD …B1C
…H1C …P1C
…W1C SCFB4 …B1B
…H1B …P1B
…W1B
Cubic capacity (cm
3) 998 998998
EU standard max.
power (kW) 53
5353
Fuel Unleaded
…B1: 3-door version
…H1: 5-door version
…P1: 3-door convertible version
…W1: 5-door convertible version
The design of your vehicle does not permit
mounting of a
towbar.
9
Technical data
Page 132 of 180
2
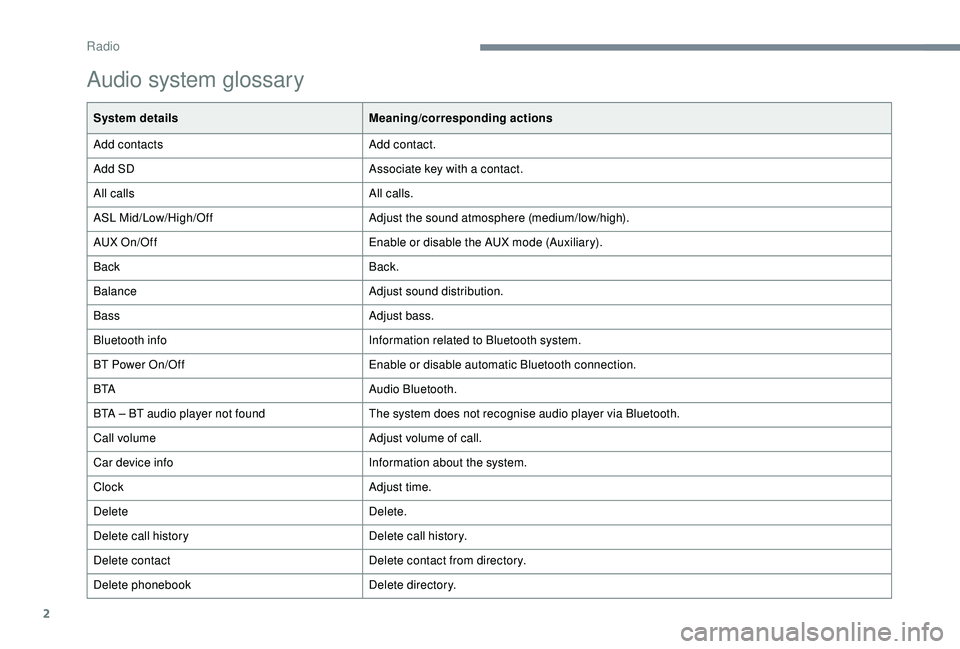
Audio system glossary
System detailsMeaning/corresponding actions
Add contacts Add contact.
Add SD Associate key with a
contact.
All calls All calls.
ASL Mid/Low/High/Off Adjust the sound atmosphere (medium/low/high).
AUX On/Off Enable or disable the AUX mode (Auxiliary).
Back Back.
Balance Adjust sound distribution.
Bass Adjust bass.
Bluetooth info Information related to Bluetooth system.
BT Power On/Off Enable or disable automatic Bluetooth connection.
B TA Audio Bluetooth.
BTA – BT audio player not found The system does not recognise audio player via Bluetooth.
Call volume Adjust volume of call.
Car device info Information about the system.
Clock Adjust time.
Delete Delete.
Delete call history Delete call history.
Delete contact Delete contact from directory.
Delete phonebook Delete directory.
Radio
Page 138 of 180
8
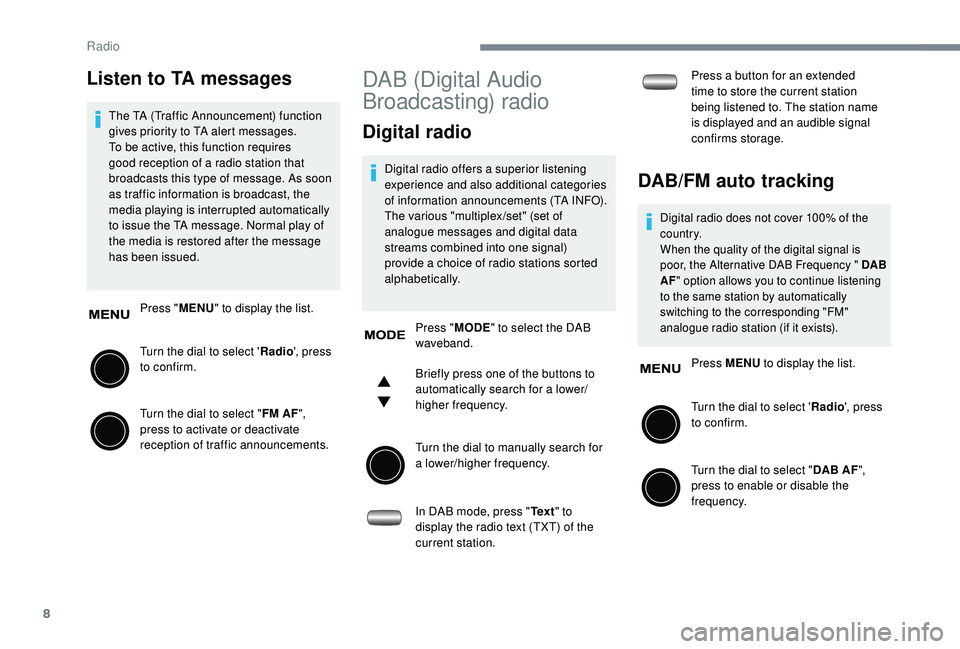
Listen to TA messages
The TA (Traffic Announcement) function
gives priority to TA alert messages.
To be active, this function requires
good reception of a radio station that
broadcasts this type of message. As soon
as traffic information is broadcast, the
media playing is interrupted automatically
to issue the TA message. Normal play of
the media is restored after the message
has been issued.
Press " MENU" to display the list.
Turn the dial to select ' Radio', press
to confirm.
Turn the dial to select " FM AF",
press to activate or deactivate
reception of traffic announcements.
DAB (Digital Audio
Broadcasting) radio
Digital radio
Digital radio offers a superior listening
e xperience and also additional categories
of information announcements (TA INFO).
The various "multiplex /set" (set of
analogue messages and digital data
streams combined into one signal)
provide a
choice of radio stations sorted
alphabetically.
Press " MODE" to select the DAB
waveband.
Briefly press one of the buttons to
automatically search for a
lower/
higher frequency.
Turn the dial to manually search for
a
lower/higher frequency.
In DAB mode, press " Te x t" to
display the radio text (TXT) of the
current station. Press a
button for an extended
time to store the current station
being listened to. The station name
is displayed and an audible signal
confirms storage.DAB/FM auto tracking
Digital radio does not cover 100% of the
c o u nt r y.
When the quality of the digital signal is
poor, the Alternative DAB Frequency " DAB
AF " option allows you to continue listening
to the same station by automatically
switching to the corresponding "FM"
analogue radio station (if it exists).
Press MENU to display the list.
Turn the dial to select ' Radio', press
to confirm.
Turn the dial to select " DAB AF",
press to enable or disable the
frequency.
Radio
Page 144 of 180
14
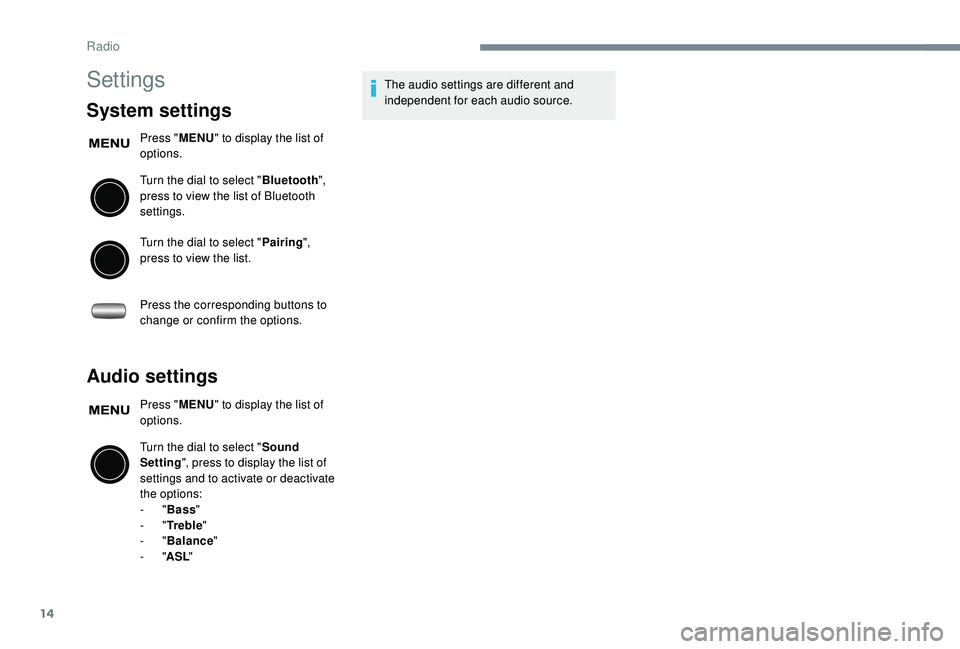
Settings
System settings
Press "MENU" to display the list of
options.
Turn the dial to select " Bluetooth",
press to view the list of Bluetooth
settings.
Turn the dial to select " Pairing",
press to view the list.
Press the corresponding buttons to
change or confirm the options.
Audio settings
Press " MENU" to display the list of
options.
Turn the dial to select " Sound
Setting ", press to display the list of
settings and to activate or deactivate
the options:
-
"Bass "
-
"Tr e b l e "
-
"Balance "
-
"ASL " The audio settings are different and
independent for each audio source.
Radio