PEUGEOT 2008 2015 Owner's Guide
Manufacturer: PEUGEOT, Model Year: 2015, Model line: 2008, Model: PEUGEOT 2008 2015Pages: 340, PDF Size: 8.4 MB
Page 31 of 340
29
2008_en_Chap01_controle-de-marche_ed01-2015
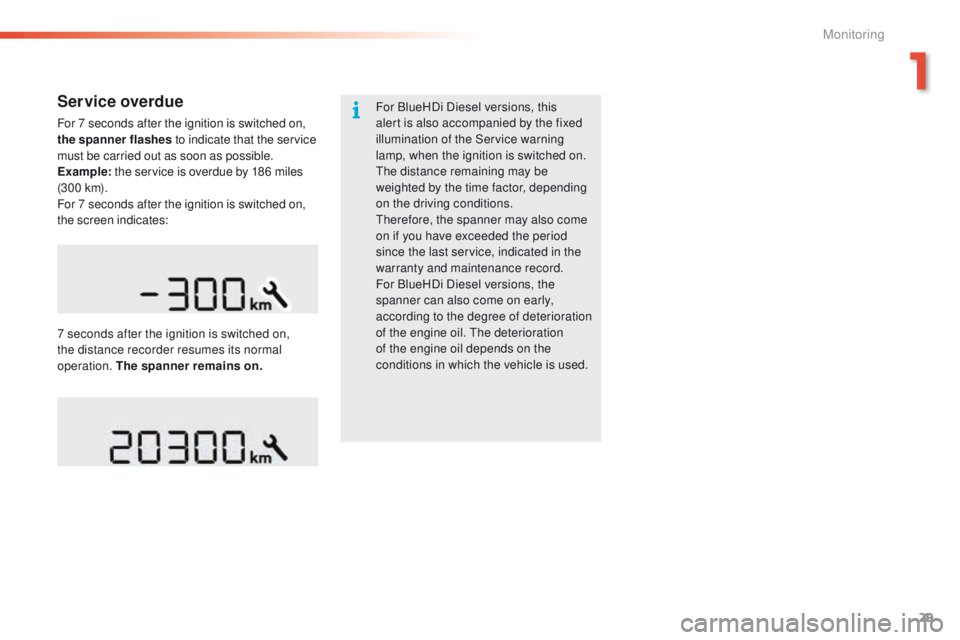
Service overdue
For 7 seconds after the ignition is switched on,
the spanner flashes to indicate that the service
must be carried out as soon as possible.
Example: the service is overdue by 186 miles
(3 0 0 k m).
For 7 seconds after the ignition is switched on,
the screen indicates: For BlueHDi Diesel versions, this
alert is also accompanied by the fixed
illumination of the Service warning
lamp, when the ignition is switched on.
The distance remaining may be
weighted by the time factor, depending
on the driving conditions.
Therefore, the spanner may also come
on if you have exceeded the period
since the last service, indicated in the
warranty and maintenance record.
For BlueHDi Diesel versions, the
spanner can also come on early,
according to the degree of deterioration
of the engine oil. The deterioration
of the engine oil depends on the
conditions in which the vehicle is used.
7 seconds after the ignition is switched on,
the distance recorder resumes its normal
operation. The spanner remains on.
1
Monitoring
Page 32 of 340
30
Retrieving the service
information
You can access the service information at any
time.
F
P
ress the trip distance recorder zero reset
button.
T
he service information is displayed for a
few seconds, then disappears.
If you have to disconnect the battery
following this operation, lock the vehicle
and wait at least five minutes for the
reset to be registered.
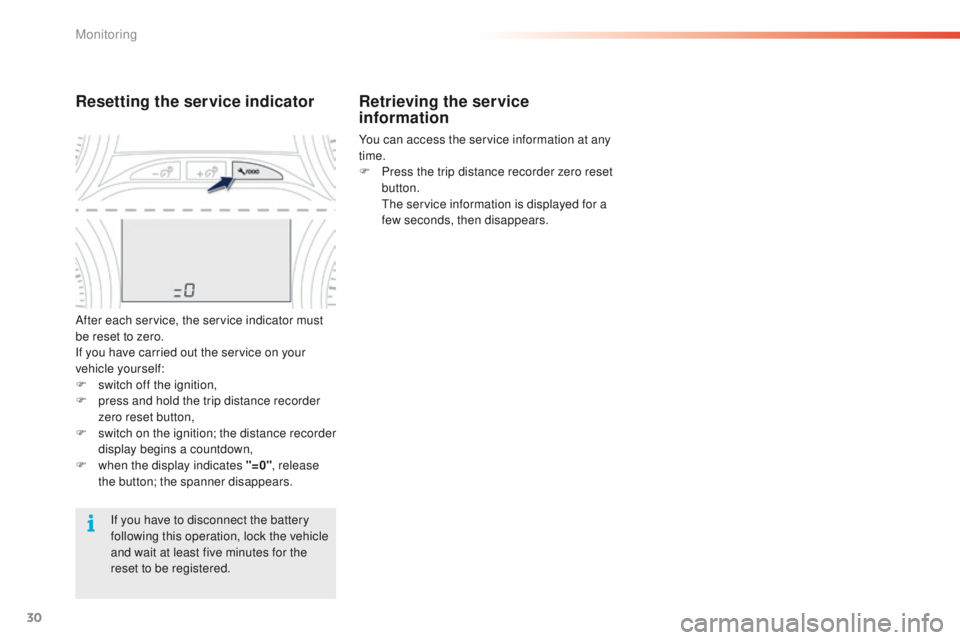
Resetting the service indicator
After each service, the service indicator must
be reset to zero.
If you have carried out the service on your
vehicle yourself:
F
s
witch off the ignition,
F
p
ress and hold the trip distance recorder
zero reset button,
F
s
witch on the ignition; the distance recorder
display begins a countdown,
F
w
hen the display indicates "=0" , release
the button; the spanner disappears.
Monitoring
Page 33 of 340
31
2008_en_Chap01_controle-de-marche_ed01-2015
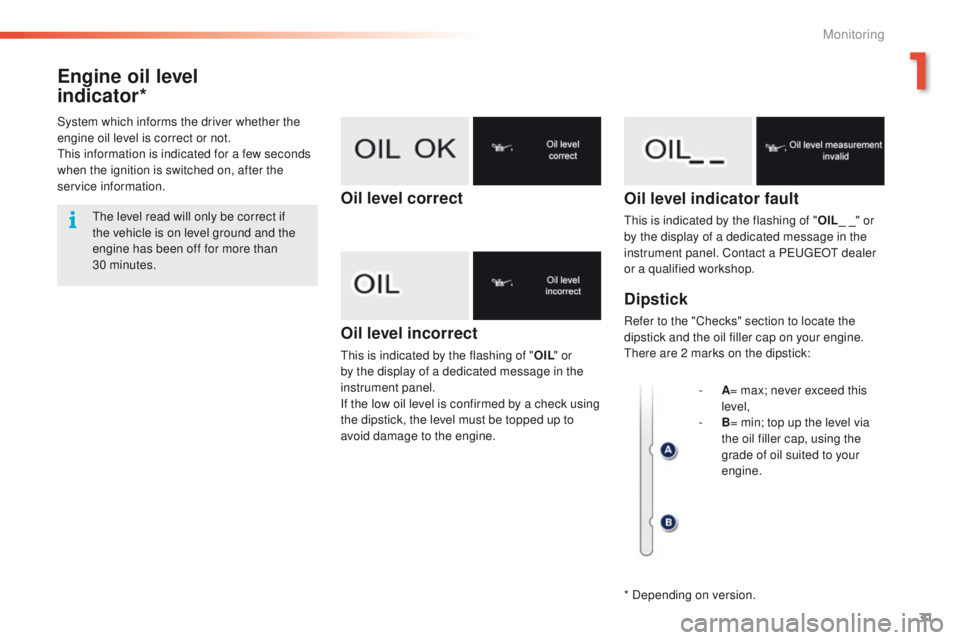
Engine oil level
indicator*
Oil level incorrect
This is indicated by the flashing of "OIL" or
by the display of a dedicated message in the
instrument panel.
If the low oil level is confirmed by a check using
the dipstick, the level must be topped up to
avoid damage to the engine.
Oil level indicator fault
This is indicated by the flashing of " OIL_ _" or
by the display of a dedicated message in the
instrument panel. Contact a PEUGEOT dealer
or a qualified workshop.
Dipstick
Refer to the "Checks" section to locate the
dipstick and the oil filler cap on your engine.
There are 2 marks on the dipstick:
System which informs the driver whether the
engine oil level is correct or not.
This information is indicated for a few seconds
when the ignition is switched on, after the
service information.
The level read will only be correct if
the vehicle is on level ground and the
engine has been off for more than
30 minutes.
-
A= m
ax; never exceed this
level,
-
B= m
in; top up the level via
the oil filler cap, using the
grade of oil suited to your
engine.
Oil level correct
* Depending on version.
1
Monitoring
Page 34 of 340
32
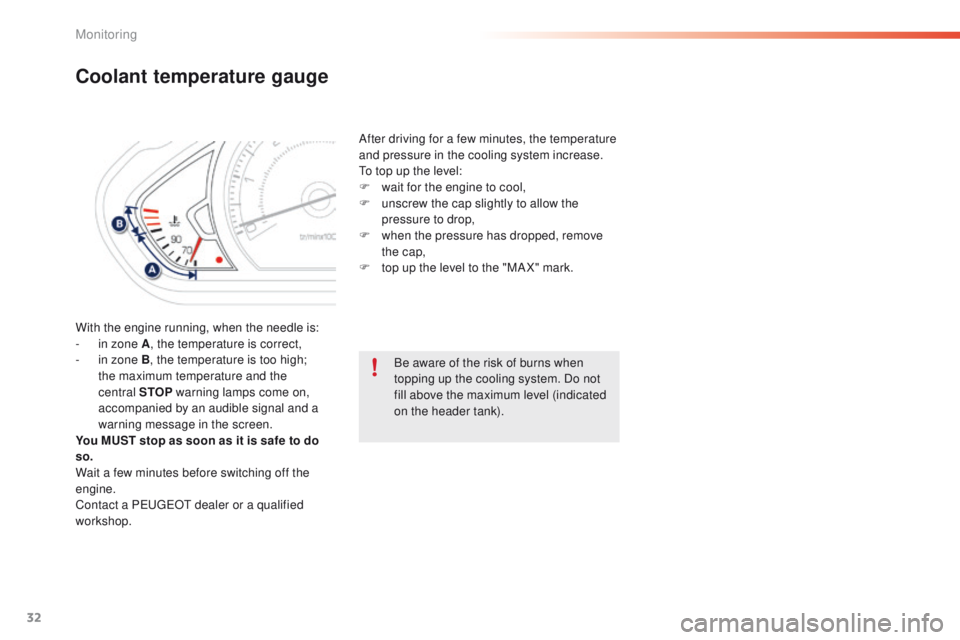
Coolant temperature gauge
With the engine running, when the needle is:
- i n zone A , the temperature is correct,
-
i
n zone B, the temperature is too high;
the maximum temperature and the
central STOP warning lamps come on,
accompanied by an audible signal and a
warning message in the screen.
You MUST stop as soon as it is safe to do
so.
Wait a few minutes before switching off the
engine.
Contact a PEUGEOT dealer or a qualified
workshop. After driving for a few minutes, the temperature
and pressure in the cooling system increase.
To top up the level:
F
w
ait for the engine to cool,
F
u
nscrew the cap slightly to allow the
pressure to drop,
F
w
hen the pressure has dropped, remove
the cap,
F
t
op up the level to the "MA X" mark.
Be aware of the risk of burns when
topping up the cooling system. Do not
fill above the maximum level (indicated
on the header tank).
Monitoring
Page 35 of 340
33
2008_en_Chap01_controle-de-marche_ed01-2015
Touch screen
For reasons of safety, the driver
should only carr y out operations
that require close attention, with the
vehicle stationary.
Some functions are not accessible
when driving.
It gives access to:
-
m
enus for adjusting settings for vehicle
functions and systems,
-
a
udio and display configuration menus,
-
a
udio system and telephone controls and
the display of associated information.
And, depending on equipment, it allows:
-
t
he display of alert messages and the
visual parking sensors information,
-
a
ccess to the controls for the navigation
system and Internet services, and the
display of associated information.
General operation
Recommendations
It is necessary to press firmly, particularly for
"flick" gestures (scrolling through lists, moving
the map...).
A light wipe is not enough.
The screen does not recognise pressing with
more than one finger.
This technology allows use at all temperatures
and when wearing gloves.
Do not use pointed objects on the touch
screen.
Do not touch the touch screen with wet hands.
Uses a soft clean cloth to clean the touch
screen.
State of indicator lamps
Some buttons contain an indicator lamp that
gives the state of the corresponding function.
Green indicator: you have switched on the
corresponding function.
Orange indicator: you have switched off the
corresponding function.
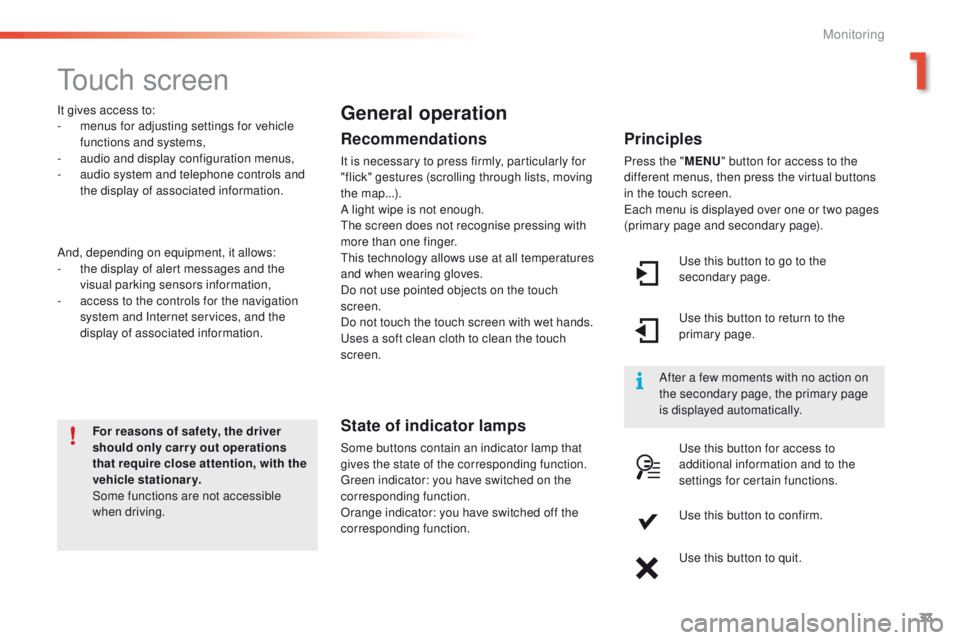
Principles
Press the " MENU" button for access to the
different menus, then press the virtual buttons
in the touch screen.
Each menu is displayed over one or two pages
(primary page and secondary page).
Use this button to go to the
secondary page.
After a few moments with no action on
the secondary page, the primary page
is displayed automatically. Use this button to return to the
primary page.
Use this button for access to
additional information and to the
settings for certain functions.
Use this button to confirm.
Use this button to quit.
1
Monitoring
Page 36 of 340
34
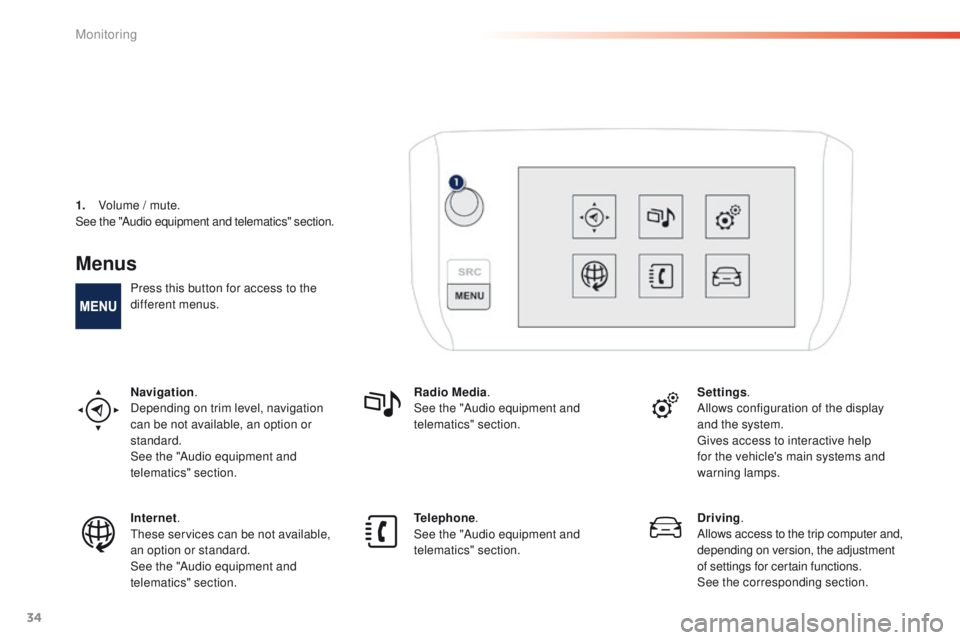
Menus
Press this button for access to the
different menus.
Navigation.
Depending on trim level, navigation
can be not available, an option or
standard.
See the "Audio equipment and
telematics" section. Radio Media
.
See the "Audio equipment and
telematics" section. Settings
.
Allows configuration of the display
and the system.
Gives access to interactive help
for the vehicle's main systems and
warning lamps.
Internet.
These services can be not available,
an option or standard.
See the "Audio equipment and
telematics" section. Telephone
.
See the "Audio equipment and
telematics" section. Driving
.
Allows access to the trip computer and,
depending on version, the adjustment
of settings for certain functions.
See the corresponding section.
1.
V
olume / mute.
See the "Audio equipment and telematics" section.
Monitoring
Page 37 of 340
35
2008_en_Chap01_controle-de-marche_ed01-2015
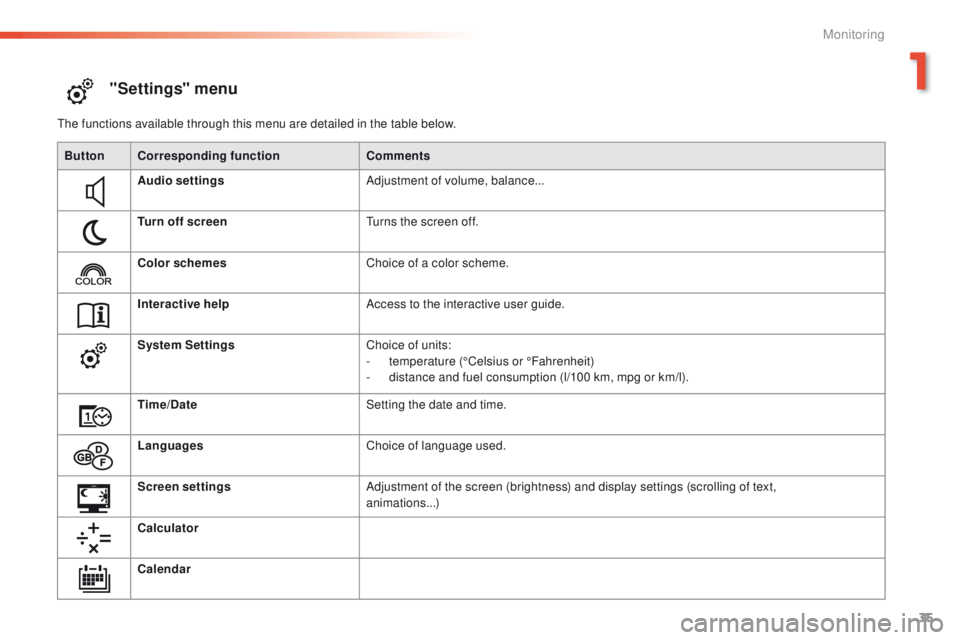
"Settings" menu
The functions available through this menu are detailed in the table below.Button Corresponding function Comments
Audio settings Adjustment of volume, balance...
Turn off screen Turns the screen off.
Color schemes Choice of a color scheme.
Interactive help Access to the interactive user guide.
System Settings Choice of units:
-
t
emperature (°Celsius or °Fahrenheit)
-
d
istance and fuel consumption (l/100 km, mpg or km/l).
Time/Date Setting the date and time.
Languages Choice of language used.
Screen settings Adjustment of the screen (brightness) and display settings (scrolling of text,
animations...)
Calculator
Calendar
1
Monitoring
Page 38 of 340
36
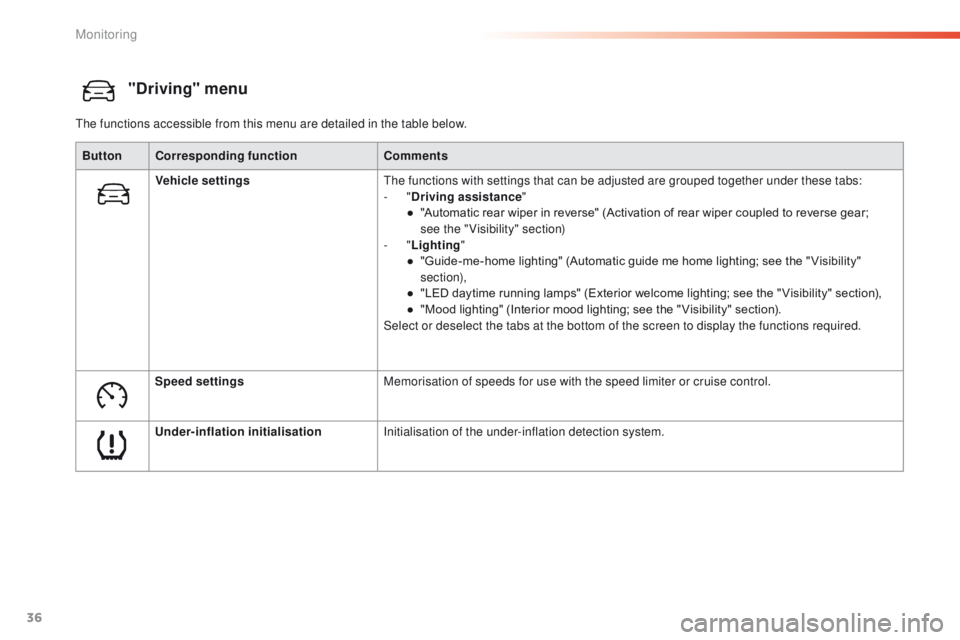
"Driving" menu
The functions accessible from this menu are detailed in the table below.Button Corresponding function Comments
Vehicle settings The functions with settings that can be adjusted are grouped together under these tabs:
-
"Driving assistance "
●
"
Automatic rear wiper in reverse" (Activation of rear wiper coupled to reverse gear;
see
the "Visibility" section)
-
"Lighting "
●
"
Guide-me-home lighting" (Automatic guide me home lighting; see the " Visibility"
section),
●
"
LED daytime running lamps" (Exterior welcome lighting; see the " Visibility" section),
●
"
Mood lighting" (Interior mood lighting; see the " Visibility" section).
Select or deselect the tabs at the bottom of the screen to display the functions required.
Speed settings Memorisation of speeds for use with the speed limiter or cruise control.
Under-inflation initialisation Initialisation of the under-inflation detection system.
Monitoring
Page 39 of 340
37
2008_en_Chap01_controle-de-marche_ed01-2015
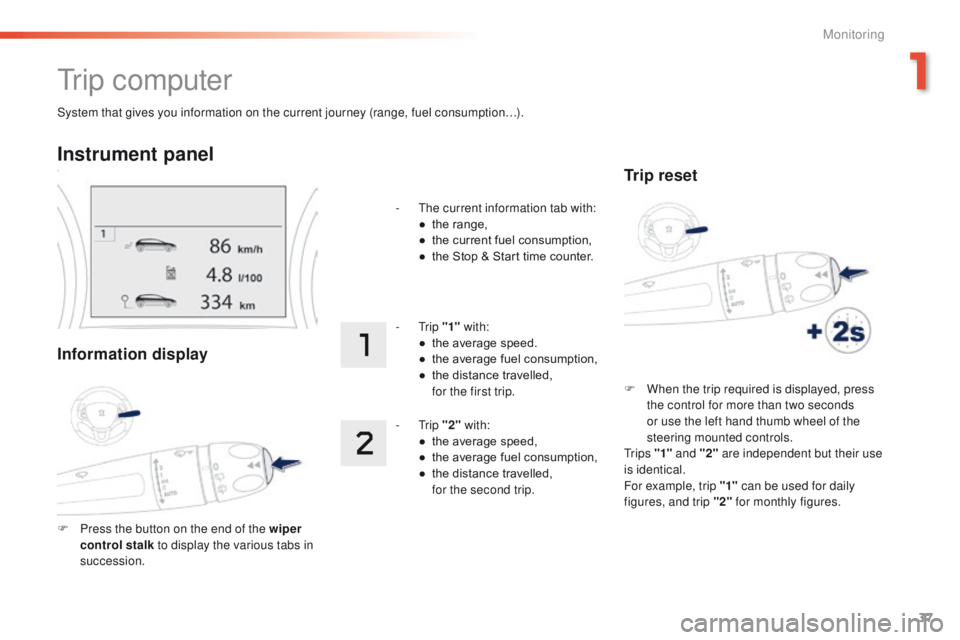
System that gives you information on the current journey (range, fuel consumption…).
Tr i p c o m p u t e r
Instrument panel
Information display
F Press the button on the end of the wiper control stalk to display the various tabs in
succession. -
T
he current information tab with:
●
t
he range,
●
t
he current fuel consumption,
●
t
he Stop & Start time counter.
- Trip
"1" with:
●
t
he average speed.
●
t
he average fuel consumption,
●
t
he distance travelled,
f
or the first trip.
- Trip
"2" with:
●
t
he average speed,
●
t
he average fuel consumption,
●
t
he distance travelled,
f
or the second trip.
Trip reset
F When the trip required is displayed, press
the control for more than two seconds
or use the left hand thumb wheel of the
steering mounted controls.
Tr i p s "1" and "2" are independent but their use
is identical.
For example, trip "1" can be used for daily
figures, and trip "2" for monthly figures.
1
Monitoring
Page 40 of 340
38
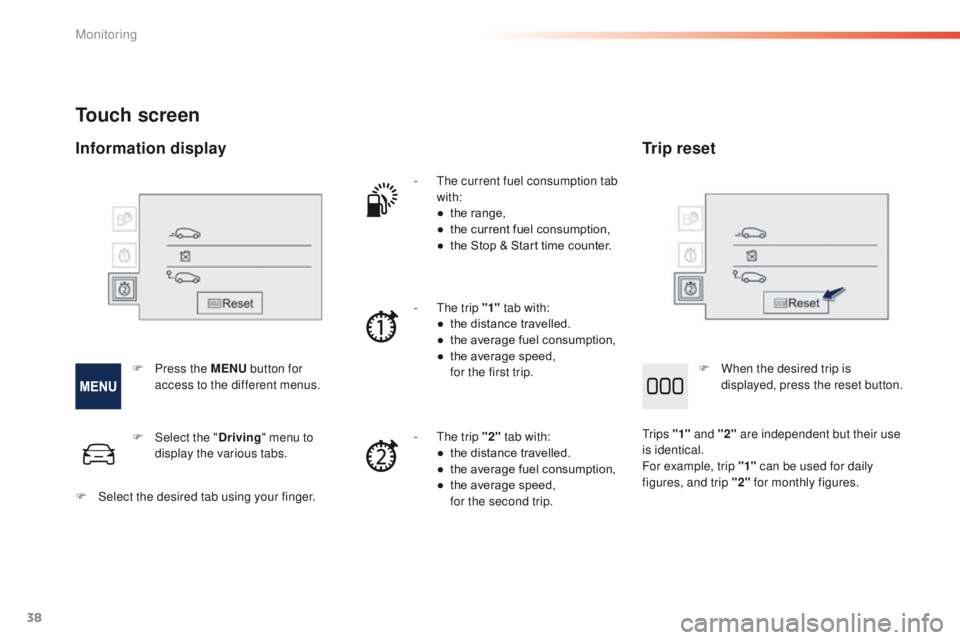
Touch screen
- The current fuel consumption tab with:
●
t
he range,
●
t
he current fuel consumption,
●
t
he Stop & Start time counter.
-
T
he trip "1" tab with:
●
t
he distance travelled.
●
t
he average fuel consumption,
●
t
he average speed,
f
or the first trip.
-
T
he trip "2" tab with:
●
t
he distance travelled.
●
t
he average fuel consumption,
●
t
he average speed,
f
or the second trip.
F
P
ress the MENU button for
access to the different menus. F
W
hen the desired trip is
displayed, press the reset button.
Tr i p s "1" and "2" are independent but their use
is identical.
For example, trip "1" can be used for daily
figures, and trip "2" for monthly figures.
F
Sel
ect the " Driving" menu to
display the various tabs.
F
S
elect the desired tab using your finger.
Information display Trip reset
Monitoring