mirror PEUGEOT 2008 2015 Owners Manual
[x] Cancel search | Manufacturer: PEUGEOT, Model Year: 2015, Model line: 2008, Model: PEUGEOT 2008 2015Pages: 340, PDF Size: 8.4 MB
Page 4 of 340
.
.
2008_en_Chap00a_sommaire_ed01-2015
Instrument panels 14
Indicator and warning lamps 1 6
Gauges and indicators
2
8
Touch screen
3
3
Trip computer
3
7
Distance recorders
4
0
Setting the date and time
4
1
MonitoringOver view
Remote control key 4
2
Doors 47
Boot
49
Locking / unlocking from the inside
5
0
Alarm
5
1
Electric windows
5
3Interior fittings
7 0
Boot fittings 7 4
AccessFittings
Front seats 55
Rear seats 5 7
Steering wheel adjustment
5
8
Mirrors
59
Ventilation
61
Heating
64
Manual air conditioning
6
4
Dual-zone digital air conditioning
6
6
Front demist - defrost
6
9
Rear screen demist - defrost
6
9
Comfort
Driving recommendations 78
Starting - Stopping the engine 7 9
Manual parking brake
8
1
5-speed manual gearbox
8
2
6-speed manual gearbox
8
2
5-speed electronic gearbox
8
3
6-speed electronic gearbox
8
6
Automatic gearbox
9
0
Gear shift indicator
9
4
Stop & Start
9
5
Hill start assist
9
8
Speed limiter
9
9
Cruise control
1
01
Memorising speeds
1
03
Parking sensors
1
05
Park Assist
1
07
Driving
Eco-driving
Contents
Page 6 of 340
4
2008_en_Chap00b_vue-ensemble_ed01-2015
Exterior
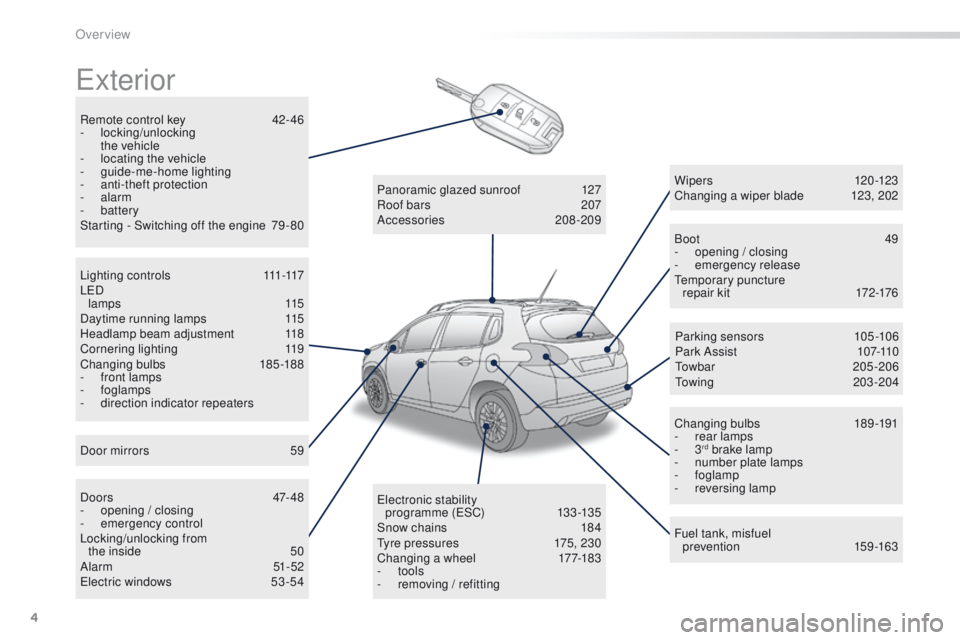
Remote control key 42- 46
- locking/unlocking
the vehicle
-
l
ocating the vehicle
-
gu
ide-me-home lighting
-
a
nti-theft protection
-
alarm
-
battery
Starting - Switching off the engine
7
9 - 80 Boot
4
9
-
ope
ning / closing
-
em
ergency release
Temporary puncture repair kit
1
72-176
Wipers
120-123
Changing a wiper blade
1
23, 202
Changing bulbs
1
89-191
-
r
ear lamps
-
3
rd brake lamp
-
n
umber plate lamps
-
foglamp
-
r
eversing lamp
Fuel tank, misfuel prevention
1
59-163
Panoramic glazed sunroof
1
27
Roof bars
2
07
Accessories
208-209
Electronic stability programme (ESC)
1
33 -135
Snow chains
1
84
Tyre pressures
1
75, 230
Changing a wheel
1
77-183
-
tools
-
r
emoving / refitting
L i g h t i n g c o n t r o l s
111
-117
LED lamps
115
Daytime running lamps
1
15
Headlamp beam adjustment
1
18
Cornering lighting
1
19
Changing bulbs
1
85-188
-
f
ront lamps
-
foglamps
-
d
irection indicator repeaters
Door mirrors
5
9
D o o r s
47- 4 8
-
ope
ning / closing
-
em
ergency control
Locking/unlocking from the inside
5
0
Alarm
51-52
Electric windows
5
3 -54 Parking sensors
1
05-106
Park Assist
10
7-110
Towbar
205-206
Towing
20
3-204
Over view
Page 8 of 340
6
2008_en_Chap00b_vue-ensemble_ed01-2015
Instruments and controls
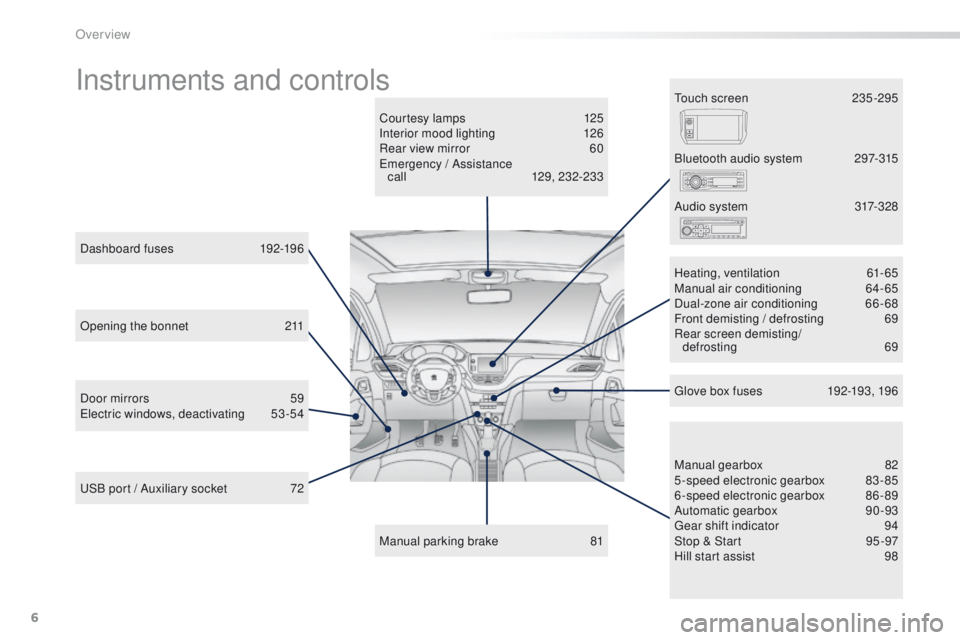
Courtesy lamps 125
Interior mood lighting 1 26
Rear view mirror
6
0
Emergency / Assistance call
1
29, 232-233
Manual parking brake
8
1Manual gearbox
8
2
5-speed electronic gearbox
8
3-85
6-speed electronic gearbox
8
6-89
Automatic gearbox
9
0-93
Gear shift indicator
9
4
Stop & Start
9
5 -97
Hill start assist
9
8
Dashboard fuses
1
92-196
USB port / Auxiliary socket
7
2 Heating, ventilation
6
1-65
Manual air conditioning
6
4-65
Dual-zone air conditioning
6
6-68
Front demisting / defrosting
6
9
Rear screen demisting/
defrosting
69
Bluetooth audio system
2
97-315
Door mirrors
5
9
Electric windows, deactivating
5
3-54 Audio system
3
17-328
Glove box fuses
1
92-193, 196
Touch screen
2
35 -295
Opening the bonnet
2
11
Over view
Page 44 of 340
42
2008_en_Chap02_ouvertures_ed01-2015
System for the central unlocking or locking
of the vehicle using the door lock or from a
distance.
It is also used to locate and start the vehicle, as
well as providing protection against theft.
Remote control key
Unlocking the vehicle
F Turn the key in the driver's door lock towards the front of the vehicle to unlock it.
Using the remote control
F Press the open padlock to unlock the vehicle.
Unlocking is confirmed by rapid
flashing of the direction indicators for
approximately two seconds.
According to version, the door mirrors
unfold at the same time.
Unlocking with the key does not
deactivate the alarm.
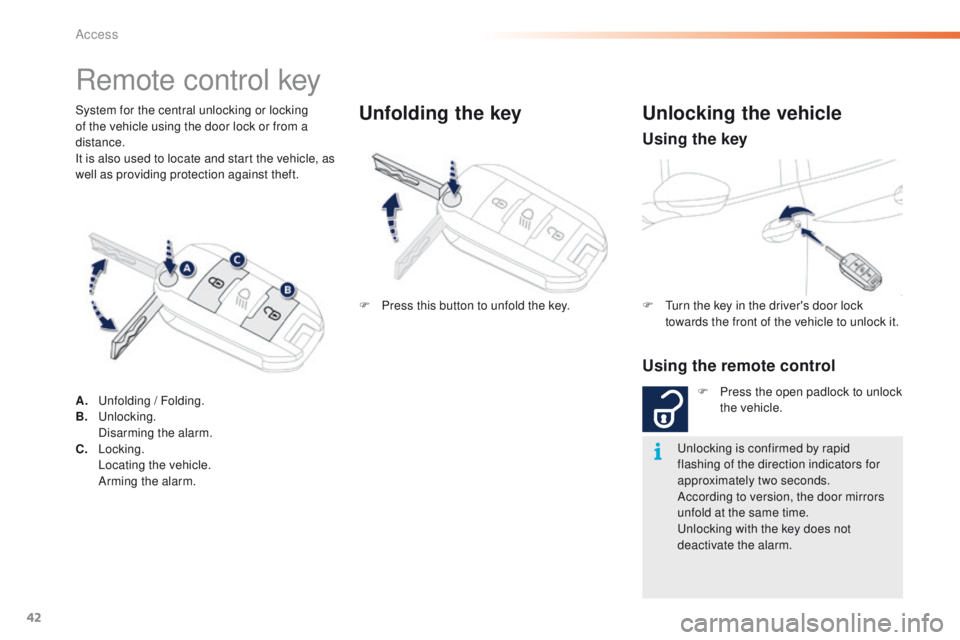
F
P
ress this button to unfold the key.
A. U
nfolding / Folding.
B.
Unlocking.
D
isarming the alarm.
C.
Locking.
L
ocating the vehicle.
A
rming the alarm.
Unfolding the key
Using the key
Access
Page 45 of 340
43
2008_en_Chap02_ouvertures_ed01-2015
Locking is confirmed by fixed
lighting of the direction indicators for
approximately two seconds.
According to version, the door mirrors
fold at the same time.
As a safety measure (children on
board), never leave the vehicle without
taking your key, even for a short period.
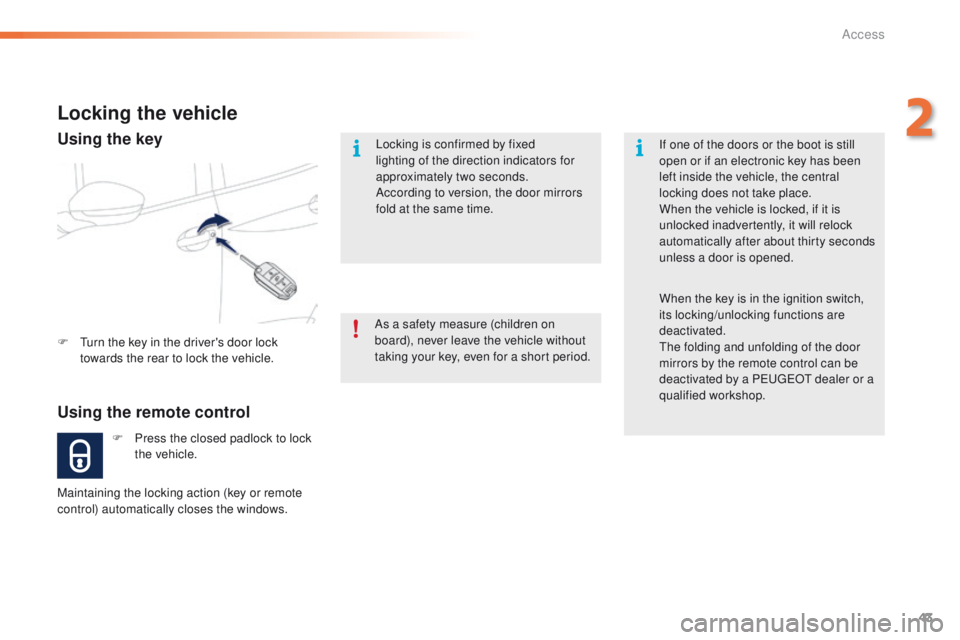
Locking the vehicle
Using the remote control
F Press the closed padlock to lock the vehicle.
F
T
urn the key in the driver's door lock
towards the rear to lock the vehicle.
Maintaining the locking action (key or remote
control) automatically closes the windows. If one of the doors or the boot is still
open or if an electronic key has been
left inside the vehicle, the central
locking does not take place.
When the vehicle is locked, if it is
unlocked inadvertently, it will relock
automatically after about thirty seconds
unless a door is opened.
When the key is in the ignition switch,
its locking/unlocking functions are
deactivated.
The folding and unfolding of the door
mirrors by the remote control can be
deactivated by a PEUGEOT dealer or a
qualified workshop.
Using the key
2
Access
Page 60 of 340
58
2008_en_Chap03_confort_ed01-2015
Steering wheel adjustment
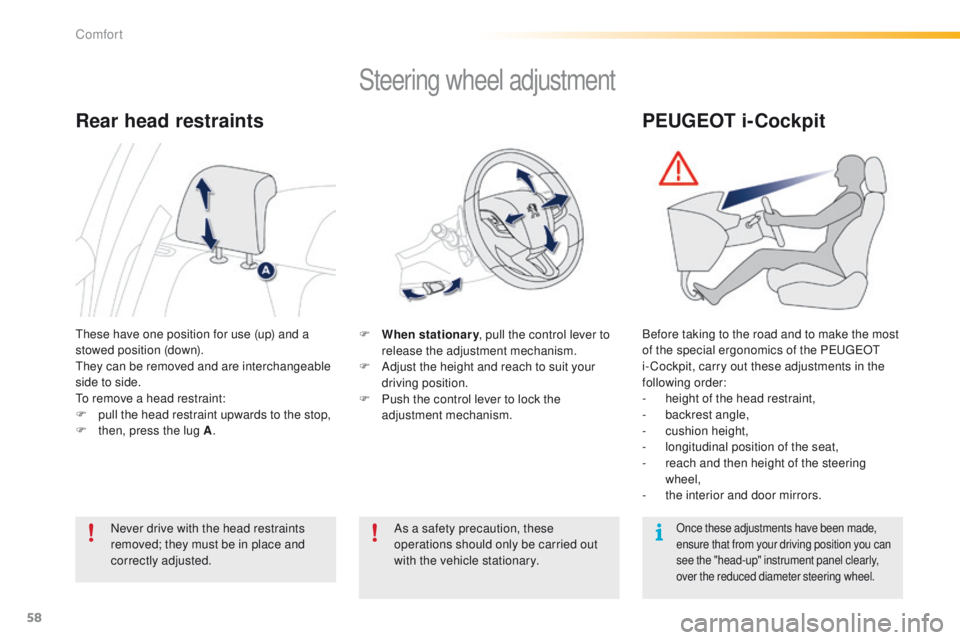
F When stationary, pull the control lever to
release the adjustment mechanism.
F
A
djust the height and reach to suit your
driving position.
F
P
ush the control lever to lock the
adjustment mechanism.
As a safety precaution, these
operations should only be carried out
with the vehicle stationary.
These have one position for use (up) and a
stowed position (down).
They can be removed and are interchangeable
side to side.
To remove a head restraint:
F
p
ull the head restraint upwards to the stop,
F
t
hen, press the lug A .
Rear head restraints
Never drive with the head restraints
removed; they must be in place and
correctly adjusted.
PEUGEOT i-Cockpit
Before taking to the road and to make the most
of the special ergonomics of the PEUGEOT
i- Cockpit, carry out these adjustments in the
following order:
-
h
eight of the head restraint,
-
b
ackrest angle,
-
c
ushion height,
-
l
ongitudinal position of the seat,
-
r
each and then height of the steering
wheel,
-
t
he interior and door mirrors.
Once these adjustments have been made,
ensure that from your driving position you can
see the "head-up" instrument panel clearly,
over the reduced diameter steering wheel.
Comfort
Page 61 of 340
59
2008_en_Chap03_confort_ed01-2015
Mirrors
Each fitted with an adjustable mirror glass
providing the lateral rear ward vision necessary
for overtaking or parking. They can also be
folded for parking in confined spaces.
Door mirrors
The objects observed are, in reality,
closer than they appear.
Take this into account in order to
correctly judge the distance of vehicles
approaching from behind.
Demisting - DefrostingAdjustment
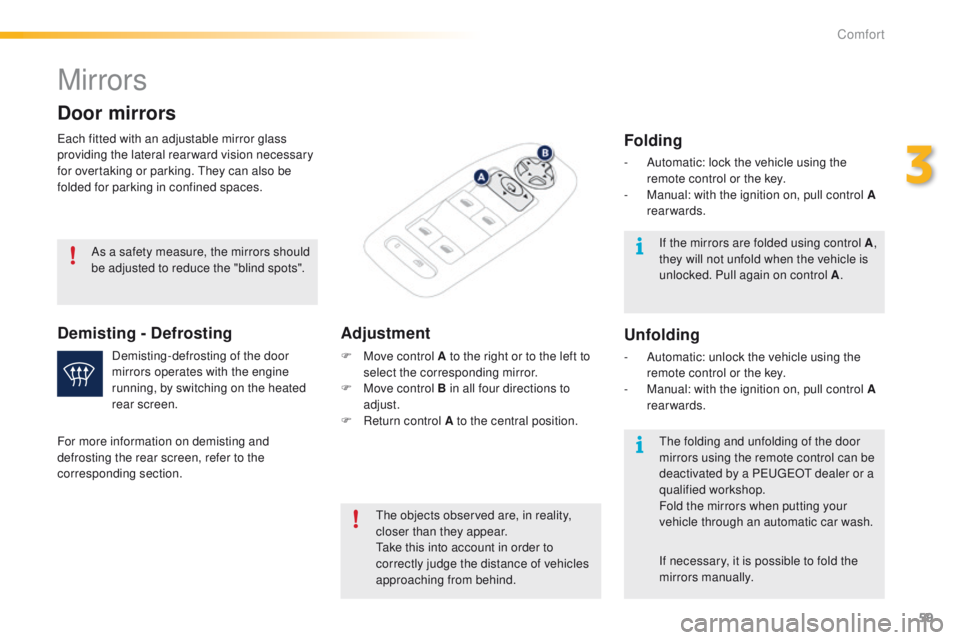
F Move control A to the right or to the left to
select the corresponding mirror.
F
M
ove control B in all four directions to
adjust.
F
R
eturn control A to the central position.
Demisting-defrosting of the door
mirrors operates with the engine
running, by switching on the heated
rear screen.
As a safety measure, the mirrors should
be adjusted to reduce the "blind spots".
For more information on demisting and
defrosting the rear screen, refer to the
corresponding section. If the mirrors are folded using control A
,
they will not unfold when the vehicle is
unlocked. Pull again on control A .
The folding and unfolding of the door
mirrors using the remote control can be
deactivated by a PEUGEOT dealer or a
qualified workshop.
Fold the mirrors when putting your
vehicle through an automatic car wash.
Folding
- Automatic: lock the vehicle using the remote control or the key.
-
M
anual: with the ignition on, pull control A
rearwards.
Unfolding
- Automatic: unlock the vehicle using the remote control or the key.
-
M
anual: with the ignition on, pull control A
rearwards.
If necessary, it is possible to fold the
mirrors manually.
3
Comfort
Page 62 of 340
60
2008_en_Chap03_confort_ed01-2015
Automatic day/night model
By means of a sensor, which measures the
light from the rear of the vehicle, this system
automatically and progressively changes
between the day and night uses.
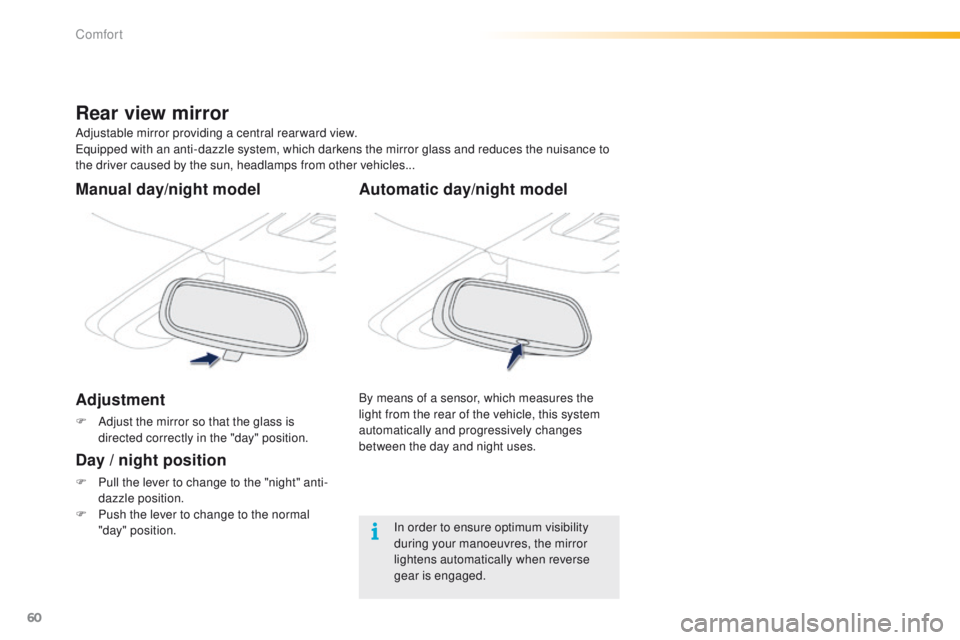
Adjustable mirror providing a central rearward view.
Equipped with an anti-dazzle system, which darkens the mirror glass and reduces the nuisance to
the driver caused by the sun, headlamps from other vehicles...
Rear view mirror
Manual day/night model
Adjustment
F Adjust the mirror so that the glass is
directed correctly in the "day" position.
Day / night position
F Pull the lever to change to the "night" anti-dazzle position.
F
P
ush the lever to change to the normal
"day" position. In order to ensure optimum visibility
during your manoeuvres, the mirror
lightens automatically when reverse
gear is engaged.
Comfort
Page 71 of 340
69
2008_en_Chap03_confort_ed01-2015
F Switch off the demisting/defrosting of the rear screen and door mirrors
as soon as appropriate, as lower
current consumption results in
reduced fuel consumption.
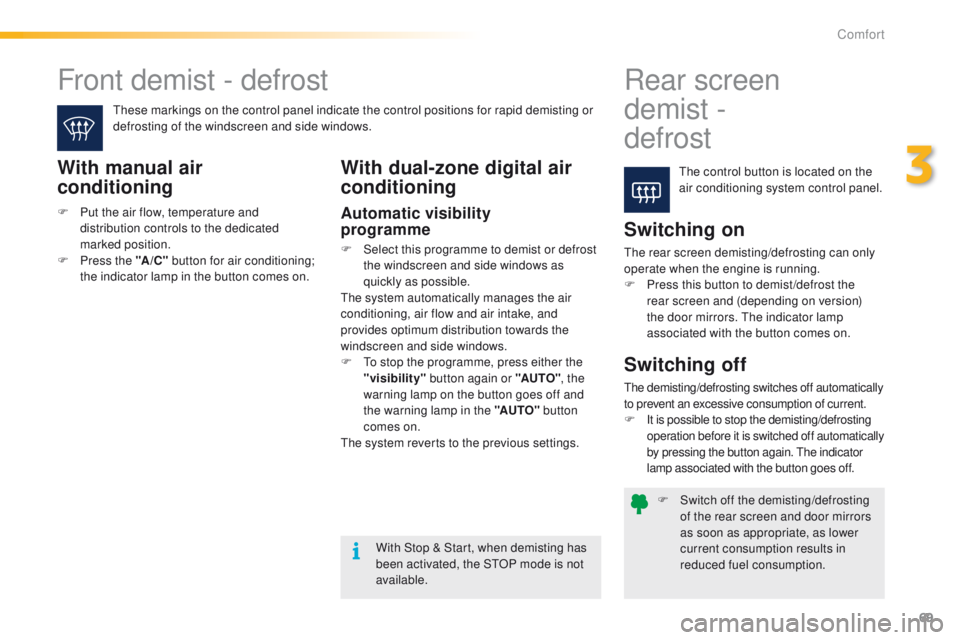
Front demist - defrost Rear screen
demist
-
defrost
The control button is located on the
air conditioning system control panel.
These markings on the control panel indicate the control positions for rapid demisting or
defrosting of the windscreen and side windows.With manual air
conditioning
Switching on
The rear screen demisting/defrosting can only
operate when the engine is running.
F
P
ress this button to demist /defrost the
rear screen and (depending on version)
the door mirrors. The indicator lamp
associated with the button comes on.
With Stop & Start, when demisting has
been activated, the STOP mode is not
available.
Switching off
The demisting/defrosting switches off automatically
to prevent an excessive consumption of current.
F
I
t is possible to stop the demisting/defrosting
operation before it is switched off automatically
by pressing the button again. The indicator
lamp associated with the button goes off.
With dual-zone digital air
conditioning
Automatic visibility
programme
F Select this programme to demist or defrost the windscreen and side windows as
quickly as possible.
The system automatically manages the air
conditioning, air flow and air intake, and
provides optimum distribution towards the
windscreen and side windows.
F
T
o stop the programme, press either the
"visibility" button again or "AUTO" , the
warning lamp on the button goes off and
the warning lamp in the "AUTO" button
comes on.
The system reverts to the previous settings.
F
P
ut the air flow, temperature and
distribution controls to the dedicated
marked position.
F
P
ress the "A /C " button for air conditioning;
the indicator lamp in the button comes on.
3
Comfort
Page 119 of 340
117
2008_en_Chap06_visibilite_ed01-2015
The sidelamps and dipped beam headlamps are
switched on automatically, without any action
on the part of the driver, when a low level of
external light is detected or in certain cases of
activation of the windscreen wipers.
As soon as the brightness returns to a sufficient
level or after the windscreen wipers are switched
off, the lamps are switched off automatically.
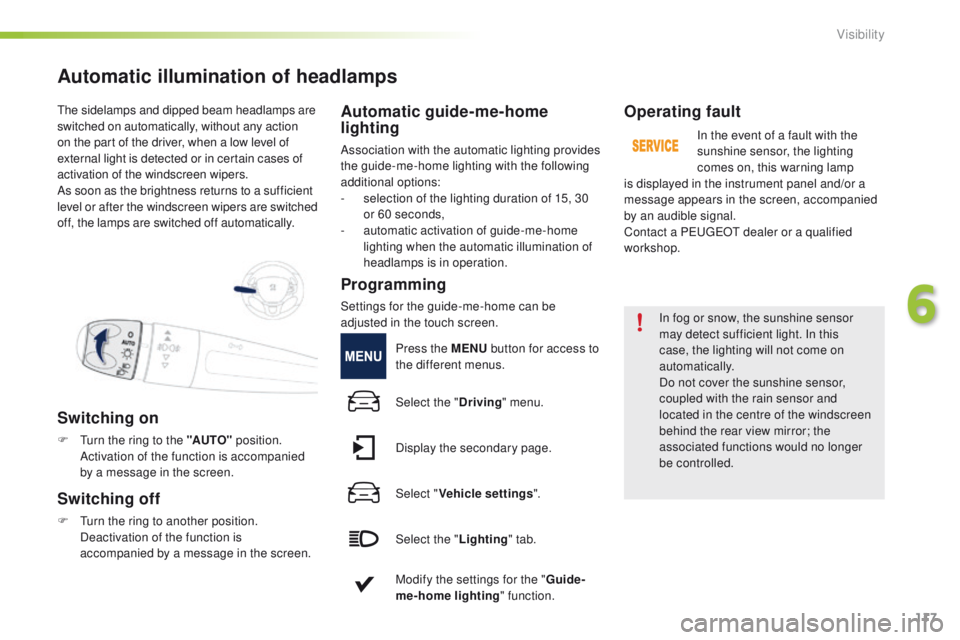
Automatic illumination of headlamps
Switching on
F Turn the ring to the "AUTO" position.
Activation of the function is accompanied
by a message in the screen.
Switching off
F Turn the ring to another position. Deactivation of the function is
accompanied by a message in the screen.
Automatic guide-me-home
lighting
Association with the automatic lighting provides
the guide-me-home lighting with the following
additional options:
-
s
election of the lighting duration of 15, 30
or 60 seconds,
-
a
utomatic activation of guide-me-home
lighting when the automatic illumination of
headlamps is in operation.
Operating fault
In the event of a fault with the
sunshine sensor, the lighting
comes on, this warning lamp
is displayed in the instrument panel and/or a
message appears in the screen, accompanied
by an audible signal.
Contact a PEUGEOT dealer or a qualified
workshop.
In fog or snow, the sunshine sensor
may detect sufficient light. In this
case, the lighting will not come on
automatically.
Do not cover the sunshine sensor,
coupled with the rain sensor and
located in the centre of the windscreen
behind the rear view mirror; the
associated functions would no longer
be controlled.
Programming
Settings for the guide-me-home can be
adjusted in the touch screen. Press the MENU button for access to
the different menus.
Select the " Driving" menu.
Display the secondary page.
Select " Vehicle settings ".
Select the " Lighting" tab.
Modify the settings for the " Guide-
me-home lighting " function.
6
Visibility