check engine Peugeot 207 CC 2014 Owner's Guide
[x] Cancel search | Manufacturer: PEUGEOT, Model Year: 2014, Model line: 207 CC, Model: Peugeot 207 CC 2014Pages: 232, PDF Size: 11.11 MB
Page 129 of 232
8
!
CHECKS
127
207CC_EN_CHAP08_VERIFICATIONS_ED01-2014
Only use products recommended by
PEUGEOT or products of equivalent
quality and specifi cations.
In order to optimise the operation
of units as important as the braking
system, PEUGEOT selects and of-
fers very specifi c products.
To avoid damaging the electrical
units, the use of a high pressure
washer in the engine compartment
is strictly prohibited .
After washing the vehicle, or in hu-
mid or wintry conditions, ice can
form on the brake discs and pads
with a resulting loss of effi ciency of
the brakes. Make a few light brake
applications to defrost and dry the
brakes.
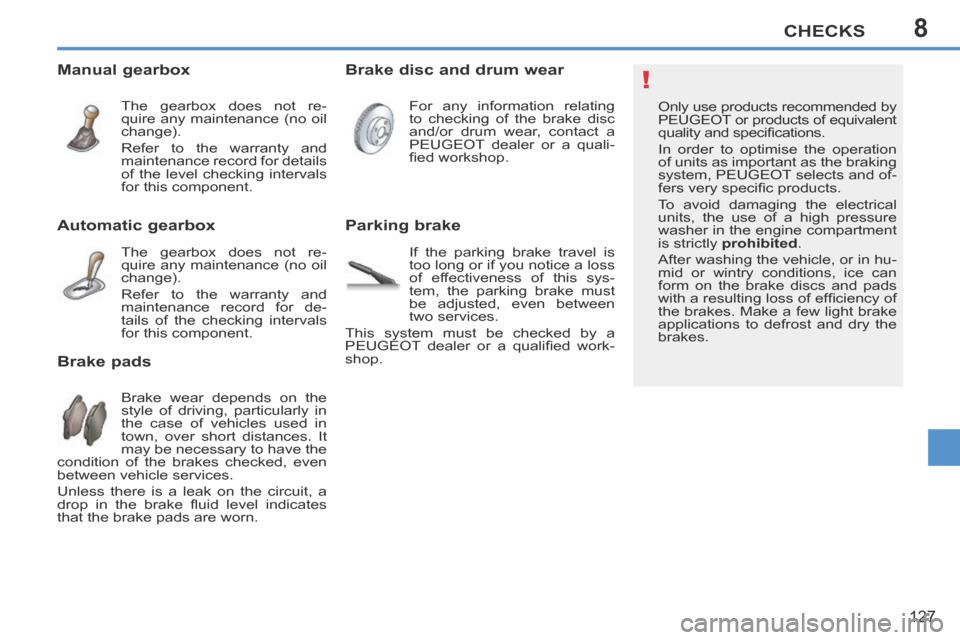
Automatic gearbox
The gearbox does not re-
quire any maintenance (no oil
change).
Refer to the warranty and
maintenance record for de-
tails of the checking intervals
for this component.
Brake disc and drum wear
For any information relating
to checking of the brake disc
and/or drum wear, contact a
PEUGEOT dealer or a quali-
fi ed workshop.
Manual gearbox
The gearbox does not re-
quire any maintenance (no oil
change).
Refer to the warranty and
maintenance record for details
of the level checking intervals
for this component.
Brake pads
Brake wear depends on the
style of driving, particularly in
the case of vehicles used in
town, over short distances. It
may be necessary to have the
condition of the brakes checked, even
between vehicle services.
Unless there is a leak on the circuit, a
drop in the brake fl uid level indicates
that the brake pads are worn.
Parking brake
If the parking brake travel is
too long or if you notice a loss
of effectiveness of this sys-
tem, the parking brake must
be adjusted, even between
two services.
This system must be checked by a
PEUGEOT dealer or a qualifi ed work-
shop.
Page 131 of 232
9
i!!
PRACTICAL INFORMATION
129
207CC_EN_CHAP09_INFO PRATIQUES_ED01-2014
Avoid removing any foreign bodies
which have penetrated into the tyre. Take care, this product is harmful
(e.g. ethylene-glycol, colophony...)
if swallowed and causes irritation
to the eyes.
Keep this product out of the reach
of children.
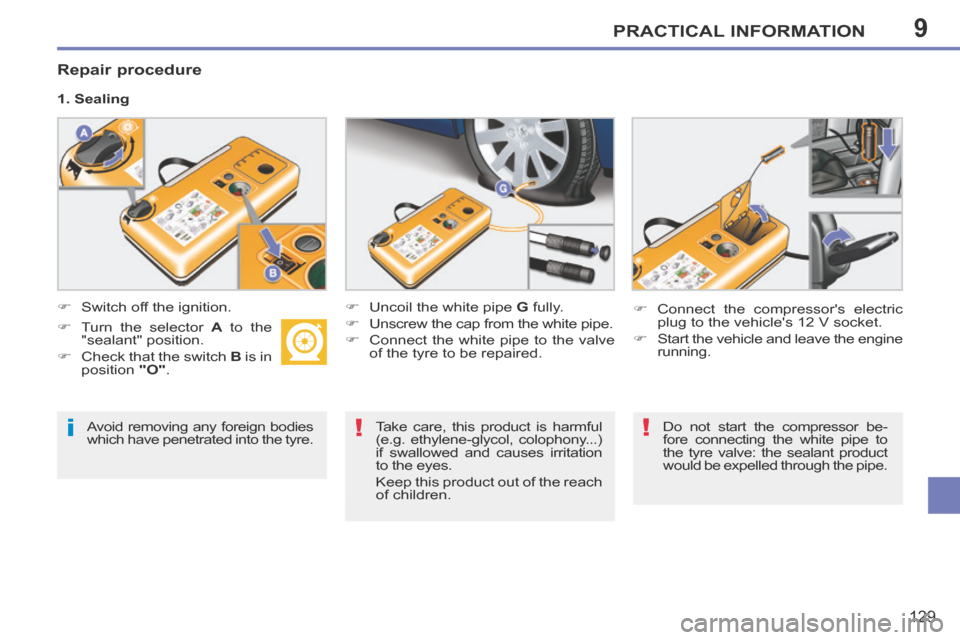
Repair procedure
1. Sealing
Switch off the ignition.
Uncoil the white pipe G fully.
Unscrew the cap from the white pipe.
Connect the white pipe to the valve of the tyre to be repaired. Connect the compressor's electric
plug to the vehicle's 12 V socket.
Start the vehicle and leave the engine running.
Do not start the compressor be-
fore connecting the white pipe to
the tyre valve: the sealant product
would be expelled through the pipe.
Turn the selector
A to the
"sealant" position.
Check that the switch B is in
position "O" .
Page 134 of 232
9
!
PRACTICAL INFORMATION
132
207CC_EN_CHAP09_INFO PRATIQUES_ED01-2014
Beware of discharges of fl uid.
The expiry date of the fl uid is indi-
cated on the cartridge.
The sealant cartridge is designed
for single use; even if only partly
used, it must be replaced.
After use, do not discard the car-
tridge into the environment, take
it to an authorised waste disposal
site or a PEUGEOT dealer.
Do not forget to obtain a new
sealant cartridge, available from
PEUGEOT dealers or from a qual-
ifi ed workshop.
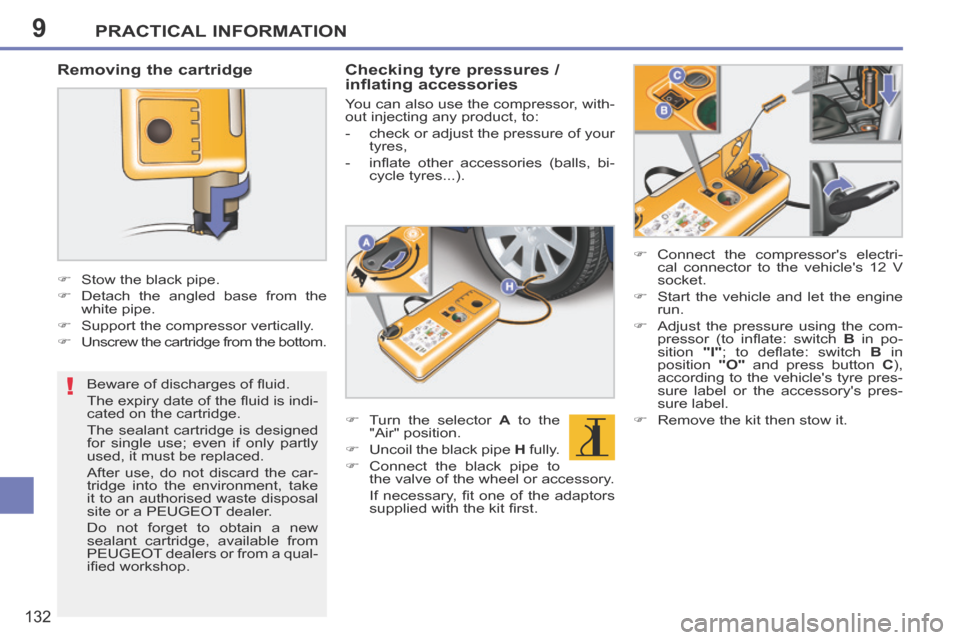
Removing the cartridge
Stow the black pipe.
Detach the angled base from the white pipe.
Support the compressor vertically.
Unscrew the cartridge from the bottom.
Checking tyre pressures / inflating accessories
You can also use the compressor, with-
out injecting any product, to:
- check or adjust the pressure of your tyres,
- infl ate other accessories (balls, bi- cycle tyres...).
Turn the selector A to the
"Air" position.
Uncoil the black pipe H fully.
Connect the black pipe to the valve of the wheel or accessory.
If necessary, fi t one of the adaptors supplied with the kit fi rst. Connect the compressor's electri-
cal connector to the vehicle's 12 V
socket.
Start the vehicle and let the engine run.
Adjust the pressure using the com- pressor (to infl ate: switch B in po-
sition "I" ; to defl ate: switch B in
position "O" and press button C ),
according to the vehicle's tyre pres-
sure label or the accessory's pres-
sure label.
Remove the kit then stow it.
Page 150 of 232
9
!
i
PRACTICAL INFORMATION
148
207CC_EN_CHAP09_INFO PRATIQUES_ED01-2014
Do not charge the batteries without
disconnecting the terminals fi rst.
Do not disconnect the terminals
while the engine is running.
The batteries contain harmful sub-
stances such as sulphuric acid and
lead. They must be disposed of in
accordance with regulations and
must not, in any circumstances, be
discarded with household waste.
Take used remote control batteries
and vehicle batteries to a special
collection point.
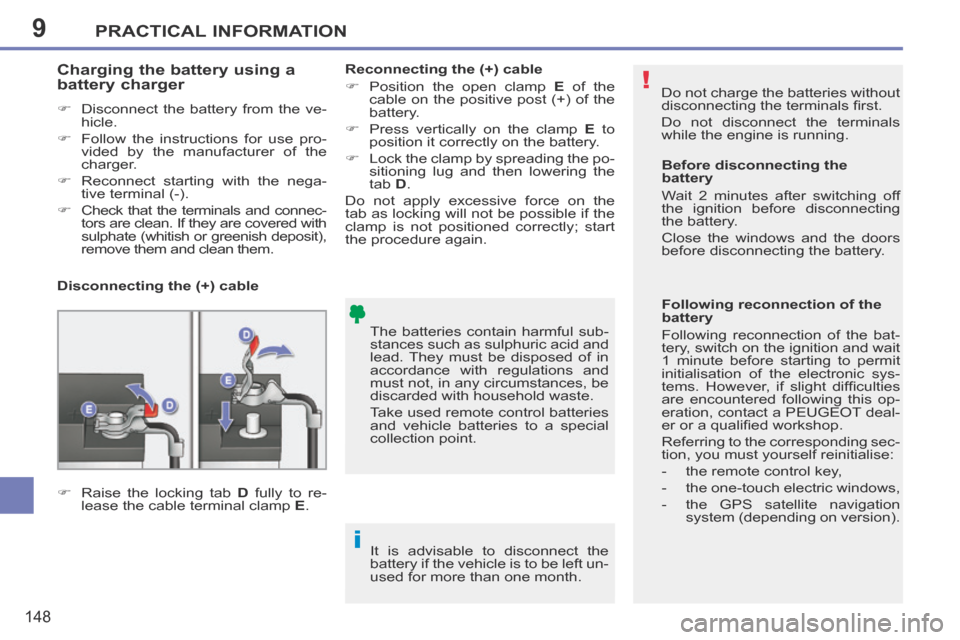
Charging the battery using a battery charger
Disconnect the battery from the ve- hicle.
Follow the instructions for use pro- vided by the manufacturer of the
charger.
Reconnect starting with the nega- tive terminal (-).
Check that the terminals and connec- tors are clean. If they are covered with
sulphate (whitish or greenish deposit),
remove them and clean them.
It is advisable to disconnect the
battery if the vehicle is to be left un-
used for more than one month. Before disconnecting the
battery
Wait 2 minutes after switching off
the ignition before disconnecting
the battery.
Close the windows and the doors
before disconnecting the battery.
Following reconnection of the
battery
Following reconnection of the bat-
tery, switch on the ignition and wait
1 minute before starting to permit
initialisation of the electronic sys-
tems. However, if slight diffi culties
are encountered following this op-
eration, contact a PEUGEOT deal-
er or a qualifi ed workshop.
Referring to the corresponding sec-
tion, you must yourself reinitialise:
- the remote control key,
- the one-touch electric windows,
- the GPS satellite navigation
system (depending on version).
Disconnecting the (+) cable
Reconnecting the (+) cable
Position the open clamp
E of the
cable on the positive post (+) of the
battery.
Press vertically on the clamp E to
position it correctly on the battery.
Lock the clamp by spreading the po- sitioning lug and then lowering the
tab D .
Do not apply excessive force on the
tab as locking will not be possible if the
clamp is not positioned correctly; start
the procedure again.
Raise the locking tab D fully to re-
lease the cable terminal clamp E .
Page 151 of 232
9
!
i
PRACTICAL INFORMATION
149
207CC_EN_CHAP09_INFO PRATIQUES_ED01-2014
A fl at battery prevents the engine
from starting (refer to the corre-
sponding paragraph).
If a roof operation is in progress,
it will be completed, but no further
operation is possible.
ENERGY ECONOMY MODE
System which manages the duration of
use of certain functions to conserve a
suffi cient level of charge in the battery.
After the engine has stopped, you can
still use functions such as the audio
equipment, windscreen wipers, dipped
beam headlamps, courtesy lamp, etc.
for a maximum combined duration of
thirty minutes.
Exiting economy mode
These functions are reactivated auto-
matically next time the vehicle is driven.
In order to resume the use of these
functions immediately, start the
engine and let it run for a few minutes.
The time available to you will then be
double the duration for which the engine
is left running. However, this period will al-
ways be between fi ve and thirty minutes.
Switching to economy mode
Once the thirty minutes are over, a
message appears on the multifunction
screen indicating that the vehicle has
switched to economy mode and the ac-
tive functions are put on standby.
CHANGING A WIPER BLADE
Procedure for replacing a worn wiper
blade with a new one without the use
of tools.
Removing a front wiper blade
Raise the corresponding wiper arm.
Unclip the wiper blade and remove it.
Fitting a front wiper blade
Check the size of the wiper blade as the shorter blade is fi tted on the
right-hand side of the vehicle.
Put the corresponding new wiper blade in place and clip it.
Fold down the wiper arm carefully.
LOAD REDUCTION MODE
System which manages the use of cer-
tain functions according to the level of
charge remaining in the battery.
When the vehicle is being driven, the
load reduction function temporarily deac-
tivates certain functions, such as the air
conditioning, the heated rear screen...
The deactivated functions are reactivated
automatically as soon as conditions permit.
Page 154 of 232
9
i
!
PRACTICAL INFORMATION
152
207CC_EN_CHAP09_INFO PRATIQUES_ED01-2014
The maximum towed load on a long in-
cline depends on the gradient and the
ambient temperature. If the warning lamp and the STOP warning lamp come
on, stop the vehicle and
switch off the engine as
soon as possible.
Braking
Towing a trailer increases the braking
distance.
To avoid overheating of the brakes on a
long mountain type of descent, the use
of engine braking is recommended.
Tyres
Check the tyre pressures of the tow- ing vehicle and of the trailer, observ-
ing the recommended pressures.
The rear parking sensors will be
deactivated automatically if a gen-
uine PEUGEOT towbar is used.
In all cases, keep a check on the cool-
ant temperature.
Lighting
Check the electrical lighting and sig-
nalling on the trailer. BOOT LUGGAGE CARRIER
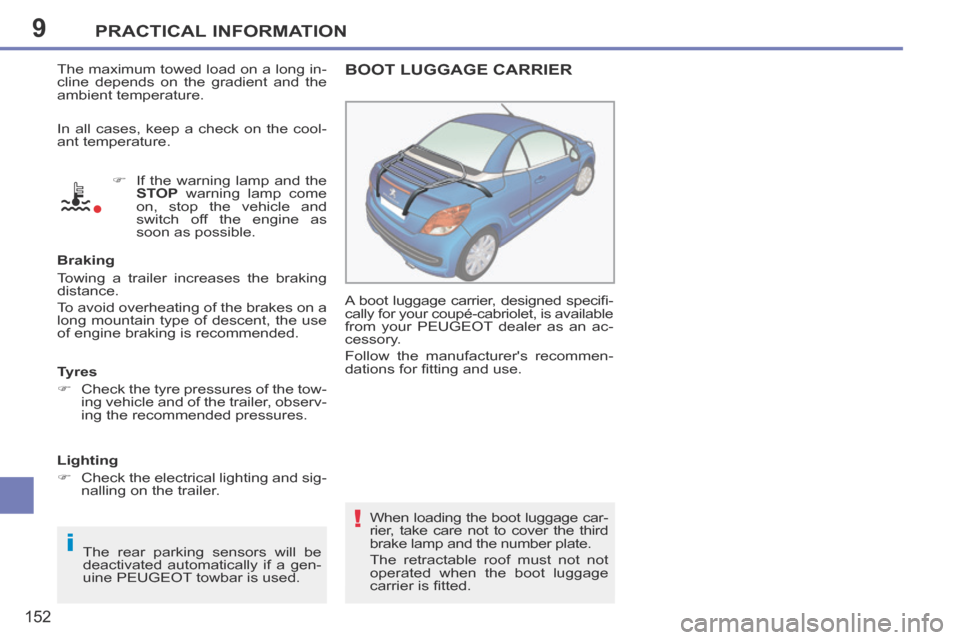
A boot luggage carrier, designed specifi -
cally for your coupé-cabriolet, is available
from your PEUGEOT dealer as an ac-
cessory.
Follow the manufacturer's recommen-
dations for fi tting and use.
When loading the boot luggage car-
rier, take care not to cover the third
brake lamp and the number plate.
The retractable roof must not not
operated when the boot luggage
carrier is fi tted.
Page 193 of 232
191
207CC_EN_CHAP11B_RNEG_ED01-2014
QUESTIONANSWERSOLUTION
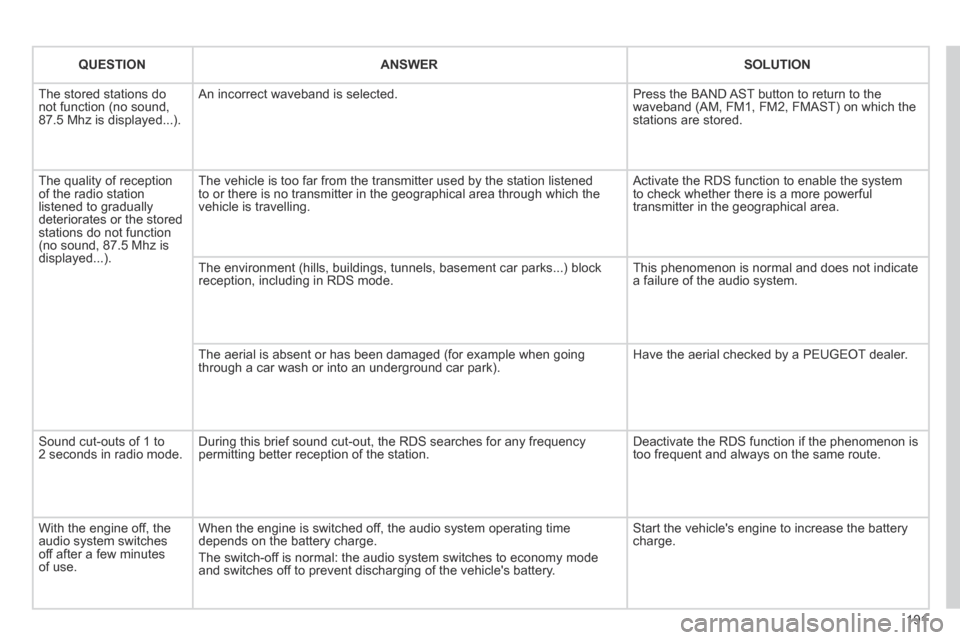
The stored stations do not function (no sound, 87.5 Mhz is displayed...).
An incorrect waveband is selected. Press the BAND AST button to return to the waveband (AM, FM1, FM2, FMAST) on which the stations are stored.
The quality of reception of the radio station listened to gradually deteriorates or the stored stations do not function (no sound, 87.5 Mhz is displayed...).
The vehicle is too far from the transmitter used by the station listened\
to or there is no transmitter in the geographical area through which the\
vehicle is travelling.
Activate the RDS function to enable the system to check whether there is a more powerful transmitter in the geographical area.
The environment (hills, buildings, tunnels, basement car parks...) blo\
ck reception, including in RDS mode. This phenomenon is normal and does not indicate a failure of the audio system.
The aerial is absent or has been damaged (for example when going through a car wash or into an underground car park). Have the aerial checked by a PEUGEOT dealer.
Sound cut-outs of 1 to 2 seconds in radio mode. During this brief sound cut-out, the RDS searches for any frequency permitting better reception of the station. Deactivate the RDS function if the phenomenon is too frequent and always on the same route.
With the engine off, the audio system switches off after a few minutes of use.
When the engine is switched off, the audio system operating time depends on the battery charge.
The switch-off is normal: the audio system switches to economy mode and switches off to prevent discharging of the vehicle's battery.
Start the vehicle's engine to increase the battery charge.
Page 216 of 232
214
QUESTIONANSWERSOLUTION
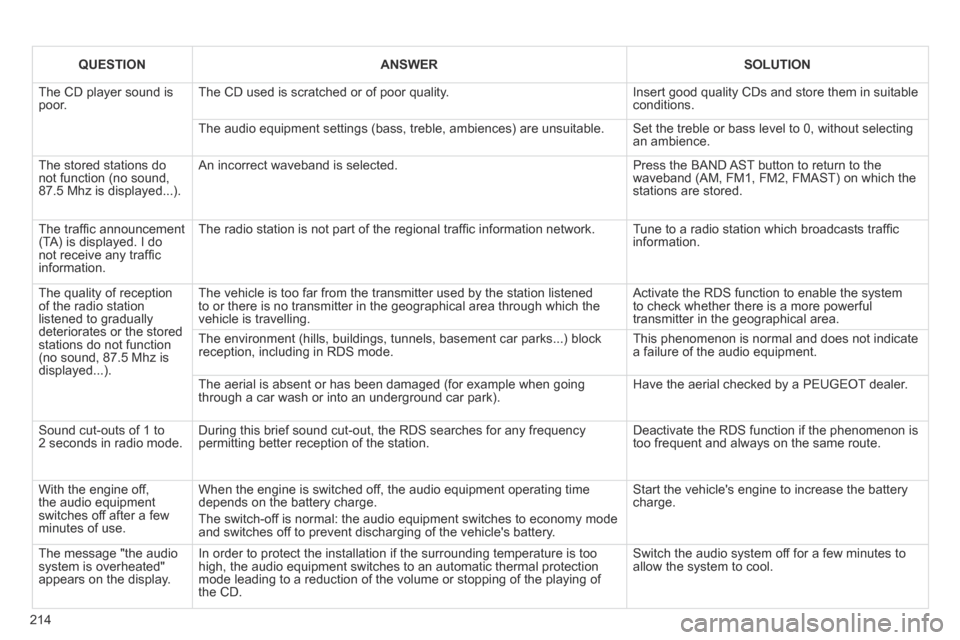
The CD player sound is poor. The CD used is scratched or of poor quality. Insert good quality CDs and store them in suitable conditions.
The audio equipment settings (bass, treble, ambiences) are unsuitable.\
Set the treble or bass level to 0, without selecting an ambience.
The stored stations do not function (no sound, 87.5 Mhz is displayed...).
An incorrect waveband is selected. Press the BAND AST button to return to the waveband (AM, FM1, FM2, FMAST) on which the stations are stored.
The traffi c announcement (TA) is displayed. I do not receive any traffi c information.
The radio station is not part of the regional traffi c information network. Tune to a radio station which broadcasts traffi c information.
The quality of reception of the radio station listened to gradually deteriorates or the stored stations do not function (no sound, 87.5 Mhz is displayed...).
The vehicle is too far from the transmitter used by the station listened\
to or there is no transmitter in the geographical area through which the\
vehicle is travelling.
Activate the RDS function to enable the system to check whether there is a more powerful transmitter in the geographical area.
The environment (hills, buildings, tunnels, basement car parks...) blo\
ck reception, including in RDS mode. This phenomenon is normal and does not indicate a failure of the audio equipment.
The aerial is absent or has been damaged (for example when going through a car wash or into an underground car park). Have the aerial checked by a PEUGEOT dealer.
Sound cut-outs of 1 to 2 seconds in radio mode. During this brief sound cut-out, the RDS searches for any frequency permitting better reception of the station. Deactivate the RDS function if the phenomenon is too frequent and always on the same route.
With the engine off, the audio equipment switches off after a few minutes of use.
When the engine is switched off, the audio equipment operating time depends on the battery charge.
The switch-off is normal: the audio equipment switches to economy mode and switches off to prevent discharging of the vehicle's battery.
Start the vehicle's engine to increase the battery charge.
The message "the audio system is overheated" appears on the display.
In order to protect the installation if the surrounding temperature is t\
oo high, the audio equipment switches to an automatic thermal protection mode leading to a reduction of the volume or stopping of the playing of \
the CD.
Switch the audio system off for a few minutes to allow the system to cool.
Page 220 of 232
218
VISUAL SEARCH
207CC_EN_CHAP12_RECHERCHE VISUELLE_ED01-2014
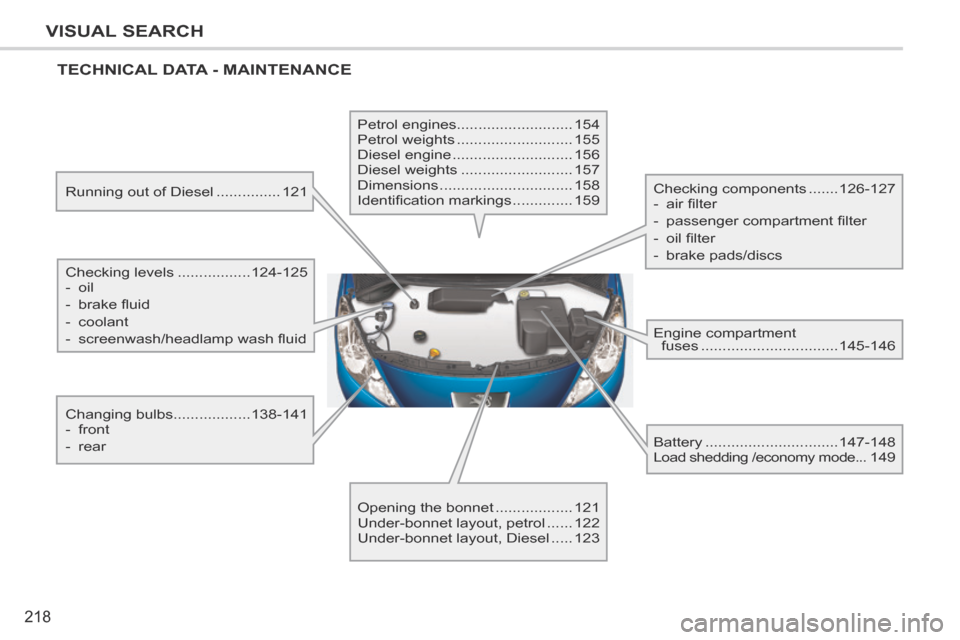
TECHNICAL DATA - MAINTENANCE
Running out of Diesel ...............121
Checking levels ................. 124-125
- oil
- brake fl uid
- coolant
- screenwash/headlamp wash fl uid
Changing bulbs ..................138-141
- front
- rear Petrol engines
........................... 154
Petrol weights ........................... 155
Diesel engine ............................ 156
Diesel weights .......................... 157
Dimensions ............................... 158
Identifi cation markings .............. 159
Opening the bonnet .................. 121
Under-bonnet layout, petrol ...... 122
Under-bonnet layout, Diesel ..... 123 Checking components .......
126-127
- air fi lter
- passenger compartment fi lter
- oil fi lter
- brake pads/discs
Engine compartment fuses ................................ 145-146
Battery ............................... 147-148
Load shedding /economy mode ...149
Page 221 of 232
219
ALPHABETICAL INDEX
207CC_EN_CHAP13_INDEX ALPHA_ED01-2014
Accessories ....................................153Accessory socket, 12V .....................59Access to rear seats .........................53Adjusting headlamps ........................83Adjusting the steering wheel ............54Airbag, knee ...................................107Airbags .....................................27, 105Airbags, front ..................................105Airbags, lateral ...............................107Air conditioning .................................18Air conditioning, digital ...............46, 50Air conditioning, manual .............46, 47Air distribution adjustment ..........48, 51Air filter ...........................................Air filter ...........................................Air filter126Air flow ..............................................18Air flow adjustment .....................48, 51Air intake ....................................48, 51Air recirculation ...........................48, 51Air vents ...........................................45Alarm ................................................69Anti-swirl net ...............................61, 62Anti-theft ...........................................66Assistance call ..........................97, 162Audible warning ................................98Audio streaming (Bluetooth) ...........207Automatic illumination of headlamps .................................82Automatic operation of hazard warning lamps ...............98Auxiliary sockets .......59, 182, 202, 204
Capacity, fuel tank ............................77CD MP3 ..................................181, 201Central locking ..................................74Changing a bulb ......................138-141Changing a fuse ......................142-146Changing a wheel....................133-136Changing a wiper blade .................149Changing the remote control battery ...........................................67Changing the time ......................34, 36Checking levels .......................122-125Checking the engine oil level ...30, 124Checking tyre pressures (using the kit) ...............................132Checks.....................................121-127Children .......................86-96, 104, 106Child seats ..................................91, 95Child seats, conventional .................91 Child seats, ISOFIX .....................94-96
Daytime running lamps .............................................81Deactivating the passenger airbag ..........................................106Deadlocking ......................................65Defrosting ...................................47, 49Demisting....................................47, 49Dials and gauges..............................20Diesel additive level........................125Dimensions .....................................158Dipped beam ............................80, 138Dipstick .....................................30, 124Directional lighting, static ..............................................83Direction indicators ...........97, 138, 140Doors ................................................73Doors emergency control .................75Door pockets ....................................58 Driving economically ........................18
Closing the boot ...............................76Closing the retractable roof ..................................................roof ..................................................roof6Connectors, audio ....59, 182, 202, 204Control for retractable roof .................Control for retractable roof .................Control for retractable roof7Control for all four windows ..............72Control panel, audio ...............164, 196Coolant level ...................................125Coolant temperature indicator .........................................indicator .........................................indicator31Courtesy mirror .................................Courtesy mirror .................................Courtesy mirror57Cruise control .................................11 6Cup holder ........................................Cup holder ........................................Cup holder58
Battery, remote control ...............67, 68Bluetooth (hands-free) .........................183, 205Bluetooth (telephone) ..........................183, 205Bonnet ............................................121Bonnet stay ....................................121Boot ..................................................76Boot luggage carrier .......................Boot luggage carrier .......................Boot luggage carrier152Brake discs .....................................126Brake lamps ...................................140Brake pads .....................................126Braking assistance system .............100
Battery ....................................126, 147Battery, charging ............................148
A
B
CD