warning light Peugeot 207 CC 2014 Owner's Manual
[x] Cancel search | Manufacturer: PEUGEOT, Model Year: 2014, Model line: 207 CC, Model: Peugeot 207 CC 2014Pages: 232, PDF Size: 11.11 MB
Page 4 of 232
2
CONTENTS
207CC_EN_CHAP00A_SOMMAIRE_ED01-2014
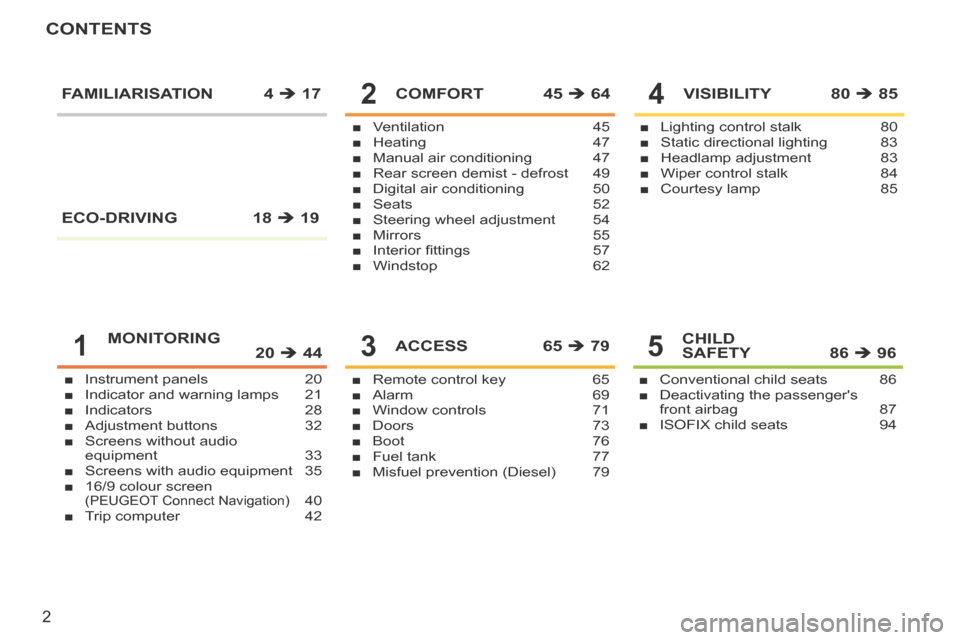
■ Instrument panels 20
■ Indicator and warning lamps 21
■ Indicators 28
■ Adjustment buttons 32
■ Screens without audio
equipment 33
■ Screens with audio equipment 35
■ 16/9 colour screen
(PEUGEOT Connect Navigation) 40
■ Trip computer 42
■ Ventilation 45
■ Heating 47
■ Manual air conditioning 47
■ Rear screen demist - defrost 49
■ Digital air conditioning 50
■ Seats 52
■ Steering wheel adjustment 54
■ Mirrors 55
■ Interior fi ttings 57
■ Windstop 62
COMFORT 45 64
■ Remote control key 65
■ Alarm 69
■ Window controls 71
■ Doors 73
■ Boot 76
■ Fuel tank 77
■ Misfuel prevention (Diesel) 79
ACCESS 65 79
■ Lighting control stalk 80
■ Static directional lighting 83
■ Headlamp adjustment 83
■ Wiper control stalk 84
■ Courtesy lamp 85
VISIBILITY 80 85
■ Conventional child seats 86
■ Deactivating the passenger's
front airbag 87
■ ISOFIX child seats 94
CHILD
SAFETY 86 96
FAMILIARISATION 4
17
MONITORING
20 445
4
3
2
1
ECO-DRIVING 18 19
Page 6 of 232
4
FAMILIARISATION
207CC_EN_CHAP00B_PRISE EN MAIN_ED01-2014
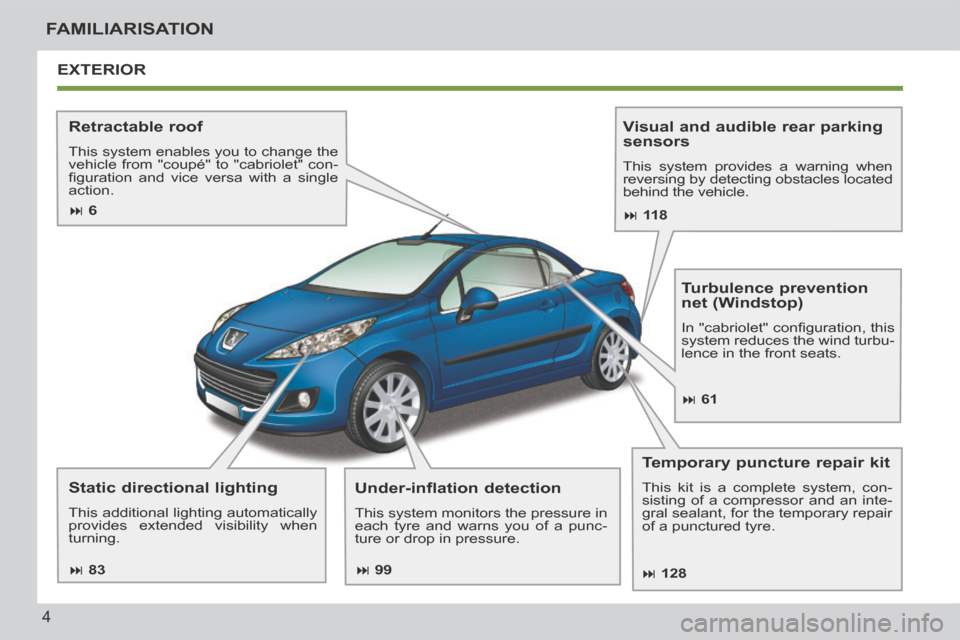
EXTERIOR
Retractable roof
This system enables you to change the
vehicle from "coupé" to "cabriolet" con-
fi guration and vice versa with a single
action.
Static directional lighting
This additional lighting automatically
provides extended visibility when
turning.
Visual and audible rear parking
sensors
This system provides a warning when
reversing by detecting obstacles located
behind the vehicle.
Under-inflation detection
This system monitors the pressure in
each tyre and warns you of a punc-
ture or drop in pressure.
Turbulence prevention
net (Windstop)
In "cabriolet" confi guration, this
system reduces the wind turbu-
lence in the front seats.
Temporary puncture repair kit
This kit is a complete system, con-
sisting of a compressor and an inte-
gral sealant, for the temporary repair
of a punctured tyre.
6
83
99
128 61
11 8
Page 23 of 232
1
!
MONITORING
21
207CC_EN_CHAP01_CONTROLE DE MARCHE_ED01-2014
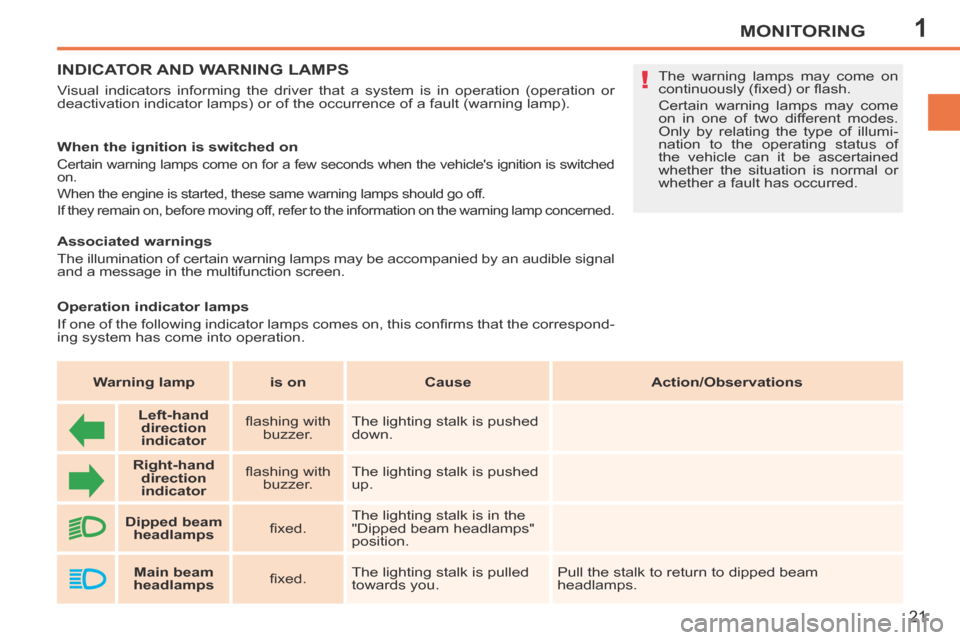
INDICATOR AND WARNING LAMPS
Visual indicators informing the driver that a system is in operation (op\
eration or
deactivation indicator lamps) or of the occurrence of a fault (warning\
lamp).
When the ignition is switched on
Certain warning lamps come on for a few seconds when the vehicle's ignit\
ion is switched
on.
When the engine is started, these same warning lamps should go off.
If they remain on, before moving off, refer to the information on the warning lamp concerned.
The warning lamps may come on
continuously (fi xed) or fl ash.
Certain warning lamps may come
on in one of two different modes.
Only by relating the type of illumi-
nation to the operating status of
the vehicle can it be ascertained
whether the situation is normal or
whether a fault has occurred.
Associated warnings
The illumination of certain warning lamps may be accompanied by an audible s ignal
and a message in the multifunction screen.
Warning lamp is on Cause Action/Observations
Left-hand direction
indicato r fl ashing with
buzzer. The lighting stalk is pushed
down.
Right-hand direction
indicator fl ashing with
buzzer. The lighting stalk is pushed
up.
Dipped beam headlamps fi xed. The lighting stalk is in the
"Dipped beam headlamps"
position.
Main beam
headlamps fi xed. The lighting stalk is pulled
towards you. Pull the stalk to return to dipped beam
headlamps.
Operation indicator lamps
If one of the following indicator lamps comes on, this confi rms that the correspond-
ing system has come into operation.
Page 33 of 232
1
i
MONITORING
31
207CC_EN_CHAP01_CONTROLE DE MARCHE_ED01-2014
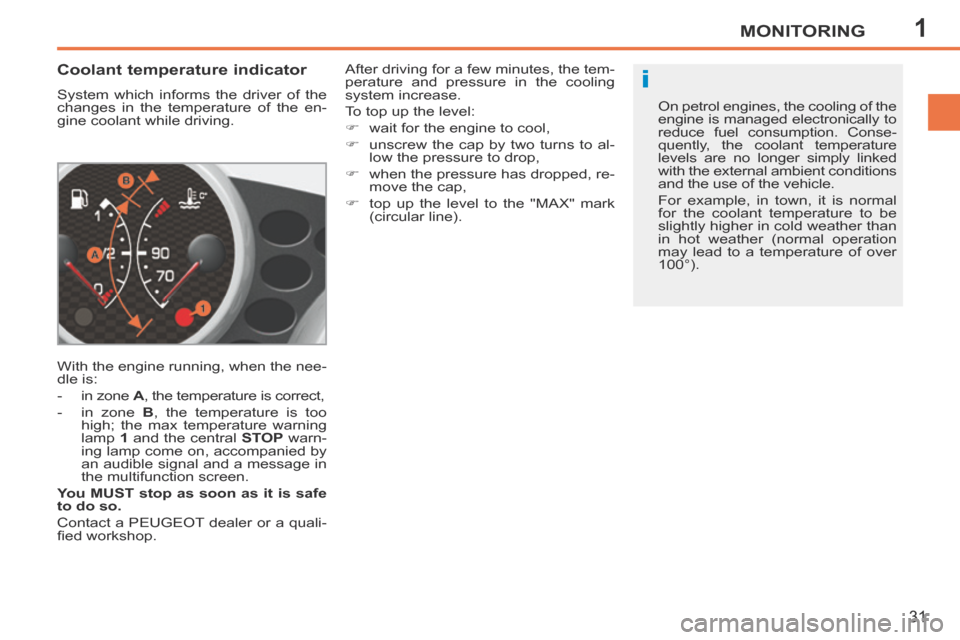
Coolant temperature indicator
System which informs the driver of the
changes in the temperature of the en-
gine coolant while driving.
With the engine running, when the nee-
dle is:
- in zone A , the temperature is correct,
- in zone B , the temperature is too high; the max temperature warning
lamp 1 and the central STOP warn-
ing lamp come on, accompanied by
an audible signal and a message in
the multifunction screen.
You MUST stop as soon as it is safe
to do so.
Contact a PEUGEOT dealer or a quali-
fi ed workshop. After driving for a few minutes, the tem-
perature and pressure in the cooling
system increase.
To top up the level:
wait for the engine to cool,
unscrew the cap by two turns to al-
low the pressure to drop,
when the pressure has dropped, re- move the cap,
top up the level to the "MAX" mark (circular line). On petrol engines, the cooling of the
engine is managed electronically to
reduce fuel consumption. Conse-
quently, the coolant temperature
levels are no longer simply linked
with the external ambient conditions
and the use of the vehicle.
For example, in town, it is normal
for the coolant temperature to be
slightly higher in cold weather than
in hot weather (normal operation
may lead to a temperature of over
100°).
Page 39 of 232
1MONITORING
37
207CC_EN_CHAP01_CONTROLE DE MARCHE_ED01-2014
MONOCHROME SCREEN C
* With air conditioning only.
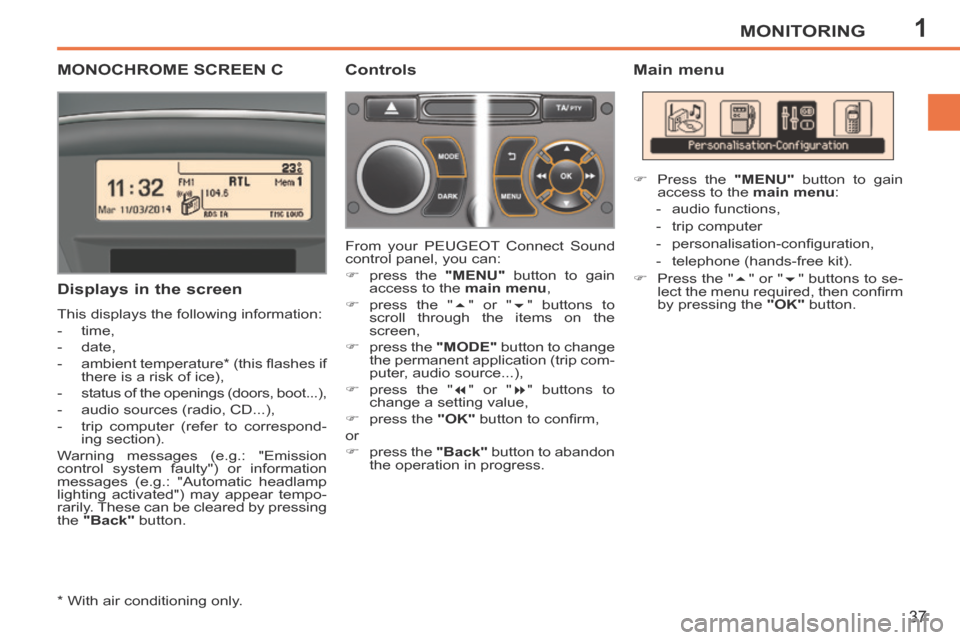
Displays in the screen
This displays the following information:
- time,
- date,
- ambient temperature * (this fl ashes if there is a risk of ice),
- status of the openings (doors, boot...),
- audio sources (radio, CD...),
- trip computer (refer to correspond- ing section).
Warning messages (e.g.: "Emission
control system faulty") or information
messages (e.g.: "Automatic headlamp
lighting activated") may appear tempo-
rarily. These can be cleared by pressing
the "Back" button. From your
PEUGEOT Connect Sound
control panel, you can:
press the "MENU" button to gain
access to the main menu ,
press the " " or " " buttons to
scroll through the items on the
screen,
press the "MODE" button to change
the permanent application (trip com-
puter, audio source...),
press the " " or " " buttons to
change a setting value,
press the "OK" button to confi rm,
or
press the "Back" button to abandon
the operation in progress. Press the
"MENU" button to gain
access to the main menu :
- audio functions,
- trip computer
- personalisation-confi guration,
- telephone (hands-free kit).
Press the " " or " " buttons to se-
lect the menu required, then confi rm
by pressing the "OK" button.
Controls Main menu
Page 68 of 232
3
i
ACCESS
66
207CC_EN_CHAP03_OUVERTURES_ED01-2014
The vehicle will lock itself again
automatically after thirty seconds
unless a door is opened. This
system prevents unintentional un-
locking.
Please note that in this case, the
alarm will not be set.
The folding and unfolding of the
door mirrors can be deactivated by
a PEUGEOT dealer.
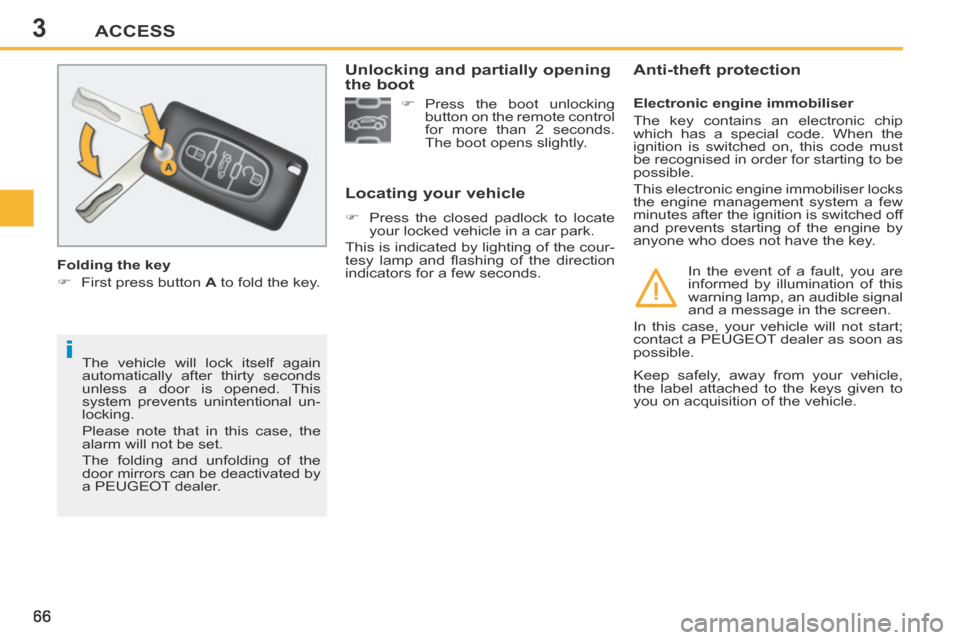
Folding the key
First press button
A to fold the key.
Locating your vehicle
Press the closed padlock to locate
your locked vehicle in a car park.
This is indicated by lighting of the cour-
tesy lamp and fl ashing of the direction
indicators for a few seconds. Electronic engine immobiliser
The key contains an electronic chip
which has a special code. When the
ignition is switched on, this code must
be recognised in order for starting to be
possible.
This electronic engine immobiliser locks
the engine management system a few
minutes after the ignition is switched off
and prevents starting of the engine by
anyone who does not have the key.
Anti-theft protection
In the event of a fault, you are
informed by illumination of this
warning lamp, an audible signal
and a message in the screen.
In this case, your vehicle will not start;
contact a PEUGEOT dealer as soon as
possible.
Press the boot unlocking
button on the remote control
for more than 2 seconds.
The boot opens slightly.
Unlocking and partially opening
the boot
Keep safely, away from your vehicle,
the label attached to the keys given to
you on acquisition of the vehicle.
Page 78 of 232
3
i
i
ACCESS
76
207CC_EN_CHAP03_OUVERTURES_ED01-2014
BOOT
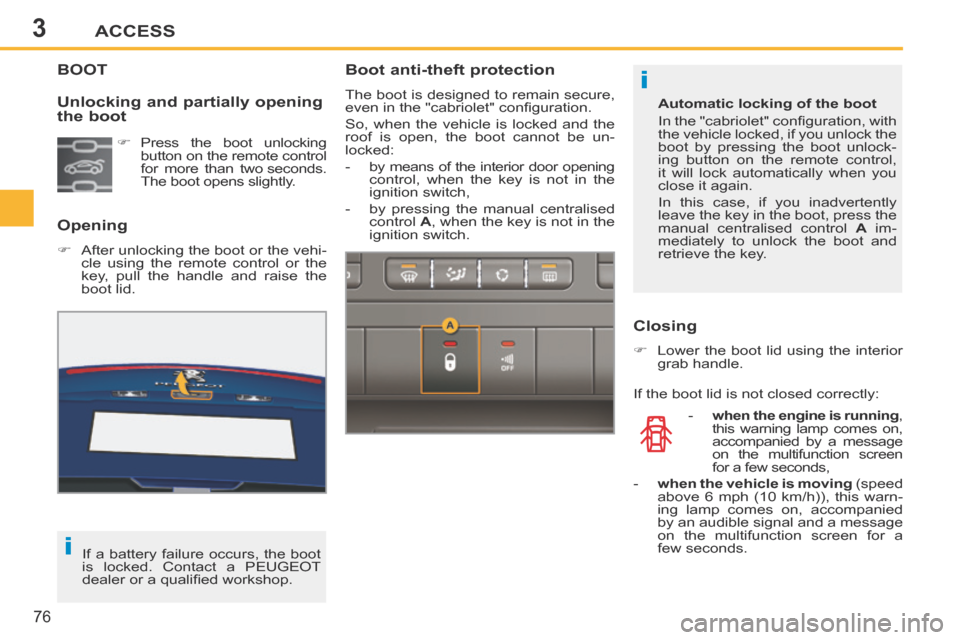
Opening
After unlocking the boot or the vehi-cle using the remote control or the
key, pull the handle and raise the
boot lid.
Unlocking and partially opening
the boot
Press the boot unlocking button on the remote control
for more than two seconds.
The boot opens slightly.
If a battery failure occurs, the boot
is locked. Contact a PEUGEOT
dealer or a qualifi ed workshop.
Boot anti-theft protection
The boot is designed to remain secure,
even in the "cabriolet" confi guration.
So, when the vehicle is locked and the
roof is open, the boot cannot be un-
locked:
- by means of the interior door opening control, when the key is not in the
ignition switch,
- by pressing the manual centralised control A , when the key is not in the
ignition switch.
- when the engine is running , this warning lamp comes on,
accompanied by a message
on the multifunction screen
for a few seconds,
- when the vehicle is moving (speed above 6 mph (10 km/h)), this warn-
ing lamp comes on, accompanied
by an audible signal and a message
on the multifunction screen for a
few seconds.
Closing
Lower the boot lid using the interior grab handle.
If the boot lid is not closed correctly: Automatic locking of the boot
In the "cabriolet" confi guration, with
the vehicle locked, if you unlock the
boot by pressing the boot unlock-
ing button on the remote control,
it will lock automatically when you
close it again.
In this case, if you inadvertently
leave the key in the boot, press the
manual centralised control
A im-
mediately to unlock the boot and
retrieve the key.
Page 84 of 232

4
!
82
VISIBILITY
207CC_EN_CHAP04_VISIBILITE_ED01-2014
In fog or snow, the sunshine sensor
may detect suffi cient light. There-
fore, the lighting will not come on
automatically.
Do not cover the sunshine sensor,
coupled with the rain sensor and
located in the centre of the wind-
screen behind the rear view mirror;
the associated functions would no
longer be controlled.
Operating fault
In the event of a fault with the
sunshine sensor, the lighting
comes on accompanied by the
service warning lamp, an audi-
ble signal and a message in the screen.
Have it checked by a PEUGEOT dealer
or a qualifi ed workshop.
Automatic illumination of headlamps
The sidelamps and dipped beam headlam-
ps are switched on automatically, without
any action on the part of the driver, when a
low level of ambient light is detected (sen-
sor behind the rear view mirror) or when the
windscreen wipers are switched on.
As soon as the brightness returns to a suf-
fi cient level or after the windscreen wipers
are switched off, the lighting is switched off
automatically.
Manual "Guide-me-home"
lighting
The dipped beam headlamps remain
on temporarily, after switching off the
vehicle's ignition, to make the driver's
exit easier in poor light.
Activation
With the ignition off, activate a "headlamp fl ash" using stalk B .
A second "headlamp fl ash" switches the function off again.
Switching off
The "guide-me-home" lighting is
switched off automatically after a pre-
determined time, following locking of
the vehicle.
Activation
Turn ring A to the " AUTO " position.
The automatic illumination of head-
lamps is accompanied by a mes-
sage in the screen.
Deactivation
Turn ring A to a position other than
" AUTO ". Deactivation is accompa-
nied by a message in the screen. Automatic "guide-me-home" lighting
With the automatic "guide-me-home"
lighting system activated, when the am-
bient light level is low the dipped beam
headlamps remain on after switching off
the ignition.
Page 85 of 232
4
i
83
VISIBILITY
207CC_EN_CHAP04_VISIBILITE_ED01-2014
STATIC DIRECTIONAL
LIGHTING
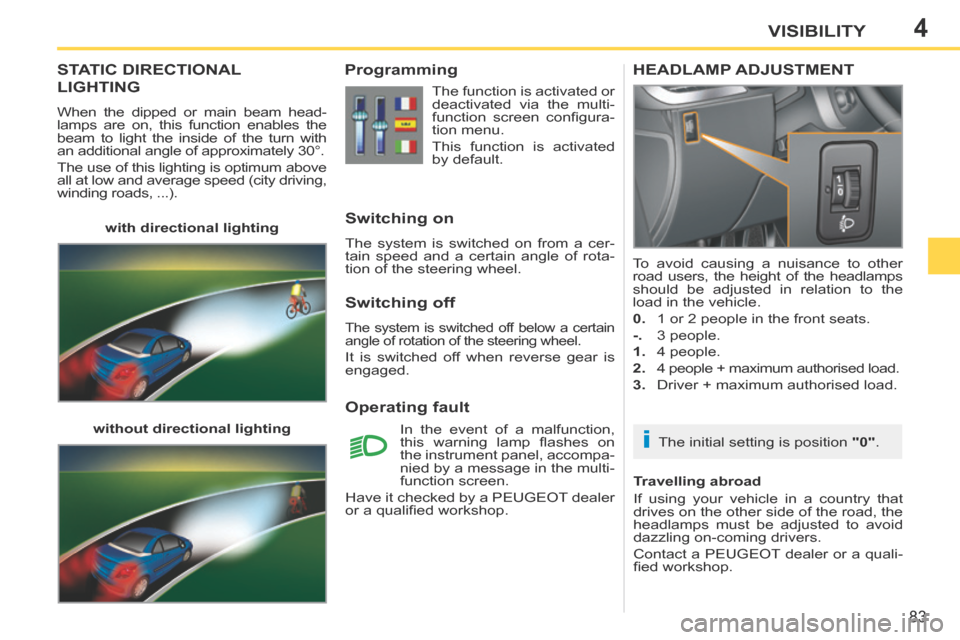
When the dipped or main beam head-
lamps are on, this function enables the
beam to light the inside of the turn with
an additional angle of approximately 30°.
The use of this lighting is optimum above
all at low and average speed (city driving,
winding roads, ...). with directional lighting
without directional lighting
Programming Switching on
The system is switched on from a cer-
tain speed and a certain angle of rota-
tion of the steering wheel.
Operating fault
The function is activated or
deactivated via the multi-
function screen confi gura-
tion menu.
This function is activated
by default.
In the event of a malfunction,
this warning lamp fl ashes on
the instrument panel, accompa-
nied by a message in the multi-
function screen.
Have it checked by a PEUGEOT dealer
or a qualifi ed workshop.
HEADLAMP ADJUSTMENT
The initial setting is position "0" .
To avoid causing a nuisance to other
road users, the height of the headlamps
should be adjusted in relation to the
load in the vehicle.
0.
1 or 2 people in the front seats.
-. 3 people.
1. 4 people.
2. 4 people + maximum authorised load.
3. Driver + maximum authorised load.
Switching off
The system is switched off below a certain
angle of rotation of the steering wheel.
It is switched off when reverse gear is
engaged.
Travelling abroad
If using your vehicle in a country that
drives on the other side of the road, the
headlamps must be adjusted to avoid
dazzling on-coming drivers.
Contact a PEUGEOT dealer or a quali-
fi ed workshop.
Page 99 of 232
6
i
i
!
SAFETY
97
207CC_EN_CHAP06_SECURITE_ED01-2014
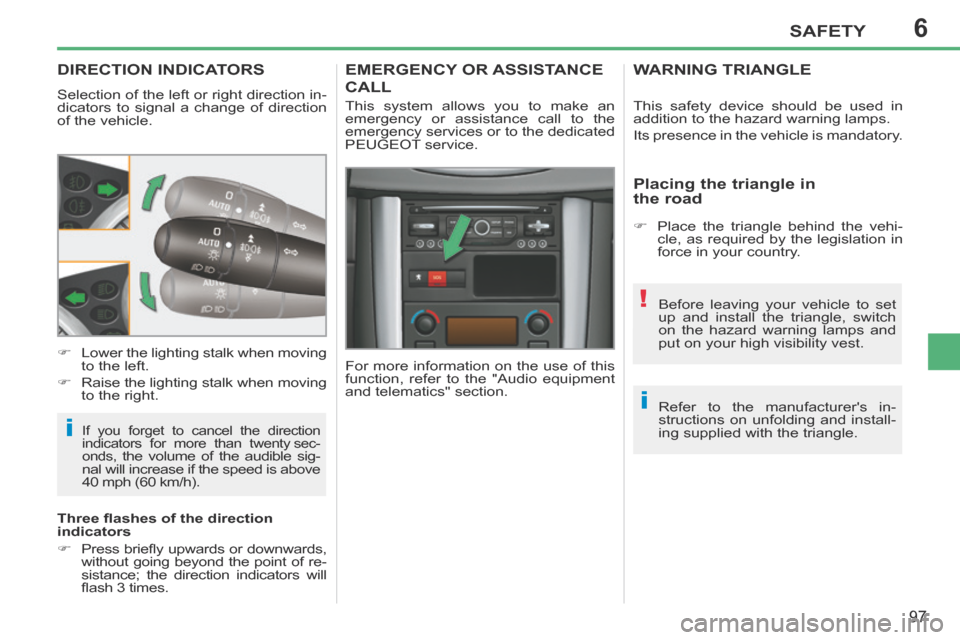
DIRECTION INDICATORS
Selection of the left or right direction in-
dicators to signal a change of direction
of the vehicle.
If you forget to cancel the direction
indicators for more than twenty sec-
onds
, the volume of the audible sig-
nal will increase if the speed is above
40 mph (60 km/h).
Lower the lighting stalk when moving
to the left.
Raise the lighting stalk when moving to the right.
Three fl ashes of the direction
indicators
Press briefl y upwards or downwards, without going beyond the point of re-
sistance; the direction indicators will
fl ash 3 times.
EMERGENCY OR ASSISTANCE
CALL
For more information on the use of this
function, refer to the "Audio equipment
and telematics" section. This system allows you to make an
emergency or assistance call to the
emergency services or to the dedicated
PEUGEOT service. This safety device should be used in
addition to the hazard warning lamps.
Its presence in the vehicle is mandatory.
WARNING TRIANGLE
Placing the triangle in
the road
Place the triangle behind the vehi-
cle, as required by the legislation in
force in your country.
Before leaving your vehicle to set
up and install the triangle, switch
on the hazard warning lamps and
put on your high visibility vest.
Refer to the manufacturer's in-
structions on unfolding and install-
ing supplied with the triangle.