change time Peugeot 208 2015 Owner's Manual - RHD (UK, Australia)
[x] Cancel search | Manufacturer: PEUGEOT, Model Year: 2015, Model line: 208, Model: Peugeot 208 2015Pages: 341, PDF Size: 38.75 MB
Page 51 of 341
49
208_en_Chap03_Indicateurs_ed01-2015
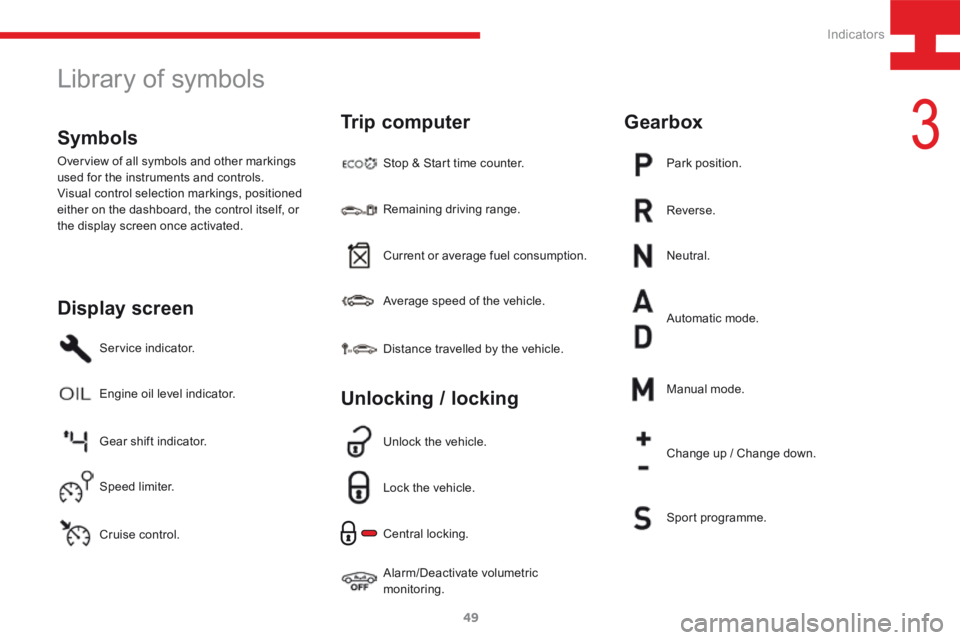
Service indicator.
Gear shift indicator.Stop & Start time counter.
Average speed of the vehicle.
Engine oil level indicator.
Cruise control. Current or average fuel consumption.
Speed limiter. Remaining driving range.
Distance travelled by the vehicle.
Unlock the vehicle.
Neutral.
Automatic mode. Reverse. Park position.
Lock the vehicle.
Alarm/Deactivate volumetric
monitoring. Central locking. Manual mode.
Change up / Change down.
Sport programme.
Display screen
Trip computer
Unlocking / lockingGearbox
Symbols
Overview of all symbols and other markings
used for the instruments and controls.
Visual control selection markings, positioned
either on the dashboard, the control itself, or
the display screen once activated.
Library of symbols
3
Indicators
Page 116 of 341
114
208_en_Chap05_conduite_ed01-2015
Stopping - Moving off on a slope
Do not uses the accelerator to hold the vehicle,
but apply the parking brake.You can change from position A to M
and from M to A at any time.
Stopping - Parking
Place the lever at N and apply the parking
brake.
Manual mode
Operation
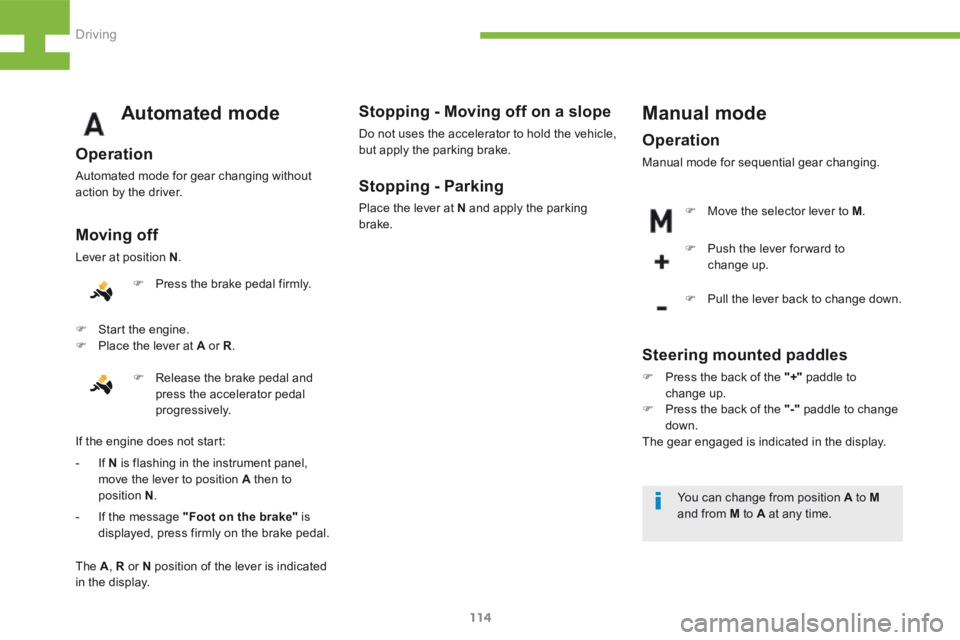
Manual mode for sequential gear changing.F Push the lever for ward to
change up.
F Pull the lever back to change down.
F
Move the selector lever to M .
Automated mode
Operation
Automated mode for gear changing without
action by the driver.
Moving off
Lever at position N.
F Press the brake pedal firmly.
F Release the brake pedal and
press the accelerator pedal
progressively.
- If N is flashing in the instrument panel,
move the lever to position A then to
position N .
- If the message "Foot on the brake" is
displayed, press firmly on the brake pedal.
F
Start the engine.
F Place the lever at A or R .
The A , R or N position of the lever is indicated
in the display.
If the engine does not start:
Steering mounted paddles
F
Press the back of the "+" paddle to
change up.
F Press the back of the "-" paddle to change
down.
The gear engaged is indicated in the display.
Driving
Page 119 of 341
117
208_en_Chap05_conduite_ed01-2015
Advice
F Select position D for automatic
changing of the four gears.
The gearbox then operates in auto-adaptive
mode, without action by the driver. It
continuously selects the most suitable gear for
the driving style, the relief of the road and the
load in the vehicle.
For maximum acceleration, without touching
the gear lever, press the accelerator pedal fully
down (kick down). The gearbox changes down
automatically or holds the gear engaged up to
maximum engine speed.
When braking, the gearbox changes down
automatically to provide effective engine
braking.
When you take your foot off the accelerator
pedal quickly, the gearbox does not change up,
for your improved safety.Manual mode
Operation
Manual mode for sequential gear changing.
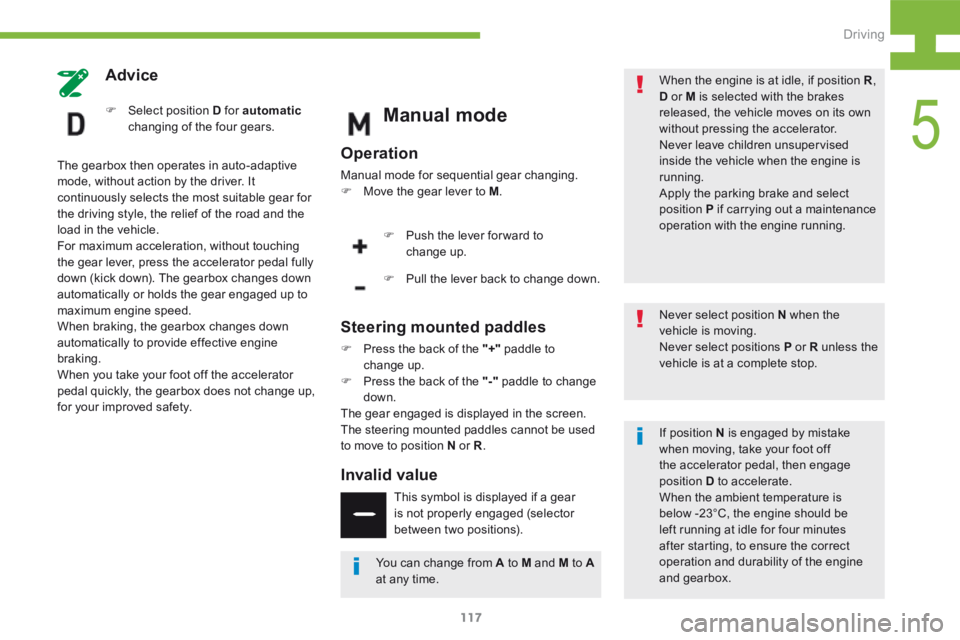
F Move the gear lever to M .
F Push the lever for ward to
change up.
F Pull the lever back to change down.
Steering mounted paddles
F Press the back of the "+" paddle to
change up.
F Press the back of the "-" paddle to change
down.
The gear engaged is displayed in the screen.
The steering mounted paddles cannot be used
to move to position N or R .
Invalid value
This symbol is displayed if a gear
is not properly engaged (selector
between two positions). When the engine is at idle, if position R
,
D or M is selected with the brakes
released, the vehicle moves on its own
without pressing the accelerator.
Never leave children unsupervised
inside the vehicle when the engine is
running.
Apply the parking brake and select
position P if carrying out a maintenance
operation with the engine running.
Never select position N when the
vehicle is moving.
Never select positions P or R unless the
vehicle is at a complete stop.
You can change from A to M and M to A
at any time. If position N is engaged by mistake
when moving, take your foot off
the accelerator pedal, then engage
position
D to accelerate.
When the ambient temperature is
below -23°C, the engine should be
left running at idle for four minutes
after starting, to ensure the correct
operation and durability of the engine
and gearbox.
5
Driving
Page 124 of 341
122
208_en_Chap05_conduite_ed01-2015
Park Assist
For entry into a parking space (parallel
parking) the system does not detect
spaces which are clearly much smaller
or larger than the size of the vehicle.
This "parking assistance" system
is activated automatically during
manoeuvres; it is therefore possible
that a symbol comes on in the screen,
accompanied by an audible signal,
without affecting the manoeuvre.The selection of the type of manoeuvre
(entering or exiting a parallel parking
space) prevents a change to STOP
mode of Stop & Start.
In STOP mode, this selection restarts
the engine.
The Park Assist system cannot in any
circumstances replace the need for
vigilance on the part of the driver.
The driver must remain in control of
their vehicle ensuring that the space
remains clear during the manoeuvre.
In some circumstances, the sensors
may not detect small obstacles located
in their blind spots. During a manoeuvre the steering wheel
turns quickly: do not hold the steering
wheel, do not place your hand between
the spokes of the steering wheel and
take care with loose and bulky clothing,
scarves, handbags... There is a risk of
injury.
The driver can take back control of the steering
at any time.
Changing tyre sizes (out-size tyres,
winter tyres, ...) can inter fere with
the correct operation of the parking
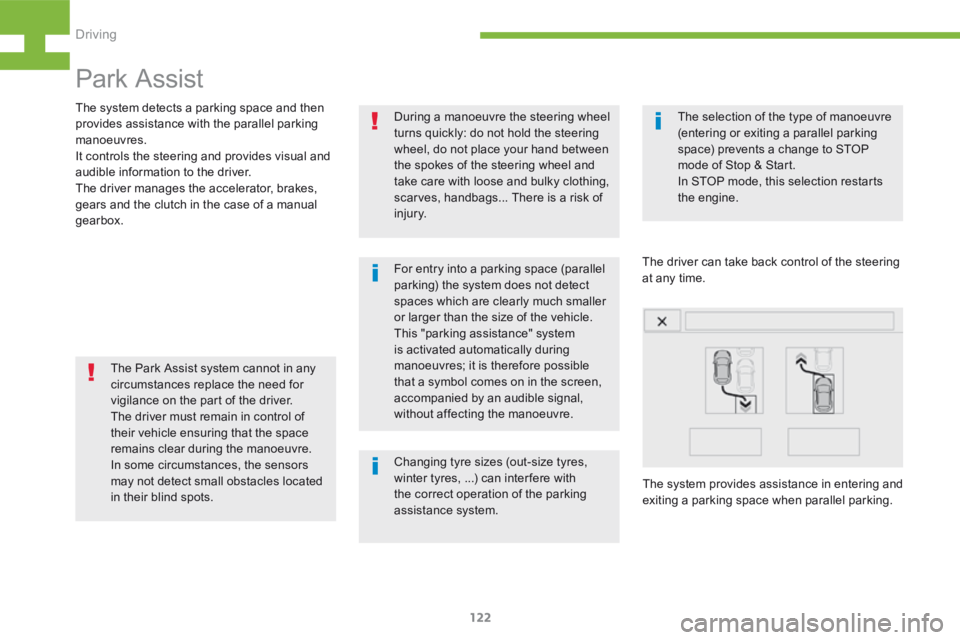
assistance system. The system provides assistance in entering and
exiting a parking space when parallel parking.
The system detects a parking space and then
provides assistance with the parallel parking
manoeuvres.
It controls the steering and provides visual and
audible information to the driver.
The driver manages the accelerator, brakes,
gears and the clutch in the case of a manual
gearbox.
Driving
Page 142 of 341
140
208_en_Chap05_conduite_ed01-2015
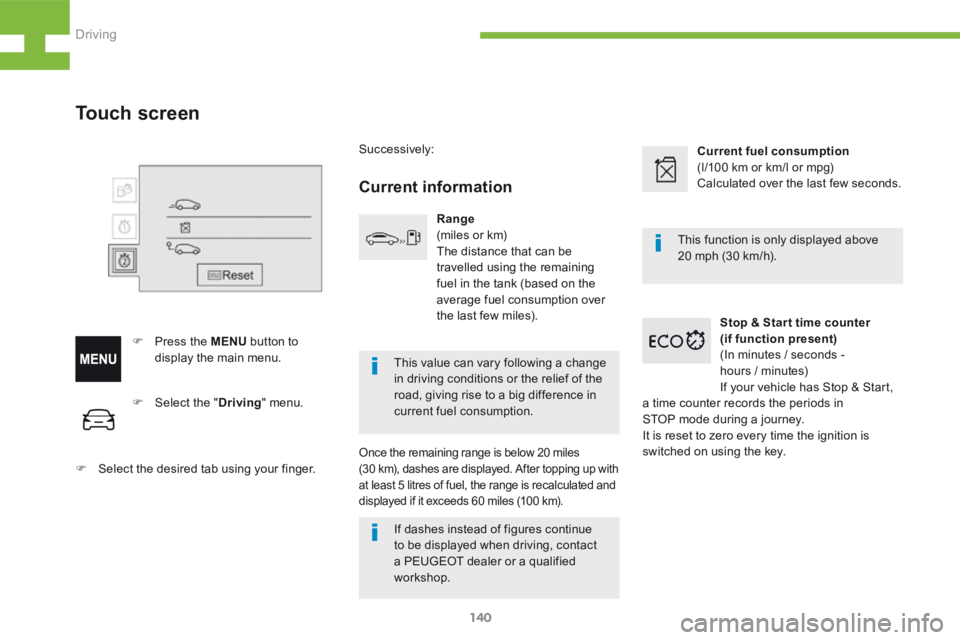
F Select the " Driving" menu.
F Select the desired tab using your finger.
Touch screen
F Press the MENU button to
display the main menu. Successively:
Current information
Range
(miles or km)
The distance that can be
travelled using the remaining
fuel in the tank (based on the
average fuel consumption over
the last few miles).
Once the remaining range is below 20 miles
(30 km), dashes are displayed. After topping up with
at least 5 litres of fuel, the range is recalculated and
displayed if it exceeds 60 miles (100 km).
Current fuel consumption
(l/100 km or km/l or mpg)
Calculated over the last few seconds.
Stop & Star t time counter
(if function present)
(In minutes / seconds -
hours / minutes)
If your vehicle has Stop & Start,
a time counter records the periods in
STOP mode during a journey.
It is reset to zero every time the ignition is
switched on using the key. This function is only displayed above
20 mph (30 km/h).
This value can vary following a change
in driving conditions or the relief of the
road, giving rise to a big difference in
current fuel consumption.
If dashes instead of figures continue
to be displayed when driving, contact
a PEUGEOT dealer or a qualified
workshop.
Driving
Page 144 of 341
142
208_en_Chap05_conduite_ed01-2015
Eco-driving
Eco-driving is a range of everyday practices that allow the motorist to optimise their fuel consumption and CO2 emissions.
Optimise the use of your gearbox
With a manual gearbox, move off gently and change up without waiting.
During acceleration change up early.
With an automatic or electronic gearbox, give preference to automatic
mode and avoid pressing the accelerator pedal heavily or suddenly.
The gear shift indicator invites you engage the most suitable gear: as
soon as the indication is displayed in the instrument panel, follow it
straight away.
For vehicles fitted with an electronic or automatic gearbox, this
indicator appears only in manual mode.
Drive smoothly
Maintain a safe distance between vehicles, use engine braking rather
than the brake pedal, and press the accelerator progressively. These
practices contribute towards a reduction in fuel consumption and CO
2
emissions and also helps reduce the background traffic noise.
If your vehicle has cruise control, make use of the system at speeds
above 25 mph (40 km/h) when the traffic is flowing well.
Control the use of your electrical
equipment
Before moving off, if the passenger compartment is too warm, ventilate it
by opening the windows and air vents before using the air conditioning.
Above 30 mph (50 km/h), close the windows and leave the air vents
open.
Remember to make use of equipment that can help keep the
temperature in the passenger compartment down (sunroof and window
blinds...).
Switch off the air conditioning, unless it has automatic regulation, as
soon as the desired temperature is attained.
Switch off the demisting and defrosting controls, if not automatic.
Switch off the heated seat as soon as possible.
Switch off the headlamps and front foglamps when the level of light
does not require their use.
Avoid running the engine before moving off, particularly in winter; your
vehicle will warm up much faster while driving.
As a passenger, if you avoid connecting your multimedia devices
(film, music, video game...), you will contribute towards limiting the
consumption of electrical energy, and so of fuel.
Disconnect your portable devices before leaving the vehicle.
Driving
Page 157 of 341
155
208_en_Chap06_Feux-Signalisations_ed01-2015
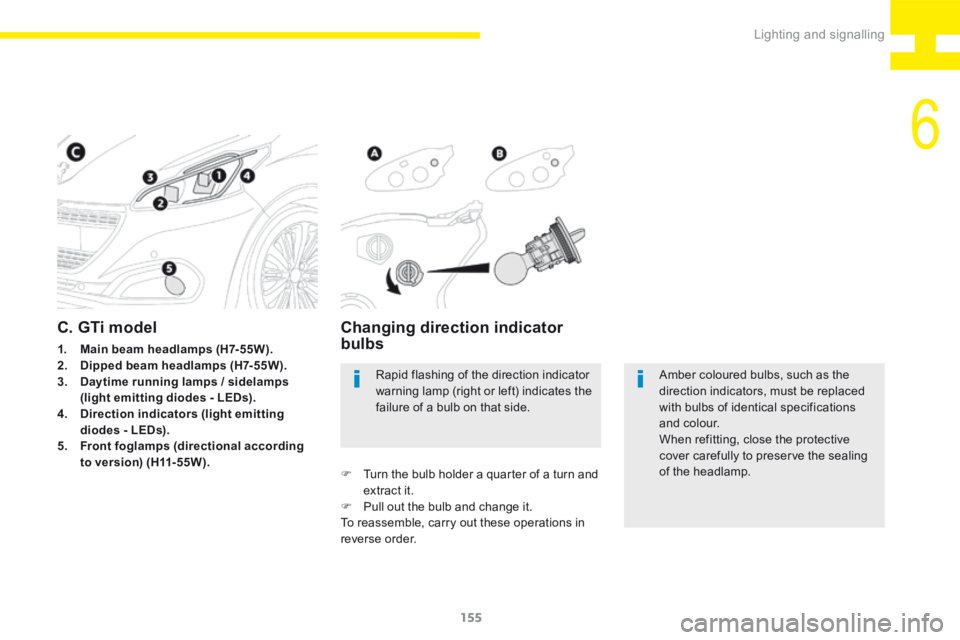
Amber coloured bulbs, such as the
direction indicators, must be replaced
with bulbs of identical specifications
and colour.
When refitting, close the protective
cover carefully to preserve the sealing
of the headlamp.
Rapid flashing of the direction indicator
warning lamp (right or left) indicates the
failure of a bulb on that side.
Changing direction indicator
bulbs
F
Turn the bulb holder a quarter of a turn and
extract it.
F Pull out the bulb and change it.
To reassemble, carry out these operations in
reverse order.
C. GTi model
1. Main beam headlamps (H7-55W).
2. Dipped beam headlamps (H7-55W).
3. Daytime running lamps / sidelamps
(light emitting diodes - LEDs).
4. Direction indicators (light emitting
diodes - LEDs).
5. Front foglamps (directional according
to version) (H11-55W).
6
Lighting and signalling
Page 158 of 341
156
208_en_Chap06_Feux-Signalisations_ed01-2015
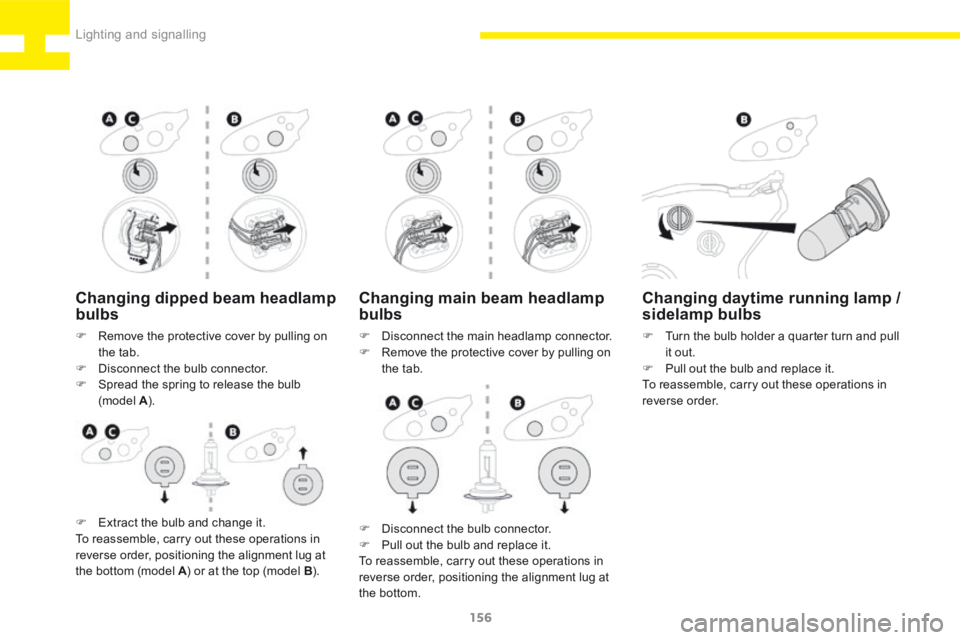
Changing main beam headlamp
bulbs
F Disconnect the main headlamp connector.
F Remove the protective cover by pulling on
the tab.
Changing daytime running lamp /
sidelamp bulbs
F Turn the bulb holder a quarter turn and pull
it out.
F Pull out the bulb and replace it.
To reassemble, carry out these operations in
reverse order.
F Disconnect the bulb connector.
F Pull out the bulb and replace it.
To reassemble, carry out these operations in
reverse order, positioning the alignment lug at
the bottom.
Changing dipped beam headlamp
bulbs
F Remove the protective cover by pulling on
the tab.
F Disconnect the bulb connector.
F Spread the spring to release the bulb
(model A ).
F Extract the bulb and change it.
To reassemble, carry out these operations in
reverse order, positioning the alignment lug at
the bottom (model A ) or at the top (model B ).
Lighting and signalling
Page 172 of 341
170
208_en_Chap07_ Amenagements_ed01-2015
Installation of radio
communication
transmitters
Before installing any after-market radio
communication transmitter, you can
contact a PEUGEOT dealer for the
specification of transmitters which can
be fitted (frequency, maximum power,
aerial position, specific installation
requirements), in line with the Vehicle
Electromagnetic Compatibility
Directive (2004/104/EC). Depending on the legislation in force in
the country, certain safety equipment
may be compulsory: high visibility
safety vests, warning triangles,
breathalyzers, spare bulbs, spare fuses,
fire extinguisher, first aid kit, mud flaps
at the rear of the vehicle.
By visiting a PEUGEOT dealer, you can also
obtain products for cleaning and maintenance
(exterior and interior) - including ecological
products in the "TECHNATURE*" range,
topping up products (screenwash...), touch-up
pens and paint aerosols for the exact colour of
your vehicle, refills (cartridge for the temporary
puncture repair kit...), ...
"Multimedia":
audio systems, portable satellite navigation
systems, semi-integral support for portable
satellite navigation system, hands-free kit, CD
changer, speakers, DVD player (depending on
version), connection kit for MP3 or CD player,
USB Box, Wi-Fi on-board...
* The "TECHNATURE" range comprises
products for the care and maintenance of
your vehicle, recommended and approved by
P E U G E O T.
Fittings
Page 202 of 341
200
208_en_Chap08_Informations-pratiques_ed01-2015
Under-inflation
The under-inflation detection system
does not replace the need for vigilance
on the part of the driver.
This system does not avoid the need to
check the tyre pressures (including the
spare wheel) every month as well as
before a long journey.
Driving with under-inflated tyres impairs
road holding, extends braking distances
and causes premature tyre wear,
particularly under arduous condition
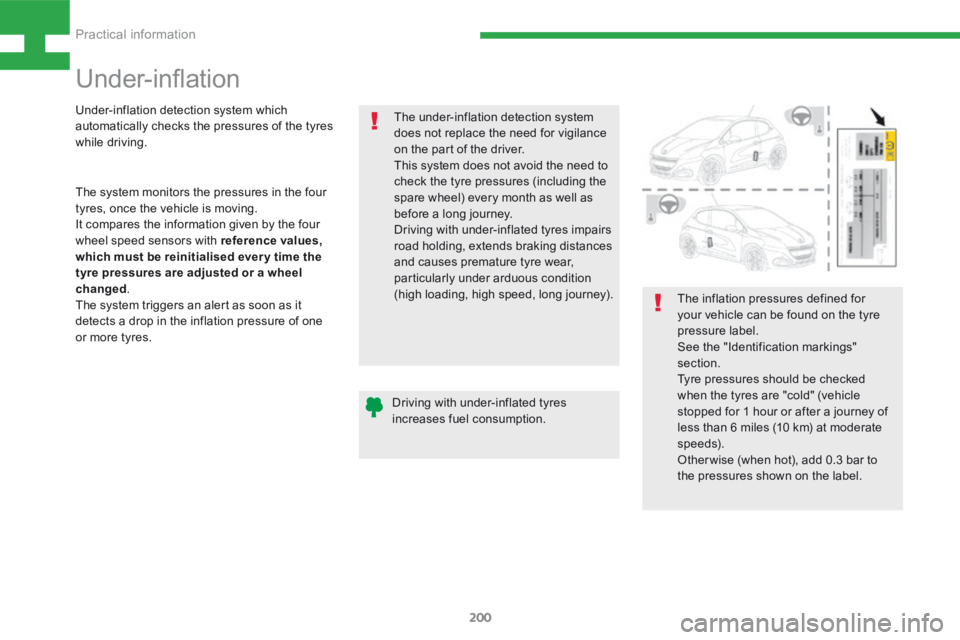
(high loading, high speed, long journey).The inflation pressures defined for
your vehicle can be found on the tyre
pressure label.
See the "Identification markings"
section.
Tyre pressures should be checked
when the tyres are "cold" (vehicle
stopped for 1 hour or after a journey of
less than 6 miles (10 km) at moderate
speeds).
Other wise (when hot), add 0.3 bar to
the pressures shown on the label.
Driving with under-inflated tyres
increases fuel consumption.
Under-inflation detection system which
automatically checks the pressures of the tyres
while driving.
The system monitors the pressures in the four
tyres, once the vehicle is moving.
It compares the information given by the four
wheel speed sensors with reference values,
which must be reinitialised ever y time the
tyre pressures are adjusted or a wheel
changed
.
The system triggers an alert as soon as it
detects a drop in the inflation pressure of one
or more tyres.
Practical information