display PEUGEOT 208 2021 Owner's Manual
[x] Cancel search | Manufacturer: PEUGEOT, Model Year: 2021, Model line: 208, Model: PEUGEOT 208 2021Pages: 276, PDF Size: 8.02 MB
Page 28 of 276
26
Instruments
With 7-inch touch screen
Use the buttons arranged around the touch
screen to access the menus, then press the
virtual buttons on the touch screen.
With 10-inch touch screen
Use the buttons arranged below the touch
screen to access the menus, then press the
virtual buttons on the touch screen.
Menus
Radio
Media
Climate
Settings for temperature, air flow, etc.
For more information on Manual air
conditioning , refer to the corresponding section.
Telephone
Driving
Activation, deactivation and settings for
certain functions.
Settings
Main system settings.
For more information about the menus,
refer to the sections describing the audio
and telematics systems.
7-inch or 10-inch touch
screen
This system gives access to the following elements:
–
Permanent display of the time and outside
temperature (a blue warning lamp appears if
there is a risk of ice).
–
Heating/air conditioning system controls.
–
V
ehicle functions and equipment setting
menus.
– Audio system and telephone controls and
display of related information.
–
Display of visual manoeuvring aid functions
(visual parking sensor information, Park
Assist,
etc.).
–
Internet services and display of
related
information.
–
Navigation system controls and
display
of related information (depending on
version).
For safety reasons, always stop the
vehicle before performing operations
that require sustained attention.
Some functions are not accessible while
driving.
Recommendations
This screen is of the capacitive type.
– Do not use pointed objects on the touch
screen.
–
Do not touch the touch screen with wet hands.
–
Use a soft, clean cloth to clean the touch
screen.
Main controls
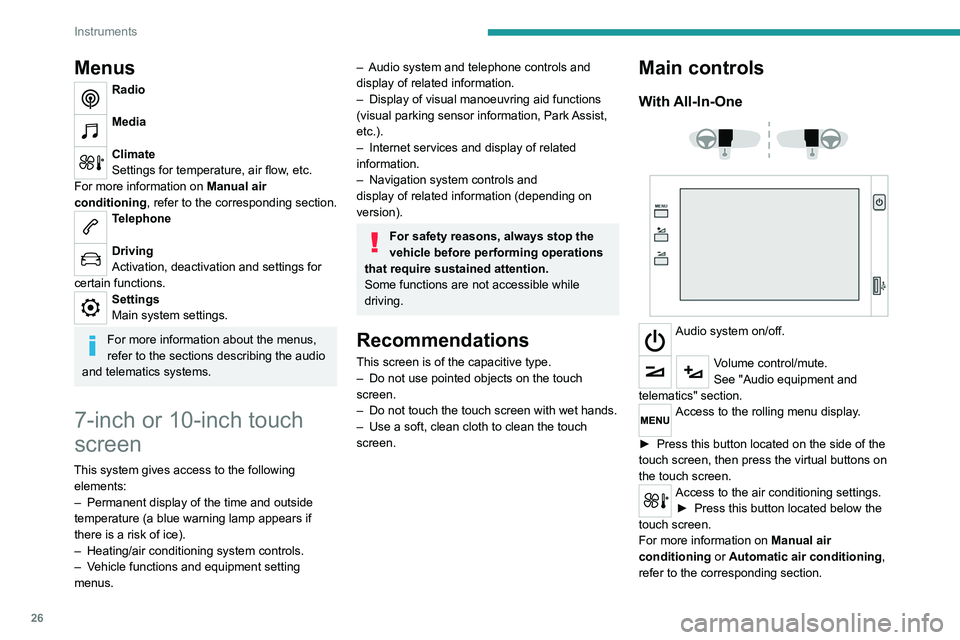
With All-In-One
Audio system on/off.
Volume control/mute.
See "Audio equipment and
telematics" section.
Access to the rolling menu display.
►
Press this button located on the side of the
touch screen, then press the virtual buttons on
the touch screen.
Access to the air conditioning settings. ► Press this button located below the
touch screen.
For more information on Manual air
conditioning or
Automatic air conditioning ,
refer to the corresponding section.
Page 29 of 276
27
Instruments
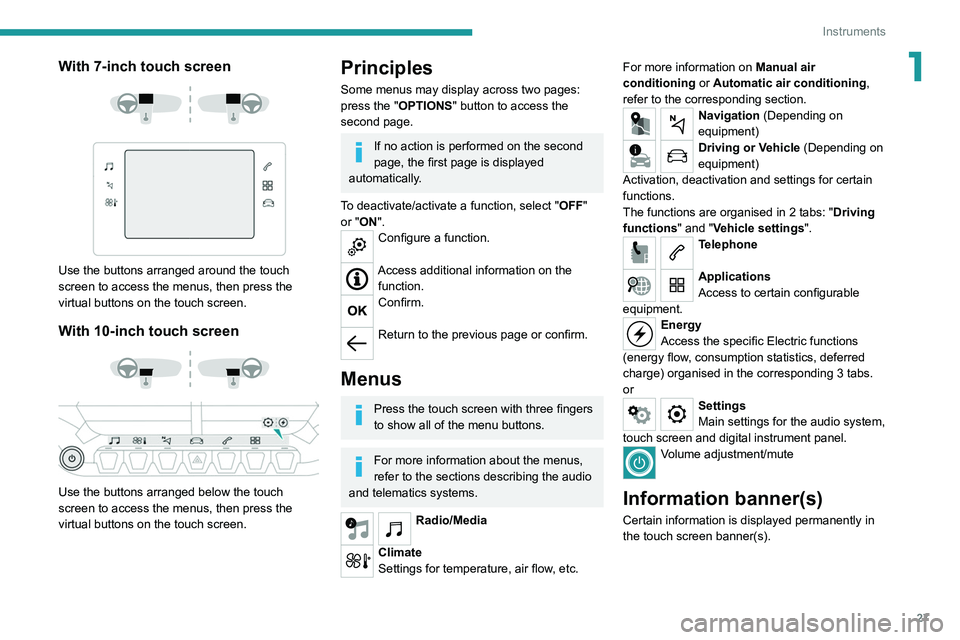
1With 7-inch touch screen
Use the buttons arranged around the touch
screen to access the menus, then press the
virtual buttons on the touch screen.
With 10-inch touch screen
Use the buttons arranged below the touch
screen to access the menus, then press the
virtual buttons on the touch screen.
Principles
Some menus may display across two pages:
press the "OPTIONS" button to access the
second page.
If no action is performed on the second
page, the first page is displayed
automatically.
To deactivate/activate a function, select " OFF"
or "ON".
Configure a function.
Access additional information on the function.
Confirm.
Return to the previous page or confirm.
Menus
Press the touch screen with three fingers
to show all of the menu buttons.
For more information about the menus,
refer to the sections describing the audio
and telematics systems.
Radio/Media
Climate
Settings for temperature, air flow, etc. For more information on
Manual air
conditioning or Automatic air conditioning ,
refer to the corresponding section.
Navigation (Depending on
equipment)
Driving or Vehicle (Depending on
equipment)
Activation, deactivation and settings for certain
functions.
The functions are organised in 2 tabs: " Driving
functions" and "Vehicle settings".
Telephone
Applications
Access to certain configurable
equipment.
Energy
Access the specific Electric functions
(energy flow, consumption statistics, deferred
charge) organised in the corresponding 3 tabs.
or
Settings
Main settings for the audio system,
touch screen and digital instrument panel.
Volume adjustment/mute
Information banner(s)
Certain information is displayed permanently in
the touch screen banner(s).
Page 30 of 276
28
Instruments
– Temperature pre-conditioning management.
– Consultation of statistics (where available).
– Consultation of the state of charge and range
of the vehicle.
Installation procedure
► Download the MYPEUGEOT APP app from
the appropriate online store for your smartphone.
► Create an account.
► Enter the vehicle’s VIN (code beginning with
"VF" on the vehicle registration document).
For more information on Identification
markings, refer to the corresponding section.
Network coverage
In order to be able to use the various
remotely operable features, ensure that your
vehicle is located in an area covered by the
mobile network.
A lack of network coverage may prevent
communication with the vehicle (for example,
if it is in an underground car park). In such
cases, the application will display a message
indicating that the connection with the vehicle
could not be established.
Upper banner of the 7" touch screen
– Time and outside temperature (a blue warning
lamp appears if there is a risk of ice).
–
Reminder of the air conditioning information,
and direct access to the corresponding menu.
–
Reminder of the information in the
Radio
Media and Telephone menus.
–
Notifications.
–
Access to the
Settings for the touch screen
and the digital instrument panel (date/time,
languages, units, etc.).
Side banners of the 10" touch screen
– Outside temperature (a blue warning lamp
appears if there is a risk of ice).
–
Access to the
Settings for the touch screen
and the digital instrument panel (date/time,
languages, units, etc.).
–
Notifications.
–
Reminder of the air conditioning information,
and direct access to the corresponding menu.
–
Time.
Energy menu
This menu is only available with PEUGEOT
Connect Nav .
Depending on version, this is accessible either:
– directly, by pressing the button near the
touch screen (with 10" touch screen).
– via the Applications menu.
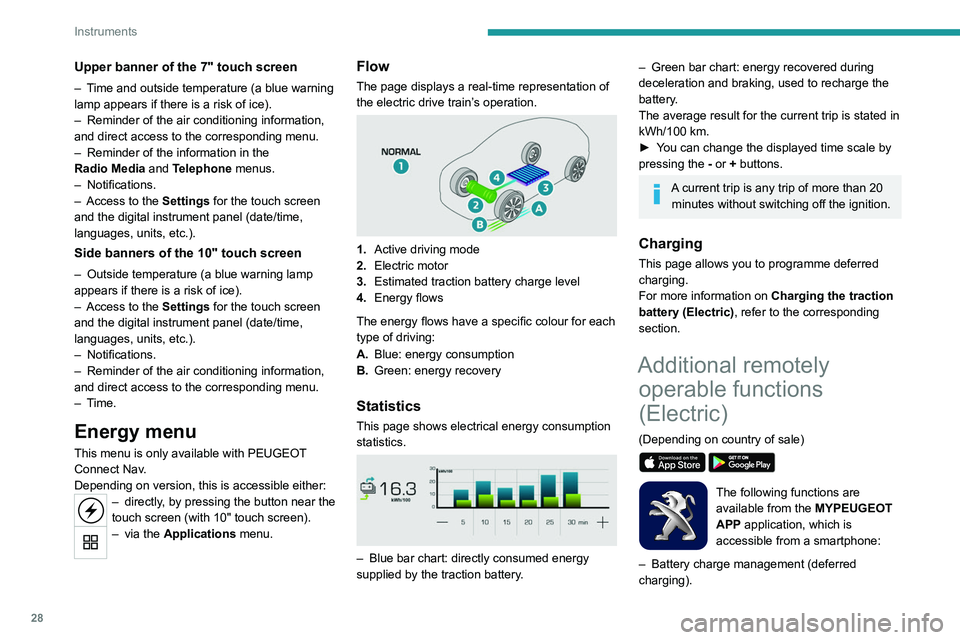
Flow
The page displays a real-time representation of
the electric drive train’s operation.
1.Active driving mode
2. Electric motor
3. Estimated traction battery charge level
4. Energy flows
The energy flows have a specific colour for each
type of driving:
A. Blue: energy consumption
B. Green: energy recovery
Statistics
This page shows electrical energy consumption
statistics.
– Blue bar chart: directly consumed energy
supplied by the traction battery .
– Green bar chart: energy recovered during
deceleration and braking, used to recharge the
battery
.
The average result for the current trip is stated in
kWh/100
km.
►
Y
ou can change the displayed time scale by
pressing the
-
or + buttons.
A current trip is any trip of more than 20 minutes without switching off the ignition.
Charging
This page allows you to programme deferred
charging.
For more information on Charging the traction
battery (Electric) , refer to the corresponding
section.
Additional remotely operable functions
(Electric)
(Depending on country of sale)
The following functions are
available from the MYPEUGEOT
APP application, which is
accessible from a smartphone:
–
Battery charge management (deferred
charging).
Page 31 of 276
29
Instruments
1– Temperature pre-conditioning management.
– Consultation of statistics (where available).
–
Consultation of the state of charge and range
of the vehicle.
Installation procedure
► Download the MYPEUGEOT APP app from
the appropriate online store for your smartphone.
►
Create an account.
►
Enter the vehicle’
s VIN (code beginning with
"VF" on the vehicle registration document).
For more information on Identification
markings, refer to the corresponding section.
Network coverage
In order to be able to use the various
remotely operable features, ensure that your
vehicle is located in an area covered by the
mobile network.
A lack of network coverage may prevent
communication with the vehicle (for example,
if it is in an underground car park). In such
cases, the application will display a message
indicating that the connection with the vehicle
could not be established.
Page 36 of 276
34
Access
after several days (approximately one week)
without being used. To unlock the vehicle, use
the remote control or press on one of the front
door handles. The next time the vehicle is
started, the automatic unlocking and locking
functions will be reactivated.
–
If the welcome lighting is triggered
several times in succession without the
vehicle subsequently being started, it will be
deactivated.
–
All "hands-free" functions switch to
extended standby mode after 21 days of non-
use.
To restore these functions, unlock the
vehicle using the remote control and start the
engine.
Electrical interference
The electronic key may not operate if
close to certain electronic devices such as
telephones (switched on or on standby) or
laptop computers, strong magnetic fields, etc.
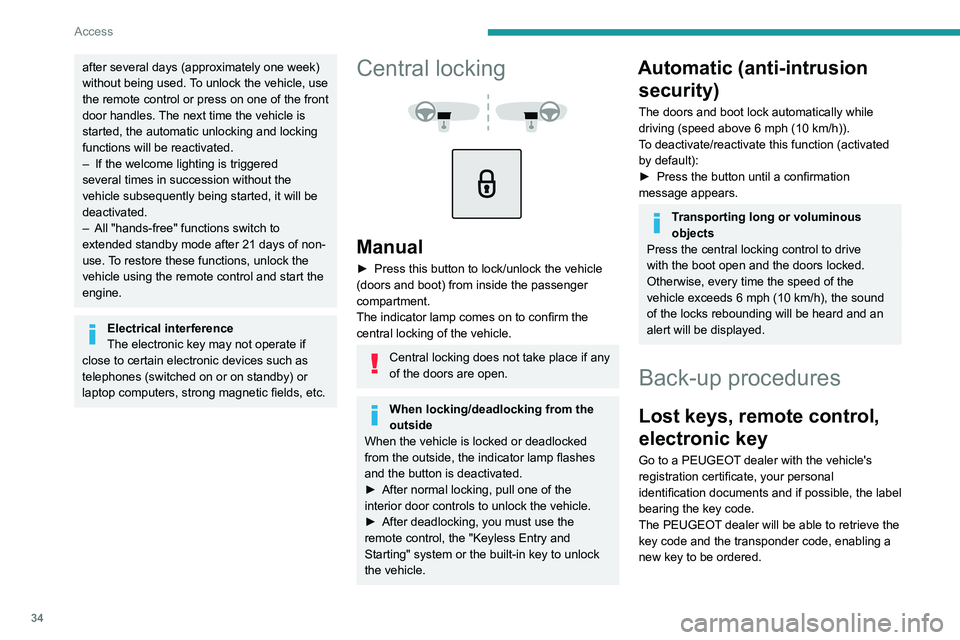
Central locking
Manual
► Press this button to lock/unlock the vehicle
(doors and boot) from inside the passenger
compartment.
The indicator lamp comes on to confirm the
central locking of the vehicle.
Central locking does not take place if any
of the doors are open.
When locking/deadlocking from the
outside
When the vehicle is locked or deadlocked
from the outside, the indicator lamp flashes
and the button is deactivated.
►
After normal locking, pull one of the
interior door controls to unlock the vehicle.
►
After deadlocking, you must use the
remote control, the "Keyless Entry and
Starting" system or the built-in key to unlock
the vehicle.
Automatic (anti-intrusion security)
The doors and boot lock automatically while
driving (speed above 6 mph (10
km/h)).
To deactivate/reactivate this function (activated
by default):
►
Press the button until a confirmation
message appears.
Transporting long or voluminous
objects
Press the central locking control to drive
with the boot open and the doors locked.
Otherwise, every time the speed of the
vehicle exceeds 6 mph (10 km/h), the sound
of the locks rebounding will be heard and an
alert will be displayed.
Back-up procedures
Lost keys, remote control,
electronic key
Go to a PEUGEOT dealer with the vehicle's
registration certificate, your personal
identification documents and if possible, the label
bearing the key code.
The PEUGEOT dealer will be able to retrieve the
key code and the transponder code, enabling a
new key to be ordered.
Complete unlocking/locking
of the vehicle with the key
Use this procedure in the following situations:
– Remote control battery discharged.
– Remote control malfunction.
– Vehicle battery discharged.
– Vehicle in an area subject to strong
electromagnetic interference.
In the first case, change the remote control
battery.
In the second case, reinitialise the remote
control.
Refer to the corresponding sections.
► Insert the key in the door lock.
► Turn the key towards the front/rear to unlock/
lock the vehicle.
► Turn the key towards the rear again within
3 seconds to deadlock the vehicle.
If the vehicle is fitted with an alarm, it will
not be activated when locking with the
key.
If the alarm is activated, the siren sounds
when the door is opened; switch on the
ignition to stop it.
Page 37 of 276
35
Access
2Complete unlocking/locking
of the vehicle with the key
Use this procedure in the following situations:
– Remote control battery discharged.
–
Remote control malfunction.
–
V
ehicle battery discharged.
–
V
ehicle in an area subject to strong
electromagnetic interference.
In the first case, change the remote control
battery.
In the second case, reinitialise
the remote
control.
Refer to the corresponding sections.
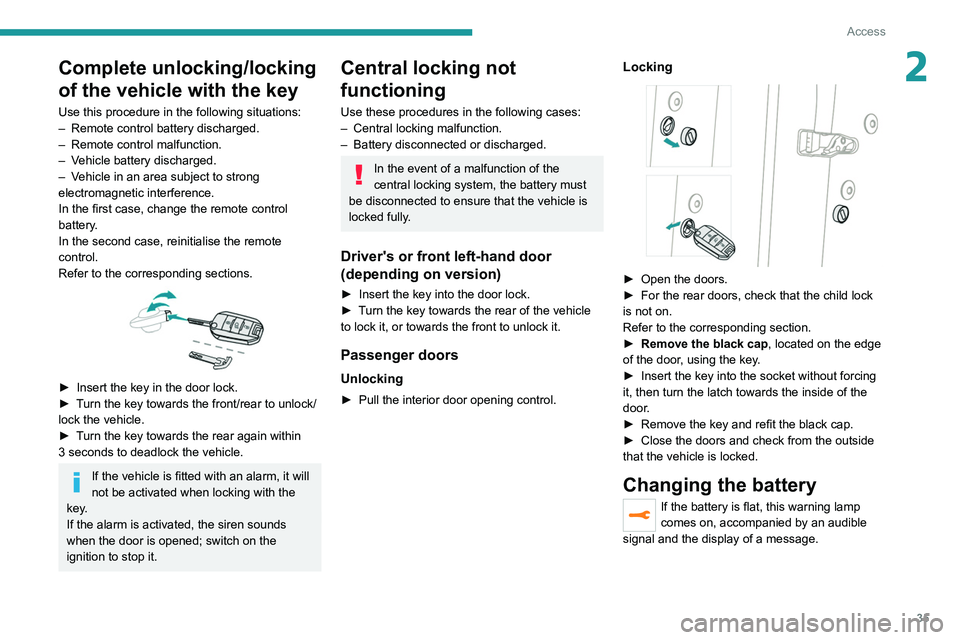
► Insert the key in the door lock.
► T urn the key towards the front/rear to unlock/
lock the vehicle.
►
T
urn the key towards the rear again within
3
seconds to deadlock the vehicle.
If the vehicle is fitted with an alarm, it will
not be activated when locking with the
key.
If the alarm is activated, the siren sounds
when the door is opened; switch on the
ignition to stop it.
Central locking not
functioning
Use these procedures in the following cases:
– Central locking malfunction.
–
Battery disconnected or discharged.
In the event of a malfunction of the
central locking system, the battery must
be disconnected to ensure that the vehicle is
locked fully.
Driver's or front left-hand door
(depending on version)
► Insert the key into the door lock.
► T urn the key towards the rear of the vehicle
to lock it, or towards the front to unlock it.
Passenger doors
Unlocking
► Pull the interior door opening control.
Locking
► Open the doors.
► For the rear doors, check that the child lock
is not on.
Refer to the corresponding section.
►
Remove the black cap
, located on the edge
of the door, using the key.
►
Insert the key into the socket without forcing
it, then turn the latch towards the inside of the
door
.
►
Remove the key and refit the black cap.
►
Close the doors and check from the outside
that the vehicle is locked.
Changing the battery
If the battery is flat, this warning lamp
comes on, accompanied by an audible
signal and the display of a message.
Page 49 of 276
47
Ease of use and comfort
3Avoid driving for too long with the ventilation off or with prolonged operation
of interior air recirculation. Risk of misting and
deterioration of the air quality!
If the interior temperature is very high
after the vehicle has stood for a long
time in the sunshine, air the passenger
compartment for a few moments.
Put the air flow control at a setting high
enough to quickly change the air in the
passenger compartment.
Condensation created by the air
conditioning results in a discharge of
water underneath the vehicle. This is perfectly
normal.
Servicing the ventilation and air
conditioning system
►
Ensure that the passenger compartment
filter is in good condition and have the filter
elements replaced regularly
.
We recommend using a composite passenger
compartment filter. Its specific active additive
helps protect against polluting gases and bad
smells.
►
T
o ensure correct operation of the
air conditioning system, have it checked
according to the recommendations in the
Manufacturer’s service schedule.
Stop & Start
The heating and air conditioning systems
only operate when the engine is running.
Temporarily deactivate the Stop & Start
system to maintain a comfortable temperature
in the passenger compartment.
For more information on the Stop &
Start
system, refer to the corresponding
section.
ECO driving mode
Selecting this mode reduces electrical
energy consumption, but restricts the
performance of the heating and air
conditioning systems, although it does not
deactivate them.
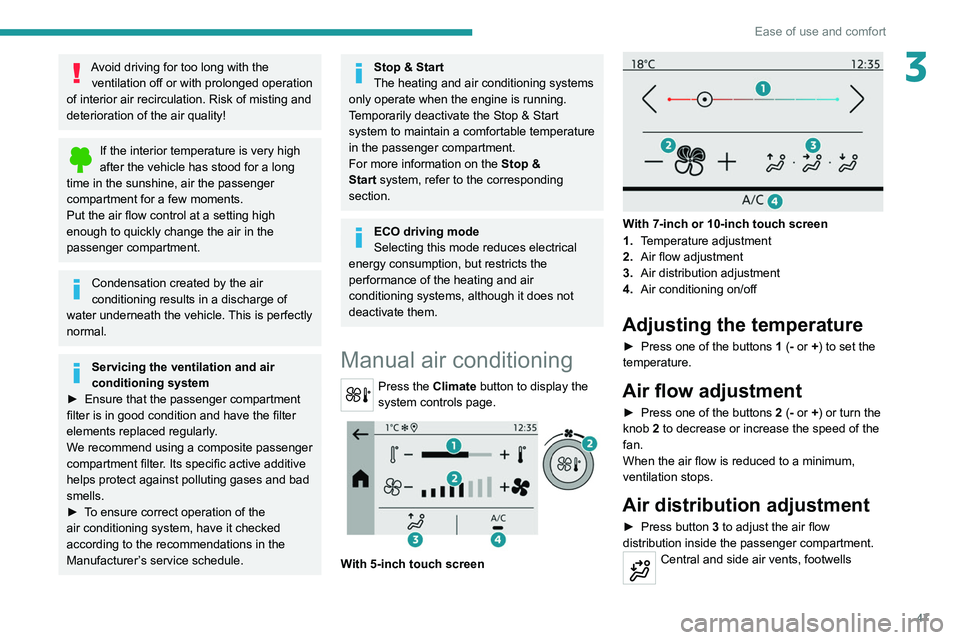
Manual air conditioning
Press the Climate button to display the
system controls page.
With 5-inch touch screen
With 7-inch or 10-inch touch screen
1. Temperature adjustment
2. Air flow adjustment
3. Air distribution adjustment
4. Air conditioning on/off
Adjusting the temperature
► Press one of the buttons 1 (- or +) to set the
temperature.
Air flow adjustment
► Press one of the buttons 2 (- or +) or turn the
knob 2 to decrease or increase the speed of the
fan.
When the air flow is reduced to a minimum,
ventilation stops.
Air distribution adjustment
► Press button 3 to adjust the air flow
distribution inside the passenger compartment.
Central and side air vents, footwells
Page 50 of 276
48
Ease of use and comfort
It is possible to activate the following buttons
simultaneously:
– Central and side air vents + footwells
– Windscreen and side windows + footwells
Air conditioning on/off
The air conditioning system is designed to
operate effectively in all seasons, with the
windows closed.
It is used to:
– lower the temperature in summer,
– increase the effectiveness of the demisting in
winter, above 3°C.
► Press button 4 to activate/deactivate the air
conditioning system.
Air conditioning does not operate when the air flow is disabled.
To obtain cool air more quickly, enable interior
air recirculation for a brief period. Then return
to the intake of exterior air.
Switching off the air conditioning may result in
some discomfort (humidity or misting).
Automatic Comfort programme
This automatic mode ensures optimum
management of the passenger compartment
temperature, air flow and air distribution, based
on the selected comfort level.
► Press button 5 to activate or deactivate the
air conditioning system’s automatic mode .
Central and side air vents
Windscreen
Windscreen, footwells
Footwells
Air conditioning on/off
The air conditioning system is designed to
operate effectively in all seasons, with the
windows closed.
It is used to:
–
lower the temperature in summer
,
–
increase the effectiveness of the demisting in
winter
, above 3°C.
►
Press button
4 to activate/deactivate the air
conditioning system.
Air conditioning does not operate when the air flow is disabled.
To obtain cool air more quickly, enable interior
air recirculation for a brief period. Then return
to the intake of exterior air.
Switching off the air conditioning may result in
some discomfort (humidity or misting).
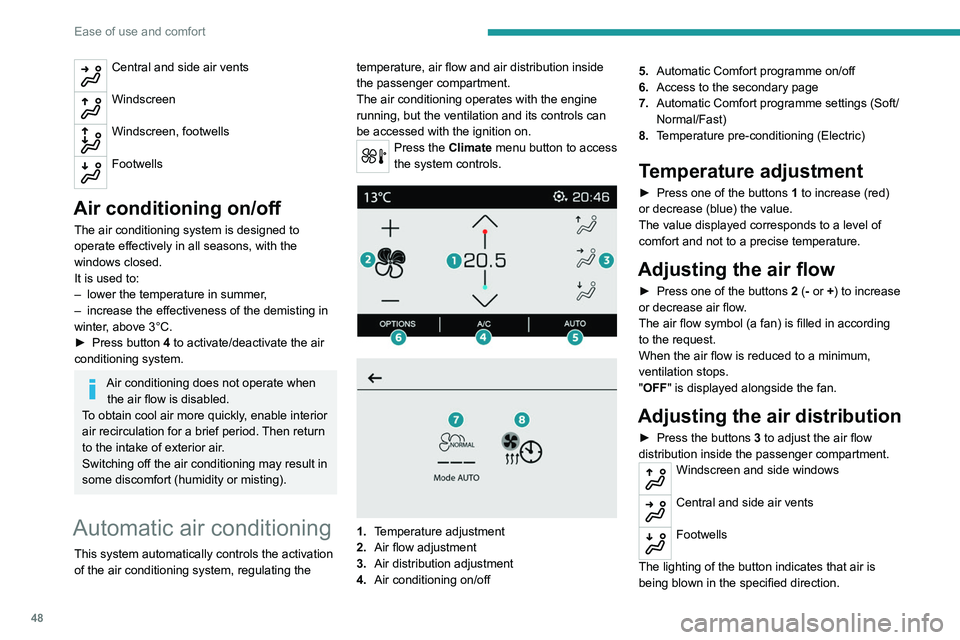
Automatic air conditioning
This system automatically controls the activation
of the air conditioning system, regulating the temperature, air flow and air distribution inside
the passenger compartment.
The air conditioning operates with the engine
running, but the ventilation and its controls can
be accessed with the ignition on.
Press the Climate menu button to access
the system controls.
1. Temperature adjustment
2. Air flow adjustment
3. Air distribution adjustment
4. Air conditioning on/off 5.
Automatic Comfort programme on/off
6. Access to the secondary page
7. Automatic Comfort programme settings (Soft/
Normal/Fast)
8. Temperature pre-conditioning (Electric)
Temperature adjustment
► Press one of the buttons 1 to increase (red)
or decrease (blue) the value.
The value displayed corresponds to a level of
comfort and not to a precise temperature.
Adjusting the air flow
► Press one of the buttons 2 (- or +) to increase
or decrease air flow.
The air flow symbol (a fan) is filled in according
to the request.
When the air flow is reduced to a minimum,
ventilation stops.
"OFF " is displayed alongside the fan.
Adjusting the air distribution
► Press the buttons 3 to adjust the air flow
distribution inside the passenger compartment.
Windscreen and side windows
Central and side air vents
Footwells
The lighting of the button indicates that air is
being blown in the specified direction.
Page 51 of 276
49
Ease of use and comfort
3It is possible to activate the following buttons
simultaneously:
–
Central and side air vents + footwells
–
Windscreen and side windows + footwells
Air conditioning on/off
The air conditioning system is designed to
operate effectively in all seasons, with the
windows closed.
It is used to:
–
lower the temperature in summer
,
–
increase the effectiveness of the demisting in
winter
, above 3°C.
►
Press button
4 to activate/deactivate the air
conditioning system.
Air conditioning does not operate when the air flow is disabled.
To obtain cool air more quickly, enable interior
air recirculation for a brief period. Then return
to the intake of exterior air.
Switching off the air conditioning may result in
some discomfort (humidity or misting).
Automatic Comfort programme
This automatic mode ensures optimum
management of the passenger compartment
temperature, air flow and air distribution, based
on the selected comfort level.
►
Press button
5 to activate or deactivate the
air conditioning system’s automatic mode .
The indicator lamp in the button lights up
when the air conditioning system is operating
automatically.
You can adjust the intensity of the
automatic Comfort programme by using the
"OPTIONS "
button to select one of the available
settings:
–
"Soft": provides soft and quiet operation by
limiting air flow.
–
"Normal": offers the best compromise
between a comfortable temperature and quiet
operation (default setting).
–
"Fast": provides strong and effective air flow.
To change the current setting (shown by the
corresponding indicator lamp), press button
7
repeatedly until the desired setting is displayed.
To ensure passenger comfort in the rear seats,
favour "Normal" and "Fast" settings.
This setting is associated with automatic mode
only. However, on deactivation of
AUTO mode,
the indicator lamp for the most recently selected
setting remains on.
Changing the setting does not reactivate AUTO
mode if it was deactivated.
In cold weather with the engine cold, the
air flow is increased gradually until the
comfort setting has been reached, in order to
limit the delivery of cold air into the passenger
compartment.
On entering the vehicle, if the interior
temperature is much colder or warmer than
the comfort setting requested, there is no
need to alter the value displayed to more
quickly reach the required level of comfort.
The system automatically corrects the
temperature difference as quickly as possible.
Interior air recirculation
The intake of exterior air prevents the formation
of mist on the windscreen and side windows.
Recirculating the interior air isolates the
passenger compartment from outside odours
and fumes and allows the desired passenger
compartment temperature to be achieved more
rapidly.
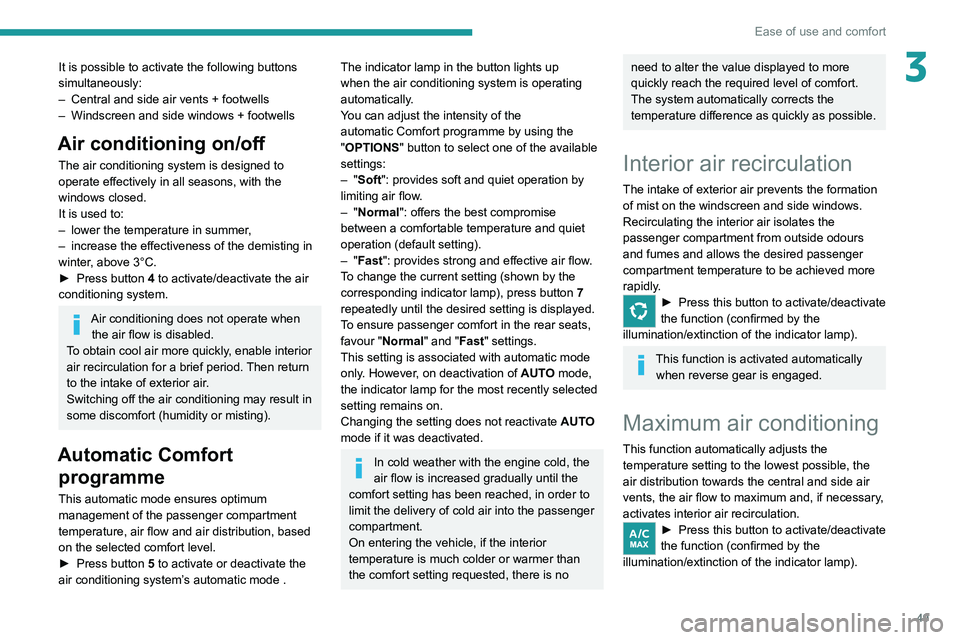
► Press this button to activate/deactivate
the function (confirmed by the
illumination/extinction of the indicator lamp).
This function is activated automatically when reverse gear is engaged.
Maximum air conditioning
This function automatically adjusts the
temperature setting to the lowest possible, the
air distribution towards the central and side air
vents, the air flow to maximum and, if necessary,
activates interior air recirculation.
► Press this button to activate/deactivate
the function (confirmed by the
illumination/extinction of the indicator lamp).
Page 54 of 276
52
Ease of use and comfort
With the Keyless Entry and Starting system, the
charger’s operation may be briefly disrupted
when a door is opened or the ignition is switched
off.
Charging
► Open the flap to access the charging area.
► With the charging area clear, place a device
in its centre.
The system is not designed to charge multiple devices simultaneously.
Do not leave any metal objects (coins,
keys, vehicle remote control, etc.) in the
charging area while a device is being
charged, due to the risk of overheating or
interrupting the charging process.
the sun's rays and cause a fire - risk of fire or
damage to interior surfaces!
Sun visor
► With the ignition on, raise the concealing
flap; depending on the version, the mirror is
illuminated automatically.
This sun visor is also equipped with a ticket
holder.
Glove box
► To open the glove box, lift the handle.
Never drive with the glove box open
when a passenger is at the front. It may
cause injury during sharp deceleration!
USB sockets
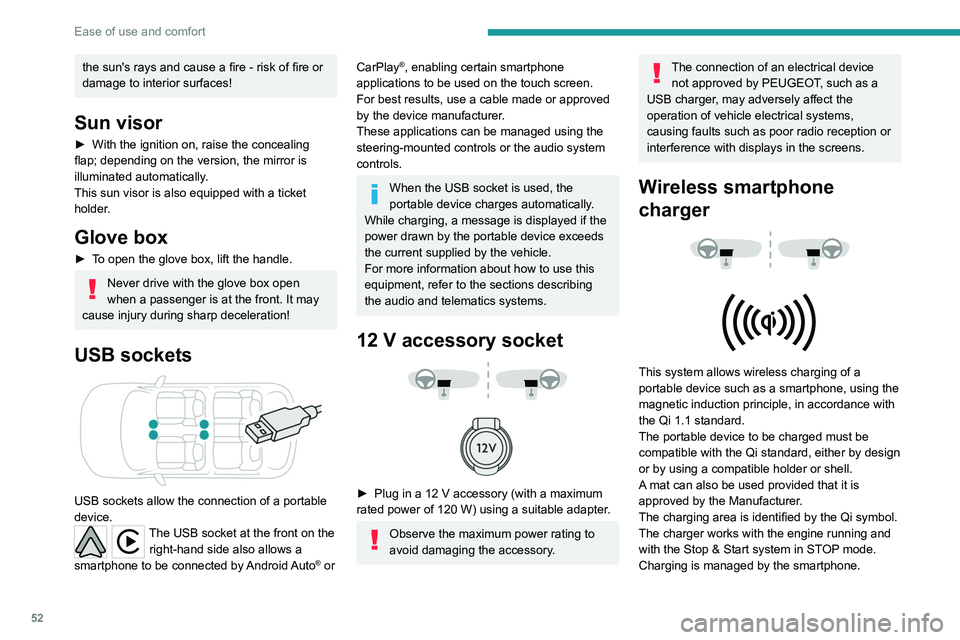
USB sockets allow the connection of a portable
device.
The USB socket at the front on the right-hand side also allows a
smartphone to be connected by Android Auto
® or
CarPlay®, enabling certain smartphone
applications to be used on the touch screen.
For best results, use a cable made or approved
by the device manufacturer.
These applications can be managed using the
steering-mounted controls or the audio system
controls.
When the USB socket is used, the
portable device charges automatically.
While charging, a message is displayed if the
power drawn by the portable device exceeds
the current supplied by the vehicle.
For more information about how to use this
equipment, refer to the sections describing
the audio and telematics systems.
12 V accessory socket
► Plug in a 12 V accessory (with a maximum
rated power of 120 W) using a suitable adapter.
Observe the maximum power rating to
avoid damaging the accessory.
The connection of an electrical device not approved by PEUGEOT, such as a
USB charger, may adversely affect the
operation of vehicle electrical systems,
causing faults such as poor radio reception or
interference with displays in the screens.
Wireless smartphone
charger
This system allows wireless charging of a
portable device such as a smartphone, using the
magnetic induction principle, in accordance with
the Qi 1.1 standard.
The portable device to be charged must be
compatible with the Qi standard, either by design
or by using a compatible holder or shell.
A mat can also be used provided that it is
approved by the Manufacturer.
The charging area is identified by the Qi symbol.
The charger works with the engine running and
with the Stop & Start system in STOP mode.
Charging is managed by the smartphone.