battery PEUGEOT 208 2021 Owner's Guide
[x] Cancel search | Manufacturer: PEUGEOT, Model Year: 2021, Model line: 208, Model: PEUGEOT 208 2021Pages: 276, PDF Size: 8.02 MB
Page 98 of 276
96
Driving
order to change modes, an alert message is
displayed on the instrument panel.
Only appropriate mode change instructions are
validated.
Coasting mode
Depending on version or engine, if D is
selected, except in Sport mode, gradually
and fully releasing the accelerator pedal
allows free-wheeling which can save fuel.
A drop in engine speed is normal (rev counter
at idle, drop in engine noise).
With the engine running and the brakes
released, if R, D or M is selected, the
vehicle moves off, even without pressing the
accelerator pedal.
Never press the accelerator and brake
pedals at the same time. Risk of
damaging the gearbox!
If the battery is flat, you must place the
chocks supplied with the vehicle tools against
one of the wheels to immobilise the vehicle.
Unlocking the gearbox
– From mode P:
► Fully depress the brake pedal.
►
Press the
Unlock button.
►
While continuing to press the brake pedal
and the
Unlock button, select another mode.
–
From neutral
N, at a speed below 3 mph
(5
km/h):
► Fully depress the brake pedal.
► While continuing to depress the brake
pedal, select another mode.
Engaging reverse gear
► Slow down until you come to a stop.
► Depress the brake pedal, then press the
Unlock
button.
►
While continuing to press, select mode
R
.
Permanent manual mode
Entering the mode:
► With mode D initially selected.
►
Press button
M; the green indicator lamp in
the button comes on.
Exiting the mode:
►
Push forwards once to return to
D.
or
►
Press button
M; the indicator lamp in the
button goes off.
Switching off the ignition
To switch off the ignition, the vehicle must be
stationary.
Free-wheeling
For more information on Free-wheeling, refer to
the corresponding section.
If you open the driver's door while mode
N is engaged, an audible signal will
sound. It will stop when you close the driver's
door again.
Special aspects of automatic mode
The gearbox selects the gear that provides
optimal performance based on ambient
temperature, road profile, vehicle loading and
driving style.
For maximum acceleration, press the accelerator
fully down (kick-down). The gearbox changes
down automatically or holds the selected gear
until the maximum engine speed is reached.
Steering mounted controls allow the driver to
temporarily select a gear, if the vehicle speed
and engine speed conditions permit.
Special aspects of manual mode
The gearbox only changes from one gear to
another if the vehicle speed and engine speed
conditions permit.
Starting the vehicle
From mode P:
► Fully depress the brake pedal.
►
Start the engine.
►
Maintaining pressure on the brake pedal,
press the
Unlock button.
►
Push once or twice rearwards to select
the automatic mode
D, or forwards to engage
reverse
R.
From neutral
N:
►
Fully depress the brake pedal.
►
Start the engine.
►
Maintaining pressure on the brake pedal,
push rearwards to select the automatic mode
D
,
or forwards, while pressing the Unlock button to
engage reverse R.
Then, from D or R:
► Release the brake pedal.
► Accelerate gradually to automatically release
the electric parking brake.
The vehicle moves off immediately.
Automatic gearbox
Never try to start the engine by pushing
the vehicle.
Switching the vehicle off
Regardless of the current gearbox mode, mode
P is immediately engaged automatically when
the ignition is switched off.
However, in mode N, mode P will be engaged
after a delay of 5 seconds (time to enable free-
wheeling mode).
Check that mode P has been engaged and
that the electric parking brake was applied
automatically; if not, apply it manually.
The corresponding indicator lamps on the gear selector and the electric parking
brake control must be on, as well as the
indicator lamps on the instrument panel.
Gearbox malfunction
This warning lamp comes on, accompanied by an audible signal and the
display of a message.
Go to a PEUGEOT dealer or a qualified
workshop.
Page 100 of 276
98
Driving
B : Brake (automatic forward gear with
regenerative braking function activated).
Operation
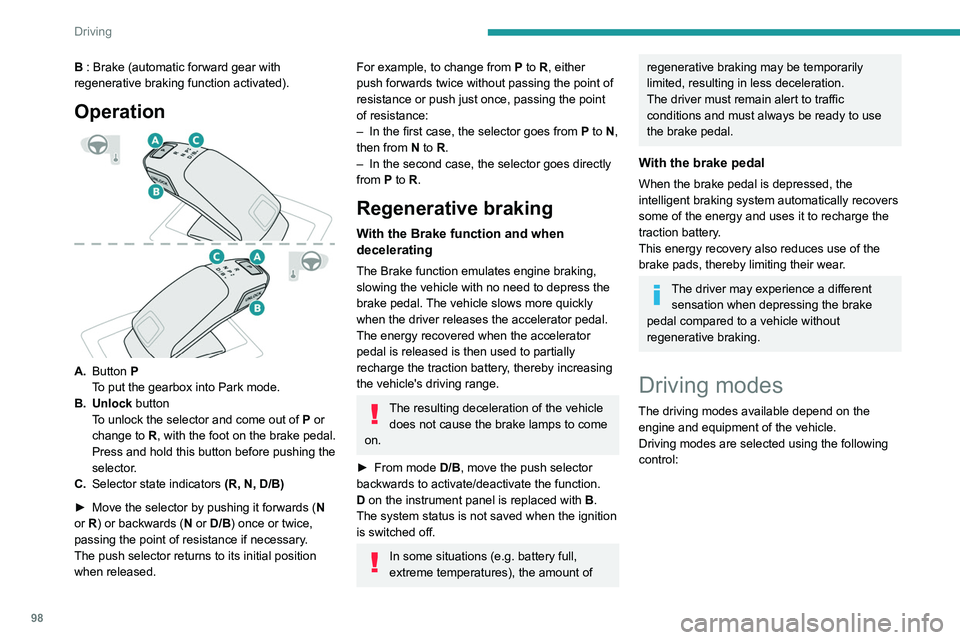
A.Button P
To put the gearbox into Park mode.
B. Unlock button To unlock the selector and come out of
P
or
change to
R, with the foot on the brake pedal.
Press and hold this button before pushing the
selector.
C. Selector state indicators (R, N, D/B)
►
Move the selector by pushing it forwards ( N
or R) or backwards (N or D/B) once or twice,
passing the point of resistance if necessary.
The push selector returns to its initial position
when released.
For example, to change from P to R, either
push forwards twice without passing the point of
resistance or push just once, passing the point
of resistance:
–
In the first case, the selector goes from
P to N,
then from
N to R.
–
In the second case, the selector goes directly
from
P to R.
Regenerative braking
With the Brake function and when
decelerating
The Brake function emulates engine braking,
slowing the vehicle with no need to depress the
brake pedal. The vehicle slows more quickly
when the driver releases the accelerator pedal.
The energy recovered when the accelerator
pedal is released is then used to partially
recharge the traction battery, thereby increasing
the vehicle's driving range.
The resulting deceleration of the vehicle does not cause the brake lamps to come
on.
►
From mode
D/B, move the push selector
backwards to activate/deactivate the function.
D on the instrument panel is replaced with B.
The system status is not saved when the ignition
is switched off.
In some situations (e.g. battery full,
extreme temperatures), the amount of
regenerative braking may be temporarily
limited, resulting in less deceleration.
The driver must remain alert to traffic
conditions and must always be ready to use
the brake pedal.
With the brake pedal
When the brake pedal is depressed, the
intelligent braking system automatically recovers
some of the energy and uses it to recharge the
traction battery.
This energy recovery also reduces use of the
brake pads, thereby limiting their wear.
The driver may experience a different sensation when depressing the brake
pedal compared to a vehicle without
regenerative braking.
Driving modes
The driving modes available depend on the engine and equipment of the vehicle.
Driving modes are selected using the following
control:
► Press the control to display the modes on the
instrument panel, and depending on version, on
the screen with PEUGEOT Connect Nav.
With an electric motor, you cannot select a mode
if the READY lamp is off.
When the message disappears, the selected
mode is activated and remains indicated on the
instrument panel (except Normal mode).
Whenever the ignition is switched on,
Normal driving mode is selected by default.
Normal
To restore the default settings.
Eco
To reduce energy consumption by reducing the
performance of the heating and air conditioning,
without deactivating them.
To further reduce the electrical energy
consumption of the traction battery by limiting the
engine torque.
Page 101 of 276
99
Driving
6
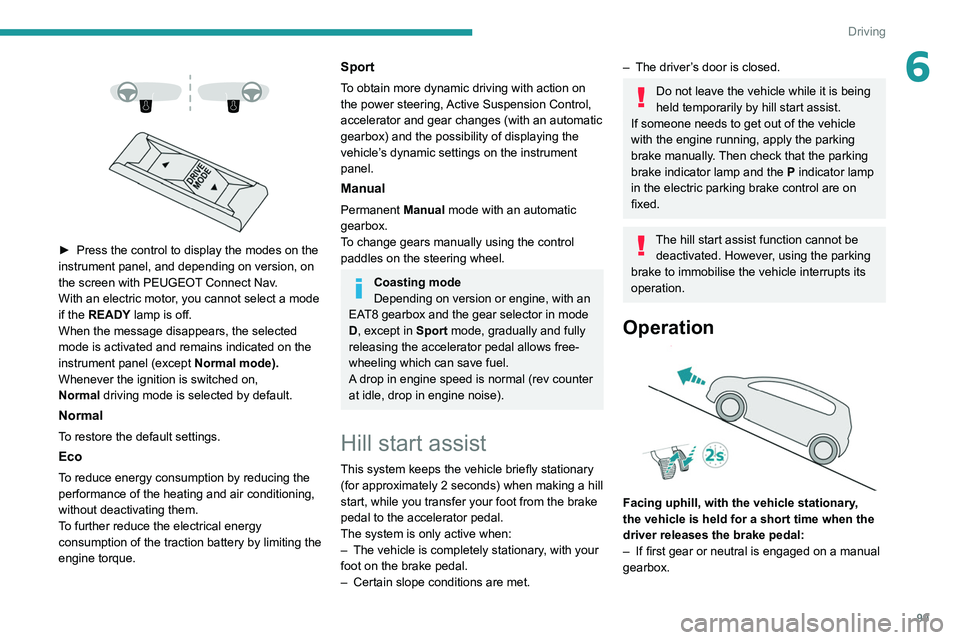
► Press the control to display the modes on the
instrument panel, and depending on version, on
the screen with PEUGEOT
Connect Nav.
With an electric motor, you cannot select a mode
if the READY lamp is off.
When the message disappears, the selected
mode is activated and remains indicated on the
instrument panel (except Normal
mode).
Whenever the ignition is switched on,
Normal
driving mode is selected by default.
Normal
To restore the default settings.
Eco
To reduce energy consumption by reducing the
performance of the heating and air conditioning,
without deactivating them.
To further reduce the electrical energy
consumption of the traction battery by limiting the
engine torque.
Sport
To obtain more dynamic driving with action on
the power steering, Active Suspension Control,
accelerator and gear changes (with an automatic
gearbox) and the possibility of displaying the
vehicle’s dynamic settings on the instrument
panel.
Manual
Permanent Manual mode with an automatic
gearbox.
To change gears manually using the control
paddles on the steering wheel.
Coasting mode
Depending on version or engine, with an
EAT8 gearbox and the gear selector in mode
D, except in
Sport mode, gradually and fully
releasing the accelerator pedal allows free-
wheeling which can save fuel.
A drop in engine speed is normal (rev counter
at idle, drop in engine noise).
Hill start assist
This system keeps the vehicle briefly stationary
(for approximately 2 seconds) when making a hill
start, while you transfer your foot from the brake
pedal to the accelerator pedal.
The system is only active when:
–
The vehicle is completely stationary
, with your
foot on the brake pedal.
–
Certain slope conditions are met.
– The driver ’s door is closed.
Do not leave the vehicle while it is being
held temporarily by hill start assist.
If someone needs to get out of the vehicle
with the engine running, apply the parking
brake manually. Then check that the parking
brake indicator lamp and the P indicator lamp
in the electric parking brake control are on
fixed.
The hill start assist function cannot be deactivated. However, using the parking
brake to immobilise the vehicle interrupts its
operation.
Operation
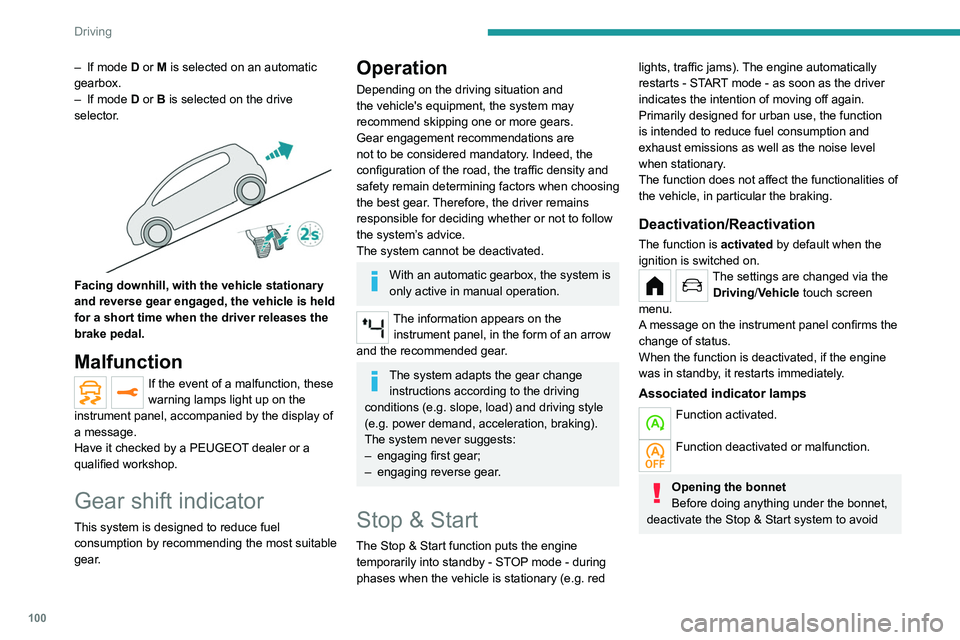
Facing uphill, with the vehicle stationary,
the vehicle is held for a short time when the
driver releases the brake pedal:
–
If first gear or neutral is engaged on a manual
gearbox.
Page 102 of 276
100
Driving
– If mode D or M is selected on an automatic
gearbox.
–
If mode
D or B is selected on the drive
selector.
Facing downhill, with the vehicle stationary
and reverse gear engaged, the vehicle is held
for a short time when the driver releases the
brake pedal.
Malfunction
If the event of a malfunction, these
warning lamps light up on the
instrument panel, accompanied by the display of
a message.
Have it checked by a PEUGEOT dealer or a
qualified workshop.
Gear shift indicator
This system is designed to reduce fuel
consumption by recommending the most suitable
gear.
Operation
Depending on the driving situation and
the vehicle's equipment, the system may
recommend skipping one or more gears.
Gear engagement recommendations are
not to be considered mandatory. Indeed, the
configuration of the road, the traffic density and
safety remain determining factors when choosing
the best gear. Therefore, the driver remains
responsible for deciding whether or not to follow
the system’s advice.
The system cannot be deactivated.
With an automatic gearbox, the system is
only active in manual operation.
The information appears on the instrument panel, in the form of an arrow
and the recommended gear.
The system adapts the gear change instructions according to the driving
conditions (e.g.
slope, load) and driving style
(e.g.
power demand, acceleration, braking).
The system never suggests:
–
engaging first gear;
–
engaging reverse gear
.
Stop & Start
The Stop & Start function puts the engine temporarily into standby - STOP mode - during
phases when the vehicle is stationary (e.g.
red
lights, traffic jams). The engine automatically
restarts - START mode - as soon as the driver
indicates the intention of moving off again.
Primarily designed for urban use, the function
is intended to reduce fuel consumption and
exhaust emissions as well as the noise level
when stationary.
The function does not affect the functionalities of
the vehicle, in particular the braking.
Deactivation/Reactivation
The function is activated by default when the
ignition is switched on.
The settings are changed via the Driving/Vehicle touch screen
menu.
A message on the instrument panel confirms the
change of status.
When the function is deactivated, if the engine
was in standby, it restarts immediately.
Associated indicator lamps
Function activated.
Function deactivated or malfunction.
Opening the bonnet
Before doing anything under the bonnet,
deactivate the Stop & Start system to avoid
any risk of injury caused by the engine
restarting automatically.
Driving on flooded roads
Before entering into a flooded area, it is
strongly recommended that you deactivate
the Stop & Start system.
For more information on Driving
recommendations, particularly on flooded
roads, refer to the corresponding section.
Operation
Main conditions for operation
– The driver’s door must be closed.
– The driver's seat belt must be fastened.
– The level of charge in the battery must be
sufficient.
– The temperature of the engine must be within
its nominal operating range.
– The outside temperature must be between
0°C and 35°C.
Putting the engine into standby
(STOP mode)
The engine automatically enters standby mode
as soon as the driver indicates their intention to
stop:
Page 103 of 276
101
Driving
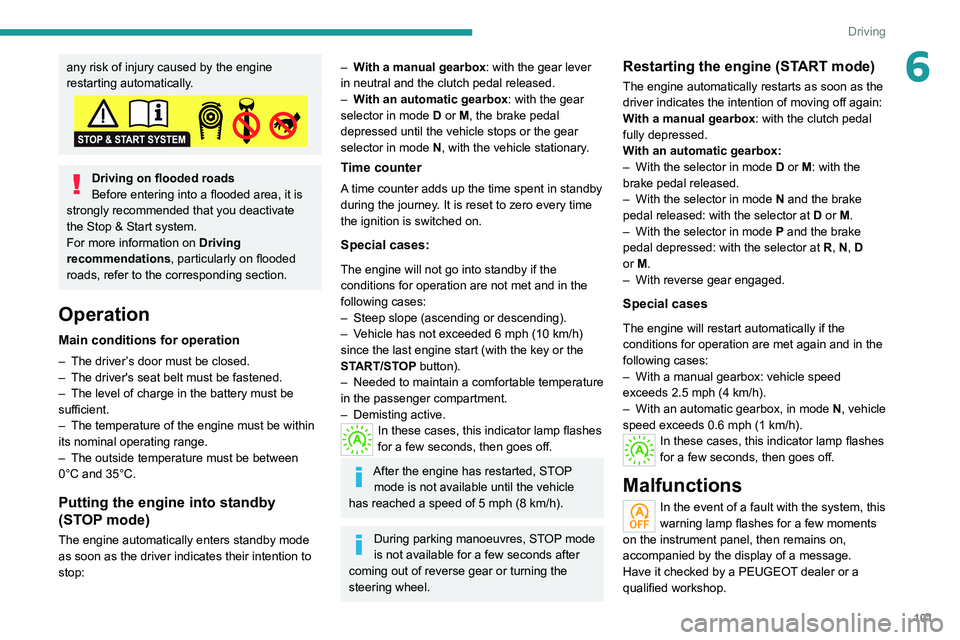
6any risk of injury caused by the engine
restarting automatically.
Driving on flooded roads
Before entering into a flooded area, it is
strongly recommended that you deactivate
the Stop & Start system.
For more information on Driving
recommendations, particularly on flooded
roads, refer to the corresponding section.
Operation
Main conditions for operation
– The driver ’s door must be closed.
– The driver's seat belt must be fastened.
–
The level of charge in the battery must be
sufficient.
–
The temperature of the engine must be within
its nominal operating range.
–
The outside temperature must be between
0°C and 35°C.
Putting the engine into standby
(STOP mode)
The engine automatically enters standby mode
as soon as the driver indicates their intention to
stop:
– With a manual gearbox: with the gear lever
in neutral and the clutch pedal released.
–
W
ith an automatic gearbox: with the gear
selector in mode D or M, the brake pedal
depressed until the vehicle stops or the gear
selector in mode N, with the vehicle stationary.
Time counter
A time counter adds up the time spent in standby
during the journey. It is reset to zero every time
the ignition is switched on.
Special cases:
The engine will not go into standby if the
conditions for operation are not met and in the
following cases:
–
Steep slope (ascending or descending).
–
V
ehicle has not exceeded 6 mph (10 km/h)
since the last engine start (with the key or the
START/STOP button).
–
Needed
to maintain a comfortable temperature
in the passenger compartment.
–
Demisting active.
In these cases, this indicator lamp flashes
for a few seconds, then goes off.
After the engine has restarted, STOP mode is not available until the vehicle
has reached a speed of 5 mph (8
km/h).
During parking manoeuvres, STOP mode
is not available for a few seconds after
coming out of reverse gear or turning the
steering wheel.
Restarting the engine (START mode)
The engine automatically restarts as soon as the
driver indicates the intention of moving off again:
With a manual gearbox: with the clutch pedal
fully depressed.
With an automatic gearbox:
–
With the selector in mode
D or M: with the
brake pedal released.
–
With the selector in mode
N and the brake
pedal released: with the selector at D or M.
–
With the selector in mode
P and the brake
pedal depressed: with the selector at R, N, D
or M.
–
With reverse gear engaged.
Special cases
The engine will restart automatically if the
conditions for operation are met again and in the
following cases:
–
With a manual gearbox: vehicle speed
exceeds 2.5 mph (4
km/h).
–
With an automatic gearbox, in mode N
, vehicle
speed exceeds 0.6 mph (1
km/h).
In these cases, this indicator lamp flashes
for a few seconds, then goes off.
Malfunctions
In the event of a fault with the system, this
warning lamp flashes for a few moments
on the instrument panel, then remains on,
accompanied by the display of a message.
Have it checked by a PEUGEOT dealer or a
qualified workshop.
Page 104 of 276
102
Driving
The vehicle stalls in STOP mode
All of the instrument panel warning lamps come
on if there is a fault.
►
Switch off the ignition then start the engine
again with the key or the " ST
ART/STOP" button.
12 V battery
The Stop & Start system requires a
12 V battery of specific technology and
specification.
All work must be carried out only by a
PEUGEOT
dealer or a qualified workshop
Tyre under-inflation detection
This system alerts the driver if one or more tyres
suffer a drop in pressure.
The alert is raised when the vehicle is moving,
not when stationary.
It compares the information given by the wheel
speed sensors with reference values, which
must be reinitialised every time the tyre
pressures are adjusted or a wheel changed.
It takes into account the last values stored
during the reinitialisation request. It is therefore
essential that the tyre pressure is correct during
the operation. This operation is the driver’s
responsibility.
The tyre under-inflation detection cannot, in any circumstances, replace the need
for vigilance on the part of the driver.
This system does not avoid the need to
regularly check the tyre pressures (including
the spare wheel), especially before a long
journey.
Driving with under-inflated tyres, particularly
in adverse conditions (heavy load, high
speed, long journey):
–
worsens road-holding.
–
lengthens braking distances.
–
causes premature wear of the tyres.
–
increases energy consumption.
The inflation pressures defined for the vehicle can be found on the tyre pressure
label.
For more information on the Identification
markings, refer to the corresponding section.
Checking tyre pressures
This check should be done monthly
when the tyres are "cold" (vehicle stopped for
1 hour or after a journey of less than 6 miles
(10
km) at moderate speeds).
Otherwise, add 0.3 bar to the pressures
shown on the label.
Snow chains
The system does not have to be
reinitialised after fitting or removing snow
chains.
Under-inflation alert
This is signalled by the fixed illumination of this warning lamp, accompanied by an
audible signal and, depending on equipment, the
display of a message.
►
Reduce speed immediately
, avoid excessive
steering movements and avoid sudden braking.
►
Stop the vehicle as soon as it is safe to do
so.
The loss of pressure detected may not always cause visible deformation of the
tyre.
Do not rely on just a visual check.
►
Using a compressor
, such as the one in
the temporary puncture repair kit, check the
pressures of all four tyres when cold.
►
If it is not possible to carry out this check
immediately
, drive carefully at reduced speed.
►
In the event of a puncture, use the
temporary puncture repair kit or the spare wheel
(depending on equipment).
Driving too slowly may not ensure
optimum monitoring.
The alert is not immediately triggered in the
event of a sudden loss of pressure or tyre
blow-out. This is because analysis of the
values read by the wheel's speed sensors
can take several minutes.
The alert may be delayed at speeds below
25 mph (40 km/h), or when adopting a sporty
driving mode.
The alert is kept active until the system is reinitialised.
Reinitialisation
► The system must be reinitialised after any
adjustment to the pressure of one or more tyres,
and after changing one or more wheels.
Before reinitialising the system, make
sure that the pressures of the four tyres
are correct for the conditions of use of the
vehicle and conform to the values written on
the tyre pressure label.
Check the pressures of the four tyres before
performing the reinitialisation.
The system does not advise if a pressure is
incorrect at the time of reinitialisation.
With the vehicle stationary, the
system is reinitialised via
the Driving/Vehicle touch screen menu.
Malfunction
In the event of a malfunction, these
warning lamps light up on the
instrument panel.
Page 140 of 276
138
Practical information
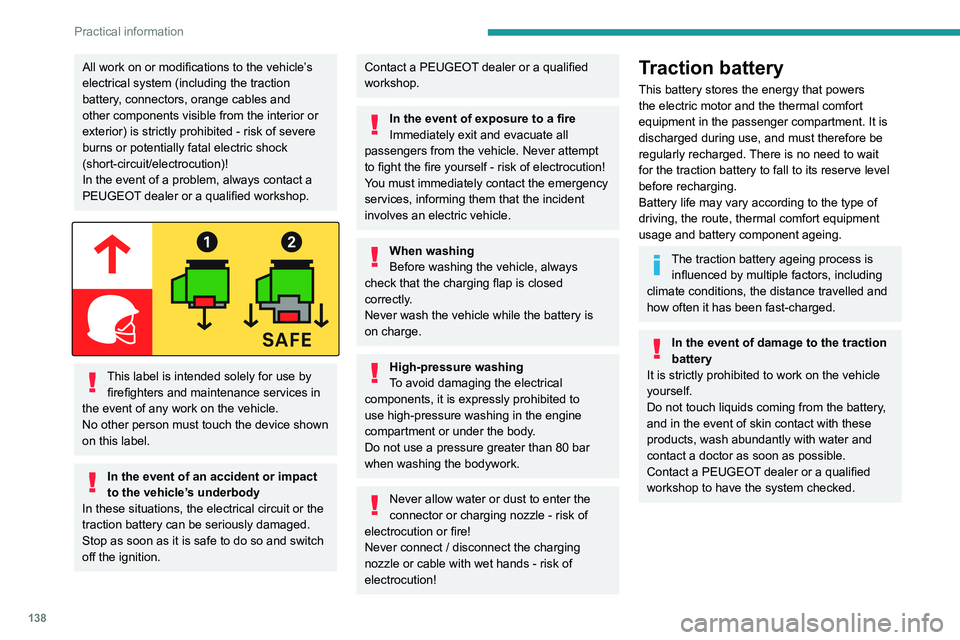
Charging connectors and
indicator lamps
1.Charging connectors
2. Deferred charging activation button
3. Nozzle locking indicator lamp
Fixed red: nozzle positioned correctly and
locked in the connector.
Flashing red: nozzle incorrectly positioned or
locking not possible.
4. Charging indicator lamp
All work on or modifications to the vehicle’s
electrical system (including the traction
battery, connectors, orange cables and
other components visible from the interior or
exterior) is strictly prohibited - risk of severe
burns or potentially fatal electric shock
(short-circuit/electrocution)!
In the event of a problem, always contact a
PEUGEOT dealer or a qualified workshop.
This label is intended solely for use by
firefighters and maintenance services in
the event of any work on the vehicle.
No other person must touch the device shown
on this label.
In the event of an accident or impact
to the vehicle’s underbody
In these situations, the electrical
circuit or the
traction battery can be seriously damaged.
Stop as soon as it is safe to do so and switch
off the ignition.
Contact a PEUGEOT dealer or a qualified
workshop.
In the event of exposure to a fire
Immediately exit and evacuate all
passengers from the vehicle. Never attempt
to fight the fire yourself - risk of electrocution!
You must immediately contact the emergency
services, informing them that the incident
involves an electric vehicle.
When washing
Before washing the vehicle, always
check that the charging flap is closed
correctly.
Never wash the vehicle while the battery is
on charge.
High-pressure washing
To avoid damaging the electrical
components, it is expressly prohibited to
use high-pressure washing in the engine
compartment or under the body.
Do not use a pressure greater than 80 bar
when washing the bodywork.
Never allow water or dust to enter the
connector or charging nozzle - risk of
electrocution or fire!
Never connect / disconnect the charging
nozzle or cable with wet hands - risk of
electrocution!
Traction battery
This battery stores the energy that powers
the electric motor and the thermal comfort
equipment in the passenger compartment. It is
discharged during use, and must therefore be
regularly recharged. There is no need to wait
for the traction battery to fall to its reserve level
before recharging.
Battery life may vary according to the type of
driving, the route, thermal comfort equipment
usage and battery component ageing.
The traction battery ageing process is influenced by multiple factors, including
climate conditions, the distance travelled and
how often it has been fast-charged.
In the event of damage to the traction
battery
It is strictly prohibited to work on the vehicle
yourself.
Do not touch liquids coming from the battery,
and in the event of skin contact with these
products, wash abundantly with water and
contact a doctor as soon as possible.
Contact a PEUGEOT dealer or a qualified
workshop to have the system checked.
Page 141 of 276
139
Practical information
7Charging connectors and
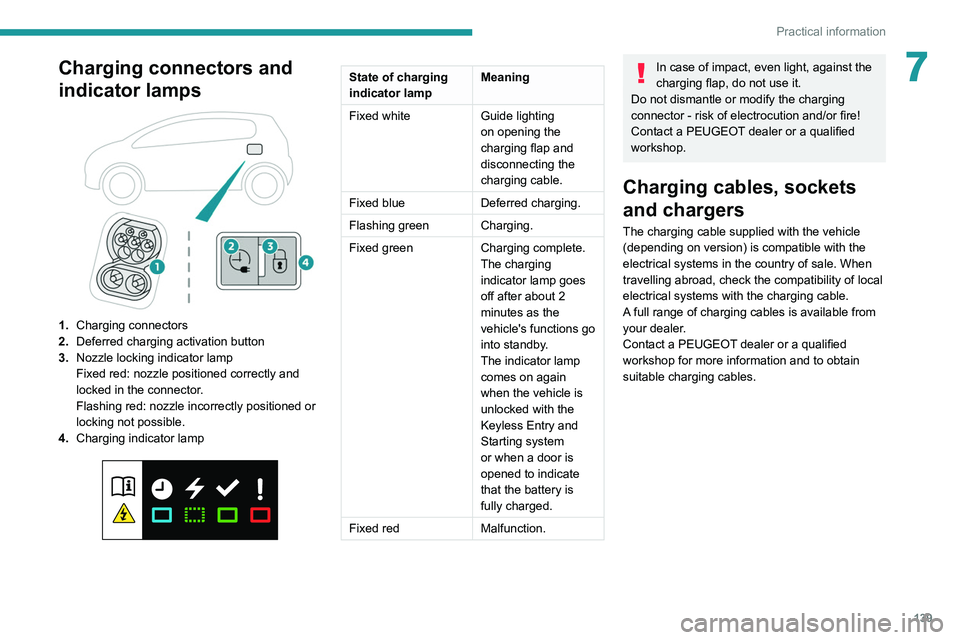
indicator lamps
1.Charging connectors
2. Deferred charging activation button
3. Nozzle locking indicator lamp
Fixed red: nozzle positioned correctly and
locked in the connector.
Flashing red: nozzle incorrectly positioned or
locking not possible.
4. Charging indicator lamp
State of charging
indicator lamp Meaning
Fixed white Guide lighting
on opening the
charging flap and
disconnecting the
charging cable.
Fixed blue Deferred charging.
Flashing green Charging.
Fixed green Charging complete.
The charging
indicator lamp goes
off after about 2
minutes as the
vehicle's functions go
into standby.
The indicator lamp
comes on again
when the vehicle is
unlocked with the
Keyless Entry and
Starting system
or when a door is
opened to indicate
that the battery is
fully charged.
Fixed red Malfunction.In case of impact, even light, against the
charging flap, do not use it.
Do not dismantle or modify the charging
connector - risk of electrocution and/or fire!
Contact a PEUGEOT dealer or a qualified
workshop.
Charging cables, sockets
and chargers
The charging cable supplied with the vehicle
(depending on version) is compatible with the
electrical systems in the country of sale. When
travelling abroad, check the compatibility of local
electrical systems with the charging cable.
A full range of charging cables is available from
your dealer.
Contact a PEUGEOT dealer or a qualified
workshop for more information and to obtain
suitable charging cables.
Page 145 of 276
143
Practical information
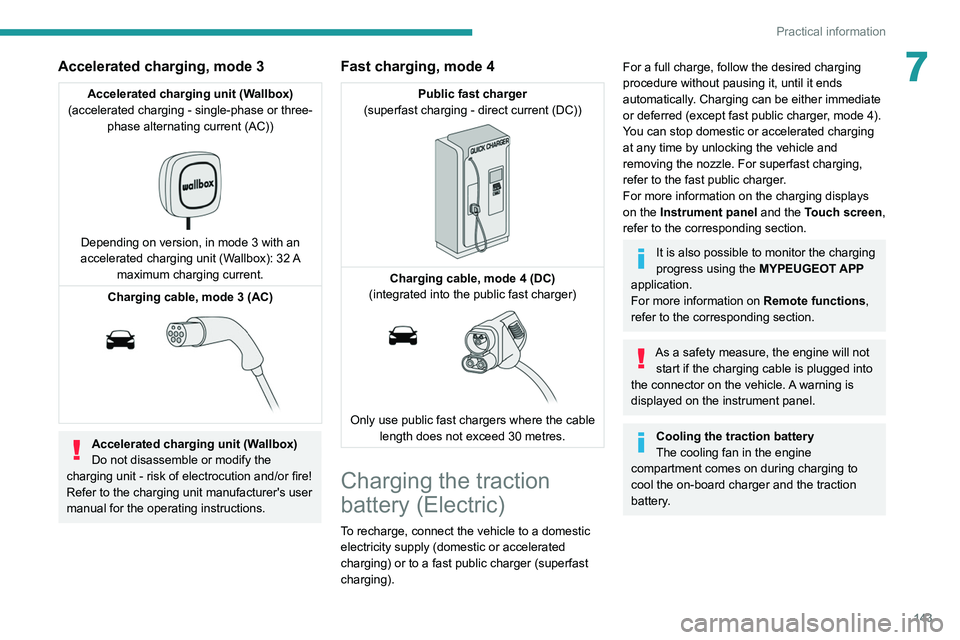
7Accelerated charging, mode 3
Accelerated charging unit (Wallbox)
(accelerated charging - single-phase or three- phase alternating current (AC))
Depending on version, in mode 3 with an
accelerated charging unit (Wallbox): 32 A
maximum charging current.
Charging cable, mode 3 (AC)
Accelerated charging unit (Wallbox)
Do not disassemble or modify the
charging unit - risk of electrocution and/or fire!
Refer to the charging unit manufacturer's user
manual for the operating instructions.
Fast charging, mode 4
Public fast charger
(superfast charging - direct current (DC))
Charging cable, mode 4 (DC)
(integrated into the public fast charger)
Only use public fast chargers where the cable length does not exceed 30 metres.
Charging the traction
battery (Electric)
To recharge, connect the vehicle to a domestic
electricity supply (domestic or accelerated
charging) or to a fast public charger (superfast
charging).
For a full charge, follow the desired charging
procedure without pausing it, until it ends
automatically. Charging can be either immediate
or deferred (except fast public charger, mode 4).
You can stop domestic or accelerated charging
at any time by unlocking the vehicle and
removing the nozzle. For superfast charging,
refer to the fast public charger.
For more information on the charging displays
on the Instrument panel and the Touch screen,
refer to the corresponding section.
It is also possible to monitor the charging
progress using the MYPEUGEOT APP
application.
For more information on Remote functions,
refer to the corresponding section.
As a safety measure, the engine will not start if the charging cable is plugged into
the connector on the vehicle. A warning is
displayed on the instrument panel.
Cooling the traction battery
The cooling fan in the engine
compartment comes on during charging to
cool the on-board charger and the traction
battery.
Page 146 of 276
144
Practical information
Connection
► Before charging, check that the drive selector
is in mode P, otherwise charging is not possible.
► Open the charging flap by pressing the
push-button, and check that there are no foreign
bodies on the charging connector.
Domestic charging, mode 2
► Connect the charging cable from the control
unit to the domestic socket.
When the connection is made, all of the indicator
lamps on the control unit light up, then only the
POWER indicator lamp remains on in green.
► Remove the protective cover from the
charging nozzle.
► Insert the nozzle into the charging connector.
The start of charging is confirmed by the flashing
green CHARGE indicator lamps in the flap, then
those on the control unit.
Vehicle in storage for more than 1
month
Discharge the traction battery down to 2 or
3 bars on the charge level indicator on the
instrument panel.
Do not connect the charging cable.
Always park the vehicle in a place with
temperatures between -10°C and 30°C
(parking in a place with extreme temperatures
can damage the traction battery).
Disconnect the cable from the (+) terminal
of the accessory battery in the engine
compartment.
Connect a 12 V battery charger to the (+)
and (-) terminals of the accessory battery
about every 3 months in order to recharge the
accessory battery and maintain an operating
voltage.
Precautions
Electric vehicles were developed in accordance
with the guidelines on maximum electromagnetic
fields issued by the International Commission
on Non-Ionizing Radiation Protection
(ICNIRP -
1998 Guidelines).
Wearers of pacemakers or equivalent
devices
The electric vehicles have been developed in accordance with the
guidelines on the maximum levels for
electromagnetic fields issued by the International
Commission on Non-Ionizing Radiation
Protection (ICNIRP - 1998 Guidelines).
If in doubt
Domestic or accelerated charging: do
not remain inside or near the vehicle, or near
the charging cable or charging unit, even for
a short time.
Superfast charging: do not use the system
yourself and avoid approaching public fast
charging points. Leave the area and ask a
third party to recharge the vehicle.
For domestic or accelerated charging
Before charging
Depending on the context:
►
Have a professional check that the
electrical system to be used complies with
applicable standards and is compatible with
the vehicle.
►
Have a professional electrician install
a dedicated domestic power socket or
accelerated charging unit (W
allbox)
compatible with the vehicle.
You should preferably use the charging cable
available as an accessory.
For more information, contact a PEUGEOT
dealer or a qualified workshop.
(During charging)
While charging is in progress, unlocking
the vehicle will cause the charging to stop.
If no action is taken on one of the openings
(door or boot) or on the charging nozzle, the
vehicle will lock again after 30 seconds and
charging will resume automatically.
Never work under the bonnet:
–
Some areas remain very hot, even an hour
after charging ends - risk of burns!
–
The fan may start at any time - risk of cuts
or strangulation!
After charging
Check that the charging flap is closed.
Do not leave the cable connected to the
domestic power socket - risk of short-circuit
or electrocution in the event of contact with or
immersion in water!
For superfast charging
Before charging
Check that the fast public charging
station and its charging cable are compatible
with the vehicle.
If the exterior temperature is below:
–
0°C, charging times may be extended.
–
-20°C, charging is still possible, but
charging times may be extended even further
(the battery has to be heated first).
After charging
Check that the charging flap is closed.