driver Peugeot 307 Break 2002 Owner's Manual
[x] Cancel search | Manufacturer: PEUGEOT, Model Year: 2002, Model line: 307 Break, Model: Peugeot 307 Break 2002Pages: 128, PDF Size: 1.82 MB
Page 2 of 128
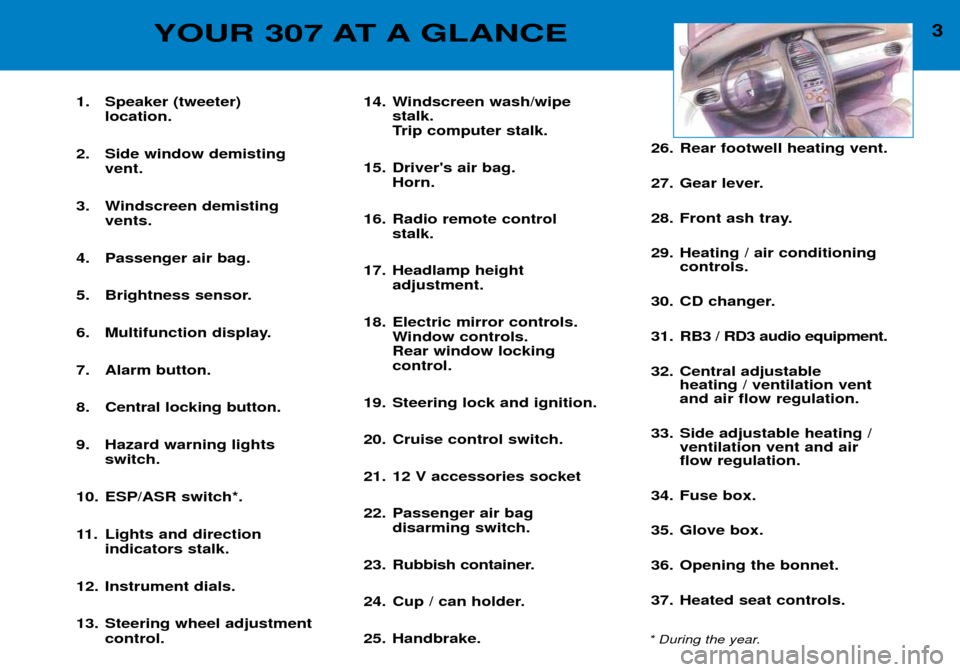
3YOUR 307 AT A GLANCE
1. Speaker (tweeter) location.
2. Side window demisting vent.
3. Windscreen demisting vents.
4. Passenger air bag.
5. Brightness sensor.
6. Multifunction display.
7. Alarm button.
8. Central locking button.
9. Hazard warning lights switch.
10. ESP/ASR switch*.
11. Lights and direction indicators stalk.
12. Instrument dials.
13. Steering wheel adjustment control. 14. Windscreen wash/wipe
stalk.
Trip computer stalk.
15. Driver's air bag. Horn.
16. Radio remote control stalk.
17. Headlamp height adjustment.
18. Electric mirror controls. Window controls. Rear window lockingcontrol.
19. Steering lock and ignition.
20. Cruise control switch.
21. 12 V accessories socket
22. Passenger air bag disarming switch.
23. Rubbish container.
24. Cup / can holder.
25. Handbrake. 26. Rear footwell heating vent.
27. Gear lever.
28. Front ash tray.
29. Heating / air conditioning
controls.
30. CD changer.
31. RB3 / RD3 audio equipment.
32. Central adjustable heating / ventilation vent and air flow regulation.
33. Side adjustable heating / ventilation vent and airflow regulation.
34. Fuse box.
35. Glove box.
36. Opening the bonnet.
37. Heated seat controls.
* During the year.
Page 3 of 128
4YOUR 307 AT A GLANCE
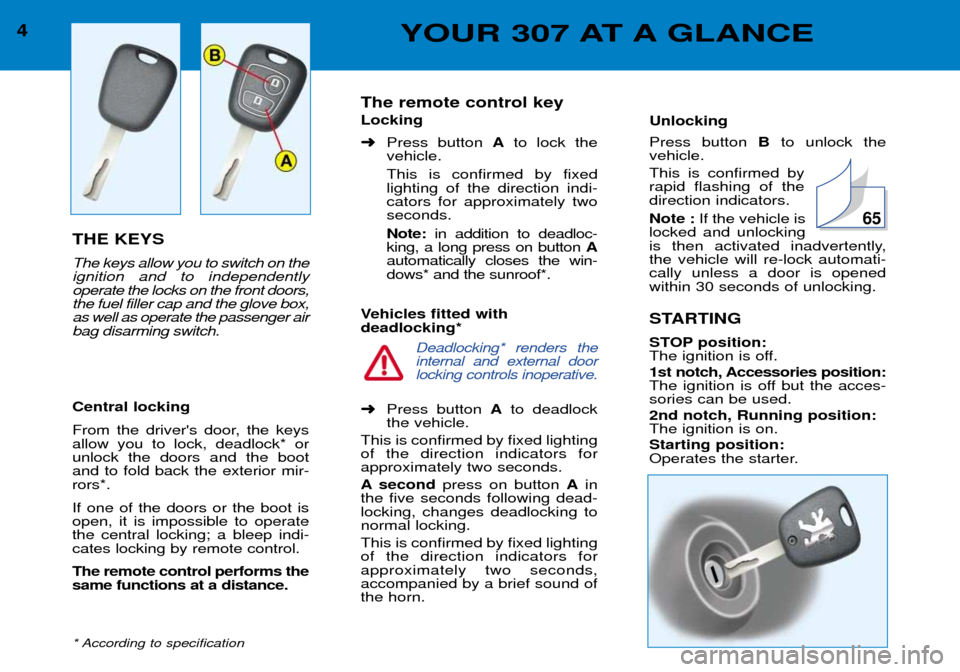
THE KEYS The keys allow you to switch on the ignition and to independentlyoperate the locks on the front doors,the fuel filler cap and the glove box,as well as operate the passenger airbag disarming switch. Central locking
From the driver's door, the keys allow you to lock, deadlock* orunlock the doors and the bootand to fold back the exterior mir-rors*. If one of the doors or the boot is open, it is impossible to operatethe central locking; a bleep indi-cates locking by remote control. The remote control performs the same functions at a distance.
* According to specificationThe remote control key Locking ➜
Press button Ato lock the
vehicle. This is confirmed by fixed lighting of the direction indi-cators for approximately twoseconds. Note: in addition to deadloc-
king, a long press on button A
automatically closes the win- dows* and the sunroof*.
Vehicles fitted withdeadlocking*
Deadlocking* renders the internal and external doorlocking controls inoperative.
➜ Press button Ato deadlock
the vehicle.
This is confirmed by fixed lighting of the direction indicators forapproximately two seconds.
A second press on button Ain
the five seconds following dead- locking, changes deadlocking tonormal locking. This is confirmed by fixed lighting of the direction indicators forapproximately two seconds,accompanied by a brief sound ofthe horn.
Unlocking Press button Bto unlock the
vehicle. This is confirmed by rapid flashing of thedirection indicators. Note : If the vehicle is
locked and unlocking
is then activated inadvertently,the vehicle will re-lock automati-cally unless a door is openedwithin 30 seconds of unlocking.
STARTING
STOP position:
The ignition is off.
1st notch, Accessories position:
The ignition is off but the acces-sories can be used. 2nd notch, Running position: The ignition is on. Starting position:
Operates the starter.
65
Page 5 of 128
6YOUR 307 AT A GLANCE
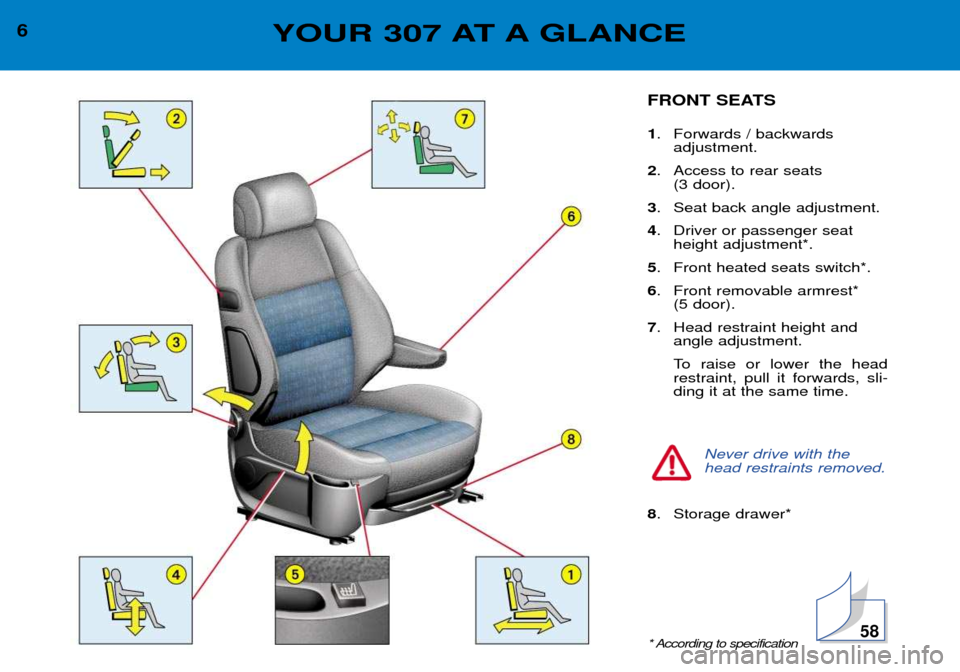
FRONT SEATS 1. Forwards / backwards
adjustment.
2 . Access to rear seats
(3 door).
3 . Seat back angle adjustment.
4 . Driver or passenger seat
height adjustment*.
5 . Front heated seats switch*.
6 . Front removable armrest*
(5 door).
7 . Head restraint height and
angle adjustment.
To raise or lower the head restraint, pull it forwards, sli-ding it at the same time.
Never drive with the head restraints removed.
8. Storage drawer*
* According to specification
58
Page 7 of 128
AIRBAGS The air bags have been designed to maximise the safety of the occu-pants in the event of serious colli-
sions. They work in conjunctionwith the force limiting seat belts. Front air bags These are folded in the centre of the steering wheel for the driverand in the fascia for the front
passenger. They are deployed
simultaneously, except in caseswhere the passenger air bag isdisarmed. Precautions regarding the passenger air bag ➜disarm the air bag if you ins- tall a rear-facing child seat,
➜ arm the air bag for an adult
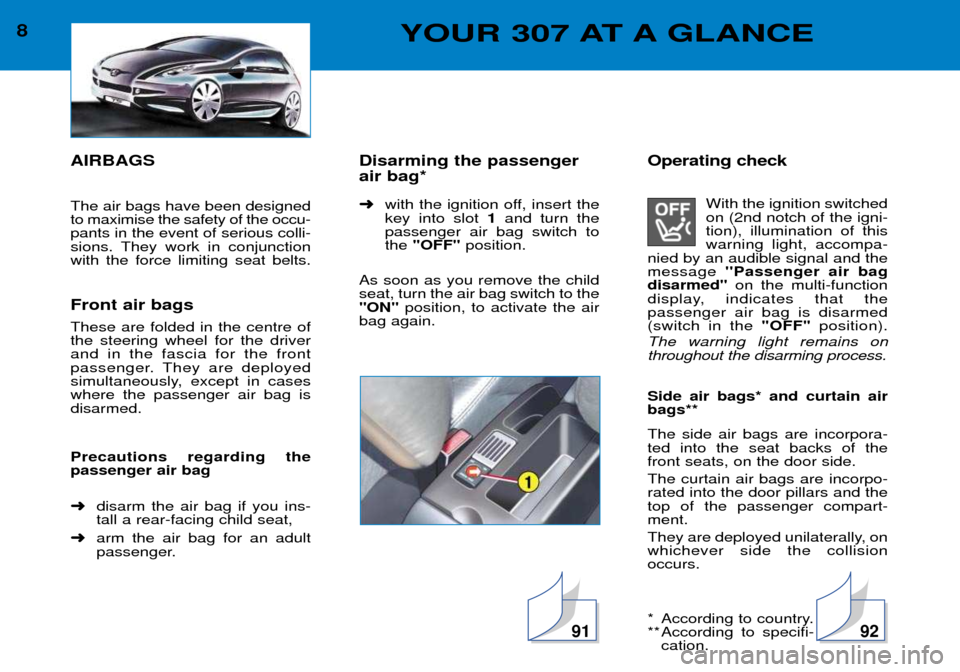
passenger. Disarming the passenger air bag* ➜
with the ignition off, insert the key into slot 1and turn the
passenger air bag switch tothe "OFF" position.
As soon as you remove the childseat, turn the air bag switch to the''ON'' position, to activate the air
bag again.Operating check
With the ignition switched on (2nd notch of the igni-tion), illumination of thiswarning light, accompa-
nied by an audible signal and themessage ''Passenger air bag
disarmed'' on the multi-function
display, indicates that thepassenger air bag is disarmed(switch in the "OFF"position).
The warning light remains onthroughout the disarming process. Side air bags* and curtain air bags** The side air bags are incorpora- ted into the seat backs of thefront seats, on the door side. The curtain air bags are incorpo- rated into the door pillars and thetop of the passenger compart-ment.
They are deployed unilaterally, on whichever side the collisionoccurs.
* According to country.
** According to specifi- cation.
8YOUR 307 AT A GLANCE
9192
Page 8 of 128
9YOUR 307 AT A GLANCE
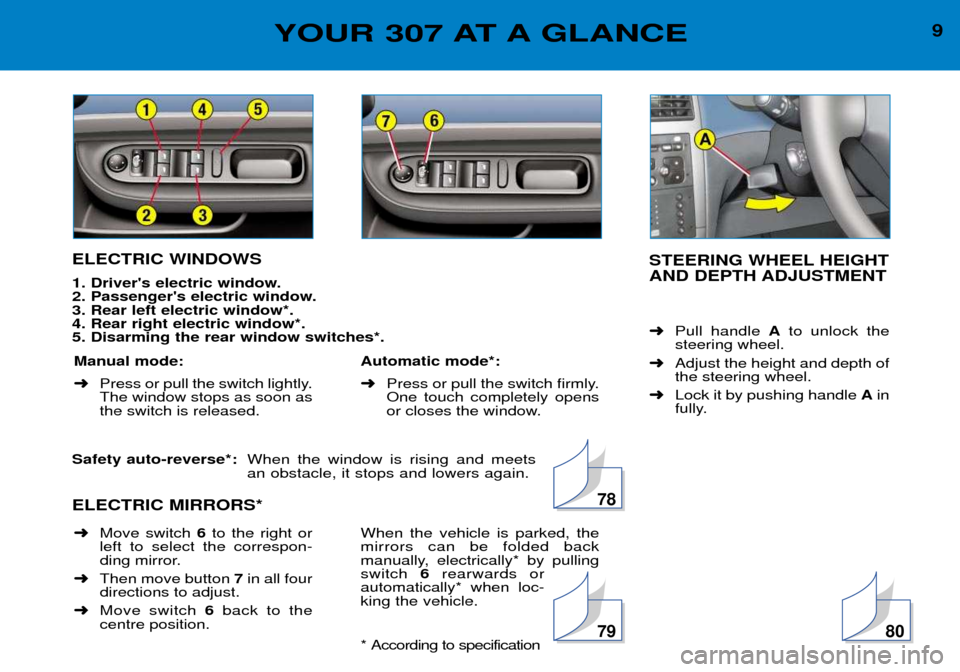
ELECTRIC WINDOWS
1. Driver's electric window.
2. Passenger's electric window.3. Rear left electric window*.4. Rear right electric window*.5. Disarming the rear window switches*. Safety auto-reverse*: When the window is rising and meets an obstacle, it stops and lowers again.
ELECTRIC MIRRORS*STEERING WHEEL HEIGHT
AND DEPTH ADJUSTMENT ➜ Pull handle Ato unlock the
steering wheel.
➜ Adjust the height and depth of the steering wheel.
➜ Lock it by pushing handle Ain
fully.
Manual mode: ➜ Press or pull the switch lightly. The window stops as soon asthe switch is released. Automatic mode*: ➜
Press or pull the switch firmly. One touch completely opens
or closes the window.
78
➜Move switch 6to the right or
left to select the correspon-
ding mirror.
➜ Then move button 7in all four
directions to adjust.
➜ Move switch 6back to the
centre position. When the vehicle is parked, themirrors can be folded back
manually, electrically* by pullingswitch
6rearwards or
automatically* when loc-king the vehicle.
* According to specification
7980
Page 28 of 128
Passenger airbag disarming indicator light* Illumination of this warning light is accompanied by an audible signal and the message "Passenger air bag disarmed" on the multifunction
display.
If the passager airbag is disarmed, the indicator light comes on when the ignitionis switched on and remains on.
In all cases, if the warning light flashes; contact a PEUGEOT dealer.
Seat belt not fastened warning light With the engine running, this indicator light comes on when the driver's seat belt is not fastened.Low fuel level warning light The warning light comes on for three seconds when the ignition is switched on for three seconds. When this light comes on with the engine running, it is accompa-
nied by an audible signal and the message "Fuel level low"on the multifunction
display.When the warning light comes on, you have enough fuel to drive at least 30 miles (50 km). The tank capacity is approximately 13 gallons (60 litres).
This light flashes to indicate a malfunction of the fuel gauge.
Contact a PEUGEOT dealer. Air bag warning light This light comes on for a few seconds when the ignition is switched on.
Illumination of this warning light, with the engine running, is accompa-
nied by an audible signal and a message "Air bag fault"on the multi-
function display indicating :
- a fault in the front air bags,or
- a fault in the side air bags or curtain air bags.
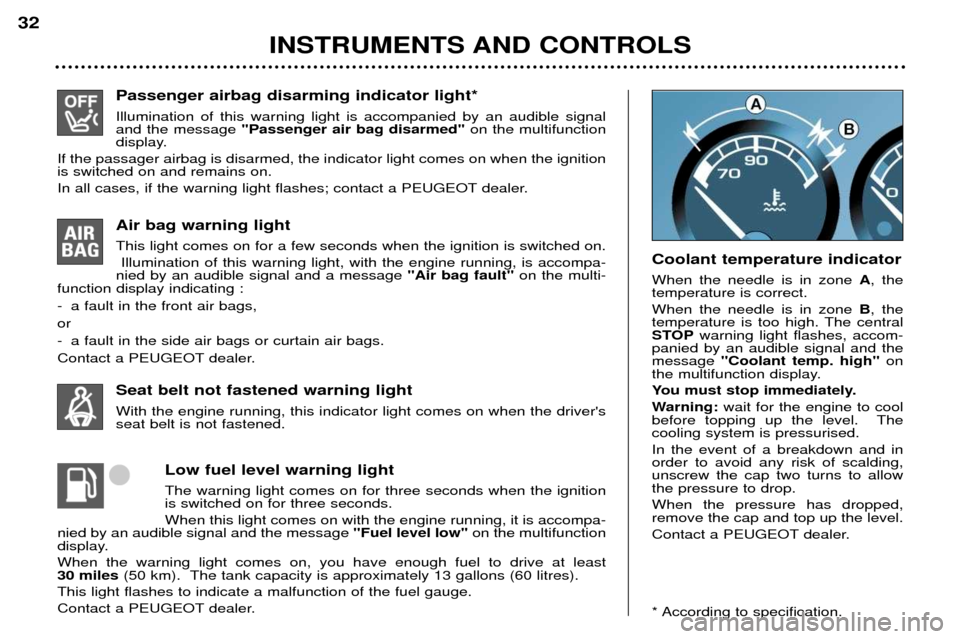
Contact a PEUGEOT dealer. Coolant temperature indicator When the needle is in zone
A, the
temperature is correct. When the needle is in zone B, the
temperature is too high. The central
STOP warning light flashes, accom-
panied by an audible signal and themessage "Coolant temp. high" on
the multifunction display.
You must stop immediately.
Warning: wait for the engine to cool
before topping up the level. The cooling system is pressurised. In the event of a breakdown and in order to avoid any risk of scalding,unscrew the cap two turns to allowthe pressure to drop. When the pressure has dropped, remove the cap and top up the level.
Contact a PEUGEOT dealer.
* According to specification.
INSTRUMENTS AND CONTROLS
32
Page 29 of 128
Passenger airbag disarming indicator light* Illumination of this warning light is accompanied by an audible signal and the message "Passenger air bag disarmed" on the multifunction
display.
If the passager airbag is disarmed, the indicator light comes on when the ignitionis switched on and remains on.
In all cases, if the warning light flashes; contact a PEUGEOT dealer.
Seat belt not fastened warning light With the engine running, this indicator light comes on when the driver's seat belt is not fastened.Low fuel level warning light The warning light comes on for three seconds when the ignition is switched on for three seconds. When this light comes on with the engine running, it is accompa-
nied by an audible signal and the message "Fuel level low"on the multifunction
display.When the warning light comes on, you have enough fuel to drive at least 30 miles (50 km). The tank capacity is approximately 13 gallons (60 litres).
This light flashes to indicate a malfunction of the fuel gauge.
Contact a PEUGEOT dealer. Air bag warning light This light comes on for a few seconds when the ignition is switched on.
Illumination of this warning light, with the engine running, is accompa-
nied by an audible signal and a message "Air bag fault"on the multi-
function display indicating :
- a fault in the front air bags,or
- a fault in the side air bags or curtain air bags.
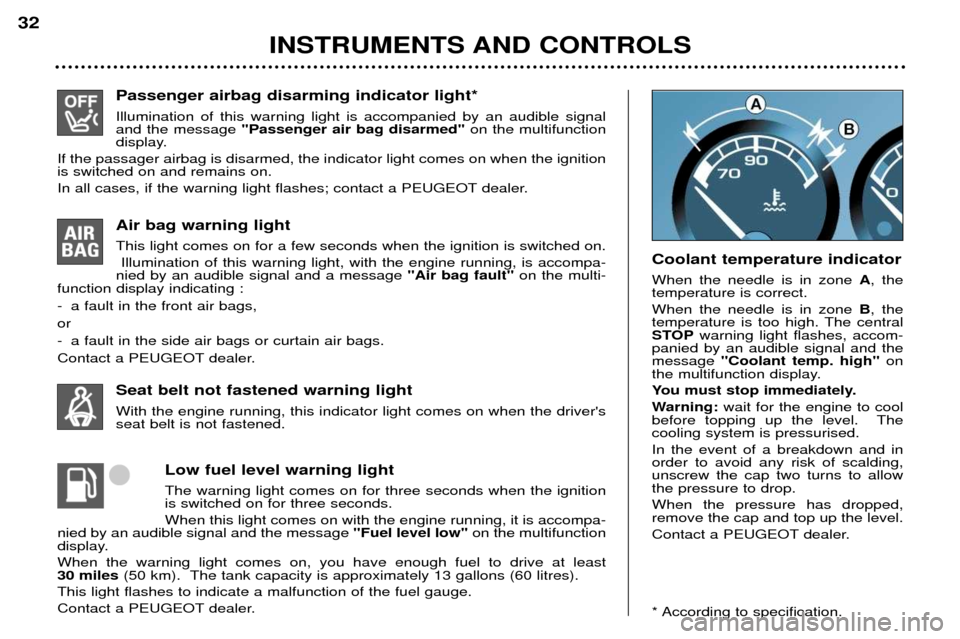
Contact a PEUGEOT dealer. Coolant temperature indicator When the needle is in zone
A, the
temperature is correct. When the needle is in zone B, the
temperature is too high. The central
STOP warning light flashes, accom-
panied by an audible signal and themessage "Coolant temp. high" on
the multifunction display.
You must stop immediately.
Warning: wait for the engine to cool
before topping up the level. The cooling system is pressurised. In the event of a breakdown and in order to avoid any risk of scalding,unscrew the cap two turns to allowthe pressure to drop. When the pressure has dropped, remove the cap and top up the level.
Contact a PEUGEOT dealer.
* According to specification.
INSTRUMENTS AND CONTROLS
32
Page 31 of 128
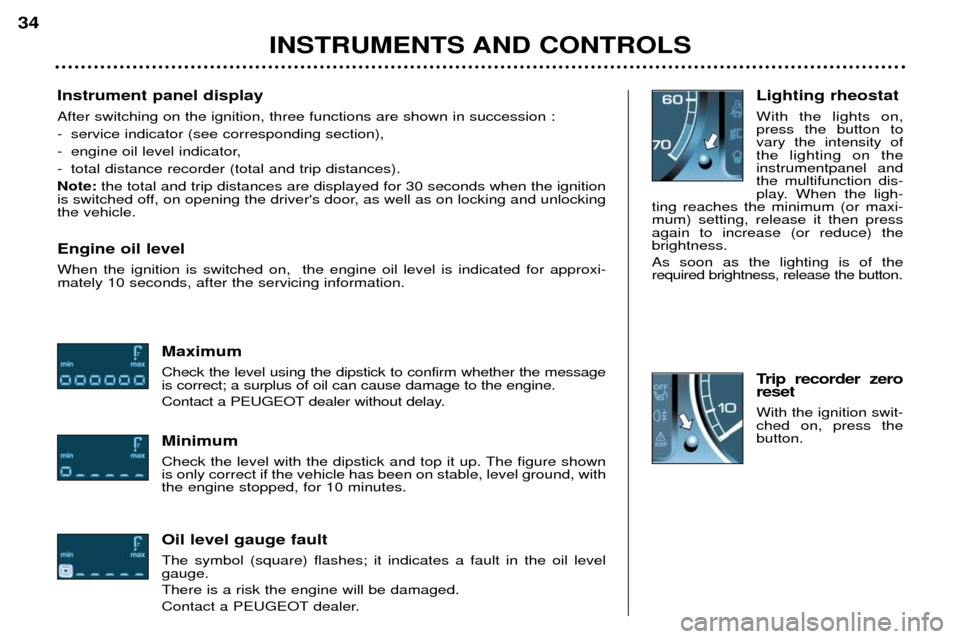
Instrument panel display After switching on the ignition, three functions are shown in succession :
- service indicator (see corresponding section),
- engine oil level indicator,
- total distance recorder (total and trip distances).Note:the total and trip distances are displayed for 30 seconds when the ignition
is switched off, on opening the driver's door, as well as on locking and unlocking the vehicle. Engine oil level When the ignition is switched on, the engine oil level is indicated for approxi- mately 10 seconds, after the servicing information.
Maximum Check the level using the dipstick to confirm whether the message is correct; a surplus of oil can cause damage to the engine.
Contact a PEUGEOT dealer without delay. Minimum
Check the level with the dipstick and top it up. The figure shown is only correct if the vehicle has been on stable, level ground, withthe engine stopped, for 10 minutes. Oil level gauge fault The symbol (square) flashes; it indicates a fault in the oil level gauge. There is a risk the engine will be damaged.
Contact a PEUGEOT dealer. Lighting rheostat With the lights on, press the button tovary the intensity ofthe lighting on theinstrumentpanel andthe multifunction dis-
play. When the ligh-
ting reaches the minimum (or maxi-mum) setting, release it then pressagain to increase (or reduce) thebrightness. As soon as the lighting is of the required brightness, release the button.
Trip recorder zeroreset With the ignition swit- ched on, press thebutton.
INSTRUMENTS AND CONTROLS
34
Page 58 of 128

FRONT SEATS
1. Forwards-backwards adjustmentLift the control and slide the seat forwards or backwards.
2. Access to rear seats (3 door) Pull the handle to fold the seatback and move the seat for-wards. On repositioning, the seat returns to its initial position.
Warning: no person or object
must prevent the seat from retur- ning to its initial position; a returnto this position is necessary forthe seat to lock in place.
3. Seat back angle adjustment Push the handle towards the rear.
4. Driver's* or passenger's* seat height adjustment* Pull the handle upwardsor push it downwards as many times asnecessary to obtain the requiredposition.
YOUR 307 IN DETAIL
58
* According to specification.
Page 66 of 128
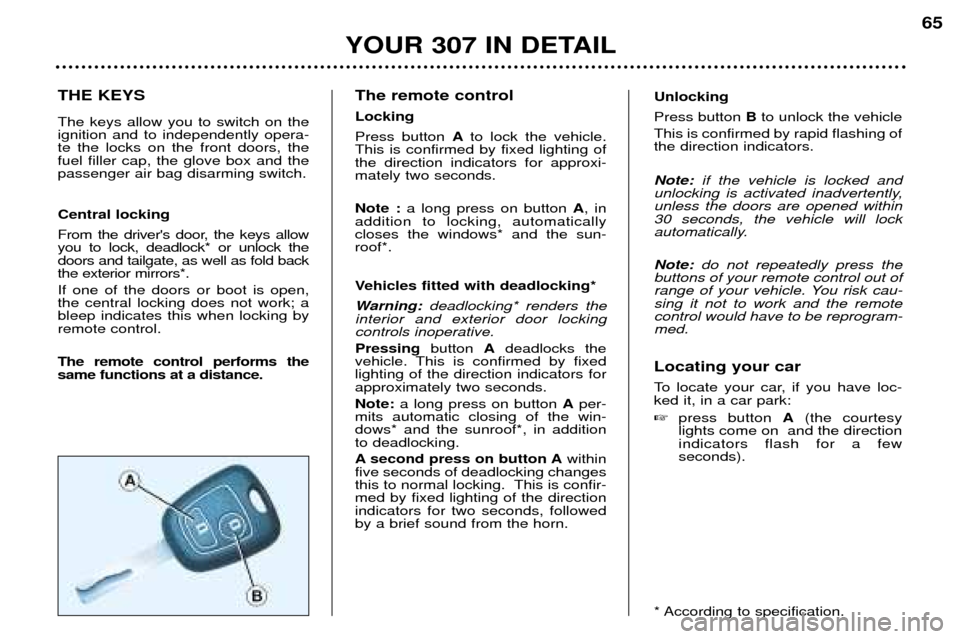
THE KEYS The keys allow you to switch on the ignition and to independently opera-te the locks on the front doors, thefuel filler cap, the glove box and thepassenger air bag disarming switch. Central locking
From the driver's door, the keys allow you to lock, deadlock* or unlock thedoors and tailgate, as well as fold backthe exterior mirrors*. If one of the doors or boot is open, the central locking does not work; ableep indicates this when locking byremote control. The remote control performs the same functions at a distance.The remote control LockingPress button
Ato lock the vehicle.
This is confirmed by fixed lighting of the direction indicators for approxi-mately two seconds. Note : a long press on button A, in
addition to locking, automatically closes the windows* and the sun-roof*.
Vehicles fitted with deadlocking*
Warning: deadlocking* renders the
interior and exterior door locking controls inoperative. Pressing button Adeadlocks the
vehicle. This is confirmed by fixed lighting of the direction indicators forapproximately two seconds. Note: a long press on button Aper-
mits automatic closing of the win- dows* and the sunroof*, in additionto deadlocking.
A second press on button A within
five seconds of deadlocking changes
this to normal locking. This is confir-med by fixed lighting of the directionindicators for two seconds, followedby a brief sound from the horn.
YOUR 307 IN DETAIL 65
Unlocking Press button
Bto unlock the vehicle
This is confirmed by rapid flashing of the direction indicators. Note: if the vehicle is locked and
unlocking is activated inadvertently, unless the doors are opened within30 seconds, the vehicle will lock
automatically. Note: do not repeatedly press the
buttons of your remote control out of
range of your vehicle. You risk cau-sing it not to work and the remotecontrol would have to be reprogram-med. Locating your car
To locate your car, if you have loc- ked it, in a car park: � press button A(the courtesy
lights come on and the direction indicators flash for a fewseconds).
* According to specification.