Lin 38 Peugeot 307 SW Dag 2002 User Guide
[x] Cancel search | Manufacturer: PEUGEOT, Model Year: 2002, Model line: 307 SW Dag, Model: Peugeot 307 SW Dag 2002Pages: 137, PDF Size: 1.42 MB
Page 37 of 137
RADIO Notes on radio reception
Your car radio is subject to phenomena which do not affect domestic radio sets. Both AM (MW/LW) and FM reception are
subject to various forms of interference. This is no reflection on the quality of the equipment, but is due to the nature of the
signals and the way in which they are transmitted.
On MW/LW, interference may be noticed when passing under high voltage power lines or bridges, or in tunnels.
On FM, interference may be the result of increasing distance from the transmitter, deflection of the signals by obstacles
(mountains, hills, buildings etc), or of being in an area which is not covered by a transmitter. Selecting radio mode
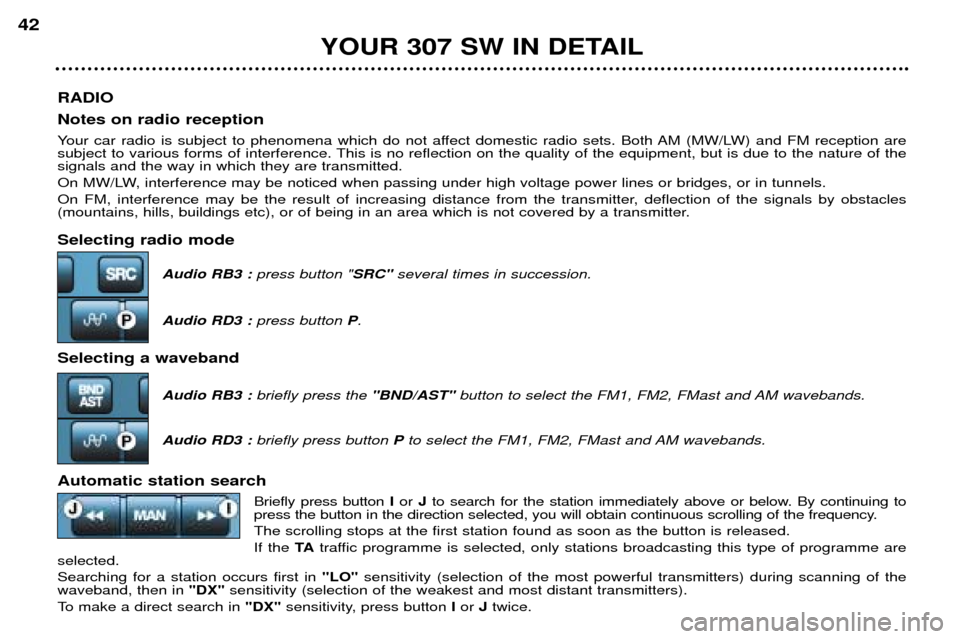
Audio RB3 : press button " SRC"several times in succession.
Audio RD3 : press button P.
Selecting a waveband Audio RB3 : briefly press the "BND/AST"button to select the FM1, FM2, FMast and AM wavebands.
Audio RD3 : briefly press button Pto select the FM1, FM2, FMast and AM wavebands.
Automatic station search Briefly press buttonIor Jto search for the station immediately above or below. By continuing to
press the button in the direction selected, you will obtain continuous scrolling of the frequency. The scrolling stops at the first station found as soon as the button is released.If the TAtraffic programme is selected, only stations broadcasting this type of programme are
selected.Searching for a station occurs first in "LO"sensitivity (selection of the most powerful transmitters) during scanning of the
waveband, then in "DX"sensitivity (selection of the weakest and most distant transmitters).
To make a direct search in "DX" sensitivity, press button Ior Jtwice.
YOUR 307 SW IN DETAIL
42
Page 38 of 137

Manual station search Press the"MAN" button.
Briefly press button Ior Jto increase or decrease the frequency displayed.
By continuing to press the button in the direction selected, you will obtain continuous scrolling of the frequency. The scrolling stops at the first station found as soon as the button is released.Pressing the "MAN"button again returns you to automatic station search.
Manual storing of stations in the memory Select the station required. Press one of the buttons "1"to "6" for more than two seconds.
The sound stops then becomes audible again, confirming that the station has been stored in the memory.
Automatic storing of FM stations in the memory (autostore)
Audio RB3 : press and hold the "BND/AST" button for more than two seconds.
Audio RD3 : press and hold button "P" for more than two seconds.
Your radio automatically stores the 6 stations with the strongest signal in FM. These stations are stored in the FMast wave-
band.
If it is not possible to find 6 stations, the remaining memories are empty.
Recalling stations stored in the memory For each waveband, briefly press buttons "1" to "6" to recall the corresponding station.
YOUR 307 SW IN DETAIL 43
Page 44 of 137
RADIO Notes on radio reception
Your car radio is subject to phenomena which do not affect domestic radio sets. Both AM (MW/LW) and FM reception are
subject to various forms of interference. This is no reflection on the quality of the equipment, but is due to the nature of the
signals and the way in which they are transmitted.
On MW/LW, interference may be noticed when passing under high voltage power lines or bridges, or in tunnels.
On FM, interference may be the result of increasing distance from the transmitter, deflection of the signals by obstacles
(mountains, hills, buildings etc), or of being in an area which is not covered by a transmitter. Selecting radio mode
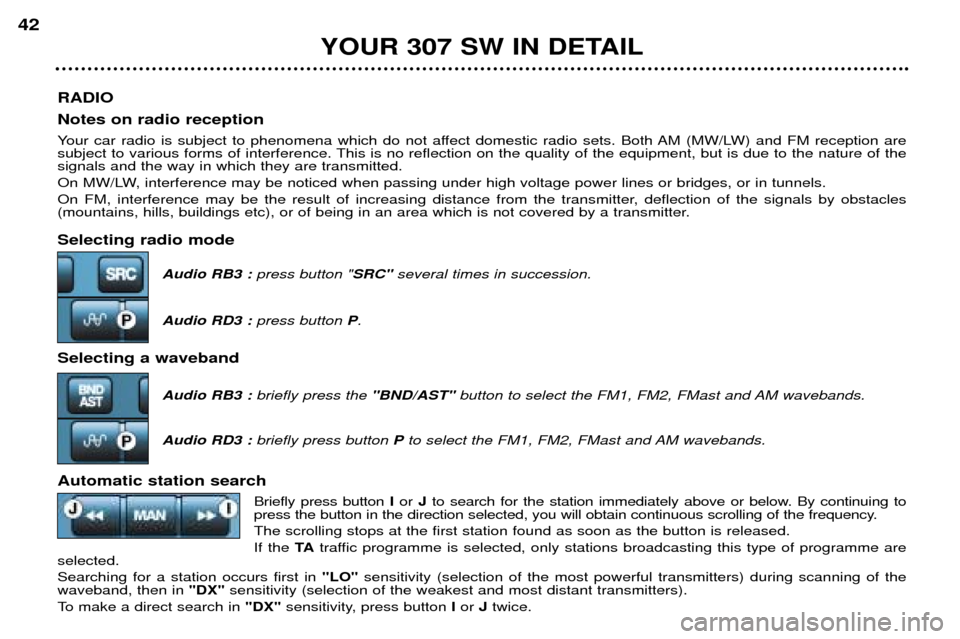
Audio RB3 : press button " SRC"several times in succession.
Audio RD3 : press button P.
Selecting a waveband Audio RB3 : briefly press the "BND/AST"button to select the FM1, FM2, FMast and AM wavebands.
Audio RD3 : briefly press button Pto select the FM1, FM2, FMast and AM wavebands.
Automatic station search Briefly press buttonIor Jto search for the station immediately above or below. By continuing to
press the button in the direction selected, you will obtain continuous scrolling of the frequency. The scrolling stops at the first station found as soon as the button is released.If the TAtraffic programme is selected, only stations broadcasting this type of programme are
selected.Searching for a station occurs first in "LO"sensitivity (selection of the most powerful transmitters) during scanning of the
waveband, then in "DX"sensitivity (selection of the weakest and most distant transmitters).
To make a direct search in "DX" sensitivity, press button Ior Jtwice.
YOUR 307 SW IN DETAIL
42
Page 45 of 137

Manual station search Press the"MAN" button.
Briefly press button Ior Jto increase or decrease the frequency displayed.
By continuing to press the button in the direction selected, you will obtain continuous scrolling of the frequency. The scrolling stops at the first station found as soon as the button is released.Pressing the "MAN"button again returns you to automatic station search.
Manual storing of stations in the memory Select the station required. Press one of the buttons "1"to "6" for more than two seconds.
The sound stops then becomes audible again, confirming that the station has been stored in the memory.
Automatic storing of FM stations in the memory (autostore)
Audio RB3 : press and hold the "BND/AST" button for more than two seconds.
Audio RD3 : press and hold button "P" for more than two seconds.
Your radio automatically stores the 6 stations with the strongest signal in FM. These stations are stored in the FMast wave-
band.
If it is not possible to find 6 stations, the remaining memories are empty.
Recalling stations stored in the memory For each waveband, briefly press buttons "1" to "6" to recall the corresponding station.
YOUR 307 SW IN DETAIL 43
Page 53 of 137
YOUR 307 SW IN DETAIL53
4. Air flow adjustment Turn the control from posi- tion 1to position 4to obtain
an air flow sufficient toensure your comfort.
5. Air intake Pressing button 5permits
recirculation of the interior
air. Recirculation, indicatedby illumination of the indica-
tor light, prevents exterior odoursand smoke from entering the pas-senger compartment. Used simultaneously with the air conditioning, recirculation enablesheating and cooling performance tobe improved. Used in a humid climate, recircula- tion may result in misting of the win-dows. As soon as possible, place button 5
in the outside air position, to prevent
deterioration of the air quality. The
indicator light switches off.
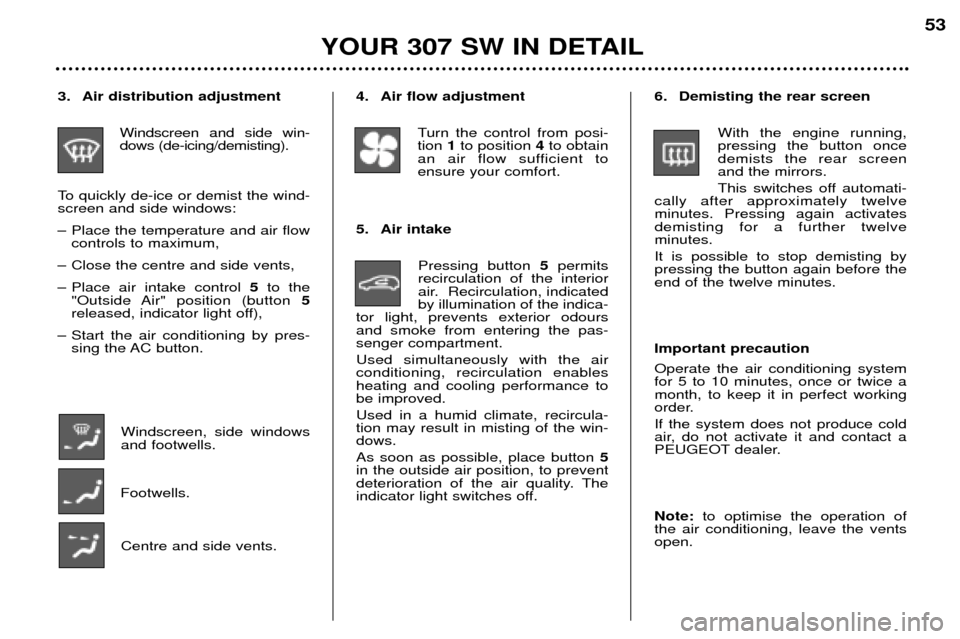
3. Air distribution adjustment
Windscreen and side win-dows (de-icing/demisting).
To quickly de-ice or demist the wind-screen and side windows:
Ð Place the temperature and air flow controls to maximum,
Ð Close the centre and side vents,
Ð Place air intake control 5to the
"Outside Air" position (button 5
released, indicator light off),
Ð Start the air conditioning by pres- sing the AC button.
Windscreen, side windows and footwells.
Footwells.
Centre and side vents. 6. Demisting the rear screen
With the engine running,pressing the button oncedemists the rear screenand the mirrors.
This switches off automati-
cally after approximately twelve minutes. Pressing again activatesdemisting for a further twelveminutes. It is possible to stop demisting by pressing the button again before theend of the twelve minutes. Important precaution Operate the air conditioning system for 5 to 10 minutes, once or twice amonth, to keep it in perfect working
order. If the system does not produce cold
air, do not activate it and contact a
PEUGEOT dealer. Note: to optimise the operation of
the air conditioning, leave the vents open.
Page 57 of 137
Never drive with the head restraints removed; theyshould be in place andcorrectly adjusted.
5. ArmrestsThese can be folded down and are removable.
To remove them, press the button located between the armrest andthe side of the seat and pull.
6. Head restraint height and angle adjustment
To raise or lower the restraint, pull it forwards, sliding it at thesame time.
To remove the head restraint, place it in the top position, lift thelug using a coin and pull it for-wards and upwards at the sametime.
To put it back in position, locate the stems of the restraint in theholes, taking care to keep them inline with the seat back. Active seat back
(front seat)
This possesses a device to prevent"whiplash". When there is an impact from the
rear, the action of the body on theseat back forces the head restraintforwards and upwards, preventingthe head being thrown backwards.
7. Storage drawers There is a storage drawer under each front seat.
Ð To open it, lift it and pull.
Ð To take it out, open it to its full extent, press the ends of the slides
and lift it, then remove it completely.
Do not place heavy objects in thedrawers. Under the front passenger seat, the layout of the floor allows for storageof a first aid kit and a warning triangle(small version).
8. Aviation style table There is an aviation style table, fitted
with a can holder, on the back ofeach front seat. REAR HEAD RESTRAINTS These have a high position for when they are in use and a low position forwhen they are stored. The head restraints are also remo- vable.
To remove them, pull upwards as far as the stop then press the lug (sideseat) or the two lugs (centre seat).
YOUR 307 SW IN DETAIL
57
The adjustment is correct when the upper edge of thehead restraint is level withthe top of the head.
Page 58 of 137
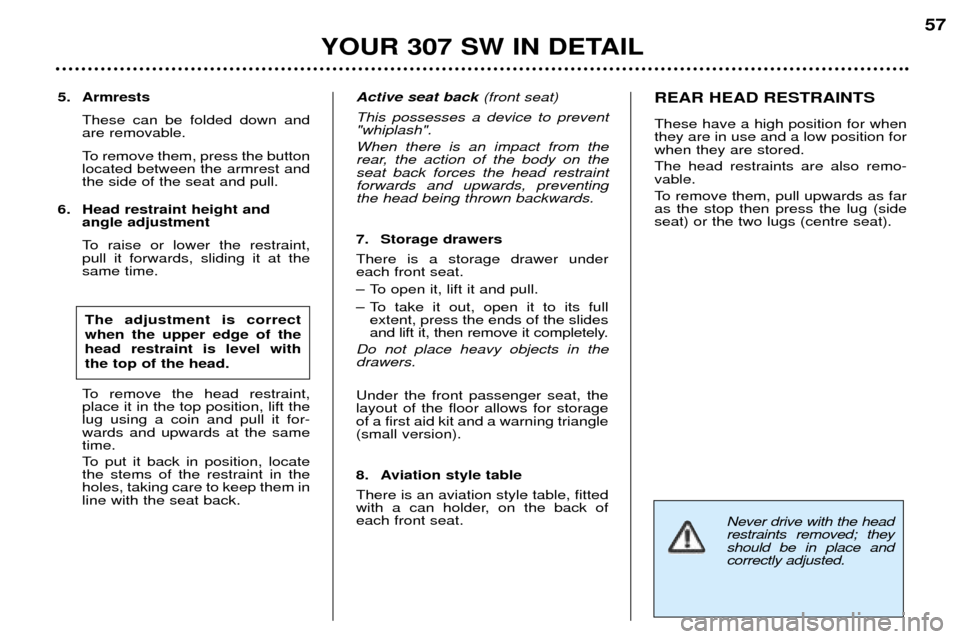
Never drive with the head restraints removed; theyshould be in place andcorrectly adjusted.
5. ArmrestsThese can be folded down and are removable.
To remove them, press the button located between the armrest andthe side of the seat and pull.
6. Head restraint height and angle adjustment
To raise or lower the restraint, pull it forwards, sliding it at thesame time.
To remove the head restraint, place it in the top position, lift thelug using a coin and pull it for-wards and upwards at the sametime.
To put it back in position, locate the stems of the restraint in theholes, taking care to keep them inline with the seat back. Active seat back
(front seat)
This possesses a device to prevent"whiplash". When there is an impact from the
rear, the action of the body on theseat back forces the head restraintforwards and upwards, preventingthe head being thrown backwards.
7. Storage drawers There is a storage drawer under each front seat.
Ð To open it, lift it and pull.
Ð To take it out, open it to its full extent, press the ends of the slides
and lift it, then remove it completely.
Do not place heavy objects in thedrawers. Under the front passenger seat, the layout of the floor allows for storageof a first aid kit and a warning triangle(small version).
8. Aviation style table There is an aviation style table, fitted
with a can holder, on the back ofeach front seat. REAR HEAD RESTRAINTS These have a high position for when they are in use and a low position forwhen they are stored. The head restraints are also remo- vable.
To remove them, pull upwards as far as the stop then press the lug (sideseat) or the two lugs (centre seat).
YOUR 307 SW IN DETAIL
57
The adjustment is correct when the upper edge of thehead restraint is level withthe top of the head.
Page 60 of 137
YOUR 307 SW IN DETAIL59
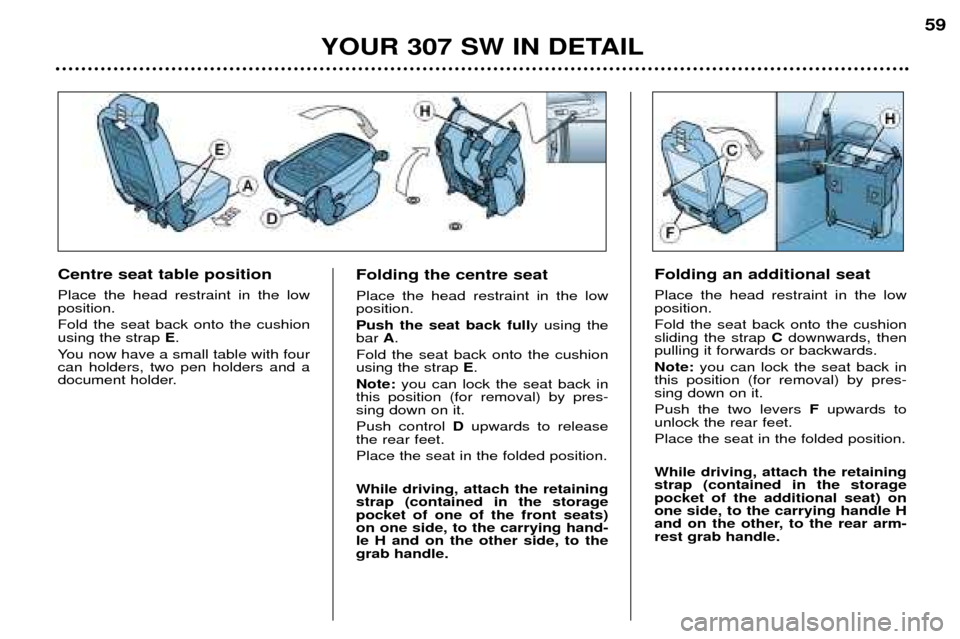
Centre seat table position Place the head restraint in the low position. Fold the seat back onto the cushion using the strap E.
You now have a small table with fourcan holders, two pen holders and a
document holder. Folding the centre seat Place the head restraint in the low position. Push the seat back full
y using the
bar A.
Fold the seat back onto the cushion using the strap E.
Note: you can lock the seat back in
this position (for removal) by pres-sing down on it. Push control Dupwards to release
the rear feet.Place the seat in the folded position. While driving, attach the retaining strap (contained in the storagepocket of one of the front seats)on one side, to the carrying hand-le H and on the other side, to thegrab handle. Folding an additional seat Place the head restraint in the low position. Fold the seat back onto the cushion sliding the strap
C downwards, then
pulling it forwards or backwards. Note: you can lock the seat back in
this position (for removal) by pres- sing down on it. Push the two levers Fupwards to
unlock the rear feet.Place the seat in the folded position. While driving, attach the retaining strap (contained in the storagepocket of the additional seat) onone side, to the carrying handle H
and on the other, to the rear arm-rest grab handle.
Page 61 of 137
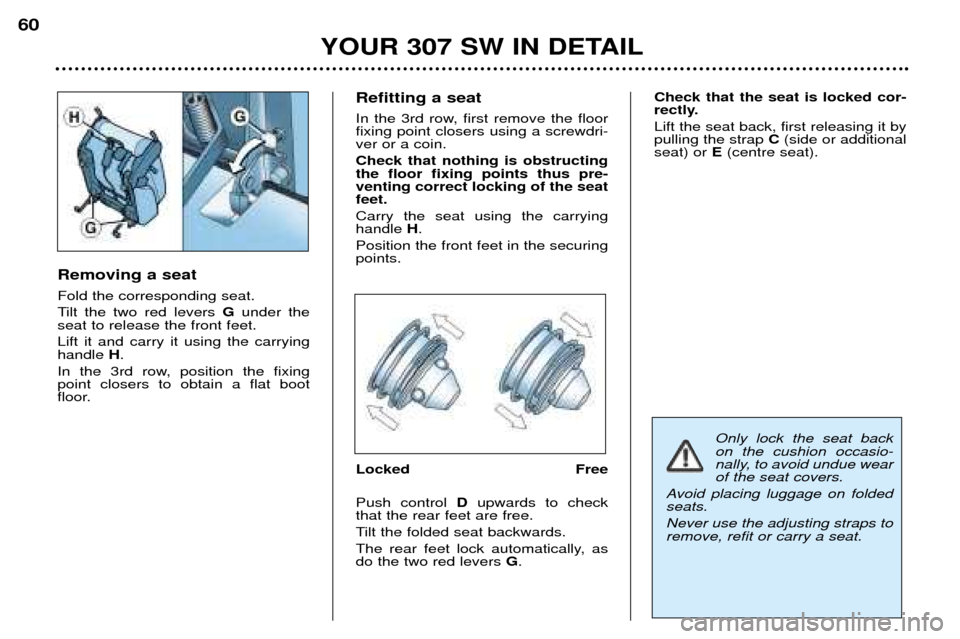
Removing a seat Fold the corresponding seat.
Tilt the two red levers Gunder the
seat to release the front feet.Lift it and carry it using the carrying handle H.
In the 3rd row, position the fixingpoint closers to obtain a flat boot
floor. Refitting a seat
In the 3rd row, first remove the floor fixing point closers using a screwdri-ver or a coin. Check that nothing is obstructing the floor fixing points thus pre-venting correct locking of the seatfeet. Carry the seat using the carrying handle
H.
Position the front feet in the securingpoints.
Locked Free Push control Dupwards to check
that the rear feet are free.
Tilt the folded seat backwards.
The rear feet lock automatically, as do the two red levers G. Check that the seat is locked cor-
rectly. Lift the seat back, first releasing it by pulling the strap
C (side or additional
seat) or E(centre seat).
YOUR 307 SW IN DETAIL
60
Only lock the seat back on the cushion occasio-
nally, to avoid undue wearof the seat covers.
Avoid placing luggage on foldedseats. Never use the adjusting straps to remove, refit or carry a seat.
Page 64 of 137
YOUR 307 SW IN DETAIL63
Never leave a child or an animal in a vehicle whichis exposed to the sun andhas the windows closed.
Never leave the keys within reach
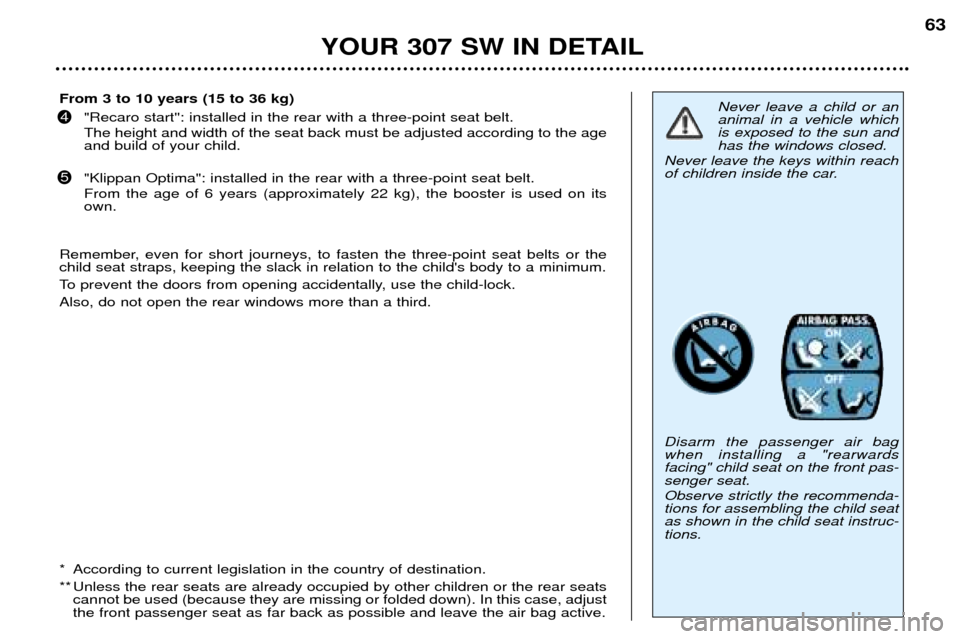
of children inside the car. Disarm the passenger air bag when installing a "rearwardsfacing" child seat on the front pas-senger seat. Observe strictly the recommenda- tions for assembling the child seatas shown in the child seat instruc-tions.
From 3 to 10 years (15 to 36 kg)
"Recaro start'': installed in the rear with a three-point seat belt. The height and width of the seat back must be adjusted according to the age and build of your child. "Klippan Optima": installed in the rear with a three-point seat belt. From the age of 6 years (approximately 22 kg), the booster is used on its own.
Remember, even for short journeys, to fasten the three-point seat belts or thechild seat straps, keeping the slack in relation to the child's body to a minimum.
To prevent the doors from opening accidentally, use the child-lock. Also, do not open the rear windows more than a third.
* According to current legislation in the country of destination.
** Unless the rear seats are already occupied by other children or the rear seats cannot be used (because they are missing or folded down). In this case, adjust the front passenger seat as far back as possible and leave the air bag active.
4
5