instrument panel Peugeot 308 2015 User Guide
[x] Cancel search | Manufacturer: PEUGEOT, Model Year: 2015, Model line: 308, Model: Peugeot 308 2015Pages: 416, PDF Size: 11.81 MB
Page 36 of 416
34
308_en_Chap01_controle-de-marche_ed01-2015
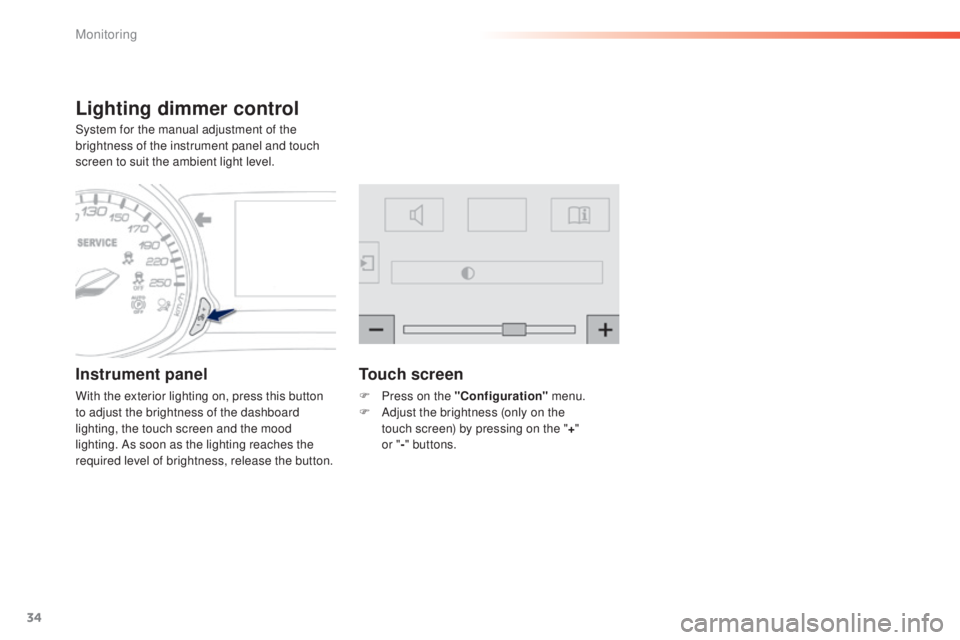
Lighting dimmer control
System for the manual adjustment of the
brightness of the instrument panel and touch
screen to suit the ambient light level.
Instrument panel
With the exterior lighting on, press this button
to adjust the brightness of the dashboard
lighting, the touch screen and the mood
lighting. As soon as the lighting reaches the
required level of brightness, release the button.
Touch screen
F Press on the "Configuration" menu.
F A djust the brightness (only on the
touch
screen) by pressing on the " +"
or " -"
buttons.
Monitoring
Page 37 of 416
35
308_en_Chap01_controle-de-marche_ed01-2015
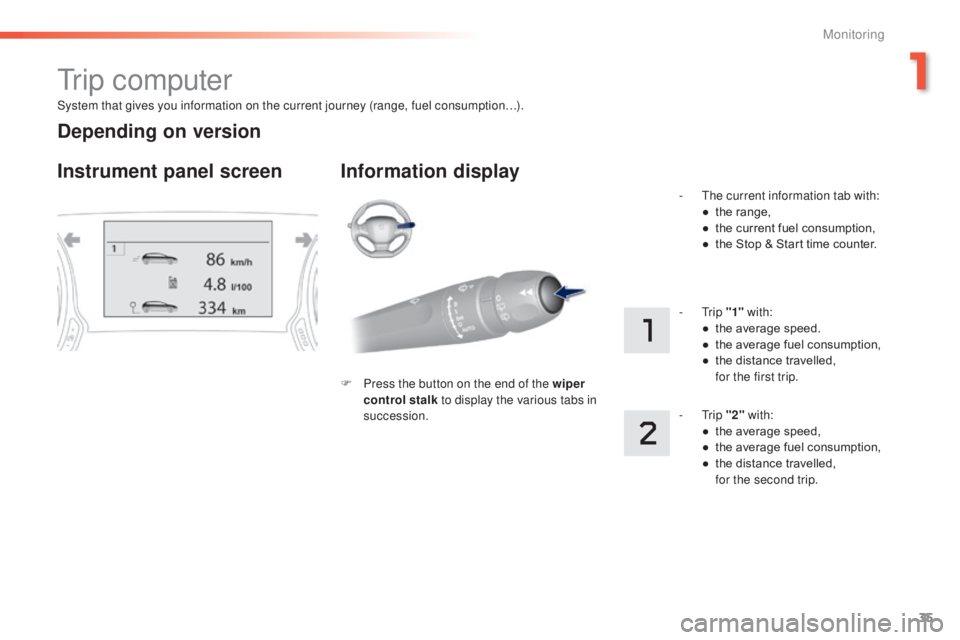
System that gives you information on the current journey (range, fuel consumption…).
tr i p c o m p u t e r
Instrument panel screen Information display
F Press the button on the end of the wiper control stalk to display the various tabs in
succession. -
t
h
e current information tab with:
●
t
he range,
●
t
he current fuel consumption,
●
t
he Stop & Start time counter.
- t
r
ip
"1" with:
●
t
he average speed.
●
t
he average fuel consumption,
●
t
he distance travelled, f
or the first trip.
- t
r
ip "2" with:
●
t
he average speed,
●
t
he average fuel consumption,
●
t
he distance travelled,
f
or the second trip.
Depending on version
1
Monitoring
Page 58 of 416
56
308_en_Chap02_ouvertures_ed01-2015
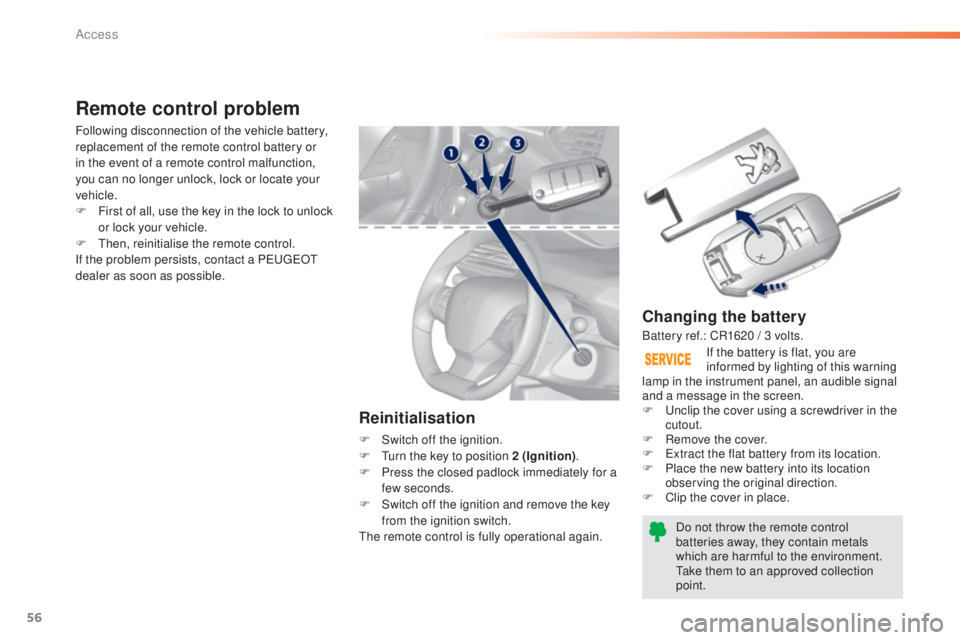
Changing the battery
Do not throw the remote control
batteries away, they contain metals
which are harmful to the environment.
ta
ke them to an approved collection
point. If the battery is flat, you are
informed by lighting of this warning
lamp in the instrument panel, an audible signal
and a message in the screen.
F
u
n
clip the cover using a screwdriver in the
cutout.
F
R
emove the cover.
F
e
x
tract the flat battery from its location.
F
P
lace the new battery into its location
observing the original direction.
F
C
lip the cover in place.
Remote control problem
Reinitialisation
F Switch off the ignition.
F
tu rn the key to position 2 (Ignition) .
F
P
ress the closed padlock immediately for a
few seconds.
F
S
witch off the ignition and remove the key
from the ignition switch.
th
e remote control is fully operational again.
Following disconnection of the vehicle battery,
replacement of the remote control battery or
in the event of a remote control malfunction,
you can no longer unlock, lock or locate your
vehicle.
F
F
irst of all, use the key in the lock to unlock
or lock your vehicle.
F
t
hen
, reinitialise the remote control.
If the problem persists, contact a P
e
uge
Ot
dealer as soon as possible.
Battery ref.: CR1620 / 3 volts.
Access
Page 68 of 416
66
308_en_Chap02_ouvertures_ed01-2015
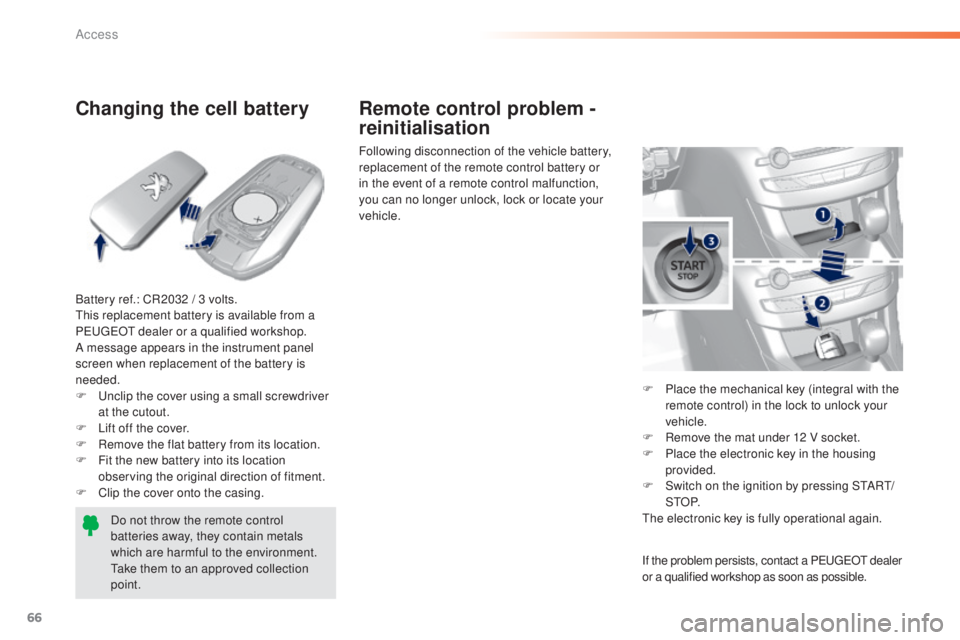
Changing the cell battery
Battery ref.: CR2032 / 3 volts.this replacement battery is available from a
P
e
uge
Ot
dealer or a qualified workshop.
A message appears in the instrument panel
screen when replacement of the battery is
needed.
F
u
n
clip the cover using a small screwdriver
at the cutout.
F
L
ift off the cover.
F
R
emove the flat battery from its location.
F
F
it the new battery into its location
observing the original direction of fitment.
F
C
lip the cover onto the casing.Do not throw the remote control
batteries away, they contain metals
which are harmful to the environment.
ta
ke them to an approved collection
point. Following disconnection of the vehicle battery,
replacement of the remote control battery or
in the event of a remote control malfunction,
you can no longer unlock, lock or locate your
vehicle.
F
P
lace the mechanical key (integral with the
remote control) in the lock to unlock your
vehicle.
F
R
emove the mat under 12 V socket.
F
P
lace the electronic key in the housing
provided.
F
S
witch on the ignition by pressing S
tA
R
t/
StO
P.
th
e electronic key is fully operational again.
Remote control problem -
reinitialisation
If the problem persists, contact a PeugeOt dealer
or a qualified workshop as soon as possible.
Access
Page 79 of 416
77
308_en_Chap02_ouvertures_ed01-2015
Low fuel level
When the low fuel level in the tank is
reached, this warning lamp comes on
in the instrument panel, accompanied
by an audible warning and a message.
Fuel supply cut-off
Your vehicle is equipped with a safety device
which cuts off the fuel supply in the event of a
collision.It is still possible to use a fuel can to fill
the tank but this must be done slowly.
In order to ensure a good flow of fuel,
do not place the nozzle of the fuel can
in direct contact with the flap of the
misfuel prevention device.
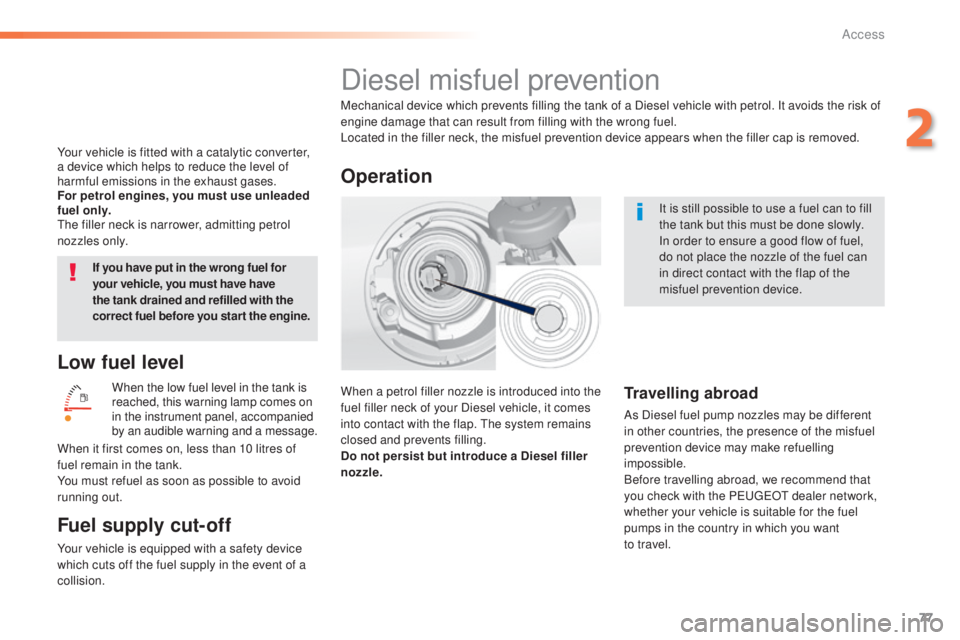
Diesel misfuel prevention
Mechanical device which prevents filling the tank of a Diesel vehicle with petrol. It avoids the risk of
engine damage that can result from filling with the wrong fuel.
Located in the filler neck, the misfuel prevention device appears when the filler cap is removed.
When a petrol filler nozzle is introduced into the
fuel filler neck of your Diesel vehicle, it comes
into contact with the flap.
t
h
e system remains
closed and prevents filling.
Do not persist but introduce a Diesel filler
nozzle.
Operation
Travelling abroad
As Diesel fuel pump nozzles may be different
in other countries, the presence of the misfuel
prevention device may make refuelling
impossible.
Before travelling abroad, we recommend that
you check with the P
e
uge
Ot
dealer network,
whether your vehicle is suitable for the fuel
pumps in the country in which you want
to
travel.
When it first comes on, less than 10 litres of
fuel remain in the tank.
You must refuel as soon as possible to avoid
running out. If you have put in the wrong fuel for
your vehicle, you must have have
the tank drained and refilled with the
correct fuel before you star t the engine.
Your vehicle is fitted with a catalytic converter,
a device which helps to reduce the level of
harmful emissions in the exhaust gases.
For petrol engines, you must use unleaded
fuel only.
th
e filler neck is narrower, admitting petrol
nozzles only.
2
Access
Page 81 of 416
79
308_en_Chap03_confort_ed01-2015
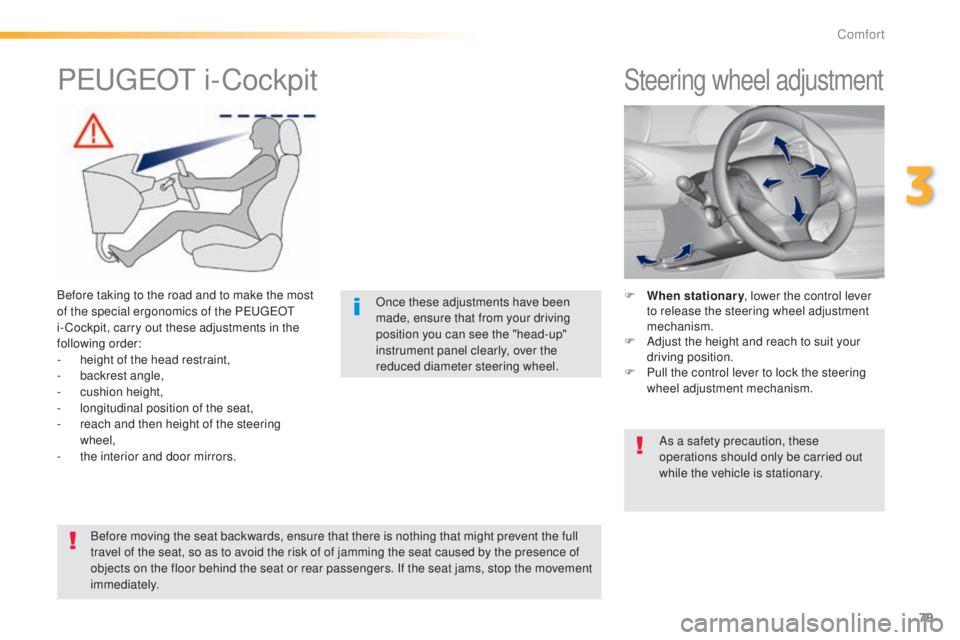
Steering wheel adjustment
F When stationary , lower the control lever
to release the steering wheel adjustment
mechanism.
F
A
djust the height and reach to suit your
driving position.
F
P
ull the control lever to lock the steering
wheel ad justment mechanism.
As a safety precaution, these
operations should only be carried out
while the vehicle is stationary.
PeugeOt i -Cockpit
Before taking to the road and to make the most
of the special ergonomics of the Pe
ugeOt
i- Cockpit, carry out these adjustments in the
following order:
-
h
eight of the head restraint,
-
b
ackrest angle,
-
c
ushion height,
-
l
ongitudinal position of the seat,
-
r
each and then height of the steering
wheel,
-
t
he interior and door mirrors. Once these adjustments have been
made, ensure that from your driving
position you can see the "head-up"
instrument panel clearly, over the
reduced diameter steering wheel.
Before moving the seat backwards, ensure that there is nothing that might prevent the full
travel of the seat, so as to avoid the risk of of jamming the seat caused by the presence of
objects on the floor behind the seat or rear passengers. If the seat jams, stop the movement
immediately.
3
Comfort
Page 116 of 416
114
308_en_Chap04_conduite_ed01-2015
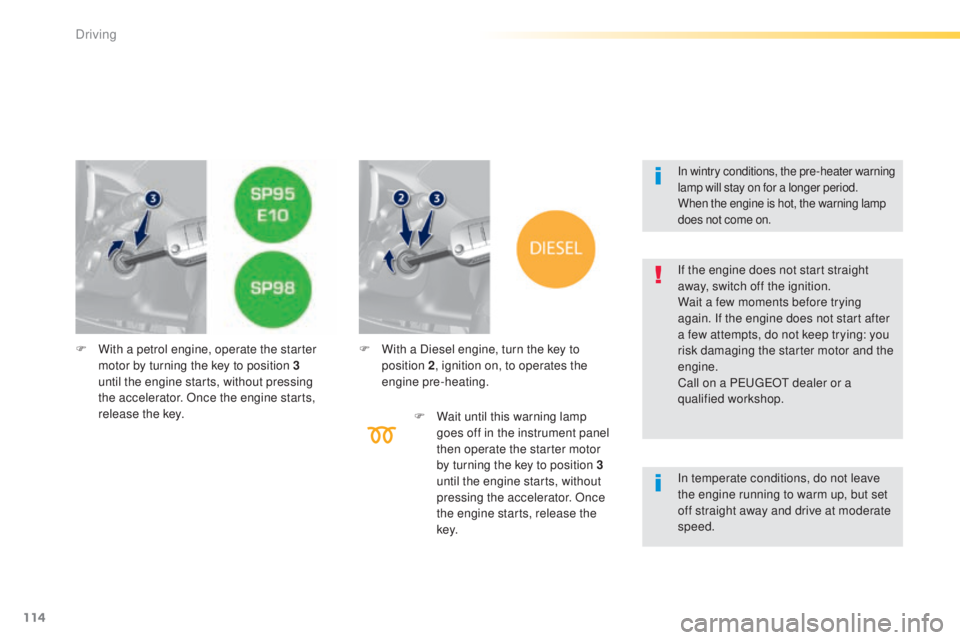
F With a petrol engine, operate the starter motor by turning the key to position 3
until the engine starts, without pressing
the accelerator. Once the engine starts,
release the key. F
W ith a Diesel engine, turn the key to
position 2 , ignition on, to operates the
engine pre-heating.
F
W
ait until this warning lamp
goes off in the instrument panel
then operate the starter motor
by turning the key to position 3
until the engine starts, without
pressing the accelerator. Once
the engine starts, release the
key.
In wintry conditions, the pre-heater warning
lamp will stay on for a longer period.
When the engine is hot, the warning lamp
does not come on.
In temperate conditions, do not leave
the engine running to warm up, but set
off straight away and drive at moderate
speed. If the engine does not start straight
away, switch off the ignition.
Wait a few moments before trying
again. If the engine does not start after
a few attempts, do not keep trying: you
risk damaging the starter motor and the
engine.
Call on a P
e
uge
Ot
dealer or a
qualified workshop.
Driving
Page 118 of 416
116
308_en_Chap04_conduite_ed01-2015
For Diesel vehicles, in sub-
zero temperatures the engine
will not start until the pre-heater
warning lamp has gone off.
If this warning lamp comes on
after pressing the "S
tA
R
t/
StO
P" button, press down on
the brake or clutch pedal until
the warning lamp goes off,
without pressing the "S
tA
R
t/
StO
P" button again, until the
engine starts and runs.
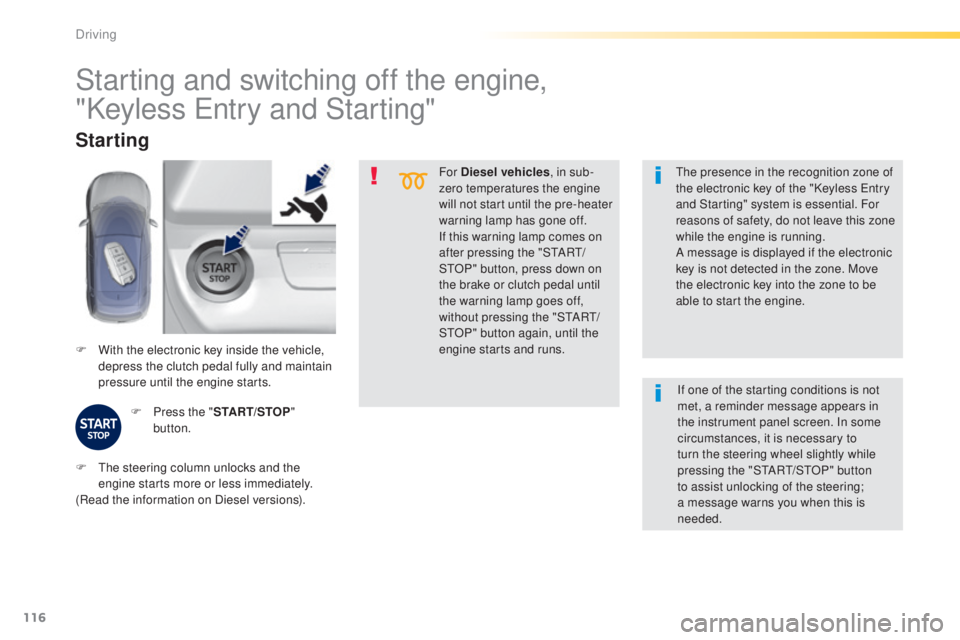
F
W
ith the electronic key inside the vehicle,
depress the clutch pedal fully and maintain
pressure until the engine starts.
Starting
F Press the " START/STOP"
button.
th
e presence in the recognition zone of
the electronic key of the "Keyless e
n
try
and Starting" system is essential. For
reasons of safety, do not leave this zone
while the engine is running.
A message is displayed if the electronic
key is not detected in the zone. Move
the electronic key into the zone to be
able to start the engine.
Starting and switching off the engine,
"Keyless e
n
try and Starting"
F the steering column unlocks and the
engine starts more or less immediately.
(Read the information on Diesel versions). If one of the starting conditions is not
met, a reminder message appears in
the instrument panel screen. In some
circumstances, it is necessary to
turn the steering wheel slightly while
pressing the "StA
Rt/ StO P" button
to assist unlocking of the steering;
a message warns you when this is
needed.
Driving
Page 119 of 416
117
308_en_Chap04_conduite_ed01-2015
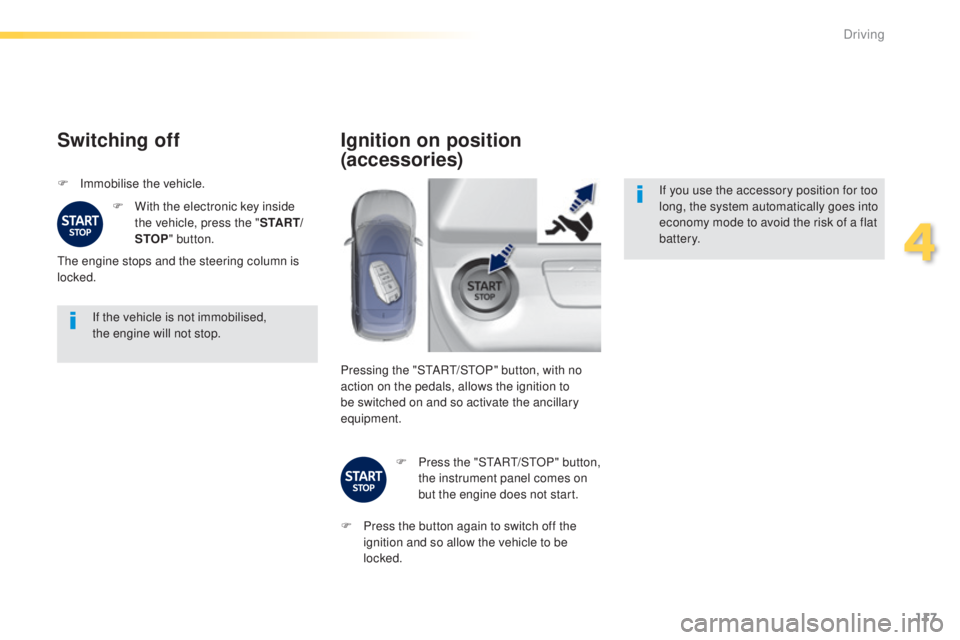
If the vehicle is not immobilised,
the engine will not stop.
Switching off
F Immobilise the vehicle.F
W
ith the electronic key inside
the vehicle, press the " S TA R T/
STOP " button.
th
e engine stops and the steering column is
locked.
Ignition on position
(accessories)
If you use the accessory position for too
long, the system automatically goes into
economy mode to avoid the risk of a flat
battery.
Pressing the "S
tA
R
t/
S
tO
P" button, with no
action on the pedals, allows the ignition to
be switched on and so activate the ancillary
equipment.
F
P
ress the "S
tA
R
t/
S
tO
P" button,
the instrument panel comes on
but the engine does not start.
F
P
ress the button again to switch off the
ignition and so allow the vehicle to be
locked.
4
Driving
Page 120 of 416
118
308_en_Chap04_conduite_ed01-2015
Key left in reader
You are warned by a message if the
electronic key is is still in the reader on
opening the driver's door.
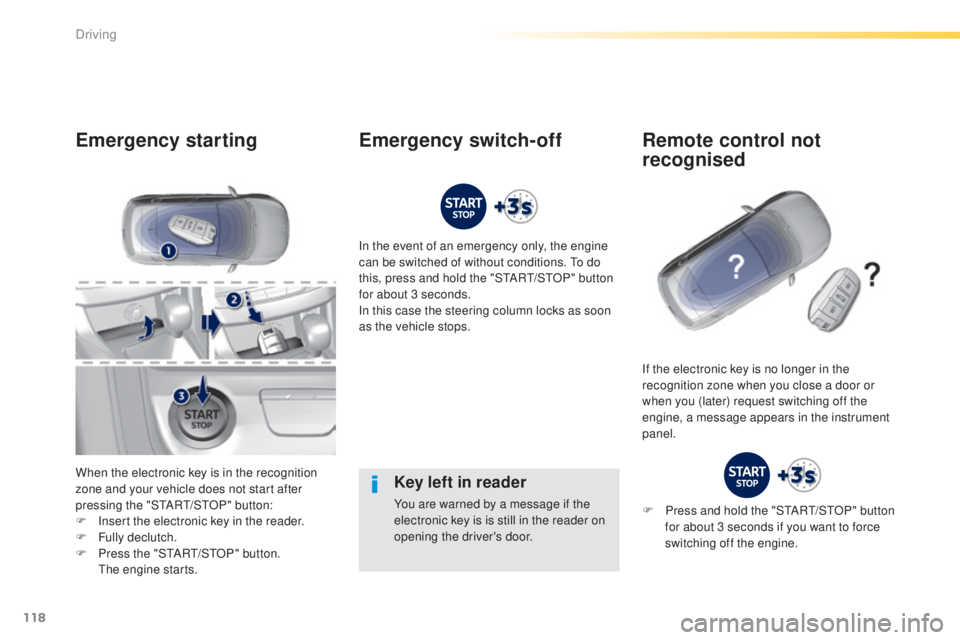
Emergency starting
When the electronic key is in the recognition
zone and your vehicle does not start after
pressing the "S
tA
R
t/
S
tO
P" button:
F
I
nsert the electronic key in the reader.
F
F
ully declutch.
F
P
ress the "S
tA
R
t/
S
tO
P" button.
t
h
e engine starts. In the event of an emergency only, the engine
can be switched of without conditions.
t
o d
o
this, press and hold the "S
tA
R
t/
S
tO
P" button
for about 3 seconds.
In this case the steering column locks as soon
as the vehicle stops.
If the electronic key is no longer in the
recognition zone when you close a door or
when you (later) request switching off the
engine, a message appears in the instrument
panel.
Emergency switch-off Remote control not recognised
F Press and hold the "StARt/ StO P" button
for about 3 seconds if you want to force
switching off the engine.
Driving