tow Peugeot 308 2016 Owner's Manual
[x] Cancel search | Manufacturer: PEUGEOT, Model Year: 2016, Model line: 308, Model: Peugeot 308 2016Pages: 398, PDF Size: 9.38 MB
Page 5 of 398
308_en_Chap00a_sommaire_ed02-2015
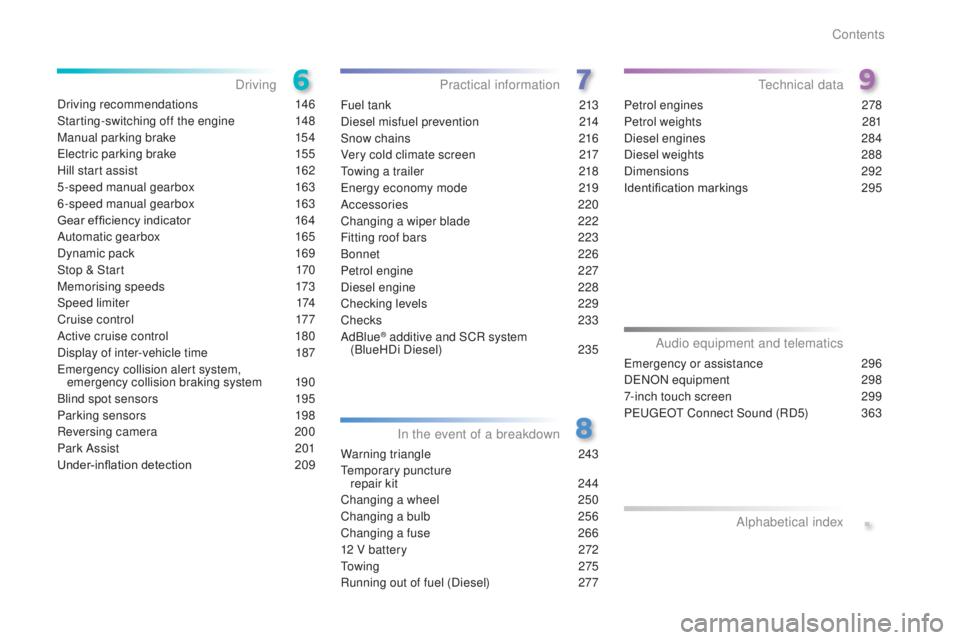
Driving recommendations 146
Starting-switching off the engine
14
8
Manual parking brake
15
4
ele
ctric parking brake
15
5
Hill start assist
16
2
5-speed manual gearbox
16
3
6-speed manual gearbox
16
3
Gear ef ficiency indicator
16
4
Automatic gearbox
16
5
Dynamic pack
16
9
Stop & Start
17
0
Memorising speeds
17
3
Speed limiter
17
4
Cruise control
17
7
Active cruise control
18
0
Display of inter-vehicle time
187
emer
gency collision alert system,
emergency collision braking system
19
0
Blind spot sensors
19
5
Parking sensors
19
8
Reversing camera
20
0
Park Assist
20
1
Under-inflation detection
209 F
uel tank 21 3
Diesel misfuel prevention
21
4
Snow chains
21
6
Very cold climate screen
21
7
tow
ing a trailer
21
8
ene
rgy economy mode
21
9
Accessories
22
0
Changing a wiper blade
22
2
Fitting roof bars
22
3
Bonnet
2
26
Petrol engine
22
7
Diesel engine
22
8
Checking levels
22
9
Checks
23
3
AdBlue
® additive and SCR system
(BlueHDi Diesel) 235
W
arning triangle
24
3
temp
orary puncture
repair kit
24
4
Changing a wheel
25
0
Changing a bulb
25
6
Changing a fuse
26
6
12 V battery
27
2
to w
i n g
2
7 5
Running out of fuel (Diesel)
27
7Petrol engines
27
8
Petrol weights
28
1
Diesel engines
28
4
Diesel weights
28
8
Dimensions
29
2
Identification markings
29
5
Driving
Practical information
In the event of a breakdowntec hnical data
.
emergency or assistance 296
D
eNO
N equipment
29
8
7-inch touch screen
29
9
P
eu
ge
Ot C
onnect Sound (RD5)
36
3
Audio equipment and telematics
Alphabetical index
Contents
Page 6 of 398
4
308_en_Chap00b_vue-ensemble_ed02-2015
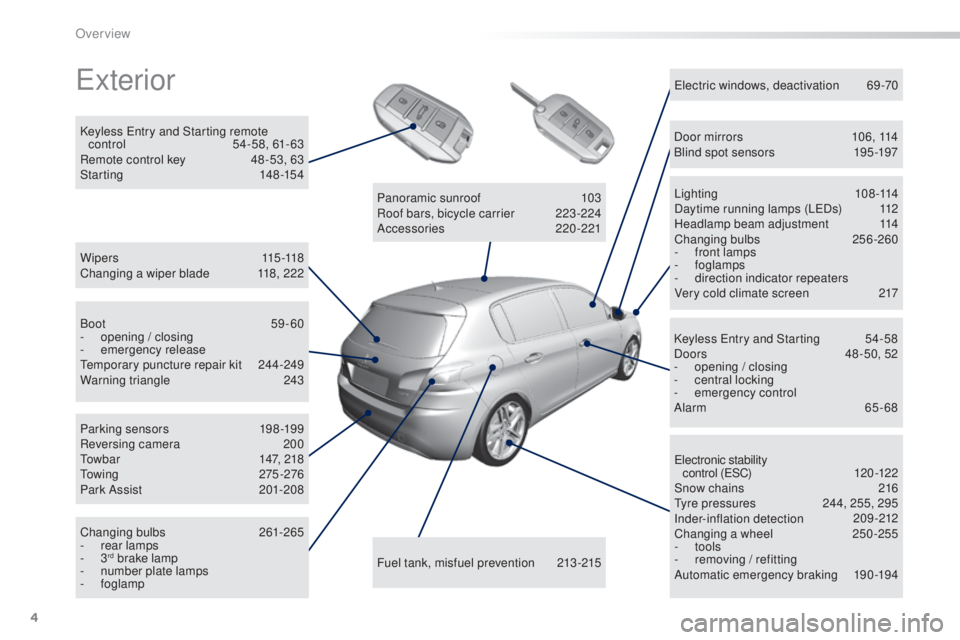
exterior
W i p e r s 115 -118
Changing a wiper blade 11 8, 222
Keyless
ent
ry and Starting remote
control
54
-58, 61- 63
Remote control key
48
-53, 63
Starting
14
8-154
elec
tronic stability
control (
eS
C)
120
-12 2
Snow chains
21
6
tyr
e pressures
24
4, 255, 295
Inder-inflation detection
209
-212
Changing a wheel
25
0-255
-
t
ools
-
re
moving / refitting
Automatic emergency braking
19
0-194
Lighting
1
08-114
Daytime running lamps (L
eDs
)
11
2
Headlamp beam adjustment
11
4
Changing bulbs
25
6-260
- fr ont lamps
- fo glamps
-
di
rection indicator repeaters
Very cold climate screen
21
7
ele
ctric windows, deactivation
69
-70
Keyless
ent
ry and Starting
54
-58
Doors
48
-50, 52
-
open
ing / closing
-
ce
ntral locking
-
emer
gency control
Alarm
6
5-68
Fuel tank, misfuel prevention
21
3-215
Panoramic sunroof
10
3
Roof bars, bicycle carrier
22
3 -224
Accessories
22
0-221
Boot
5
9-60
-
open
ing / closing
-
emer
gency release
tem
porary puncture repair kit
24
4-249
Warning triangle
24
3
Parking sensors
19
8-199
Reversing camera
20
0
tow
bar
14
7, 218
tow
ing
27
5 -276
Park Assist
20
1-208
Changing bulbs
26
1-265
-
re
ar lamps
-
3rd brake lamp
- nu mber plate lamps
-
fo
glamp Door mirrors
10
6, 114
Blind spot sensors
19
5 -197
Over view
Page 7 of 398
5
308_en_Chap00b_vue-ensemble_ed02-2015
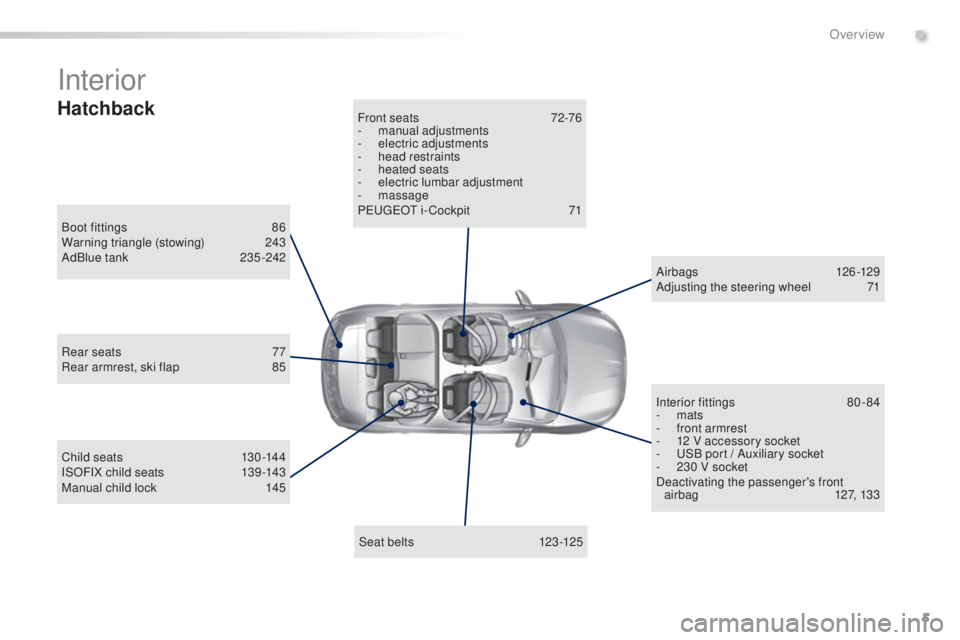
Interior
Boot fittings 86
W arning triangle (stowing) 24 3
AdBlue tank
23
5 -242
Seat belts
123
-125
Front seats
72
-76
-
man
ual adjustments
-
ele
ctric adjustments
-
he
ad restraints
-
heat
ed seats
-
el
ectric lumbar adjustment
-
m
assage
P
eu
ge
Ot i
- Cockpit
71
C
hild seats
13
0 -144
ISOFIX child seats
13
9 -143
Manual child lock
145 A
ir bags
12
6 -129
Adjusting the steering wheel
71
I
nterior fittings
80
-84
-
m
ats
-
fr
ont armrest
-
12 V a
ccessory socket
-
u
SB p
ort / Auxiliary socket
-
23
0 V socket
Deactivating the passenger's front airbag
12
7, 133
Rear seats
77
R
ear armrest, ski flap
85
Hatchback
.
Over view
Page 8 of 398
6
308_en_Chap00b_vue-ensemble_ed02-2015
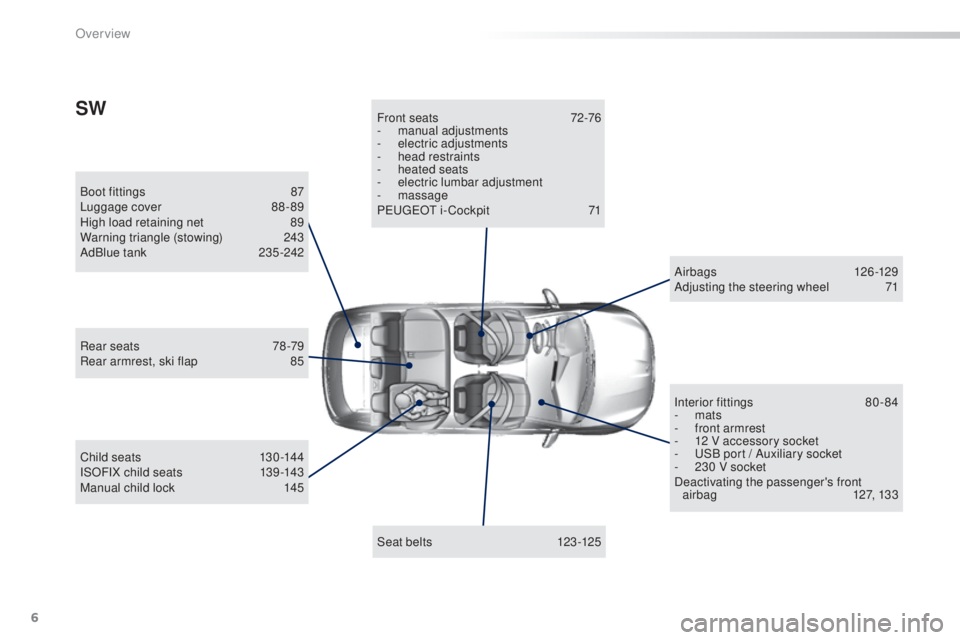
Boot fittings 87
Lu ggage cover 88 - 89
High load retaining net
89
W
arning triangle (stowing)
24
3
AdBlue tank
23
5 -242
Seat belts
123
-125
Front seats
72
-76
-
man
ual adjustments
-
ele
ctric adjustments
-
he
ad restraints
-
heat
ed seats
- el ectric lumbar adjustment
- m assage
P
eu
ge
Ot i
- Cockpit
71
C
hild seats
13
0 -144
ISOFIX child seats
13
9 -143
Manual child lock
145 A
ir bags
12
6 -129
Adjusting the steering wheel
71
I
nterior fittings
80
-84
-
m
ats
-
fr
ont armrest
-
12 V a
ccessory socket
-
u
SB p
ort / Auxiliary socket
-
23
0 V socket
Deactivating the passenger's front airbag
12
7, 133
Rear seats
78
-79
Rear armrest, ski flap
85
SW
Over view
Page 12 of 398
10
308_en_Chap00c_eco-conduite_ed02-2015
Optimise the use of your gearbox
With a manual gearbox, move off gently and change up without waiting.
During acceleration change up early.
With an automatic or electronic gearbox, give preference to automatic
mode and avoid pressing the accelerator pedal heavily or suddenly.
Control the use of your electrical
equipment
Before moving off, if the passenger compartment is too warm, ventilate it
by opening the windows and air vents before using the air conditioning.
Above 30 mph (50 km/h), close the windows and leave the air vents
open.
Remember to make use of equipment that can help keep the
temperature in the passenger compartment down (sunroof and window
blinds...).
Switch off the air conditioning, unless it has automatic regulation, as
soon as the desired temperature is attained.
Switch off the demisting and defrosting controls, if not automatic.
Switch off the heated seat as soon as possible.
Switch off the headlamps and front foglamps when the level of light
does not require their use.
Avoid running the engine before moving off, particularly in winter; your
vehicle will warm up much faster while driving.
As a passenger, if you avoid connecting your multimedia devices
(film, music, video game...), you will contribute towards limiting the
consumption of electrical energy, and so of fuel.
Disconnect your portable devices before leaving the vehicle.
eco-driving
eco-driving is a range of everyday practices that allow the motorist to optimise their fuel consumption and CO2 emissions.
Drive smoothly
Maintain a safe distance between vehicles, use engine braking rather
than the brake pedal, and press the accelerator progressively. these
practices contribute towards a reduction in fuel consumption and
CO
2 emissions and also helps reduce the background traffic noise.
If y
our vehicle has cruise control, make use of the system at speeds
above 25 mph (40 km/h) when the traffic is flowing well.
the g
ear shift indicator invites you engage the most suitable gear: as
soon as the indication is displayed in the instrument panel, follow it
straight away.
For vehicles fitted with an electronic or automatic gearbox, this
indicator appears only in manual mode.
eco-driving
Page 16 of 398
14
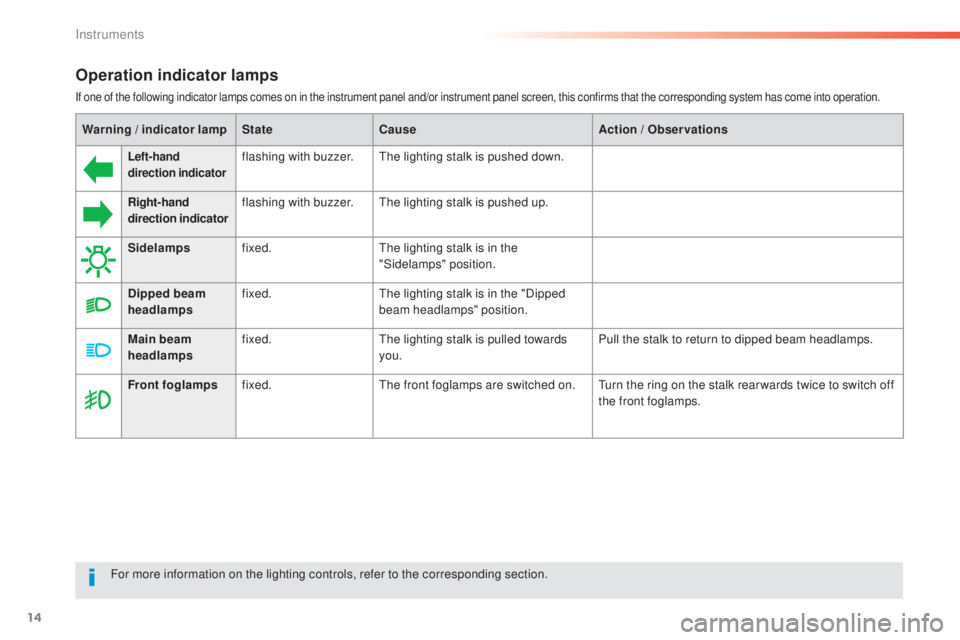
Operation indicator lamps
If one of the following indicator lamps comes on in the instrument panel and/or instrument panel screen, this confirms that the corresponding system has come into operation.
Warning / indicator lampStateCause Action / Observations
Left-hand
direction indicatorflashing with buzzer.the l ighting stalk is pushed down.
Right-hand
direction indicatorflashing with buzzer.the lighting stalk is pushed up.
Sidelamps fixed.
the l
ighting stalk is in the
"Sidelamps" position.
Dipped beam
headlamps fixed.
the l
ighting stalk is in the "Dipped
beam headlamps" position.
Main beam
headlamps fixed.
the l
ighting stalk is pulled towards
you. Pull the stalk to return to dipped beam headlamps.
Front foglamps fixed.
the f
ront foglamps are switched on.
tur
n the ring on the stalk rear wards twice to switch off
the front foglamps.
For more information on the lighting controls, refer to the corresponding section.
Instruments
Page 51 of 398
49
308_en_Chap02_ouvertures_ed02-2015
Selective unlocking
F to unlock the driver's door only,
p ress the open padlock once.
Using the remote control
Complete unlocking is activated by default.this is set in the " Driving assistance " menu,
then " Vehicle settings " and "Vehicle access ".
unl
ocking is confirmed by rapid
flashing of the direction indicators for
approximately two seconds.
According to version, the door mirrors
unfold at the same time as the first
unlocking action.
F
t
o un
lock the other doors and the boot,
press the open padlock again.
use t
his button for access to
additional information. Locking is confirmed by fixed
lighting of the direction indicators for
approximately two seconds.
According to version, the door mirrors
fold at the same time.
Driving with the doors locked may
render access for the emergency
services difficult in an emergency.
As a safety measure (children on
board), never leave the vehicle without
taking your key, even for a short period.
Normal locking
Using the remote control
F Press the closed padlock to lock
t he vehicle completely.
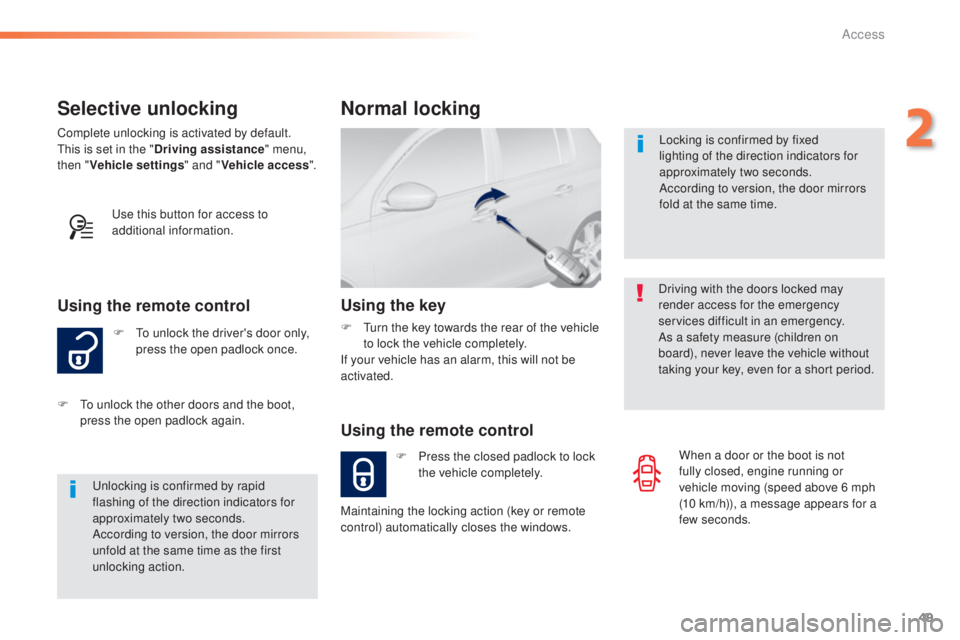
Using the key
F turn the key towards the rear of the vehicle
t o lock the vehicle completely.
If your vehicle has an alarm, this will not be
activated.
Maintaining the locking action (key or remote
control) automatically closes the windows. When a door or the boot is not
fully closed, engine running or
vehicle moving (speed above 6 mph
(10
k
m/h)), a message appears for a
few seconds.
2
Access
Page 81 of 398
79
308_en_Chap03_ergonomie-et-confort_ed02-2015
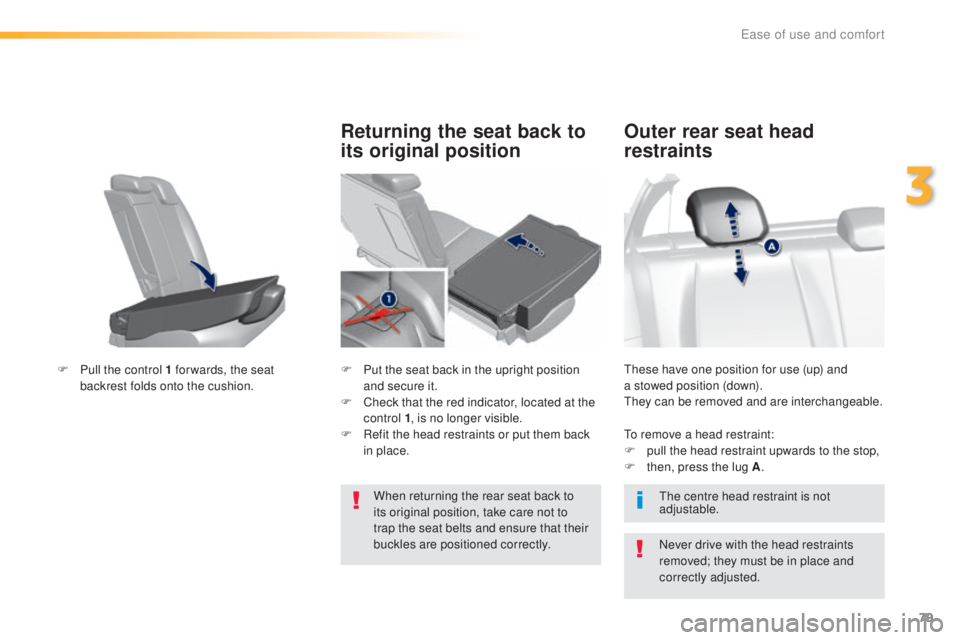
these have one position for use (up) and
a s towed position (down).
the
y can be removed and are interchangeable.
Outer rear seat head
restraints
Never drive with the head restraints
removed; they must be in place and
correctly adjusted.
to re
move a head restraint:
F
pu
ll the head restraint upwards to the stop,
F
th
en, press the lug A
.
the c
entre head restraint is not
adjustable.
F
Pu
ll the control 1 for wards, the seat
backrest folds onto the cushion.
Returning the seat back to
its original position
F Put the seat back in the upright position
a nd secure it.
F
Ch
eck that the red indicator, located at the
control 1 , is no longer visible.
F
Re
fit the head restraints or put them back
in place.
When returning the rear seat back to
its original position, take care not to
trap the seat belts and ensure that their
buckles are positioned correctly.
3
ease of use and comfort
Page 88 of 398
86
308_en_Chap03_ergonomie-et-confort_ed02-2015
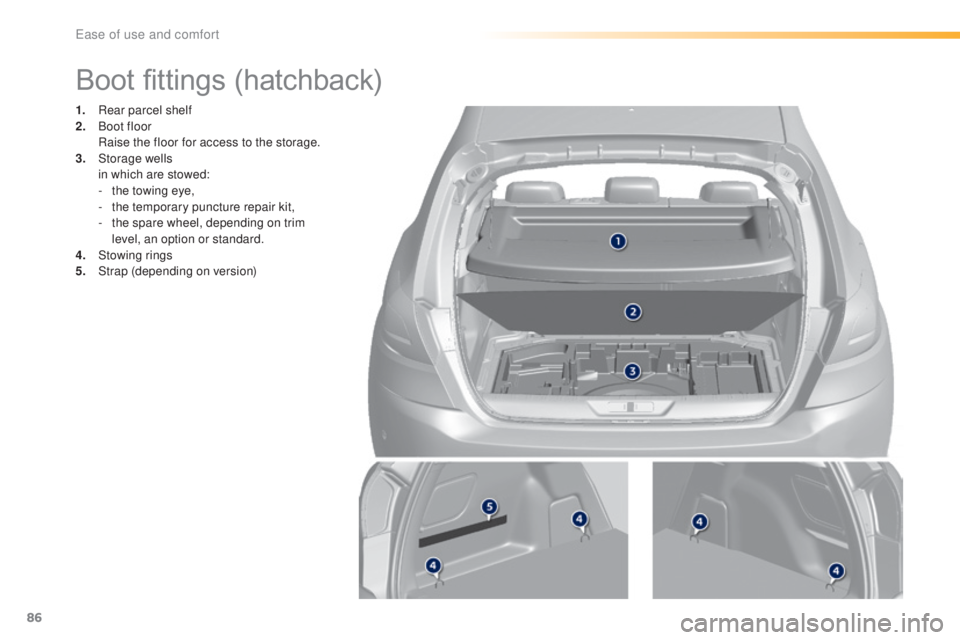
Boot fittings (hatchback)
1. Rear parcel shelf
2. Boot floor
Ra
ise the floor for access to the storage.
3.
Sto
rage wells
in w
hich are stowed:
-
th
e towing eye,
-
th
e temporary puncture repair kit,
-
th
e spare wheel, depending on trim
level, an option or standard.
4.
St
owing rings
5.
St
rap (depending on version)
ease of use and comfort
Page 89 of 398
87
308_en_Chap03_ergonomie-et-confort_ed02-2015
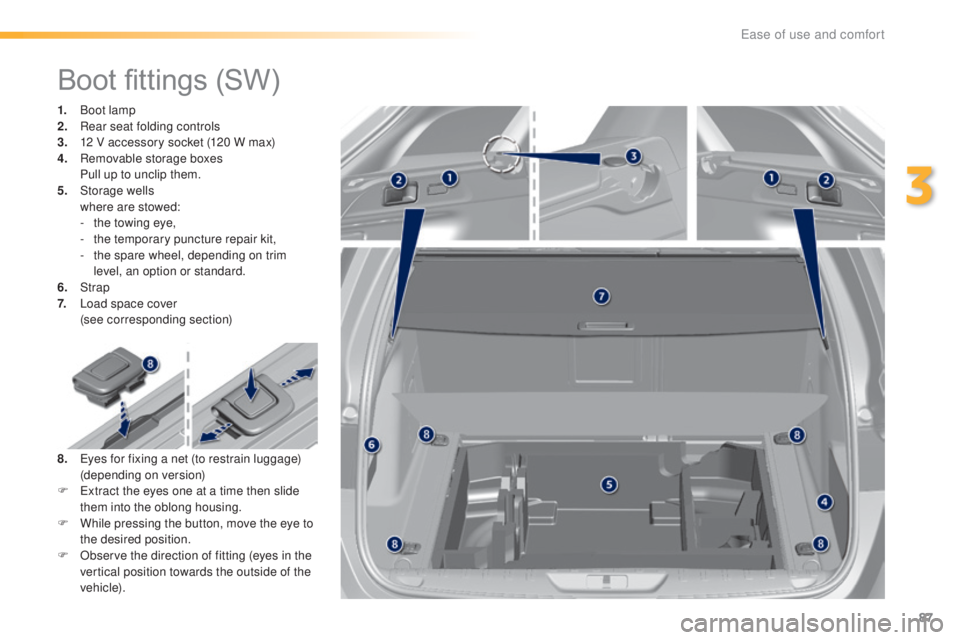
Boot fittings (SW)
1. Boot lamp
2. Rea r seat folding controls
3.
12 V a
ccessory socket (120 W max)
4.
Re
movable storage boxes
Pu
ll up to unclip them.
5.
Sto
rage wells
wh
ere are stowed:
-
th
e towing eye,
-
th
e temporary puncture repair kit,
-
th
e spare wheel, depending on trim
level, an option or standard.
6.
St
rap
7.
Lo
ad space cover
(se
e corresponding section)
8.
eyes f
or fixing a net (to restrain luggage)
(d
epending on version)
F
e
xt
ract the eyes one at a time then slide
them into the oblong housing.
F
Wh
ile pressing the button, move the eye to
the desired position.
F
Ob
serve the direction of fitting (eyes in the
vertical position towards the outside of the
vehicle).
3
ease of use and comfort