engine PEUGEOT 308 2018 Manual PDF
[x] Cancel search | Manufacturer: PEUGEOT, Model Year: 2018, Model line: 308, Model: Peugeot 308 2018Pages: 360, PDF Size: 12.38 MB
Page 170 of 360
168
when you place the gear lever in neutral and
release the clutch pedal,
-
w
ith an automatic gearbox, at a speed
below 12
mph (20 km/h) for 1.5 BlueHDi
and 2.0
BlueHDi 180 versions, or with the
vehicle stationary for other versions, when
you depress the brake pedal or place the
gear selector to mode N .
A time counter calculates the time spent in
STOP mode during the journey. It is reset to
zero every time the ignition is switched on with
the key or the " START/STOP" button.
For your comfort, during parking
manoeuvres, STOP mode is not available
for a few seconds after coming out of
reverse gear.
The Stop & Start does not affect the
operation of vehicle systems such as
braking, power steering, etc.
Special cases: STOP mode not
available
- the driver's seat belt is not fastened,
- t he vehicle has not exceeded 6 mph
(10
km/h) since the last engine start (with
the key or the " START/STOP" b u t to n),
-
t
he electric parking brake is applied or
being applied,
-
t
he engine is needed to maintain a
comfortable temperature in the passenger
compartment,
-
d
emisting is active,
-
s
ome temporary conditions (battery charge,
engine temperature, braking assistance,
exterior temperature, etc.) make this
necessary to ensure control of a system.
Going into engine START mode
This indicator lamp goes off and the
engine starts automatically:
Special cases: START mode
triggered automatically
As a safety measure or to maintain comfort
levels in the vehicle, START mode is triggered
automatically when:
-
y
ou open the driver's door,
-
y
ou unfasten the driver's seat belt,
-
t
he speed of the vehicle exceeds 16 mph
(25
km/h) with the 2.0 BlueHDi 180 version
with automatic gearbox in mode D , or 2
mph
(3
km/h) with other versions,
-
t
he electric parking brake is being applied,
-
s
ome specific conditions (battery charge,
engine temperature, braking assistance, air
conditioning setting, etc.) require it for the
control of a system or the vehicle.
In this case, this indicator lamp
flashes for a few seconds, then goes
of f.
STOP mode is not invoked when:
-
t
he vehicle is on a steep slope (rising or
falling),
-
t
he driver's door is open, In this case, this indicator lamp
flashes for a few seconds then goes
of f.
This operation is perfectly normal.
-
w
ith a manual gearbox , when you fully
depress the clutch pedal,
-
W
ith an automatic gearbox:
•
g
ear selector in mode D or M , when you
release the brake pedal, •
o
r gear selector in mode N and brake
pedal released, when you place the gear
selector in mode D or M ,
•
o
r when you engage reverse.
This operation is perfectly normal.
Driving
Page 171 of 360
169
Deactivation / Reactivation
In certain circumstances, such as the need
to maintain the temperature in the passenger
compartment, it may be useful to deactivate
the Stop & Start system.
The system can be deactivated at any time,
once the ignition is switched on.
If the engine is in STOP mode, it restarts
immediately.
The Stop & Start system is reactivated
automatically every time the ignition is
switched on.
With the button on the dashboard
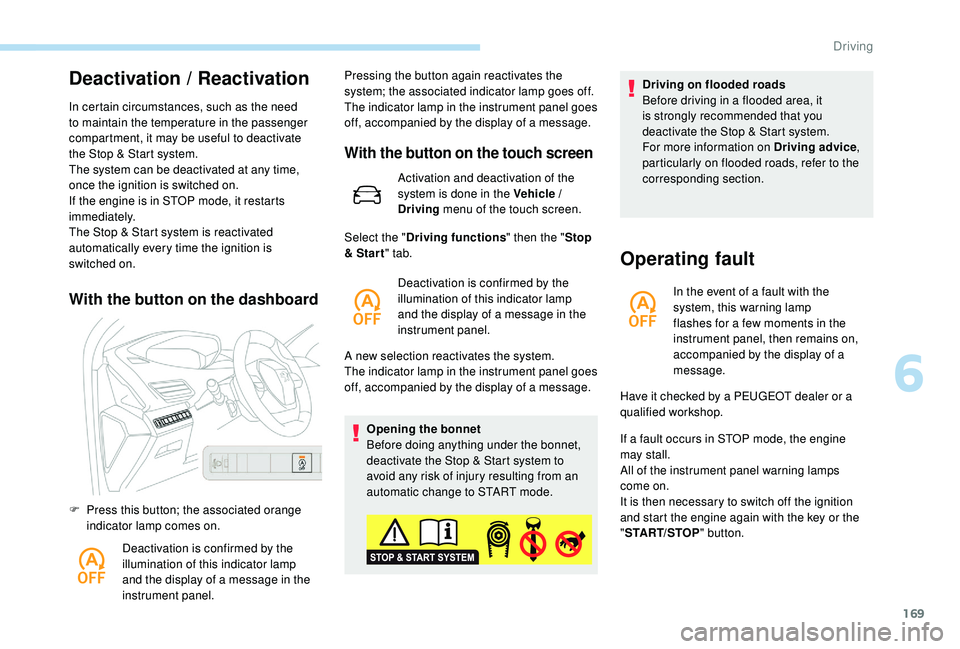
F Press this button; the associated orange indicator lamp comes on.
Deactivation is confirmed by the
illumination of this indicator lamp
and the display of a message in the
instrument panel. Pressing the button again reactivates the
system; the associated indicator lamp goes off.
The indicator lamp in the instrument panel goes
off, accompanied by the display of a message.
With the button on the touch screen
Activation and deactivation of the
system is done in the Vehicle /
Driving
menu of the touch screen.
A new selection reactivates the system.
The indicator lamp in the instrument panel goes
off, accompanied by the display of a message. Opening the bonnet
Before doing anything under the bonnet,
deactivate the Stop & Start system to
avoid any risk of injury resulting from an
automatic change to START mode.
Select the "
Driving functions " then the "Stop
& Star t " tab.
Deactivation is confirmed by the
illumination of this indicator lamp
and the display of a message in the
instrument panel. Driving on flooded roads
Before driving in a flooded area, it
is strongly recommended that you
deactivate the Stop & Start system.
For more information on Driving advice
,
particularly on flooded roads, refer to the
corresponding section.
Operating fault
In the event of a fault with the
system, this warning lamp
flashes for a few moments in the
instrument panel, then remains on,
accompanied by the display of a
message.
If a fault occurs in STOP mode, the engine
may stall.
All of the instrument panel warning lamps
come on.
It is then necessary to switch off the ignition
and start the engine again with the key or the
" START/STOP " button.
Have it checked by a PEUGEOT dealer or a
qualified workshop.
6
Driving
Page 183 of 360
181
Principle of operation
The system automatically adapts the speed of
your vehicle to that of the vehicle in front, to
maintain a constant distance.
If the vehicle in front is driving more slowly, the
system slows, or even stops your vehicle, using
engine braking and the braking system (for
versions fitted with an automatic gearbox).The brake lamps illuminate as soon as
the braking system is activated with
deceleration of the vehicle.
Primarily designed for driving on main
roads and motor ways, this system only
works on moving vehicles
, driving in the
same direction as your vehicle. If the vehicle in front accelerates or changes
lane, the cruise control progressively
accelerates your vehicle to return to the
programmed speed.
If the driver operates a direction indicator to
overtake a slower vehicle, the cruise control
allows your vehicle to temporarily approach
the vehicle in front to assist the overtaking
manoeuvre, though never exceeding the
programmed speed.
The adaptive cruise control system
is a driving aid that cannot, in any
circumstances, replace the need to obser ve
speed limits and safety distances, nor the
need for vigilance on the part of the driver.
It is recommended that you always keep
your feet close to the pedals.
The driver must be ready to take back
control of their vehicle at any time,
using the brake or accelerator pedal as
appropriate.
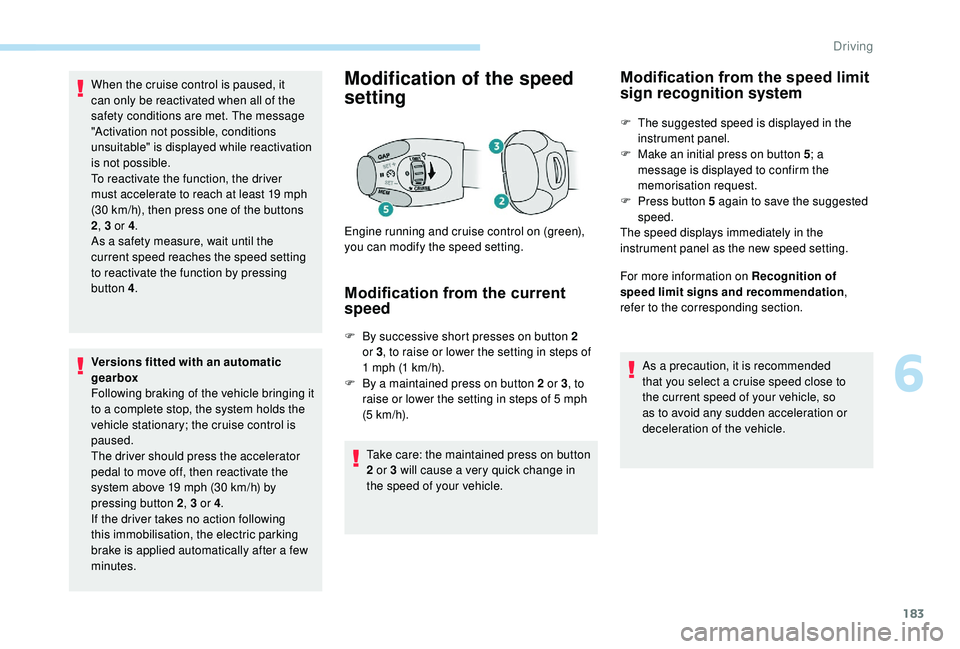
Steering mounted control
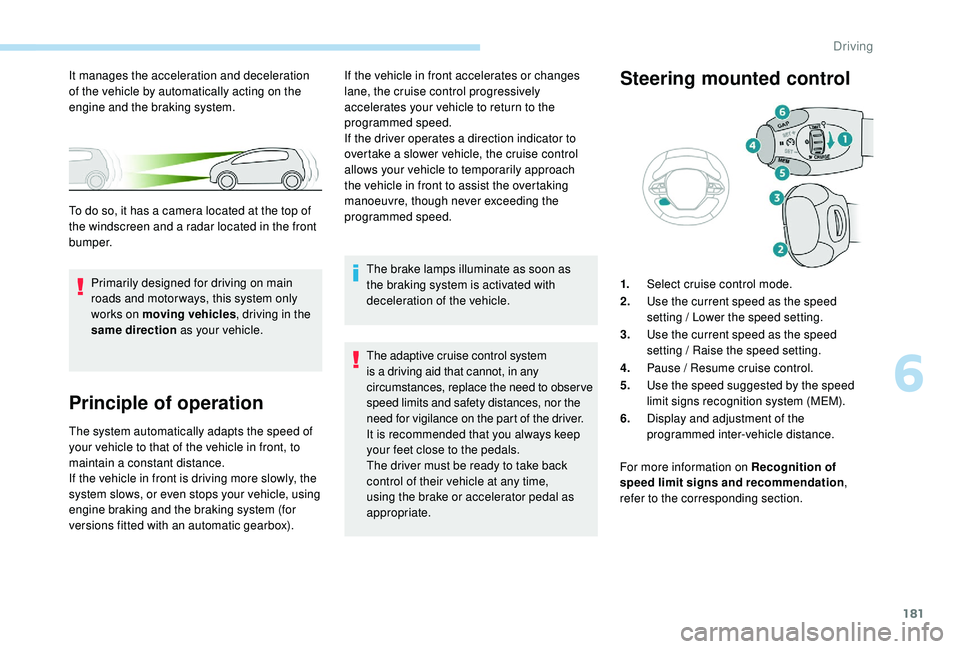
1.
Select cruise control mode.
2. Use the current speed as the speed
setting / Lower the speed setting.
3. Use the current speed as the speed
setting / Raise the speed setting.
4. Pause / Resume cruise control.
5. Use the speed suggested by the speed
limit signs recognition system (MEM).
6. Display and adjustment of the
programmed inter-vehicle distance.
For more information on Recognition of
speed limit signs and recommendation ,
refer to the corresponding section.
It manages the acceleration and deceleration
of the vehicle by automatically acting on the
engine and the braking system.
To do so, it has a camera located at the top of
the windscreen and a radar located in the front
b u m p e r.
6
Driving
Page 184 of 360
182
Displays on the instrument panel
Switching on
The cruise control is switched on manually.
The speed of the vehicle must be between 19
and 112
mph (30 and 180 km/h).
With an automatic gearbox: in mode D or M .
Pause
The adaptive cruise control can be paused
manually by:
-
a
ction by the driver:
•
O
n button 4 (Pause).
•
O
n the brake pedal.
•
O
n the electric parking brake control.
•
B
y changing from mode D to N with an
automatic gearbox.
-
o
r automatically, if operation of the ESC
system is triggered for reasons of safety.
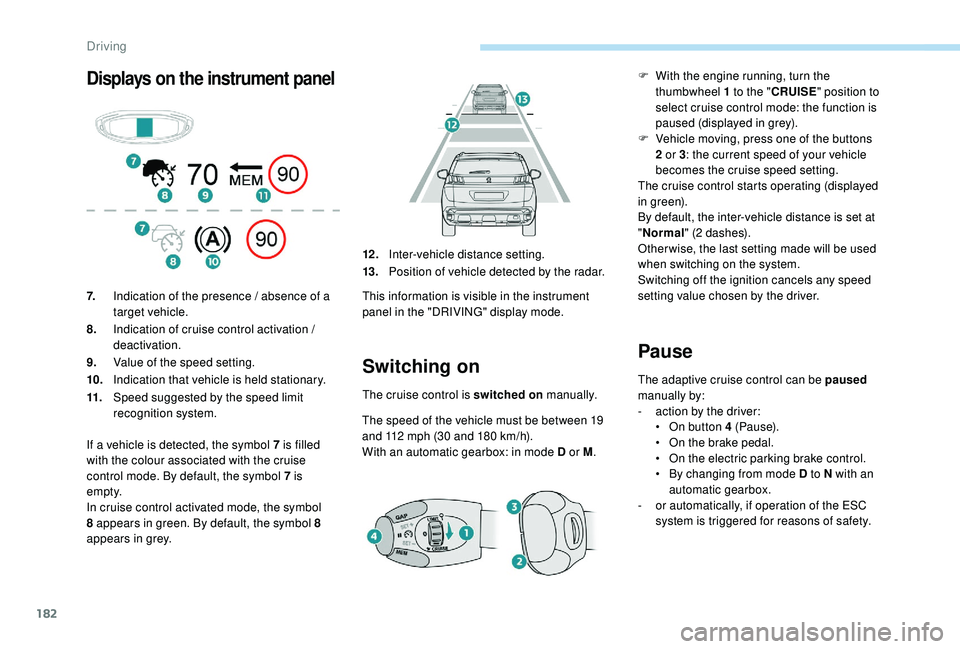
7.
Indication of the presence / absence of a
target vehicle.
8. Indication of cruise control activation /
deactivation.
9. Value of the speed setting.
10. Indication that vehicle is held stationary.
11. Speed suggested by the speed limit
recognition system. 12 .
Inter-vehicle distance setting.
13. Position of vehicle detected by the radar.
This information is visible in the instrument
panel in the "DRIVING" display mode.
If a vehicle is detected, the symbol 7
is filled
with the colour associated with the cruise
control mode. By default, the symbol 7 is
e m pt y.
In cruise control activated mode, the symbol
8 appears in green. By default, the symbol 8
appears in grey. F
W
ith the engine running, turn the
thumbwheel 1 to the " CRUISE" position to
select cruise control mode: the function is
paused (displayed in grey).
F
V
ehicle moving, press one of the buttons
2 or 3 : the current speed of your vehicle
becomes the cruise speed setting.
The cruise control starts operating (displayed
in green).
By default, the inter-vehicle distance is set at
" Normal " (2 dashes).
Other wise, the last setting made will be used
when switching on the system.
Switching off the ignition cancels any speed
setting value chosen by the driver.
Driving
Page 185 of 360
183
When the cruise control is paused, it
can only be reactivated when all of the
safety conditions are met. The message
"Activation not possible, conditions
unsuitable" is displayed while reactivation
is not possible.
To reactivate the function, the driver
must accelerate to reach at least 19 mph
(30
km/h), then press one of the buttons
2 , 3 or 4 .
As a safety measure, wait until the
current speed reaches the speed setting
to reactivate the function by pressing
button
4.
Versions fitted with an automatic
gearbox
Following braking of the vehicle bringing it
to a complete stop, the system holds the
vehicle stationary; the cruise control is
paused.
The driver should press the accelerator
pedal to move off, then reactivate the
system above 19
mph (30 km/h) by
pressing button 2 , 3 or 4.
If the driver takes no action following
this immobilisation, the electric parking
brake is applied automatically after a few
minutes.Modification of the speed
setting
Modification from the current
speed
F By successive short presses on button 2 or 3 , to raise or lower the setting in steps of
1
mph (1 km/h).
F
B
y a maintained press on button 2 or 3 , to
raise or lower the setting in steps of 5
mph
(5
km/h).
Take care: the maintained press on button
2 or 3 will cause a very quick change in
the speed of your vehicle.
Engine running and cruise control on (green),
you can modify the speed setting.
Modification from the speed limit
sign recognition system
F The suggested speed is displayed in the
instrument panel.
F
M
ake an initial press on button 5 ; a
message is displayed to confirm the
memorisation request.
F
P
ress button 5 again to save the suggested
speed.
The speed displays immediately in the
instrument panel as the new speed setting.
For more information on Recognition of
speed limit signs and recommendation ,
refer to the corresponding section.
As a precaution, it is recommended
that you select a cruise speed close to
the current speed of your vehicle, so
as to avoid any sudden acceleration or
deceleration of the vehicle.
6
Driving
Page 186 of 360
184
This setting remains in memory, whatever the
state of the system and when the ignition is
switched off.
Exceeding the programmed
setting
It is possible to exceed the speed setting
temporarily by depressing the accelerator
pedal.
The cruise control no longer manages the
braking system during this period.
Simply release the accelerator pedal to return
to the programmed speed.
If the programmed speed setting is exceeded,
the display of the speed setting disappears
and a message "Cruise control suspended"
is displayed until the accelerator pedal is
released.
Driving situations and
associated alerts
To benefit from all necessary information on
the instrument panel, you must previously
select the "DRIVING" display mode.
The table below describes the alerts and
messages displayed depending on the driving
situation.
The display of these alerts is not sequential.
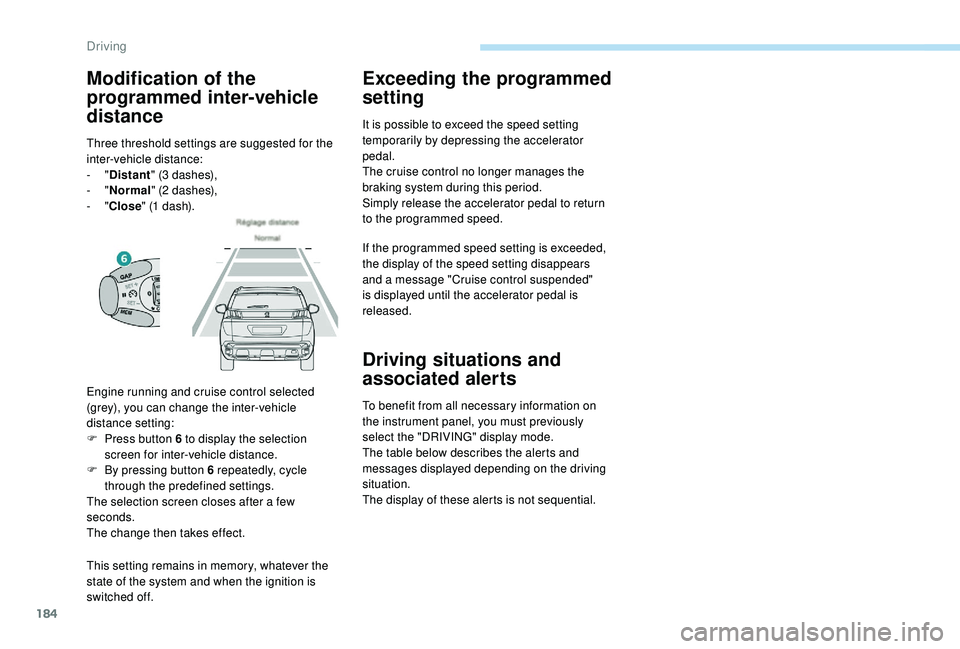
Engine running and cruise control selected
(grey), you can change the inter-vehicle
distance setting:
F
P
ress button 6 to display the selection
screen for inter-vehicle distance.
F
B
y pressing button 6 repeatedly, cycle
through the predefined settings.
The selection screen closes after a few
seconds.
The change then takes effect.
Modification of the
programmed inter-vehicle
distance
Three threshold settings are suggested for the
inter-vehicle distance:
-
"Distant " (3
dashes),
-
"Normal " (2
dashes),
-
"Close " (1
dash).
Driving
Page 192 of 360
190
It is possible that warnings are not given,
are given too late or seem unjustified.
Consequently, always stay alert and be
prepared to react at any time to avoid an
accident.
Distance alert
Depending on the degree of risk of collision
detected by the system and the alert threshold
chosen by the driver, different levels of
alert can be triggered and displayed in the
instrument panel.Level 1 (orange)
: visual alert only,
signalling to you that the vehicle in
front is very close.
The message " Vehicle close" is
displayed.
This level of alert is based on the inter-vehicle
time between your vehicle and the vehicle in
front.
Level 2 (red) : visual and audible
alert, warning you that a collision is
imminent.
The message " Brake!" is displayed.
This level of alert is based on the time before
collision. It takes account of the vehicle
dynamics, the speed of your vehicle and the
one in front, the environmental conditions, the
operation of the vehicle (cornering, pedals
pressed, etc.) to trigger the alert at the best
moment.
Where the speed of your vehicle is too
high approaching another vehicle, the
first level of alert may not be displayed:
the level 2 alert may be displayed
di r e c t l y.
Important: alert level 1 is never
displayed when the " Close" trigger
threshold has been selected.
-
w
hen carrying long objects on roof bars or a
roof rack,
-
b
efore using an automatic car wash, with
the engine running,
-
b
efore placing the vehicle on a rolling road
in a workshop,
-
w
hen the vehicle is being towed, with the
engine running,
-
w
hen a "space-saver" type spare wheel is
fitted (depending on version),
-
fo
llowing impact damage to the windscreen
close to the detection camera,
-
i
f the front bumper has been damaged
(version with radar),
-
i
f the brake lamps are not working.
Modifying the alert trigger
threshold
This threshold determines how you wish to be
warned of the presence of a vehicle moving
or stationary in front of you, or a pedestrian
present in your traffic lane.
The current threshold can be modified via the
vehicle configuration menu.
You can select one of three predefined
thresholds:
-
"Distant ",
-
"Normal ",
-
"Close ".
The last threshold selected is kept in memory
when the ignition is switched off.
Intelligent emergency
braking assistance
If the driver brakes, but not sufficiently to avoid
a collision, this system will supplement the
braking, within the limits of the laws of physics.
This assistance will only be provided if you
press the brake pedal.
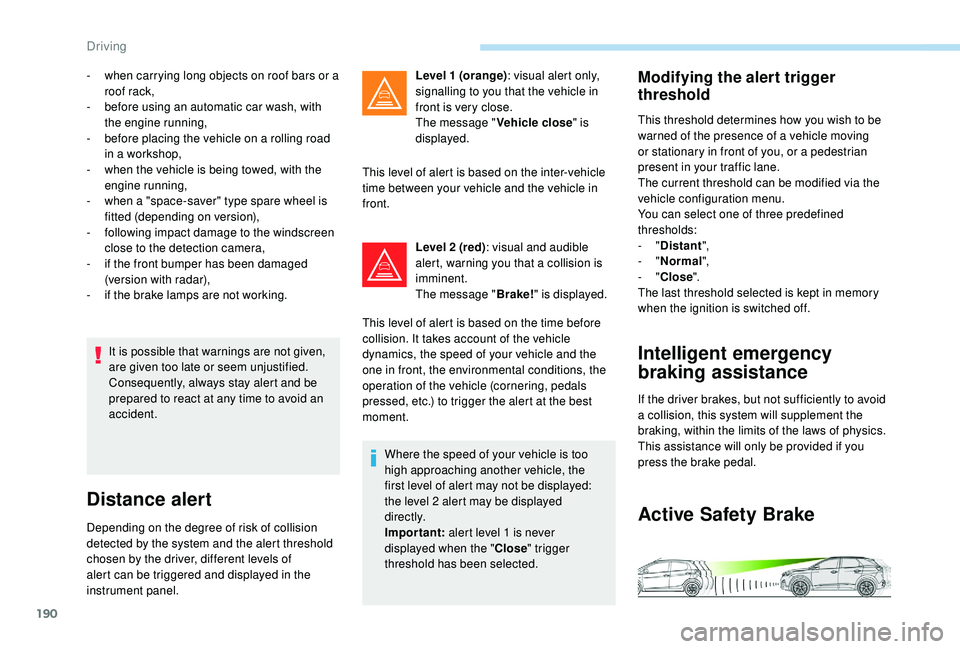
Active Safety Brake
Driving
Page 193 of 360
191
If the camera and/or radar have
confirmed the presence of a vehicle
or a pedestrian, this warning lamp
flashes once the function is acting
on the vehicle's brakes.
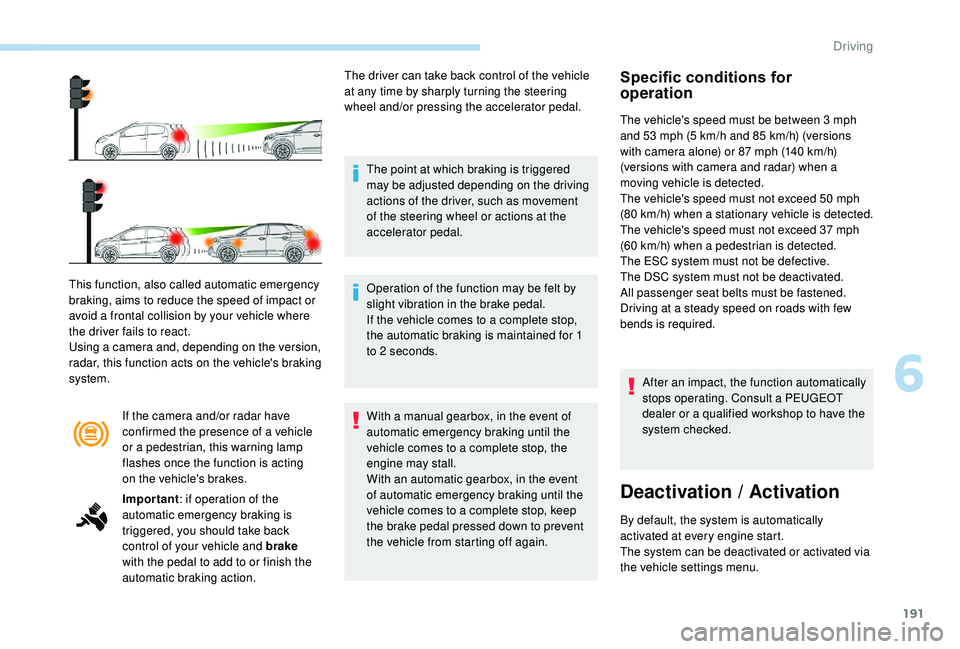
This function, also called automatic emergency
braking, aims to reduce the speed of impact or
avoid a frontal collision by your vehicle where
the driver fails to react.
Using a camera and, depending on the version,
radar, this function acts on the vehicle's braking
system.
Important : if operation of the
automatic emergency braking is
triggered, you should take back
control of your vehicle and brake
with the pedal to add to or finish the
automatic braking action. The driver can take back control of the vehicle
at any time by sharply turning the steering
wheel and/or pressing the accelerator pedal.
The point at which braking is triggered
may be adjusted depending on the driving
actions of the driver, such as movement
of the steering wheel or actions at the
accelerator pedal.
Operation of the function may be felt by
slight vibration in the brake pedal.
If the vehicle comes to a complete stop,
the automatic braking is maintained for 1
to 2 seconds.
With a manual gearbox, in the event of
automatic emergency braking until the
vehicle comes to a complete stop, the
engine may stall.
With an automatic gearbox, in the event
of automatic emergency braking until the
vehicle comes to a complete stop, keep
the brake pedal pressed down to prevent
the vehicle from starting off again.
Specific conditions for
operation
The vehicle's speed must be between 3 mph
a nd 53 mph (5 km/h and 85 km/h) (versions
with camera alone) or 87
mph (140 km/h)
(versions with camera and radar) when a
moving vehicle is detected.
The vehicle's speed must not exceed 50
mph
(80
k
m/h) when a stationary vehicle is detected.
The vehicle's speed must not exceed 37
mph
(60
km/h) when a pedestrian is detected.
The ESC system must not be defective.
The DSC system must not be deactivated.
All passenger seat belts must be fastened.
Driving at a steady speed on roads with few
bends is required.
After an impact, the function automatically
stops operating. Consult a PEUGEOT
dealer or a qualified workshop to have the
system checked.
Deactivation / Activation
By default, the system is automatically
activated at every engine start.
The system can be deactivated or activated via
the vehicle settings menu.
6
Driving
Page 206 of 360
204
- Certain materials (fabrics) absorb sound waves: pedestrians may not be detected.
-
A
ccumulated snow or dead leaves on the
road sur face can inter fere with the vehicle's
sensors.
-
A f
ront or rear impact to the vehicle can
distort the settings of the sensors, which is
not always detected by the system: distance
measurements may be incorrect.
-
T
he tilting of the vehicle if the boot is
very loaded can affect the distance
measurements.
-
T
he sensors may be affected by poor
weather conditions (heavy rain, thick fog,
snowfall, etc.).
Recommendations on care
In bad or wintry weather, ensure that the
sensors are not covered with mud, ice or
snow. When reverse gear is engaged, an
audible signal (long beep) indicates that
the sensors may be dirty. High pressure washing
When washing your vehicle, direct the
lance at least 30
cm away from the
sensors.
Operating fault
If a fault occurs when shifting
to reverse, this warning lamp
comes on in the instrument panel,
accompanied by a message and an
audible signal (short beep).
Contact a PEUGEOT dealer or a qualified
workshop
to have the system checked.
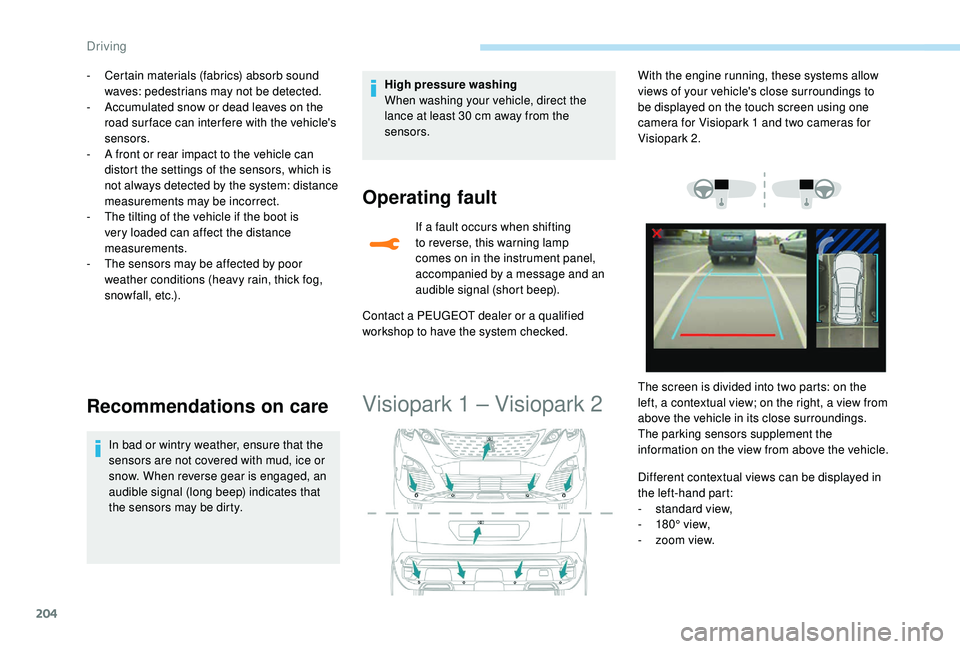
Visiopark 1 – Visiopark 2
Different contextual views can be displayed in
the left-hand part:
-
s
tandard view,
-
1
80° view,
-
z
oom view.
With the engine running, these systems allow
views of your vehicle's close surroundings to
be displayed on the touch screen using one
camera for Visiopark 1 and two cameras for
Visiopark 2.
The screen is divided into two parts: on the
left, a contextual view; on the right, a view from
above the vehicle in its close surroundings.
The parking sensors supplement the
information on the view from above the vehicle.
Driving
Page 210 of 360
208
With the engine running and the
speed below 12 mph (20 km/h), the
system is activated via the Vehicle /
Driving menu of the touch screen:
F
Sel
ect " Panoramic visual aid ".
AUTO mode is displayed by default, with front
vision, if the gearbox is in neutral or with a
gear engaged, or with rear vision, if reverse is
engaged.
The system is deactivated:
-
a
utomatically above about 19 mph (30 km/h)
(the image disappears temporarily from
12
mph (20 km/h)),
-
b
y pressing the red cross in the top left-
hand corner of the touch screen.
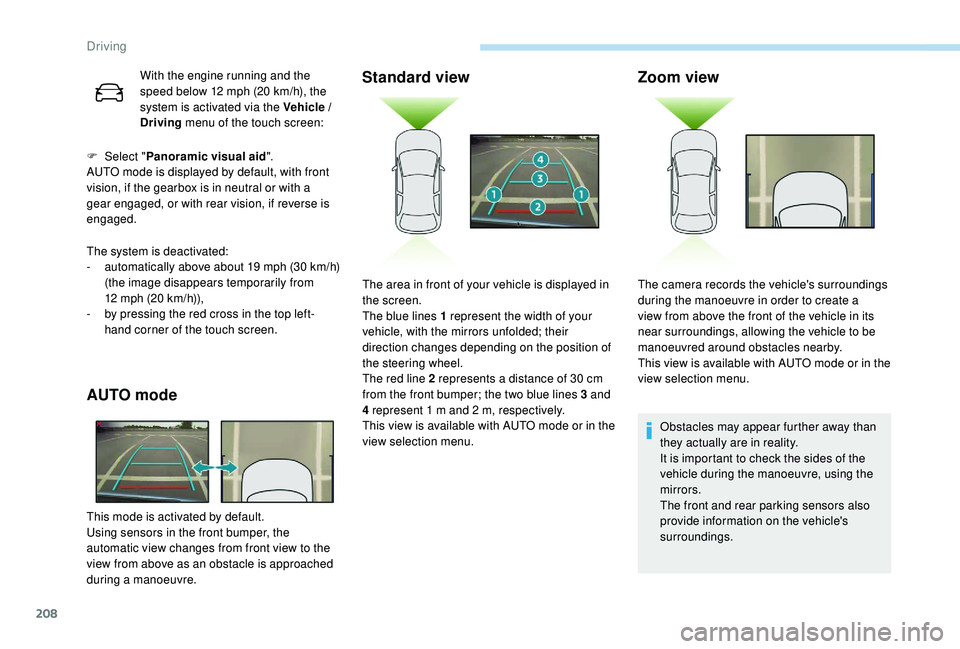
AUTO mode
This mode is activated by default.
Using sensors in the front bumper, the
automatic view changes from front view to the
view from above as an obstacle is approached
during a manoeuvre.
Standard view Zoom view
Obstacles may appear further away than
they actually are in reality.
It is important to check the sides of the
vehicle during the manoeuvre, using the
mirrors.
The front and rear parking sensors also
provide information on the vehicle's
surroundings.
The area in front of your vehicle is displayed in
the screen.
The blue lines 1 represent the width of your
vehicle, with the mirrors unfolded; their
direction changes depending on the position of
the steering wheel.
The red line 2 represents a distance of 30
cm
from the front bumper; the two blue lines 3 and
4 represent 1
m and 2
m, respectively.
This view is available with AUTO mode or in the
view selection menu. The camera records the vehicle's surroundings
during the manoeuvre in order to create a
view from above the front of the vehicle in its
near surroundings, allowing the vehicle to be
manoeuvred around obstacles nearby.
This view is available with AUTO mode or in the
view selection menu.
Driving