battery Peugeot 308 CC 2014 Owner's Manual
[x] Cancel search | Manufacturer: PEUGEOT, Model Year: 2014, Model line: 308 CC, Model: Peugeot 308 CC 2014Pages: 268, PDF Size: 15.33 MB
Page 5 of 268
3
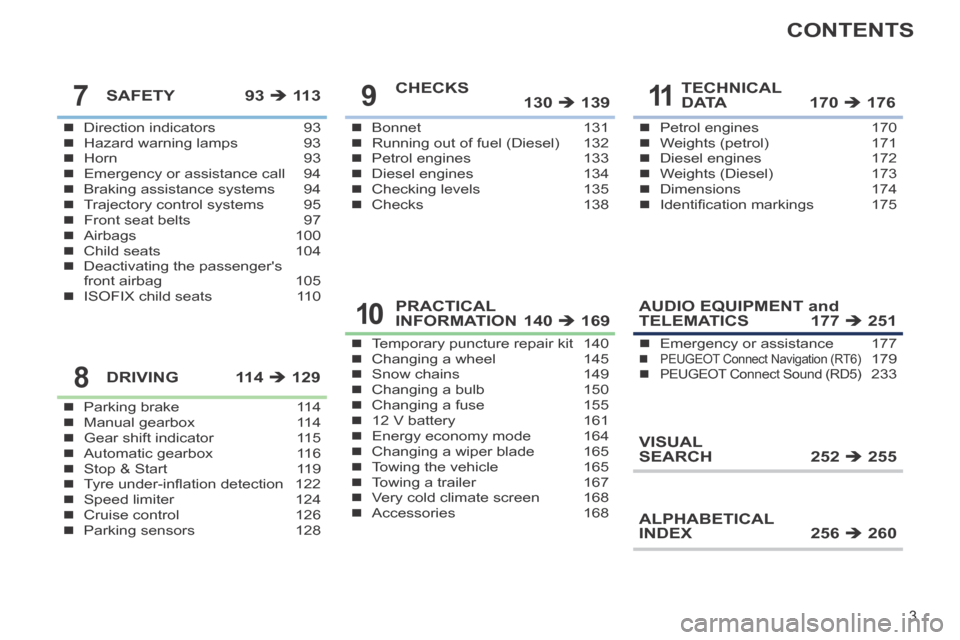
CONTENTS
Direction indicators 93Hazard warning lamps 93Horn 93Emergency or assistance call 94Braking assistance systems 94Trajectory control systems 95Front seat belts 97Airbags 100Child seats 104Deactivating the passenger's front airbag 105ISOFIX child seats 110
SAFETY 93 11 3
Parking brake 114Manual gearbox 114Gear shift indicator 115Automatic gearbox 116Stop & Start 119Tyre under-infl ation detection 122Speed limiter 124Cruise control 126Parking sensors 128
DRIVING 114 129
Bonnet 131Running out of fuel (Diesel) 132Petrol engines 133Diesel engines 134Checking levels 135Checks 138
CHECKS 130 139
Temporary puncture repair kit 140Changing a wheel 145Snow chains 149Changing a bulb 150Changing a fuse 15512 V battery 161Energy economy mode 164Changing a wiper blade 165Towing the vehicle 165Towing a trailer 167Very cold climate screen 168Accessories 168
PRACTICAL INFORMATION 140 169
Petrol engines 170Weights (petrol) 171Diesel engines 172Weights (Diesel) 173Dimensions 174Identifi cation markings 175
TECHNICAL D ATA 170 D ATA 170 D ATA 176
AUDIO EQUIPMENT and TELEMATICS 177 251
VISUAL SEARCH 252 255
ALPHABETICAL INDEX 256 260
Emergency or assistance 177PEUGEOT Connect Navigation (RT6)PEUGEOT Connect Navigation (RT6)PEUGEOT 179PEUGEOT Connect Sound (RD5)PEUGEOT Connect Sound (RD5)PEUGEOT 233
7
8
9
10
11
Page 27 of 268
1
25
MONITORING
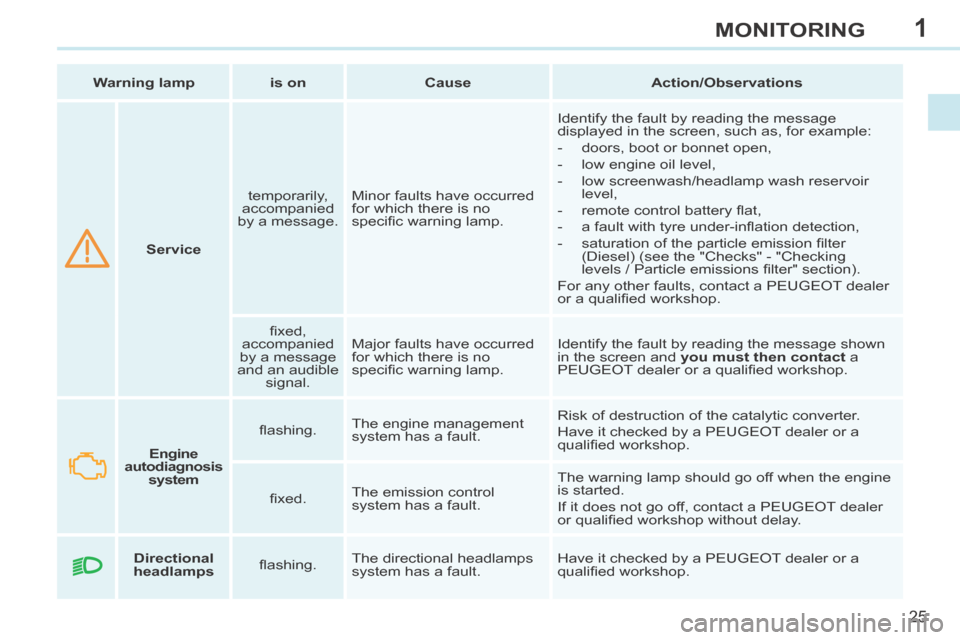
Service temporarily,
accompanied
by a message. Minor faults have occurred
for which there is no
specifi c warning lamp. Identify the fault by reading the message
displayed in the screen, such as, for example:
- doors, boot or bonnet open,
- low engine oil level,
- low screenwash/headlamp wash reservoir
level,
- remote control battery fl at,
- a fault with tyre under-infl ation detection,
- saturation of the particle emission fi lter (Diesel) (see the "Checks" - "Checking
levels / Particle emissions fi lter" section).
For any other faults, contact a PEUGEOT dealer
or a qualifi ed workshop.
fi xed,
accompanied
by a message
and an audible signal. Major faults have occurred
for which there is no
specifi c warning lamp.
Identify the fault by reading the message shown
in the screen and
you must then contact a
PEUGEOT dealer or a qualifi ed workshop.
Warning lamp
is on Cause Action/Observations
Engine
autodiagnosis system fl ashing.
The engine management
system has a fault. Risk of destruction of the catalytic converter.
Have it checked by a PEUGEOT dealer or a
qualifi ed workshop.
fi xed. The emission control
system has a fault. The warning lamp should go off when the engine
is started.
If it does not go off, contact a PEUGEOT dealer
or qualifi ed workshop without delay.
Directional
headlamps fl ashing. The directional headlamps
system has a fault. Have it checked by a PEUGEOT dealer or a
qualifi ed workshop.
Page 36 of 268
1
i
i
34
MONITORING
Following this operation, if you wish
to disconnect the battery, lock the
vehicle and wait at least fi ve minutes
for the zero reset to be registered.
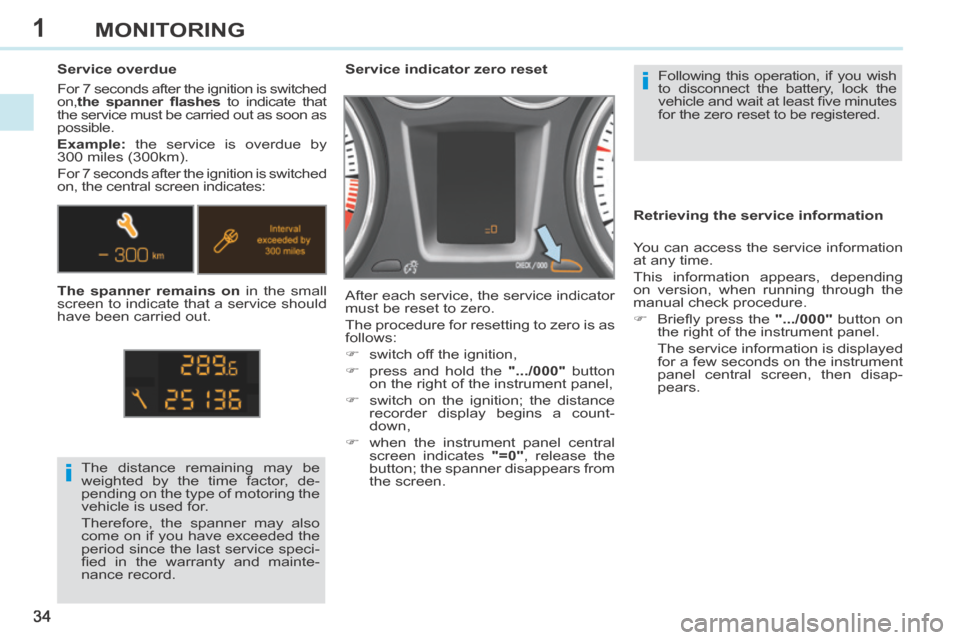
Service indicator zero reset
After each service, the service indicator
must be reset to zero.
The procedure for resetting to zero is as
follows:
switch off the ignition,
press and hold the
".../000" button
on the right of the instrument panel,
switch on the ignition; the distance recorder display begins a count-
down,
when the instrument panel central screen indicates "=0" , release the
button; the spanner disappears from
the screen.
The distance remaining may be
weighted by the time factor, de-
pending on the type of motoring the
vehicle is used for.
Therefore, the spanner may also
come on if you have exceeded the
period since the last service speci-
fi ed in the warranty and mainte-
nance record.
Service overdue
For 7 seconds after the ignition is switched
on,
the spanner fl ashes to indicate that
the service must be carried out as soon as
possible.
Example: the service is overdue by
300 miles (300km).
For 7 seconds after the ignition is switched
on, the central screen indicates:
The spanner remains on in the small
screen to indicate that a service should
have been carried out. Retrieving the service information
You can access the service information
at any time.
This information appears, depending
on version, when running through the
manual check procedure.
Briefl y press the
".../000" button on
the right of the instrument panel.
The service information is displayed for a few seconds on the instrument
panel central screen, then disap-
pears.
Page 43 of 268
2
!
!
41
MULTIFUNCTION SCREENS
For safety reasons, confi guration
of the multifunction screen by the
driver must be done only when sta-
tionary.
Display confi guration
Once this menu has been selected, you
have access to the following settings:
- brightness-video setting,
- date and time setting,
- choice of units.
Choice of language
Once this menu has been selected,
you can change the language used by
the display (Deutsch, English, Espanol,
Français, Italiano, Nederlands,
Portugues, Portugues-Brasil, Russe,
Türkçe * ).
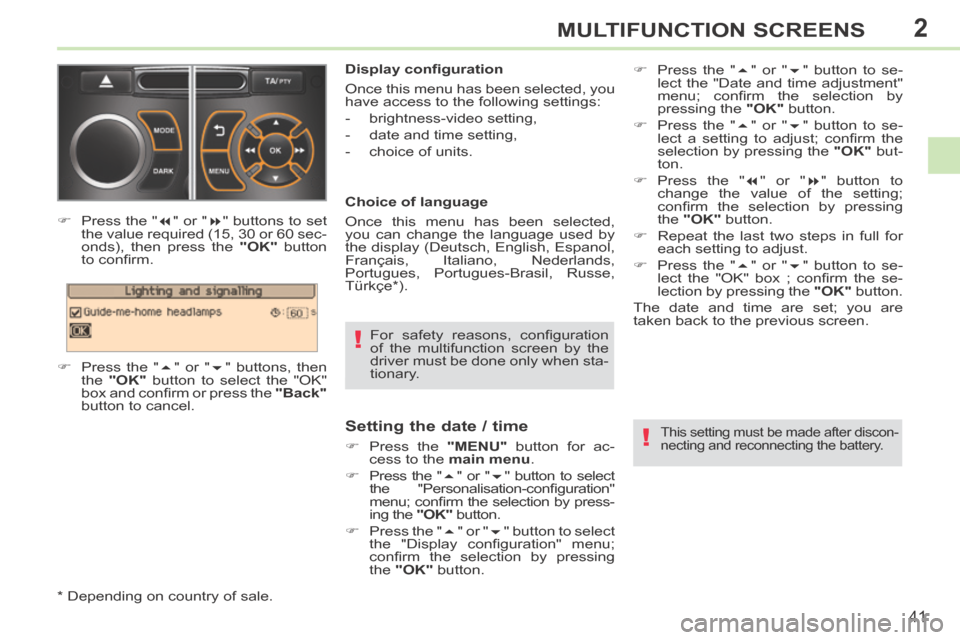
Press the "
" or " " buttons to set
the value required (15, 30 or 60 sec-
onds), then press the "OK" button
to confi rm.
Press the " " or " " buttons, then
the "OK" button to select the "OK"
box and confi rm or press the "Back"
button to cancel.
* Depending on country of sale.
Setting the date / time
Press the "MENU" button for ac-
cess to the main menu .
Press the " " or " " button to select
the "Personalisation-confi guration"
menu; confi rm the selection by press-
ing the "OK" button.
Press the " " or " " button to select
the "Display confi guration" menu;
confi rm the selection by pressing
the "OK" button. This setting must be made after discon-
necting and reconnecting the battery.
Press the " " or " " button to se-
lect the "Date and time adjustment"
menu; confi rm the selection by
pressing the "OK" button.
Press the " " or " " button to se-
lect a setting to adjust; confi rm the
selection by pressing the "OK" but-
ton.
Press the " " or " " button to
change the value of the setting;
confi rm the selection by pressing
the "OK" button.
Repeat the last two steps in full for each setting to adjust.
Press the " " or " " button to se-
lect the "OK" box ; confi rm the se-
lection by pressing the "OK" button.
The date and time are set; you are
t aken back to the previous screen.
Page 45 of 268
2
i
!
43
MULTIFUNCTION SCREENS
Display confi guration
This menu is used to select the colour
scheme for the screen, adjust its bright-
ness, set the date and time and select
the units for distance (km or miles),
fuel consumption (l/100 km, mpg or
km/l) and temperature (°Celsius or
°Fahrenheit).
Voice synthesiser
This menu is used to set the volume for
navigation instructions and to select the
type of voice (male or female).
Choice of language
This menu allows you to select the
language used by the screen: French,
English, Italian, Portuguese, Spanish,
German, Dutch, Turkish, Polish,
Russian). Vehicle settings *
This menu is used to activate or deacti-
vate certain driving and comfort equip-
ment, sorted by category:
- Access to the vehicle
● Plip action: "Driver's door" or "All doors".
- Parking assistance
- Rear wiper operation ● Operation of rear wiper in reverse (Rear wiper coupled to reverse;
see "Visibility"),
- Lighting confi guration (see "Visibility"):
●
Duration of guide-me-home lighting,
● Directional headlamps (Main / ad- ditional directional lighting),
● Mood lighting (Interior mood light- ing),
● Daytime running lamps ** .
Alert log
This summarises the active alerts by
displaying their associated messages
in turn.
* Depending on version.
** Depending on country of sale. When setting the time you can
select "Synchronise minutes with
GPS", so that the minutes are set
automatically by satellite reception.
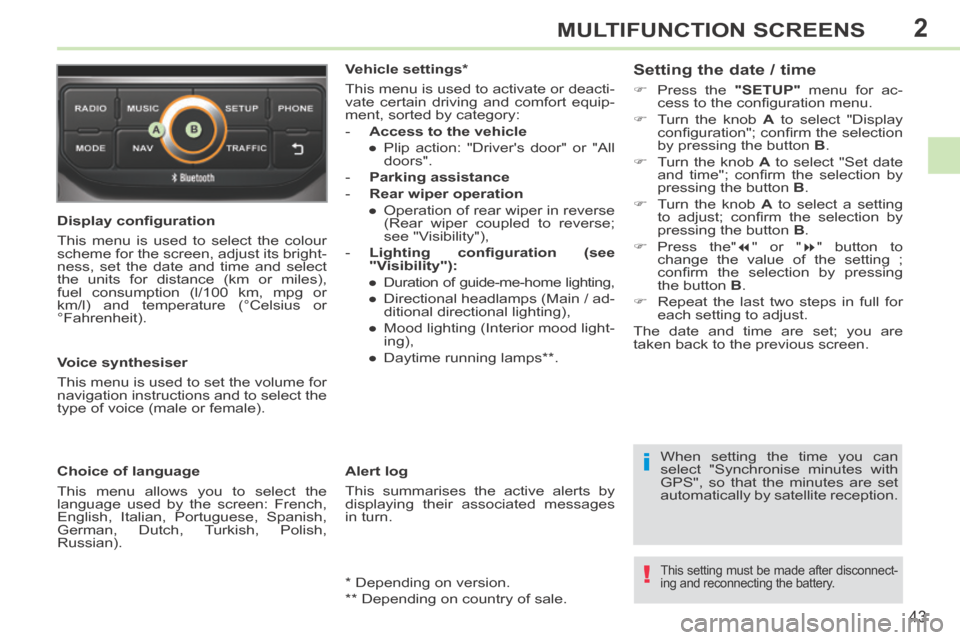
Setting the date / time
Press the
"SETUP" menu for ac-
cess to the confi guration menu.
Turn the knob A to select "Display
confi guration"; confi rm the selection
by pressing the button B .
Turn the knob A to select "Set date
and time"; confi rm the selection by
pressing the button B .
Turn the knob A to select a setting
to adjust; confi rm the selection by
pressing the button B .
Press the" " or " " button to
change the value of the setting ;
confi rm the selection by pressing
the button B .
Repeat the last two steps in full for each setting to adjust.
The date and time are set; you are
t aken back to the previous screen.
This setting must be made after disconnect-
ing and reconnecting the battery.
Page 59 of 268
3
!
!
57
COMFORT
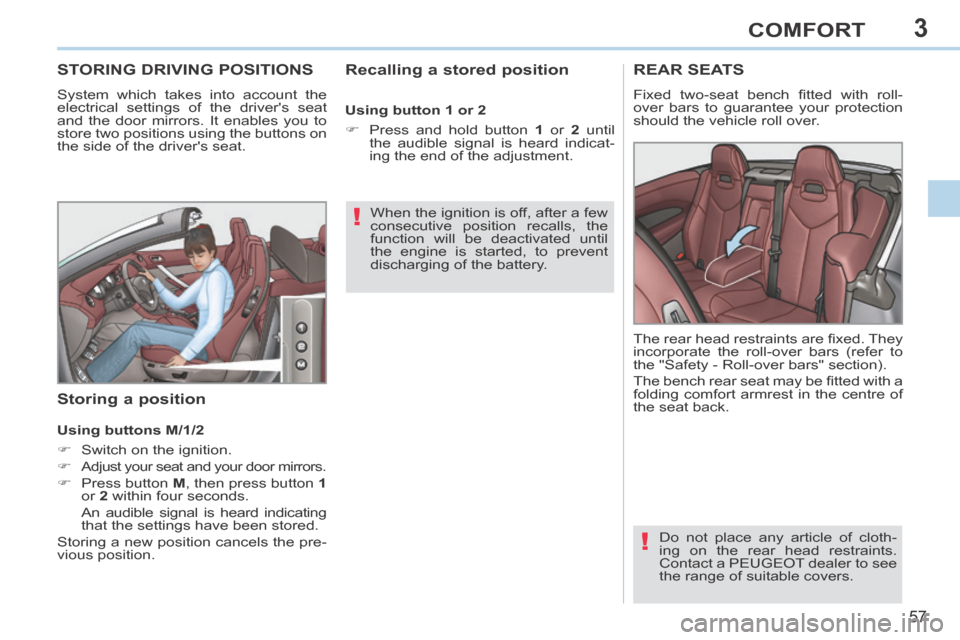
STORING DRIVING POSITIONS
System which takes into account the
electrical settings of the driver's seat
and the door mirrors. It enables you to
store two positions using the buttons on
the side of the driver's seat.
Recalling a stored position
Storing a position
When the ignition is off, after a few
consecutive position recalls, the
function will be deactivated until
the engine is started, to prevent
discharging of the battery.
Using buttons M/1/2
Switch on the ignition.
Adjust your seat and your door mirrors.
Press button M , then press button 1
or 2 within four seconds.
An audible signal is heard indicating that the settings have been stored.
Storing a new position cancels the pre-
vious position.
REAR SEATS
Fixed two-seat bench fi tted with roll-
over bars to guarantee your protection
should the vehicle roll over.
Do not place any article of cloth-
ing on the rear head restraints.
Contact a PEUGEOT dealer to see
the range of suitable covers.
The rear head restraints are fi xed. They
incorporate the roll-over bars (refer to
the "Safety - Roll-over bars" section).
The bench rear seat may be fi tted with a
folding comfort armrest in the centre of
the seat back.
Using button 1 or 2
Press and hold button
1 or 2 until
the audible signal is heard indicat-
ing the end of the adjustment.
Page 66 of 268
4
64
ACCESS
308CC_EN_CHAP04_OUVERTURES_ED01-2013
Remote control problem
Following disconnection of the vehicle
battery, replacement of the remote con-
trol battery or in the event of a remote
control malfunction, you can no longer
unlock, lock or locate your vehicle.
First of all, use the key in the lock to unlock or lock your vehicle.
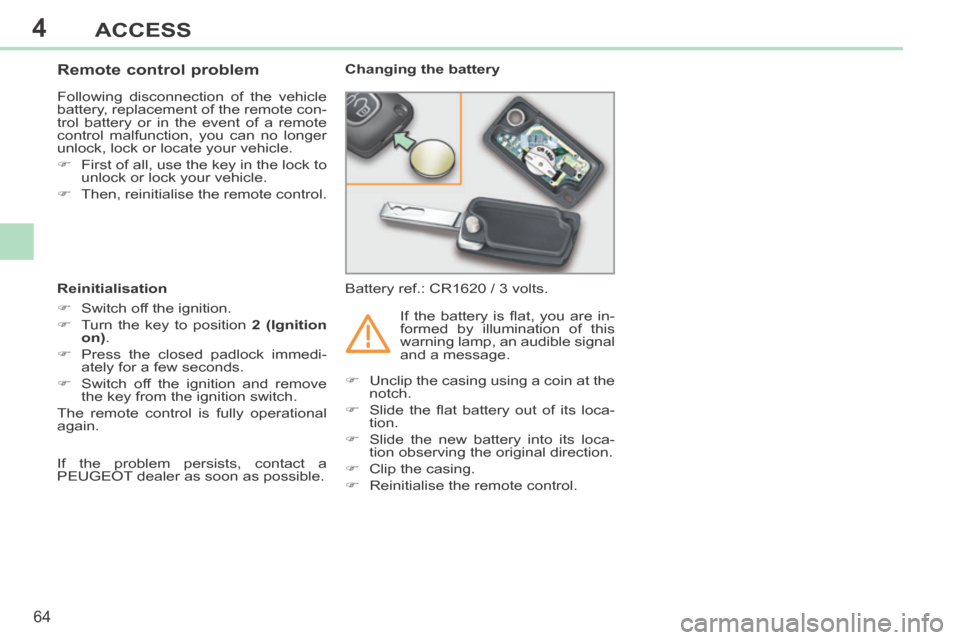
Then, reinitialise the remote control. Changing the battery
Battery ref.: CR1620 / 3 volts.
Reinitialisation
Switch off the ignition.
Turn the key to position 2 (Ignition
on) .
Press the closed padlock immedi- ately for a few seconds.
Switch off the ignition and remove the key from the ignition switch.
The remote control is fully operational
again. Unclip the casing using a coin at the
notch.
Slide the fl at battery out of its loca- tion.
Slide the new battery into its loca- tion observing the original direction.
Clip the casing.
Reinitialise the remote control. If the battery is fl at, you are in-
formed by illumination of this
warning lamp, an audible signal
and a message.
If the problem persists, contact a
PEUGEOT dealer as soon as possible.
Page 68 of 268
4
!
i
66
ACCESS
308CC_EN_CHAP04_OUVERTURES_ED01-2013
ALARM
System which protects and provides a de-
terrent against theft and break-ins. It pro-
vides the following types of monitoring.
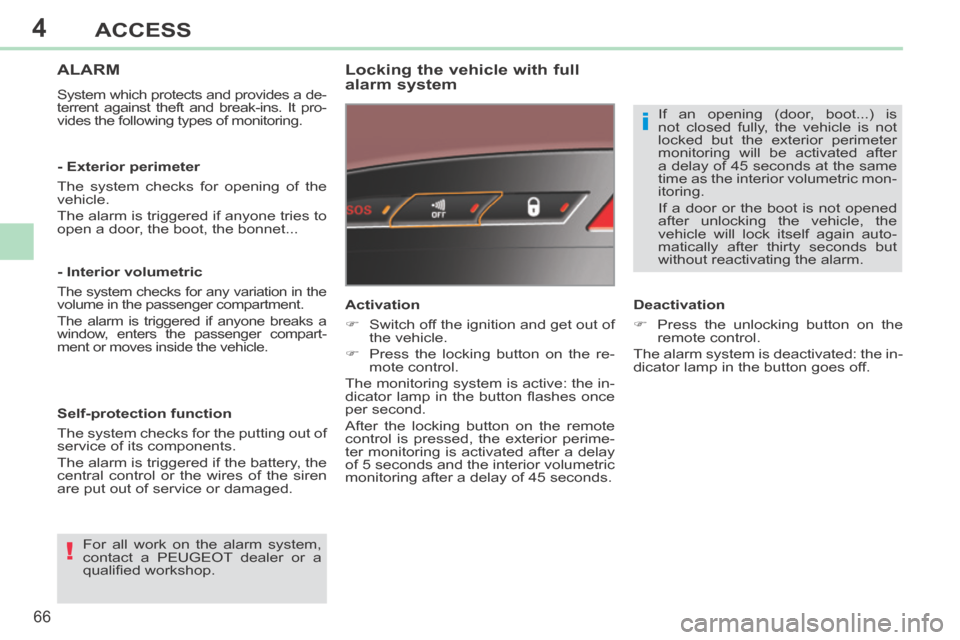
Locking the vehicle with full
alarm system
For all work on the alarm system,
contact a PEUGEOT dealer or a
qualifi ed workshop. Activation
Switch off the ignition and get out of
the vehicle.
Press the locking button on the re- mote control.
The monitoring system is active: the in-
dicator lamp in the button fl ashes once
per second.
After the locking button on the remote
control is pressed, the exterior perime-
ter monitoring is activated after a delay
of 5 seconds and the interior volumetric
monitoring after a delay of 45 seconds.
- Exterior perimeter
The system checks for opening of the
vehicle.
The alarm is triggered if anyone tries to
open a door, the boot, the bonnet...
- Interior volumetric
The system checks for any variation in the
volume in the passenger compartment.
The alarm is triggered if anyone breaks a
window, enters the passenger compart-
ment or moves inside the vehicle.
Self-protection function
The system checks for the putting out of
service of its components.
The alarm is triggered if the battery, the
central control or the wires of the siren
are put out of service or damaged.
Deactivation
Press the unlocking button on the
remote control.
The alarm system is deactivated: the in-
dicator lamp in the button goes off. If an opening (door, boot...) is
not closed fully, the vehicle is not
locked but the exterior perimeter
monitoring will be activated after
a delay of 45 seconds at the same
time as the interior volumetric mon-
itoring.
If a door or the boot is not opened
after unlocking the vehicle, the
v ehicle will lock itself again auto-
matically after thirty seconds but
without reactivating the alarm.
Page 71 of 268
4
!
i
i
69
ACCESS
308CC_EN_CHAP04_OUVERTURES_ED01-2013
This procedure reinitialises the op-
eration of the electric windows and
the automatic partial opening of the
door windows
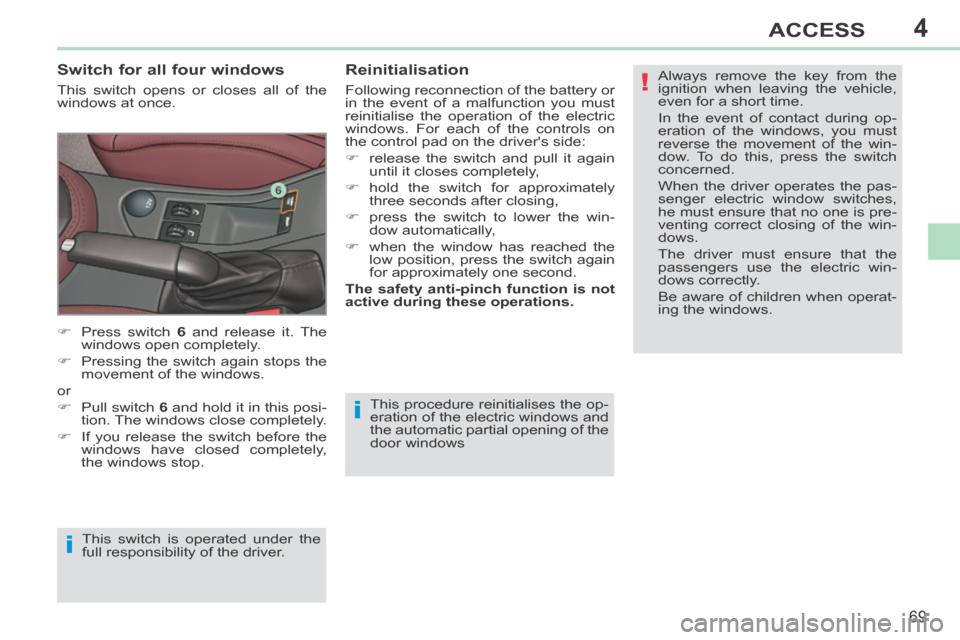
Switch for all four windows
This switch opens or closes all of the
windows at once. Always remove the key from the
ignition when leaving the vehicle,
even for a short time.
In the event of contact during op-
eration of the windows, you must
reverse the movement of the win-
dow. To do this, press the switch
concerned.
When the driver operates the pas-
senger electric window switches,
he must ensure that no one is pre-
venting correct closing of the win-
dows.
The driver must ensure that the
passengers use the electric win-
dows correctly.
Be aware of children when operat-
ing the windows.
Reinitialisation
Following reconnection of the battery or
in the event of a malfunction you must
reinitialise the operation of the electric
windows. For each of the controls on
the control pad on the driver's side:
release the switch and pull it again
until it closes completely,
hold the switch for approximately three seconds after closing,
press the switch to lower the win- dow automatically,
when the window has reached the low position, press the switch again
for approximately one second.
The safety anti-pinch function is not
active during these operations.
Press switch 6 and release it. The
windows open completely.
Pressing the switch again stops the movement of the windows.
or
Pull switch 6 and hold it in this posi-
tion. The windows close completely.
If you release the switch before the windows have closed completely,
the windows stop.
This switch is operated under the
full responsibility of the driver.
Page 74 of 268
4
!
72
ACCESS
308CC_EN_CHAP04_OUVERTURES_ED01-2013
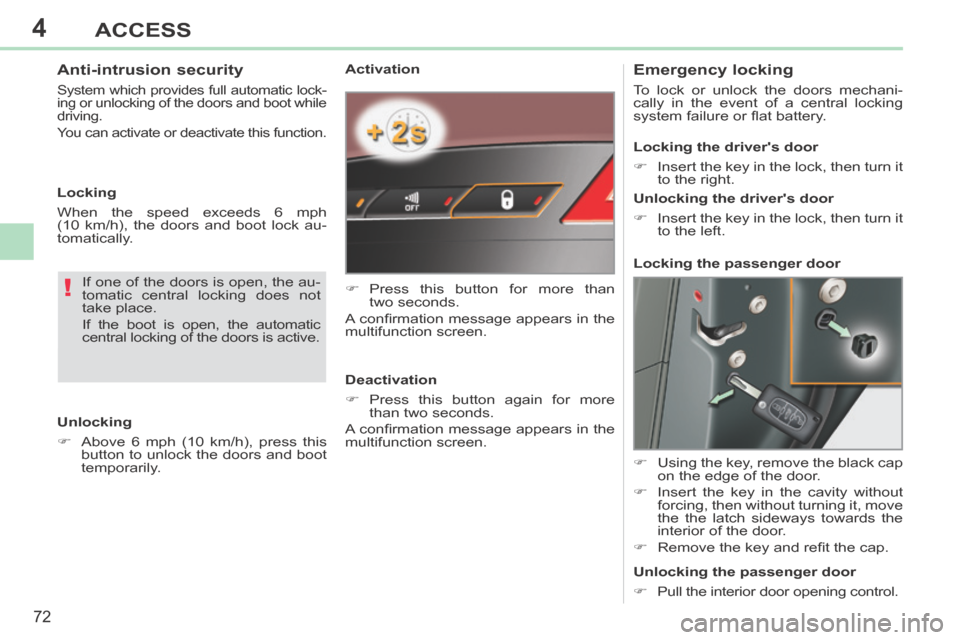
Activation
Press this button for more than two seconds.
A confi rmation message appears in the
multifunction screen.
Deactivation
Press this button again for more than two seconds.
A confi rmation message appears in the
multifunction screen. Emergency locking
To lock or unlock the doors mechani-
cally in the event of a central locking
system failure or fl at battery.
Using the key, remove the black cap on the edge of the door.
Insert the key in the cavity without forcing, then without turning it, move
the the latch sideways towards the
interior of the door.
Remove the key and refi t the cap. Locking the driver's door
Insert the key in the lock, then turn it to the right.
Unlocking the driver's door
Insert the key in the lock, then turn it to the left.
Locking the passenger door
Unlocking the passenger door
Pull the interior door opening control.
If one of the doors is open, the au-
tomatic central locking does not
take place.
If the boot is open, the automatic
central locking of the doors is active.
Anti-intrusion security
System which provides full automatic lock-
ing or unlocking of the doors and boot while
driving.
You can activate or deactivate this function.
Unlocking
Above 6 mph (10 km/h), press this
button to unlock the doors and boot
temporarily.
Locking
When the speed exceeds 6 mph
(10 km/h), the doors and boot lock au-
tomatically.