towing PEUGEOT 4008 2017 Owners Manual
[x] Cancel search | Manufacturer: PEUGEOT, Model Year: 2017, Model line: 4008, Model: PEUGEOT 4008 2017Pages: 368, PDF Size: 12.22 MB
Page 7 of 368
5
4008_en_Chap00b_vue-ensemble_ed01-2016
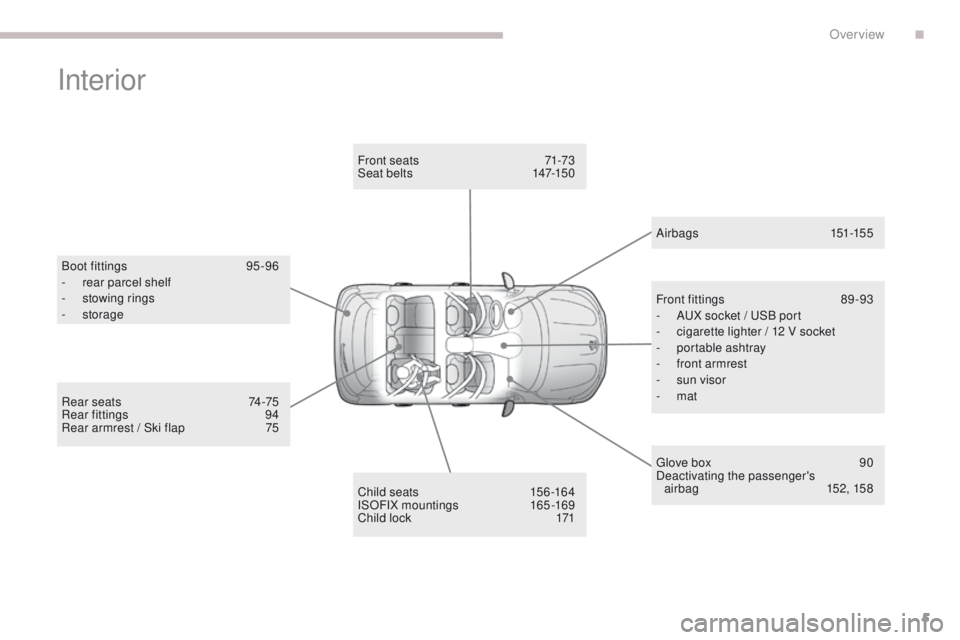
Interior
Boot fittings 95 -96
- r ear parcel shelf
-
s
towing rings
-
storage
Child seats
1
56 -164
ISOFIX mountings
1
65-169
Child lock
1
71
Front seats
7
1-73
Seat belts
1
47-150
gl
ove box
9
0
Deactivating the passenger's air bag
15
2, 15 8
A ir bags
151-155
Front fittings
8
9 -93
-
AuX s
ocket / u
S
B port
-
c
igarette lighter / 12 V socket
-
p
ortable ashtray
-
f
ront armrest
-
s
un visor
-
mat
Rear seats
7
4-75
Rear fittings
9
4
Rear armrest / Ski flap
7
5
.
Over view
Page 82 of 368
80
4008_en_Chap03_Ergonomie-et-confort_ed01-2016
In order for these systems to be fully effective, follow the operation and maintenance
guidelines below:
F t
o o
btain an even air distribution, take care not to obstruct the exterior air intake grilles
located at the base of the windscreen, the nozzles, the vents and the air outlets, as well
as the air extractor located in the boot.
F
D
o not cover the sunshine sensor, located on the dashboard; this is used for regulation
of the air conditioning system.
F
O
perate the air conditioning system for at least 5 to 10 minutes, once or twice a month
to keep it in per fect working order.
F
e
n
sure that the passenger compartment filter is in good condition and have the filter
elements replaced regularly.
W
e recommend the use of a combined passenger compartment filter. t
h
anks to its
special active additive, it contributes to the purification of the air breathed by the
occupants and the cleanliness of the passenger compartment (reduction of allergic
symptoms, bad odours and greasy deposits).
F
t
o e
nsure correct operation of the air conditioning system, you are also advised to have
it checked regularly as recommended in the warranty and maintenance record.
F
I
f the system does not produce cold air, switch it off and contact a P
e
uge
Ot
dealer or
a qualified workshop.
Recommendations for ventilation and air conditioning
If after an extended stop in sunshine,
the interior temperature is very high, first
ventilate the passenger compartment for
a few moments.
Put the air flow control at a setting high
enough to quickly change the air in the
passenger compartment.
Humid air cooled quickly by the
vehicle's air conditioning system may
produce condensation at the vent
outlets.
th
is phenomenon disappears after a
few seconds.
When towing the maximum load on a steep gradient in high temperatures, switching off the
air conditioning increases the available engine power and so improves the towing ability.
th
e condensation created by the air
conditioning results in a discharge
of water under the vehicle which is
perfectly normal.
ease of use and comfort
Page 97 of 368
95
4008_en_Chap03_Ergonomie-et-confort_ed01-2016
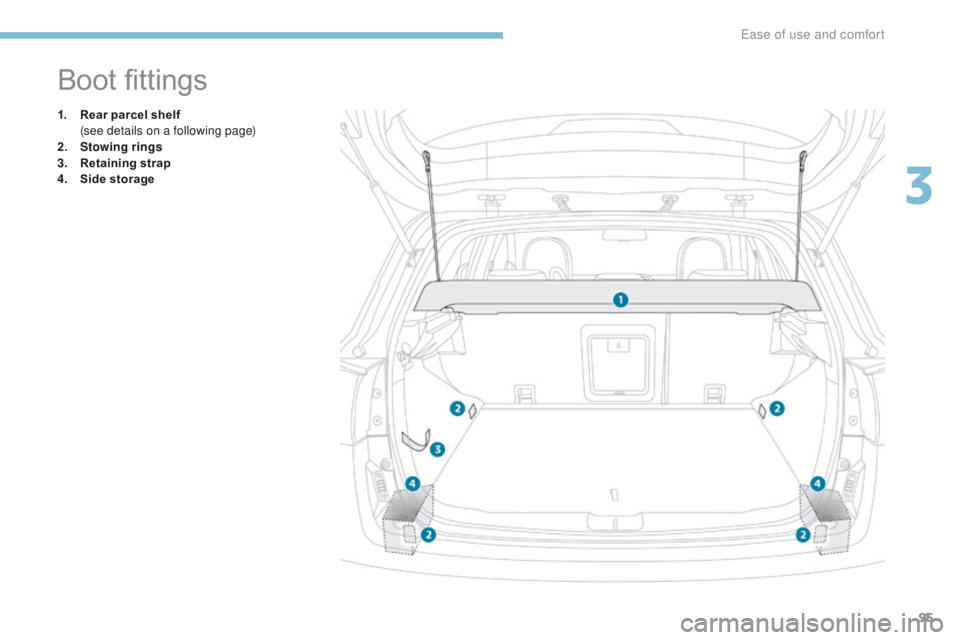
Boot fittings
1. Rear parcel shelf (see details on a following page)
2.
S
towing rings
3.
R
etaining strap
4.
S
ide storage
3
ease of use and comfort
Page 98 of 368
96
4008_en_Chap03_Ergonomie-et-confort_ed01-2016
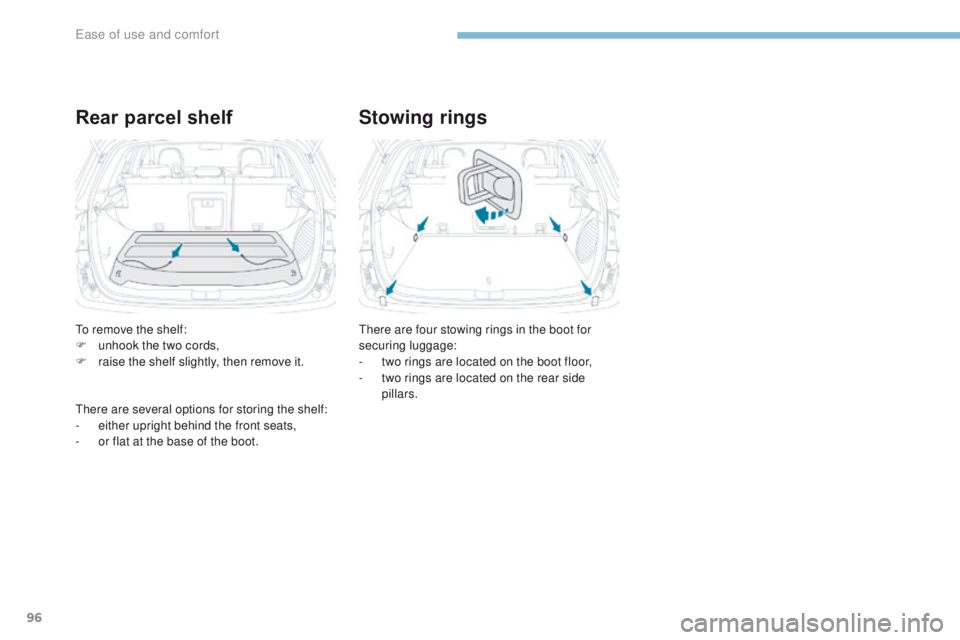
Rear parcel shelfStowing rings
there are four stowing rings in the boot for
securing luggage:
-
t
wo rings are located on the boot floor,
-
t
wo rings are located on the rear side
pillars.to r
emove the shelf:
F
u
nhook the two cords,
F
r
aise the shelf slightly, then remove it.
ther
e are several options for storing the shelf:
-
ei
ther upright behind the front seats,
-
o
r flat at the base of the boot.
Ease of use and comfort
Page 127 of 368
125
4008_en_Chap04_conduite_ed01-2016
Visual assistance
Front parking sensors
Deactivation / Activation of the
front and rear parking sensors
the function is deactivated by pressing this
button. th e indicator lamp in the button goes off.
Pressing this button again reactivates the
function.
t
h
e indicator lamp in the button
comes on.
Operating fault
the front parking sensors are triggered when
an obstacle is detected in front, a gear is
engaged (position D for vehicles with a CV
t
gearbox) and the speed of the vehicle remains
below 6 mph (10 km/h).
th
e front parking sensors are interrupted if
the vehicle stops for more than five seconds
in for ward gear, if no further obstacles are
detected or when the speed of the vehicle
exceeds 6 mph (10 km/h). Remember to deactivate the system if
towing a trailer or caravan.In bad weather or in winter, ensure that
the sensors are not covered with mud,
ice or snow.
When the vehicle is moving at a speed
below 6 mph (10 km/h), certain sound
sources (motorcycle, lorry, pneumatic
drill, etc.) may trigger the audible
signals of the parking sensor system.
In the event of an problem, when reverse gear
is engaged this lamp in the button flashes,
accompanied by an audible signal.
th
is supplements the audible
signal by displaying bars in the
screen, in front of or behind the
vehicle. If one of the sensors is faulty, it
flashes in the instrument panel
screen.
Contact a P
e
uge
Ot
dealer or a qualified
workshop.
th
ese bars flash at the start of the manoeuvre
then become fixed from a certain distance
between the vehicle and the obstacle.
4
Driving
Page 144 of 368
142
4008_en_Chap06_securite_ed01-2016
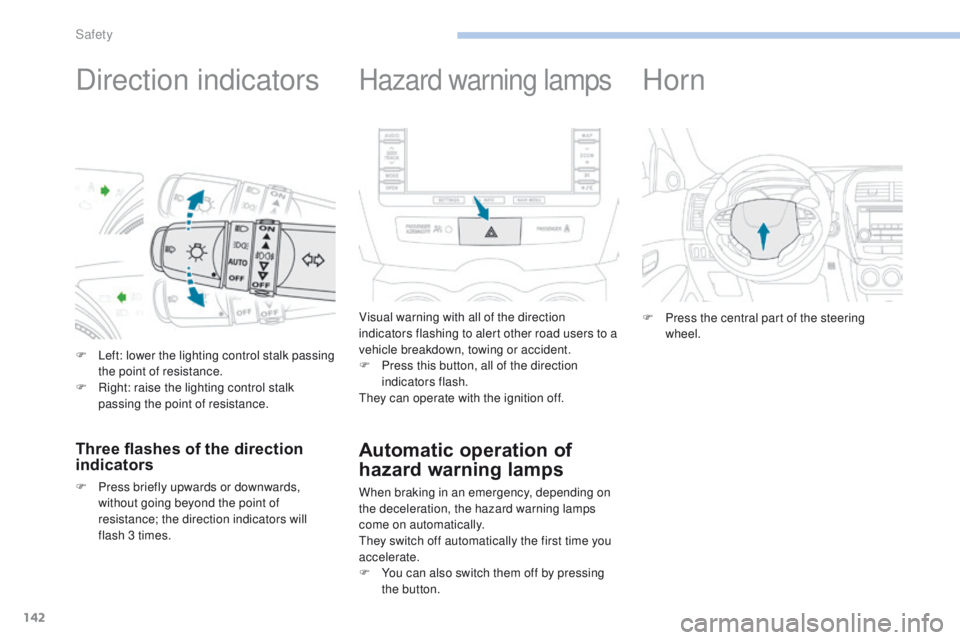
Direction indicators
F Left: lower the lighting control stalk passing the point of resistance.
F
R
ight: raise the lighting control stalk
passing the point of resistance.
Three flashes of the direction
indicators
F Press briefly upwards or downwards, without going beyond the point of
resistance; the direction indicators will
flash 3 times.
Hazard warning lamps
Visual warning with all of the direction
indicators flashing to alert other road users to a
vehicle breakdown, towing or accident.
F
P
ress this button, all of the direction
indicators flash.
th
ey can operate with the ignition off.
Automatic operation of
hazard warning lamps
When braking in an emergency, depending on
the deceleration, the hazard warning lamps
come on automatically.
th
ey switch off automatically the first time you
accelerate.
F
Y
ou can also switch them off by pressing
the button.
Horn
F Press the central part of the steering wheel.
Safety
Page 151 of 368
149
4008_en_Chap06_securite_ed01-2016
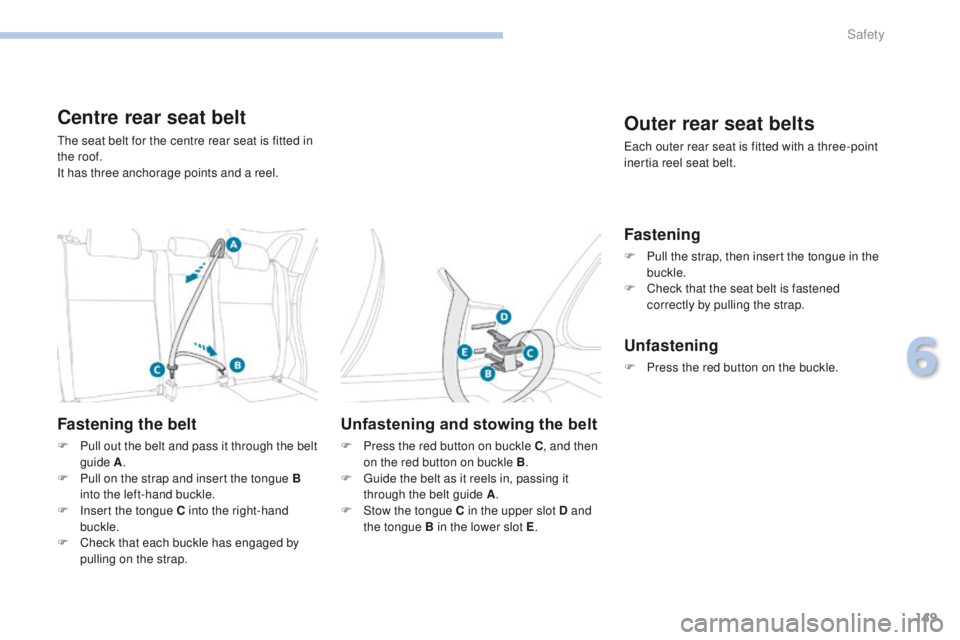
Centre rear seat belt
the seat belt for the centre rear seat is fitted in
the roof.
It has three anchorage points and a reel.
Fastening the belt
F Pull out the belt and pass it through the belt guide A .
F
P
ull on the strap and insert the tongue B
into the left-hand buckle.
F
I
nsert the tongue C into the right-hand
buckle.
F
C
heck that each buckle has engaged by
pulling on the strap.
Unfastening and stowing the belt
F Press the red button on buckle C , and then
on the red button on buckle B .
F
g
u
ide the belt as it reels in, passing it
through the belt guide A .
F
S
tow the tongue C in the upper slot D and
the tongue B in the lower slot E .
Outer rear seat belts
each outer rear seat is fitted with a three-point
inertia reel seat belt.
Fastening
F Pull the strap, then insert the tongue in the
buckle.
F
C
heck that the seat belt is fastened
correctly by pulling the strap.
Unfastening
F Press the red button on the buckle.
6
Safety
Page 179 of 368
177
4008_en_Chap07_info-pratiques_ed01-2016
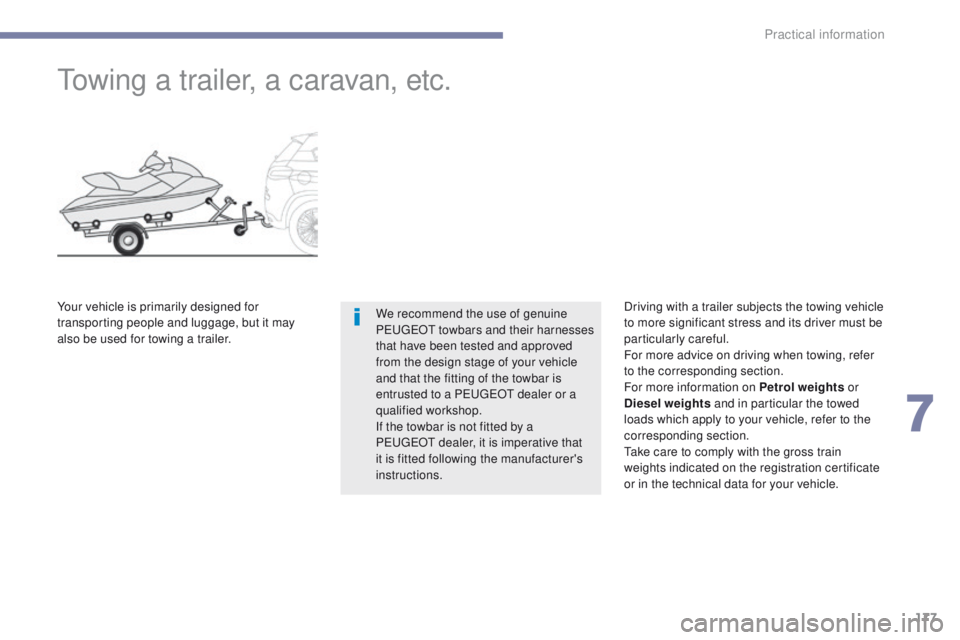
towing a trailer, a caravan, etc.
We recommend the use of genuine
PeugeOt towbars and their harnesses
that have been tested and approved
from the design stage of your vehicle
and that the fitting of the towbar is
entrusted to a P
e
uge
Ot
dealer or a
qualified workshop.
If the towbar is not fitted by a
P
e
uge
Ot
dealer, it is imperative that
it is fitted following the manufacturer's
instructions.
Your vehicle is primarily designed for
transporting people and luggage, but it may
also be used for towing a trailer.
Driving with a trailer subjects the towing vehicle
to more significant stress and its driver must be
particularly careful.
For more advice on driving when towing, refer
to the corresponding section.
For more information on Petrol weights
or
Diesel weights and in particular the towed
loads which apply to your vehicle, refer to the
corresponding section.
ta
ke care to comply with the gross train
weights indicated on the registration certificate
or in the technical data for your vehicle.
7
Practical information
Page 180 of 368
178
4008_en_Chap07_info-pratiques_ed01-2016
Advice on driving when towing
Distribution of loads
F Distribute the load in the trailer so that the heaviest items are as close as possible to
the axle and the nose weight approaches
the maximum permitted without exceeding
it.
Air density decreases with altitude, thus
reducing engine performance. Above
1
000 metres, the maximum towing load must
be reduced by 10
% of the gt
W a
nd so on for
every 1
000 metres of altitude.
For more information on Petrol weights or
Diesel weights and in particular the towed
loads which apply to your vehicle, refer to the
corresponding section.
Side wind
F take into account the increased sensitivity to side wind.
Cooling
towing a trailer on a slope increases the
temperature of the coolant.
As the fan is electrically controlled, its cooling
capacity is not dependent on the engine speed.
F
t
o l
ower the engine speed, reduce your
speed.
th
e maximum towed load on a long slope
depends on the gradient and the exterior
temperature.
In all cases, pay attention to the coolant
temperature.
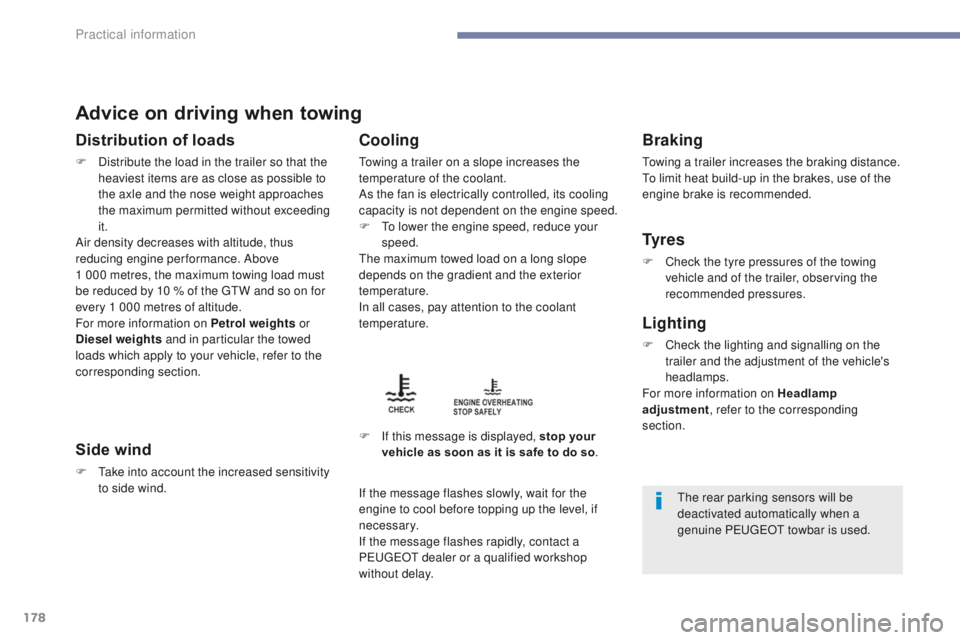
F
I
f this message is displayed, stop your
vehicle as soon as it is safe to do so .
Braking
towing a trailer increases the braking distance.to l
imit heat build-up in the brakes, use of the
engine brake is recommended.
Ty r e s
F Check the tyre pressures of the towing vehicle and of the trailer, observing the
recommended pressures.
Lighting
F Check the lighting and signalling on the trailer and the adjustment of the vehicle's
headlamps.
For more information on Headlamp
adjustment , refer to the corresponding
section.
If the message flashes slowly, wait for the
engine to cool before topping up the level, if
necessary.
If the message flashes rapidly, contact a
P
e
uge
Ot
dealer or a qualified workshop
without delay.
the rear parking sensors will be
deactivated automatically when a
genuine P
e
uge
Ot
towbar is used.
Practical information
Page 195 of 368
193
4008_en_Chap08_en-cas-de panne_ed01-2016
Changing a wheel
the tools are stowed in the boot under the
f l o o r.
to g
ain access to them:
F
O
pen the boot.
F
L
ift and remove the boot floor.
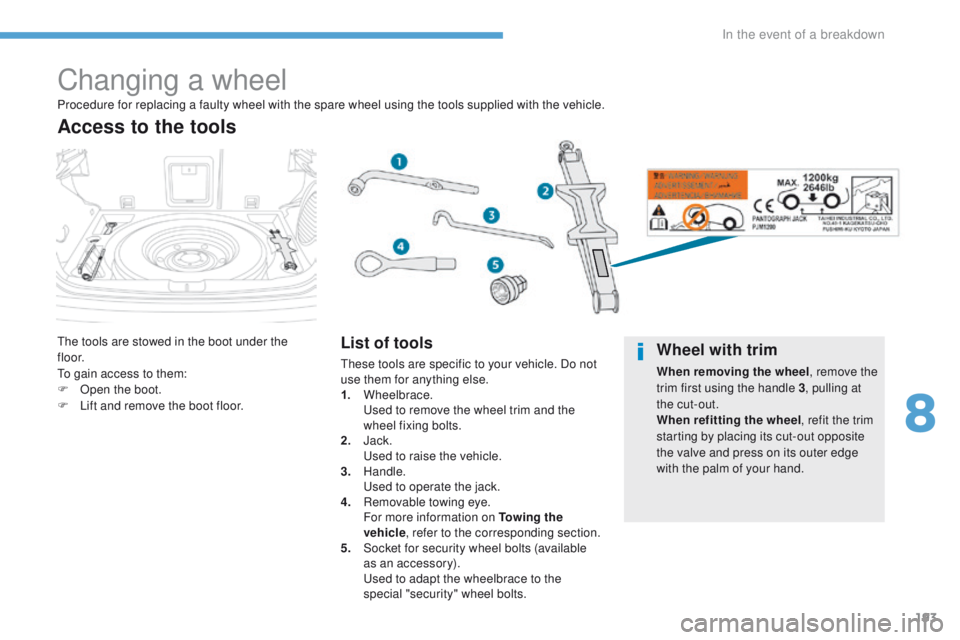
Access to the tools
List of tools
these tools are specific to your vehicle. Do not
use them for anything else.
1.
Wheelbrace.
u
s
ed to remove the wheel trim and the
wheel fixing bolts.
2.
J
ack.
u
se
d to raise the vehicle.
3.
Handle.
u
s
ed to operate the jack.
4.
R
emovable towing eye.
F
or more information on To w i n g the
vehicle , refer to the corresponding section.
5.
S
ocket for security wheel bolts (available
as an accessory).
u
s
ed to adapt the wheelbrace to the
special "security" wheel bolts.
Procedure for replacing a faulty wheel with the spare wheel using the tools supplied with the vehicle.Wheel with trim
When removing the wheel
, remove the
trim first using the handle 3 , pulling at
the cut-out.
When refitting the wheel , refit the trim
starting by placing its cut-out opposite
the valve and press on its outer edge
with the palm of your hand.
8
In the event of a breakdown