rear view mirror PEUGEOT 408 2023 Owners Manual
[x] Cancel search | Manufacturer: PEUGEOT, Model Year: 2023, Model line: 408, Model: PEUGEOT 408 2023Pages: 244, PDF Size: 7.37 MB
Page 4 of 244

2
Contents
■
Overview
■
Eco-driving
1Dashboard instrumentsDriver information 10
Digital instrument panels 10
Warning and indicator lamps 11
Indicators 17
Manual test 19
Total distance recorder 19
Trip computer 19
10-inch touch screen 20
i-Toggles 22
Remotely operable additional functions
(Rechargeable hybrid)
22
2AccessElectronic key with remote control function and
built-in key 24
Proximity Keyless Entry and Start 26
Central locking 28
Back-up procedures 29
Doors 31
Boot 31
Motorised tailgate 31
Alarm 35
Electric windows 37
Sunroof 38
3Ease of use and comfortDriving position 40
Front seats 41
Steering wheel adjustment 45
Heated steering wheel 45
Mirrors 45
Rear bench seat 47
Heating and Ventilation 48
Dual-zone automatic air conditioning 49
Front demisting/defrosting 52
Rear screen demisting/defrosting 52
Heated windscreen 53
Temperature pre-conditioning
(Rechargeable hybrid)
53
Front fittings 54
Courtesy lamps 57
Interior ambient lighting 58
Rear fittings 58
Boot fittings 59
4Lighting and visibilityExterior lighting control stalk 61
Direction indicators 62
Headlamp beam height adjustment 62
Automatic illumination of headlamps 63
Guide-me-home and welcome lighting 63
Automatic lighting systems - General
recommendations
64
Automatic headlamp dipping 64
Peugeot Matrix LED Technology 2.0 65
Night Vision 67
Wiper control stalk 68
Intermittent wipers 70
Automatic wipers 70
Changing a wiper blade 71
5SafetyGeneral safety recommendations 72
Hazard warning lamps 72
Horn 73
Pedestrian horn (Rechargeable hybrid) 73
Emergency or assistance 73
Electronic stability control (ESC) 75
Seat belts 78
Airbags 80
Active bonnet 82
Child seats 83
Deactivating the front passenger airbag 84
ISOFIX child seats 85
i-Size child seats 87
Installing child seats 88
Child lock 90
6DrivingDriving recommendations 91
Starting/switching off the engine 92
Starting rechargeable hybrid vehicles 93
Electric parking brake 94
Automatic gearbox 96
Driving modes 99
Hill start assist 100
Gear shift indicator 101
Stop & Start 101
Tyre under-inflation detection 103
Driving and manoeuvring aids - General
recommendations
104
Steering wheel with hands-on detection 106
Shortcuts for driving aids 106
Road signs recognition 107
Speed limiter 111
Cruise control - Specific recommendations 11 2 CarM an uals 2 .c o m
Page 48 of 244

46
Ease of use and comfort
Adjustment
► Move control A to the right or to the left to
select the corresponding mirror.
►
Move control
B in any of the four directions
to adjust.
►
Return control A
to its central position.
Manual folding
The mirrors can be folded manually (parking
obstruction, narrow garage, etc.).
►
T
urn the mirror towards the vehicle.
Electric folding
Depending on equipment, the door mirrors can
be folded electrically.
► From the inside, with the
ignition on, place control A
in the
central position.
►
Pull control A
backwards.
►
Lock the vehicle from the outside.
If the mirrors are folded using control A,
they will not unfold when the vehicle is
unlocked.
Electric unfolding
► From outside: unlock the vehicle.
► From inside: with the ignition on, place
control
A in the central position and then pull it
rearwards.
The automatic folding/unfolding of the door mirrors is configured in the
Settings
> Vehicle touch screen application.
Before using an automatic car wash, fold the
mirrors.
Automatic tilting in reverse gear
Depending on version, this function allows you to
automatically tilt the mirrors downwards to assist
with parking manoeuvres in reverse gear.
With the engine running, on engaging reverse
gear, the mirror glasses tilt downwards.
They each return to their original positions:
–
A
few seconds after coming out of reverse
gear.
– Once the vehicle speed exceeds 6 mph
(10 km/h).
–
When the engine is switched off.
It can be activated/deactivated in the
Settings > Vehicle touch screen
application.
Electrochrome interior rear
view mirror
The electrochrome system uses a sensor that
detects the level of exterior brightness and that
coming from the rear of the vehicle, in order to
automatically and gradually switch between day
and night usage.
To ensure optimum visibility while manoeuvring, the mirror automatically
brightens when reverse gear is engaged.
The system is deactivated if the load in the
boot exceeds the height of the load space CarM an uals 2 .c o m
Page 65 of 244

63
Lighting and visibility
40 (Initial setting)Driver only or driver + front passenger
1 5 people
2 5 people + load in the boot
3 Driver only + load in the boot
4 5 6 Not used
Automatic Peugeot Matrix
LED Technology 2.0
headlamp adjustment
This system automatically adjusts the height of
the headlamp beams according to the load in the
vehicle.
In the event of a malfunction, this warning
lamp lights up on the instrument panel,
accompanied by the display of a message and
an audible signal.
The system places the headlamp beams in the
lowest position.
Have it checked by a PEUGEOT dealer or a
qualified workshop.
Do not touch the Peugeot Matrix LED
Technology 2.0 headlamps - risk of
electrocution!
Automatic illumination of lamps
With the lighting control stalk in the “ AUTO”
position and if a low level of exterior brightness
is detected by the rain/sunshine sensor, the
sidelamps and dipped beam headlamps are
switched on automatically, without any action on
the part of the driver. They may also come on if
rain is detected, at the same time as automatic
operation of the windscreen wipers.
As soon as the brightness returns to a sufficient
level or after the windscreen wipers are switched
off, the lamps are switched off automatically.
Malfunction
In the event of a malfunction of the rain/
sunshine sensor, the vehicle’s lamps
come on and this warning lamp is displayed on
the instrument panel, accompanied by an
audible signal and/or the display of a message.
Have it checked by a PEUGEOT dealer or a
qualified workshop.
Do not cover the rain/sunshine sensor
located at the top centre of the
windscreen behind the interior rear view
mirror; the associated functions would no
longer be controlled.
In fog or snow, the rain/sunshine sensor
may detect sufficient light. For this
reason, the lighting will not come on
automatically.
The inner surface of the windscreen may become misted up and affect the proper
operation of the rain/sunshine sensor.
In humid and cold weather, demist the
windscreen regularly.
Guide-me-home and
welcome lighting
Guide-me-home lighting
Automatic
With the ring of the lighting control stalk in the
"AUTO” position and when the light is poor, the
dipped beam headlamps come on automatically
when the ignition is switched off.
You can activate/deactivate and adjust the duration of the guide-me-home
lighting in the Settings
> Vehicle touch screen
application.
Manual
CarM an uals 2 .c o m
Page 69 of 244

67
Lighting and visibility
4off from the outside to the inside of the vehicle to
switch to the dipped beams.
Exiting an illuminated area
The lamp segments gradually light up from the
inside to the outside of the vehicle to restore the
main beams.
Pause
If the situation requires a change of headlamp
beam, the driver can take over at any time.
►
Switch the dipped/main beam headlamps
manually to pause the function.
The lighting system changes to "Automatic
illumination of lamps" mode.
►
T
o reactivate the function, manually switch
the dipped/main beam headlamps again.
Malfunction
If a malfunction occurs with the adaptive
headlamp lighting or the camera, this
warning lamp is displayed on the instrument
panel, accompanied by an audible signal and a
message.
Have it checked by a PEUGEOT dealer or a
qualified workshop.
Do not cover the rain/sunshine sensor
located at the top centre of the
windscreen behind the interior rear view
mirror; the associated functions would no
longer be controlled.
Night Vision
This system identifies and signals the presence
of pedestrians and animals in the driver's field
of vision, in low exterior light conditions, using
an infrared camera located at the front of the
vehicle.
Select the "Night vision " display mode if you
want the infrared camera image to be displayed
constantly on the instrument panel. When the
conditions are met, an alert is triggered if there is
a risk of collision.
The permanent
display disappears upon
switching off the ignition or if the conditions are
not met.
This system is a driving aid system that cannot, under any circumstances,
replace the driver's assessment of night-time
visibility and traffic conditions.
In some cases, the differences in temperature
are insufficient and the system may not detect
all dangers or, conversely, it may give false
warnings (e.g. engines of lorries parked by
the side of the road).
Conditions for operation
– With the engine running and in Stop mode
of Stop & Start.
–
V
ery low light conditions with dipped beam
headlamps on and in good working order.
–
T
emperature between -30°C and +28°C.
–
Speed below 99 mph (160
km/h).–
Detection of pedestrians or animals taller than
0.50 m.
Activation/Deactivation
It is configured in the ADAS touch screen
application.
Operation
If the function is selected but the display
on the instrument panel, on the extended
head-up display, and the alerts are not available
(on the "Night vision " page), the indicator lamp
comes on in grey.
If all operating conditions are met, the
indicator lamp comes on in green: the
display on the instrument panel, on the extended
head-up display (with the " Night vision" page
selected) and the triggering of alerts are
available.
If certain operating conditions (speed or
temperature) are not met, the indicator
lamp comes on in orange: only the display on the
instrument panel and on the extended head-up
display are available (on the " Night vision"
page).
Whilst the exterior light is too bright or the dipped
beam headlamps have not been switched on,
the alerts are not available.
CarM an uals 2 .c o m
Page 72 of 244

70
Lighting and visibility
Front intermittent wiping
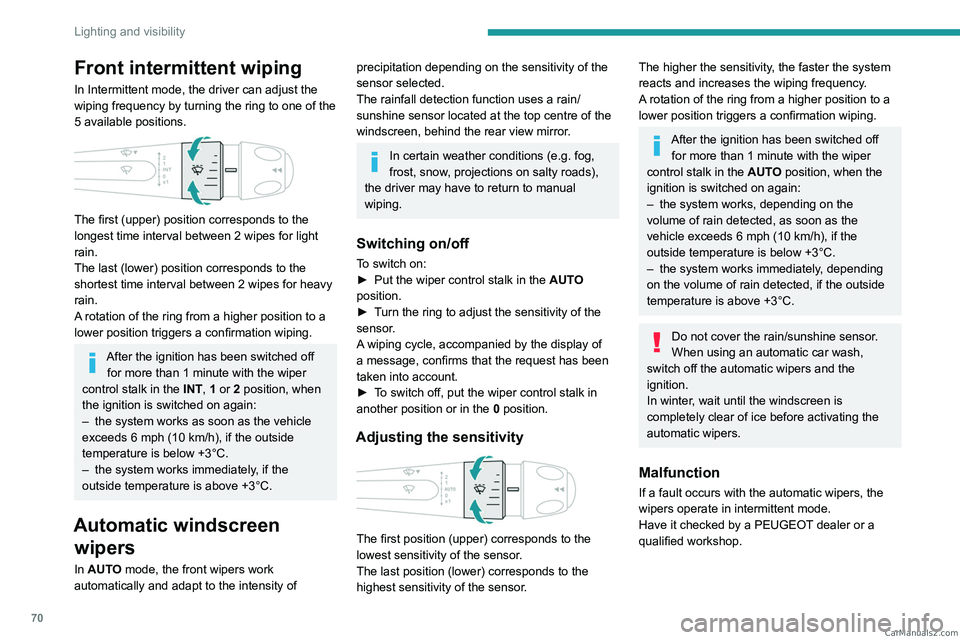
In Intermittent mode, the driver can adjust the
wiping frequency by turning the ring to one of the
5 available positions.
The first (upper) position corresponds to the
longest time interval between 2 wipes for light
rain.
The last (lower) position corresponds to the
shortest time interval between 2 wipes for heavy
rain.
A rotation of the ring from a higher position to a
lower position triggers a confirmation wiping.
After the ignition has been switched off for more than 1 minute with the wiper
control stalk in the INT, 1 or 2
position, when
the ignition is switched on again:
–
the system works as soon as the vehicle
exceeds 6 mph (10 km/h), if the outside
temperature is below +3°C.
–
the system works immediately
, if the
outside temperature is above +3°C.
Automatic windscreen wipers
In AUTO mode, the front wipers work
automatically and adapt to the intensity of
precipitation depending on the sensitivity of the
sensor selected.
The rainfall detection function uses a rain/
sunshine sensor located at the top centre of the
windscreen, behind the rear view mirror.
In certain weather conditions (e.g. fog,
frost, snow , projections on salty roads),
the driver may have to return to manual
wiping.
Switching on/off
To switch on:
► Put the wiper control stalk in the AUT
O
position.
►
T
urn the ring to adjust the sensitivity of the
sensor.
A wiping cycle, accompanied by the display of
a message, confirms that the request has been
taken into account.
►
T
o switch off, put the wiper control stalk in
another position or in the 0 position.
Adjusting the sensitivity
The first position (upper) corresponds to the
lowest sensitivity of the sensor.
The last position (lower) corresponds to the
highest sensitivity of the sensor.
The higher the sensitivity, the faster the system
reacts and increases the wiping frequency.
A rotation of the ring from a higher position to a
lower position triggers a confirmation wiping.
After the ignition has been switched off
for more than 1 minute with the wiper
control stalk in the AUTO position, when the
ignition is switched on again:
–
the system works, depending on the
volume of rain detected, as soon as the
vehicle exceeds 6 mph (10 km/h), if the
outside temperature is below +3°C.
–
the system works immediately
, depending
on the volume of rain detected, if the outside
temperature is above +3°C.
Do not cover the rain/sunshine sensor.
When using an automatic car wash,
switch off the automatic wipers and the
ignition.
In winter, wait until the windscreen is
completely clear of ice before activating the
automatic wipers.
Malfunction
If a fault occurs with the automatic wipers, the
wipers operate in intermittent mode.
Have it checked by a PEUGEOT dealer or a
qualified workshop. CarM an uals 2 .c o m
Page 139 of 244

137
Driving
6
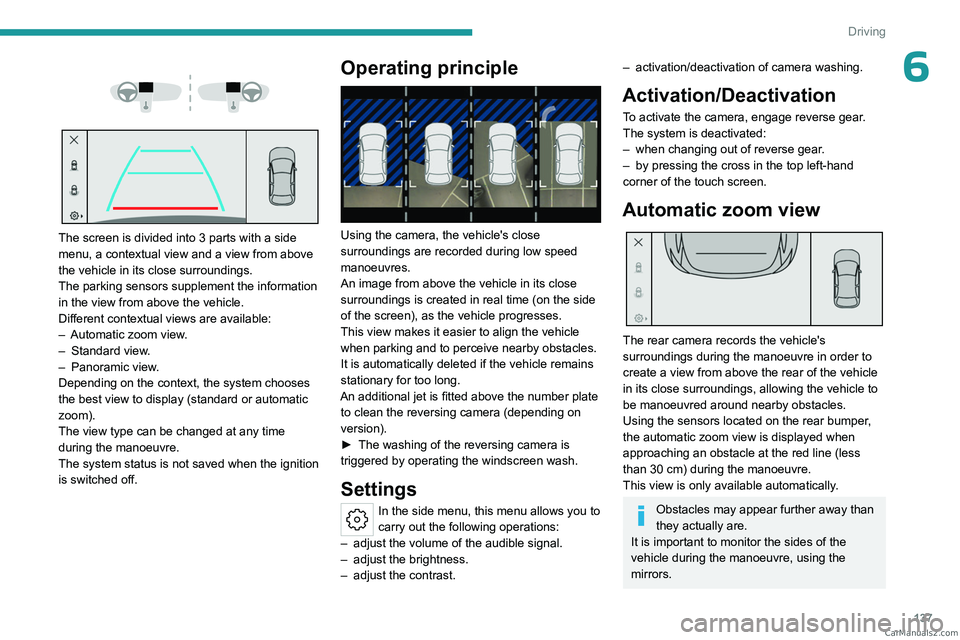
The screen is divided into 3 parts with a side
menu, a contextual view and a view from above
the vehicle in its close surroundings.
The parking sensors supplement the information
in the view from above the vehicle.
Different contextual views are available:
–
Automatic zoom view
.
–
Standard view
.
–
Panoramic view
.
Depending on the context, the system chooses
the best view to display (standard or automatic
zoom).
The view type can be changed at any time
during the manoeuvre.
The system status is not saved when the ignition
is switched off.
Operating principle
Using the camera, the vehicle's close
surroundings are recorded during low speed
manoeuvres.
An image from above the vehicle in its close
surroundings is created in real time (on the side
of the screen), as the vehicle progresses.
This view makes it easier to align the vehicle
when parking and to perceive nearby obstacles.
It is automatically deleted if the vehicle remains
stationary for too long.
An additional jet is fitted above the number plate to clean the reversing camera (depending on
version).
►
The washing of the reversing camera is
triggered by operating the windscreen wash.
Settings
In the side menu, this menu allows you to
carry out the following operations:
–
adjust the volume of the audible signal.
–
adjust the brightness.
–
adjust the contrast.
– activation/deactivation of camera washing.
Activation/Deactivation
To activate the camera, engage reverse gear.
The system is deactivated:
–
when changing out of reverse gear
.
–
by pressing the cross in the top left-hand
corner of the touch screen.
Automatic zoom view
The rear camera records the vehicle's
surroundings during the manoeuvre in order to
create a view from above the rear of the vehicle
in its close surroundings, allowing the vehicle to
be manoeuvred around nearby obstacles.
Using the sensors located on the rear bumper,
the automatic zoom view is displayed when
approaching an obstacle at the red line (less
than 30 cm) during the manoeuvre.
This view is only available automatically.
Obstacles may appear further away than
they actually are.
It is important to monitor the sides of the
vehicle during the manoeuvre, using the
mirrors. CarM an uals 2 .c o m
Page 140 of 244

138
Driving
Parking sensors also provide additional
information about the area around the vehicle.
Standard view
The area behind the vehicle is displayed on the
screen.
The blue lines 1 represent the width of your
vehicle, with the mirrors unfolded; their direction
changes according to the position of the steering
wheel.
The red line 2 represents a distance of 30
cm
from the rear bumper; the two blue lines 3 and 4
represent 1
m and 2 m, respectively.
This view is available automatically or by
selection in the side menu.
Panoramic view
The panoramic view allows you to leave, in
reverse, a parking space by anticipating the
arrival of vehicles, pedestrians or cyclists.
This view is not recommended for carrying out a
complete manoeuvre.
This view is only available by selection in the
side menu.
Visiopark 3
For more information, refer to the
General recommendations on the use
of driving and manoeuvring aids .
This system allows you to view your vehicle's
close surroundings
on the touch screen using
cameras, located at the front and rear of the
vehicle, as well as under the door mirrors.
The screen is divided into 4 parts with two side
menus, a contextual view and a view from above
the vehicle in its close surroundings.
The parking sensors supplement the information
in the view from above the vehicle. Depending on the view angle chosen in the
left-hand side menu, the system provides
specific visual assistance in particular driving
conditions, such as entering a blind intersection
or manoeuvring in areas with reduced visibility.
Different contextual views are available for the
rear or for the front:
–
Automatic zoom view
.
–
Standard view
.
–
Panoramic view
.
Depending on the context, the system chooses
the best view to display (standard or automatic
zoom).
The view type can be changed at any time
during the manoeuvre.
The system status is not saved when the ignition
is switched off.
Operating principle
Reconstructed view
The cameras are activated and a reconstruction
of a view from above your vehicle in its close
surroundings is displayed on the touch screen.
Live view
CarM an uals 2 .c o m
Page 141 of 244

139
Driving
6The front, rear and side views automatically
appear in the view from above the vehicle.
It is also possible to display any live view by
selecting the corresponding zone.
The front view can be selected in forward gear
up to 10 mph (16 km/h).
Installing the very cold climate screen
can alter the image transmitted by the
front camera.
An additional jet is fitted above the number plate to clean the reversing camera (depending on
version).
►
The washing of the reversing camera is
triggered by operating the windscreen wash.
Settings
In the side menu, this menu allows you to
carry out the following operations:
–
adjust the volume of the audible signal.
–
adjust the brightness.
–
adjust the contrast.
–
activation/deactivation of camera washing.
Activation/Deactivation
Automatic
With the rear camera, engine running and
vehicle stationary, rear vision is displayed
automatically if reverse gear is engaged.
With the front camera, engine running and speed
below 10 mph (16 km/h), rear vision is displayed
automatically if a gear is engaged.
Manual
► In the ADAS touch screen application,
select Functions>Panoramic Camera
The system is deactivated:
–
automatically for the rear
, when changing out
of reverse gear.
–
automatically for the front, above
approximately 10 mph (16 km/h).
–
by pressing the cross in the top left-hand
corner of the touch screen.
Automatic zoom view
The front or rear camera records the
surroundings during the manoeuvre to create
a front or rear view from above the vehicle in
its close surroundings, making it possible to
manoeuvre the vehicle around the surrounding
obstacles.
Using the sensors located on the front or
rear
bumper, the automatic zoom view is
displayed when approaching an obstacle at the
red line (less than 30 cm) during the manoeuvre.
This view is only available automatically.
Depending on version, it can be activated/
deactivated in the ADAS application of the touch
screen.
Obstacles may appear further away than
they actually are.
It is important to monitor the sides of the
vehicle during the manoeuvre, using the
mirrors.
Parking sensors also provide additional
information about the area around the vehicle.
Standard view
Depending on the context, the area behind or in
front of your vehicle is displayed on the screen.
The blue lines (at the rear)/orange lines (at the
front) 1 represent the width of your vehicle, with
the mirrors unfolded;
their direction changes
according to the position of the steering wheel.
The red line 2 represents a distance of 30 cm
from the rear or front bumper; the two blue lines
(at the rear)/orange lines (at the front)
3
and
4
represent 1 m and 2 m respectively.
This view is available automatically or by
selection in the left-hand side menu. CarM an uals 2 .c o m
Page 213 of 244

2 11
Alphabetical index
Lamps with Full LED technology 63, 65
Lane assist
114–115, 119–121
Lane keeping assist
131
Leather (care)
167
LEDs - Light-emitting diodes
62, 176
Level, brake fluid
162
Level, engine coolant
18, 162
Level, engine oil
17, 161
Levels and checks
161–162
Level, screenwash fluid
69, 162
Light-emitting diodes - LEDs
62, 176
Lighting, boot
60
Lighting dimmer
19
Lighting, exterior
61, 64
Lighting, guide-me home
63
Lighting, interior
57–58
Lighting, mood
58
Lighting, welcome
63–64
Loading
157–158
Load reduction mode
160
Load space cover
59
Locating your vehicle
25
Locking
25, 27
Locking from the inside
28
Locking the doors
28
Log, alerts
19
Long-distance blind spot monitoring
134
Long objects, transporting
59
Lumbar
42M
Mains socket (domestic network) 146–147
Maintenance (advice)
145, 165
Maintenance, routine
105, 163–164
Manoeuvring aids (recommendations)
104
Map reading lamps
57
Markings, identification
188
Massage function
44
Massage, multi-point
44
Mat
57, 106
Menu, shortcuts
21
Mirror, rear view
46
Mirrors, door
45–46, 52, 134
Mirror, vanity
54
Mobile application
22, 53, 151, 153
Motor, electric
100, 144, 187
Motorised tailgate
31–32, 34
Mountings, ISOFIX
85, 88–89
N
Net, luggage retaining 59
Night vision
67
Night Vision
67
O
Obstacle detection 135
Oil change
161
Oil consumption
161
Oil, engine 161
On-board tools
60, 168–169
Opening the bonnet
160
Opening the boot
26, 31
Opening the doors
26, 31
P
Pads, brake 163
Paint
165, 188
Paint colour code
188
Parcel shelf, rear
59
Parking brake, electric
94–96, 164
Parking (sensors)
135
Parking sensors, audible and visual
135
Parking sensors, front
136
Parking sensors, rear
135
Passenger compartment temperature pre-
conditioning (Rechargeable hybrid)
22, 53
Pedestrian horn (Rechargeable hybrid)
73
Personalisation
10, 22
Plates, identification
188
Port, USB
55, 58
Post Collision Safety Brake
76
Power
18
Power indicator (Rechargeable hybrid)
9, 18
Pressures, tyres
164, 170, 188
Pre-tensioning (seat belts)
79
Profiles
190
Protecting children
80, 83–87
Proximity Keyless Entry and Start
26
Puncture
169–170, 172 CarM an uals 2 .c o m