steering wheel adjustment PEUGEOT 408 2023 Owners Manual
[x] Cancel search | Manufacturer: PEUGEOT, Model Year: 2023, Model line: 408, Model: PEUGEOT 408 2023Pages: 244, PDF Size: 7.37 MB
Page 4 of 244
2
Contents
■
Overview
■
Eco-driving
1Dashboard instrumentsDriver information 10
Digital instrument panels 10
Warning and indicator lamps 11
Indicators 17
Manual test 19
Total distance recorder 19
Trip computer 19
10-inch touch screen 20
i-Toggles 22
Remotely operable additional functions
(Rechargeable hybrid)
22
2AccessElectronic key with remote control function and
built-in key 24
Proximity Keyless Entry and Start 26
Central locking 28
Back-up procedures 29
Doors 31
Boot 31
Motorised tailgate 31
Alarm 35
Electric windows 37
Sunroof 38
3Ease of use and comfortDriving position 40
Front seats 41
Steering wheel adjustment 45
Heated steering wheel 45
Mirrors 45
Rear bench seat 47
Heating and Ventilation 48
Dual-zone automatic air conditioning 49
Front demisting/defrosting 52
Rear screen demisting/defrosting 52
Heated windscreen 53
Temperature pre-conditioning
(Rechargeable hybrid)
53
Front fittings 54
Courtesy lamps 57
Interior ambient lighting 58
Rear fittings 58
Boot fittings 59
4Lighting and visibilityExterior lighting control stalk 61
Direction indicators 62
Headlamp beam height adjustment 62
Automatic illumination of headlamps 63
Guide-me-home and welcome lighting 63
Automatic lighting systems - General
recommendations
64
Automatic headlamp dipping 64
Peugeot Matrix LED Technology 2.0 65
Night Vision 67
Wiper control stalk 68
Intermittent wipers 70
Automatic wipers 70
Changing a wiper blade 71
5SafetyGeneral safety recommendations 72
Hazard warning lamps 72
Horn 73
Pedestrian horn (Rechargeable hybrid) 73
Emergency or assistance 73
Electronic stability control (ESC) 75
Seat belts 78
Airbags 80
Active bonnet 82
Child seats 83
Deactivating the front passenger airbag 84
ISOFIX child seats 85
i-Size child seats 87
Installing child seats 88
Child lock 90
6DrivingDriving recommendations 91
Starting/switching off the engine 92
Starting rechargeable hybrid vehicles 93
Electric parking brake 94
Automatic gearbox 96
Driving modes 99
Hill start assist 100
Gear shift indicator 101
Stop & Start 101
Tyre under-inflation detection 103
Driving and manoeuvring aids - General
recommendations
104
Steering wheel with hands-on detection 106
Shortcuts for driving aids 106
Road signs recognition 107
Speed limiter 111
Cruise control - Specific recommendations 11 2 CarM an uals 2 .c o m
Page 7 of 244
5
Overview
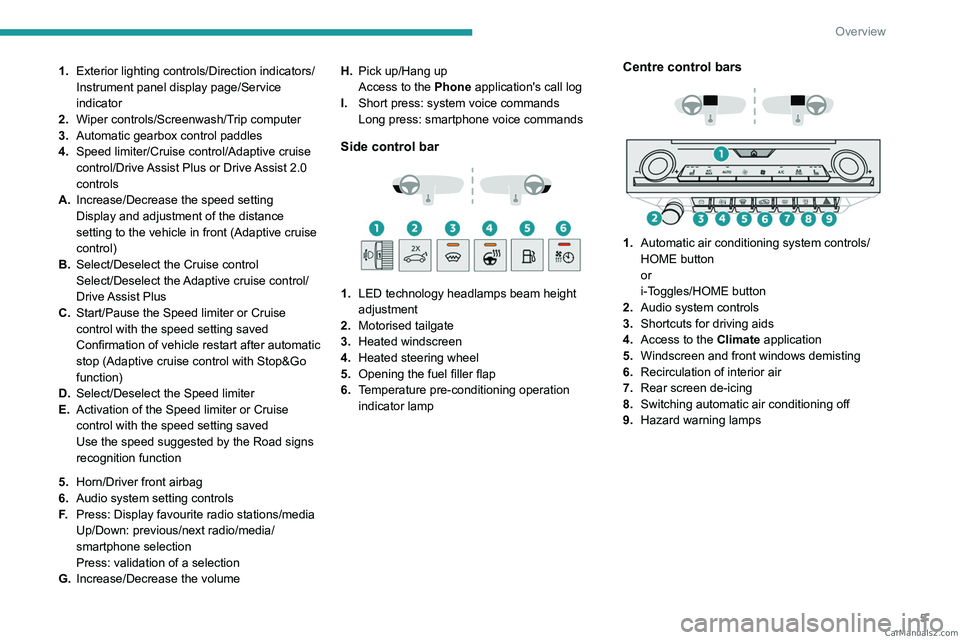
1.Exterior lighting controls/Direction indicators/
Instrument panel display page/Service
indicator
2. Wiper controls/Screenwash/Trip computer
3. Automatic gearbox control paddles
4. Speed limiter/Cruise control/Adaptive cruise
control/Drive Assist Plus or Drive Assist 2.0
controls
A. Increase/Decrease the speed setting
Display and adjustment of the distance
setting to the vehicle in front (Adaptive cruise
control)
B. Select/Deselect the Cruise control
Select/Deselect the Adaptive cruise control/
Drive Assist Plus
C. Start/Pause the Speed limiter or Cruise
control with the speed setting saved
Confirmation of vehicle restart after automatic
stop (Adaptive cruise control with Stop&Go
function)
D. Select/Deselect the Speed limiter
E. Activation of the Speed limiter or Cruise
control with the speed setting saved
Use the speed suggested by the Road signs
recognition function
5. Horn/Driver front airbag
6. Audio system setting controls
F. Press: Display favourite radio stations/media
Up/Down: previous/next radio/media/
smartphone selection
Press: validation of a selection
G. Increase/Decrease the volume H.
Pick up/Hang up
Access to the Phone application's call log
I. Short press: system voice commands
Long press: smartphone voice commands
Side control bar
1. LED technology headlamps beam height
adjustment
2. Motorised tailgate
3. Heated windscreen
4. Heated steering wheel
5. Opening the fuel filler flap
6. Temperature pre-conditioning operation
indicator lamp
Centre control bars
1. Automatic air conditioning system controls/
HOME button
or
i-Toggles/HOME button
2. Audio system controls
3. Shortcuts for driving aids
4. Access to the Climate application
5. Windscreen and front windows demisting
6. Recirculation of interior air
7. Rear screen de-icing
8. Switching automatic air conditioning off
9. Hazard warning lamps CarM an uals 2 .c o m
Page 23 of 244
21
Dashboard instruments
1Recommendations
These recommendations are valid for the touch
screen and for the i-Toggles (depending on
equipment).
The touch screen and the i-Toggles screen are
capacitive touch screens.
Do not use pointed objects on the touch screen.
Do not touch the touch screen with wet hands.
►
Use a soft, clean cloth to clean the touch
screen.
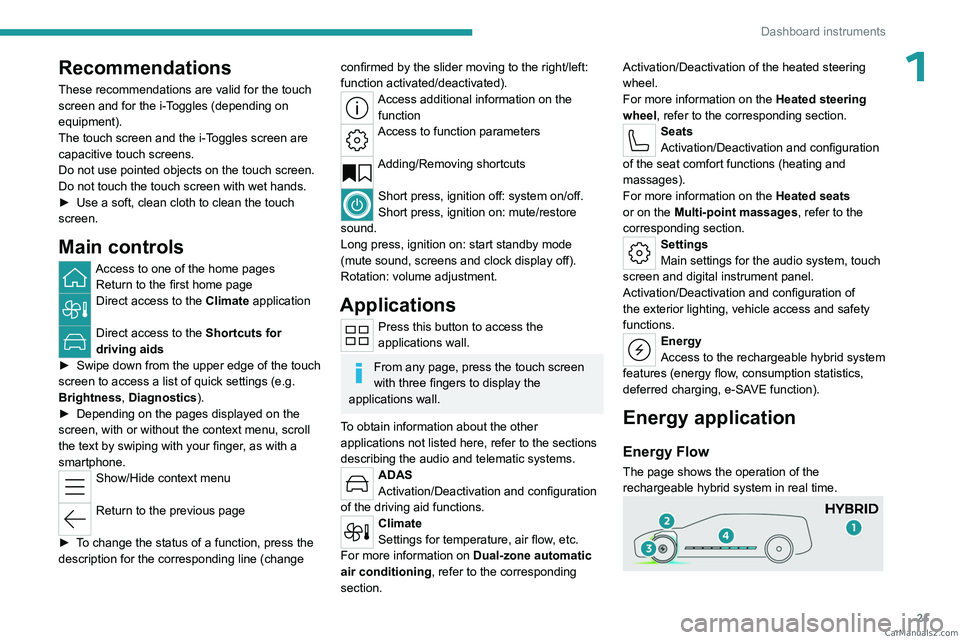
Main controls
Access to one of the home pages Return to the first home page
Direct access to the Climate application
Direct access to the Shortcuts for
driving aids
►
Swipe down from the upper edge of the touch
screen to access a list of quick settings (e.g.
Brightness
, Diagnostics).
►
Depending on the pages displayed on the
screen, with or without the context menu, scroll
the text by swiping with your finger
, as with a
smartphone.
Show/Hide context menu
Return to the previous page
►
T
o change the status of a function, press the
description for the corresponding line (change
confirmed by the slider moving to the right/left:
function activated/deactivated).
Access additional information on the function
Access to function parameters
Adding/Removing shortcuts
Short press, ignition off: system on/off.
Short press, ignition on: mute/restore
sound.
Long press, ignition on: start standby mode
(mute sound, screens and clock display off).
Rotation: volume adjustment.
Applications
Press this button to access the
applications wall.
From any page, press the touch screen
with three fingers to display the
applications wall.
To obtain information about the other
applications not listed here, refer to the sections
describing the audio and telematic systems.
ADAS
Activation/Deactivation and configuration
of the driving aid functions.
Climate
Settings for temperature, air flow, etc.
For more information on Dual-zone automatic
air conditioning , refer to the corresponding
section. Activation/Deactivation of the heated steering
wheel.
For more information on the
Heated steering
wheel, refer to the corresponding section.
Seats
Activation/Deactivation and configuration
of the seat comfort functions (heating and
massages).
For more information on the Heated seats
or on the Multi-point massages, refer to the
corresponding section.
Settings
Main settings for the audio system, touch
screen and digital instrument panel.
Activation/Deactivation and configuration of
the exterior lighting, vehicle access and safety
functions.
Energy
Access to the rechargeable hybrid system
features (energy flow, consumption statistics,
deferred charging, e
- SAVE function).
Energy application
Energy Flow
The page shows the operation of the
rechargeable hybrid system in real time. CarM an uals 2 .c o m
Page 42 of 244

40
Ease of use and comfort
Driving position
Correct seating position
Adopting a good driving position contributes to
improving driver comfort and protection.
It also optimises interior and exterior visibility as
well as access to controls.
Certain seat adjustments described in this
section depend on the trim level and the country
in which the vehicle is sold.
Driver’s side
Sit fully back in the seat with your pelvis, back
and shoulders in contact with the seat backrest.
Adjust the seat cushion height so that your eyes
are level with the centre of the windscreen.
The head should be at a minimum distance of
10 cm from the roof.
Adjust the longitudinal position of the seat so
that you can fully depress the pedals with legs
slightly flexed.
The distance between the knees and the
dashboard should be at least 10 cm, for easy
access to the dashboard controls.
Adjust the backrest angle to as vertical a position
as possible; never tilt it more than 25°.
Adjust the head restraint so that its upper edge is
level with the top of the head.
Adjust the length of the seat cushion to support
your thighs.
Adjust the lumbar support so that it conforms to
the shape of the spine.
Adjust the steering wheel reach so that it is at
least 25
cm from the sternum and you can hold it
with your arms slightly bent.
Adjust the steering wheel height so that it does
not obstruct the information displayed on the
instrument panel.
As a safety precaution, adjust the seats only when the vehicle is stationary.
Electrically-adjustable seats
Switch the ignition on to enable the
adjustments to be made.
Passenger’s side
Sit fully back in the seat with the pelvis, back and
shoulders in contact with the seat backrest.
Adjust the longitudinal position of the seat so that
you are at a distance of at least 25
cm from the
dashboard.
Adjust the head restraint so that its upper edge is
level with the top of the head.
Before moving off
Adjust the interior and exterior door mirrors to
reduce blind spots.
Fasten the seat belt: place the diagonal belt in
the middle of the shoulder and adjust the lap belt
so that it is tightened across the pelvis.
Ensure that all passengers have fastened their
seat belts correctly.
Electric door mirrors
Switch the ignition on to enable the
adjustments to be made. CarM an uals 2 .c o m
Page 43 of 244

41
Ease of use and comfort
3When driving
Maintain a good driving position and hold the
steering wheel with both hands at the 'quarter to
three' position, so that you can easily and quickly
reach the controls behind and near the steering
wheel.
Never adjust the seats or steering wheel
when driving.
Always keep your feet on the floor.
Front seats
Before moving the seat backwards,
ensure that there is no person or object
that might prevent the full travel of the seat.
There is a risk of trapping or pinching
passengers if present in the rear seats or of
jamming the seat if large objects are placed
on the floor behind the seat.
Front head restraints
Adjusting the height
Upwards:
► Pull the head restraint up to the desired
position; you can feel the head restraint clicking
into position.
Downwards:
►
Depending on equipment, press lug A
or
button B and then, while still pressing, lower the
head restraint.
The head restraint is correctly adjusted when its upper edge is level with the top
of the head.
Removing a head restraint
► Pull the head restraint fully up.
► Press lug A to release the head restraint and
raise it fully.
►
Stow the head restraint securely
.
Refitting a head restraint
► Insert the head restraint rods into the guides
in the corresponding seat backrest.
►
Push the head restraint fully down.
►
Press the lug
A to release the head restraint
and push it down.
►
Adjust the height of the head restraint.
Never drive with the head restraints
removed; they should be in place and
adjusted for the occupant of the seat.
Manual adjustments
Longitudinal
► Raise the control bar and slide the seat
forwards or backwards.
►
Release the control bar to lock the seat in
position on one of the notches. CarM an uals 2 .c o m
Page 47 of 244

45
Ease of use and comfort
3Steering wheel
adjustment
► When stationary, pull the control to release
the steering wheel.
►
Adjust the height and reach to suit your
driving position.
►
Push the control to lock the steering wheel.
For safety reasons, these adjustments
must only be carried out with the vehicle
stationary.
PEUGEOT i-Cockpit®
The instrument panel information is
visible above the steering wheel, for greater
safety and driving comfort.
Adjust the steering wheel height so that it
does not obstruct the instrument panel.
Heated steering wheel
In cold weather, this function heats the circular
part of the steering wheel. It can be activated when the outside temperature
is below 20°C.
Without
i-Toggles
► With the engine running, press this button to
activate/deactivate the function (confirmed by the
indicator lamp coming on/going out).
The system is automatically deactivated every
time the engine is switched off.
W
ith i-Toggles
In the Climate touch screen application,
select the Seats and Steering Wheel
tab.
Press to activate/deactivate the function.
The function is memorised each time the engine
is switched off.
Mirrors
Door mirrors
Demisting/Defrosting
The demisting/defrosting of the door mirrors works with the demisting/
defrosting of the rear screen.
For more information on Rear screen
demisting/defrosting , refer to the
corresponding section.
As a safety measure, the mirrors should be adjusted to reduce the "blind spots".
The objects that you see in the mirrors are
in fact closer than they appear. Take this
into account in order to correctly judge the
distance of vehicles approaching from behind. CarM an uals 2 .c o m
Page 106 of 244
104
Driving
audible signal and, depending on equipment, the
display of a message.
►
Reduce speed immediately
, avoid excessive
steering movements and avoid sudden braking.
►
Stop the vehicle as soon as it is safe to do
so.
The loss of pressure detected may not always cause visible deformation of the
tyre.
Do not rely on just a visual check.
►
Using a compressor
, such as the one in
the temporary puncture repair kit, check the
pressures of all four tyres when cold.
►
If it is not possible to carry out this check
immediately
, drive carefully at reduced speed.
►
In the event of a puncture, use the
temporary puncture repair kit or the spare wheel
(depending on equipment).
Driving too slowly may not ensure
optimum monitoring.
The alert is not immediately triggered in the
event of a sudden loss of pressure or tyre
blow-out. This is because analysis of the
values read by the wheel's speed sensors
can take several minutes.
The alert may be delayed at speeds below
25 mph (40 km/h), or when adopting a sporty
driving mode.
The alert is kept active until the system is reinitialised.
Reinitialisation
► The system must be reinitialised after any
adjustment to the pressure of one or more tyres,
and after changing one or more wheels.
Before reinitialising the system, make
sure that the pressures of the four tyres
are correct for the conditions of use of the
vehicle and conform to the values written on
the tyre pressure label.
Check the pressures of the four tyres before
performing the reinitialisation.
The system does not advise if a pressure is
incorrect at the time of reinitialisation.
With the vehicle stationary, the system
can be reinitialised in the
Settings>Vehicle touch screen application.
►
Then select
Safety > Tire Pressure Setup.
►
Press
YES to confirm.
The
reinitialisation is confirmed by the display of
a message and an audible signal.
Malfunction
In the event of a malfunction,
these warning lamps light up on
the instrument panel.
A message appears, accompanied by an audible
signal.
In this case, the tyre under-inflation monitoring
function is no longer performed.
Have it checked by a PEUGEOT dealer or a
qualified workshop.
Non-standard or 'space-saver' spare
wheel
The use of this type of spare wheel may
suspend tyre pressure monitoring.
In this case, the malfunction warning lamp
comes on and disappears once the wheel
has been replaced by one of uniform size (the
same as the others), the pressure readjusted
and the
reinitialisation carried out.
Driving and manoeuvring
aids - General
recommendations
Driving and manoeuvring aids cannot, in
any circumstances, replace the need for
vigilance on the part of the driver.
The driver must comply with the Highway
Code, must remain in control of the vehicle in
all circumstances and must be able to retake
control of it at all times. The driver must adapt
the speed to climatic conditions, traffic and
the state of the road.
It is the driver's responsibility to constantly
monitor traffic conditions, assess the distance
and relative speed of other vehicles, and
anticipate their manoeuvres before using the
direction indicator and changing lanes.
These systems do not make it possible to
exceed the laws of physics. CarM an uals 2 .c o m
Page 135 of 244

133
Driving
6Function statusDisplayComments
ON
"Hold the steering
wheel" or "Stay in lane" (depending on version) If, while correcting the trajectory, the system determines that the correction will not be
enough and that a solid line will be crossed: the driver is warned that \
they must provide
additional trajectory adjustment.
If the steering wheel is not held properly, an audible warning sounds, accompanied by
a message, until the trajectory correction is completed or the driver ha\
s grasped the
steering wheel correctly.
The duration of audible warnings will increase if multiple corrections a\
re performed
in quick succession. The warning will become continuous, persisting until the driver
responds.
Operating limits
The system goes into standby automatically in
the following cases:
–
ESC deactivated or operation triggered.
–
Speed below 40 mph (65
km/h) or greater
than 112 mph (180
km/h).
–
Electrical connection to a trailer
.
–
Use of a"space-saver" spare wheel detected
(as detection is not immediate, deactivation of
the system is recommended).
–
Dynamic driving style detected, pressure on
the brake or accelerator pedal.
–
Driving over lane markings.
–
Activation
of the direction indicators.
–
Crossing the inside line on a bend.
–
Driving on a tight bend.
–
Inactivity by the driver detected during
correction.
–
Narrow lane detected.
The following situations may interfere with the operation of the system or
prevent it from working:
–
Insufficient contrast between the road
surface and the verge or hard shoulder
(e.g.
shade).
–
Lane markings worn, hidden (snow
, mud)
or multiple (roadworks, etc.),
–
Close proximity to the vehicle in front (lane
markings may not be detected).
–
Roads that are narrow
, winding.
Risk of undesirable operation
The system should be deactivated in the
following situations:
–
When changing a wheel or working near a
wheel.
–
T
owing or with a bicycle carrier on a towing
device, especially with trailer not plugged in or
not approved. –
Road in poor condition, unstable or with very
poor grip (risk of aquaplaning, snow
, ice).
–
Adverse weather conditions.
–
Driving on racing circuits.
–
Driving on a rolling road.
Deactivation/Activation
By default, the system is automatically activated
at every engine start.
It is configured in the ADAS touch screen
application.
or
Direct access to the Shortcuts for driving aids .
Deactivation is confirmed by the
illumination of this indicator lamp on the
instrument panel.
Malfunction
In the event of a malfunction,
these warning lamps light up on CarM an uals 2 .c o m
Page 212 of 244
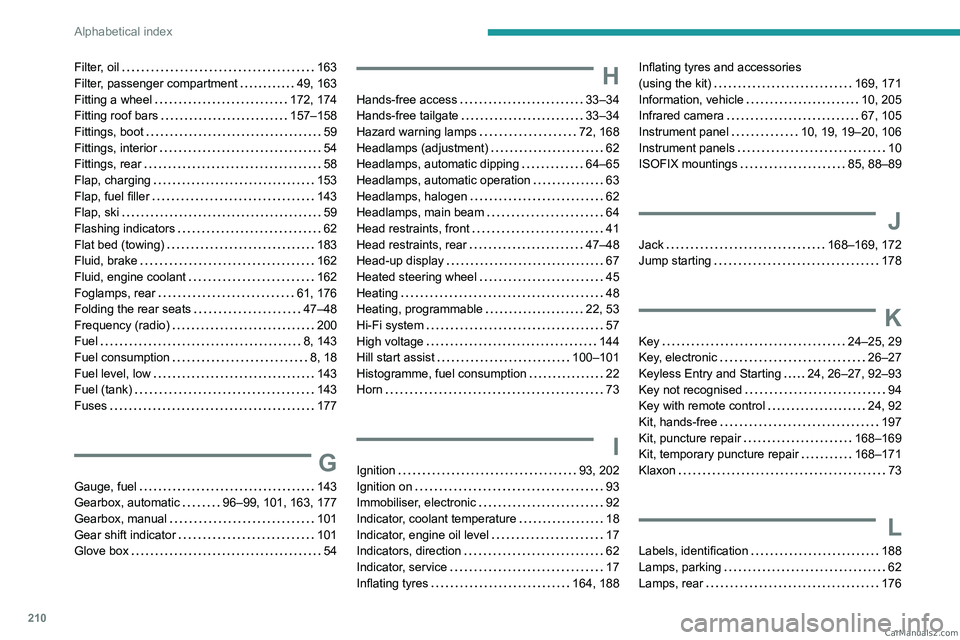
210
Alphabetical index
Filter, oil 163
Filter, passenger compartment
49, 163
Fitting a wheel
172, 174
Fitting roof bars
157–158
Fittings, boot
59
Fittings, interior
54
Fittings, rear
58
Flap, charging
153
Flap, fuel filler
143
Flap, ski
59
Flashing indicators
62
Flat bed (towing)
183
Fluid, brake
162
Fluid, engine coolant
162
Foglamps, rear
61, 176
Folding the rear seats
47–48
Frequency (radio)
200
Fuel
8, 143
Fuel consumption
8, 18
Fuel level, low
143
Fuel (tank)
143
Fuses
177
G
Gauge, fuel 143
Gearbox, automatic
96–99, 101, 163, 177
Gearbox, manual
101
Gear shift indicator
101
Glove box
54
H
Hands-free access 33–34
Hands-free tailgate
33–34
Hazard warning lamps
72, 168
Headlamps (adjustment)
62
Headlamps, automatic dipping
64–65
Headlamps, automatic operation
63
Headlamps, halogen
62
Headlamps, main beam
64
Head restraints, front
41
Head restraints, rear
47–48
Head-up display
67
Heated steering wheel
45
Heating
48
Heating, programmable
22, 53
Hi-Fi system
57
High voltage
144
Hill start assist
100–101
Histogramme, fuel consumption
22
Horn
73
I
Ignition 93, 202
Ignition on
93
Immobiliser, electronic
92
Indicator, coolant temperature
18
Indicator, engine oil level
17
Indicators, direction
62
Indicator, service
17
Inflating tyres
164, 188
Inflating tyres and accessories
(using the kit)
169, 171
Information, vehicle
10, 205
Infrared camera
67, 105
Instrument panel
10, 19, 19–20, 106
Instrument panels
10
ISOFIX mountings
85, 88–89
J
Jack 168–169, 172
Jump starting
178
K
Key 24–25, 29
Key, electronic
26–27
Keyless Entry and Starting
24, 26–27, 92–93
Key not recognised
94
Key with remote control
24, 92
Kit, hands-free
197
Kit, puncture repair
168–169
Kit, temporary puncture repair
168–171
Klaxon
73
L
Labels, identification 188
Lamps, parking
62
Lamps, rear
176 CarM an uals 2 .c o m
Page 214 of 244
212
Alphabetical index
R
Radar (warnings) 105
Radio
199–200
Reading lamps
57
Reading lamps, touch-sensitive
58
READY (warning lamp)
160
Rear bench seat
47
Rear cross traffic alert
140
Rear screen (demisting)
52
Rechargeable
hybrid engine
9, 21, 160, 183, 187
Rechargeable
hybrid system
6, 9, 21, 93, 100, 144
Recharging the battery
177–178, 181
Recharging the traction battery
148
Recharging the traction battery
(Rechargeable hybrid)
144, 151–153
Recirculation, air
51–52
Recorder, trip distance
19
Reduction of electrical load (mode)
160
Regenerative braking (deceleration by
engine braking)
98
Reinitialising the remote control
30
Reinitialising the under-inflation detection
system
104
Reminder, lighting on
61
Remote control
24–27, 29
Remote functions
153
Remotely operable functions (Rechargeable
hybrid)
22, 53
Removing a wheel
172–174
Removing the mat
57
Replacing bulbs 175–176
Replacing fuses
177
Replacing the air filter
163
Replacing the oil filter
163
Replacing the passenger compartment
filter
163
Reservoir, screenwash
162
Resetting the trip
19–20
Reversing camera
105, 136–138
Reversing lamps
176
Roof bars
157–158
Roof, opening
38
S
Safety, children 80, 83–87
Screen, cold climate
158
Screenwash
69
Screenwash, front
69
Seat angle
42
Seat belts
78–79, 85
Seat belts, rear
78
Seats, electric
42–43
Seats, front
41–43
Seats, heated
43–44
Seats, rear
47–48, 83
Selector, gear
96–99
Semi-automatic lane changing
122
Sensors (warnings)
105
Serial number, vehicle
188
Servicing
17, 163–164
Settings, equipment
10, 21
Shield, snow 158
Sidelamps
62, 176
Silent vehicle warning sound (Rechargeable
hybrid)
73
Smartphone
22–23, 55
Snow chains
103, 159
Snow screen
158
Socket, 12 V
54
Socket, 12 V accessory
54, 60
Speakers
57
Speed limiter
109–112
Speed limit recognition
107, 109
Speedometer
10, 106
Sport mode
99–100
Spotlamps, side
64
Stability control (ESC)
75, 77
Starting/Stopping the vehicle
92
Starting the engine
92–93
Starting the vehicle
93, 98
Starting using another battery
94, 178
State of charge, battery
21
Station, radio
199–200
Stay, engine bonnet
160
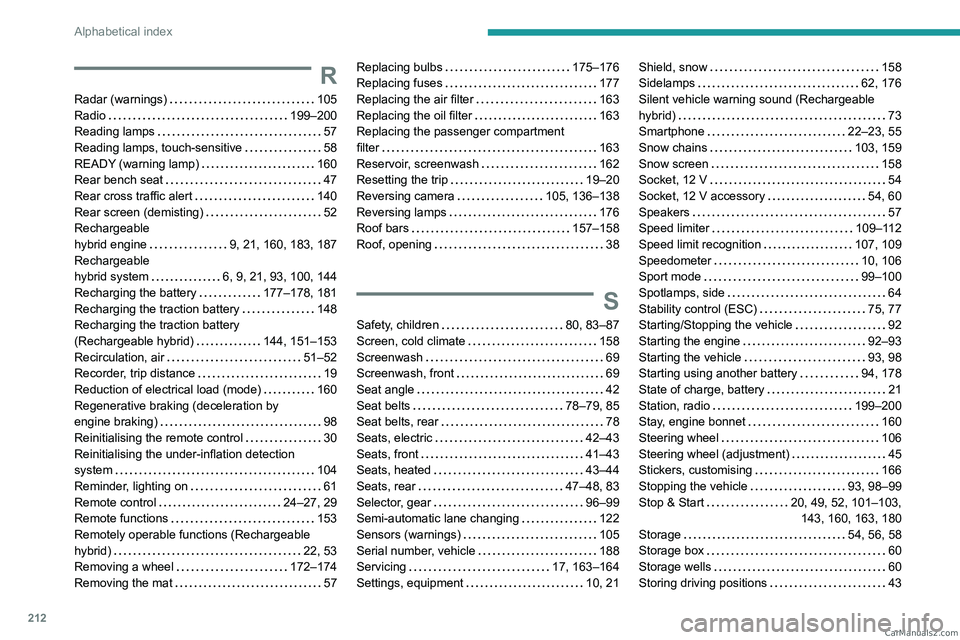
Steering wheel
106
Steering wheel (adjustment)
45
Stickers, customising
166
Stopping the vehicle
93, 98–99
Stop & Start
20, 49, 52, 101–103,
143, 160, 163, 180
Storage
54, 56, 58
Storage box
60
Storage wells
60
Storing driving positions
43 CarM an uals 2 .c o m