door lock Peugeot 508 RXH 2016 Owner's Guide
[x] Cancel search | Manufacturer: PEUGEOT, Model Year: 2016, Model line: 508 RXH, Model: Peugeot 508 RXH 2016Pages: 364, PDF Size: 10.31 MB
Page 98 of 364
96
508_en_Chap03_ergonomie-et-confort_ed01-2016
F Switch off the demist /defrost of the rear screen and door mirrors as
soon as it is no longer needed as
lower current consumption results
in reduced fuel consumption.
Front demist -
defrost Rear screen demist
-
defrost
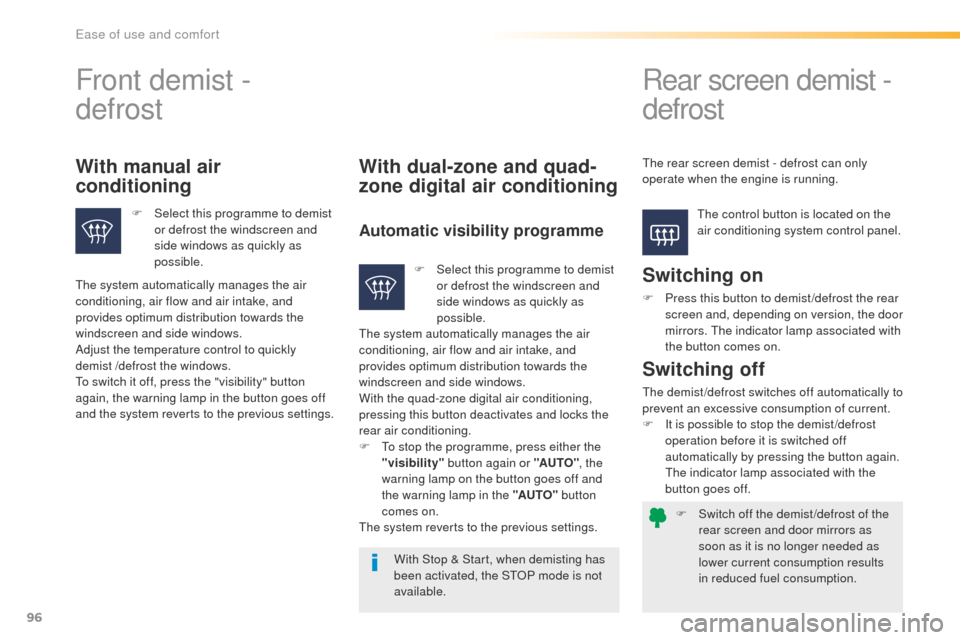
the control button is located on the
air conditioning system control panel.
With manual air
conditioning
F Select this programme to demist
or defrost the windscreen and
side windows as quickly as
possible.
With dual-zone and quad-
zone digital air conditioning
Automatic visibility programme
Switching on
F Press this button to demist /defrost the rear screen and, depending on version, the door
mirrors.
t
h
e indicator lamp associated with
the button comes on.
With Stop & Start, when demisting has
been activated, the S
tO
P mode is not
available.
Switching off
the demist /defrost switches off automatically to
prevent an excessive consumption of current.
F
I
t is possible to stop the demist /defrost
operation before it is switched off
automatically by pressing the button again.
th
e indicator lamp associated with the
button goes off.
th
e system automatically manages the air
conditioning, air flow and air intake, and
provides optimum distribution towards the
windscreen and side windows.
Adjust the temperature control to quickly
demist
/defrost the windows.to s
witch it off, press the "visibility" button
again, the warning lamp in the button goes off
and the system reverts to the previous settings. F
S
elect this programme to demist
or defrost the windscreen and
side windows as quickly as
possible.
th
e system automatically manages the air
conditioning, air flow and air intake, and
provides optimum distribution towards the
windscreen and side windows.
With the quad-zone digital air conditioning,
pressing this button deactivates and locks the
rear air conditioning.
F
t
o s
top the programme, press either the
"visibility" button again or "AUTO" , the
warning lamp on the button goes off and
the warning lamp in the "AUTO" button
comes on.
the
system reverts to the previous settings.
th
e rear screen demist - defrost can only
operate when the engine is running.
ease of use and comfort
Page 104 of 364
102
508_en_Chap03_ergonomie-et-confort_ed01-2016
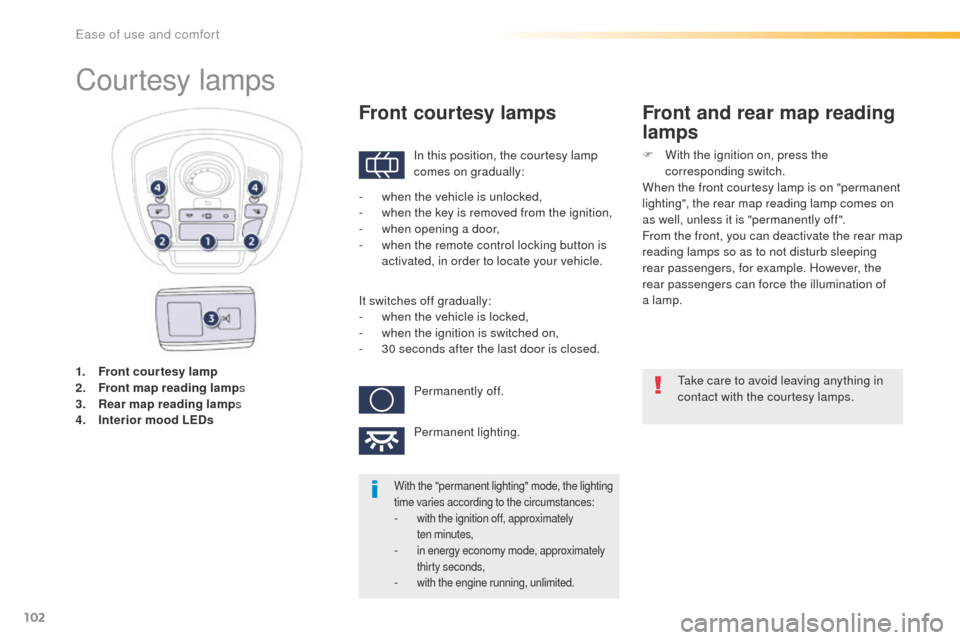
1. Front courtesy lamp
2. Front map reading lamp s
3.
R
ear map reading lamp s
4.
I
nterior mood LEDs
Courtesy lamps
In this position, the courtesy lamp
comes on gradually:
Front courtesy lamps
take care to avoid leaving anything in
contact with the courtesy lamps.
With the "permanent lighting" mode, the lighting
time varies according to the circumstances:
- with the ignition off, approximately ten minutes,
- in energy economy mode, approximately thirty seconds,
- with the engine running, unlimited.
- when the vehicle is unlocked,
- w hen the key is removed from the ignition,
-
w
hen opening a door,
-
w
hen the remote control locking button is
activated, in order to locate your vehicle.
It switches off gradually:
-
w
hen the vehicle is locked,
-
w
hen the ignition is switched on,
-
3
0 seconds after the last door is closed.Permanently off.
Permanent lighting.
Front and rear map reading
lamps
F With the ignition on, press the corresponding switch.
When the front courtesy lamp is on "permanent
lighting", the rear map reading lamp comes on
as well, unless it is "permanently off ".
From the front, you can deactivate the rear map
reading lamps so as to not disturb sleeping
rear passengers, for example. However, the
rear passengers can force the illumination of
a lamp.
ease of use and comfort
Page 127 of 364
125
508_en_Chap04_eclairage-et-visibilite_ed01-2016
Exterior welcome lighting
Remote switching on of the lighting makes your
approach to the vehicle easier in poor light. th e
lighting comes on or not depending on the the
level of ambient light detected by the sunshine
sensor.
Switching off
the exterior welcome lighting
switches off automatically after a set
time, when the ignition is switched on
or on locking the vehicle.
Door mirror spotlamps
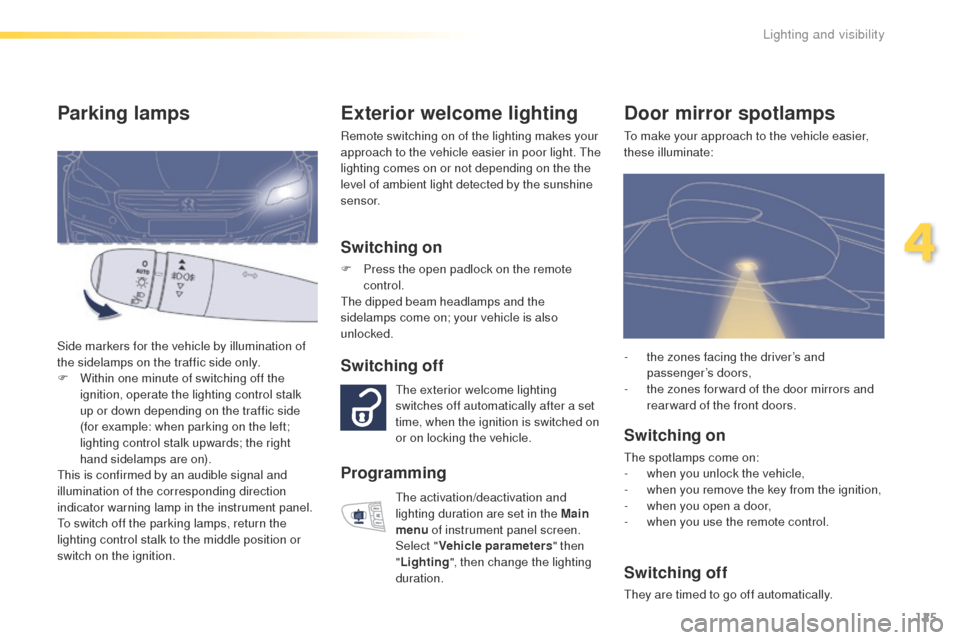
to make your approach to the vehicle easier,
these illuminate:
Switching on
the spotlamps come on:
- w hen you unlock the vehicle,
-
w
hen you remove the key from the ignition,
-
w
hen you open a door,
-
w
hen you use the remote control.
Switching off
they are timed to go off automatically. -
t
he zones facing the driver’s and
passenger’s doors,
-
t
he zones for ward of the door mirrors and
rear ward of the front doors.
Switching on
F Press the open padlock on the remote control.
th
e dipped beam headlamps and the
sidelamps come on; your vehicle is also
unlocked.
Parking lamps
Side markers for the vehicle by illumination of
the sidelamps on the traffic side only.
F
W
ithin one minute of switching off the
ignition, operate the lighting control stalk
up or down depending on the traffic side
(for example: when parking on the left;
lighting control stalk upwards; the right
hand sidelamps are on).
th
is is confirmed by an audible signal and
illumination of the corresponding direction
indicator warning lamp in the instrument panel.
to s
witch off the parking lamps, return the
lighting control stalk to the middle position or
switch on the ignition.
Programming
the activation/deactivation and
lighting duration are set in the Main
menu of instrument panel screen.
Select " Vehicle parameters " then
" Lighting ", then change the lighting
duration.
4
Lighting and visibility
Page 159 of 364
157
508_en_Chap05_securite_ed01-2016
Child seats
the incorrect installation of a child seat in a
vehicle compromises the child's protection in
the event of an accident.
Check that there is no seat belt or seat belt
buckle under the child seat as this could
destabilise it.
Remember to fasten the seat belts or the
child seat harnesses keeping the slack in
relation to the child's body to a minimum,
even for short journeys.
For the installation of a child seat using a
seat belt, ensure that this is well tensioned
on the child seat and that it is holding the
child seat firmly against the seat of your
vehicle. If your front passenger seat is
adjustable, move it forward if necessary.
At the rear seats, always leave sufficient
space between the front seat and:
-
a r
ear ward facing child seat,
-
t
he feet of a child seated in a for ward
facing child seat.
For this, move the front seat for ward and if
necessary straighten its backrest.
Recommendations
Installing a booster
cushion
As a safety precaution, do not leave:
- o ne or more children alone and
unsupervised in a vehicle,
-
a c
hild or an animal in a vehicle which
is exposed to the sun, with the windows
closed,
-
t
he keys within reach of children inside
the vehicle.
to p
revent accidental opening of the doors,
use the child lock.
ta
ke care not to open the rear windows by
more than one third.
to p
rotect young children from the rays of
the sun, fit side blinds on the rear windows.
th
e chest part of the seat belt must be
positioned on the child's shoulder without
touching the neck.
en
sure that the lap part of the seat belt
passes correctly over the child's thighs.
P
e
uge
Ot
recommends the use of a booster
seat which has a back, fitted with a seat belt
guide at shoulder level.
For optimum installation of the forward facing
child seat, ensure that the back of the child
seat is as close as possible to the backrest
of the vehicle's seat, or in contact if possible.
th
e head restraint must be removed before
installing a child seat with a backrest on the
passenger seat.
en
sure that the head restraint is stowed or
attached securely so that it is not thrown
around the vehicle in the event of sharp
braking.
Refit the head restraint as soon as the child
seat is removed.Children at the front
the legislation on carrying a child on the
front passenger seat is specific to each
country. Refer to the legislation in force in
the country in which you are driving.
Deactivate the passenger's front airbag
when a rear ward facing child seat is installed
on the front passenger seat. Otherwise, the
child would risk being seriously injured or
killed if the airbag were deployed.
5
Safety
Page 160 of 364
158
508_en_Chap05_securite_ed01-2016
electric child lock
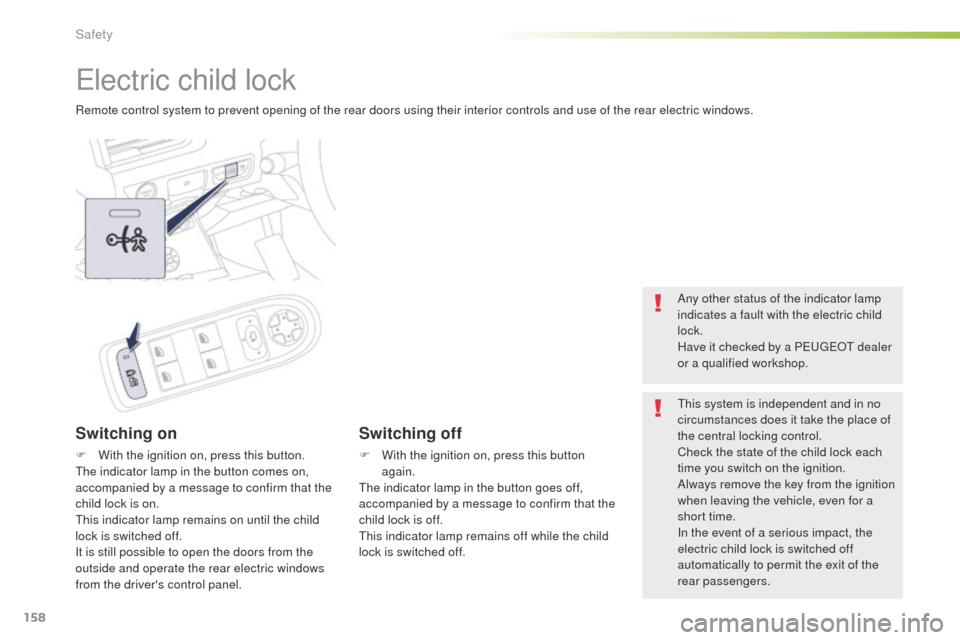
Remote control system to prevent opening of the rear doors using their interior controls and use of the rear electric windows.
Switching on
F With the ignition on, press this button.the indicator lamp in the button comes on,
accompanied by a message to confirm that the
child lock is on.
th
is indicator lamp remains on until the child
lock is switched off.
It is still possible to open the doors from the
outside and operate the rear electric windows
from the driver's control panel.
Switching off
F With the ignition on, press this button again.
th
e indicator lamp in the button goes off,
accompanied by a message to confirm that the
child lock is off.
th
is indicator lamp remains off while the child
lock is switched off. Any other status of the indicator lamp
indicates a fault with the electric child
lock.
Have it checked by a P
e
uge
Ot
dealer
or a qualified workshop.
th
is system is independent and in no
circumstances does it take the place of
the central locking control.
Check the state of the child lock each
time you switch on the ignition.
Always remove the key from the ignition
when leaving the vehicle, even for a
short time.
In the event of a serious impact, the
electric child lock is switched off
automatically to permit the exit of the
rear passengers.
Safety
Page 166 of 364
164
508_en_Chap06_conduite_ed01-2016
Switching off
Never switch off the ignition until the vehicle
has been brought to a complete stop.
to facilitate unlocking of the steering
wheel, it is recommended that you
place the wheels in the straight ahead
position before switching off the engine.When leaving the vehicle, remove the
key and lock the doors.
F
C
heck that the parking brake is correctly
applied, particularly when parking on a
slope.
●
W
ith a manual parking brake, the
lever must be pulled up.
●
W
ith an electric parking brake,
the indicator lamp in the control
lever must be on. Switching off the engine leads to a loss
of braking assistance.
Key left in the ignition switch
there is an audible signal on opening
the driver's door if the key has been left
in the ignition switch. Avoid attaching heavy objects to the
key, which would weigh down on its
blade in the ignition switch and could
cause a malfunction.
F
Imm
obilise the vehicle.
F
t
u
rn the key fully towards you to position 1
(Stop) .
F
R
emove the key from the ignition switch.
F
t
o l
ock the steering column, turn the
steering wheel until it locks.
Driving
Page 168 of 364
166
508_en_Chap06_conduite_ed01-2016
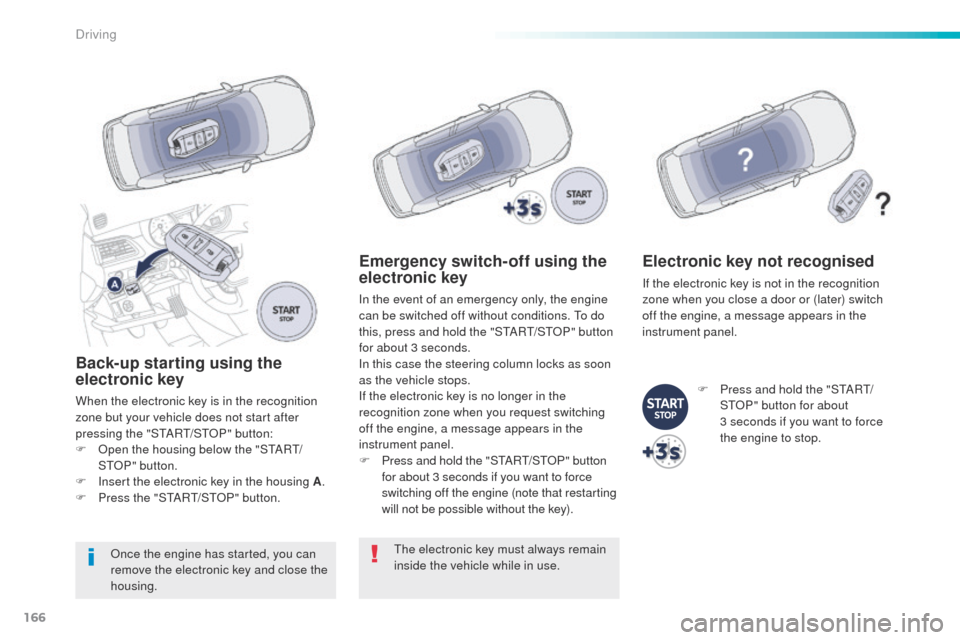
Back-up starting using the
electronic key
When the electronic key is in the recognition
zone but your vehicle does not start after
pressing the "S
tA
R
t/
S
tO
P" button:
F
O
pen the housing below the "S
tA
R
t/
St
OP " button.
F
I
nsert the electronic key in the housing A .
F
P
ress the "S
tA
R
t/
S
tO
P" button.
Once the engine has started, you can
remove the electronic key and close the
housing.
Emergency switch-off using the
electronic key
In the event of an emergency only, the engine
can be switched off without conditions. to d o
this, press and hold the "S
tA
R
t/
S
tO
P" button
for about 3 seconds.
In this case the steering column locks as soon
as the vehicle stops.
If the electronic key is no longer in the
recognition zone when you request switching
off the engine, a message appears in the
instrument panel.
F
P
ress and hold the "S
tA
R
t/
S
tO
P" button
for about 3 seconds if you want to force
switching off the engine (note that restarting
will not be possible without the key).
th
e electronic key must always remain
inside the vehicle while in use.
Electronic key not recognised
If the electronic key is not in the recognition
zone when you close a door or (later) switch
off the engine, a message appears in the
instrument panel.
F
P
ress and hold the "S
tA
R
t/
StO
P" button for about
3
seconds if you want to force
the engine to stop.
Driving
Page 181 of 364
179
508_en_Chap06_conduite_ed01-2016
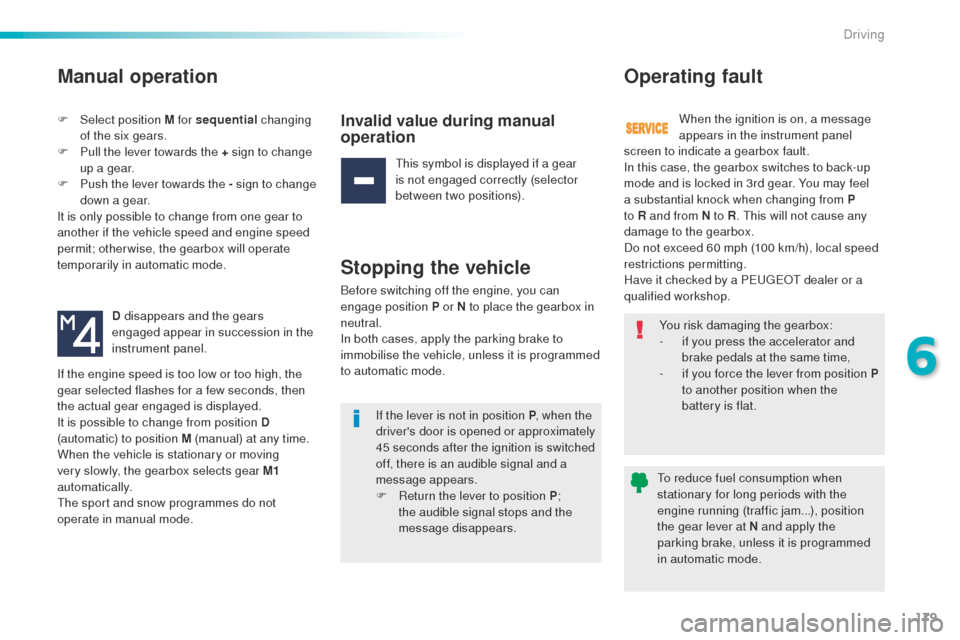
Manual operation
F Select position M for sequential changing
of the six gears.
F
P
ull the lever towards the + sign to change
up a gear.
F
P
ush the lever towards the - sign to change
down a gear.
It is only possible to change from one gear to
another if the vehicle speed and engine speed
permit; otherwise, the gearbox will operate
temporarily in automatic mode.
D disappears and the gears
engaged appear in succession in the
instrument panel.Invalid value during manual
operation
this symbol is displayed if a gear
is not engaged correctly (selector
between two positions).
Stopping the vehicle
Before switching off the engine, you can
engage position P or N to place the gearbox in
neutral.
In both cases, apply the parking brake to
immobilise the vehicle, unless it is programmed
to automatic mode.
Operating fault
When the ignition is on, a message
appears in the instrument panel
If the engine speed is too low or too high, the
gear selected flashes for a few seconds, then
the actual gear engaged is displayed.
It is possible to change from position D
(automatic) to position M (manual) at any time.
When the vehicle is stationary or moving
very slowly, the gearbox selects gear M1
automatically.
th
e sport and snow programmes do not
operate in manual mode. You risk damaging the gearbox:
-
i
f you press the accelerator and
brake pedals at the same time,
-
i
f you force the lever from position P
to another position when the
battery is flat.
If the lever is not in position P , when the
driver's door is opened or approximately
45 seconds after the ignition is switched
off, there is an audible signal and a
message appears.
F
R
eturn the lever to position P ;
the audible signal stops and the
message disappears.
to r
educe fuel consumption when
stationary for long periods with the
engine running (traffic jam...), position
the gear lever at N and apply the
parking brake, unless it is programmed
in automatic mode.
screen to indicate a gearbox fault.
In this case, the gearbox switches to back-up
mode and is locked in 3rd gear. You may feel
a substantial knock when changing from P
to R and from N to R
.
t
h
is will not cause any
damage to the gearbox.
Do not exceed 60 mph (100 km/h), local speed
restrictions permitting.
Have it checked by a P
e
uge
Ot
dealer or a
qualified workshop.
6
Driving
Page 228 of 364
226
508_en_Chap07_info-pratiques_ed01-2016
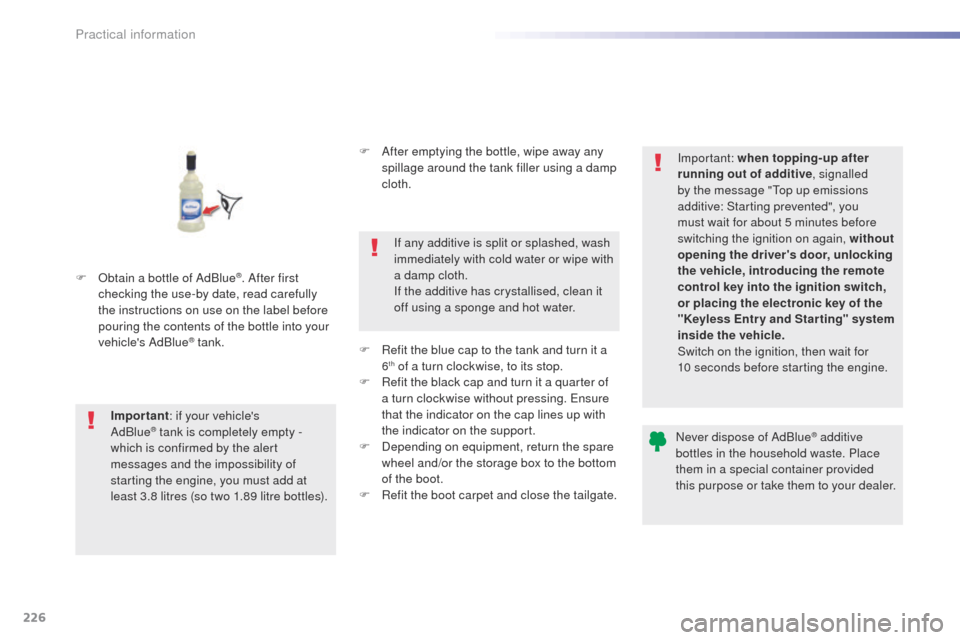
F Obtain a bottle of AdBlue®. After first
checking the use-by date, read carefully
the instructions on use on the label before
pouring the contents of the bottle into your
vehicle's AdBlue
® tank.
Important : if your vehicle's
AdBlue
® tank is completely empty -
w
hich is confirmed by the alert
messages and the impossibility of
starting the engine, you must add at
least 3.8 litres (so two 1.89 litre bottles). F
A
fter emptying the bottle, wipe away any
spillage around the tank filler using a damp
cloth.
If any additive is split or splashed, wash
immediately with cold water or wipe with
a damp cloth.
If the additive has crystallised, clean it
off using a sponge and hot water.
F
R
efit the blue cap to the tank and turn it a
6
th of a turn clockwise, to its stop.
F
R
efit the black cap and turn it a quarter of
a turn clockwise without pressing.
e
n
sure
that the indicator on the cap lines up with
the indicator on the support.
F
D
epending on equipment, return the spare
wheel and/or the storage box to the bottom
of the boot.
F
R
efit the boot carpet and close the tailgate. Important: when topping-up after
running out of additive
, signalled
by the message "
to
p up emissions
additive: Starting prevented", you
must wait for about 5 minutes before
switching the ignition on again, without
opening the driver's door, unlocking
the vehicle, introducing the remote
control key into the ignition switch,
or placing the electronic key of the
"Keyless Entr y and Star ting" system
inside the vehicle.
Switch on the ignition, then wait for
10 seconds before starting the engine.
Never dispose of AdBlue
® additive
bottles in the household waste. Place
them in a special container provided
this purpose or take them to your dealer.
Practical information
Page 258 of 364
256
508_en_Chap08_en-cas-de-pannes_ed01-2016
Do not force the lever as locking will
not be possible if the clamp is not
positioned correctly; start the procedure
again.
Disconnecting the battery
In order to maintain an adequate state
of charge for starting the engine, it is
recommended that the battery be disconnected
if the vehicle is taken out of service for a long
period.
Wait 2 minutes after switching off the ignition
before disconnecting the battery.
F
c
lose the windows and the doors before
disconnecting the battery,
F
s
witch off all electrical consumers (audio
system, wipers, lighting, ...),
F
s
witch off the ignition and wait for
four
minutes.
Having exposed the battery, it is only
necessary to disconnect the (+) terminal.Following reconnection of
the battery
After reconnecting the battery, switch on the
ignition and wait 1 minute before starting to
allow initialisation of the electronic systems.
However, if minor problems persist following
this operation, contact a P
e
uge
Ot
dealer or a
qualified workshop.
Referring to the corresponding section, you
must yourself reinitialise or reset certain
systems, such as:
-
t
he remote control or electronic key
(depending on version),
-
t
he electric blind(s),
-
t
he electric windows
-
t
he date and time,
-
t
he radio preset stations.
Quick release terminal
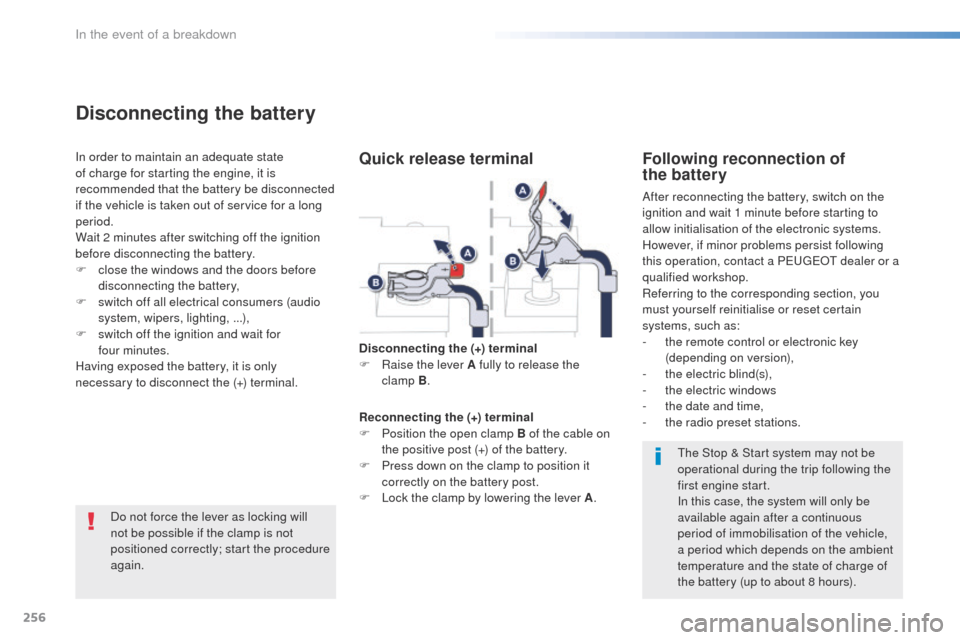
Disconnecting the (+) terminal
F Ra ise the lever A fully to release the
clamp
B.
Reconnecting the (+) terminal
F
P
osition the open clamp B of the cable on
the positive post (+) of the battery.
F
P
ress down on the clamp to position it
correctly on the battery post.
F
L
ock the clamp by lowering the lever A .
th
e Stop & Start system may not be
operational during the trip following the
first engine start.
In this case, the system will only be
available again after a continuous
period of immobilisation of the vehicle,
a period which depends on the ambient
temperature and the state of charge of
the battery (up to about 8 hours).
In the event of a breakdown