PEUGEOT 607 2004 Owner's Guide
Manufacturer: PEUGEOT, Model Year: 2004, Model line: 607, Model: PEUGEOT 607 2004Pages: 173, PDF Size: 1.99 MB
Page 31 of 173
YOUR 607 IN DETAIL35
Setting the parameters From the
'general menu' , the
'Display configuration' menu
allows you to access the following parameters:
- setting the video brightness and display,
- setting the date and time,
- choosing the language in which information is heard and displayed (German, Spanish, French, English, Italian, Dutch), setting the
formats and the units. These settings allow you to choose a display in km/h or mph, the temperature in Celsius or in Fahrenheit, and to modify the hour(12 or 24 hour) and date format.
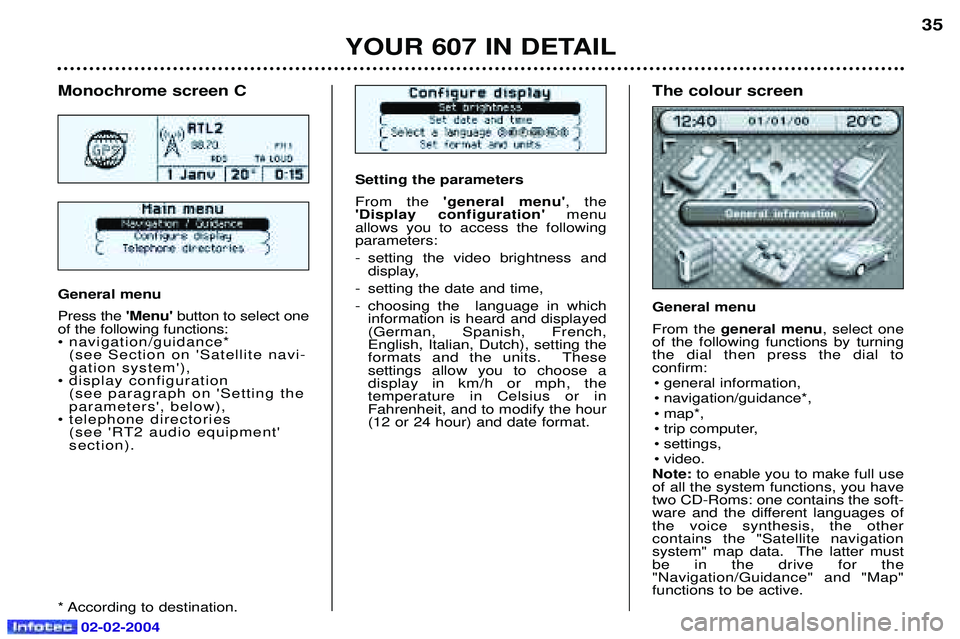
Monochrome screen C General menu Press the 'Menu' button to select one
of the following functions:
¥ navigation/guidance* (see Section on 'Satellite navi-gation system'),
¥ display configuration (see paragraph on 'Setting theparameters', below),
¥ telephone directories (see 'RT2 audio equipment'section).
* According to destination. The colour screen General menu From the general menu , select one
of the following functions by turning the dial then press the dial toconfirm:
¥ general information,
¥ navigation/guidance*,
¥ map*,
¥ trip computer,
¥ settings,
¥ video.
Note: to enable you to make full use
of all the system functions, you have two CD-Roms: one contains the soft-
ware and the different languages ofthe voice synthesis, the othercontains the "Satellite navigation
system" map data. The latter mustbe in the drive for the"Navigation/Guidance" and "Map"functions to be active.
02-02-2004
Page 32 of 173
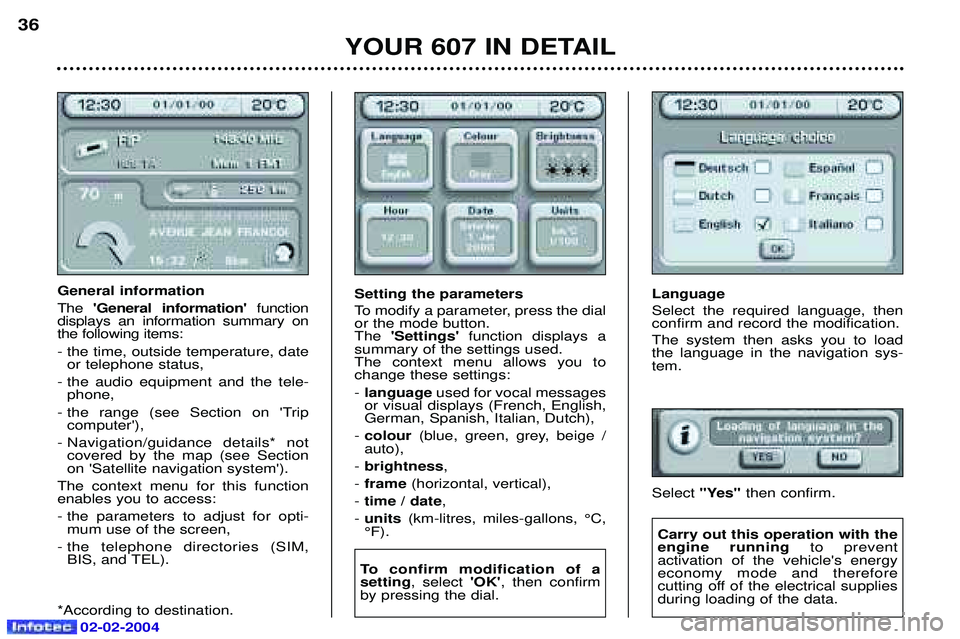
Language Select the required language, then confirm and record the modification. The system then asks you to load the language in the navigation sys-tem. Select "Yes" then confirm.
YOUR 607 IN DETAIL
36
General information The
'General information' function
displays an information summary on the following items: - the time, outside temperature, date or telephone status,
- the audio equipment and the tele- phone,
- the range (see Section on 'Trip computer'),
- Navigation/guidance details* not covered by the map (see Section on 'Satellite navigation system').
The context menu for this functionenables you to access:
- the parameters to adjust for opti- mum use of the screen,
- the telephone directories (SIM, BIS, and TEL).
*According to destination. Setting the parameters
To modify a parameter, press the dial or the mode button.The
'Settings' function displays a
summary of the settings used.The context menu allows you tochange these settings: - language used for vocal messages
or visual displays (French, English, German, Spanish, Italian, Dutch),
- colour (blue, green, grey, beige /
auto),
- brightness ,
- frame (horizontal, vertical),
- time / date ,
- units (km-litres, miles-gallons, ¡C,
¡F).
To confirm modification of a setting , select 'OK', then confirm
by pressing the dial.
Carry out this operation with the engine running to prevent
activation of the vehicle's energyeconomy mode and therefore
cutting off of the electrical suppliesduring loading of the data.
02-02-2004
Page 33 of 173
02-02-2004
YOUR 607 IN DETAIL37
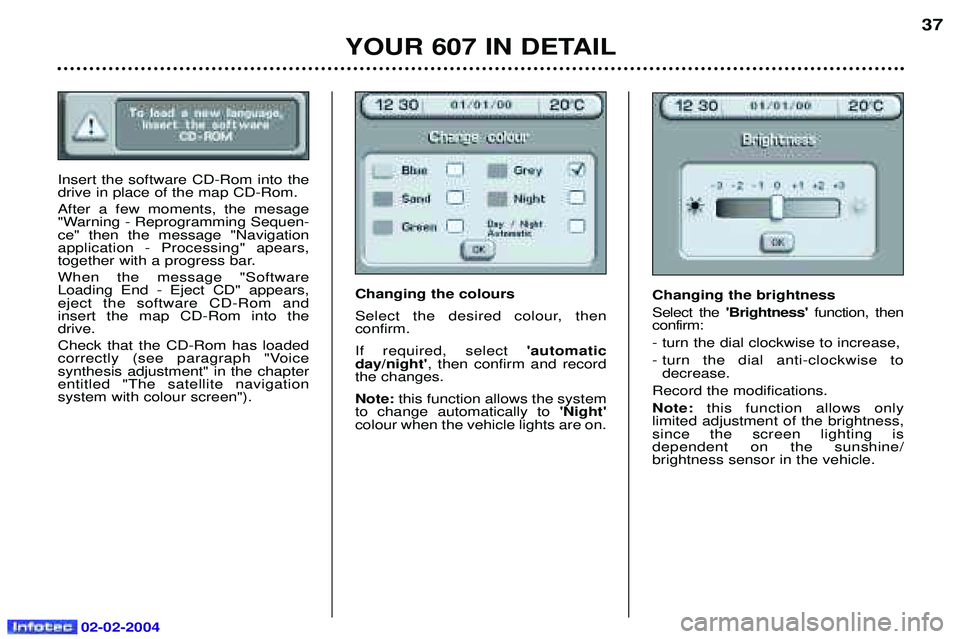
Insert the software CD-Rom into the drive in place of the map CD-Rom. After a few moments, the mesage
"Warning - Reprogramming Sequen-ce" then the message "Navigationapplication - Processing" apears,
together with a progress bar. When the message "Software Loading End - Eject CD" appears,eject the software CD-Rom andinsert the map CD-Rom into thedrive. Check that the CD-Rom has loaded
correctly (see paragraph "Voice synthesis adjustment" in the chapterentitled "The satellite navigation system with colour screen").Changing the colours
Select the desired colour, then confirm. If required, select
'automatic
day/night' , then confirm and record
the changes.Note: this function allows the system
to change automatically to 'Night'
colour when the vehicle lights are on.
Changing the brightness Select the 'Brightness' function, then
confirm:- turn the dial clockwise to increase,
- turn the dial anti-clockwise to decrease.
Record the modifications.Note: this function allows only
limited adjustment of the brightness, since the screen lighting is dependent on the sunshine/brightness sensor in the vehicle.
Page 34 of 173

02-02-2004
Setting the image frame This function allows the image to be centralised on the screen. Select the'Vertical frame' function,
then confirm:
- turn the dial clockwise to go up the screen,
- turn the dial anti-clockwise to go down the screen,
- confirm, to finish setting the vertical frame.
Select the 'Horizontal frame' func-
tion, then confirm:
- turn the dial clockwise to go to the right,
- turn the dial anti-clockwise to go to the left,
- confirm, to finish setting the hori- zontal frame.
Record the changes. Setting the time and date Select the
'Hours'function, then
confirm:
- turn the dial clockwise to scroll upwards through the hours, or turn it anti-clockwise to scroll down-wards through the hours,
- confirm, to finish setting the time. Proceed in the same way for the 'Minutes' function.
Select the '12h'or '24h' function by
pressing the dial. Select the
'Day'function, then
confirm:
- turn the dial clockwise to scroll for- wards through the days, or turn it anti-clockwise to scroll backwardsthrough the days,
- confirm, to finish setting the day. Proceed in the same way for the 'Month' and 'Year' functions.
Record the changes. Changing the units Select the units required, then confirm and record the changes.
YOUR 607 IN DETAIL
38
Page 35 of 173
02-02-2004
Video sockets
Video sockets may be used wha-
tever the position of the key. It isimpossible to use the video whendriving above 20 mph (30 km/h).
You have three cinch (RCA) points, located in the glove box, for connec-
ting a camcorder, a DVD drive, etc.: - a video socket (yellow),
- two audio system sockets (red +white).
The video connection is compatible
with PAL, SECAM and NTSC. Open the glove box and connect the equipment. Switch on the equipment.
To set the video, press the 'MENU'
button to access the general menu,
then select the 'Video' symbol and
confirm.
YOUR 607 IN DETAIL 39
Page 36 of 173
02-02-2004
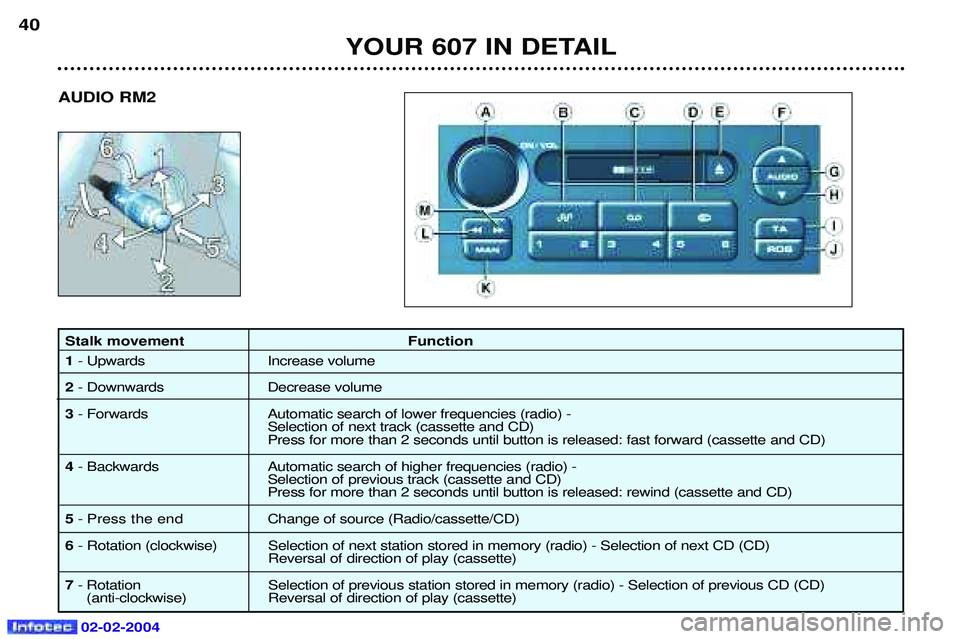
Stalk movement Function 1- Upwards Increase volume
2 - Downwards Decrease volume
3 - Forwards Automatic search of lower frequencies (radio) -
Selection of next track (cassette and CD) Press for more than 2 seconds until button is released: fast forward (cassette and CD)
4 - Backwards Automatic search of higher frequencies (radio) -
Selection of previous track (cassette and CD) Press for more than 2 seconds until button is released: rewind (cassette and CD)
5 - Press the end C hange of source (Radio/cassette/CD)
6 - Rotation (clockwise) Selection of next station stored in memory (radio) - Selection of next CD (CD)
Reversal of direction of play (cassette)
7 - Rotation Selection of previous station stored in memory (radio) - Selection of previous CD (CD)
(anti-clockwise) Reversal of direction of play (cassette)
YOUR 607 IN DETAIL
40
AUDIO RM2
Page 37 of 173
02-02-2004
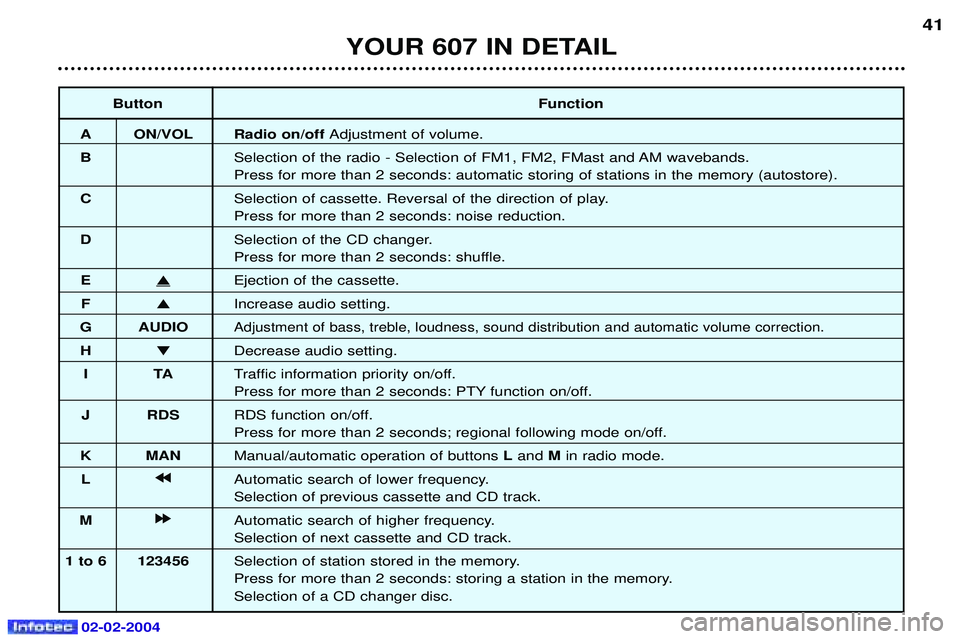
ButtonFunction
A ON/VOL Radio on/off Adjustment of volume.
B Selection of the radio - Selection of FM1, FM2, FMast and AM wavebands. Press for more than 2 seconds: automatic storing of stations in the memory (autostore).
C Selection of cassette. Reversal of the direction of play.Press for more than 2 seconds: noise reduction.
D Selection of the CD changer.
Press for more than 2 seconds: shuffle.
E �
Ejection of the cassette.
F � Increase audio setting.
G AUDIO
Adjustment of bass, treble, loudness, sound distribution and automatic volume correction.
H � Decrease audio setting.
IT ATraffic information priority on/off.
Press for more than 2 seconds: PTY function on/off.
J RDS RDS function on/off.
Press for more than 2 seconds; regional following mode on/off.
K MAN Manual/automatic operation of buttons Land Min radio mode.
L j
j j
j
Automatic search of lower frequency.Selection of previous cassette and CD track.
M k
k k
k
Automatic search of higher frequency.Selection of next cassette and CD track.
1 to 6 123456 Selection of station stored in the memory.
Press for more than 2 seconds: storing a station in the memory.Selection of a CD changer disc.
YOUR 607 IN DETAIL 41
Page 38 of 173
02-02-2004
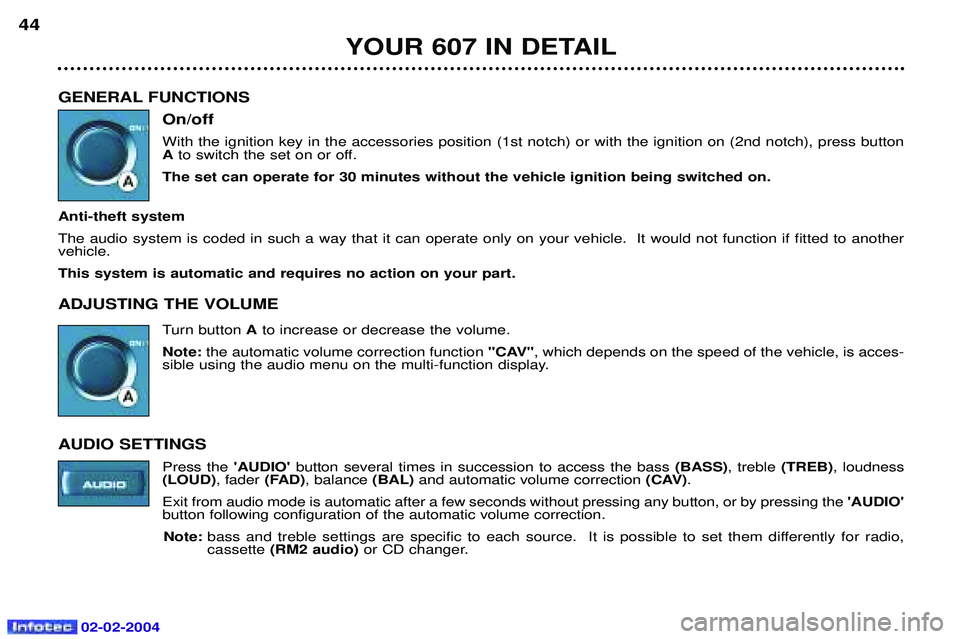
GENERAL FUNCTIONSOn/off With the ignition key in the accessories position (1st notch) or with the ignition on (2nd notch), press button Ato switch the set on or off.
The set can operate for 30 minutes without the vehicle ignition being switched on.
Anti-theft system The audio system is coded in such a way that it can operate only on your vehicle. It would not function if fitted to another vehicle. This system is automatic and requires no action on your part. ADJUSTING THE VOLUME Turn button Ato increase or decrease the volume.
Note: the automatic volume correction function "CAV", which depends on the speed of the vehicle, is acces-
sible using the audio menu on the multi-function display.
AUDIO SETTINGS Press the 'AUDIO'button several times in succession to access the bass (BASS), treble (TREB), loudness
(LOUD) , fader(FAD), balance (BAL)and automatic volume correction (CAV).
Exit from audio mode is automatic after a few seconds without pressing any button, or by pressing the 'AUDIO'
button following configuration of the automatic volume correction.
Note: bass and treble settings are specific to each source. It is possible to set them differently for radio, cassette (RM2 audio) or CD changer.
YOUR 607 IN DETAIL
44
Page 39 of 173
02-02-2004
YOUR 607 IN DETAIL45
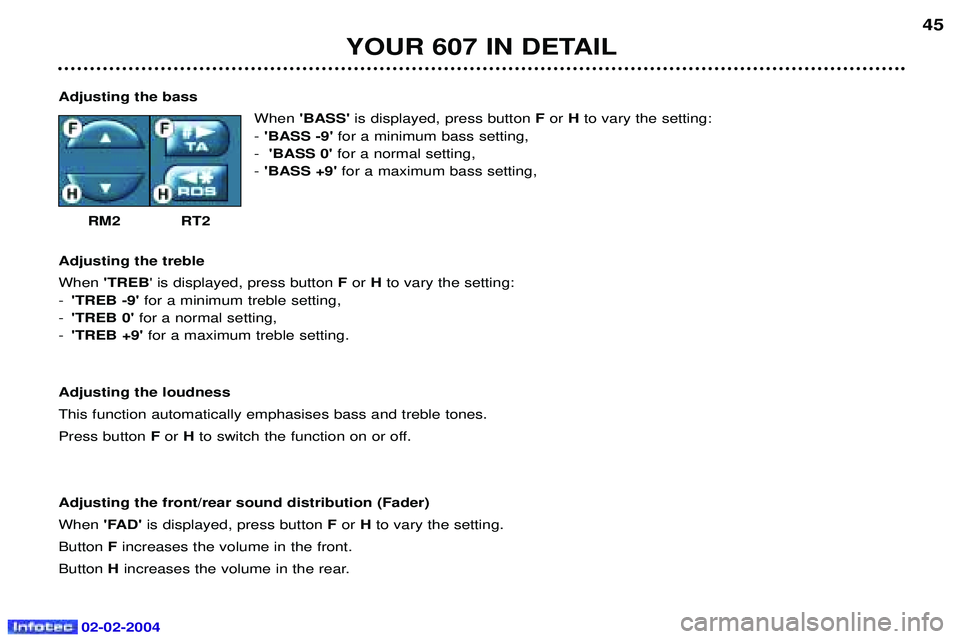
Adjusting the bass When'BASS' is displayed, press button For Hto vary the setting:
- 'BASS -9' for a minimum bass setting,
- 'BASS 0' for a normal setting,
- 'BASS +9' for a maximum bass setting,
RM2 RT2
Adjusting the treble When 'TREB ' is displayed, press button For H to vary the setting:
- 'TREB -9' for a minimum treble setting,
- 'TREB 0' for a normal setting,
- 'TREB +9' for a maximum treble setting.
Adjusting the loudnessThis function automatically emphasises bass and treble tones.Press button For Hto switch the function on or off.
Adjusting the front/rear sound distribution (Fader)When 'FAD'is displayed, press button For Hto vary the setting.
Button Fincreases the volume in the front.
Button Hincreases the volume in the rear.
Page 40 of 173
02-02-2004
YOUR 607 IN DETAIL
46
Adjusting the left/right sound distribution (Balance) When 'BAL' is displayed, press button F or Hto vary the setting.
Button F increases the volume on the right-hand side.
Button Hincreases the volume on the left-hand side.
Automatic volume correction "CAV" This function allows the volume to be adjusted automatically depending on the level of noise produced by the speed of the vehicle. Press buttons For Hto switch the function on or off.
Note: this function is only operational from 35 mph (60 km/h).
RADIO Notes on radio reception
Your radio is subject to phenomena which do not affect domestic radio sets. Both MW/LW and FM reception are subject to
various forms of interference. This is no reflection on the quality of the equipment, but is due to the nature of the signals and
the way in which they are transmitted.
On MW/LW, interference may be noticed when passing under high voltage power lines or bridges, or in tunnels.
On FM, interference may be the result of increasing distance from the transmitter, deflection of the signals by obstacles
(mountains, hills, buildings, etc.) or of being in an area which is not covered by a transmitter.
Selecting radio mode / Selecting a waveband Press button B.
Briefly press button Bto select the FM1, FM2, FMast and AM wavebands.
Automatic station searchBriefly press button Mor Lto search for the station immediately above or below. By continuing to press the
button in the direction selected, you will obtain continuous scrolling of the frequency.The scrolling stops at the first station found as soon as the button is released.