window Peugeot Boxer 2003 Owner's Manual
[x] Cancel search | Manufacturer: PEUGEOT, Model Year: 2003, Model line: Boxer, Model: Peugeot Boxer 2003Pages: 180, PDF Size: 2.71 MB
Page 3 of 180
05-05-2003
3YOUR BOXER AT A GLANCE
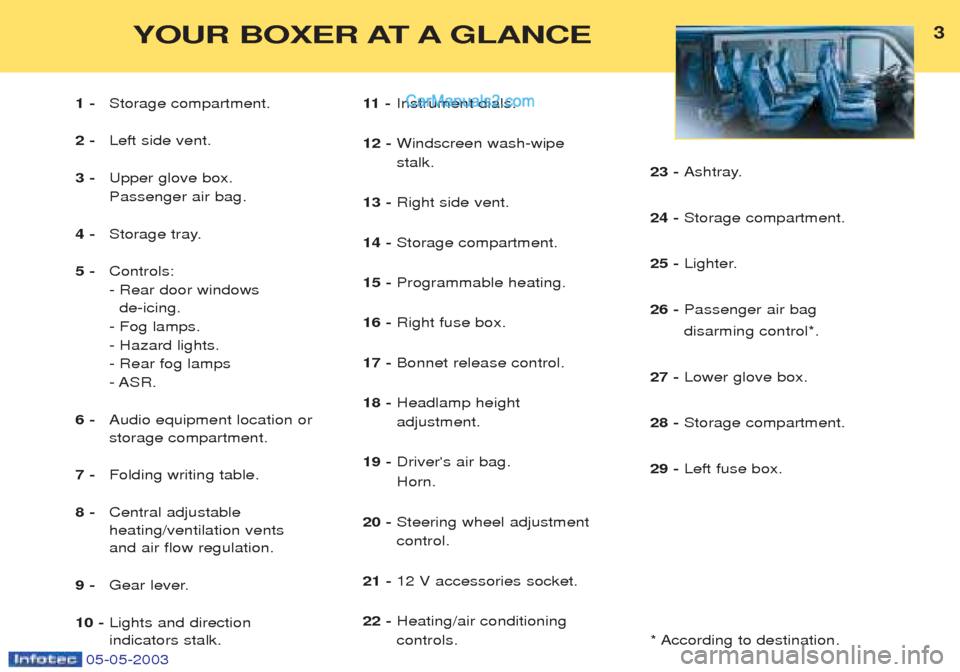
1 -Storage compartment.
2 - Left side vent.
3 - Upper glove box. Passenger air bag.
4 - Storage tray.
5 - Controls:
- Rear door windows
de-icing.
- Fog lamps.- Hazard lights.- Rear fog lamps- ASR.
6 - Audio equipment location or storage compartment.
7 - Folding writing table.
8 - Central adjustableheating/ventilation vents and air flow regulation.
9 - Gear lever.
10 - Lights and direction indicators stalk. 11 -
Instrument dials.
12 - Windscreen wash-wipe stalk.
13 - Right side vent.
14 - Storage compartment.
15 - Programmable heating.
16 - Right fuse box.
17 - Bonnet release control.
18 - Headlamp height adjustment.
19 - Driver's air bag. Horn.
20 - Steering wheel adjustment control.
21 - 12 V accessories socket.
22 - Heating/air conditioningcontrols. 23 -
Ashtray.
24 - Storage compartment.
25 - Lighter.
26 - Passenger air bag disarming control*.
27 - Lower glove box.
28 - Storage compartment.
29 - Left fuse box.
* According to destination.
Page 8 of 180
05-05-2003
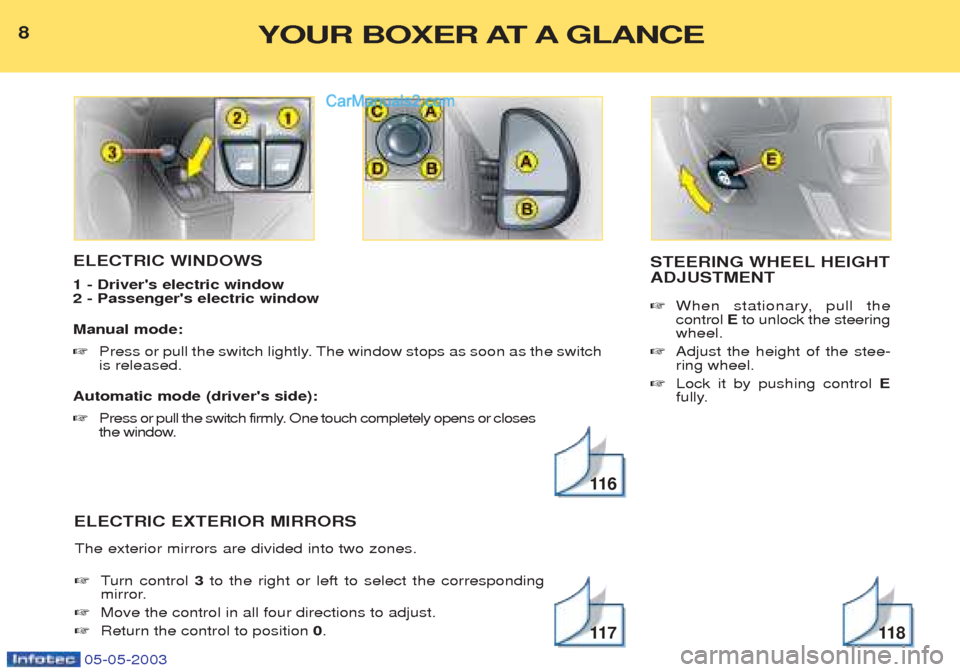
ELECTRIC WINDOWS 1 - Driver's electric window 2 - Passenger's electric window Manual mode: ☞Press or pull the switch lightly. The window stops as soon as the switch is released.
Automatic mode (driver's side): ☞ Press or pull the switch firmly. One touch completely opens or closes
the window.
The exterior mirrors are divided into two zones. ☞ Turn control 3to the right or left to select the corresponding
mirror.
☞ Move the control in all four directions to adjust.
☞ Return the control to position 0.
8
STEERING WHEEL HEIGHT ADJUSTMENT ☞ When stationary, pull the control Eto unlock the steering
wheel.
☞ Adjust the height of the stee-ring wheel.
☞ Lock it by pushing control E
fully.
11 6
11 711 8
8YOUR BOXER AT A GLANCE
ELECTRIC EXTERIOR MIRRORS
Page 47 of 180
05-05-2003
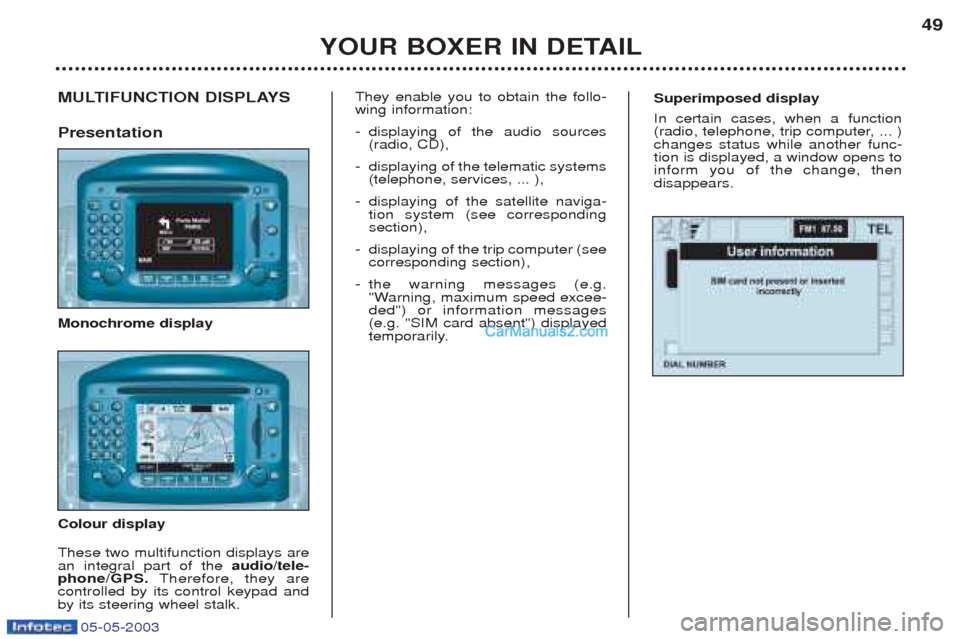
Superimposed display In certain cases, when a function
(radio, telephone, trip computer, ... )changes status while another func-tion is displayed, a window opens toinform you of the change, thendisappears.MULTIFUNCTION DISPLAYS Presentation Monochrome display Colour display These two multifunction displays are an integral part of theaudio/tele-
phone/GPS. Therefore, they are
controlled by its control keypad andby its steering wheel stalk. They enable you to obtain the follo-wing information: -
displaying of the audio sources (radio, CD),
- displaying of the telematic systems(telephone, services, ... ),
- displaying of the satellite naviga-tion system (see correspondingsection),
- displaying of the trip computer (seecorresponding section),
- the warning messages (e.g.
"Warning, maximum speed excee-ded") or information messages(e.g. "SIM card absent") displayed
temporarily.
YOUR BOXER IN DETAIL 49
Page 69 of 180
YOUR BOXER IN DETAIL71
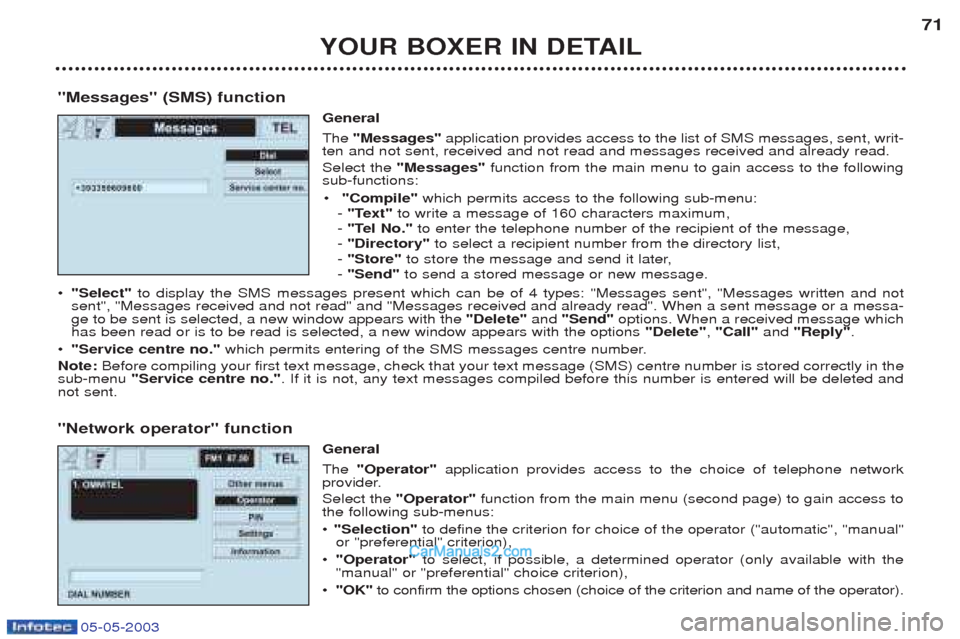
"Messages" (SMS) function General The"Messages" application provides access to the list of SMS messages, sent, writ-
ten and not sent, received and not read and messages received and already read. Select the "Messages" function from the main menu to gain access to the following
sub-functions:
¥ "Compile" which permits access to the following sub-menu:
- "Text" to write a message of 160 characters maximum,
- "Tel No." to enter the telephone number of the recipient of the message,
- "Directory" to select a recipient number from the directory list,
- "Store" to store the message and send it later,
- "Send" to send a stored message or new message.
¥ "Select" to display the SMS messages present which can be of 4 types: "Messages sent", "Messages written and not
sent", "Messages received and not read" and "Messages received and already read". When a sent message or a messa- ge to be sent is selected, a new window appears with the "Delete"and "Send" options. When a received message which
has been read or is to be read is selected, a new window appears with the options "Delete", "Call" and "Reply" .
¥ "Service centre no." which permits entering of the SMS messages centre number.
Note: Before compiling your first text message, check that your text message (SMS) centre number is stored correctly in the
sub-menu "Service centre no." . If it is not, any text messages compiled before this number is entered will be deleted and
not sent.
"Network operator" function General The "Operator" application provides access to the choice of telephone network
provider. Select the "Operator" function from the main menu (second page) to gain access to
the following sub-menus: ¥ "Selection" to define the criterion for choice of the operator ("automatic", "manual"
or "preferential" criterion),
¥ "Operator" to select, if possible, a determined operator (only available with the
"manual" or "preferential" choice criterion),
¥ "OK" to confirm the options chosen (choice of the criterion and name of the operator).
05-05-2003
Page 91 of 180
05-05-2003
YOUR BOXER IN DETAIL
92
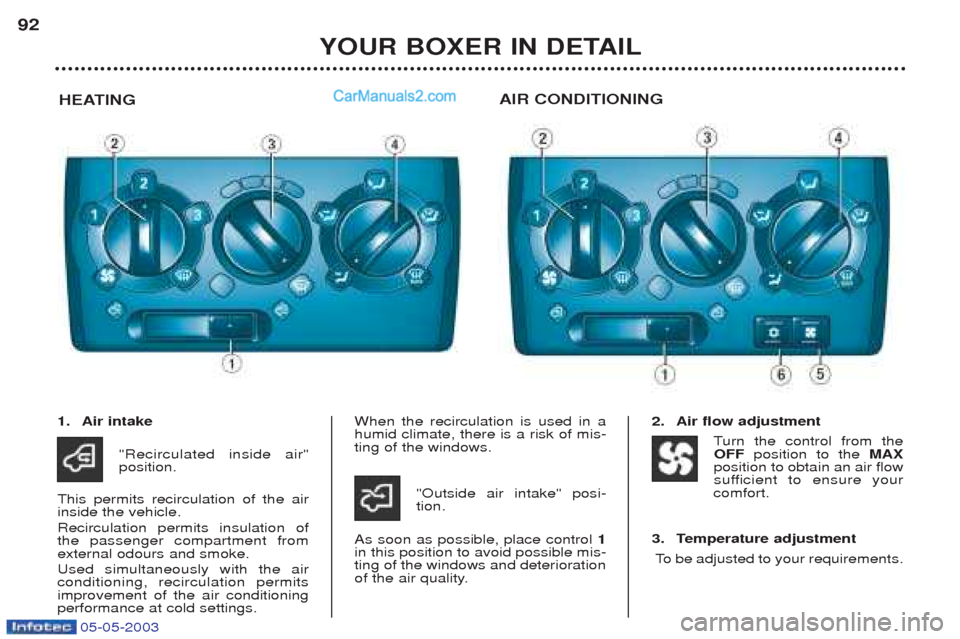
HEATING AIR CONDITIONING
1. Air intake
"Recirculated inside air" position.
This permits recirculation of the airinside the vehicle. Recirculation permits insulation of the passenger compartment fromexternal odours and smoke. Used simultaneously with the air conditioning, recirculation permitsimprovement of the air conditioningperformance at cold settings. When the recirculation is used in ahumid climate, there is a risk of mis-ting of the windows.
"Outside air intake" posi-tion.
As soon as possible, place control 1
in this position to avoid possible mis-ting of the windows and deterioration
of the air quality. 2. Air flow adjustment
Turn the control from the
OFF position to the MAX
position to obtain an air flow
sufficient to ensure your
comfort.
3. Temperature adjustment To be adjusted to your requirements.
Page 92 of 180
05-05-2003
YOUR BOXER IN DETAIL93
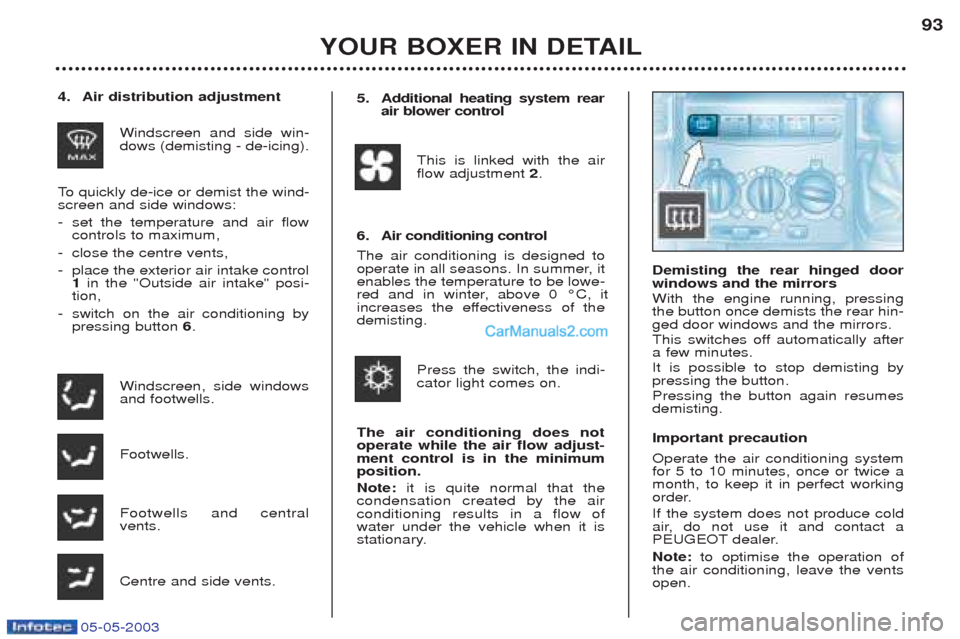
4. Air distribution adjustment
Windscreen and side win- dows (demisting - de-icing).
To quickly de-ice or demist the wind-
screen and side windows:
- set the temperature and air flowcontrols to maximum,
- close the centre vents,
- place the exterior air intake control1 in the "Outside air intake" posi-
tion,
- switch on the air conditioning bypressing button 6.
Windscreen, side windowsand footwells. Footwells. Footwells and central vents. Centre and side vents. Demisting the rear hinged door windows and the mirrors With the engine running, pressing the button once demists the rear hin-ged door windows and the mirrors.
This switches off automatically after a few minutes. It is possible to stop demisting by pressing the button. Pressing the button again resumes demisting. Important precaution Operate the air conditioning system for 5 to 10 minutes, once or twice amonth, to keep it in perfect working
order. If the system does not produce cold
air, do not use it and contact a
PEUGEOT dealer. Note:
to optimise the operation of
the air conditioning, leave the vents open. 5. Additional heating system rear air blower control
This is linked with the airflow adjustment 2.
6. Air conditioning control
The air conditioning is designed to
operate in all seasons. In summer, itenables the temperature to be lowe-
red and in winter, above 0 ¡C, it
increases the effectiveness of thedemisting.
Press the switch, the indi-cator light comes on.
The air conditioning does notoperate while the air flow adjust-ment control is in the minimumposition. Note: it is quite normal that the
condensation created by the air conditioning results in a flow ofwater under the vehicle when it is
stationary.
Page 93 of 180
05-05-2003
YOUR BOXER IN DETAIL
94
PROGRAMMABLE HEATING
(WEBASTO)* The programmable heating is provided to operate with the engine
off. It permits heating of the passen-ger compartment, de-icing of thewindows and pre-heating of thecoolant circuit to provide an optimumoperating temperature when theengine is switched on.
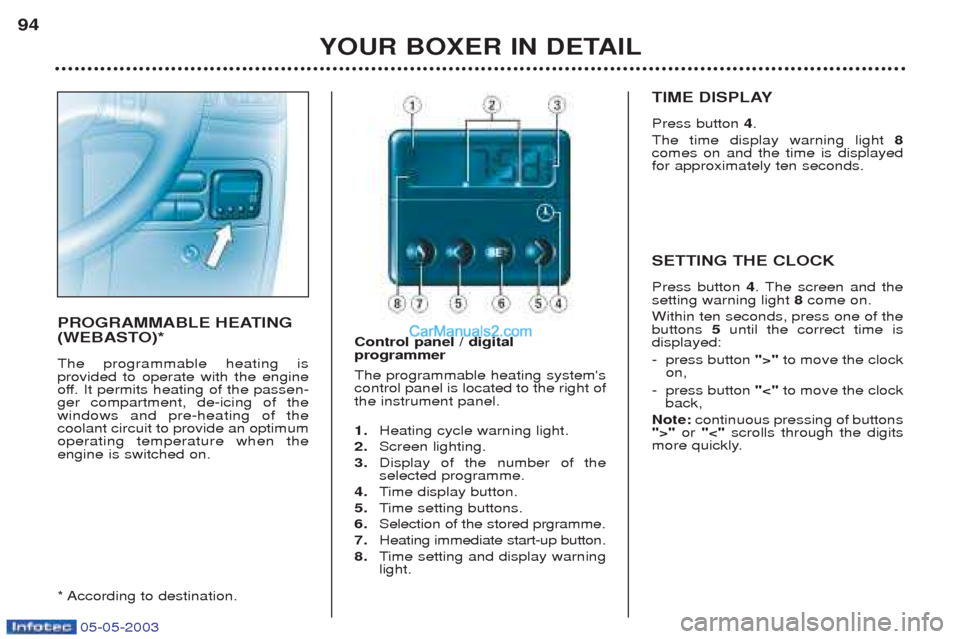
* According to destination. Control panel / digital programmer The programmable heating system's control panel is located to the right ofthe instrument panel. 1.
Heating cycle warning light.
2. Screen lighting.
3. Display of the number of the selected programme.
4. Time display button.
5. Time setting buttons.
6. Selection of the stored prgramme.
7. Heating immediate start-up button.
8. Time setting and display warning
light.
TIME DISPLAY Press button 4.
The time display warning light 8
comes on and the time is displayed for approximately ten seconds. SETTING THE CLOCK Press button 4. The screen and the
setting warning light 8come on.
Within ten seconds, press one of the buttons 5until the correct time is
displayed: - press button ">"to move the clock
on,
- press button "<"to move the clock
back,
Note: continuous pressing of buttons
">" or "<" scrolls through the digits
more quickly.
Page 102 of 180
05-05-2003
YOUR BOXER IN DETAIL103
Never leave one or more chil- dren alone and unsupervisedin a vehicle. Never leave a child or an ani-
mal in a vehicle which is exposed to the sun and has the windows closed.
To protect your young children from the
sun, fit blinds on the rear windows.Never leave the keys within reach of children inside the vehicle. Disarm the passenger air bag when ins- talling a "rearwards facing" child seat onthe front passenger seat. Otherwise,the child would risk being killed orseriously injured were the air bag toinflate. Observe strictly the recommendations for assembling and securing the childseat as shown in the child seat instruc-tions.
To prevent the doors from opening acci-
dentally, use the child lock*.Also, do not open the rear windows more than a third*.
* According to model.
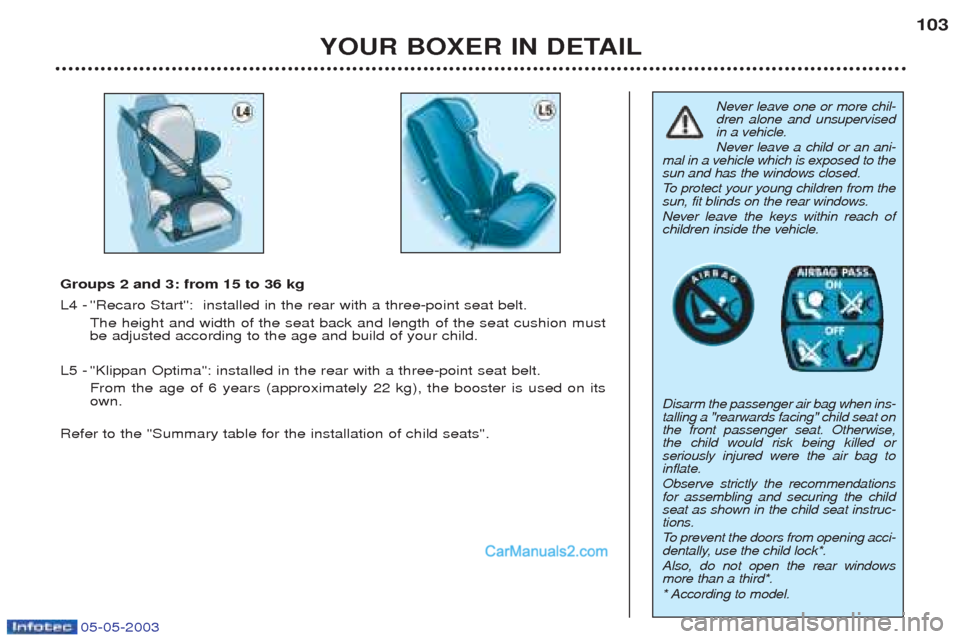
Groups 2 and 3: from 15 to 36 kg
L4 - ''Recaro Start'': installed in the rear with a three-point seat belt.
The height and width of the seat back and length of the seat cushion must be adjusted according to the age and build of your child.
L5 - "Klippan Optima": installed in the rear with a three-point seat belt. From the age of 6 years (approximately 22 kg), the booster is used on itsown.
Refer to the "Summary table for the installation of child seats".
Page 110 of 180
05-05-2003
YOUR BOXER IN DETAIL109
THE ALARM This provides two types of protection: -
exterior protection: it sounds if a
door, the tailgate or the bonnet isopened.
- interior protection: it sounds if thevolume inside the passenger com-partment changes (breaking of awindow or a movement inside thevehicle).
Setting the alarm ☞ Switch off the ignition and get out of the vehicle.
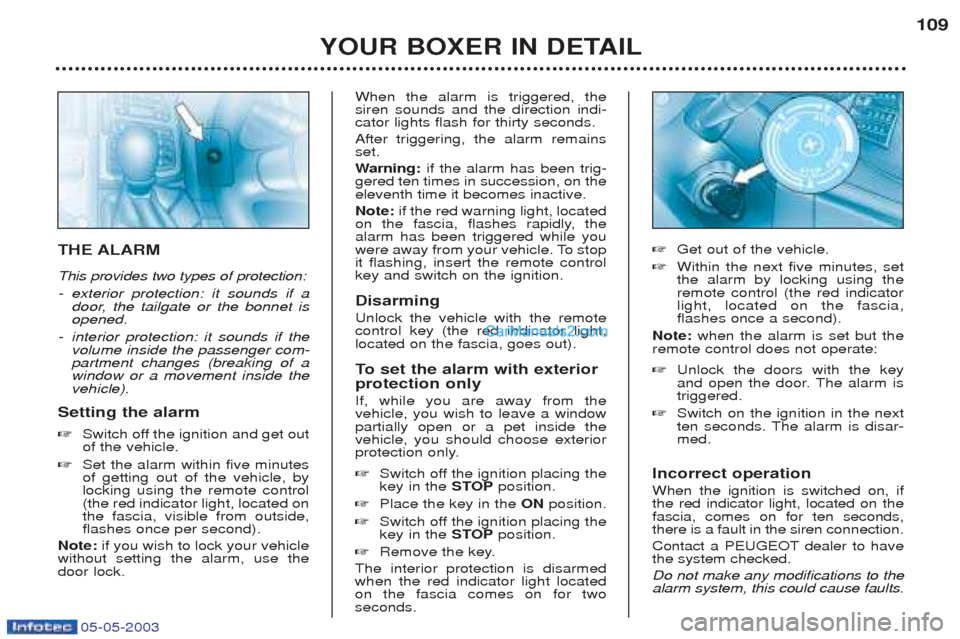
☞ Set the alarm within five minutesof getting out of the vehicle, bylocking using the remote control(the red indicator light, located onthe fascia, visible from outside,flashes once per second).
Note: if you wish to lock your vehicle
without setting the alarm, use thedoor lock. When the alarm is triggered, thesiren sounds and the direction indi-cator lights flash for thirty seconds. After triggering, the alarm remains set. W
arning: if the alarm has been trig-
gered ten times in succession, on the eleventh time it becomes inactive. Note: if the red warning light, located
on the fascia, flashes rapidly, the alarm has been triggered while you
were away from your vehicle. To stopit flashing, insert the remote controlkey and switch on the ignition. Disarming Unlock the vehicle with the remote control key (the red indicator light,located on the fascia, goes out).
To set the alarm with exterior
protection only If, while you are away from the vehicle, you wish to leave a windowpartially open or a pet inside thevehicle, you should choose exterior
protection only. ☞ Switch off the ignition placing the key in the STOPposition.
☞ Place the key in the ONposition.
☞ Switch off the ignition placing thekey in the STOPposition.
☞ Remove the key.
The interior protection is disarmedwhen the red indicator light locatedon the fascia comes on for twoseconds. ☞
Get out of the vehicle.
☞ Within the next five minutes, setthe alarm by locking using theremote control (the red indicatorlight, located on the fascia,flashes once a second).
Note: when the alarm is set but the
remote control does not operate: ☞ Unlock the doors with the key
and open the door. The alarm istriggered.
☞ Switch on the ignition in the next
ten seconds. The alarm is disar-med.
Incorrect operation When the ignition is switched on, if the red indicator light, located on thefascia, comes on for ten seconds,there is a fault in the siren connection.
Contact a PEUGEOT dealer to have the system checked. Do not make any modifications to the alarm system, this could cause faults.
Page 119 of 180
05-05-2003
YOUR BOXER IN DETAIL
116
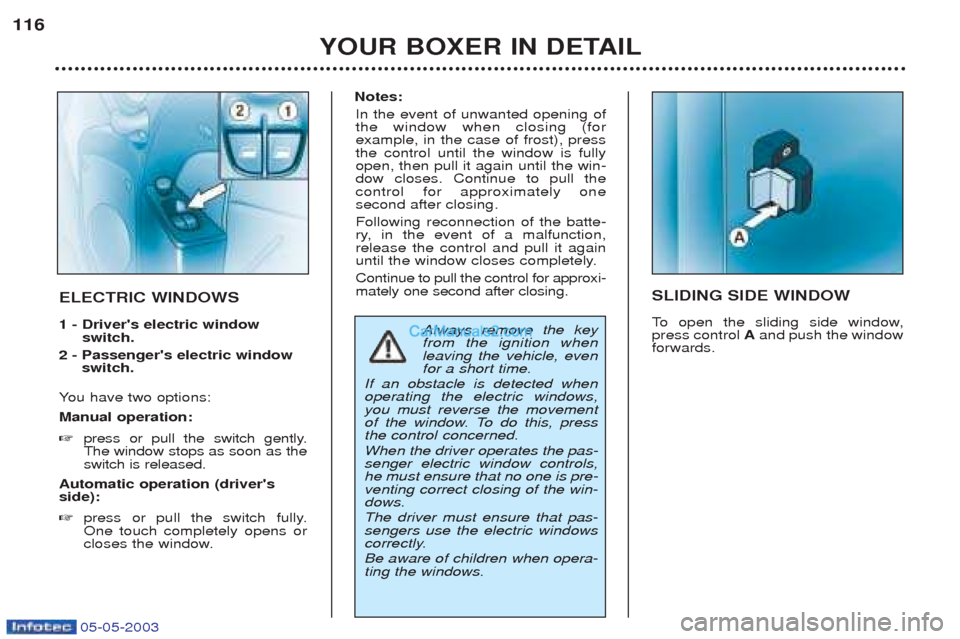
SLIDING SIDE WINDOW
To
open the sliding side window,
press control Aand push the window
forwards.ELECTRIC WINDOWS 1 - Driver's electric window switch.
2 - Passenger's electric window switch.
Y ou have two options:
Manual operation: ☞ press or pull the switch gently. The window stops as soon as theswitch is released.
Automatic operation (driver'sside): ☞ press or pull the switch fully. One touch completely opens or
closes the window.
Notes:
In the event of unwanted opening of the window when closing (forexample, in the case of frost), pressthe control until the window is fullyopen, then pull it again until the win-dow closes. Continue to pull thecontrol for approximately onesecond after closing. Following reconnection of the batte-
ry, in the event of a malfunction,release the control and pull it again
until the window closes completely. Continue to pull the control for approxi- mately one second after closing.
Always remove the key from the ignition whenleaving the vehicle, evenfor a short time.
If an obstacle is detected whenoperating the electric windows,you must reverse the movement
of the window. To do this, pressthe control concerned. When the driver operates the pas- senger electric window controls,he must ensure that no one is pre-venting correct closing of the win-dows. The driver must ensure that pas- sengers use the electric windows
correctly. Be aware of children when opera- ting the windows.