bonnet Peugeot Boxer 2018 Owner's Manual
[x] Cancel search | Manufacturer: PEUGEOT, Model Year: 2018, Model line: Boxer, Model: Peugeot Boxer 2018Pages: 232, PDF Size: 9.09 MB
Page 5 of 232
3
.
.
10
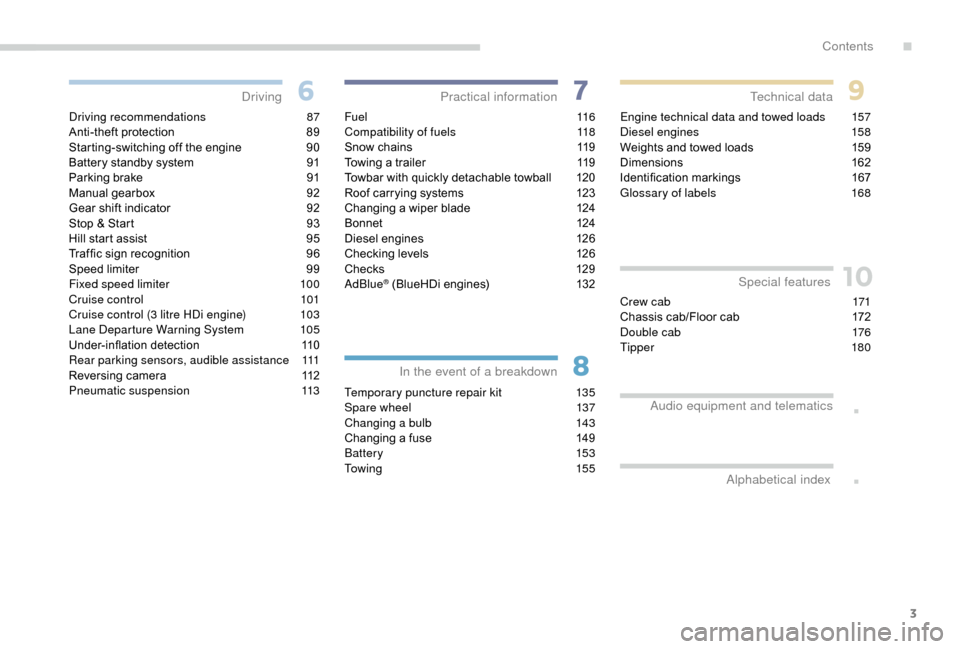
Driving recommendations 87
Anti-theft protection 8 9
Starting-switching off the engine
9
0
Battery standby system
9
1
Parking brake
9
1
Manual gearbox
9
2
Gear shift indicator
9
2
Stop & Start
9
3
Hill start assist
9
5
Traf fic sign recognition
9
6
Speed limiter
9
9
Fixed speed limiter
1
00
Cruise control
1
01
Cruise control (3
litre HDi engine)
1
03
Lane Departure Warning System
1
05
Under-inflation detection
1
10
Rear parking sensors, audible assistance
1
11
Reversing camera
1
12
Pneumatic suspension
1
13F u e l
11 6
Compatibility of fuels 1 18
Snow chains
1
19
Towing a
trailer
1
19
Towbar with quickly detachable towball
1
20
Roof carrying systems
1
23
Changing a
wiper blade
1
24
Bonnet
12
4
Diesel engines
1
26
Checking levels
1
26
Chec ks
12
9
AdBlue
® (BlueHDi engines) 1 32
Temporary puncture repair kit
1
35
Spare wheel
1
37
Changing a
bulb
1
43
Changing a
fuse
1
49
Battery
153
To w i n g
15 5Engine technical data and towed loads
1
57
Diesel engines
1
58
Weights and towed loads
1
59
Dimensions
1
62
Identification markings
1
67
Glossary of labels
1
68
Driving
Practical information
In the event of a breakdown Technical data
Alphabetical index Special features
Crew cab 1
71
Chassis cab/Floor cab 1 72
Double cab
1
76
Tipper
18
0
Audio equipment and telematics
.
Contents
Page 12 of 232
10
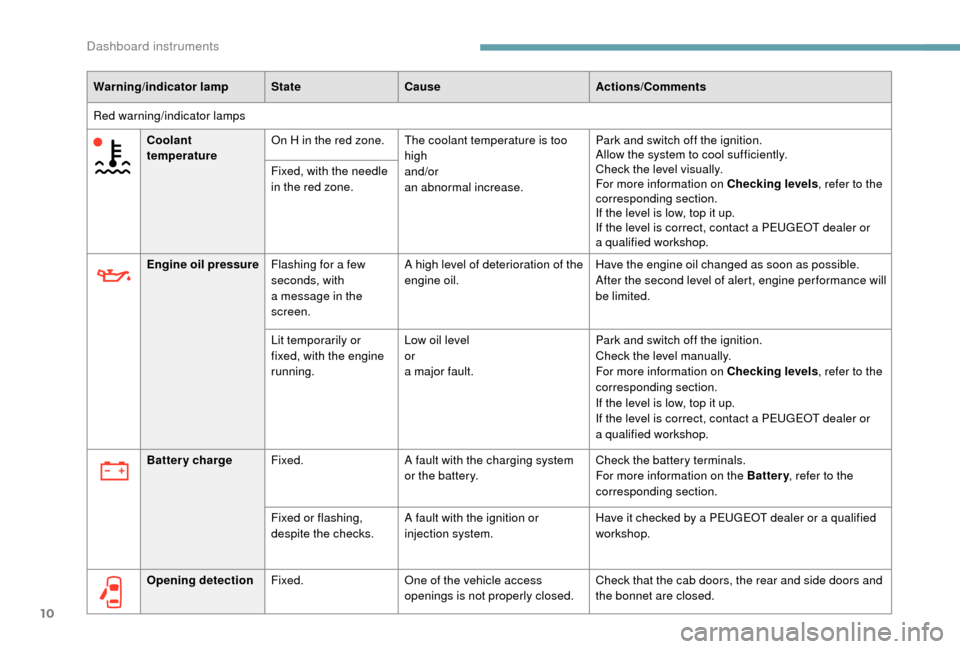
Warning/indicator lampStateCause Actions/Comments
Red warning/indicator lamps Coolant
temperature On H in the red zone. The coolant temperature is too
high
and/or
an abnormal increase. Park and switch off the ignition.
Allow the system to cool sufficiently.
Check the level visually.
For more information on Checking levels
, refer to the
corresponding section.
If the level is low, top it up.
If the level is correct, contact a
PEUGEOT dealer or
a
qualified workshop.
Fixed, with the needle
in the red zone.
Engine oil pressure Flashing for a
few
seconds, with
a
message in the
screen. A high level of deterioration of the
engine oil.
Have the engine oil changed as soon as possible.
After the second level of alert, engine per formance will
be limited.
Lit temporarily or
fixed, with the engine
running. Low oil level
or
a major fault. Park and switch off the ignition.
Check the level manually.
For more information on Checking levels
, refer to the
corresponding section.
If the level is low, top it up.
If the level is correct, contact a
PEUGEOT dealer or
a
qualified workshop.
Battery charge Fixed. A fault with the charging system
or the battery. Check the battery terminals.
For more information on the Battery
, refer to the
corresponding section.
Fixed or flashing,
despite the checks. A fault with the ignition or
injection system. Have it checked by a
PEUGEOT dealer or a qualified
workshop.
Opening detection Fixed. One of the vehicle access
openings is not properly closed. Check that the cab doors, the rear and side doors and
the bonnet are closed.
Dashboard instruments
Page 37 of 232
35
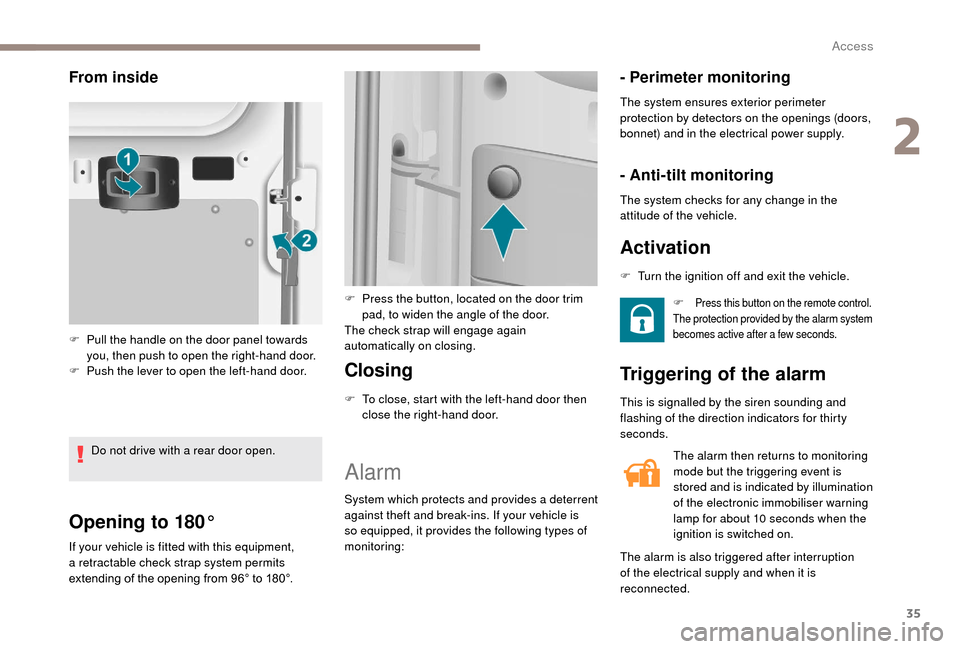
Opening to 180°
If your vehicle is fitted with this equipment,
a retractable check strap system permits
extending of the opening from 96° to 180°.
Closing
F To close, start with the left-hand door then close the right-hand door.
Alarm
System which protects and provides a deterrent
a gainst theft and break-ins. If your vehicle is
so equipped, it provides the following types of
monitoring:
- Perimeter monitoring
The system ensures exterior perimeter
protection by detectors on the openings (doors,
bonnet) and in the electrical power supply.
- Anti-tilt monitoring
The system checks for any change in the
attitude of the vehicle.
Activation
F Press this button on the remote control.
The protection provided by the alarm system
becomes active after a
few seconds.
Triggering of the alarm
The alarm then returns to monitoring
mode but the triggering event is
stored and is indicated by illumination
of the electronic immobiliser warning
lamp for about 10
seconds when the
ignition is switched on.
The alarm is also triggered after interruption
of the electrical supply and when it is
reconnected.
From inside
F Pull the handle on the door panel towards you, then push to open the right-hand door.
F
P
ush the lever to open the left-hand door.
Do not drive with a
rear door open. F
P
ress the button, located on the door trim
pad, to widen the angle of the door.
The check strap will engage again
automatically on closing. F
T
urn the ignition off and exit the vehicle.
This is signalled by the siren sounding and
flashing of the direction indicators for thirty
seconds.
2
Access
Page 62 of 232
60
Exterior fittings
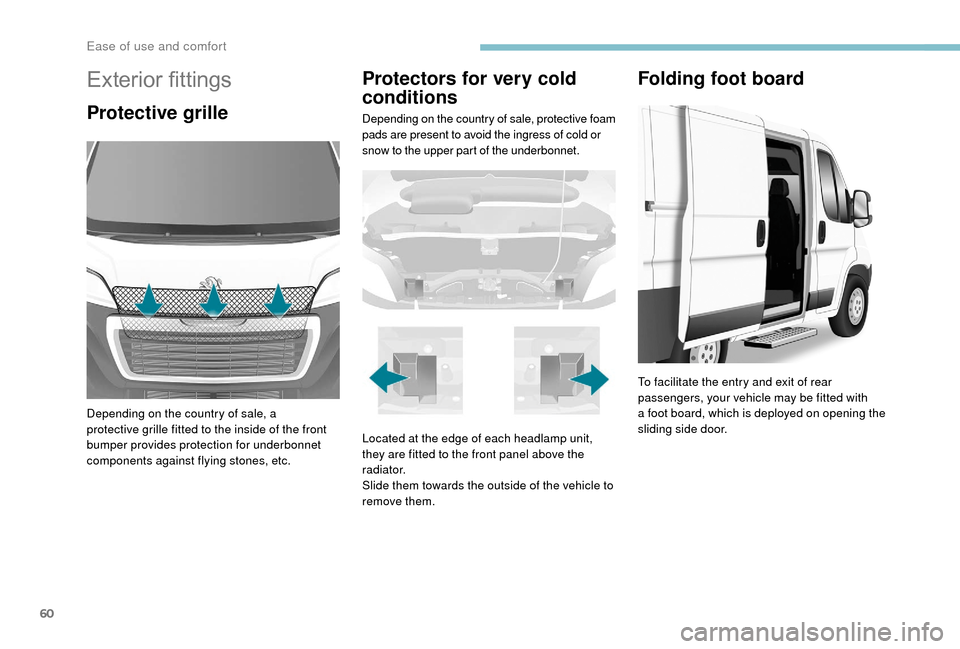
Protective grille
Depending on the country of sale, a
protective grille fitted to the inside of the front
bumper provides protection for underbonnet
components against flying stones, etc.
Protectors for very cold
conditions
Depending on the country of sale, protective foam
pads are present to avoid the ingress of cold or
snow to the upper part of the underbonnet.
Folding foot board
Located at the edge of each headlamp unit,
they are fitted to the front panel above the
r a d i a t o r.
Slide them towards the outside of the vehicle to
remove them.To facilitate the entry and exit of rear
passengers, your vehicle may be fitted with
a
foot board, which is deployed on opening the
sliding side door.
Ease of use and comfort
Page 97 of 232
95
Reactivation
Malfunction
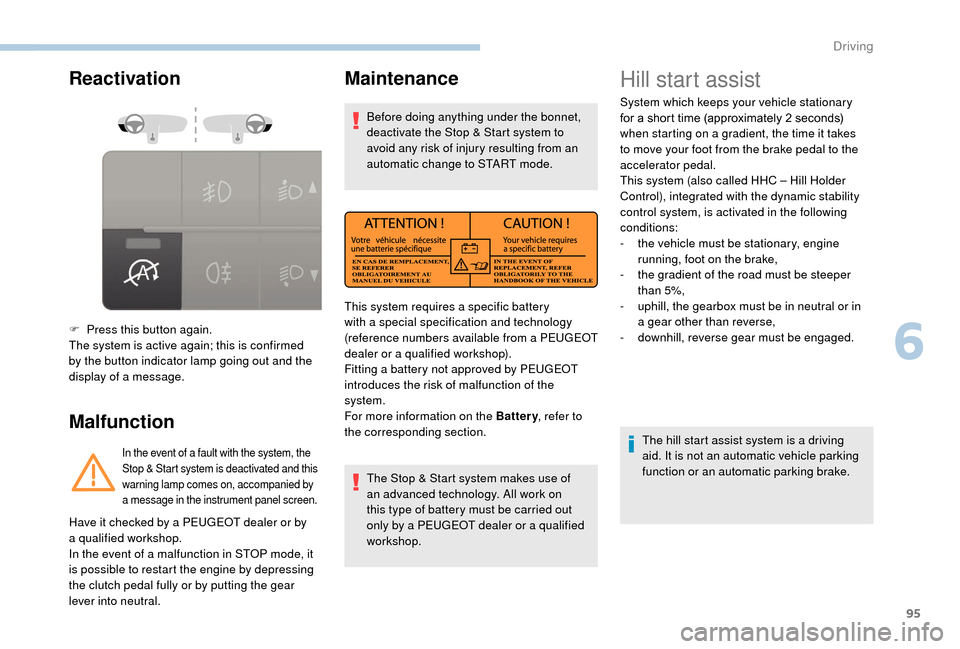
F Press this button again.
The system is active again; this is confirmed
by the button indicator lamp going out and the
display of a message.
In the event of a fault with the system, the
S top & Start system is deactivated and this
warning lamp comes on, accompanied by
a
message in the instrument panel screen.
Maintenance
Before doing anything under the bonnet,
deactivate the Stop & Start system to
avoid any risk of injury resulting from an
automatic change to START mode.
The Stop & Start system makes use of
an advanced technology. All work on
this type of battery must be carried out
only by a
PEUGEOT dealer or a qualified
workshop.
Have it checked by a
PEUGEOT dealer or by
a
qualified workshop.
In the event of a
malfunction in STOP mode, it
is possible to restart the engine by depressing
the clutch pedal fully or by putting the gear
lever into neutral. This system requires a
specific battery
with a
special specification and technology
(reference numbers available from a
PEUGEOT
dealer or a
qualified workshop).
Fitting a
battery not approved by PEUGEOT
introduces the risk of malfunction of the
system.
For more information on the Battery , refer to
the corresponding section.
Hill start assist
System which keeps your vehicle stationary
for a short time (approximately 2 seconds)
when starting on a
gradient, the time it takes
to move your foot from the brake pedal to the
accelerator pedal.
This system (also called HHC – Hill Holder
Control), integrated with the dynamic stability
control system, is activated in the following
conditions:
-
t
he vehicle must be stationary, engine
running, foot on the brake,
-
t
he gradient of the road must be steeper
than 5%,
-
u
phill, the gearbox must be in neutral or in
a
gear other than reverse,
-
do
wnhill, reverse gear must be engaged.
The hill start assist system is a
driving
aid. It is not an automatic vehicle parking
function or an automatic parking brake.
6
Driving
Page 127 of 232
125
Bonnet
Opening
Before doing anything under the bonnet,
deactivate the Stop & Start system to
avoid the risk of injury related to an
automatic change to START mode.
Inside
This operation must only be carried out with the
vehicle stationary and the driver's door open.
Outside
Do not open the bonnet in very windy
conditions.
When the engine is hot, handle the safety
catch and stay with care (risk of burns).Because of the presence of electrical
equipment under the bonnet, it is
recommended that exposure to water
(rain, washing, etc.) be limited.
Closing the bonnet
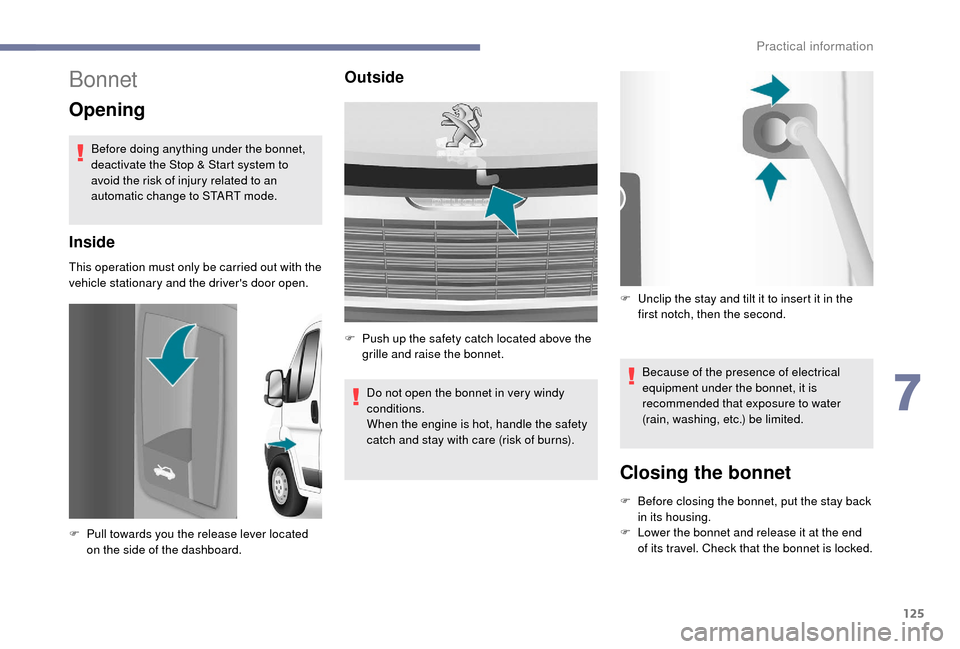
F Pull towards you the release lever located
on the side of the dashboard. F
P
ush up the safety catch located above the
grille and raise the bonnet. F
U
nclip the stay and tilt it to insert it in the
first notch, then the second.
F
B
efore closing the bonnet, put the stay back
in its housing.
F L ower the bonnet and release it at the end
of its travel. Check that the bonnet is locked.
7
Practical information
Page 133 of 232
131
Brake disc wear
For information on checking brake
disc wear, contact a PEUGEOT
dealer or a
qualified workshop.
Parking brake
If excessive travel or a loss of
e ffectiveness of this system is
noticed, the parking brake must
be checked, even between two
services.
This system must be checked by a
PEUGEOT
dealer or a
qualified workshop.
Diesel fuel filter
The Diesel fuel filter is located under the
bonnet, close to the brake fluid reser voir. If this warning lamp comes on, the
filter must be purged to remove
water.
You can also purge the fuel filter
regularly, every time the engine oil
is changed.
Purging water from the filterThe HDi engines use advanced technology.
All work must be done by personnel that
have had special training, which can be
ensured by going to a
PEUGEOT dealer or
a
qualified workshop.
Only use products recommended by
PEUGEOT or products of equivalent
quality and specification.
In order to optimise the operation of
components as important as those in the
braking system, PEUGEOT selects and
offers very specific products.
After washing the vehicle, dampness, or
in wintry conditions, ice can form on the
brake discs and pads: braking efficiency
may be reduced. Make light brake
applications to dry and defrost the brakes.
F
C
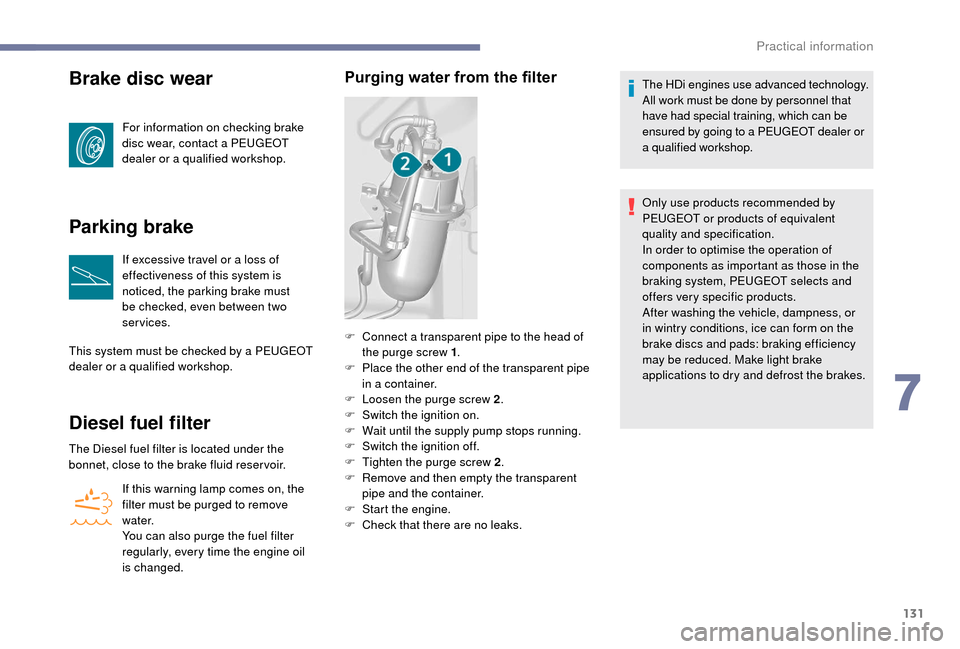
onnect a
transparent pipe to the head of
the purge screw 1 .
F
P
lace the other end of the transparent pipe
in a
container.
F
L
oosen the purge screw 2 .
F
S
witch the ignition on.
F
W
ait until the supply pump stops running.
F
S
witch the ignition off.
F
T
ighten the purge screw 2 .
F
R
emove and then empty the transparent
pipe and the container.
F
S
tart the engine.
F
C
heck that there are no leaks.
7
Practical information
Page 147 of 232
145
If necessary you can remove the headlamp
unit:
F
D
epending on country of sale, remove the
extreme cold protection foam by making it
slide sideways towards the outside.
F
D
isconnect the electrical connector by
removing its locking ring.
F
R
emove the two headlamp unit fixing
screws.
F
M
ove the headlamp towards the centre of
the vehicle to extract it from its sliders. On
the left-hand side, be careful of the bonnet
st ay.
Main beam headlamps
Ty p e D , H7 - 55W
F R emove the cover by pulling on the rubber
tongue.
F
D
isconnect the electrical connector.
F
R
elease the retaining spring by pressing on
the central clip.
F
C
hange the bulb taking care to align the
metal part with the groove on the lamp.
Dipped beam headlamps
Ty p e D , H7 - 55W
F R emove the cover by pulling on the rubber
tongue.
F
D
isconnect the electrical connector.
F
R
elease the retaining spring by pressing on
the central clip.
F
C
hange the bulb taking care to align the
metal part with the grooves on the lamp.
Direction indicators
Ty p e A , W Y21W – 21W
F R emove the cover by pulling on the rubber
tongue.
F
T
urn the bulb holder a quarter turn anti-
clockwise.
F
C
hange the bulb.
F
O
pen and secure the bonnet with the stay.
F
T
o access the lamps and bulbs, reach
behind the headlamp unit. Ty p e A
, W21/5W – 21W and 5W
F
R
emove the cover by pulling on the rubber
tongue.
F
T
urn the bulb holder a quarter turn anti-
clockwise.
F
C
hange the bulb.
Sidelamps/daytime running
lamps
LED daytime running lamps
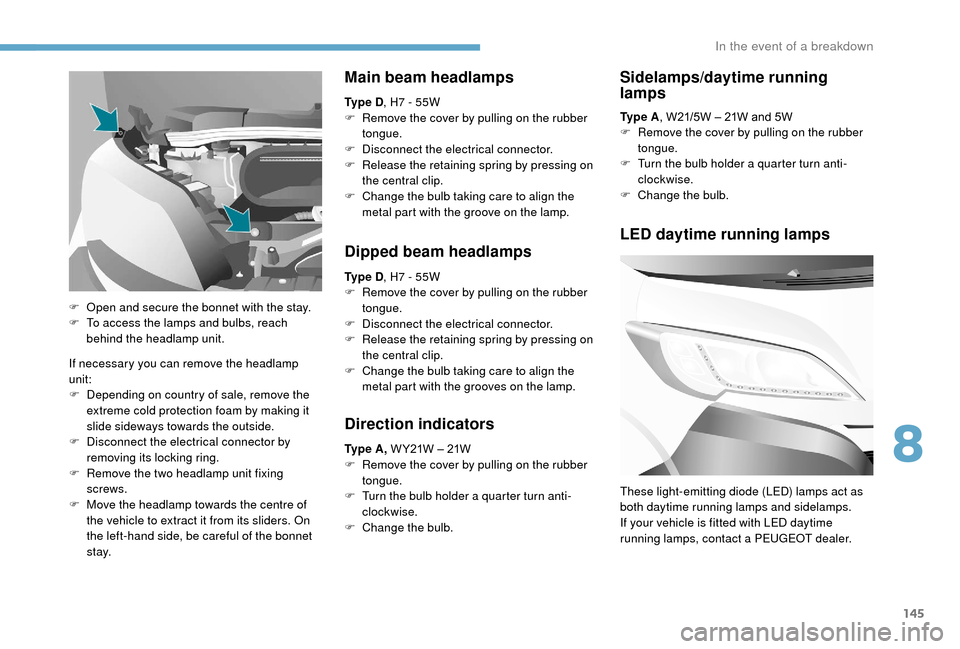
These light-emitting diode (LED) lamps act as
both daytime running lamps and sidelamps.
If your vehicle is fitted with LED daytime
running lamps, contact a PEUGEOT dealer.
8
In the event of a breakdown
Page 169 of 232
167
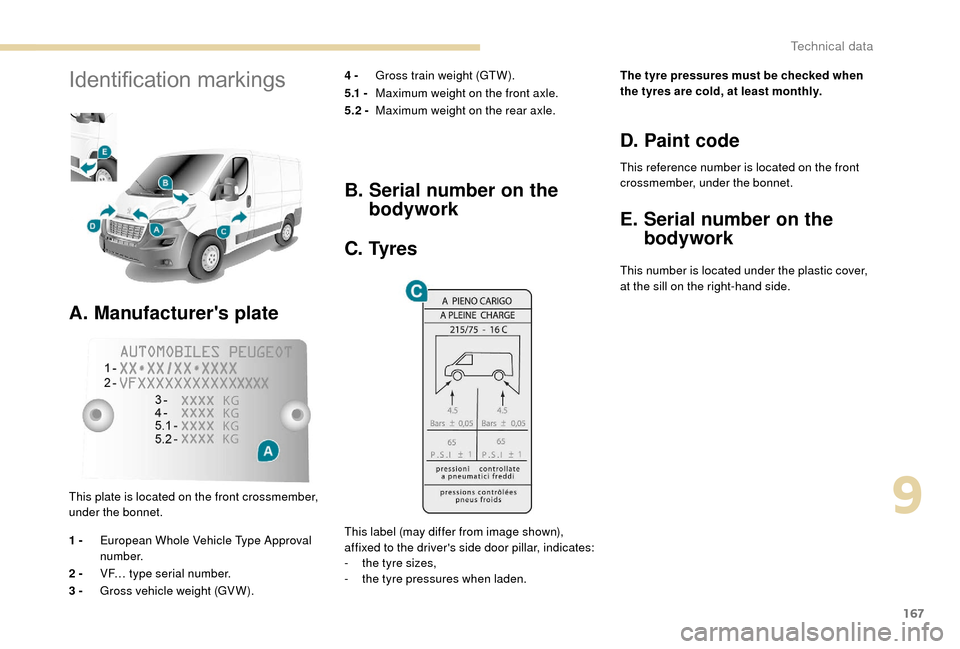
Identification markings
A. Manufacturer's plate
4 - Gross train weight (GTW).
5.1 - Maximum weight on the front axle.
5.2 - Maximum weight on the rear axle.
This plate is located on the front crossmember,
under the bonnet.
1 - European Whole Vehicle Type Approval
number.
2 - VF… type serial number.
3 - Gross vehicle weight (GV W).
B. Serial number on the
bodywork
C. Tyres
This label (may differ from image shown),
affixed to the driver's side door pillar, indicates:
-
t
he tyre sizes,
-
t
he tyre pressures when laden. The tyre pressures must be checked when
the tyres are cold, at least monthly.
D. Paint code
This reference number is located on the front
crossmember, under the bonnet.
E. Serial number on the
bodywork
This number is located under the plastic cover,
at the sill on the right-hand side.
9
Technical data
Page 170 of 232
168
Glossary of labels
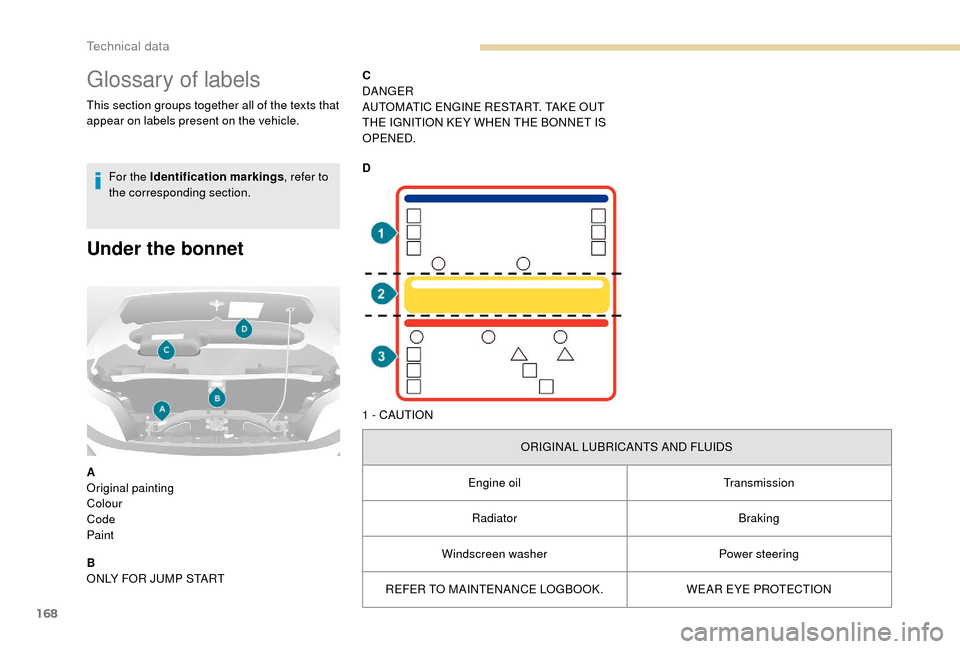
This section groups together all of the texts that
appear on labels present on the vehicle.For the Identification markings , refer to
the corresponding section.
Under the bonnet
A
Original painting
Colour
Code
Paint
B
ONLY FOR JUMP START C
DANGER
AUTOMATIC ENGINE RESTART. TAKE OUT
THE IGNITION KEY WHEN THE BONNET IS
OPENED.
D
1 - CAUTION
ORIGINAL LUBRICANTS AND FLUIDS
Engine oil Transmission
Radiator Braking
Windscreen washer Power steering
REFER TO MAINTENANCE LOGBOOK. WEAR EYE PROTECTION
Technical data