bulb PEUGEOT EXPERT 2023 Owners Manual
[x] Cancel search | Manufacturer: PEUGEOT, Model Year: 2023, Model line: EXPERT, Model: PEUGEOT EXPERT 2023Pages: 348, PDF Size: 12 MB
Page 5 of 348
3
Contents
6-speed manual gearbox 141
Gear shift indicator 142
Automatic gearbox 142
Drive selector (Electric) 145
Driving modes (Electric) 146
Stop & Start 147
Tyre under-inflation detection 148
Driving and manoeuvring aids - General
recommendations
150
Memorising speeds 151
Road signs recognition 152
Speed limiter 154
Cruise control - Specific recommendations 156
Cruise control 156
Adaptive cruise control 158
Active Safety Brake with Collision Risk Alert and
Intelligent emergency braking assistance
162
Lane departure warning 165
Distraction detection 166
Blind spot monitoring 167
Parking sensors 168
Visiopark 1 170
7Practical informationCompatibility of fuels 174
Refuelling 174
Diesel misfuel prevention 175
Charging system (Electric) 176
Charging the traction battery (Electric) 183
Energy economy mode 187
Snow chains 188
Towing device 188
Roof bars/Roof rack 189
Bonnet 190
Engine compartment 191
Checking levels 191
Checks 194
AdBlue® (BlueHDi) 196
Free-wheeling 198
Advice on care and maintenance 199
8In the event of a breakdownWarning triangle 202
Running out of fuel (Diesel) 202
Tool box 203
Temporary puncture repair kit 204
Spare wheel 207
Changing a bulb 2 11
Fuses 216
12
V battery
/ Accessory battery 216
Towing the vehicle 220
9Technical dataEngine technical data and towed loads 223
Diesel engines 224
Electric motor 227
Dimensions 229
Identification markings 231
10Bluetooth® audio systemFirst steps 232
Steering mounted controls 233
Menus 233
Radio 234
DAB (Digital Audio Broadcasting) radio 235
Media 236
Telephone 238
Frequently asked questions 241
11Audio System with Touch ScreenFirst steps 244
Steering mounted controls 245
Menus 246
Applications 247
Radio 247
DAB (Digital Audio Broadcasting) radio 249
Media 249
Telephone 251
Settings 254
Frequently asked questions 255
123D Connected NavigationFirst steps 257
Steering mounted controls 258
Menus 258
Voice commands 260
Navigation 263
Connected navigation 266
Applications 268
Radio 271
DAB (Digital Audio Broadcasting) radio 272
Media 272
Telephone 274
Settings 276
Frequently asked questions 278
13Vehicle data recording and privacy
■
Alphabetical index
■
Appendix
■
Hydrogen electric motor supplement CarM an uals 2 .c o m
Page 99 of 348
97
Safety
5General safety
recommendations
Do not remove the labels attached in
different places on your vehicle. They
include safety warnings as well as
identification information for the vehicle.
For all work on your vehicle, use a
qualified workshop that has the technical
information, skills and equipment required, all
of which a PEUGEOT dealer is able to
provide.
Depending on country regulations,
certain safety equipment may be
mandatory: high visibility safety vests,
warning triangles, breathalysers, spare bulbs,
spare fuses, fire extinguisher, first aid kit, mud
flaps at the rear of the vehicle, etc.
Installing electrical accessories:
– The fitting of electrical equipment or
accessories not approved by PEUGEOT
may
cause excessive current consumption and
faults and failures with the electrical system
of your vehicle. Contact a PEUGEOT dealer
for information on the range of approved
accessories.
–
As a safety measure, access to the
diagnostic socket, used for the vehicle's
electronic systems, is reserved strictly for
PEUGEOT dealers or qualified workshops,
equipped with the special tools required (risk
of malfunctions of the vehicle's electronic
systems that could cause breakdowns or
serious accidents). The Manufacturer cannot
be held responsible if this advice is not
followed.
–
Any modification or adaptation not intended
or authorised by PEUGEOT
or carried out
without meeting the technical requirements
defined by the Manufacturer will result in the
suspension of the commercial warranty.
Installation of accessory radio
communication transmitters
Before installing a radio communication
transmitter with an external aerial, you must
without fail contact a PEUGEOT dealer for
the specification of transmitters which can
be fitted (frequency, maximum power, aerial
position, specific installation requirements),
in line with the Vehicle Electromagnetic
Compatibility Directive (2004/104/EC).
Declarations of conformity for radio
equipment
The relevant certificates are available on the
brand website:
http://public.servicebox.peugeot.com/APddb/
Hazard warning lamps
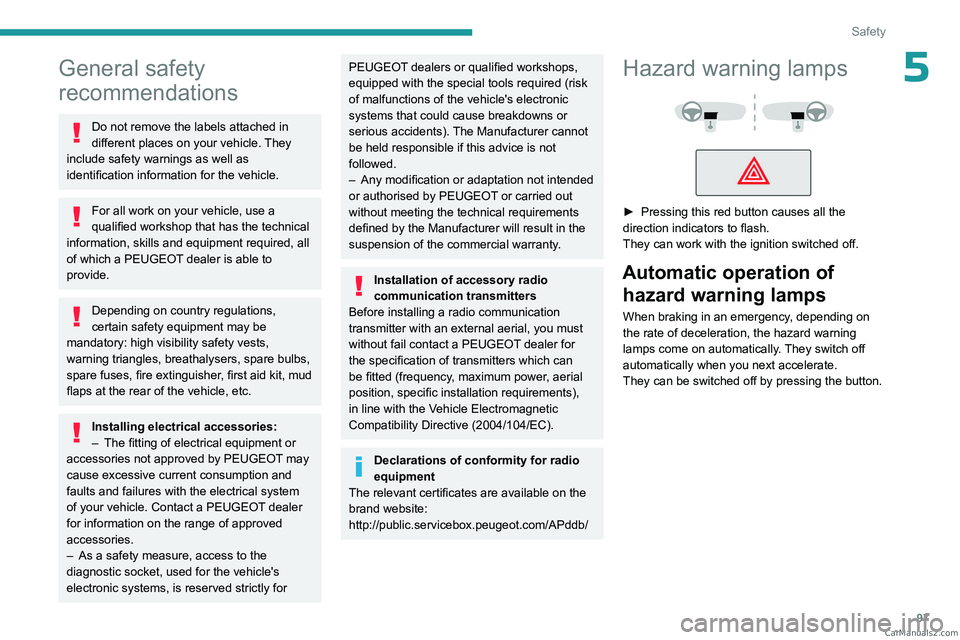
► Pressing this red button causes all the
direction indicators to flash.
They can work with the ignition switched off.
Automatic operation of hazard warning lamps
When braking in an emergency, depending on
the rate of deceleration, the hazard warning
lamps come on automatically. They switch off
automatically when you next accelerate.
They can be switched off by pressing the button. CarM an uals 2 .c o m
Page 213 of 348
2 11
In the event of a breakdown
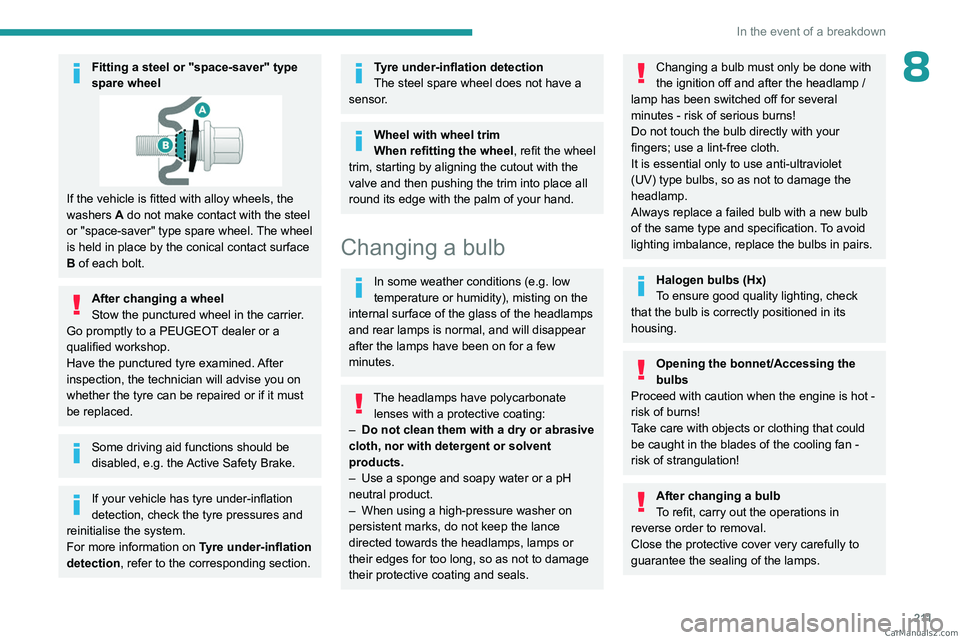
8Fitting a steel or "space-saver" type
spare wheel
If the vehicle is fitted with alloy wheels, the
washers A do not make contact with the steel
or "space-saver" type spare wheel. The wheel
is held in place by the conical contact surface
B of each bolt.
After changing a wheel
Stow the punctured wheel in the carrier.
Go promptly to a PEUGEOT dealer or a
qualified workshop.
Have the punctured tyre examined. After
inspection, the technician will advise you on
whether the tyre can be repaired or if it must
be replaced.
Some driving aid functions should be
disabled, e.g. the Active Safety Brake.
If your vehicle has tyre under-inflation
detection, check the tyre pressures and
reinitialise the system.
For more information on Tyre under-inflation
detection, refer to the corresponding section.
Tyre under-inflation detection
The steel spare wheel does not have a
sensor.
Wheel with wheel trim
When refitting the wheel, refit the wheel
trim, starting by aligning the cutout with the
valve and then pushing the trim into place all
round its edge with the palm of your hand.
Changing a bulb
In some weather conditions (e.g. low
temperature or humidity), misting on the
internal surface of the glass of the headlamps
and rear lamps is normal, and will disappear
after the lamps have been on for a few
minutes.
The headlamps have polycarbonate lenses with a protective coating:
–
Do not clean them with a dry or abrasive
cloth, nor with detergent or solvent
products.
–
Use a sponge and soapy water or a pH
neutral product.
–
When using a high-pressure washer on
persistent marks, do not keep the lance
directed towards the headlamps, lamps or
their edges for too long, so as not to damage
their protective coating and seals.
Changing a bulb must only be done with
the ignition off and after the headlamp /
lamp has been switched off for several
minutes - risk of serious burns!
Do not touch the bulb directly with your
fingers; use a lint-free cloth.
It is essential only to use anti-ultraviolet
(UV) type bulbs, so as not to damage the
headlamp.
Always replace a failed bulb with a new bulb
of the same type and specification. To avoid
lighting imbalance, replace the bulbs in pairs.
Halogen bulbs (Hx)
To ensure good quality lighting, check
that the bulb is correctly positioned in its
housing.
Opening the bonnet/Accessing the
bulbs
Proceed with caution when the engine is hot -
risk of burns!
Take care with objects or clothing that could
be caught in the blades of the cooling fan -
risk of strangulation!
After changing a bulb
To refit, carry out the operations in
reverse order to removal.
Close the protective cover very carefully to
guarantee the sealing of the lamps. CarM an uals 2 .c o m
Page 214 of 348
212
In the event of a breakdown
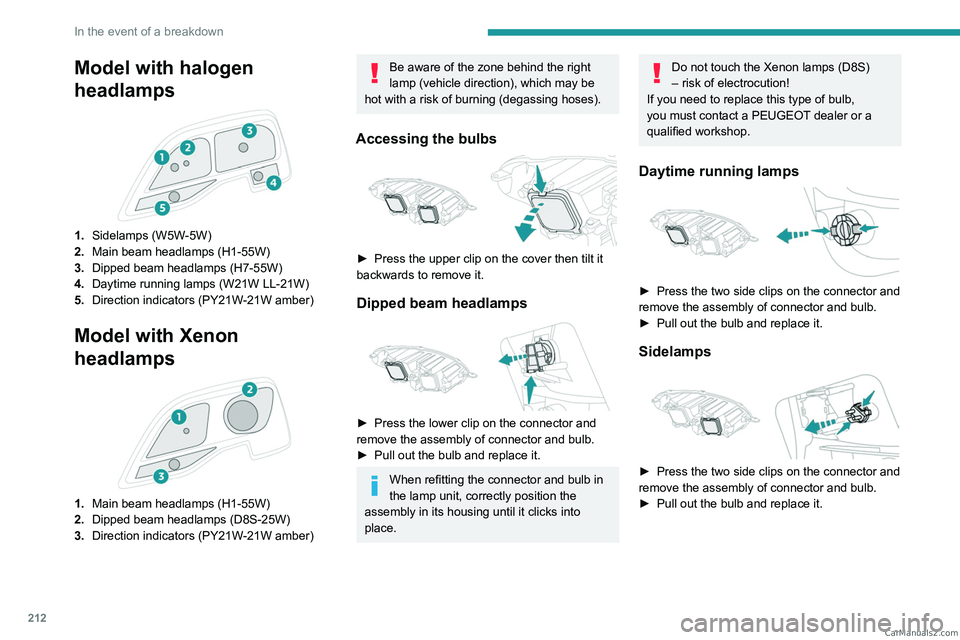
Model with halogen
headlamps
1.Sidelamps (W5W-5W)
2. Main beam headlamps (H1-55W)
3. Dipped beam headlamps (H7-55W)
4. Daytime running lamps (W21W LL-21W)
5. Direction indicators (PY21W-21W amber)
Model with Xenon
headlamps
1.Main beam headlamps (H1-55W)
2. Dipped beam headlamps (D8S-25W)
3. Direction indicators (PY21W-21W amber)
Be aware of the zone behind the right
lamp (vehicle direction), which may be
hot with a risk of burning (degassing hoses).
Accessing the bulbs
► Press the upper clip on the cover then tilt it
backwards to remove it.
Dipped beam headlamps
► Press the lower clip on the connector and
remove the assembly of connector and bulb.
►
Pull out the bulb and replace it.
When refitting the connector and bulb in
the lamp unit, correctly position the
assembly in its housing until it clicks into
place.
Do not touch the Xenon lamps (D8S)
– risk of electrocution!
If you need to replace this type of bulb,
you must contact a PEUGEOT dealer or a
qualified workshop.
Daytime running lamps
► Press the two side clips on the connector and
remove the assembly of connector and bulb.
►
Pull out the bulb and replace it.
Sidelamps
► Press the two side clips on the connector and
remove the assembly of connector and bulb.
►
Pull out the bulb and replace it. CarM an uals 2 .c o m
Page 215 of 348
213
In the event of a breakdown
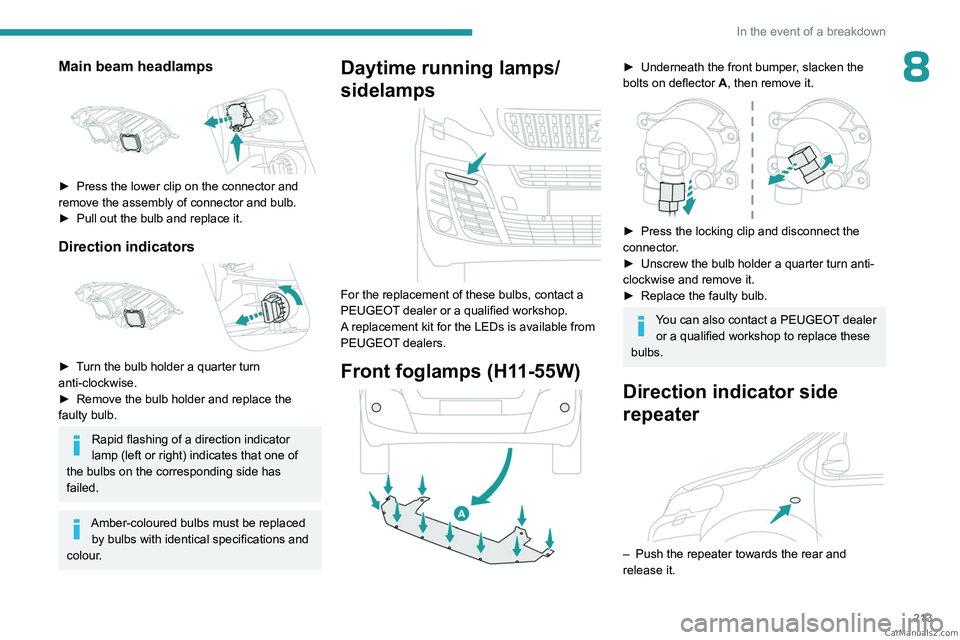
8Main beam headlamps
► Press the lower clip on the connector and
remove the assembly of connector and bulb.
►
Pull out the bulb and replace it.
Direction indicators
► Turn the bulb holder a quarter turn
anti-clockwise.
►
Remove the bulb holder and replace the
faulty bulb.
Rapid flashing of a direction indicator
lamp (left or right) indicates that one of
the bulbs on the corresponding side has
failed.
Amber-coloured bulbs must be replaced by bulbs with identical specifications and
colour.
Daytime running lamps/
sidelamps
For the replacement of these bulbs, contact a
PEUGEOT dealer or a qualified workshop.
A replacement kit for the LEDs is available from
PEUGEOT dealers.
Front foglamps (H11-55W)
► Underneath the front bumper , slacken the
bolts on deflector A, then remove it.
► Press the locking clip and disconnect the
connector .
►
Unscrew the bulb holder a quarter turn anti-
clockwise and remove it.
►
Replace the faulty bulb.
You can also contact a PEUGEOT dealer or a qualified workshop to replace these
bulbs.
Direction indicator side
repeater
– Push the repeater towards the rear and
release it. CarM an uals 2 .c o m
Page 216 of 348
214
In the event of a breakdown
– When refitting, engage the repeater towards
the front and then slide it backwards.
Amber coloured bulbs (direction indicators and
side repeaters) must be replaced with bulbs of
identical specification and colour
.
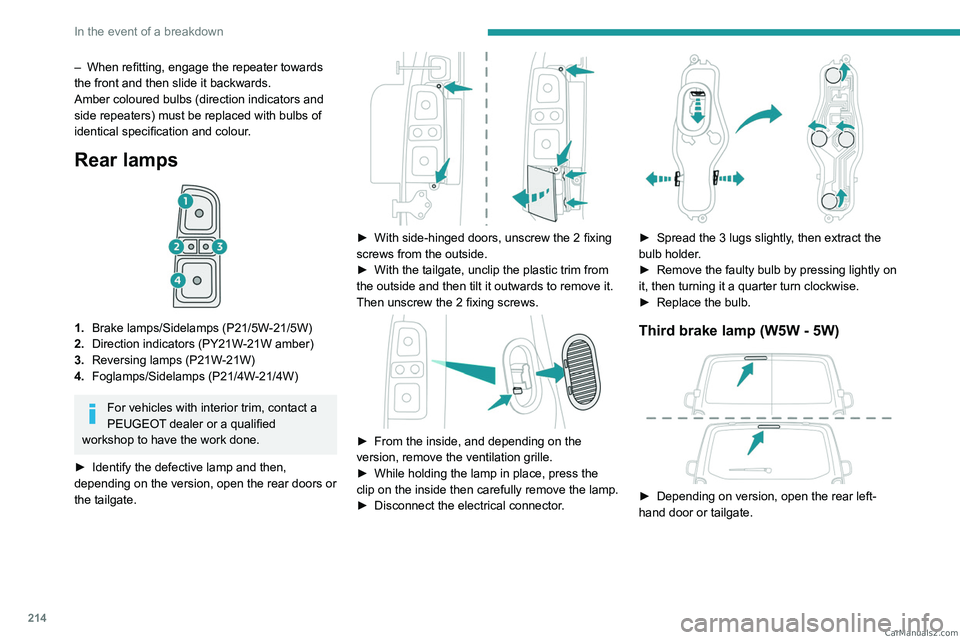
Rear lamps
1.Brake lamps/Sidelamps (P21/5W-21/5W)
2. Direction indicators (PY21W-21W amber)
3. Reversing lamps (P21W-21W)
4. Foglamps/Sidelamps (P21/4W-21/4W)
For vehicles with interior trim, contact a
PEUGEOT dealer or a qualified
workshop to have the work done.
►
Identify the defective lamp and then,
depending on the version, open the rear doors or
the tailgate.
► With side-hinged doors, unscrew the 2 fixing
screws from the outside.
►
With the tailgate, unclip the plastic trim from
the outside and then tilt it outwards to remove it.
Then unscrew the 2 fixing screws.
► From the inside, and depending on the
version, remove the ventilation grille.
►
While holding the lamp in place, press the
clip on the inside then carefully remove the lamp.
►
Disconnect the electrical connector
.
► Spread the 3 lugs slightly, then extract the
bulb holder.
►
Remove the faulty bulb by pressing lightly on
it, then turning it a quarter turn clockwise.
►
Replace the bulb.
Third brake lamp (W5W - 5W)
► Depending on version, open the rear left-
hand door or tailgate.
CarM an uals 2 .c o m
Page 217 of 348
215
In the event of a breakdown
8
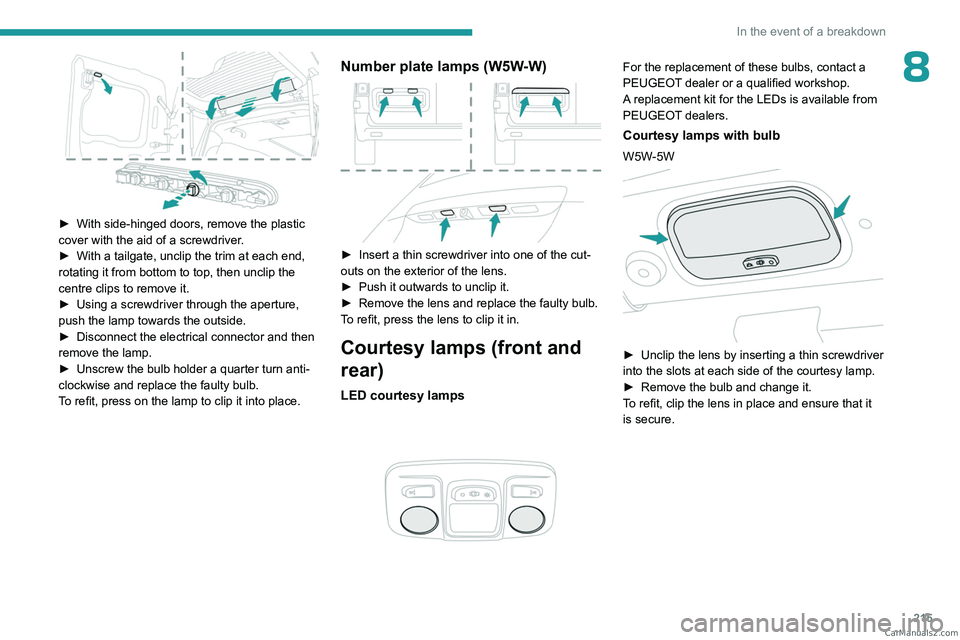
► With side-hinged doors, remove the plastic
cover with the aid of a screwdriver .
►
With a tailgate, unclip the trim at each end,
rotating it from bottom to top, then unclip the
centre clips to remove it.
►
Using a screwdriver through the aperture,
push the lamp towards the outside.
►
Disconnect the electrical connector and then
remove the lamp.
►
Unscrew the bulb holder a quarter turn anti-
clockwise and replace the faulty bulb.
T
o refit, press on the lamp to clip it into place.
Number plate lamps (W5W-W)
► Insert a thin screwdriver into one of the cut-
outs on the exterior of the lens.
►
Push it outwards to unclip it.
►
Remove the lens and replace the faulty bulb.
T
o refit, press the lens to clip it in.
Courtesy lamps (front and
rear)
LED courtesy lamps
For the replacement of these bulbs, contact a
PEUGEOT dealer or a qualified workshop.
A replacement kit for the LEDs is available from
PEUGEOT dealers.
Courtesy lamps with bulb
W5W-5W
► Unclip the lens by inserting a thin screwdriver
into the slots at each side of the courtesy lamp.
►
Remove the bulb and change it.
T
o refit, clip the lens in place and ensure that it
is secure. CarM an uals 2 .c o m
Page 218 of 348
216
In the event of a breakdown
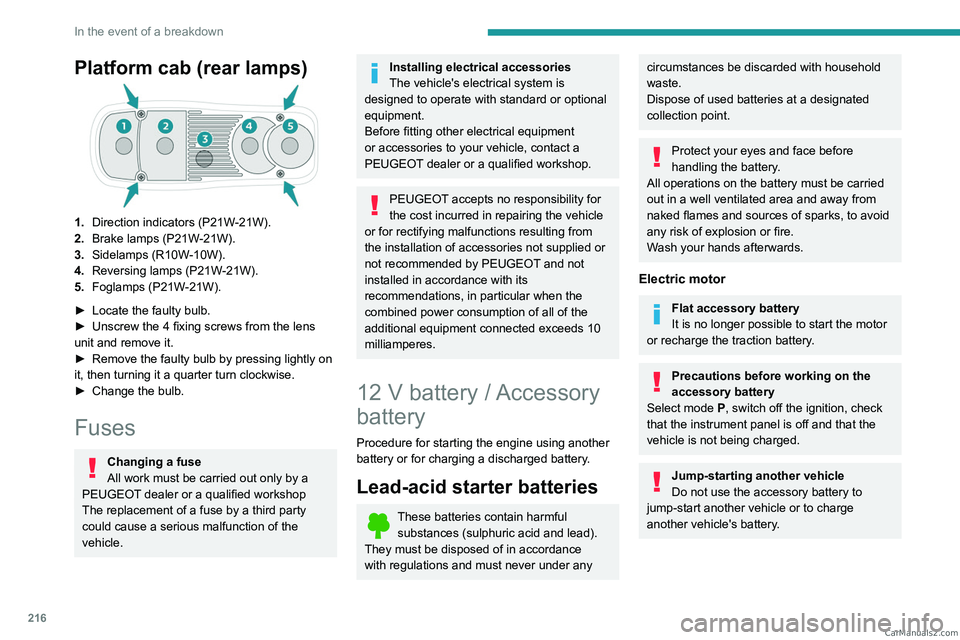
Platform cab (rear lamps)
1.Direction indicators (P21W-21W).
2. Brake lamps (P21W-21W).
3. Sidelamps (R10W-10W).
4. Reversing lamps (P21W-21W).
5. Foglamps (P21W-21W).
►
Locate the faulty bulb.
►
Unscrew the 4 fixing screws from the lens
unit and remove it.
►
Remove the faulty bulb by pressing lightly on
it, then turning it a quarter turn clockwise.
►
Change the bulb.
Fuses
Changing a fuse
All work must be carried out only by a
PEUGEOT dealer or a qualified workshop
The replacement of a fuse by a third party
could cause a serious malfunction of the
vehicle.
Installing electrical accessories
The vehicle's electrical system is
designed to operate with standard or optional
equipment.
Before fitting other electrical equipment
or accessories to your vehicle, contact a
PEUGEOT dealer or a qualified workshop.
PEUGEOT accepts no responsibility for
the cost incurred in repairing the vehicle
or for rectifying malfunctions resulting from
the installation of accessories not supplied or
not recommended by PEUGEOT and not
installed in accordance with its
recommendations, in particular when the
combined power consumption of all of the
additional equipment connected exceeds 10
milliamperes.
12 V battery / Accessory
battery
Procedure for starting the engine using another
battery or for charging a discharged battery.
Lead-acid starter batteries
These batteries contain harmful
substances (sulphuric acid and lead).
They must be disposed of in accordance
with regulations and must never under any
circumstances be discarded with household
waste.
Dispose of used batteries at a designated
collection point.
Protect your eyes and face before
handling the battery.
All operations on the battery must be carried
out in a well ventilated area and away from
naked flames and sources of sparks, to avoid
any risk of explosion or fire.
Wash your hands afterwards.
Electric motor
Flat accessory battery
It is no longer possible to start the motor
or recharge the traction battery.
Precautions before working on the
accessory battery
Select mode
P, switch off the ignition, check
that the instrument panel is off and that the
vehicle is not being charged.
Jump-starting another vehicle
Do not use the accessory battery to
jump-start another vehicle or to charge
another vehicle's battery. CarM an uals 2 .c o m
Page 287 of 348
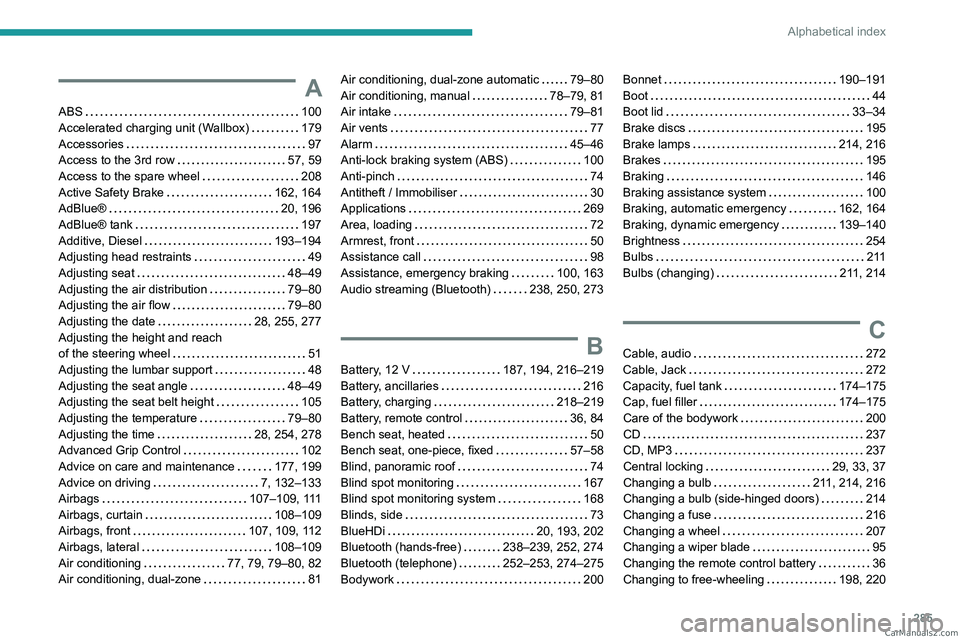
285
Alphabetical index
A
ABS 100
Accelerated charging unit (Wallbox)
179
Accessories
97
Access to the 3rd row
57, 59
Access to the spare wheel
208
Active Safety Brake
162, 164
AdBlue®
20, 196
AdBlue® tank
197
Additive, Diesel
193–194
Adjusting head restraints
49
Adjusting seat
48–49
Adjusting the air distribution
79–80
Adjusting the air flow
79–80
Adjusting the date
28, 255, 277
Adjusting the height and reach
of the steering wheel
51
Adjusting the lumbar support
48
Adjusting the seat angle
48–49
Adjusting the seat belt height
105
Adjusting the temperature
79–80
Adjusting the time
28, 254, 278
Advanced Grip Control
102
Advice on care and maintenance
177, 199
Advice on driving
7, 132–133
Airbags
107–109, 111
Airbags, curtain
108–109
Airbags, front
107, 109, 112
Airbags, lateral
108–109
Air conditioning
77, 79, 79–80, 82
Air conditioning, dual-zone
81
Air conditioning, dual-zone automatic 79–80
Air conditioning, manual
78–79, 81
Air intake
79–81
Air vents
77
Alarm
45–46
Anti-lock braking system (ABS)
100
Anti-pinch
74
Antitheft / Immobiliser
30
Applications
269
Area, loading
72
Armrest, front
50
Assistance call
98
Assistance, emergency braking
100, 163
Audio streaming (Bluetooth)
238, 250, 273
B
Battery, 12 V 187, 194, 216–219
Battery, ancillaries
216
Battery, charging
218–219
Battery, remote control
36, 84
Bench seat, heated
50
Bench seat, one-piece, fixed
57–58
Blind, panoramic roof
74
Blind spot monitoring
167
Blind spot monitoring system
168
Blinds, side
73
BlueHDi
20, 193, 202
Bluetooth (hands-free)
238–239, 252, 274
Bluetooth (telephone)
252–253, 274–275
Bodywork
200
Bonnet 190–191
Boot
44
Boot lid
33–34
Brake discs
195
Brake lamps
214, 216
Brakes
195
Braking
146
Braking assistance system
100
Braking, automatic emergency
162, 164
Braking, dynamic emergency
139–140
Brightness
254
Bulbs
2 11
Bulbs (changing)
211, 214
C
Cable, audio 272
Cable, Jack
272
Capacity, fuel tank
174–175
Cap, fuel filler
174–175
Care of the bodywork
200
CD
237
CD, MP3
237
Central locking
29, 33, 37
Changing a bulb
211, 214, 216
Changing a bulb (side-hinged doors)
214
Changing a fuse
216
Changing a wheel
207
Changing a wiper blade
95
Changing the remote control battery
36
Changing to free-wheeling
198, 220 CarM an uals 2 .c o m
Page 291 of 348
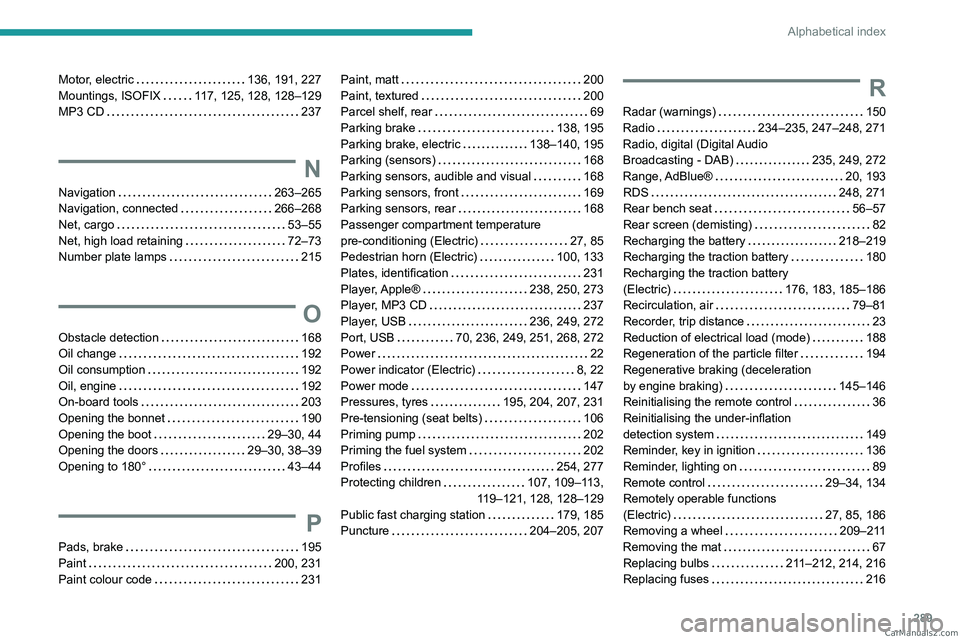
289
Alphabetical index
Motor, electric 136, 191, 227
Mountings, ISOFIX
117, 125, 128, 128–129
MP3 CD
237
N
Navigation 263–265
Navigation, connected
266–268
Net, cargo
53–55
Net, high load retaining
72–73
Number plate lamps
215
O
Obstacle detection 168
Oil change
192
Oil consumption
192
Oil, engine
192
On-board tools
203
Opening the bonnet
190
Opening the boot
29–30, 44
Opening the doors
29–30, 38–39
Opening to 180°
43–44
P
Pads, brake 195
Paint
200, 231
Paint colour code
231
Paint, matt 200
Paint, textured
200
Parcel shelf, rear
69
Parking brake
138, 195
Parking brake, electric
138–140, 195
Parking (sensors)
168
Parking sensors, audible and visual
168
Parking sensors, front
169
Parking sensors, rear
168
Passenger compartment temperature
pre-conditioning (Electric)
27, 85
Pedestrian horn (Electric)
100, 133
Plates, identification
231
Player, Apple®
238, 250, 273
Player, MP3 CD
237
Player, USB
236, 249, 272
Port, USB
70, 236, 249, 251, 268, 272
Power
22
Power indicator (Electric)
8, 22
Power mode
147
Pressures, tyres
195, 204, 207, 231
Pre-tensioning (seat belts)
106
Priming pump
202
Priming the fuel system
202
Profiles
254, 277
Protecting children
107, 109–113,
119–121, 128, 128–129
Public fast charging station
179, 185
Puncture
204–205, 207R
Radar (warnings) 150
Radio
234–235, 247–248, 271
Radio, digital (Digital Audio
Broadcasting - DAB)
235, 249, 272
Range, AdBlue®
20, 193
RDS
248, 271
Rear bench seat
56–57
Rear screen (demisting)
82
Recharging the battery
218–219
Recharging the traction battery
180
Recharging the traction battery
(Electric)
176, 183, 185–186
Recirculation, air
79–81
Recorder, trip distance
23
Reduction of electrical load (mode)
188
Regeneration of the particle filter
194
Regenerative braking (deceleration
by engine braking)
145–146
Reinitialising the remote control
36
Reinitialising the under-inflation
detection system
149
Reminder, key in ignition
136
Reminder, lighting on
89
Remote control
29–34, 134
Remotely operable functions
(Electric)
27, 85, 186
Removing a wheel
209–211
Removing the mat
67
Replacing bulbs
211–212, 214, 216
Replacing fuses
216 CarM an uals 2 .c o m