Peugeot Landtrek 2021 Service Manual
Manufacturer: PEUGEOT, Model Year: 2021, Model line: Landtrek, Model: Peugeot Landtrek 2021Pages: 176, PDF Size: 6.04 MB
Page 41 of 176
39
Ease of use and comfort
3Storage boxes
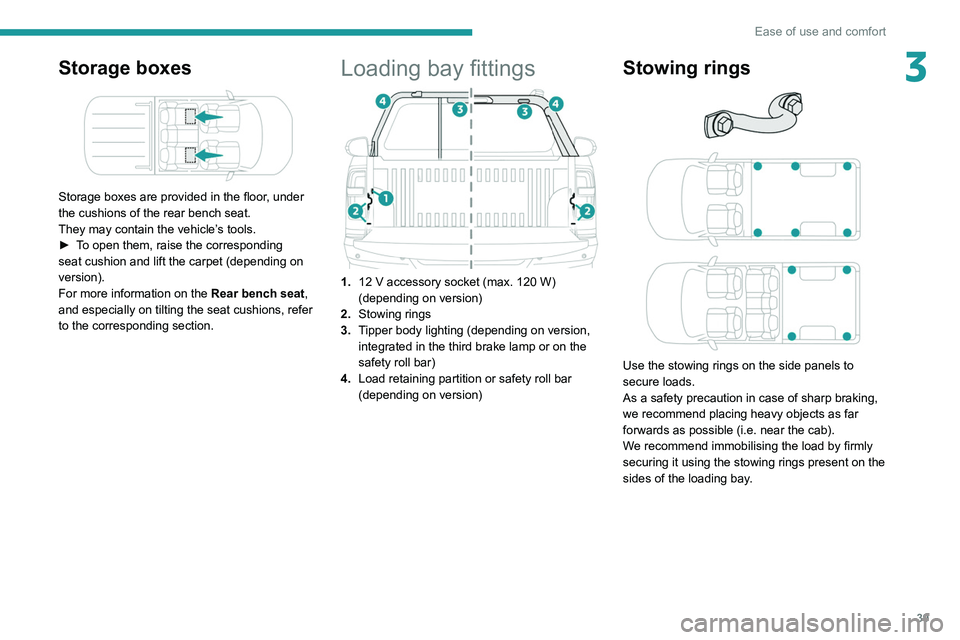
Storage boxes are provided in the floor, under
the cushions of the rear bench seat.
They may contain the vehicle’s tools.
â–ş
T
o open them, raise the corresponding
seat cushion and lift the carpet (depending on
version).
For more information on the Rear bench seat,
and especially on tilting the seat cushions, refer
to the corresponding section.
Loading bay fittings
1. 12 V accessory socket (max. 120 W)
(depending on version)
2. Stowing rings
3. Tipper body lighting (depending on version,
integrated in the third brake lamp or on the
safety roll bar)
4. Load retaining partition or safety roll bar
(depending on version)
Stowing rings
Use the stowing rings on the side panels to
secure loads.
As a safety precaution in case of sharp braking,
we recommend placing heavy objects as far
forwards as possible (i.e. near the cab).
We recommend immobilising the load by firmly
securing it using the stowing rings present on the
sides of the loading bay.
Page 42 of 176
40
Ease of use and comfort
Load retaining partition
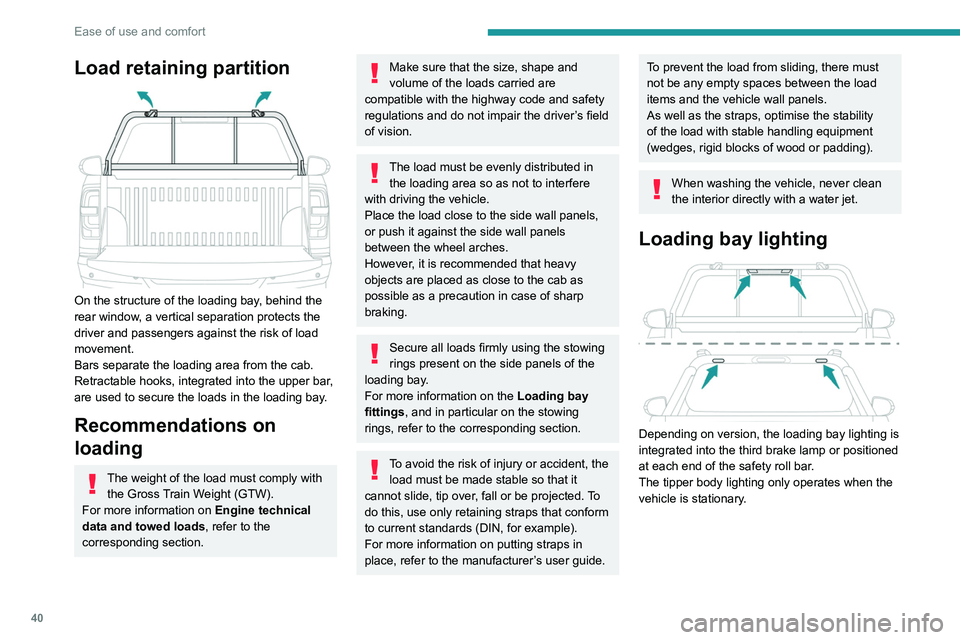
On the structure of the loading bay, behind the
rear window, a vertical separation protects the
driver and passengers against the risk of load
movement.
Bars separate the loading area from the cab.
Retractable hooks, integrated into the upper bar,
are used to secure the loads in the loading bay.
Recommendations on
loading
The weight of the load must comply with the Gross Train Weight (GTW).
For more information on Engine technical
data and towed loads , refer to the
corresponding section.
Make sure that the size, shape and
volume of the loads carried are
compatible with the highway code and safety
regulations and do not impair the driver’s field
of vision.
The load must be evenly distributed in the loading area so as not to interfere
with driving the vehicle.
Place the load close to the side wall panels,
or push it against the side wall panels
between the wheel arches.
However, it is recommended that heavy
objects are placed as close to the cab as
possible as a precaution in case of sharp
braking.
Secure all loads firmly using the stowing
rings present on the side panels of the
loading bay.
For more information on the Loading bay
fittings, and in particular on the stowing
rings, refer to the corresponding section.
To avoid the risk of injury or accident, the load must be made stable so that it
cannot slide, tip over, fall or be projected. To
do this, use only retaining straps that conform
to current standards (DIN, for example).
For more information on putting straps in
place, refer to the manufacturer’s user guide.
To prevent the load from sliding, there must
not be any empty spaces between the load
items and the vehicle wall panels.
As well as the straps, optimise the stability
of the load with stable handling equipment
(wedges, rigid blocks of wood or padding).
When washing the vehicle, never clean
the interior directly with a water jet.
Loading bay lighting
Depending on version, the loading bay lighting is
integrated into the third brake lamp or positioned
at each end of the safety roll bar.
The tipper body
lighting only operates when the
vehicle is stationary.
Page 43 of 176
41
Ease of use and comfort
3
â–ş When the vehicle is stationary , press this
button to activate/deactivate the loading bay
lighting function (confirmed by the illumination/
extinction of the indicator lamp).
The loading bay lighting is no longer available if the speed of the vehicle is
above 2 mph (3
km/h).
Page 44 of 176
42
Lighting and visibility
Exterior lighting control
stalk
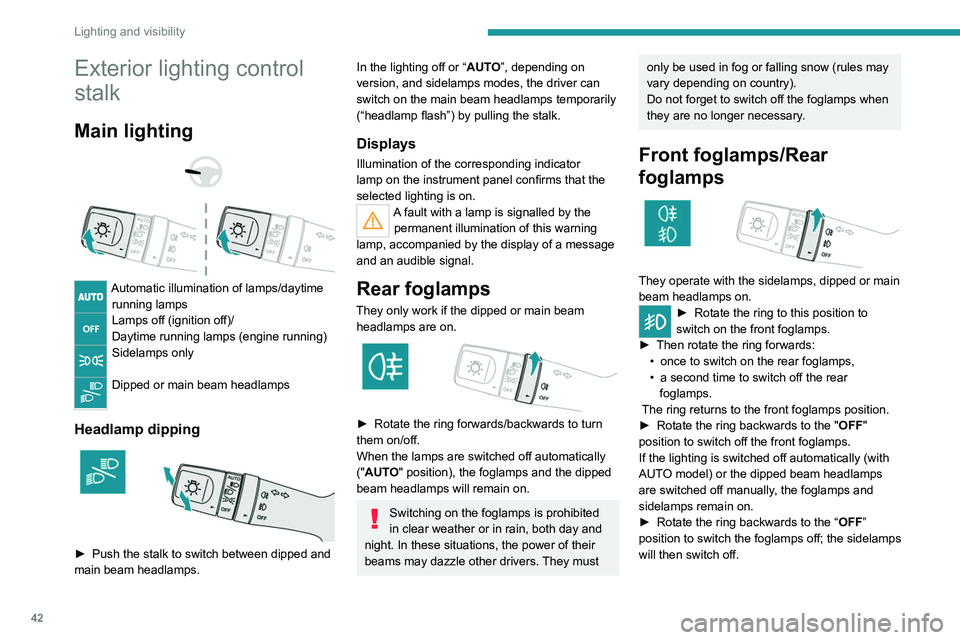
Main lighting
Automatic illumination of lamps/daytime running lamps
Lamps off (ignition off)/
Daytime running lamps (engine running)
Sidelamps only
Dipped or main beam headlamps
Headlamp dipping
â–ş Push the stalk to switch between dipped and
main beam headlamps.
In the lighting off or “ AUTO”, depending on
version, and sidelamps modes, the driver can
switch on the main beam headlamps temporarily
(“headlamp flash”) by pulling the stalk.
Displays
Illumination of the corresponding indicator
lamp on the instrument panel confirms that the
selected lighting is on.
A fault with a lamp is signalled by the permanent illumination of this warning
lamp, accompanied by the display of a message
and an audible signal.
Rear foglamps
They only work if the dipped or main beam headlamps are on.
â–ş Rotate the ring forwards/backwards to turn
them on/off.
When the lamps are switched off automatically
("AUTO" position), the foglamps and the dipped
beam headlamps will remain on.
Switching on the foglamps is prohibited
in clear weather or in rain, both day and
night. In these situations, the power of their
beams may dazzle other drivers. They must
only be used in fog or falling snow (rules may
vary depending on country).
Do not forget to switch off the foglamps when
they are no longer necessary.
Front foglamps/Rear
foglamps
They operate with the sidelamps, dipped or main
beam headlamps on.
â–ş Rotate the ring to this position to
switch on the front foglamps.
â–ş
Then rotate the ring forwards:
•
once to switch on the rear foglamps,
•
a second time to switch off the rear
foglamps.
The ring returns to the front foglamps position.
â–ş
Rotate
the ring backwards to the " OFF"
position to switch off the front foglamps.
If the lighting is switched off automatically (with
AUTO model) or the dipped beam headlamps
are switched off manually, the foglamps and
sidelamps remain on.
â–ş
Rotate the ring backwards to the “ OFF”
position to switch the foglamps off; the sidelamps
will then switch off.
Switching off of the lamps when the
ignition is switched off
When the ignition is switched off, all of the
lamps turn off immediately, except for dipped
beam headlamps if automatic guide-me-home
lighting is activated.
Switching on the lamps after
switching off the ignition
To reactivate the lighting control, rotate the
ring, depending on version, to the " OFF"
position - lamps off, or to the "AUTO" position,
then to the desired position.
If the driver's door is opened, a temporary
audible signal warns the driver that the lamps
are on.
They will go off automatically after a period of
time that depends on the state of charge of
the battery (entering energy economy mode).
In some weather conditions (e.g. low
temperature or humidity), misting on the
internal surface of the glass of the headlamps
and rear lamps is normal, and will disappear
after the lamps have been on for a few
minutes.
Never look too closely at the light beam
of LED technology lamps - risk of serious
eye injury!
Page 45 of 176
43
Lighting and visibility
4Switching off of the lamps when the
ignition is switched off
When the ignition is switched off, all of the
lamps turn off immediately, except for dipped
beam headlamps if automatic guide-me-home
lighting is activated.
Switching on the lamps after
switching off the ignition
To reactivate the lighting control, rotate the
ring, depending on version, to the " OFF"
position - lamps off, or to the "AUTO" position,
then to the desired position.
If the driver's door is opened, a temporary
audible signal warns the driver that the lamps
are on.
They will go off automatically after a period of
time that depends on the state of charge of
the battery (entering energy economy mode).
In some weather conditions (e.g. low
temperature or humidity), misting on the
internal surface of the glass of the headlamps
and rear lamps is normal, and will disappear
after the lamps have been on for a few
minutes.
Never look too closely at the light beam
of LED technology lamps - risk of serious
eye injury!
Travelling abroad
Vehicles equipped with halogen
headlamps:
If planning to use your vehicle in a country
that drives on the other side of the road, the
headlamp dipped beams must be adjusted to
avoid dazzling oncoming drivers. Contact a
PEUGEOT dealer or a qualified workshop.
Daytime running lamps/
Sidelamps
These lamps at the front and rear of the vehicle
light up automatically when the engine starts.
They perform the following functions:
–
Daytime running lamps (lighting control stalk
at position "
OFF" or "AUTO" with adequate
ambient light).
–
Sidelamps (lighting control stalk at position
"
AUTO" with low ambient light or "Sidelamps
only" or "Dipped/main beam headlamps").
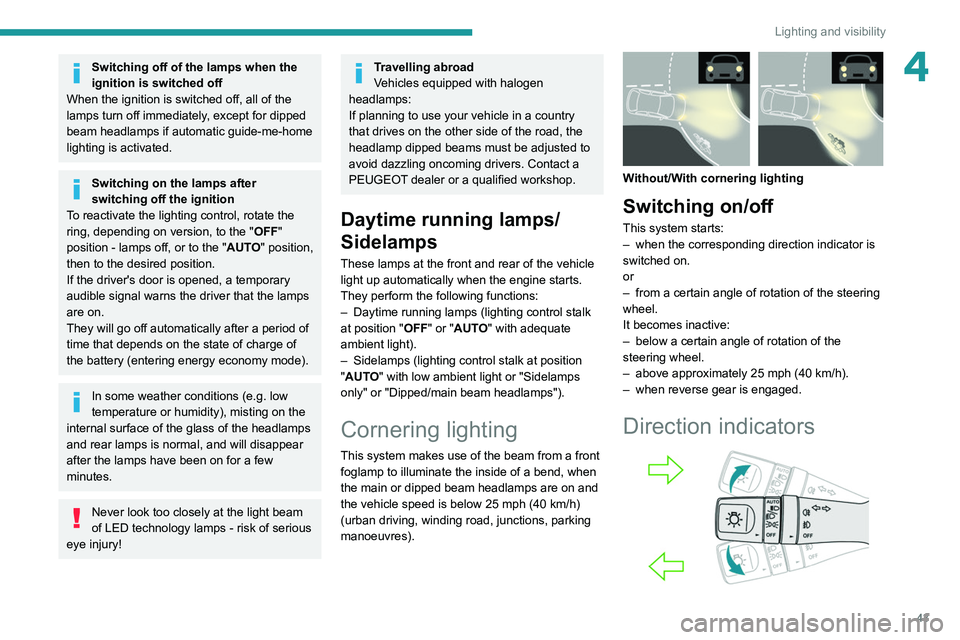
Cornering lighting
This system makes use of the beam from a front
foglamp to illuminate the inside of a bend, when
the main or dipped beam headlamps are on and
the vehicle speed is below 25 mph (40
km/h)
(urban driving, winding road, junctions, parking
manoeuvres).
Without/With cornering lighting
Switching on/off
This system starts:
– when the corresponding direction indicator is
switched on.
or
–
from a certain angle of rotation of the steering
wheel.
It becomes inactive:
–
below a certain angle of rotation of the
steering wheel.
–
above approximately 25 mph (40
km/h).
–
when reverse gear is engaged.
Direction indicators
Page 46 of 176
44
Lighting and visibility
â–ş Left or right: lower or raise the lighting control
stalk, beyond the point of resistance.
Parking lamps
Vehicle side marking by lighting the sidelamps
on the traffic side only.
â–ş
Depending on version, within one minute
of switching off the ignition, move the lighting
control stalk up or down, depending which side
the traffic is on (for example, when parking on
the left, moving the lighting control stalk upwards
turns on the right-hand sidelamps).
This is confirmed by an audible signal and the
lighting of the corresponding direction indicator
lamp on the instrument panel.
â–ş
T
o switch off the parking lamps, return the
lighting control stalk to the central position.
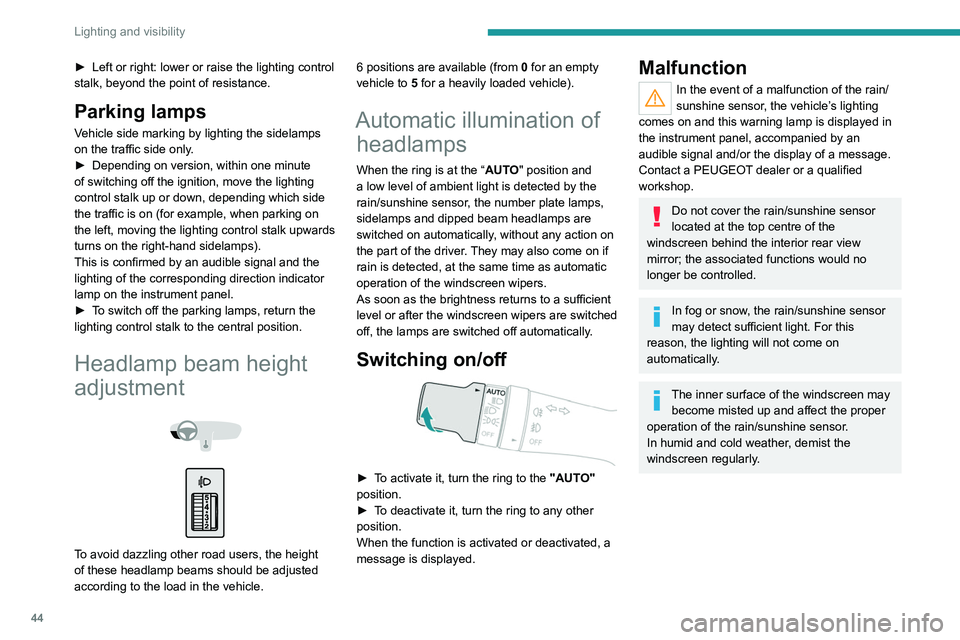
Headlamp beam height
adjustment
To avoid dazzling other road users, the height
of these headlamp beams should be adjusted
according to the load in the vehicle. 6 positions are available (from
0 for an empty
vehicle to 5 for a heavily loaded vehicle).
Automatic illumination of headlamps
When the ring is at the “AUTO" position and
a low level of ambient light is detected by the
rain/sunshine sensor, the number plate lamps,
sidelamps and dipped beam headlamps are
switched on automatically, without any action on
the part of the driver. They may also come on if
rain is detected, at the same time as automatic
operation of the windscreen wipers.
As soon as the brightness returns to a sufficient
level or after the windscreen wipers are switched
off, the lamps are switched off automatically.
Switching on/off
â–ş To activate it, turn the ring to the "AUTO"
position.
â–ş
T
o deactivate it, turn the ring to any other
position.
When the function is activated or deactivated, a
message is displayed.
Malfunction
In the event of a malfunction of the rain/
sunshine sensor, the vehicle’s lighting
comes on and this warning lamp is displayed in
the instrument panel, accompanied by an
audible signal and/or the display of a message.
Contact a PEUGEOT dealer or a qualified
workshop.
Do not cover the rain/sunshine sensor
located at the top centre of the
windscreen behind the interior rear view
mirror; the associated functions would no
longer be controlled.
In fog or snow, the rain/sunshine sensor
may detect sufficient light. For this
reason, the lighting will not come on
automatically.
The inner surface of the windscreen may become misted up and affect the proper
operation of the rain/sunshine sensor.
In humid and cold weather, demist the
windscreen regularly.
Guide-me-home and
welcome lighting
Guide-me-home lighting
Depending on version, when the light is poor, the
dipped beam headlamps come on automatically
when the ignition is switched off.
Guide-me-home lighting goes off automatically
after a period of time.
You can activate/deactivate this function and adjust the guide-me-home lighting
duration in the Vehicle settings touch screen
menu.
Welcome lighting
When unlocking the vehicle, this system
automatically switches on the dipped beam
headlamps and certain lights in the passenger
compartment.
DOORWhen the front courtesy lamp control is
activated, the front courtesy lamp comes
on automatically when a door is opened.
Depending on version, the front doors have sill
lighting. Each sill light automatically switches on
when a front door is opened to facilitate entry
into the vehicle at night.
You can activate/deactivate this function and adjust the welcome lighting duration
in the Vehicle settings touch screen menu.
Page 47 of 176
45
Lighting and visibility
4Guide-me-home and
welcome lighting
Guide-me-home lighting
Depending on version, when the light is poor, the
dipped beam headlamps come on automatically
when the ignition is switched off.
Guide-me-home lighting goes off automatically
after a period of time.
You can activate/deactivate this function and adjust the guide-me-home lighting
duration in the Vehicle settings
touch screen
menu.
Welcome lighting
When unlocking the vehicle, this system
automatically switches on the dipped beam
headlamps and certain lights in the passenger
compartment.
DOORWhen the front courtesy lamp control is
activated, the front courtesy lamp comes
on automatically when a door is opened.
Depending on version, the front doors have sill
lighting. Each sill light automatically switches on
when a front door is opened to facilitate entry
into the vehicle at night.
You can activate/deactivate this function and adjust the welcome lighting duration
in the Vehicle settings touch screen menu.
Wiper control stalk
Before operating the wipers in wintry
conditions, clear any snow, ice or frost
from the windscreen, and from around the
wiper arms and blades.
Do not operate the wipers on a dry
windscreen. In extremely hot or cold
weather, check that the wiper blades are not
stuck to the windscreen before operating the
wipers.
After using an automatic car wash, you may temporarily notice abnormal noises
and poorer wiping performance.
You do not
need to replace the wiper blades.
Without AUTO wiping
With AUTO wiping
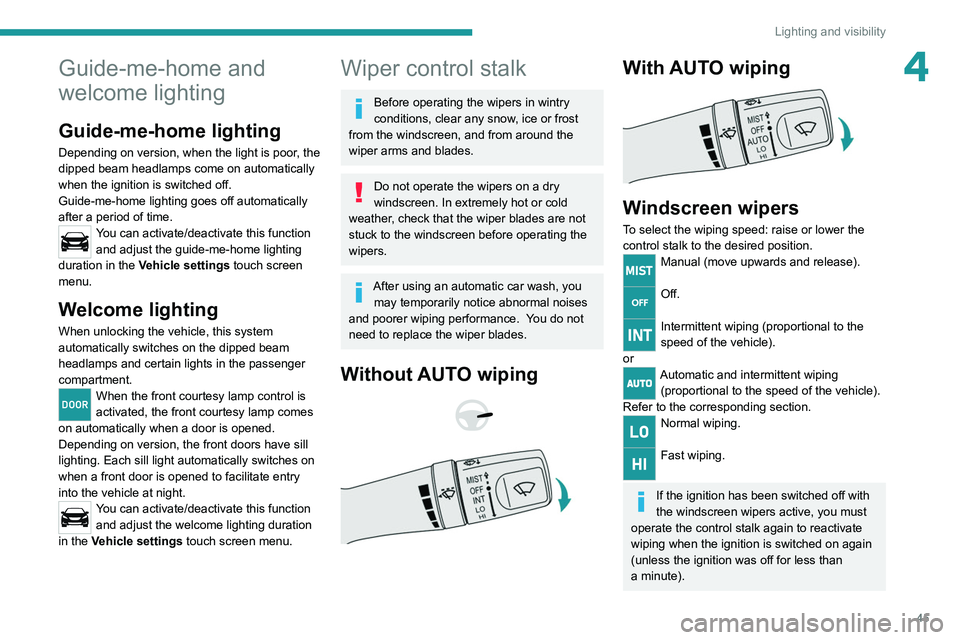
Windscreen wipers
To select the wiping speed: raise or lower the
control stalk to the desired position.
Manual (move upwards and release).
Off.
Intermittent wiping (proportional to the
speed of the vehicle).
or
Automatic and intermittent wiping (proportional to the speed of the vehicle).
Refer to the corresponding section.
Normal wiping.
Fast wiping.
If the ignition has been switched off with
the windscreen wipers active, you must
operate the control stalk again to reactivate
wiping when the ignition is switched on again
(unless the ignition was off for less than
a
minute).
Page 48 of 176
46
Lighting and visibility
Decreasing or increasing the wiping
frequency
â–ş Rotate the ring upwards/downwards to
increase/decrease the wiping frequency
(with "
INT" or "AUTO” wiping position).
Windscreen wash
â–ş Pull the wiper control stalk towards you and
hold.
A
final wiping cycle is performed when
screenwashing ends.
To avoid damaging the wiper blades, do not operate the screenwash if the
screenwash reservoir is empty.
Only operate the screenwash if there is no
risk of the fluid freezing on the windscreen
and hindering visibility. During the winter
period, use "very cold climate" rated products.
Never top up with water.
Changing a wiper blade
To check that the wiper blades have not become rough, gently slide your finger
along the blade.
To maintain the effectiveness of the wipers, it
is advisable to:
–
handle them with care.
–
clean them regularly using soapy water
.
–
clean the windscreen regularly with a
special detergent.
–
avoid using them to hold cardboard on the
windscreen.
–
replace them at the first signs of wear
.
For safety reasons and to avoid
damaging the windscreen or the
windscreen wiper blades, always clean them
if foreign bodies
are present (for example:
sand, dust, oil, bird droppings).
Never use petrol, thinner or another similar
solvent to clean the wiper blades.
Never shake, rotate or bend the wiper arm
and blade.
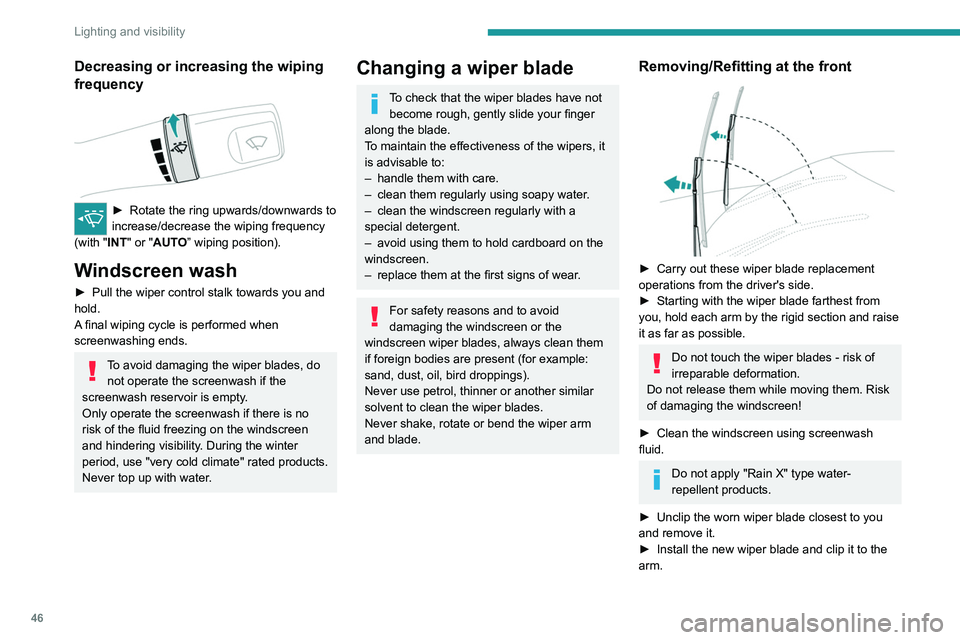
Removing/Refitting at the front
â–ş Carry out these wiper blade replacement
operations from the driver's side.
â–ş
Starting with the wiper blade farthest from
you, hold each arm by the rigid section and raise
it as far as possible.
Do not touch the wiper blades - risk of
irreparable deformation.
Do not release them while moving them. Risk
of damaging the windscreen!
â–ş
Clean the windscreen using screenwash
fluid.
Do not apply "Rain X" type water-
repellent products.
â–ş
Unclip the worn wiper blade closest to you
and remove it.
â–ş
Install the new wiper blade and clip it to the
arm.
â–ş Repeat the procedure for the other wiper
blade.
â–ş Starting with the wiper blade closest to you,
once again hold each arm by the rigid section,
then guide it carefully onto the windscreen.
Automatic windscreen wipers
In AUTO mode, the windscreen wipers work
automatically and adapt to the intensity of the
rain.
The rainfall detection function uses a rain/
sunshine sensor located at the top centre of the
windscreen, behind the rear view mirror.
Do not cover the rain/sunshine sensor.
When using an automatic car wash,
switch off the automatic wipers and the
ignition.
In winter, wait until the windscreen is
completely clear of ice before activating the
automatic wipers.
Switching on
Page 49 of 176
47
Lighting and visibility
4â–ş Repeat the procedure for the other wiper
blade.
â–ş
Starting with the wiper blade closest to you,
once again hold each arm by the rigid section,
then guide it carefully onto the windscreen.
Automatic windscreen wipers
In AUTO mode, the windscreen wipers work
automatically and adapt to the intensity of the
rain.
The rainfall detection function uses a rain/
sunshine sensor located at the top centre of the
windscreen, behind the rear view mirror.
Do not cover the rain/sunshine sensor.
When using an automatic car wash,
switch off the automatic wipers and the
ignition.
In winter, wait until the windscreen is
completely clear of ice before activating the
automatic wipers.
Switching on
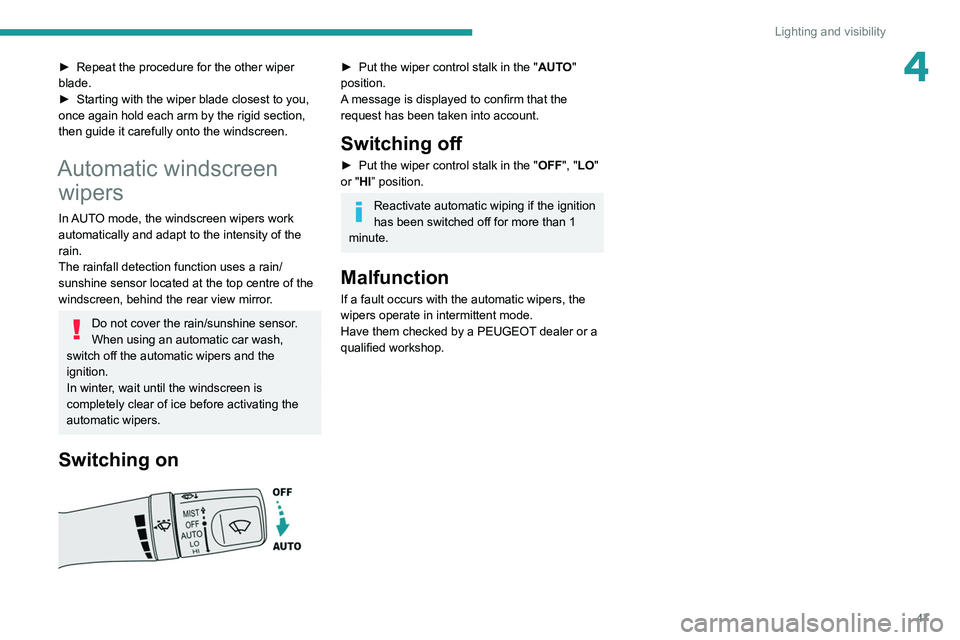
â–ş Put the wiper control stalk in the " AUT O"
position.
A message is displayed to confirm that the
request has been taken into account.
Switching off
â–ş Put the wiper control stalk in the " OFF", " LO"
or "HI” position.
Reactivate automatic wiping if the ignition
has been switched off for more than 1
minute.
Malfunction
If a fault occurs with the automatic wipers, the
wipers operate in intermittent mode.
Have them checked by a PEUGEOT dealer or a
qualified workshop.
Page 50 of 176
48
Safety
General safety
recommendations
On and off-road driving
This commercial and all-terrain type
vehicle can be driven on roads and rough
terrain. The higher ground clearance and
centre of gravity make this vehicle more
likely to tip over. Refer to the Driving
recommendations.
Do not remove the labels attached in
different places on your vehicle. They
include safety warnings as well as
identification information for the vehicle.
For all work on your vehicle, use a
qualified workshop that has the technical
information, skills and equipment required, all
of which a PEUGEOT dealer is able to
provide.
Depending on country regulations,
certain safety equipment may be
mandatory: high visibility safety vests,
warning triangles, breathalysers, spare bulbs,
spare fuses, fire extinguisher, first aid kit, mud
flaps at the rear of the vehicle, etc.
Installing electrical accessories:
– The fitting of electrical equipment or
accessories not approved by PEUGEOT
may
cause excessive current consumption and
faults and failures with the electrical system
of your vehicle. Contact a PEUGEOT dealer
for information on the range of approved
accessories.
–
As a safety measure, access to the
diagnostic socket, used for the vehicle's
electronic systems, is reserved strictly for
PEUGEOT
dealers or qualified workshops,
equipped with the special tools required (risk
of malfunctions of the vehicle's electronic
systems that could cause breakdowns or
serious accidents). The Manufacturer cannot
be held responsible if this advice is not
followed.
–
Any modification or adaptation not intended
or authorised by PEUGEOT
or carried out
without meeting the technical requirements
defined by the Manufacturer will result in the
suspension of the commercial warranty.
Installation of accessory radio
communication transmitters
Before installing a radio communication
transmitter with an external aerial, you must
without fail contact a PEUGEOT dealer for
the specification of transmitters which can
be fitted (frequency, maximum power, aerial
position, specific installation requirements),
in line with the Vehicle Electromagnetic
Compatibility Directive (2004/104/EC).
Declarations of conformity for radio
equipment
The relevant certificates are available on the
http://public.servicebox.peugeot.com/APddb/
website.
Operating speed thresholds
The speed threshold values, for the
operation of certain systems, are given for
information purposes only. The thresholds
may be different under actual conditions of
use of the vehicle.
Hazard warning lamps
â–ş Pressing the red button causes all the
direction indicators to flash.
They can operate with the ignition off.
Automatic operation of hazard warning lamps
When braking in an emergency, depending on
the rate of deceleration, the hazard warning
lamps come on automatically. They switch off
automatically when you next accelerate.
They can be turned off by pressing the button
again.
Horn
â–ş Press the central part of the steering wheel.
Electronic stability control
(ESC)
(Depending on version)
The electronic stability control programme
includes the following systems:
– Anti-lock braking system (ABS) and Electronic
brake force distribution (EBFD).
– Emergency braking assistance (EBA).
– Anti-slip regulation (ASR).
– Dynamic stability control (DSC).