park assist Peugeot Landtrek 2021 Owner's Manual
[x] Cancel search | Manufacturer: PEUGEOT, Model Year: 2021, Model line: Landtrek, Model: Peugeot Landtrek 2021Pages: 176, PDF Size: 6.04 MB
Page 4 of 176
2
Contents
■
Overview
■
Eco-driving
1Instruments
Instrument panels 7
Warning and indicator lamps 8
Total distance recorder 12
Lighting dimmer
12
Trip computer 12
Monochrome screen 13
Touch screen 14
2Access
Electronic key with remote control function
and built-in key, 16
Keyless Entry and Starting 18
Central locking 19
Back-up procedures 20
Doors 21
Tailgate 22
Alarm 22
Electric windows 24
3Ease of use and comfort
Front seats 25
2-seat front bench seat 26
Steering wheel adjustment 27
Mirrors 28
Rear bench seat 29
Heating and Ventilation 31
Heating 32
Manual air conditioning 32
Dual-zone automatic air conditioning 33
Front demisting - defrosting 35
Rear screen demisting/defrosting 35
Front fittings 35
Courtesy lamps 37
Rear fittings 38
Tipper body fittings
39
4Lighting and visibility
Exterior lighting control stalk 42
Cornering lighting 43
Direction indicators 43
Headlamp beam height adjustment 44
Automatic illumination of headlamps 44
Guide-me-home and welcome lighting 45
Wiper control stalk 45
Changing a wiper blade 46
Automatic wipers 47
5Safety
General safety recommendations 48
Hazard warning lamps 48
Horn 49
Electronic stability control (ESC) 49
Hill Assist Descent Control 51
Seat belts 52
Airbags 54
Child seats 56
Deactivating the front passenger airbag 58
ISOFIX child seats 59
Child lock 60
6Driving
Driving recommendations 61
Starting / Switching off the engine with
the key
63
Starting/Switching off the engine with
Keyless Entry and Starting
65
Manual parking brake 66
Locking the rear differential 67
4-wheel drive transmission selector 67
6-speed manual gearbox 69
Automatic gearbox 69
Driving mode 71
Hill start assist 72
Gear shift indicator 73
Tyre under-inflation detection 73
Driving and manoeuvring aids - General
recommendations
74
Speed limiter 75
Overspeed alert at 75 mph (120
km/h) 76
Cruise control - particular recommendations 76
Cruise control 77
Lane Departure Warning System 78
Parking sensors 80
Reversing camera 81
Off Road camera 82
360° camera 82
Page 7 of 176
5
Overview
2.Deactivate the Lane Departure Warning
System function
3. Headlamp beam height adjustment
4. Activate loading zone external lighting
(available only when stationary)
5. Deactivate parking sensors
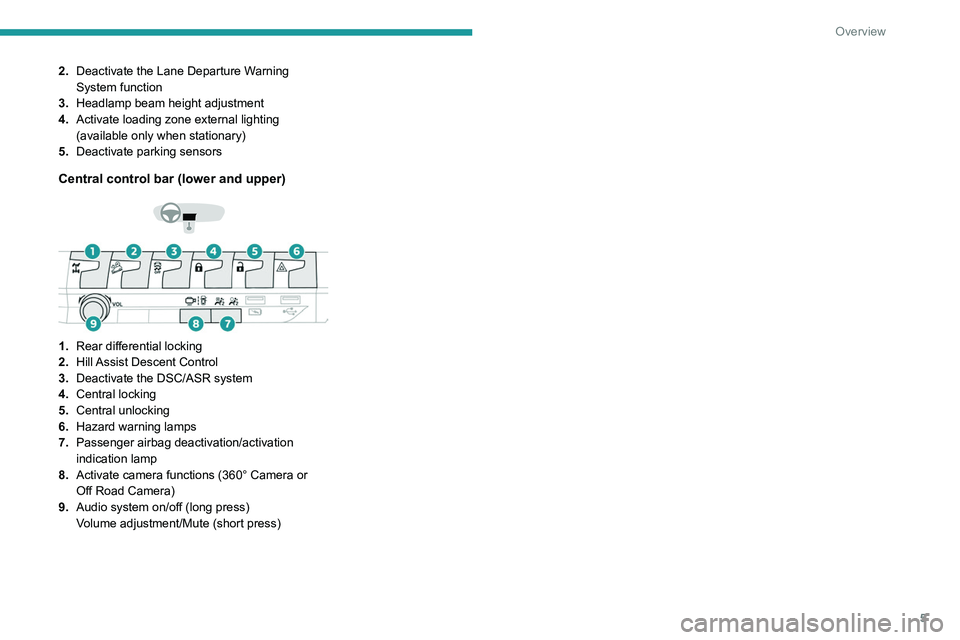
Central control bar (lower and upper)
1.Rear differential locking
2. Hill Assist Descent Control
3. Deactivate the DSC/ASR system
4. Central locking
5. Central unlocking
6. Hazard warning lamps
7. Passenger airbag deactivation/activation
indication lamp
8. Activate camera functions (360° Camera or
Off Road Camera)
9. Audio system on/off (long press)
Volume adjustment/Mute (short press)
Page 66 of 176
64
Driving
To switch the ignition back on, turn the key to
position 1, then back to position 3.
Starting/Switching off the
engine with Keyless Entry
and Starting
The electronic key must be present in the
passenger compartment.
If it is not detected, a message is displayed.
Move the electronic key so that the engine
can be started or switched off.
If there is still a problem, refer to the "Key
not detected - Back-up starting or Back-up
switch-off" section.
Starting
► With a manual gearbox, place the gear lever
in neutral and fully depress the clutch pedal.
Once the state of charge of the battery drops to
the reserve level, the system switches to energy
economy mode : the power supply is cut off
automatically to preserve the remaining battery
charge.
Starting the engine
With the parking brake applied:
► With a manual gearbox, place the gear lever
in neutral then fully depress the clutch pedal.
►
With an
automatic gearbox, place the gear
selector in mode N or P then depress the brake
pedal.
►
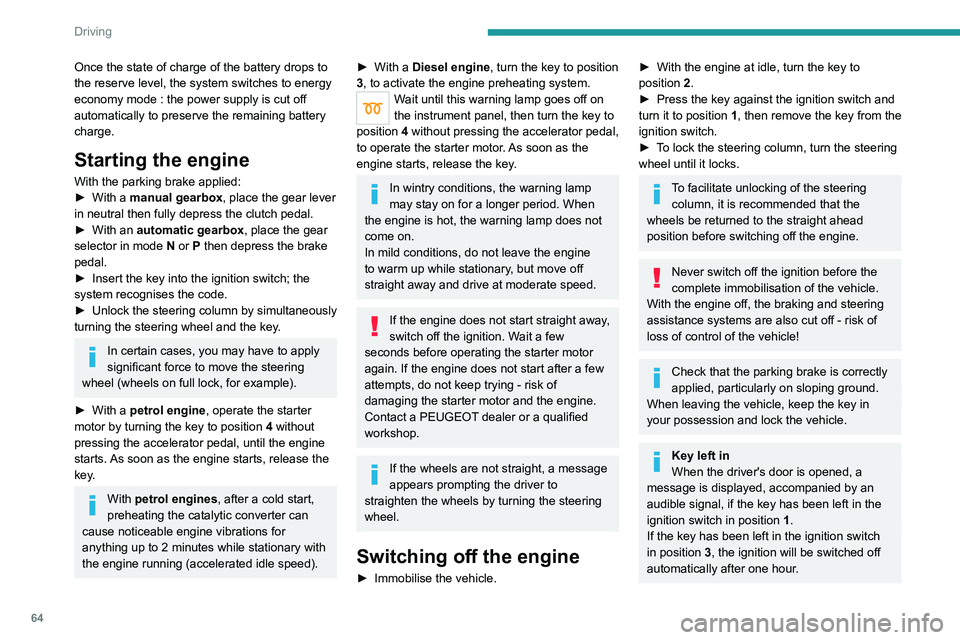
Insert the key into the ignition switch; the
system recognises the code.
►
Unlock
the steering column by simultaneously
turning the steering wheel and the key.
In certain cases, you may have to apply
significant force to move the steering
wheel (wheels on full lock, for example).
►
With a
petrol engine , operate the starter
motor by turning the key to position 4 without
pressing the accelerator pedal, until the engine
starts. As soon as the engine starts, release the
key.
With petrol engines , after a cold start,
preheating the catalytic converter can
cause
noticeable engine vibrations for
anything up to 2 minutes while stationary with
the engine running (accelerated idle speed).
► With a Diesel engine, turn the key to position
3, to activate the engine preheating system.
Wait until this warning lamp goes off on
the instrument panel, then turn the key to
position 4 without pressing the accelerator pedal,
to operate the starter motor. As soon as the
engine starts, release the key.
In wintry conditions, the warning lamp
may stay on for a longer period. When
the engine is hot, the warning lamp does not
come on.
In mild conditions, do not leave the engine
to warm up while stationary, but move off
straight away and drive at moderate speed.
If the engine does not start straight away,
switch off the ignition. Wait a few
seconds before operating the starter motor
again. If the engine does not start after a few
attempts, do not keep trying - risk of
damaging the starter motor and the engine.
Contact a PEUGEOT dealer or a qualified
workshop.
If the wheels are not straight, a message
appears prompting the driver to
straighten the wheels by turning the steering
wheel.
Switching off the engine
► Immobilise the vehicle.
► With the engine at idle, turn the key to
position 2
.
►
Press the key against the ignition switch and
turn it to position
1, then remove the key from the
ignition switch.
►
T
o lock the steering column, turn the steering
wheel until it locks.
To facilitate unlocking of the steering column, it is recommended that the
wheels be returned to the straight ahead
position before switching off the engine.
Never switch off the ignition before the
complete immobilisation of the vehicle.
With the engine off, the braking and steering
assistance systems are also cut off - risk of
loss of control of the vehicle!
Check that the parking brake is correctly
applied, particularly on sloping ground.
When leaving the vehicle, keep the key in
your possession and lock the vehicle.
Key left in
When the driver's door is opened, a
message is displayed, accompanied by an
audible signal, if the key has been left in the
ignition switch in position 1.
If the key has been left in the ignition switch
in position 3, the ignition will be switched off
automatically after one hour.
Page 74 of 176
72
Driving
Facing downhill, with the vehicle stationary
and reverse gear engaged, the vehicle is held
for a short time when you release the brake
pedal.
Malfunction
These warning lamps come on in the event of a malfunction,
accompanied by the display of a message.
Contact a PEUGEOT dealer or a qualified
workshop to have the system checked.
Gear shift indicator
(Depending on engine.)
System which reduces fuel consumption by
recommending the most appropriate gear.
Operation
Depending on the driving situation and
the vehicle's equipment, the system may
recommend skipping one or more gears.
Gear shift recommendations should not be
considered compulsory. The road layout, traffic
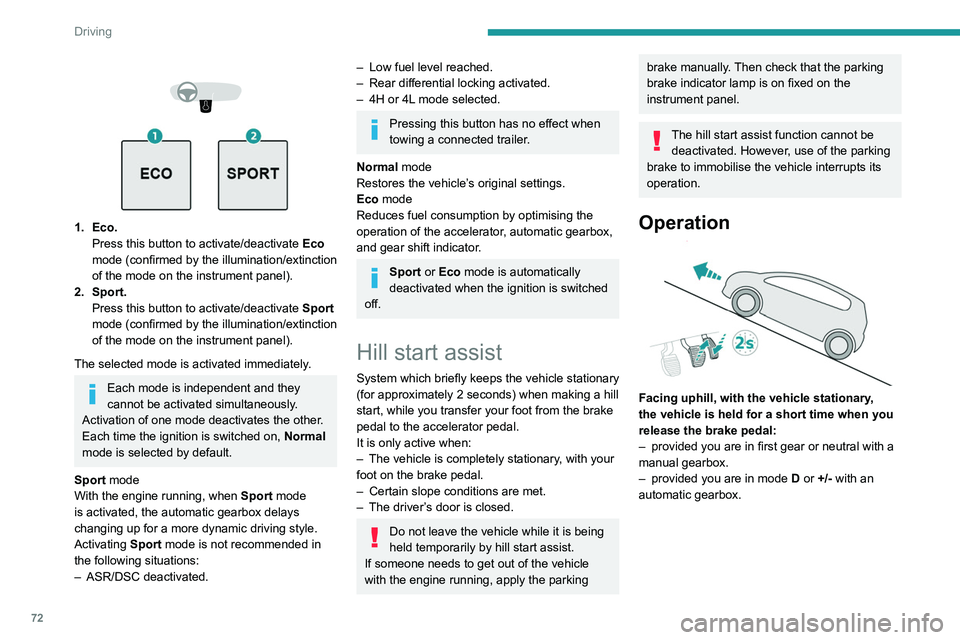
1. Eco. Press this button to activate/deactivate Eco
mode (confirmed by the illumination/extinction
of the mode on the instrument panel).
2. Sport. Press this button to activate/deactivate
Sport
mode (confirmed by the illumination/extinction
of the mode on
the instrument panel).
The selected mode is activated immediately.
Each mode is independent and they
cannot be activated simultaneously.
Activation of one mode deactivates the other.
Each time the ignition is switched on, Normal
mode is selected by default.
Sport mode
With the engine running, when
Sport
mode
is activated, the automatic gearbox delays
changing up for a more dynamic driving style.
Activating
Sport mode is not recommended in
the following situations:
–
ASR/DSC deactivated.
– Low fuel level reached.
– Rear differential locking activated.
–
4H or 4L
mode selected.
Pressing this button has no effect when
towing a connected trailer.
Normal mode
Restores the vehicle’s original settings.
Eco mode
Reduces fuel consumption by optimising the
operation of the accelerator, automatic gearbox,
and gear shift indicator.
Sport or Eco mode is automatically
deactivated when the ignition is switched
off.
Hill start assist
System which briefly keeps the vehicle stationary
(for approximately 2 seconds) when making a hill
start, while you transfer your foot from the brake
pedal to the accelerator pedal.
It is only active when:
–
The vehicle is completely stationary
, with your
foot on the brake pedal.
–
Certain slope conditions are met.
–
The driver
’s door is closed.
Do not leave the vehicle while it is being
held temporarily by hill start assist.
If someone needs to get out of the vehicle
with the engine running, apply the parking
brake manually. Then check that the parking
brake indicator lamp is on fixed on the
instrument panel.
The hill start assist function cannot be deactivated. However, use of the parking
brake to immobilise the vehicle interrupts its
operation.
Operation
Facing uphill, with the vehicle stationary,
the vehicle is held for a short time when you
release the brake pedal:
–
provided you are in first gear or neutral with a
manual gearbox.
–
provided you are in mode D
or +/- with an
automatic gearbox.
Page 83 of 176
81
Driving
6This supplements the audible signal by
displaying bars on the screen that move
progressively nearer to the vehicle.
Front parking sensors
Supplementing the rear parking sensors, the
front parking sensors are triggered when an
obstacle is detected in front and the speed of the
vehicle is still below 6 mph (10 km/h).
Front parking sensor operation is suspended if
an obstacle is no longer detected or the vehicle
speed exceeds 6
mph (10 km/h).
The sound emitted by the speaker (front or rear) locates the obstacle relative to
the vehicle, in front or behind it.
Deactivation / Activation
► To deactivate or activate the system, press
this button.
The indicator lamp is lit when the system is
deactivated.
The state of the system stays in the memory
when the ignition is switched off.
The rear parking sensors system will be deactivated automatically if a trailer or
bicycle carrier is connected to a towing device
installed in accordance with the
manufacturer's recommendations.
Operating limits
If the boot is heavily loaded, the vehicle may tilt,
affecting distance measurements.
Malfunction
In the event of a malfunction when
changing into reverse, this warning lamp
comes on on the instrument panel, accompanied
by an onscreen message and an audible signal
(short beep).
Contact a PEUGEOT dealer or a qualified
workshop to have the system checked.
Reversing camera
Refer to the General recommendations on the
use of driving and manoeuvring aids .
The visual reversing assistance camera is
activated automatically when reverse gear is
engaged.
The function may be supplemented by parking
sensors.
The image is displayed on the touch screen.
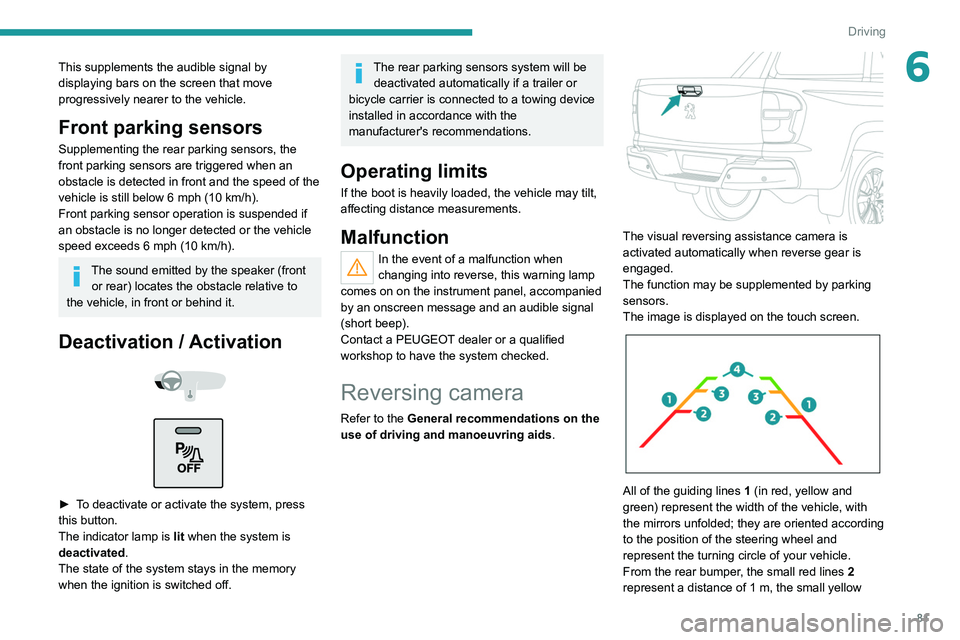
All of the guiding lines 1 (in red, yellow and
green) represent the width of the vehicle, with
the mirrors unfolded; they are oriented according
to the position of the steering wheel and
represent the turning circle of your vehicle.
From the rear bumper, the small red lines 2
represent a distance of 1 m, the small yellow
Page 91 of 176
89
Practical information
7► Turn the filler cap to the left, remove it and
place it on its support (on the filler flap).
►
Introduce the filler nozzle and push it in as far
as possible before starting to refuel (to minimise
the risk of splashing).
Do not continue after the nozzle’
s third cut-
out. Doing so may cause malfunctions.
►
Put the filler cap back in place and turn it to
the right.
►
Close the fuel filler flap.
If you have put in the wrong fuel for the
vehicle, you must have the fuel tank
drained and filled with the correct fuel before
starting the engine.
Depending on version, the vehicle is fitted with
a catalytic converter, which helps to reduce the
level of harmful emissions in the exhaust gases.
For petrol engines, you must use unleaded
fuel.
The filler neck is narrower, admitting unleaded
petrol nozzles only.
Towing device
Load distribution
► Distribute the load in the trailer so that the
heaviest items are as close as possible to the
axle, and the nose weight approaches the
maximum permitted without exceeding it.
Air density decreases with altitude, thus reducing
engine performance.
The maximum towable load
must be reduced by 10% per 1,000 metres of
altitude.
Use genuine towing devices and their
wiring harnesses approved by
PEUGEOT. We recommend having them
fitted by a PEUGEOT dealer or a qualified
workshop.
If not fitted by a PEUGEOT dealer, they must
still be fitted in accordance with the vehicle
manufacturer's instructions.
Certain driving or manoeuvring aid functions
are automatically deactivated while an
approved towing system is in use.
For more information about driving with a
towing device fitted to a trailer and associated
with the Trailer stability assist, refer to the
corresponding section.
Comply with the maximum authorised
towable weight, as indicated on your
vehicle's registration certificate, on the
manufacturer's label and in the Technical
data section of this guide.
Complying with the maximum authorised
nose weight (towball weight) also includes
the use of accessories (bicycle carriers,
tow boxes, etc.).
Observe the legislation in force in the
country where you are driving.
Snow chains
In wintry conditions, snow chains improve
traction as well as the behaviour of the vehicle
when braking.
Snow chains must be fitted only to
driving wheels.
Observe the legislation in force in your
country relating to the use of snow
chains and maximum authorised speeds.
Only use chains designed for the vehicle's wheel
type:
Tyre size Link size
245/70 R16 13 to 16
mm
265/65 R17 13 to 16
mm
265/60R18 13 to 16
mm
It is also possible to use snow socks.
For more information on snow chains, contact a
PEUGEOT dealer or a qualified workshop.
Installation tips
► To fit the snow chains during a journey, stop
the vehicle on a flat surface at the side of the
road.
►
Apply the parking brake and position any
wheel chocks under the wheels to prevent
movement of the vehicle.
Page 121 of 176
11 9
In the event of a breakdown
8► Switch off all electricity-consuming devices
(audio system, wipers, lamps, etc.).
►
Switch off the ignition and wait for 4
minutes.
After accessing the battery, it is only necessary
to disconnect the (+) terminal.
Screwed terminal
Disconnecting the (+) terminal
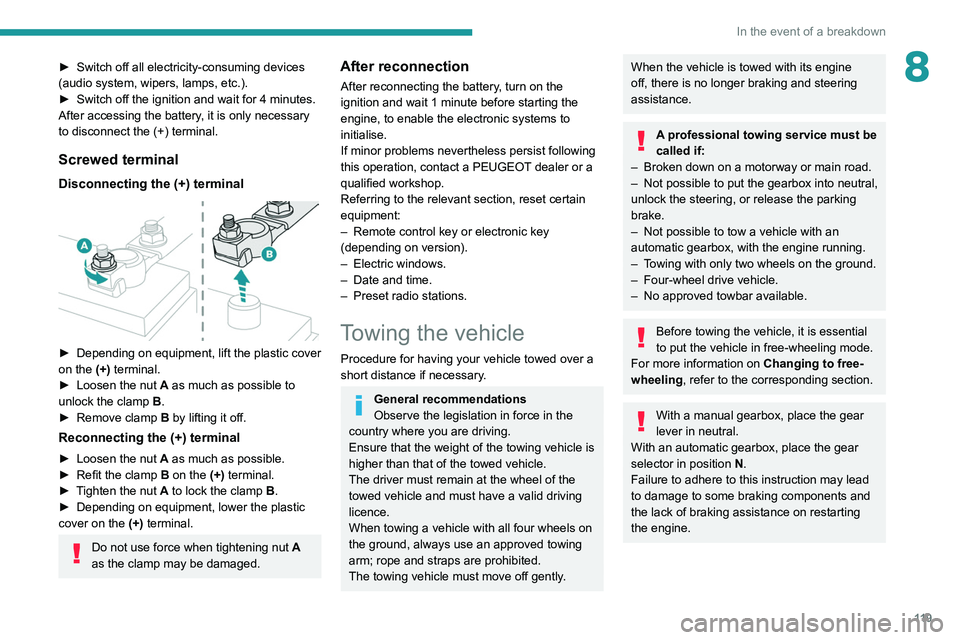
► Depending on equipment, lift the plastic cover
on the (+) terminal.
►
Loosen the nut
A as much as possible to
unlock the clamp B.
►
Remove clamp
B
by lifting it off.
Reconnecting the (+) terminal
► Loosen the nut A as much as possible.
► Refit the clamp B on the (+) terminal.
►
T
ighten the nut A to lock the clamp B.
►
Depending on equipment, lower the plastic
cover on the
(+) terminal.
Do not use force when tightening nut A
as the clamp may be damaged.
After reconnection
After reconnecting the battery, turn on the
ignition and wait 1 minute before starting the
engine, to enable the electronic systems to
initialise.
If minor problems nevertheless persist following
this operation, contact a PEUGEOT dealer or a
qualified workshop.
Referring to the relevant section, reset certain
equipment:
–
Remote control key or electronic key
(depending on version).
–
Electric windows.
–
Date and time.
–
Preset radio stations.
Towing the vehicle
Procedure for having your vehicle towed over a
short distance if necessary.
General recommendations
Observe the legislation in force in the
country where you are driving.
Ensure that the weight of the towing vehicle is
higher than that of the towed vehicle.
The driver must remain at the wheel of the
towed vehicle and must have a valid driving
licence.
When towing a vehicle with all four wheels on
the ground, always use an approved towing
arm; rope and straps are prohibited.
The towing vehicle must move off gently.
When the vehicle is towed with its engine
off, there is no longer braking and steering
assistance.
A professional towing service must be
called if:
–
Broken down on a motorway or main road.
–
Not possible to put
the gearbox into neutral,
unlock the steering, or release the parking
brake.
–
Not possible to tow a vehicle with an
automatic gearbox, with the engine running.
–
T
owing with only two wheels on the ground.
–
Four-wheel drive vehicle.
–
No approved towbar available.
Before towing the vehicle, it is essential
to put the vehicle in free-wheeling mode.
For more information on Changing to free-
wheeling , refer to the corresponding section.
With a manual gearbox, place the gear
lever in neutral.
With an automatic gearbox, place the gear
selector in position N.
Failure to adhere to this instruction may lead
to damage to some braking components and
the lack of braking assistance on restarting
the engine.
Page 122 of 176
120
In the event of a breakdown
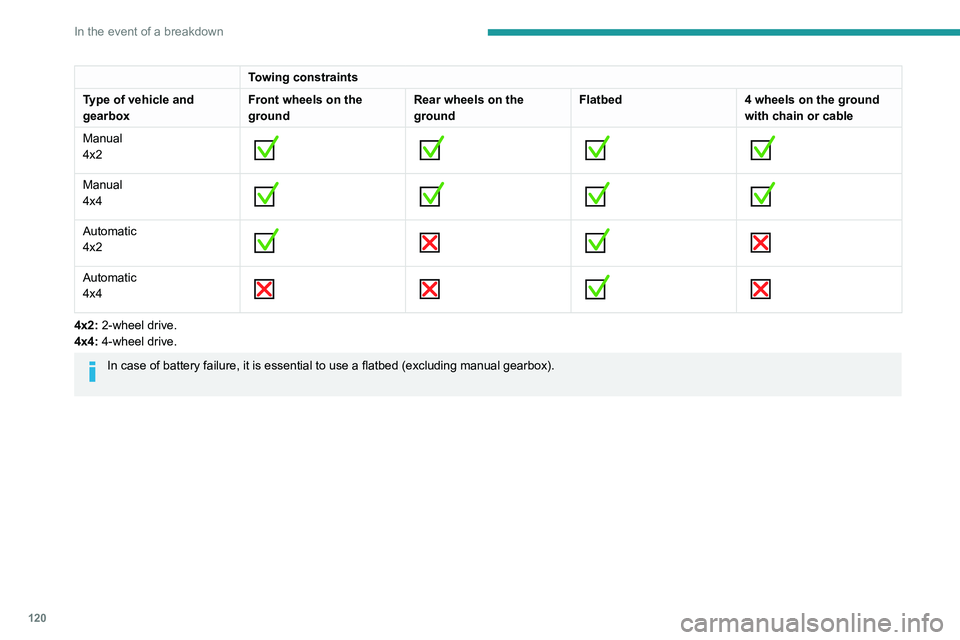
Towing constraints
Type of vehicle and
gearbox Front wheels on the
groundRear wheels on the
groundFlatbed
4 wheels on the ground
with chain or cable
Manual
4x2
Manual
4x4
Automatic
4x2
Automatic
4x4
4x2: 2-wheel drive.
4x4: 4-wheel drive.
In case of battery failure, it is essential to use a flatbed (excluding manua
l gearbox).
Towing your vehicle
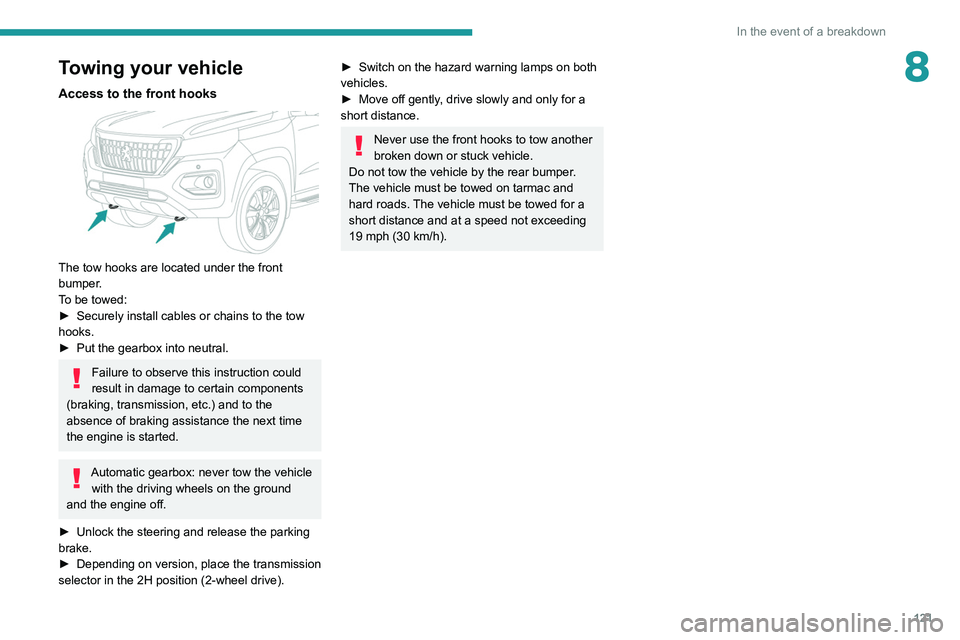
Access to the front hooks
The tow hooks are located under the front
bumper.
To be towed:
► Securely install cables or chains to the tow
hooks.
► Put the gearbox into neutral.
Failure to observe this instruction could
result in damage to certain components
(braking, transmission, etc.) and to the
absence of braking assistance the next time
the engine is started.
Automatic gearbox: never tow the vehicle with the driving wheels on the ground
and the engine off.
► Unlock the steering and release the parking
brake.
► Depending on version, place the transmission
selector in the 2H position (2-wheel drive).
Page 123 of 176
121
In the event of a breakdown
8Towing your vehicle
Access to the front hooks
The tow hooks are located under the front
bumper.
To be towed:
►
Securely install cables or chains to the tow
hooks.
►
Put the gearbox into neutral.
Failure to observe this instruction could
result in damage to certain components
(braking, transmission, etc.) and to the
absence of braking assistance the next time
the engine is started.
Automatic gearbox: never tow the vehicle with the driving wheels on the ground
and the engine off.
►
Unlock the steering and release the parking
brake.
►
Depending on version, place the transmission
selector in the 2H position (2-wheel drive).
► Switch on the hazard warning lamps on both
vehicles.
►
Move off gently
, drive slowly and only for a
short distance.
Never use the front hooks to tow another
broken down or stuck vehicle.
Do not tow the vehicle by the rear bumper.
The vehicle must be towed on tarmac and
hard roads. The vehicle must be towed for a
short distance and at a speed not exceeding
19 mph (30 km/h).
Page 142 of 176
140
Alphabetical index
H
Hazard warning lamps 48, 104
headlamp adjustment
44
Headlamp adjustment
44
Headlamp beam height
44
Headlamps, automatic illumination
44
Headlamps, dipped beam
11 0 – 111
Headlamps, halogen
11 0 – 111
Headlamps, main beam
11 0 – 111
Head restraints, front
25
Head restraints, rear
27, 29–30
Heating
31–33, 35
Hill Assist Descent Control (HADC)
51
Hill start assist
72–73
Hooks
38
Horn
49
I
Ignition 66
Ignition on
66
Ignition switch
63–64
Immobiliser, electronic
63
Indicator, coolant temperature
11
Indicators, direction
43, 111
Inflating tyres
95, 126
Infrared camera
75
Instrument panel
7, 12, 75
ISOFIX mountings
59
J
Jack 106–107
Jump starting
11 7
K
Key 16–17, 20
Key, electronic
18–19
Keyless Entry and Starting
18, 65
Key not recognised
66
Key with remote control
16–17, 63
Kit, hands-free
129–130, 134
L
Labels, identification 125
Lamps, parking
44
Lamps, rear
11 2
Lams with Full LED technology
43
Lane Departure Warning System
(LDWS)
78, 80
Leather (care)
103
LEDs - Light-emitting diodes
43, 110, 112
Level, brake fluid
93
Level, Diesel additive
95
Level, engine coolant
11, 93
Level, engine oil
92
Level, power steering fluid
93
Levels and checks
91–94
Level, screenwash fluid 46, 94
Light-emitting diodes - LEDs
43, 110, 112
Lighting
40
Lighting, cornering
43
Lighting dimmer
12
Lighting, exterior
42
Lighting, guide-me home
45
Lighting, interior
38
Lighting, mood
12
Lighting, welcome
45
Loading
40, 90
Load restraint
40
Locating your vehicle
17
Locking
17–18
Locking from the inside
19
Locking the doors
19
Low fuel level
88
M
Maintenance 96
Maintenance (advice)
102
Maintenance, routine
75, 94, 96
Manoeuvring aids (recommendations)
74
Map reading lamps
38
Markings, identification
125
Mat
37, 75
Mirror, rear view
28
Mirrors, door
28, 35
Mirror, vanity
36
Mode, driving
71