stop start Peugeot Partner 2020 Owner's Manual
[x] Cancel search | Manufacturer: PEUGEOT, Model Year: 2020, Model line: Partner, Model: Peugeot Partner 2020Pages: 260, PDF Size: 7.76 MB
Page 4 of 260
2
Contents
■
Overview
Labels 4
■
Eco-driving
Eco-coaching 8
1Instruments
Instrument Panel 9
Warning and indicator lamps 11
Indicators 16
Trip computer 21
Setting the date and time 23
2Access
Electronic key with remote control function
and built-in key, 24
Back-up procedures 30
Central locking / unlocking 33
Doors 34
General recommendations for the sliding
side doors
35
Rear roof flap 36
Alarm 37
Electric windows 39
Tilting rear door windows 39
3Ease of use and comfort
General recommendations for the seats 40
Front seats 40
PEUGEOT
i-Cockpit 40
Steering wheel adjustment 42
Mirrors 43
2-seat front bench seat 44
Rear bench seat 46
Interior fittings 47
Multi-Flex bench seat 51
Crew cab 52
Heating and Ventilation 55
Heating 56
Manual air conditioning 56
Dual-zone automatic air conditioning 56
Front demisting - defrosting 58
Rear screen and/or door mirrors demisting -
defrosting
59
Additional heating/ventilation system 60
4Lighting and visibility
Lighting control stalk 63
Direction indicators 64
Automatic illumination of headlamps 64
Daytime running lamps / Sidelamps 65
Parking lamps 65
Automatic headlamp dipping 65
Headlamp beam height adjustment 67
Wiper control stalk 67
Changing a wiper blade 69
Automatic wiping 69
5Safety
General safety recommendations 71
Emergency or assistance call 71
Hazard warning lamps 74
Horn 75
Electronic stability control (ESC) 75
Advanced Grip Control 77
Hill Assist Descent Control 78
Seat belts 79
Airbags 81
Child seats 84
Deactivating the front passenger airbag 86
Manual child lock 89
Electric child lock 89
6Driving
Driving recommendations 90
Starting/switching off the engine 91
Manual parking brake 94
Electric parking brake 95
Hill start assist 97
5-speed manual gearbox 98
6-speed manual gearbox 98
Automatic gearbox 99
Gear efficiency indicator 102
Stop & Start 102
Under-inflation detection 104
Driving and manoeuvring aids - General
recommendations
105
Speed Limit Recognition and
Recommendation
107
Speed limiter 11 0
Cruise control - particular
recommendations
11 2
Programmable cruise control 11 2
Adaptive Cruise Control 11 4
Memorising speeds 11 7
Active Safety Brake with Distance Alert and
Intelligent emergency braking assistance
11 8
Active Lane Keeping Assistance 120
Blind Spot Monitoring System 124
Active Blind Spot Monitoring System 125
Distraction detection 126
Page 7 of 260
5
Overview
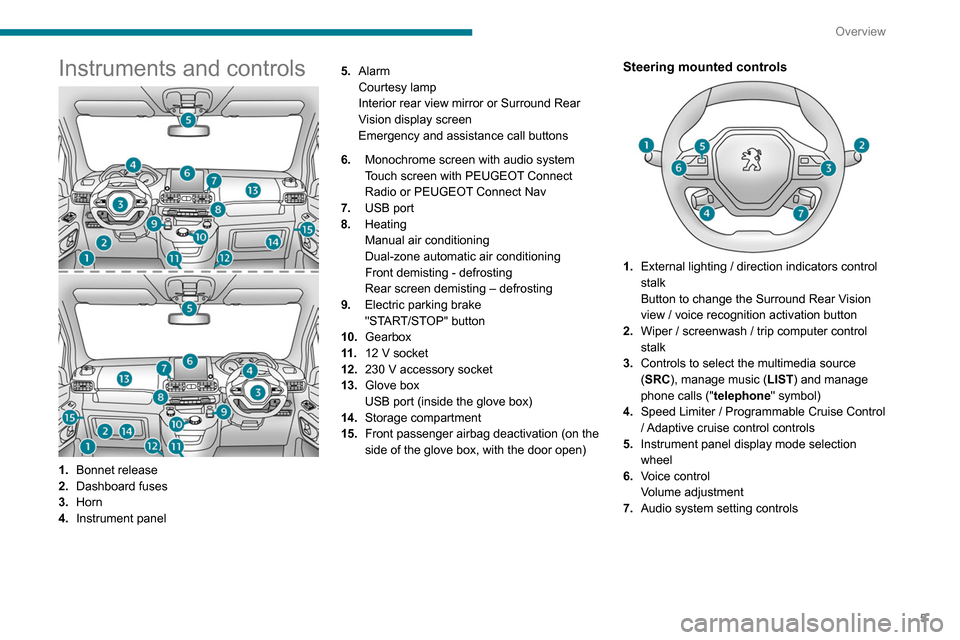
Instruments and controls
1.Bonnet release
2. Dashboard fuses
3. Horn
4. Instrument panel 5.
Alarm
Courtesy lamp
Interior rear view mirror or Surround Rear
Vision display screen
Emergency and assistance call buttons
6. Monochrome screen with audio system
Touch screen with PEUGEOT Connect
Radio or PEUGEOT Connect Nav
7. USB port
8. Heating
Manual air conditioning
Dual-zone automatic air conditioning
Front demisting - defrosting
Rear screen demisting – defrosting
9. Electric parking brake
"START/STOP" button
10. Gearbox
11 . 12 V socket
12. 230 V accessory socket
13. Glove box
USB port (inside the glove box)
14. Storage compartment
15. Front passenger airbag deactivation (on the
side of the glove box, with the door open)
Steering mounted controls
1.External lighting / direction indicators control
stalk
Button to change the Surround Rear Vision
view / voice recognition activation button
2. Wiper / screenwash / trip computer control
stalk
3. Controls to select the multimedia source
(SRC), manage music (LIST) and manage
phone calls (" telephone" symbol)
4. Speed Limiter / Programmable Cruise Control
/ Adaptive cruise control controls
5. Instrument panel display mode selection
wheel
6. Voice control
Volume adjustment
7. Audio system setting controls
Page 8 of 260
6
Overview
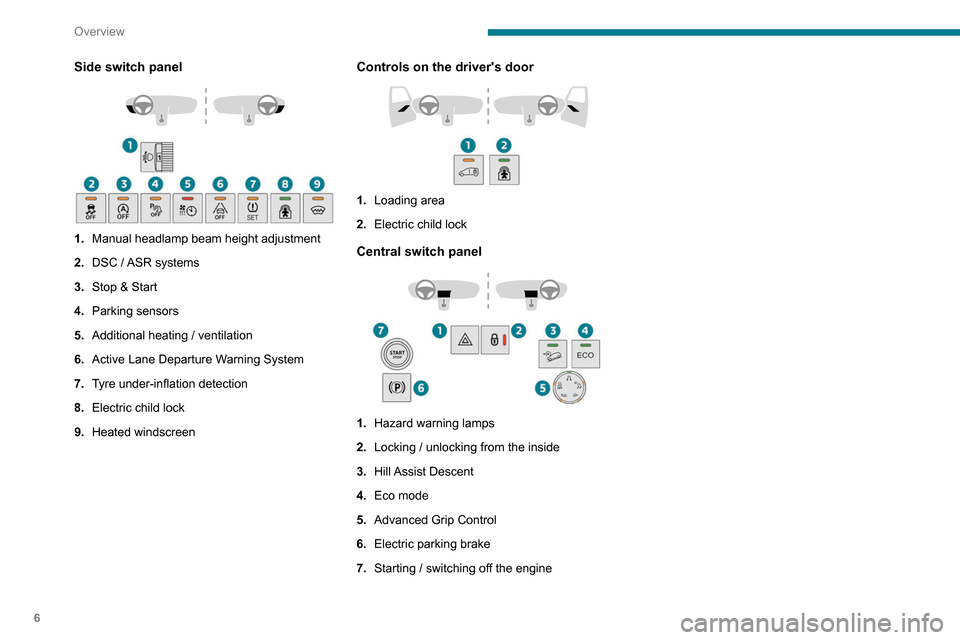
Side switch panel
1.Manual headlamp beam height adjustment
2. DSC / ASR systems
3. Stop & Start
4. Parking sensors
5. Additional heating / ventilation
6. Active Lane Departure Warning System
7. Tyre under-inflation detection
8. Electric child lock
9. Heated windscreen
Controls on the driver's door
1.Loading area
2. Electric child lock
Central switch panel
1.Hazard warning lamps
2. Locking / unlocking from the inside
3. Hill Assist Descent
4. Eco mode
5. Advanced Grip Control
6. Electric parking brake
7. Starting / switching off the engine
Page 13 of 260
11
Instruments
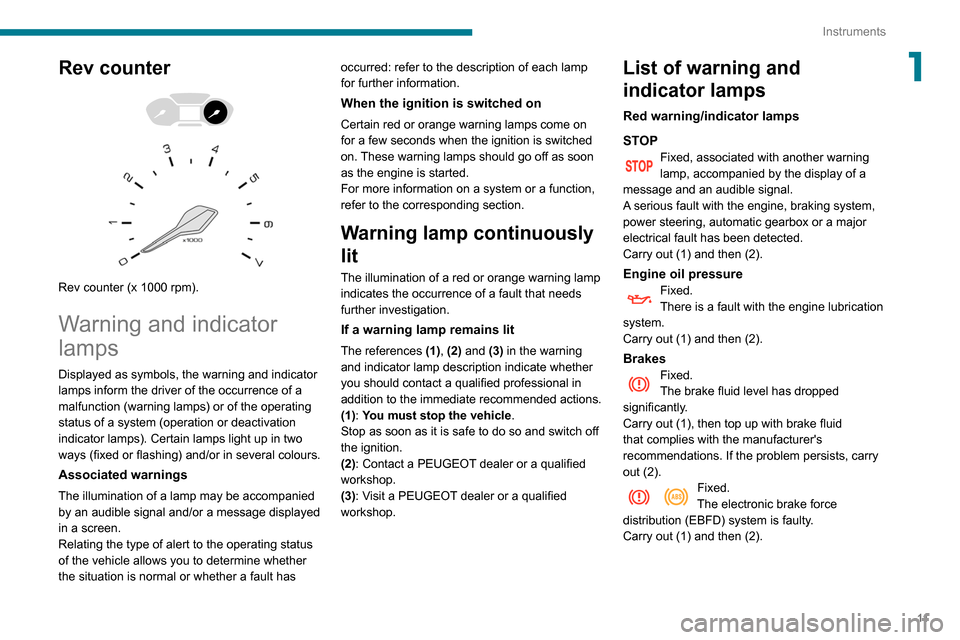
1Rev counter
Rev counter (x 1000 rpm).
Warning and indicator
lamps
Displayed as symbols, the warning and indicator
lamps inform the driver of the occurrence of a
malfunction (warning lamps) or of the operating
status of a system (operation or deactivation
indicator lamps). Certain lamps light up in two
ways (fixed or flashing) and/or in several colours.
Associated warnings
The illumination of a lamp may be accompanied
by an audible signal and/or a message displayed
in a screen.
Relating the type of alert to the operating status
of the vehicle allows you to determine whether
the situation is normal or whether a fault has occurred: refer to the description of each lamp
for further information.
When the ignition is switched on
Certain red or orange warning lamps come on
for a few seconds when the ignition is switched
on. These warning lamps should go off as soon
as the engine is started.
For more information on a system or a function,
refer to the corresponding section.
Warning lamp continuously
lit
The illumination of a red or orange warning lamp
indicates the occurrence of a fault that needs
further investigation.
If a warning lamp remains lit
The references (1), (2) and (3) in the warning
and indicator lamp description indicate whether
you should contact a qualified professional in
addition to the immediate recommended actions.
(1): You must stop the vehicle
.
Stop as soon as it is safe to do so and switch off
the ignition.
(2): Contact a PEUGEOT dealer or a qualified
workshop.
(3): Visit a PEUGEOT dealer or a qualified
workshop.
List of warning and
indicator lamps
Red warning/indicator lamps
STOP
Fixed, associated with another warning
lamp, accompanied by the display of a
message and an audible signal.
A serious fault with the engine, braking system,
power steering, automatic gearbox or a major
electrical fault has been detected.
Carry out (1) and then (2).
Engine oil pressureFixed.
There is a fault with the engine lubrication
system.
Carry out (1) and then (2).
BrakesFixed.
The brake fluid level has dropped
significantly.
Carry out (1), then top up with brake fluid
that complies with the manufacturer's
recommendations. If the problem persists, carry
out (2).
Fixed.
The electronic brake force
distribution
(EBFD) system is faulty.
Carry out (1) and then (2).
Page 18 of 260
16
Instruments
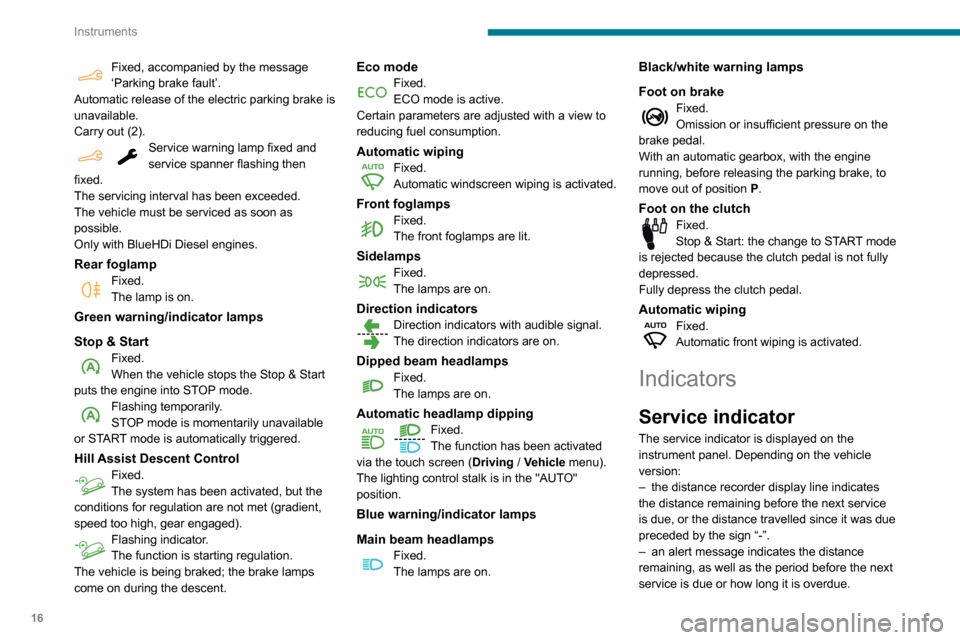
Fixed, accompanied by the message
‘Parking brake fault’.
Automatic release of the electric parking brake is
unavailable.
Carry out (2).
Service warning lamp fixed and
service spanner flashing then
fixed.
The servicing interval has been exceeded.
The vehicle must be serviced as soon as
possible.
Only with BlueHDi Diesel engines.
Rear foglampFixed.
The lamp is on.
Green warning/indicator lamps
Stop & Start
Fixed.
When the vehicle stops the Stop & Start
puts the engine into STOP mode.
Flashing temporarily.
STOP mode is momentarily unavailable
or START mode is automatically triggered.
Hill Assist Descent ControlFixed.
The system has been activated, but the
conditions for regulation are not met (gradient,
speed too high, gear engaged).
Flashing indicator.
The function is starting regulation.
The vehicle is being braked; the brake lamps
come on during the descent.
Eco modeFixed.
ECO mode is active.
Certain parameters are adjusted with a view to
reducing fuel consumption.
Automatic wipingFixed.
Automatic windscreen wiping is activated.
Front foglampsFixed.
The front foglamps are lit.
SidelampsFixed.
The lamps are on.
Direction indicatorsDirection indicators with audible signal.
The direction indicators are on.
Dipped beam headlampsFixed.
The lamps are on.
Automatic headlamp dipping
Fixed.
The function has been activated
via the touch screen (Driving
/ Vehicle menu).
The lighting control stalk is in the "AUTO"
position.
Blue warning/indicator lamps
Main beam headlamps
Fixed.
The lamps are on.
Black/white warning lamps
Foot on brake
Fixed.
Omission or insufficient pressure on the
brake pedal.
With an automatic gearbox, with the engine
running, before releasing the parking brake, to
move out of position P.
Foot on the clutchFixed.
Stop & Start: the change to START mode
is rejected because the clutch pedal is not fully
depressed.
Fully depress the clutch pedal.
Automatic wipingFixed.
Automatic front wiping is activated.
Indicators
Service indicator
The service indicator is displayed on the
instrument panel. Depending on the vehicle
version:
–
the distance recorder display line indicates
the distance remaining before the next service
is due, or the distance travelled since it was due
preceded by the sign “-”.
–
an alert message indicates the distance
remaining, as well as the period before the next
service is due or how long it is overdue.
Page 23 of 260
21
Instruments
1While driving, the message is displayed every 30
seconds. The alert is repeated when switching
on the ignition.
You can continue driving for up to 685 miles
(1,100 km) before the engine immobiliser
system is triggered.
Have the system checked by a
PEUGEOT dealer or a qualified
workshop as soon as possible.
Starting prevented
Whenever the ignition is switched on, the
"Emissions fault: Starting prevented" or "NO
START IN" message is displayed.
To be able to restart the engine, contact a PEUGEOT dealer or a qualified
workshop.
Lighting dimmer
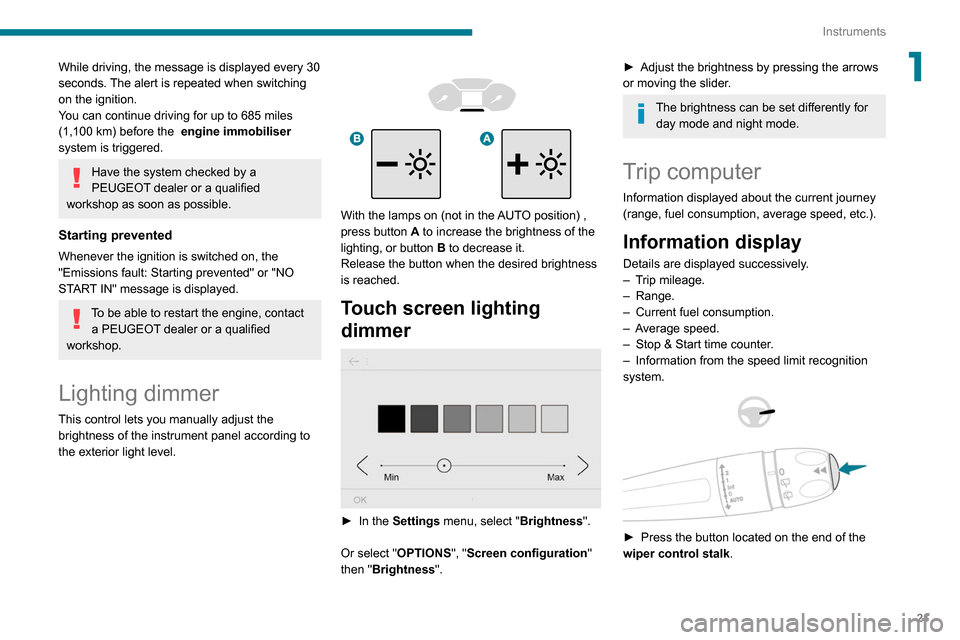
This control lets you manually adjust the
brightness of the instrument panel according to
the exterior light level.
With the lamps on (not in the AUTO position) ,
press button A to increase the brightness of the
lighting, or button B to decrease it.
Release the button when the desired brightness
is reached.
Touch screen lighting
dimmer
► In the Settings menu, select "Brightness".
Or select "OPTIONS ", "Screen configuration "
then "Brightness".
► Adjust the brightness by pressing the arrows
or moving the slider .
The brightness can be set differently for day mode and night mode.
Trip computer
Information displayed about the current journey
(range, fuel consumption, average speed, etc.).
Information display
Details are displayed successively.
– T rip mileage.
–
Range.
–
Current fuel consumption.
–
A
verage speed.
–
Stop & Start time counter
.
–
Information from the speed limit recognition
system.
► Press the button located on the end of the
wiper control stalk .
Page 24 of 260
22
Instruments
Setting the date and time
Without audio system
Set the date and time via the instrument panel
display.
► Press and hold this button.
► Press one of these buttons to select
the setting to be changed.
► Briefly press this button to confirm.
► Press one of these buttons to change
the setting and confirm again to record
the change.
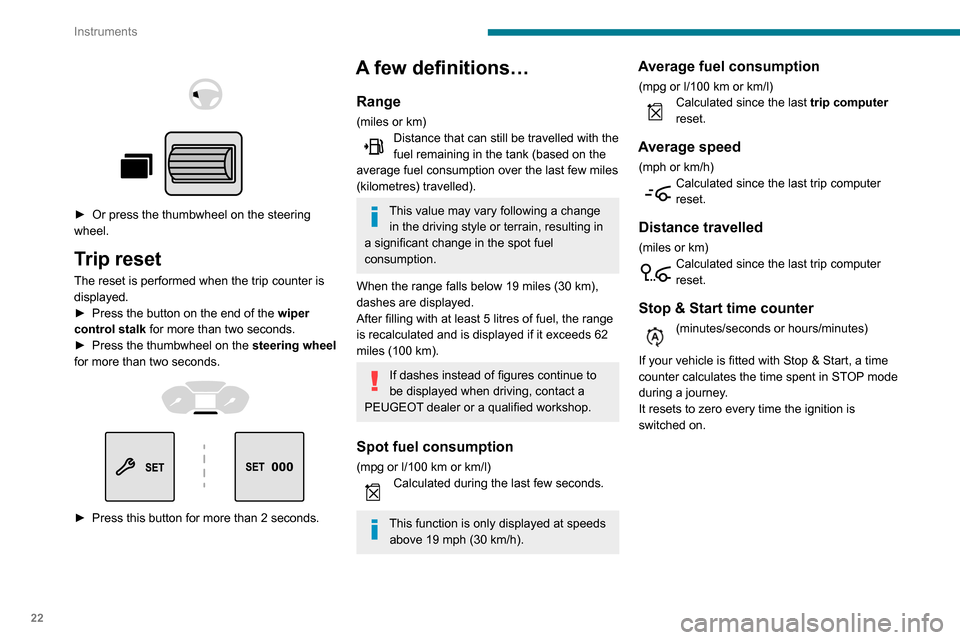
► Or press the thumbwheel on the steering
wheel.
Trip reset
The reset is performed when the trip counter is
displayed.
►
Press the button on the end of the
wiper
control stalk
for more than two seconds.
►
Press the thumbwheel on the steering wheel
for more than two seconds.
► Press this button for more than 2 seconds.
A few definitions…
Range
(miles or km)Distance that can still be travelled with the
fuel remaining in the tank (based on the
average fuel consumption over the last few miles
(kilometres) travelled).
This value may vary following a change in the driving style or terrain, resulting in
a significant change in the spot fuel
consumption.
When the range falls below 19 miles (30
km),
dashes are displayed.
After filling with at least 5 litres of fuel, the range
is recalculated and is displayed if it exceeds 62
miles (100
km).
If dashes instead of figures continue to
be displayed when driving, contact a
PEUGEOT dealer or a qualified workshop.
Spot fuel consumption
(mpg or l/100 km or km/l)Calculated during the last few seconds.
This function is only displayed at speeds above 19 mph (30 km/h).
Average fuel consumption
(mpg or l/100 km or km/l)Calculated since the last trip computer
reset.
Average speed
(mph or km/h)Calculated since the last trip computer
reset.
Distance travelled
(miles or km)Calculated since the last trip computer
reset.
Stop & Start time counter
(minutes/seconds or hours/minutes)
If your vehicle is fitted with Stop & Start, a time
counter calculates the time spent in STOP mode
during a journey.
It resets to zero every time the ignition is
switched on.
Page 26 of 260
24
Access
Electronic key with
remote control function
and built-in key,
Remote control key
This allows the central locking or unlocking of the
vehicle using the door lock or remotely.
It also allows the vehicle to be located, the fuel
filler cap to be removed and refitted and the
engine to be started or switched off, as well as
providing protection against theft.
The remote control buttons are not active with the ignition switched on.
Unfolding / Folding the key
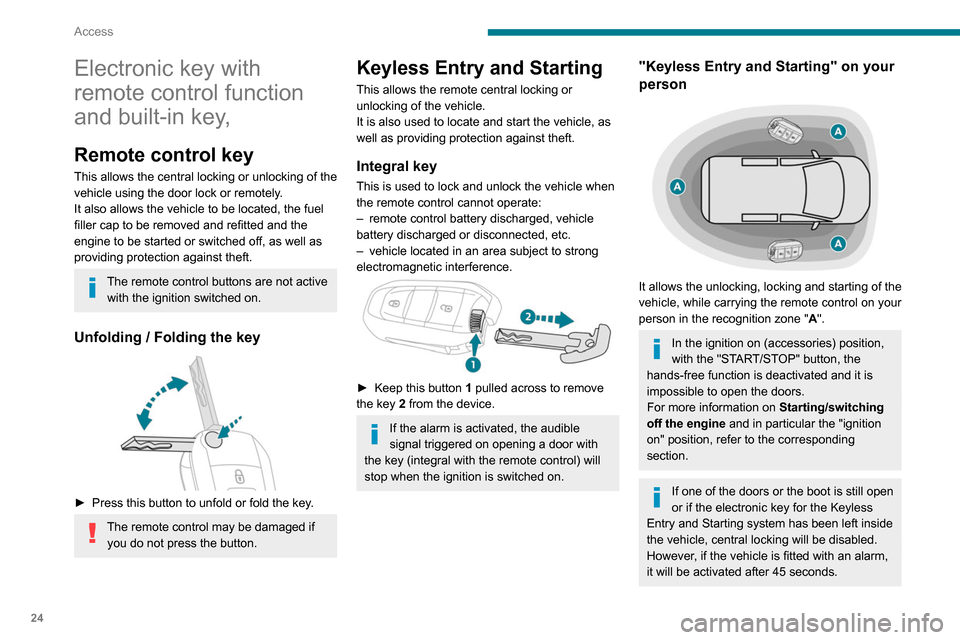
► Press this button to unfold or fold the key .
The remote control may be damaged if
you do not press the button.
Keyless Entry and Starting
This allows the remote central locking or
unlocking of the vehicle.
It is also used to locate and start the vehicle, as
well as providing protection against theft.
Integral key
This is used to lock and unlock the vehicle when
the remote control cannot operate:
–
remote control battery discharged, vehicle
battery discharged or disconnected, etc.
–
vehicle located in an area subject to strong
electromagnetic interference.
► Keep this button 1 pulled across to remove
the key 2 from the device.
If the alarm is activated, the audible
signal triggered on opening a door with
the key (integral with the remote control) will
stop when the ignition is switched on.
"Keyless Entry and Starting" on your
person
It allows the unlocking, locking and starting of the
vehicle, while carrying the remote control on your
person in the recognition zone " A".
In the ignition on (accessories) position,
with the "START/STOP" button, the
hands-free function is deactivated and it is
impossible to open the doors.
For more information on Starting/switching
off the engine and in particular the "ignition
on" position, refer to the corresponding
section.
If one of the doors or the boot is still open
or if the electronic key for the Keyless
Entry and Starting
system has been left inside
the vehicle, central locking will be disabled.
However
, if the vehicle is fitted with an alarm,
it will be activated after 45
seconds.
Page 30 of 260
28
Access
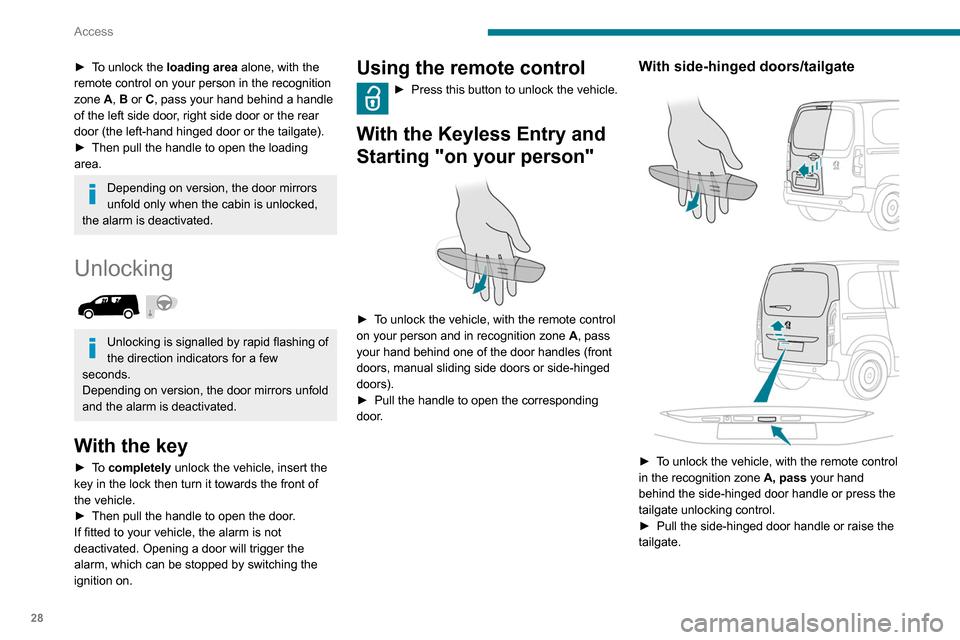
► To unlock the loading area alone, with the
remote control on your person in the recognition
zone A, B or C, pass your hand behind a handle
of the left side door, right side door or the rear
door (the left-hand hinged door or the tailgate).
►
Then pull the handle to open the loading
area.
Depending on version, the door mirrors
unfold only when the cabin is unlocked,
the alarm is deactivated.
Unlocking
Unlocking is signalled by rapid flashing of
the direction indicators for a few
seconds.
Depending on version, the door mirrors unfold
and the alarm is deactivated.
With the key
► To completely unlock the vehicle, insert the
key in the lock then turn it towards the front of
the vehicle.
►
Then pull the handle to open the door
.
If fitted to your vehicle, the alarm is not
deactivated. Opening a door will trigger the
alarm, which can be stopped by switching the
ignition on.
Using the remote control
► Press this button to unlock the vehicle.
With the Keyless Entry and
Starting "on your person"
► To unlock the vehicle, with the remote control
on your person and in recognition zone A, pass
your hand behind one of the door handles (front
doors, manual sliding side doors or side-hinged
doors).
►
Pull the handle to open the corresponding
door
.
With side-hinged doors/tailgate
► To unlock the vehicle, with the remote control
in the recognition zone A, pass
your hand
behind the side-hinged door handle or press the
tailgate unlocking control.
►
Pull the side-hinged door handle or raise the
tailgate.
Page 31 of 260
29
Access
2Locking
Ensure that no person or object prevents
the correct closing of the windows.
Be particularly aware of children when
operating the windows.
If your vehicle is not fitted with an alarm,
the locking/deadlocking is signalled by
the fixed illumination of the direction
indicators for about two seconds.
Depending on your version, the door mirrors
fold at the same time.
With the key
► To lock the vehicle, insert the key in the lock
then turn it towards the rear of the vehicle.
With the remote control
► To lock the vehicle, press this button.
If your vehicle is so equipped, pressing
and holding this button closes the
windows. The window stops in position when
you release the button.
With the Keyless Entry and
Starting "on your person"
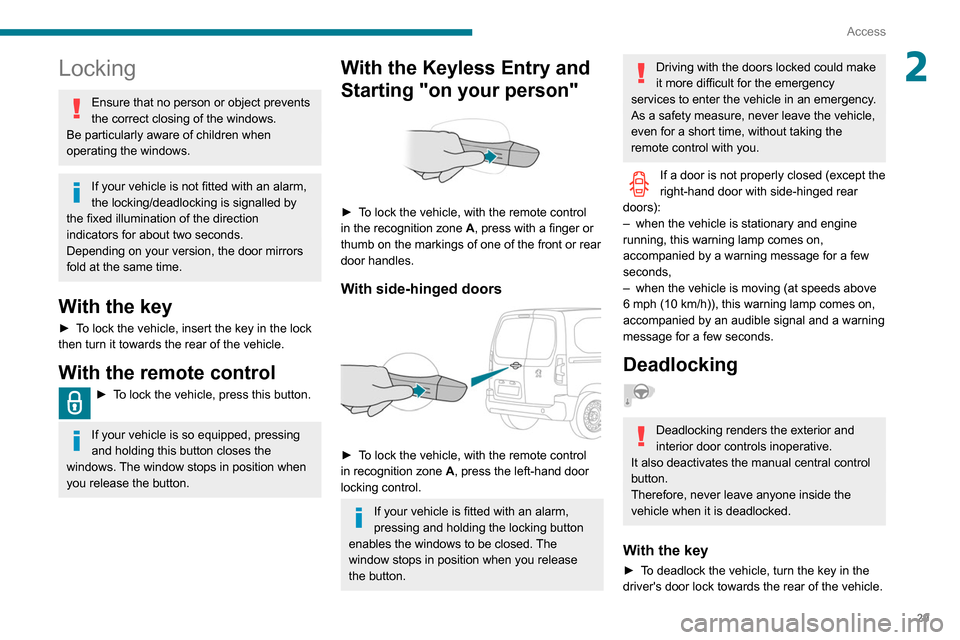
► To lock the vehicle, with the remote control
in the recognition zone A, press with a finger or
thumb on the markings of one of the front or rear
door handles.
With side-hinged doors
► To lock the vehicle, with the remote control
in recognition zone A, press the left-hand door
locking control.
If your vehicle is fitted with an alarm,
pressing and holding the locking button
enables the windows to be closed. The
window stops in position when you release
the button.
Driving with the doors locked could make
it more difficult for the emergency
services to enter the vehicle in an emergency.
As a safety measure, never leave the vehicle,
even for a short time, without taking the
remote control with you.
If a door is not properly closed (except the
right-hand door with side-hinged rear
doors):
–
when the vehicle is stationary and engine
running, this warning lamp comes on,
accompanied by a warning message for a few
seconds,
–
when the vehicle is moving (at speeds above
6 mph (10 km/h)), this warning lamp comes on,
accompanied by an audible signal and a warning
message for a few seconds.
Deadlocking
Deadlocking renders the exterior and
interior door controls inoperative.
It also deactivates the manual central control
button.
Therefore, never leave anyone inside the
vehicle when it is deadlocked.
With the key
► To deadlock the vehicle, turn the key in the
driver's door lock towards the rear of the vehicle.