roof Peugeot Partner Tepee 2011 Owner's Manual
[x] Cancel search | Manufacturer: PEUGEOT, Model Year: 2011, Model line: Partner Tepee, Model: Peugeot Partner Tepee 2011Pages: 232, PDF Size: 7.4 MB
Page 4 of 232
2
Contents
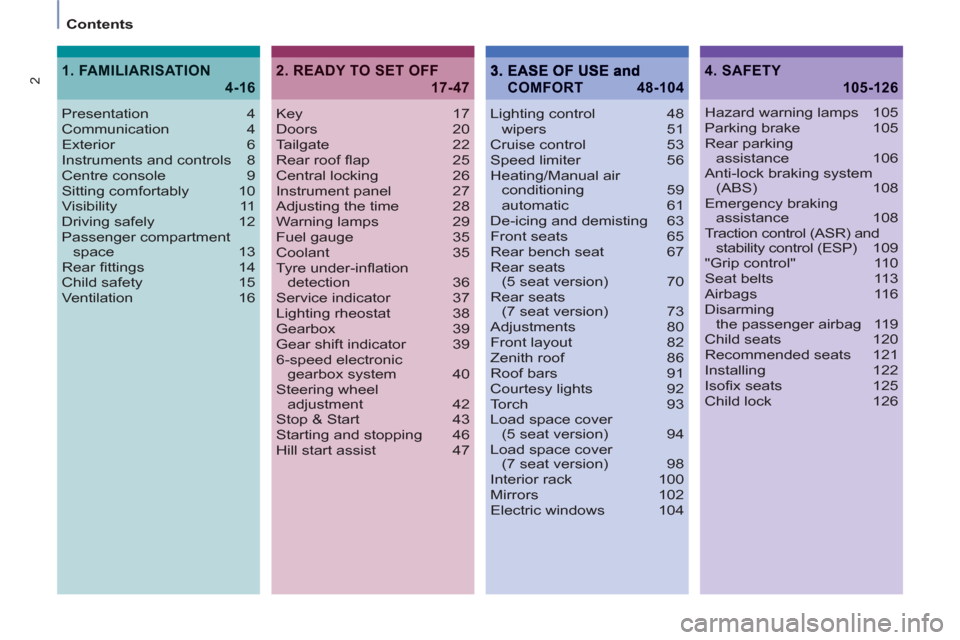
Key 17
Doors 20
Tailgate 22
Rear roof fl ap 25
Central locking 26
Instrument panel 27
Adjusting the time 28
Warning lamps 29
Fuel gauge 35
Coolant 35
Tyre under-infl ation
detection 36
Service indicator 37
Lighting rheostat 38
Gearbox 39
Gear shift indicator 39
6-speed electronic
gearbox system 40
Steering wheel
adjustment 42
Stop & Start 43
Starting and stopping 46
Hill start assist 47Lighting control 48
wipers 51
Cruise control 53
Speed limiter 56
Heating/Manual air
conditioning 59
automatic 61
De-icing and demisting 63
Front seats 65
Rear bench seat 67
Rear seats
(5 seat version) 70
Rear seats
(7 seat version) 73
Adjustments 80
Front layout 82
Zenith roof 86
Roof bars 91
Courtesy lights 92
Torch 93
Load space cover
(5 seat version) 94
Load space cover
(7 seat version) 98
Interior rack 100
Mirrors 102
Electric windows 104
2. READY TO SET OFF
17-47
4. SAFETY
105-126
Presentation 4
Communication 4
Exterior 6
Instruments and controls 8
Centre console 9
Sitting comfortably 10
Visibility 11
Driving safely 12
Passenger compartment
space 13
Rear fi ttings 14
Child safety 15
Ventilation 16
1. FAMILIARISATION
4-16
Hazard warning lamps 105
Parking brake 105
Rear parking
assistance 106
Anti-lock braking system
(ABS) 108
Emergency braking
assistance 108
Traction control (ASR) and
stability control (ESP) 109
"Grip control" 110
Seat belts 113
Airbags 116
Disarming
the passenger airbag 119
Child seats 120
Recommended seats 121
Installing 122
Isofi x seats 125
Child lock 126
COMFORT 48-104
Page 9 of 232
4
2c
2e7b
7a
2d
2d
7a
7b
2c
2e
4
7
1
FAMILIARISATION
Exterior
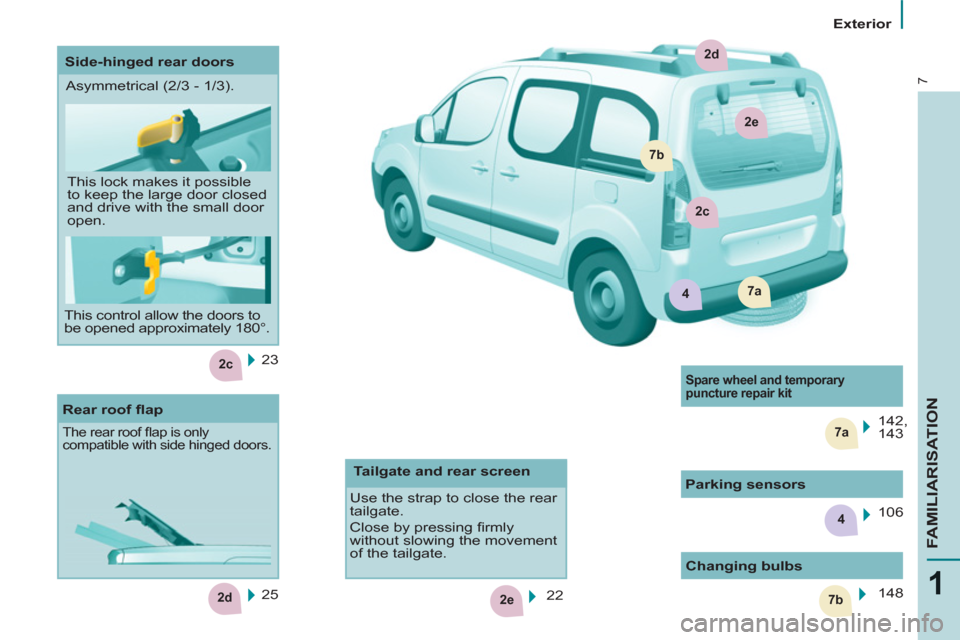
23
25
Rear roof fl ap
The rear roof fl ap is only
compatible with side hinged doors.
Changing bulbs
148
142,
143
Spare wheel and temporary
puncture repair kit
Side-hinged rear doors
Tailgate and rear screen
Use the strap to close the rear
tailgate.
Close by pressing fi rmly
without slowing the movement
of the tailgate.
22 Asymmetrical (2/3 - 1/3).
This lock makes it possible
to keep the large door closed
and drive with the small door
open.
This control allow the doors to
be opened approximately 180°.
Parking sensors
106
Page 15 of 232
33
3
3
13
1
FAMILIARISATION
Interior
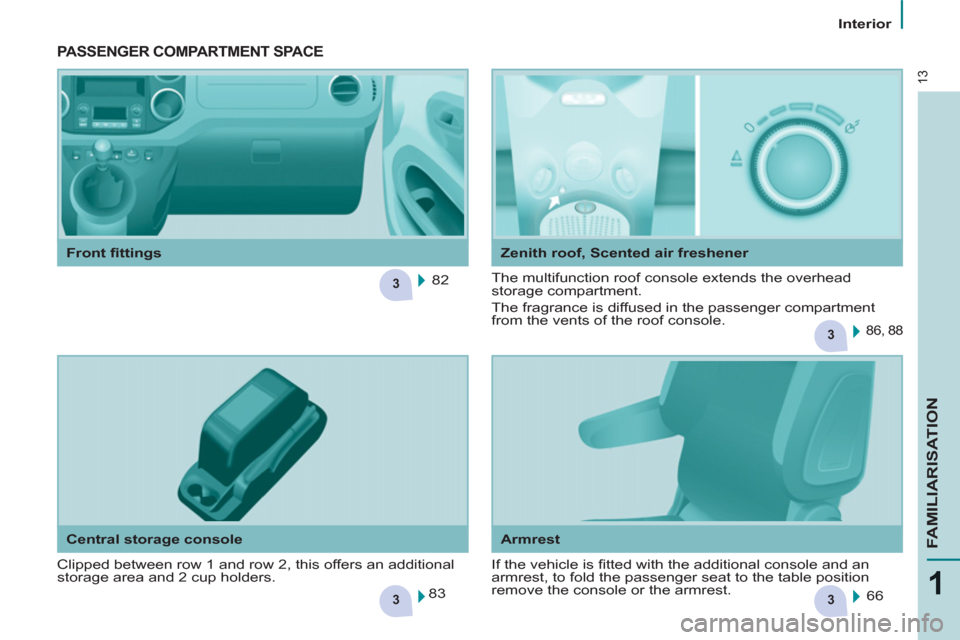
Armrest
Central storage console
Zenith roof, Scented air freshener
PASSENGER COMPARTMENT SPACE
Clipped between row 1 and row 2, this offers an additional
storage area and 2 cup holders. If the vehicle is fi tted with the additional console and an
armrest, to fold the passenger seat to the table position
remove the console or the armrest. 82
83
86, 88
66
The multifunction roof console extends the overhead
storage compartment.
The fragrance is diffused in the passenger compartment
from the vents of the roof console.
Front fi ttings
Page 16 of 232
3
3
33
3
14
Interior
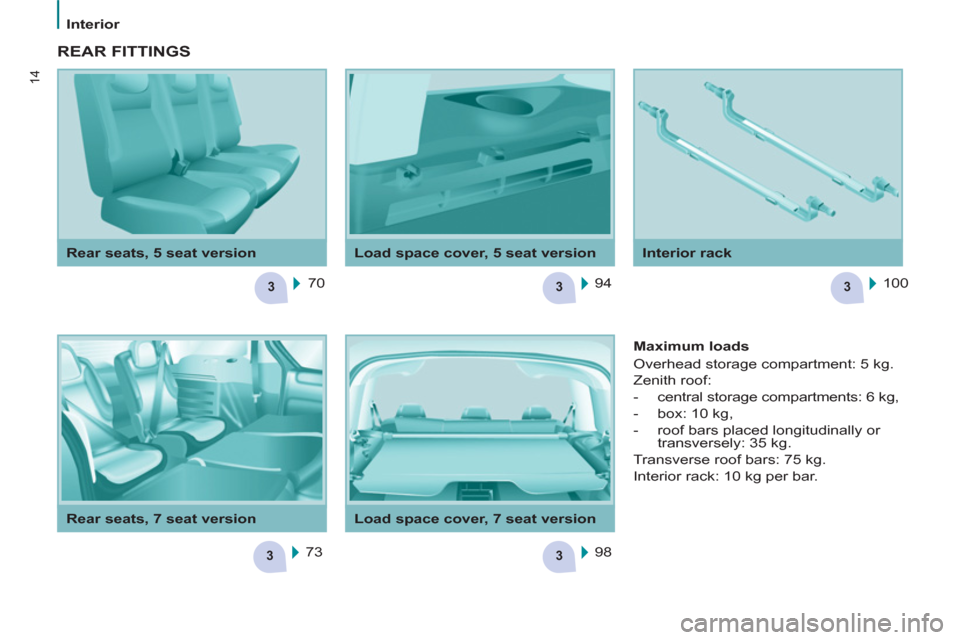
Interior rack
Load space cover, 5 seat version
Rear seats, 5 seat version
REAR FITTINGS
70
73 94 100
98
Maximum loads
Overhead storage compartment: 5 kg.
Zenith roof:
- central storage compartments: 6 kg,
- box: 10 kg,
- roof bars placed longitudinally or
transversely: 35 kg.
Transverse roof bars: 75 kg.
Interior rack: 10 kg per bar.
Load space cover, 7 seat version
Rear seats, 7 seat version
Page 25 of 232
23
Access
READY TO SET OFF
2
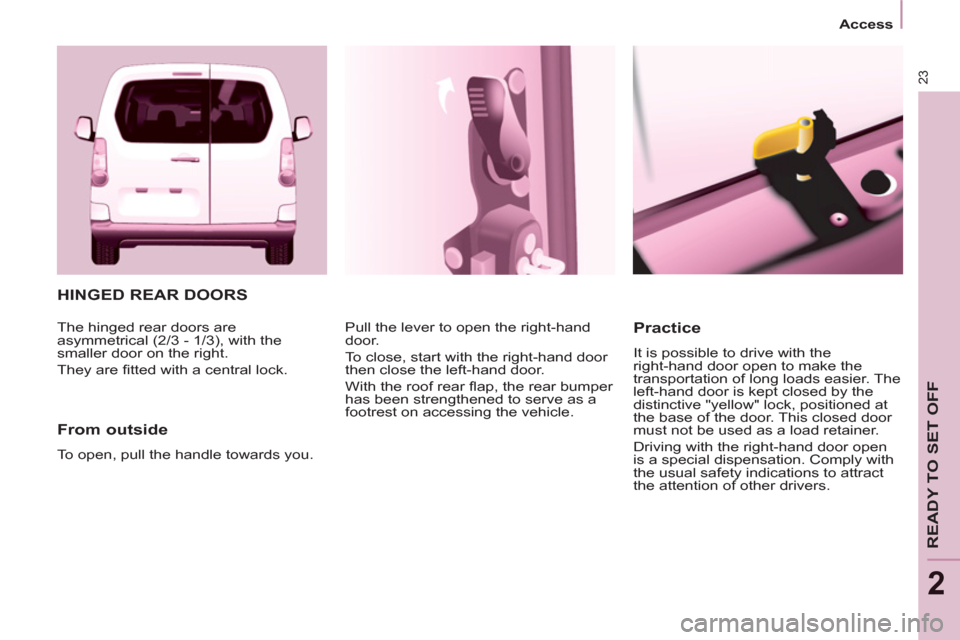
HINGED REAR DOORS
From outside
To open, pull the handle towards you. Pull the lever to open the right-hand
door.
To close, start with the right-hand door
then close the left-hand door.
With the roof rear fl ap, the rear bumper
has been strengthened to serve as a
footrest on accessing the vehicle.
Practice
It is possible to drive with the
right-hand door open to make the
transportation of long loads easier. The
left-hand door is kept closed by the
distinctive "yellow" lock, positioned at
the base of the door. This closed door
must not be used as a load retainer.
Driving with the right-hand door open
is a special dispensation. Comply with
the usual safety indications to attract
the attention of other drivers. The hinged rear doors are
asymmetrical (2/3 - 1/3), with the
smaller door on the right.
They are fi tted with a central lock.
Page 27 of 232
25
Access
READY TO SET OFF
2
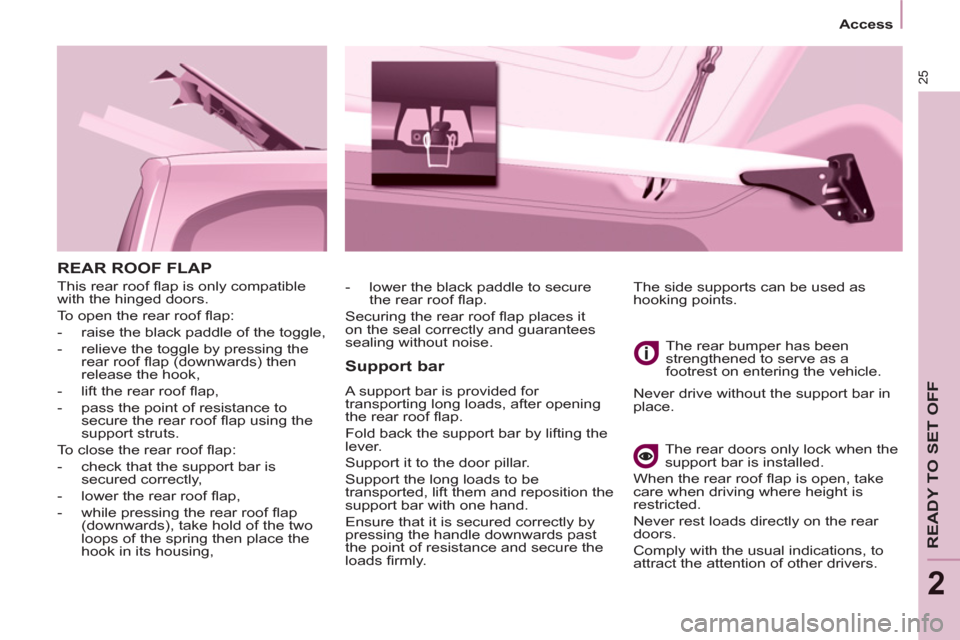
REAR ROOF FLAP
This rear roof fl ap is only compatible
with the hinged doors.
To open the rear roof fl ap:
- raise the black paddle of the toggle,
- relieve the toggle by pressing the
rear roof fl ap (downwards) then
release the hook,
- lift the rear roof fl ap,
- pass the point of resistance to
secure the rear roof fl ap using the
support struts.
To close the rear roof fl ap:
- check that the support bar is
secured correctly,
- lower the rear roof fl ap,
- while pressing the rear roof fl ap
(downwards), take hold of the two
loops of the spring then place the
hook in its housing,
Support bar
A support bar is provided for
transporting long loads, after opening
the rear roof fl ap.
Fold back the support bar by lifting the
lever.
Support it to the door pillar.
Support the long loads to be
transported, lift them and reposition the
support bar with one hand.
Ensure that it is secured correctly by
pressing the handle downwards past
the point of resistance and secure the
loads fi rmly. The rear bumper has been
strengthened to serve as a
footrest on entering the vehicle.
Never drive without the support bar in
place.
The rear doors only lock when the
support bar is installed.
When the rear roof fl ap is open, take
care when driving where height is
restricted.
Never rest loads directly on the rear
doors.
Comply with the usual indications, to
attract the attention of other drivers. The side supports can be used as
hooking points.
- lower the black paddle to secure
the rear roof fl ap.
Securing the rear roof fl ap places it
on the seal correctly and guarantees
sealing without noise.
Page 88 of 232
86
Practical information
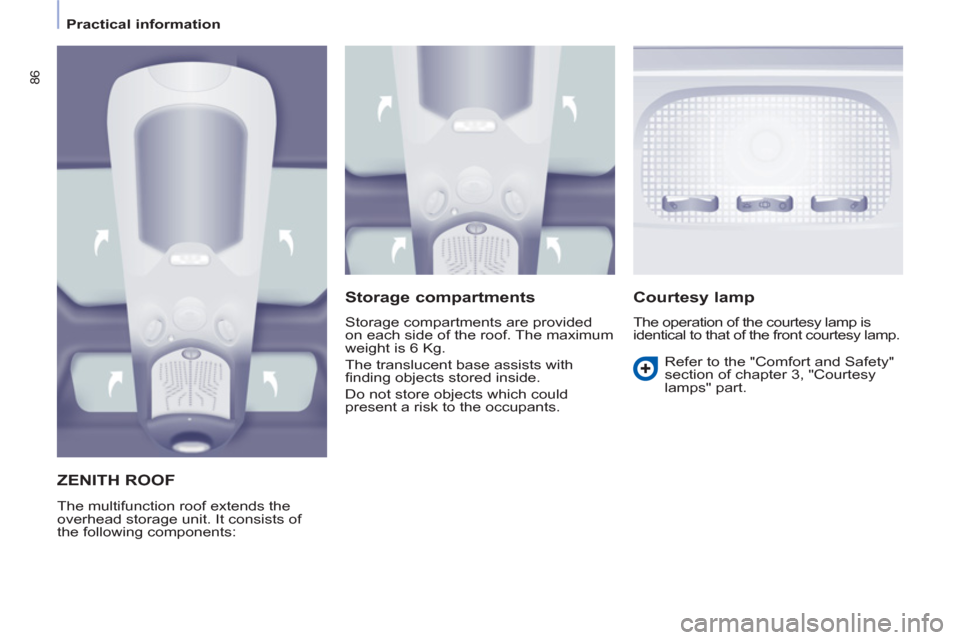
ZENITH ROOF
The multifunction roof extends the
overhead storage unit. It consists of
the following components:
Storage compartments
Storage compartments are provided
on each side of the roof. The maximum
weight is 6 Kg.
The translucent base assists with
fi nding objects stored inside.
Do not store objects which could
present a risk to the occupants.
Courtesy lamp
The operation of the courtesy lamp is
identical to that of the front courtesy lamp.
Refer to the "Comfort and Safety"
section of chapter 3, "Courtesy
lamps" part.
Page 89 of 232
87
EASE OF USE
andCOMFOR
T
3
Practical information
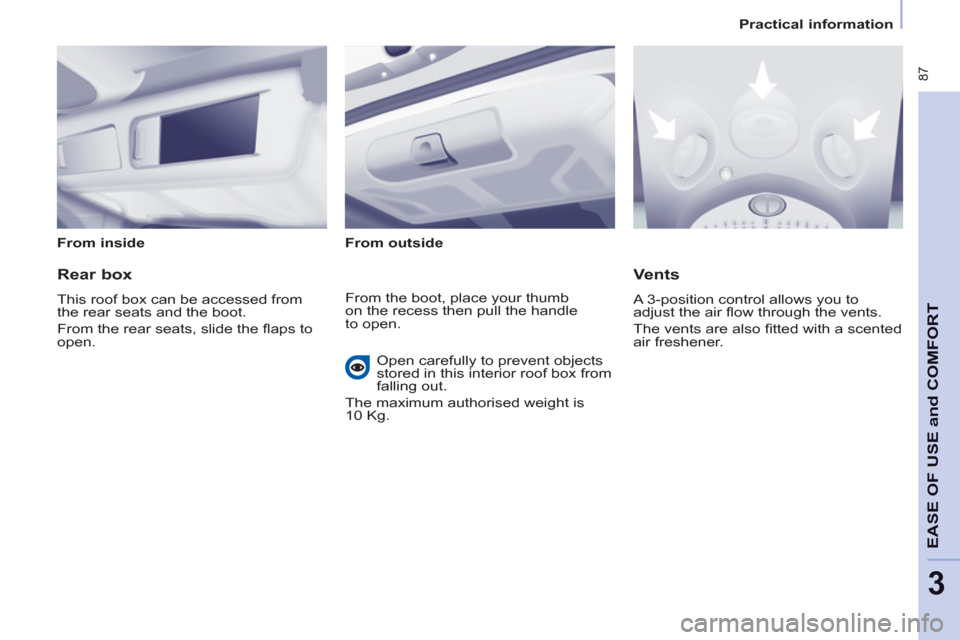
From inside
From outside
Rear box
This roof box can be accessed from
the rear seats and the boot.
From the rear seats, slide the fl aps to
open.
Vents
A 3-position control allows you to
adjust the air fl ow through the vents.
The vents are also fi tted with a scented
air freshener. From the boot, place your thumb
on the recess then pull the handle
to open.
Open carefully to prevent objects
stored in this interior roof box from
falling out.
The maximum authorised weight is
10 Kg.
Page 90 of 232
88
Practical information
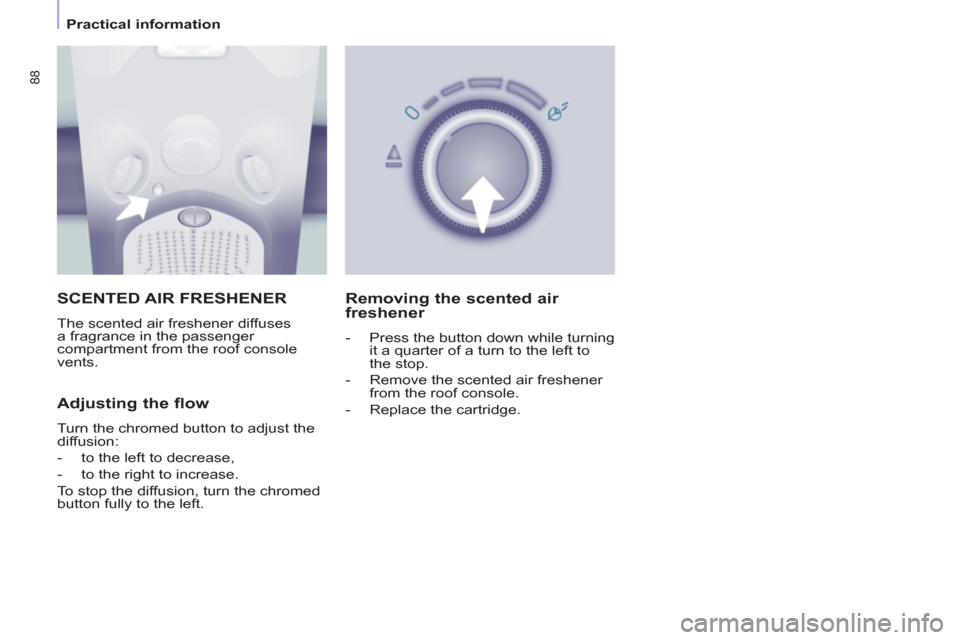
SCENTED AIR FRESHENER
The scented air freshener diffuses
a fragrance in the passenger
compartment from the roof console
vents.
Adjusting the flow
Turn the chromed button to adjust the
diffusion:
- to the left to decrease,
- to the right to increase.
To stop the diffusion, turn the chromed
button fully to the left.
Removing the scented air
freshener
- Press the button down while turning
it a quarter of a turn to the left to
the stop.
- Remove the scented air freshener
from the roof console.
- Replace the cartridge.
Page 91 of 232
89
EASE OF USE
andCOMFOR
T
3
Practical information
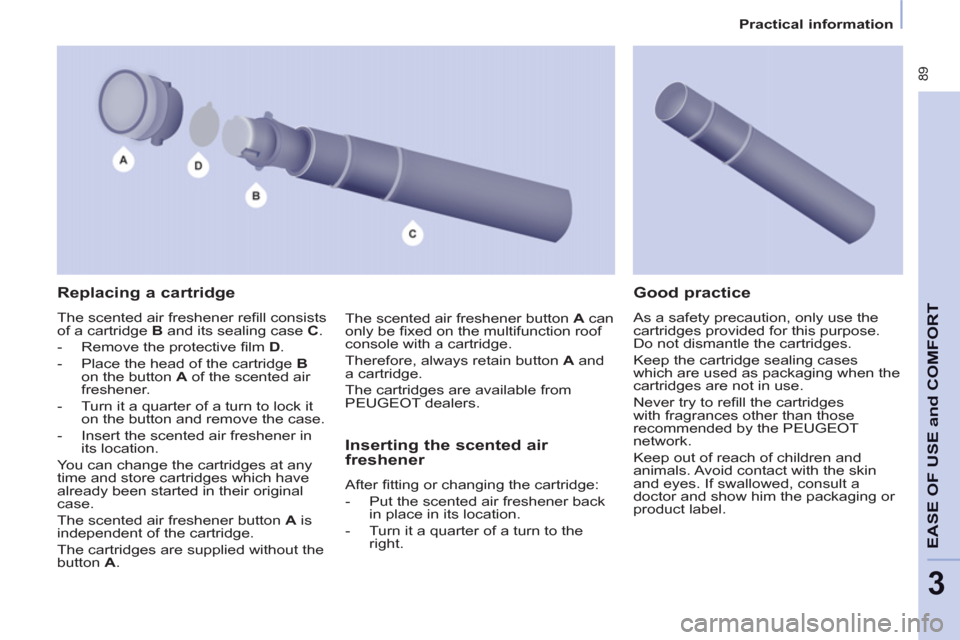
Replacing a cartridge
The scented air freshener refi ll consists
of a cartridge B and its sealing case C .
- Remove the protective fi lm D .
- Place the head of the cartridge B
on the button A of the scented air
freshener.
- Turn it a quarter of a turn to lock it
on the button and remove the case.
- Insert the scented air freshener in
its location.
You can change the cartridges at any
time and store cartridges which have
already been started in their original
case.
The scented air freshener button A is
independent of the cartridge.
The cartridges are supplied without the
button A .
Inserting the scented air
freshener
After fi tting or changing the cartridge:
- Put the scented air freshener back
in place in its location.
- Turn it a quarter of a turn to the
right.
Good practice
As a safety precaution, only use the
cartridges provided for this purpose.
Do not dismantle the cartridges.
Keep the cartridge sealing cases
which are used as packaging when the
cartridges are not in use.
Never try to refi ll the cartridges
with fragrances other than those
recommended by the PEUGEOT
network.
Keep out of reach of children and
animals. Avoid contact with the skin
and eyes. If swallowed, consult a
doctor and show him the packaging or
product label. The scented air freshener button A can
only be fi xed on the multifunction roof
console with a cartridge.
Therefore, always retain button A and
a cartridge.
The cartridges are available from
PEUGEOT dealers.