stop start Peugeot Partner Tepee 2015 User Guide
[x] Cancel search | Manufacturer: PEUGEOT, Model Year: 2015, Model line: Partner Tepee, Model: Peugeot Partner Tepee 2015Pages: 276, PDF Size: 12.76 MB
Page 51 of 276
49
Partner_2_VP_en_Chap03_Pret-a-partir_ed02-2014
Reactivation
Press the "ECO OFF" switch again.
t
he system is active again; this is
confirmed by the switch warning
lamp going off and a message in the
instrument panel.
t
he system is reactivated
automatically at every new start
using the key.
Operating fault
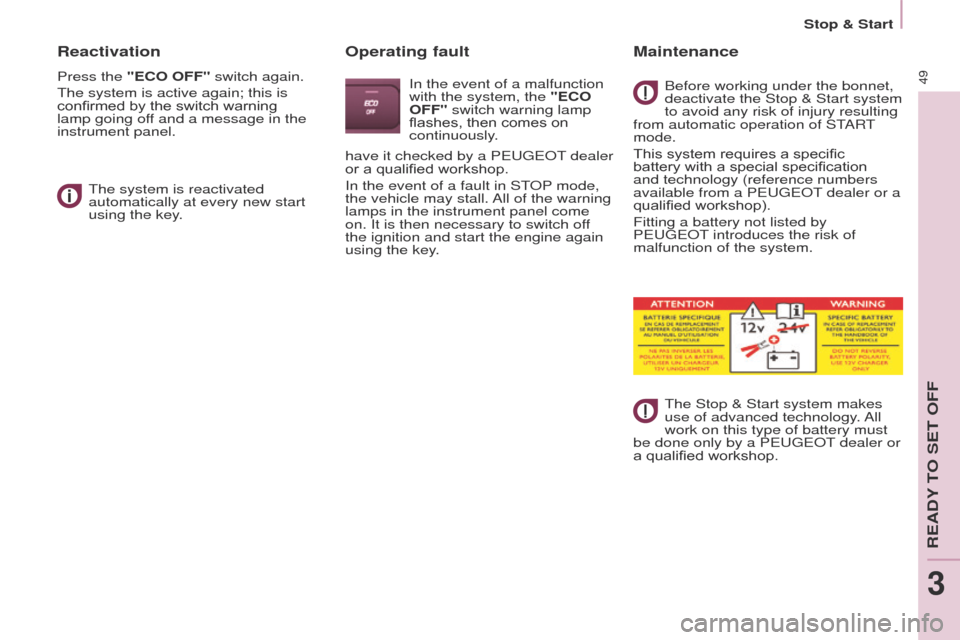
In the event of a malfunction
with the system, the "ECO
OFF" switch warning lamp
flashes, then comes on
continuously.
Maintenance
Before working under the bonnet,
deactivate the Stop & Start system
to avoid any risk of injury resulting
from automatic operation of S
t
ARt
mode.
This system requires a specific
battery with a special specification
and technology (reference numbers
available from a P
euge O t
dealer or a
qualified workshop).
Fitting a battery not listed by
P
euge O t introduces the risk of
malfunction of the system.
t
he Stop & Start system makes
use of advanced technology. All
work on this type of battery must
be done only by a P
euge O t
dealer or
a qualified workshop.
have it checked by a P
euge
O
t
dealer
or a qualified workshop.
In the event of a fault in S
t
OP
mode,
the vehicle may stall. All of the warning
lamps in the instrument panel come
on. It is then necessary to switch off
the ignition and start the engine again
using the key.
Stop & Start
ReADY tO Set OFF
3
Page 52 of 276
50
Partner_2_VP_en_Chap03_Pret-a-partir_ed02-2014
Good practice when stopping Good practice when starting
Diesel pre-heating warning
lamp
If the temperature is high
enough, the warning lamp
comes on for less than
one second, you can start
without waiting.
In cold weather, wait for this warning
lamp to go off then operate the starter
(Starting position) until the engine
starts.
Door or bonnet open warning lamp
If this comes on, a door or
the bonnet is not closed
correctly, check!
Minimise engine and gearbox wear
When switching off the ignition, let the
engine run for a few seconds to allow
the turbocharger (Diesel engine) to
return to idle.
Do not press the accelerator when
switching off the ignition.
t
here is no need to engage a gear
after parking the vehicle.
STARTING AND STOPPING
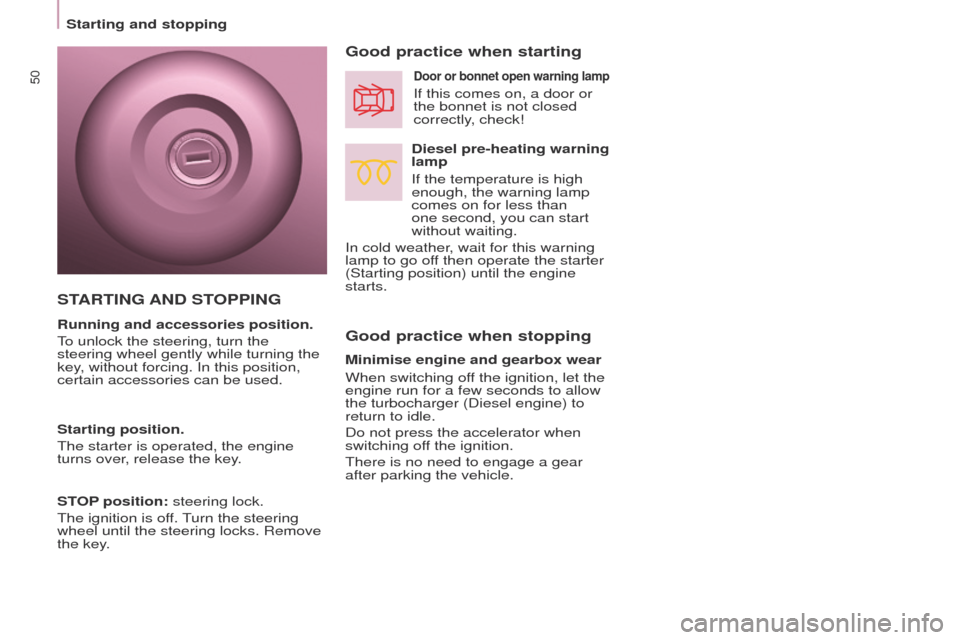
Running and accessories position.
to unlock the steering, turn the
steering wheel gently while turning the
key
, without forcing. In this position,
certain accessories can be used.
Starting position.
t
he starter is operated, the engine
turns over, release the key.
STOP position: steering lock.
t
he ignition is off.
turn the steering
wheel until the steering locks. Remove
the key
.
Starting and stopping
Page 53 of 276
51
Partner_2_VP_en_Chap03_Pret-a-partir_ed02-2014
HILL START ASSIST
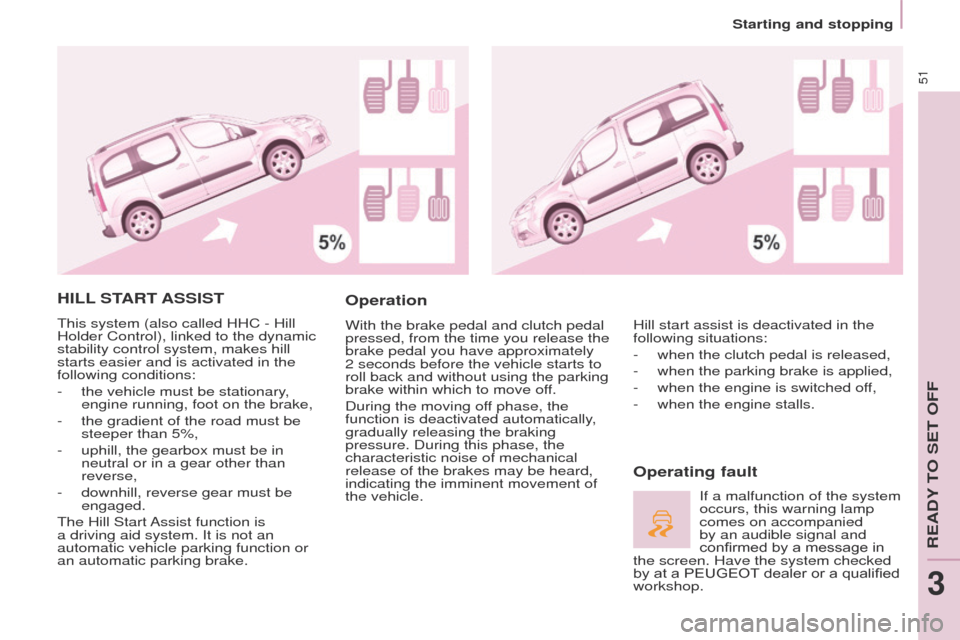
this system (also called HHC - Hill
Holder Control), linked to the dynamic
stability control system, makes hill
starts easier and is activated in the
following conditions:
-
the vehicle must be stationary
,
engine running, foot on the brake,
-
the gradient of the road must be
steeper than 5%,
-
uphill, the gearbox must be in
neutral or in a gear other than
reverse,
-
downhill, reverse gear must be
engaged.
t
he Hill Start Assist function is
a driving aid system. It is not an
automatic vehicle parking function or
an automatic parking brake.
Operation
With the brake pedal and clutch pedal
pressed, from the time you release the
brake pedal you have approximately
2 seconds before the vehicle starts to
roll back and without using the parking
brake within which to move off.
During the moving off phase, the
function is deactivated automatically,
gradually releasing the braking
pressure. During this phase, the
characteristic noise of mechanical
release of the brakes may be heard,
indicating the imminent movement of
the vehicle.
Operating fault
Hill start assist is deactivated in the
following situations:
-
when the clutch pedal is released,
-
when the parking brake is applied,
-
when the engine is switched of
f,
-
when the engine stalls.
If a malfunction of the system
occurs, this warning lamp
comes on accompanied
by an audible signal and
confirmed by a message in
the screen. Have the system checked
by at a PEUGEOT
dealer or a qualified
workshop.
Starting and stopping
ReADY tO Set OFF
3
Page 55 of 276
53
Partner_2_VP_en_Chap04_ergonomie_ed02-2014
LED DAYTIME RUNNING LAMPS
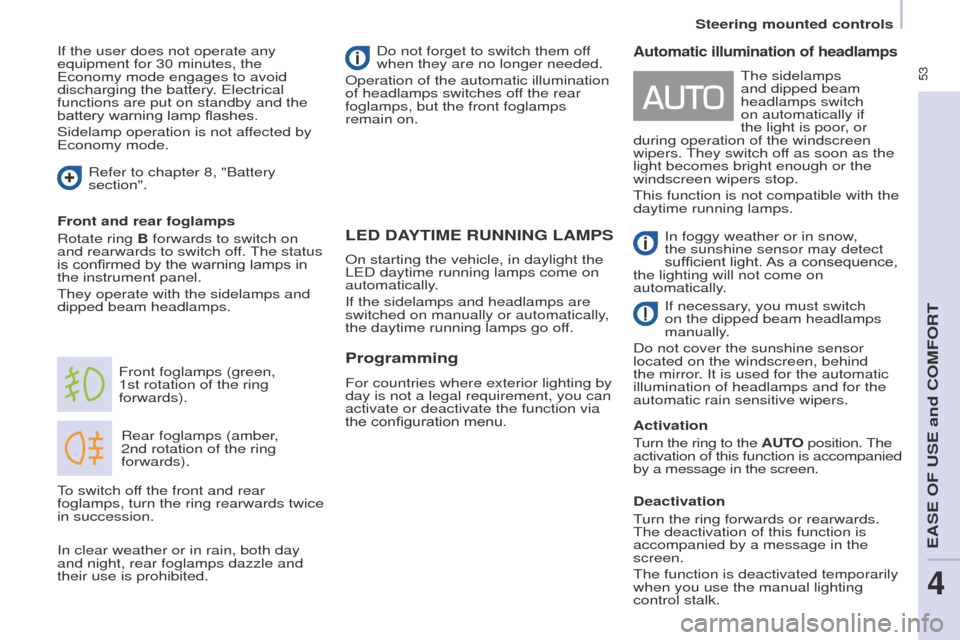
Rear foglamps (amber,
2nd rotation of the ring
forwards).
Front foglamps (green,
1st
rotation of the ring
forwards).
Front and rear foglamps
Rotate ring B forwards to switch on
and rearwards to switch off.
t
he status
is confirmed by the warning lamps in
the instrument panel.
t
hey operate with the sidelamps and
dipped beam headlamps. Do not forget to switch them off
when they are no longer needed.
Operation of the automatic illumination
of headlamps switches off the rear
foglamps, but the front foglamps
remain on.
to switch of
f the front and rear
foglamps, turn the ring rearwards twice
in succession.
Automatic illumination of headlamps
In foggy weather or in snow,
the sunshine sensor may detect
sufficient light. As a consequence,
the lighting will not come on
automatically.
If necessary, you must switch
on the dipped beam headlamps
manually.
Do not cover the sunshine sensor
located on the windscreen, behind
the mirror. It is used for the automatic
illumination of headlamps and for the
automatic rain sensitive wipers.
Activation
turn the ring to the
AUTO position. t he
activation of this function is accompanied
by a message in the screen.
Deactivation
turn the ring forwards or rearwards. t
he deactivation of this function is
accompanied by a message in the
screen.
t
he function is deactivated temporarily
when you use the manual lighting
control stalk.
t
he sidelamps
and dipped beam
headlamps switch
on automatically if
the light is poor, or
during operation of the windscreen
wipers.
t
hey switch off as soon as the
light becomes bright enough or the
windscreen wipers stop.
t
his function is not compatible with the
daytime running lamps.
On starting the vehicle, in daylight the
L
e
D daytime running lamps come on
automatically.
If the sidelamps and headlamps are
switched on manually or automatically,
the daytime running lamps go off.
Programming
For countries where exterior lighting by
day is not a legal requirement, you can
activate or deactivate the function via
the configuration menu.
If the user does not operate any
equipment for 30 minutes, the
e
conomy mode engages to avoid
discharging the battery.
e
lectrical
functions are put on standby and the
battery warning lamp flashes.
Sidelamp operation is not affected by
e
conomy mode.
In clear weather or in rain, both day
and night, rear foglamps dazzle and
their use is prohibited. Refer to chapter 8, "Battery
section".
Steering mounted controls
eASe OF uSe and COMFORt
4
Page 146 of 276
144
Partner_2_VP_en_Chap07_Verification_ed02-2014
Cooling system
Only use the fluid recommended by the
manufacturer.
Otherwise, you risk seriously damaging
your engine.
When the engine is warm, the
temperature of the coolant is controlled
by the engine fan. As this fan can
operate with the ignition key removed
and because the cooling system is
pressurised, wait for at least one hour
after the engine has stopped before
carrying out any work.
Slacken the cap by 1/4 of a turn to
release the pressure to prevent any
risk of scalding. When the pressure
has dropped, remove the cap and top
up the level with coolant.
If fluid has to be added frequently,
this indicates a fault which must be
checked by a Peuge O t
dealer as
soon as possible.
Power steering fluid level
the vehicle must be parked on level
ground with the engine cold. u nscrew
the cap integrated with the gauge and
check the level which must be between
the MIN and MAX marks. In order to regenerate the filter, you
are advised to drive at a speed higher
than 40 mph (60 km/h) for at least five
minutes as soon as possible, when
traffic conditions permit (until the
message disappears and the service
warning lamp goes off).
During regeneration of the particle
emission filter, the noise of a relay
operating may be heard under the
dashboard.
If the message is still displayed and
if the service warning lamp remains
on, contact a P
euge O t
dealer or a
qualified workshop.
T
opping up
t
he level must be between the MIN
and MAX marks on the expansion
bottle. If more than 1 litre of fluid is
required to top up the level, have
the system checked by a P
euge
O
t
dealer or a qualified workshop.
Screenwash and headlamp
wash level
For best quality cleaning and for your
safety, we would advise that you use
products of the P
euge O t
range.
For optimum cleaning and to avoid
freezing, this fluid must not be topped
up or replaced with plain water
.
Capacity of the screenwash reservoir:
approximately 3 litres.
If your vehicle is fitted with headlamp
washers, the capacity of the reservoir
is 6 litres.
Diesel additive level
(Diesel with particle
emission filter)
Topping up
t
his additive must be topped up by
a PEUGEOT dealer or a qualified
workshop without delay.
Waste products
Avoid prolonged contact of used oil
with the skin.
Brake fluid is harmful to health and
very corrosive.
Do not dispose of used oil, brake fluid
or coolant into drains or into the ground
but into the containers dedicated to this
use at a P
euge O t
dealer (France) or
an authorised waste disposal site.
t
he minimum level of this additive
is indicated by lighting of the service
warning lamp, accompanied by an
audible signal and a message in the
screen.
When this occurs with the engine
running it is due to the start of
saturation of the particle emission filter
(exceptionally prolonged urban type
driving conditions: low speed, long
traffic jams, ...).
Levels
Page 158 of 276
156
Partner_2_VP_en_Chap07_Verification_ed02-2014
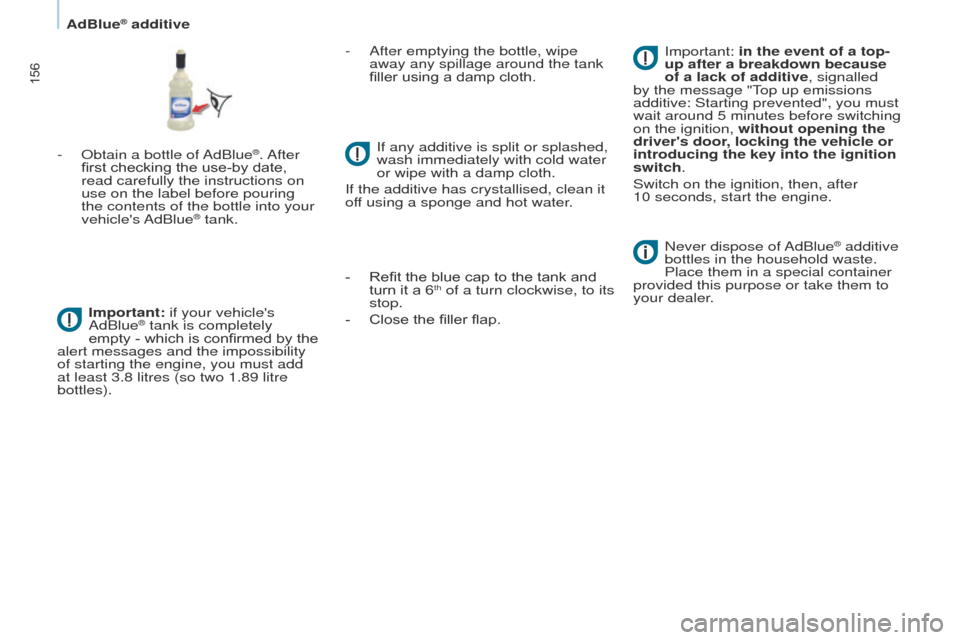
- Obtain a bottle of AdBlue®. After
first checking the use-by date,
read carefully the instructions on
use on the label before pouring
the contents of the bottle into your
vehicle's AdBlue
® tank.
Important: if your vehicle's
AdBlue
® tank is completely
empty
- which is confirmed by the
alert messages and the impossibility
of starting the engine, you must add
at least 3.8 litres (so two 1.89 litre
bottles). -
After emptying the bottle, wipe
away any spilla
ge around the tank
filler using a damp cloth.
If any additive is split or splashed,
wash immediately with cold water
or wipe with a damp cloth.
If the additive has crystallised, clean it
off using a sponge and hot water.
-
Refit the blue cap to the tank and
turn it a 6th of a turn clockwise, to its
stop.
-
Close the filler flap. Never dispose of
AdBlue
® additive
bottles in the household waste.
Place them in a special container
provided this purpose or take them to
your dealer. Important: in the event of a top-
up after a breakdown because
of a lack of additive, signalled
by the message "
t
op up emissions
additive: Starting prevented", you must
wait around 5 minutes before switching
on the ignition,
without opening the
driver's door, locking the vehicle or
introducing the key into the ignition
switch.
Switch on the ignition, then, after
10
seconds, start the engine.
AdBlue® additive
Page 159 of 276
157
Partner_2_VP_en_Chap08_Aide-rapide_ed02-2014
BATTERY
Before disconnecting the battery, you
must wait for 2 minutes after switching
off the ignition.
Never disconnect a terminal when the
engine is running.
Never charge a battery without first
disconnecting the terminals.
After every reconnection of the battery,
switch on the ignition and wait 1 minute
before starting to allow the electronic
systems to be initialised. If problems
remain after doing this, please contact
a PEUGEOT dealer or a qualified
workshop.
After changing bulbs, wait
approximately 3 minutes before
reconnecting the battery.
It is advisable to disconnect the
battery if the vehicle is not to be
used for a period of more than
one
month.
To charge the battery using a
battery charger
- Disconnect the battery,
-
Follow the instructions for use
given by the battery charger
manufacturer
,
-
Reconnect starting with the
negative (-) terminal,
-
Check that the terminals and
connectors are clean. If they are
covered with sulphate (white or
greenish deposit), disconnect them
and clean them.
To start the vehicle from
another battery
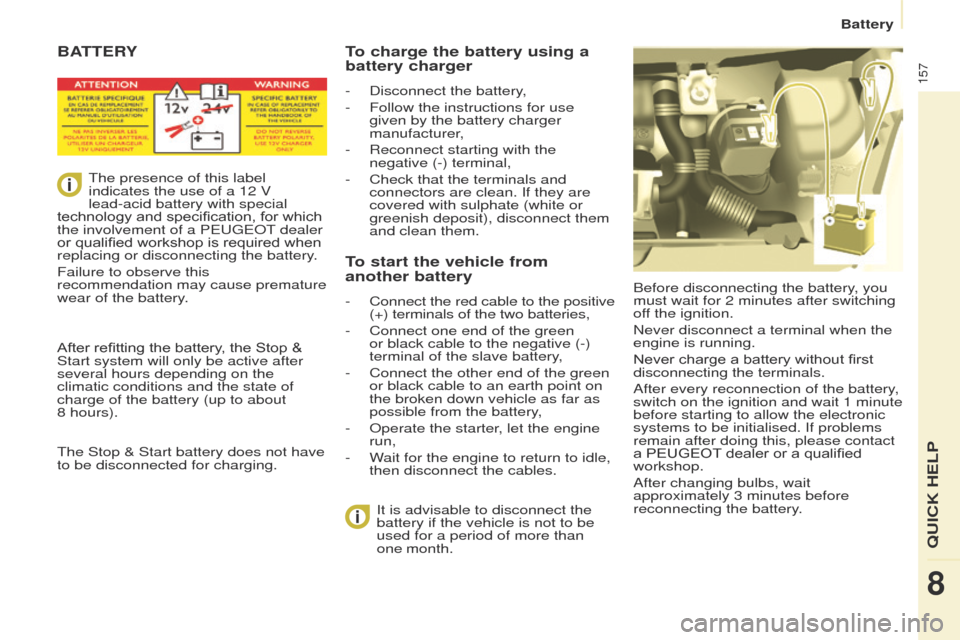
- Connect the red cable to the positive
(+) terminals of the two batteries,
-
Connect one end of the green
or black cable to the negative (-)
terminal of the slave battery
,
-
Connect the other end of the green
or black cable to an earth point on
the broken down vehicle as far as
possible from the battery
,
-
Operate the starter
, let the engine
run,
-
W
ait for the engine to return to idle,
then disconnect the cables.
t
he presence of this label
indicates the use of a 12 V
lead-acid battery with special
technology and specification, for which
the involvement of a P
euge
O
t
dealer
or qualified workshop is required when
replacing or disconnecting the battery
.
Failure to observe this
recommendation may cause premature
wear of the battery.
After refitting the battery, the Stop
&
Start system will only be active after
several hours depending on the
climatic conditions and the state of
charge of the battery (up to about
8 hours).
t
he Stop & Start battery does not have
to be disconnected for charging.
Battery
QuICK HeLP
8
Page 160 of 276
158
Partner_2_VP_en_Chap08_Aide-rapide_ed02-2014
ECONOMY MODE
After the engine has stopped, with
the key in the ignition position, certain
functions (windscreen wiper, electric
windows, courtesy lamps, audio
equipment, etc.) can only be used for a
cumulative duration of thirty minutes, to
prevent discharging of the battery.
Once the thirty minutes are over, the
active functions are put on standby
and the battery warning lamp flashes
accompanied by a message in the
screen.
to resume the use of these functions
immediately
, start the engine and let it
run for a few minutes.
t
he time available will then be double
the time for which the engine was left
running. However, this time will always
be between five and thirty minutes.
A flat battery will prevent the
engine from starting.
Battery
Page 188 of 276
186
Partner_2_VP_en_Chap09_Caract-technique_ed02-2014
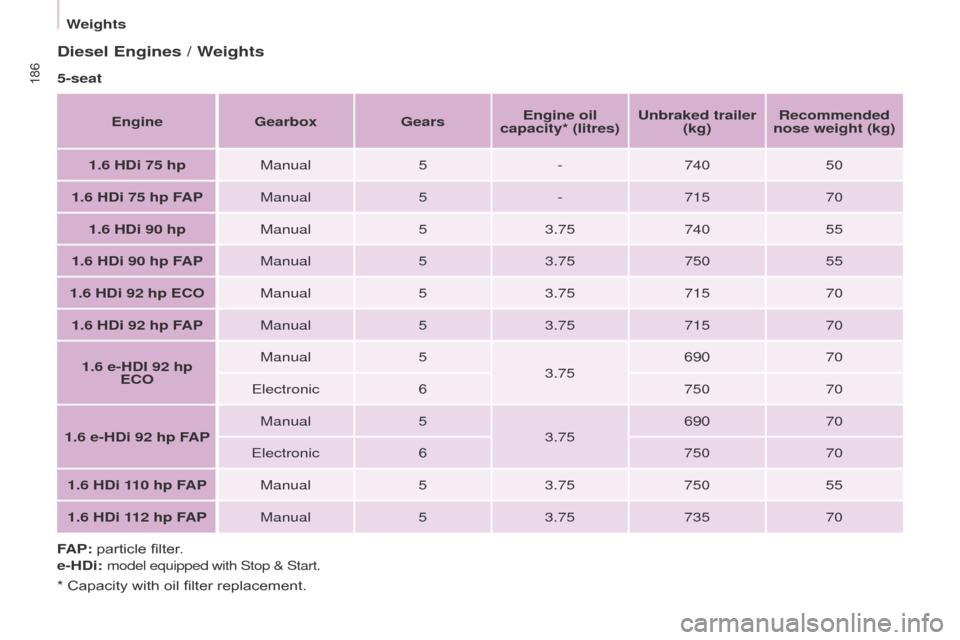
Diesel Engines / Weights
5-seatEngine Gearbox GearsEngine oil
capacity* (litres) Unbraked trailer
(kg) Recommended
nose weight (kg)
1.6 HDi 75 hp Manual5-740 50
1.6 HDi 75 hp FAP Manual5-715 70
1.6 HDi 90 hp Manual53.75 740 55
1.6 HDi 90 hp FAP Manual53.75 750 55
1.6 HDi 92 hp ECO Manual53.75 715 70
1.6 HDi 92 hp FAP Manual53.75 715 70
1.6 e-HDI 92 hp ECO Manual
5
3.75 690
70
e
lectronic6 75070
1.6 e-HDi 92 hp FAP Manual
5
3.75 690
70
e
lectronic6 75070
1.6 HDi 110 hp FAP Manual53.75 750 55
1.6 HDi 112 hp FAP Manual53.75 735 70
FAP: particle filter.
e-HDi:
model equipped with Stop & Start.
* Capacity with oil filter replacement.
Weights
Page 189 of 276
187
Partner_2_VP_en_Chap09_Caract-technique_ed02-2014
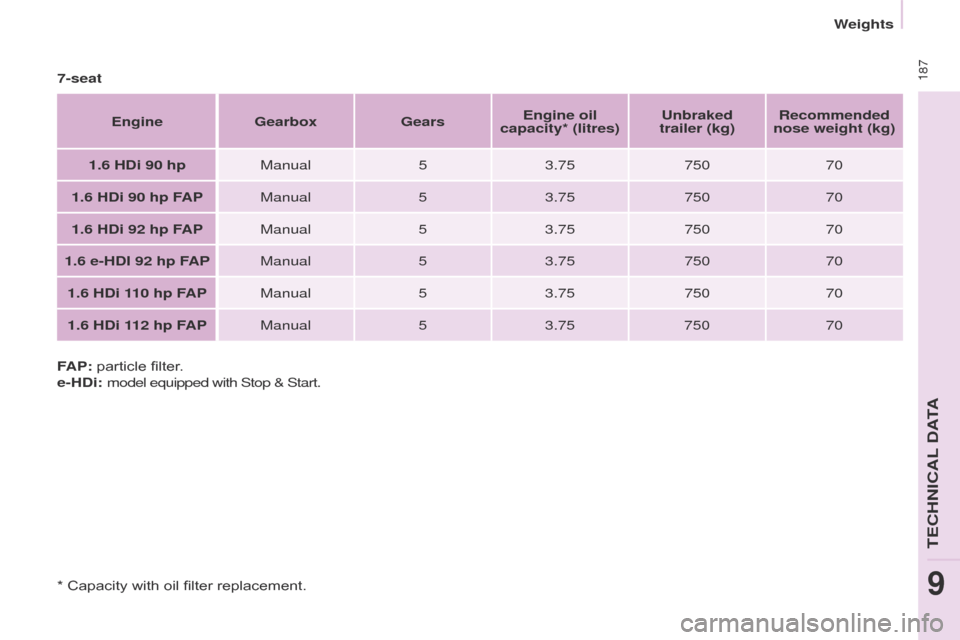
7-seatEngine Gearbox GearsEngine oil
capacity* (litres) Unbraked
trailer (kg) Recommended
nose weight (kg)
1.6 HDi 90 hp Manual53.75 750 70
1.6 HDi 90 hp FAP Manual53.75 750 70
1.6 HDi 92 hp FAP Manual53.75 750 70
1.6 e-HDI 92 hp FAP Manual53.75 750 70
1.6 HDi 110 hp FAP Manual53.75 750 70
1.6 HDi 112 hp FAP Manual53.75 750 70
FAP: particle filter.
e-HDi: model equipped with Stop & Start.
* Capacity with oil filter replacement.
teCHNICAL DAtA
9
Weights