Peugeot Partner Tepee 2015 Owner's Guide
Manufacturer: PEUGEOT, Model Year: 2015, Model line: Partner Tepee, Model: Peugeot Partner Tepee 2015Pages: 276, PDF Size: 12.76 MB
Page 21 of 276
19
Partner_2_VP_en_Chap03_Pret-a-partir_ed02-2014
Good practice
take care not to allow the remote
control to come into contact with
grease, dust, rain or a damp
environment.
A
heavy object attached to the key
(keyring, ...) weighing on the shaft of
the key in the switch, may cause a
malfunction.
REMOTE CONTROL Reinitialising the remote control
Following changing of the remote
control battery or disconnection of the
vehicle battery, the remote control may
have to be reinitialised.
Wait at least one minute before using
the remote control.
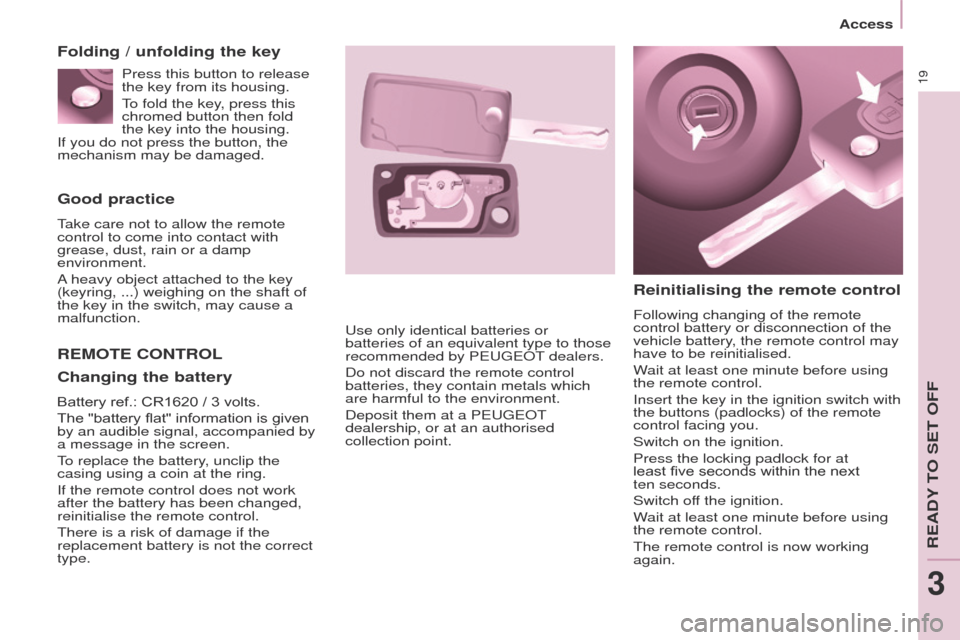
Insert the key in the ignition switch with
the buttons (padlocks) of the remote
control facing you.
Switch on the ignition.
Press the locking padlock for at
least five seconds within the next
ten
seconds.
Switch off the ignition.
Wait at least one minute before using
the remote control.
t
he remote control is now working
again.u
se only identical batteries or
batteries of an equivalent type to those
recommended by P
euge
O
t
dealers.
Do not discard the remote control
batteries, they contain metals which
are harmful to the environment.
Deposit them at a P
euge
O
t
dealership, or at an authorised
collection point.
Folding / unfolding the key
Changing the battery
Battery ref.: CR1620 / 3 volts.
The "battery flat" information is given
by an audible signal, accompanied by
a message in the screen.
to replace the battery
, unclip the
casing using a coin at the ring.
If the remote control does not work
after the battery has been changed,
reinitialise the remote control.
t
here is a risk of damage if the
replacement battery is not the correct
type. Press this button to release
the key from its housing.
to fold the key
, press this
chromed button then fold
the key into the housing.
If you do not press the button, the
mechanism may be damaged.
Access
ReADY tO Set OFF
3
Page 22 of 276
20
Partner_2_VP_en_Chap03_Pret-a-partir_ed02-2014
When leaving the vehicle, check that
the lamps are off and nothing of value
is visible.
As a safety precaution (with children
on board), remove the key from the
ignition when leaving the vehicle, even
for a short time.
Good practice
Do not make any modifications to the
electronic immobiliser system.
Operating the remote control, even
when it is in your pocket, may result in
involuntary unlocking of the doors.
t
he simultaneous use of other
high frequency equipment (mobile
telephones, domestic alarms…), may
interfere with the operation of the
remote control temporarily.
t
he remote control does not operate
while the key is in the ignition, even if
the ignition is off.
ELECTRONIC IMMOBILISER
All of the keys contain an electronic
immobiliser device.
t
his device locks the engine supply
system. It is activated automatically
when the key is removed from the
ignition.
After the ignition is switched on, a
dialogue is established between the
key and the electronic immobiliser
system.
t
he metal part of the key must be
unfolded correctly for correct dialogue
to take place.
If you lose your keys
Visit a P
euge O t
dealer with the
vehicle's V5 registration document and
your identification document.
A
P euge O t
dealer will be able
to retrieve the key code and
the transponder code so that a
replacement key can be ordered. When purchasing a second-hand
vehicle:
-
have the keys memorised by a
P
euge O t
dealer to ensure that
the keys in your possession are
the only ones which can start the
vehicle.
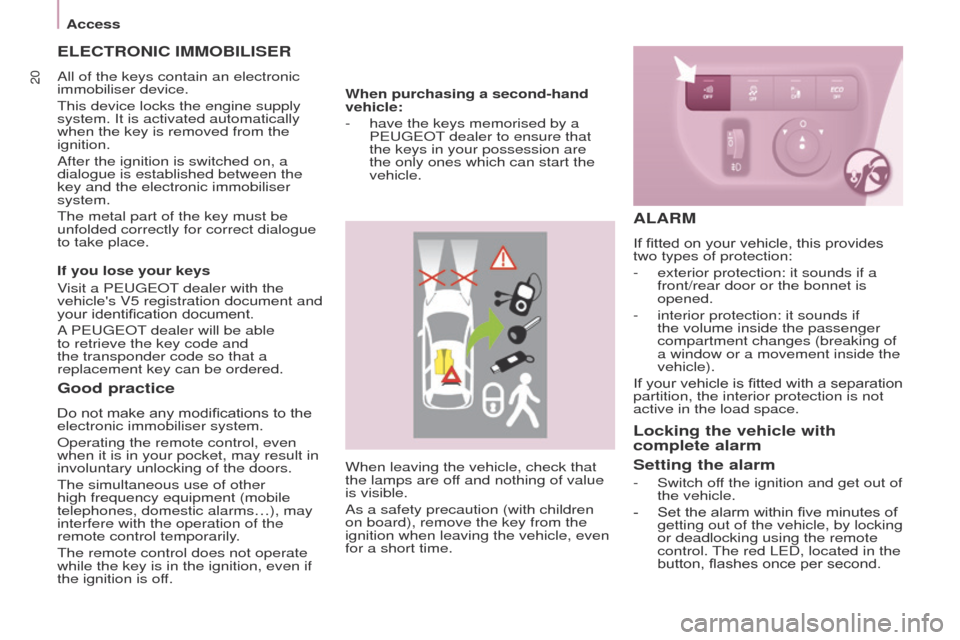
ALARM
If fitted on your vehicle, this provides
two types of protection:
-
exterior protection: it sounds if a
front/rear door or the bonnet is
opened.
-
interior protection: it sounds if
the volume inside the passenger
compartment changes (breaking of
a window or a movement inside the
vehicle).
If
your vehicle is fitted with a separation
partition, the interior protection is not
active in the load space.
Locking the vehicle with
complete alarm
Setting the alarm
- Switch of f the ignition and get out of
the vehicle.
-
Set the alarm within five minutes of
getting out of the vehicle, by locking
or deadlocking using the remote
control.
t
he red L e D, located in the
button, flashes once per second.
Access
Page 23 of 276
21
Partner_2_VP_en_Chap03_Pret-a-partir_ed02-2014
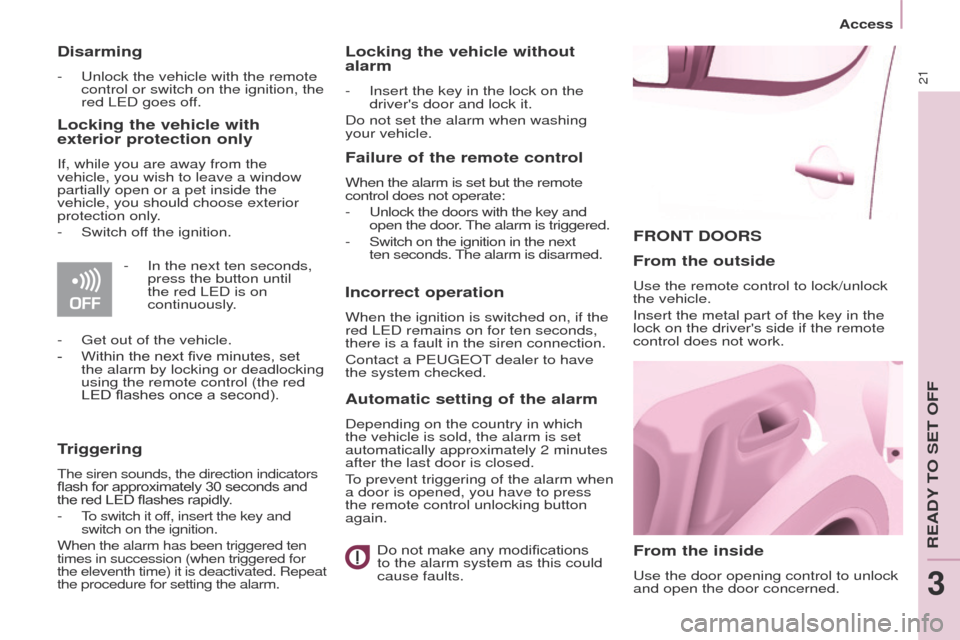
FRONT DOORS
From the inside
use the door opening control to unlock
and open the door concerned.
From the outside
use the remote control to lock/unlock
the vehicle.
Insert the metal part of the key in the
lock on the driver's side if the remote
control does not work.
Disarming
- unlock the vehicle with the remote
control or switch on the ignition, the
red L
e D goes off.
Locking the vehicle with
exterior protection only
If, while you are away from the
vehicle, you wish to leave a window
partially open or a pet inside the
vehicle, you should choose exterior
protection only.
-
Switch of
f the ignition.
-
In the next ten seconds,
press the button until
the red L
e D is on
continuously.
-
g et out of the vehicle.
-
Within the next five minutes, set
the alarm by locking or deadlocking
using the remote control (the red
LED flashes once a second).
Triggering
the siren sounds, the direction indicators
flash for approximately 30 seconds and
the red LED flashes rapidly.
-
t
o switch it of
f, insert the key and
switch on the ignition.
When the alarm has been triggered ten
times in succession (when triggered for
the eleventh time) it is deactivated. Repeat
the procedure for setting the alarm.
Locking the vehicle without
alarm
- Insert the key in the lock on the
driver's door and lock it.
Do not set the alarm when washing
your vehicle.
Failure of the remote control
When the alarm is set but the remote
control does not operate:
-
u nlock the doors with the key and
open the door.
t
he alarm is triggered.
-
Switch on the ignition in the next
ten
seconds.
t
he alarm is disarmed.
Incorrect operation
When the ignition is switched on, if the
red Le D remains on for ten seconds,
there is a fault in the siren connection.
Contact a P
euge O t
dealer to have
the system checked.
Automatic setting of the alarm
Depending on the country in which
the vehicle is sold, the alarm is set
automatically approximately 2 minutes
after the last door is closed.
to prevent triggering of the alarm when
a door is opened, you have to press
the remote control unlocking button
again.
Do not make any modifications
to the alarm system as this could
cause faults.
Access
ReADY tO Set OFF
3
Page 24 of 276
22
Partner_2_VP_en_Chap03_Pret-a-partir_ed02-2014
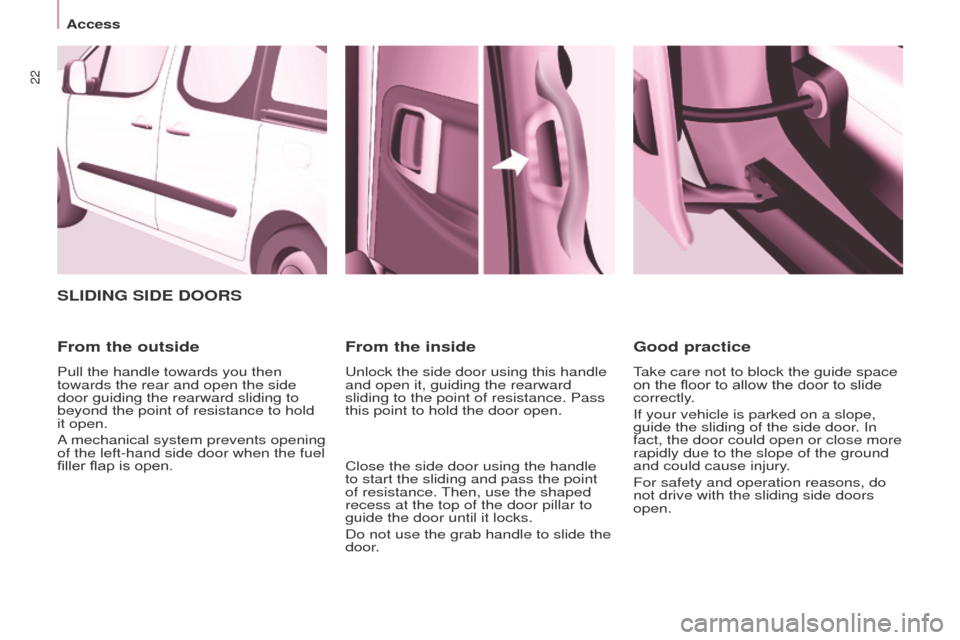
SLIDING SIDE DOORS
From the outside
Pull the handle towards you then
towards the rear and open the side
door guiding the rearward sliding to
beyond the point of resistance to hold
it open.
A mechanical system prevents opening
of the left-hand side door when the fuel
filler flap is open.
From the inside
unlock the side door using this handle
and open it, guiding the rearward
sliding to the point of resistance. Pass
this point to hold the door open.
Close the side door using the handle
to start the sliding and pass the point
of resistance.
t
hen, use the shaped
recess at the top of the door pillar to
guide the door until it locks.
Do not use the grab handle to slide the
door.
Good practice
take care not to block the guide space
on the floor to allow the door to slide
correctly
.
If your vehicle is parked on a slope,
guide the sliding of the side door. In
fact, the door could open or close more
rapidly due to the slope of the ground
and could cause injury.
For safety and operation reasons, do
not drive with the sliding side doors
open.
Access
Page 25 of 276
23
Partner_2_VP_en_Chap03_Pret-a-partir_ed02-2014
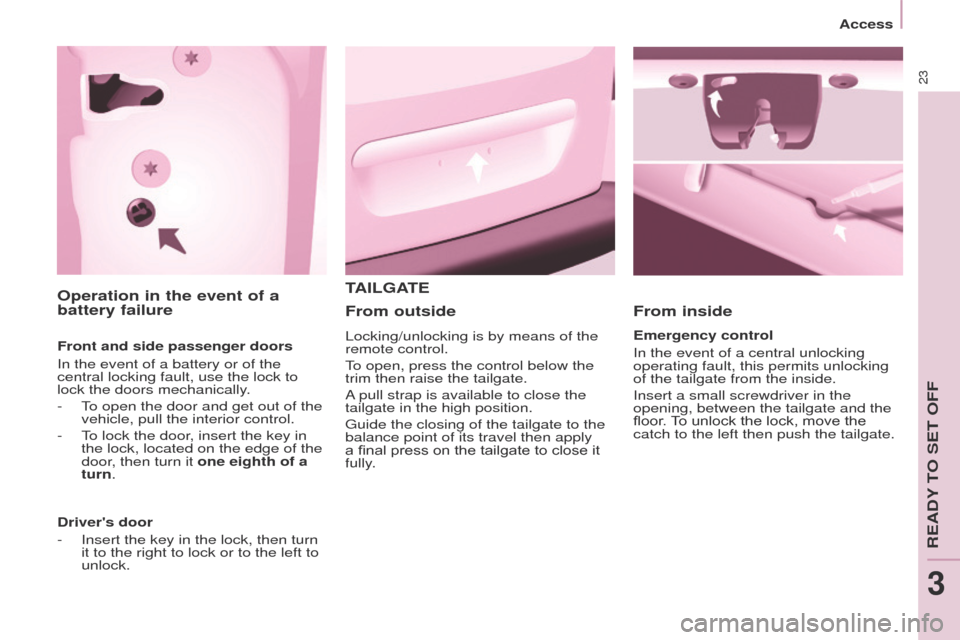
Operation in the event of a
battery failure
Front and side passenger doors
In the event of a battery or of the
central locking fault, use the lock to
lock the doors mechanically.
- t
o open the door and get out of the
vehicle, pull the interior control.
-
t
o lock the door
, insert the key in
the lock, located on the edge of the
door, then turn it one eighth of a
turn.
Driver's door
-
Insert the key in the lock, then turn
it to the right to lock or to the left to
unlock.
TAILGATE From inside
Emergency control
In the event of a central unlocking
operating fault, this permits unlocking
of the tailgate from the inside.
Insert a small screwdriver in the
opening, between the tailgate and the
floor. To unlock the lock, move the
catch to the left then push the tailgate.
From outside
Locking/unlocking is by means of the
remote control.
to open, press the control below the
trim then raise the tailgate.
A
pull strap is available to close the
tailgate in the high position.
g
uide the closing of the tailgate to the
balance point of its travel then apply
a final press on the tailgate to close it
fully.
Access
ReADY tO Set OFF
3
Page 26 of 276
24
Partner_2_VP_en_Chap03_Pret-a-partir_ed02-2014
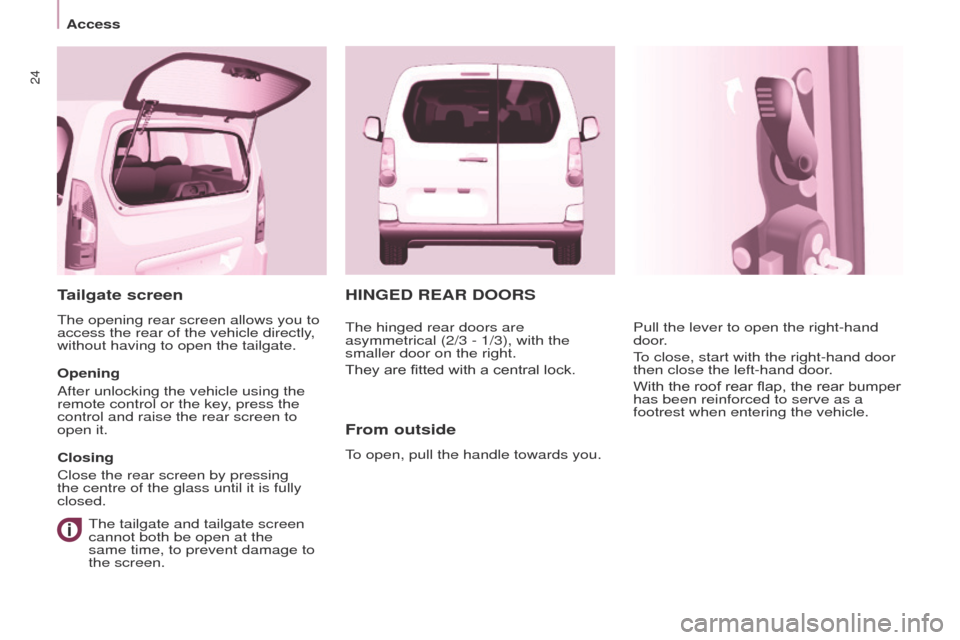
HINGED REAR DOORS
From outside
to open, pull the handle towards you.Pull the lever to open the right-hand
door
.
to close, start with the right-hand door
then close the left-hand door
.
With the roof rear flap, the rear bumper
has been reinforced to serve as a
footrest when entering the vehicle.
t
he hinged rear doors are
asymmetrical (2/3 - 1/3), with the
smaller door on the right.
They are fitted with a central lock.
Tailgate screen
the opening rear screen allows you to
access the rear of the vehicle directly ,
without having to open the tailgate.
Opening
After unlocking the vehicle using the
remote control or the key, press the
control and raise the rear screen to
open it.
Closing
Close the rear screen by pressing
the centre of the glass until it is fully
closed.
t he tailgate and tailgate screen
cannot both be open at the
same time, to prevent damage to
the
screen.
Access
Page 27 of 276
25
Partner_2_VP_en_Chap03_Pret-a-partir_ed02-2014
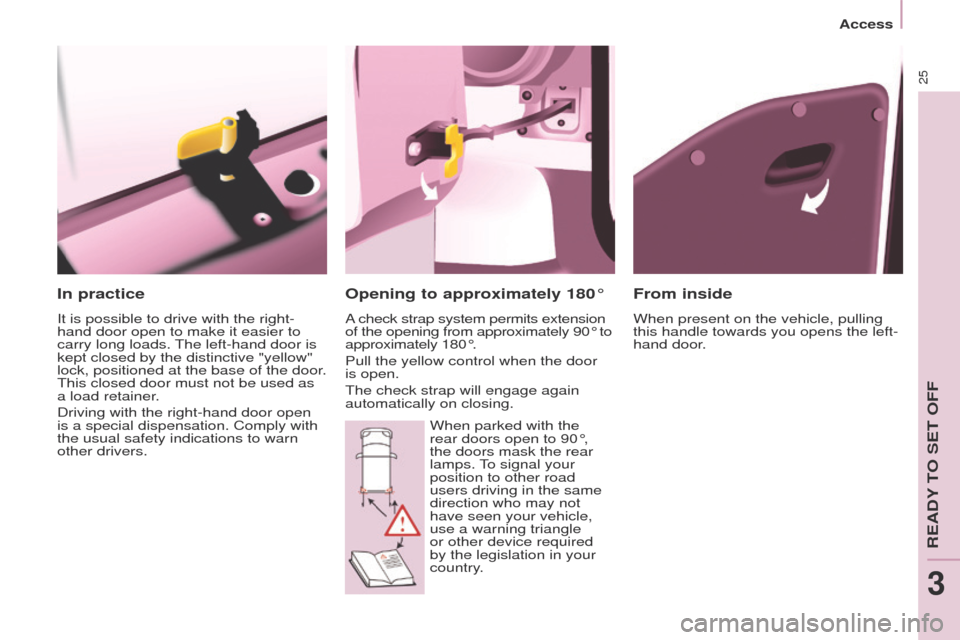
In practice
It is possible to drive with the right-
hand door open to make it easier to
carry long loads.
t
he left-hand door is
kept closed by the distinctive "yellow"
lock, positioned at the base of the door.
t
his closed door must not be used as
a load retainer.
Driving with the right-hand door open
is a special dispensation. Comply with
the usual safety indications to warn
other drivers.
From inside
When present on the vehicle, pulling
this handle towards you opens the left-
hand door.
Opening to approximately 180°
A check strap system permits extension
of the opening from approximately 90° to
approximately 180°.
Pull the yellow control when the door
is open.
t
he check strap will engage again
automatically on closing.
When parked with the
rear doors open to 90°,
the doors mask the rear
lamps.
to signal your
position to other road
users driving in the same
direction who may not
have seen your vehicle,
use a warning triangle
or other device required
by the legislation in your
country
.
Access
ReADY tO Set OFF
3
Page 28 of 276
26
Partner_2_VP_en_Chap03_Pret-a-partir_ed02-2014
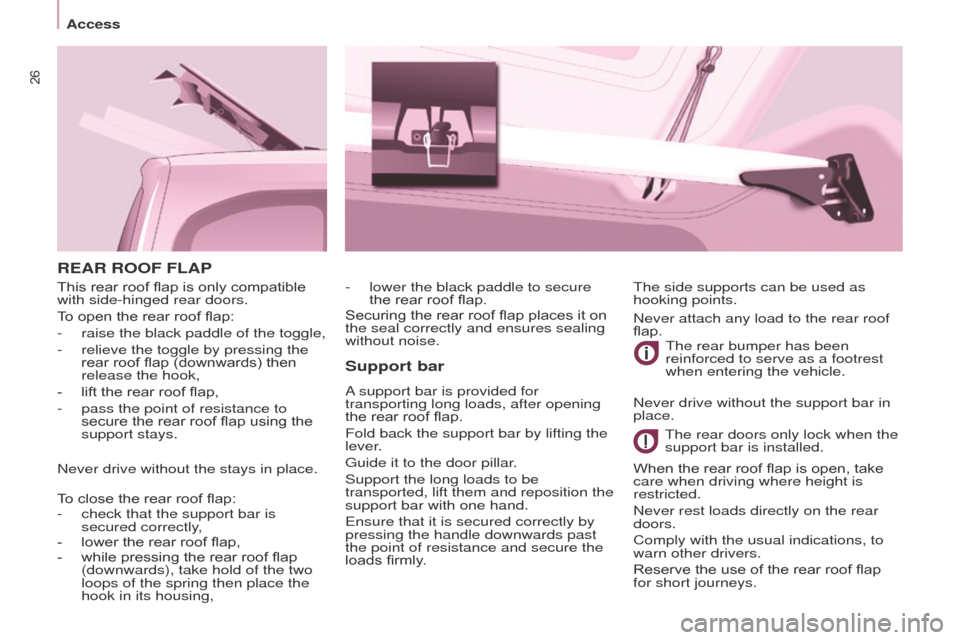
REAR ROOF FLAPSupport bar
A support bar is provided for
transporting long loads, after opening
the rear roof flap.
Fold back the support bar by lifting the
lever.
g
uide it to the door pillar.
Support the long loads to be
transported, lift them and reposition the
support bar with one hand.
e
nsure that it is secured correctly by
pressing the handle downwards past
the point of resistance and secure the
loads firmly.
t
he rear bumper has been
reinforced to serve as a footrest
when entering the vehicle.
t
he rear doors only lock when the
support bar is installed.
When the rear roof flap is open, take
care when driving where height is
restricted.
Never rest loads directly on the rear
doors.
Comply with the usual indications, to
warn other drivers.
Reserve the use of the rear roof flap
for short journeys.
t
he side supports can be used as
hooking points.
-
lower the black paddle to secure
the rear roof flap.
Securing the rear roof flap places it on
the seal correctly and ensures sealing
without noise.
This rear roof flap is only compatible
with side-hinged rear doors.
T
o open the rear roof flap:
-
raise the black paddle of the toggle,
-
relieve the toggle by pressing the
rear roof flap (downwards) then
release the hook,
-
lift the rear roof flap,
-
pass the point of resistance to
secure the rear roof flap using the
support stays.
Never drive without the stays in place.
T
o close the rear roof flap:
-
check that the support bar is
secured correctly
,
-
lower the rear roof flap,
-
while pressing the rear roof flap
(downwards), take hold of the two
loops of the spring then place the
hook in its housing, Never attach any load to the rear roof
flap.
Never drive without the support bar in
place.
Access
Page 29 of 276
27
Partner_2_VP_en_Chap03_Pret-a-partir_ed02-2014
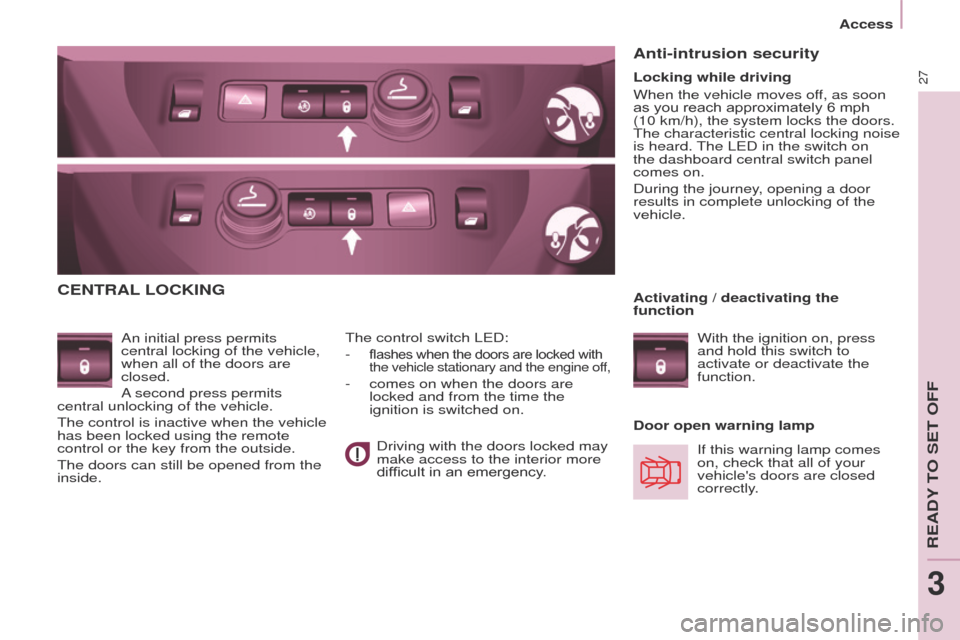
CENTRAL LOCKING
An initial press permits
central locking of the vehicle,
when all of the doors are
closed.
A second press permits
central unlocking of the vehicle.
t
he control is inactive when the vehicle
has been locked using the remote
control or the key from the outside.
t
he doors can still be opened from the
inside. Door open warning lampt
he control switch L e D:
-
flashes when the doors are locked with
the vehicle stationary and the engine off,
- comes on when the doors are
locked and from the time the
ignition is switched on.
Anti-intrusion security
If this warning lamp comes
on, check that all of your
vehicle's doors are closed
correctly.
Locking while driving
When the vehicle moves off, as soon
as you reach approximately 6 mph
(10 km/h), the system locks the doors.
t
he characteristic central locking noise
is heard.
t
he L e D in the switch on
the dashboard central switch panel
comes
on.
During the journey, opening a door
results in complete unlocking of the
vehicle.
Activating / deactivating the
function
With the ignition on, press
and hold this switch to
activate or deactivate the
function.
Driving with the doors locked may
make access to the interior more
difficult in an emergency.
Access
ReADY tO Set OFF
3
Page 30 of 276
28
Partner_2_VP_en_Chap03_Pret-a-partir_ed02-2014
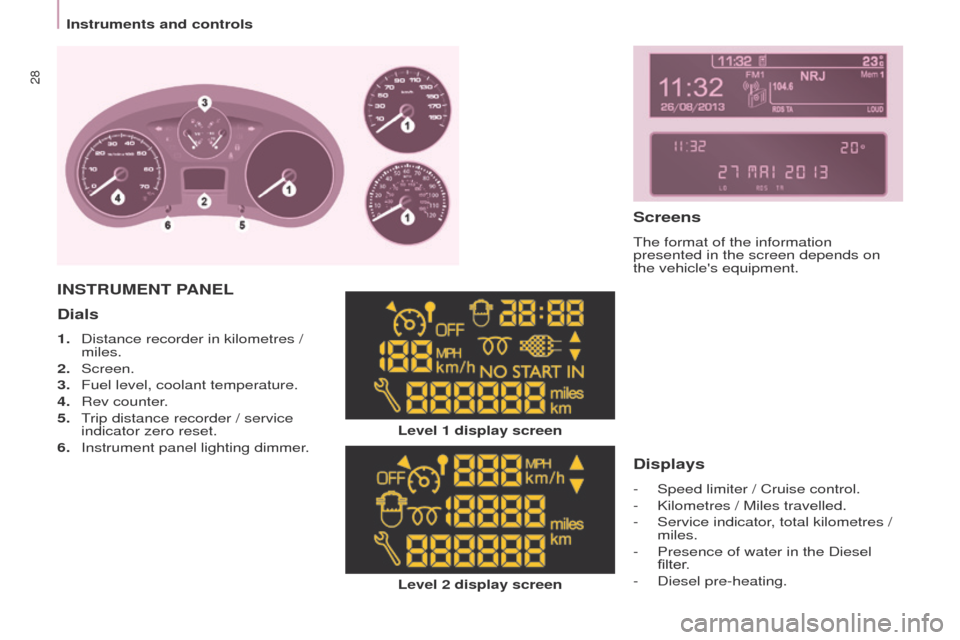
Dials
1. Distance recorder in kilometres /
miles.
2.
Screen.
3.
Fuel level, coolant temperature.
4.
Rev counter
.
5.
t
rip distance recorder / service
indicator zero reset.
6.
Instrument panel lighting dimmer
.
Level 2 display screen
INSTRUMENT PANEL
Level 1 display screen
Displays
- Speed limiter / Cruise control.
-
Kilometres / Miles travelled.
-
Service indicator
, total kilometres /
miles.
-
Presence of water in the Diesel
filter
.
-
Diesel pre-heating.
Screens
the format of the information
presented in the screen depends on
the vehicle's equipment.
Instruments and controls