seats Peugeot Partner Tepee 2015 Owner's Guide
[x] Cancel search | Manufacturer: PEUGEOT, Model Year: 2015, Model line: Partner Tepee, Model: Peugeot Partner Tepee 2015Pages: 276, PDF Size: 12.76 MB
Page 87 of 276
85
Partner_2_VP_en_Chap04_ergonomie_ed02-2014
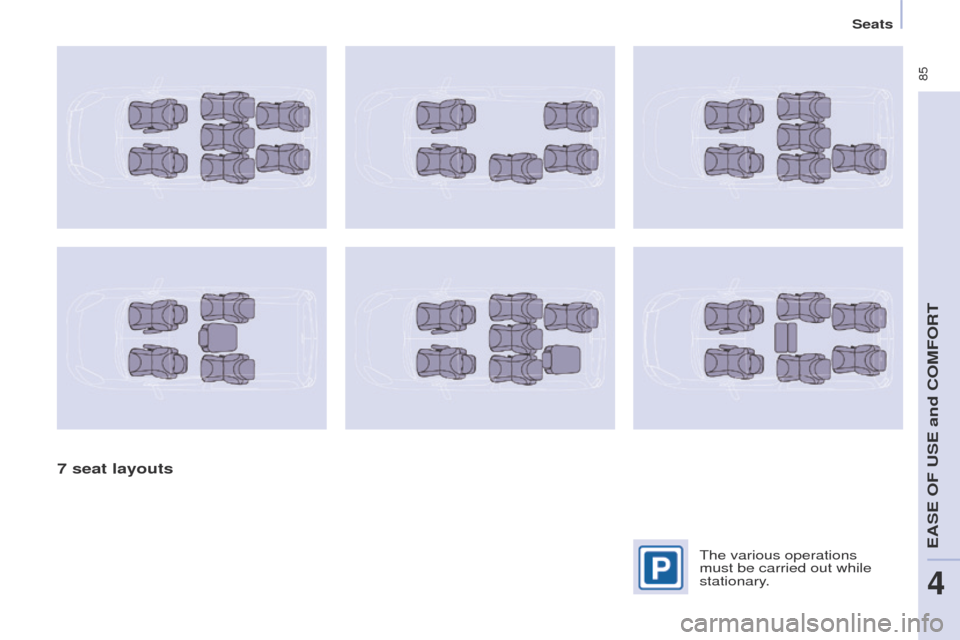
7 seat layouts
the various operations
must be carried out while
stationary
.
Seats
eASe OF uSe and COMFORt
4
Page 90 of 276
88
Partner_2_VP_en_Chap04_ergonomie_ed02-2014
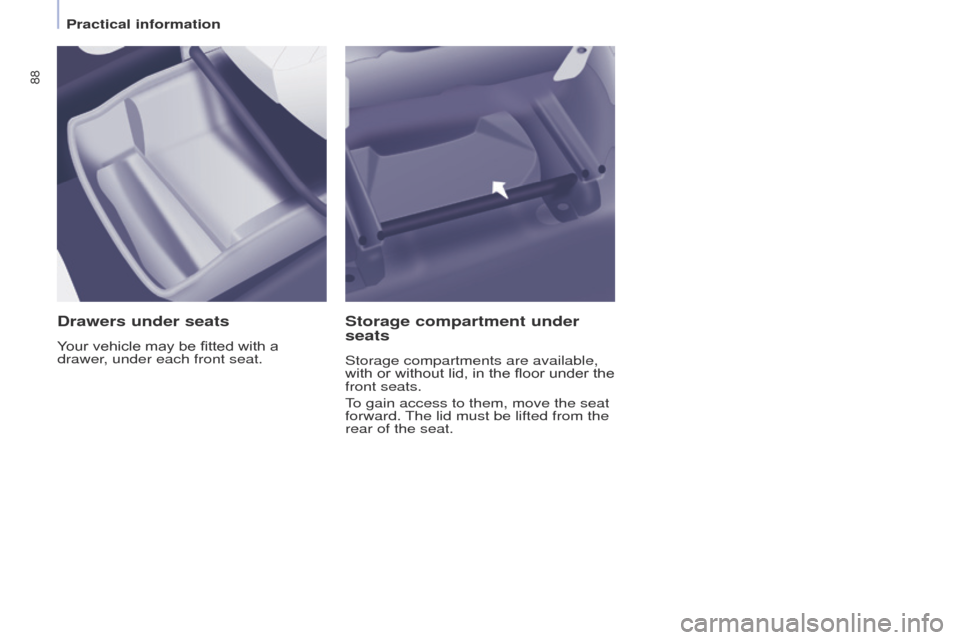
Drawers under seats
Your vehicle may be fitted with a
drawer, under each front seat.
Storage compartment under
seats
Storage compartments are available,
with or without lid, in the floor under the
front seats.
to gain access to them, move the seat
forward. t
he lid must be lifted from the
rear of the seat.
Practical information
Page 93 of 276
91
Partner_2_VP_en_Chap04_ergonomie_ed02-2014
From insideFrom outside
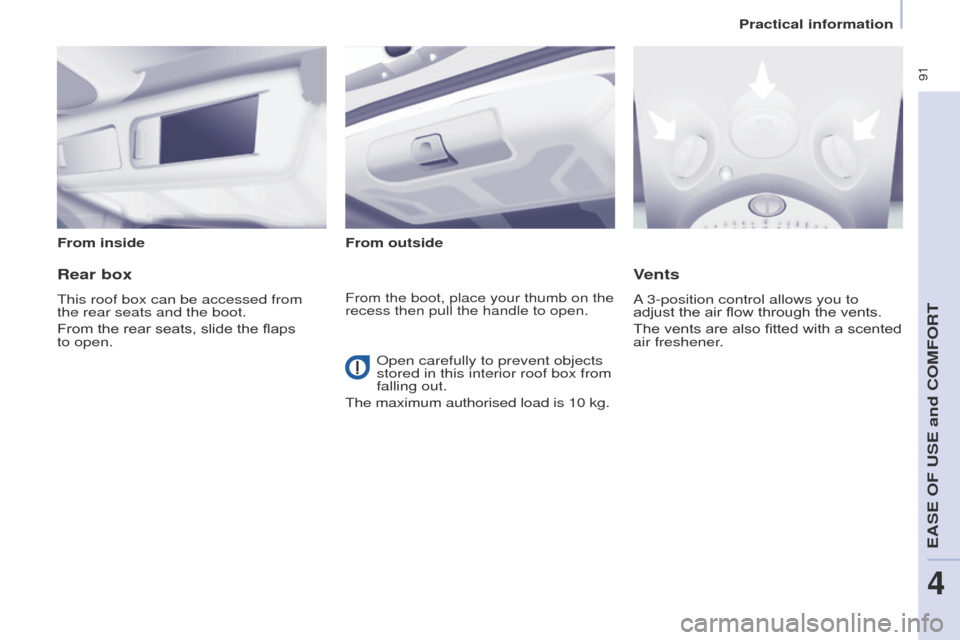
Rear box
this roof box can be accessed from
the rear seats and the boot.
From the rear seats, slide the flaps
to
open.
Vents
A 3-position control allows you to
adjust the air flow through the vents.
The vents are also fitted with a scented
air freshener.From the boot, place your thumb on the
recess then pull the handle to open.
Open carefully to prevent objects
stored in this interior roof box from
falling out.
t
he maximum authorised load is 10 kg.
Practical information
eASe OF uSe and COMFORt
4
Page 98 of 276
96
Partner_2_VP_en_Chap04_ergonomie_ed02-2014
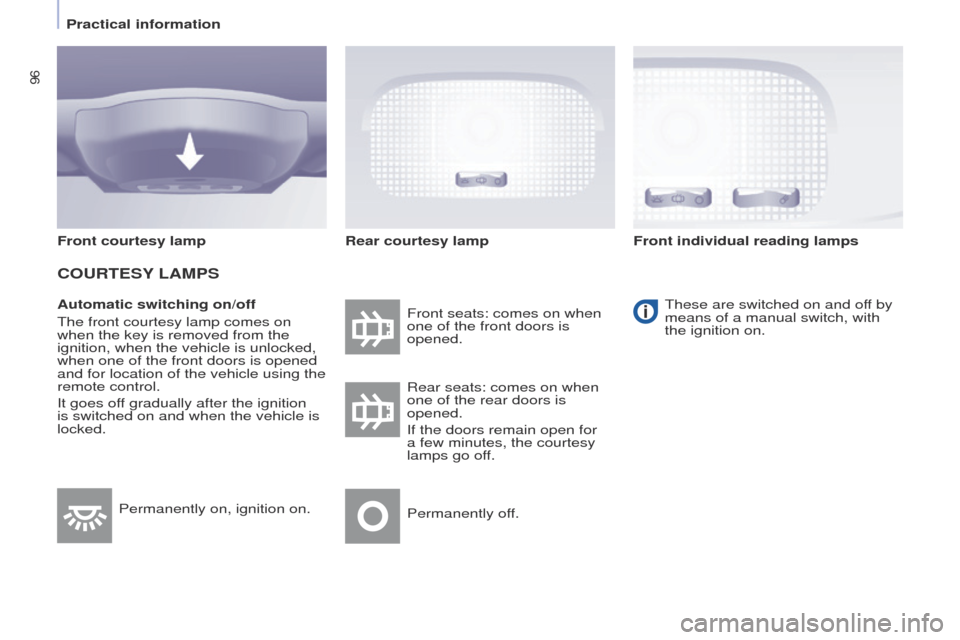
Automatic switching on/off
t
he front courtesy lamp comes on
when the key is removed from the
ignition, when the vehicle is unlocked,
when one of the front doors is opened
and for location of the vehicle using the
remote control.
It goes off gradually after the ignition
is switched on and when the vehicle is
locked. Front seats: comes on when
one of the front doors is
opened.t
hese are switched on and off by
means of a manual switch, with
the ignition on.
Rear seats: comes on when
one of the rear doors is
opened.
If the doors remain open for
a few minutes, the courtesy
lamps go off.
Permanently off.
Permanently on, ignition on.
Front courtesy lamp
COURTESY LAMPS
Rear courtesy lamp
Front individual reading lamps
Practical information
Page 99 of 276
97
Partner_2_VP_en_Chap04_ergonomie_ed02-2014
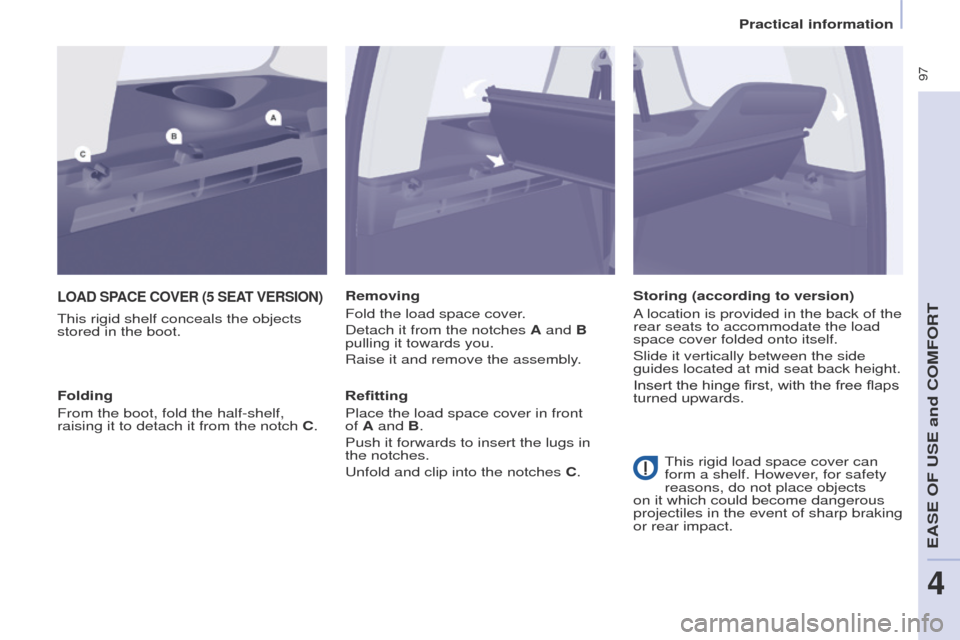
LOAD SPACE COVER (5 SEAT VERSION)
this rigid shelf conceals the objects
stored in the boot. Removing
Fold the load space cover
.
Detach it from the notches A and B
pulling it towards you.
Raise it and remove the assembly.
Refitting
Place the load space cover in front
of A and B.
Push it forwards to insert the lugs in
the notches.
u
nfold and clip into the notches C.
Folding
From the boot, fold the half-shelf,
raising it to detach it from the notch C. Storing (according to version)
A location is provided in the back of the
rear seats to accommodate the load
space cover folded onto itself.
Slide it vertically between the side
guides located at mid seat back height.
Insert the hinge first, with the free flaps
turned upwards.
t
his rigid load space cover can
form a shelf. However, for safety
reasons, do not place objects
on it which could become dangerous
projectiles in the event of sharp braking
or rear impact.
Practical information
eASe OF uSe and COMFORt
4
Page 103 of 276
101
Partner_2_VP_en_Chap04_ergonomie_ed02-2014
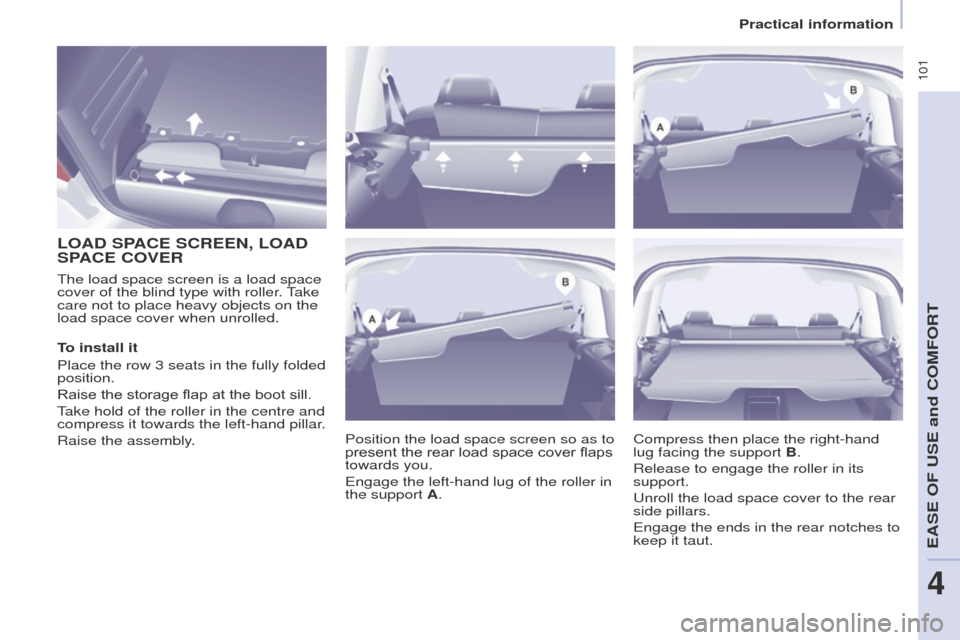
LOAD SPACE SCREEN, LOAD
SPACE COVER
the load space screen is a load space
cover of the blind type with roller . take
care not to place heavy objects on the
load space cover when unrolled.
Position the load space screen so as to
present the rear load space cover flaps
towards you.
e
ngage the left-hand lug of the roller in
the support A.
To install it
Place the row 3 seats in the fully folded
position.
Raise the storage flap at the boot sill.
take hold of the roller in the centre and
compress it towards the left-hand pilla
r.
Raise the assembly. Compress then place the right-hand
lug facing the support B.
Release to engage the roller in its
support.
u
nroll the load space cover to the rear
side pillars.
e
ngage the ends in the rear notches to
keep it taut.
Practical information
eASe OF uSe and COMFORt
4
Page 104 of 276
102
Partner_2_VP_en_Chap04_ergonomie_ed02-2014
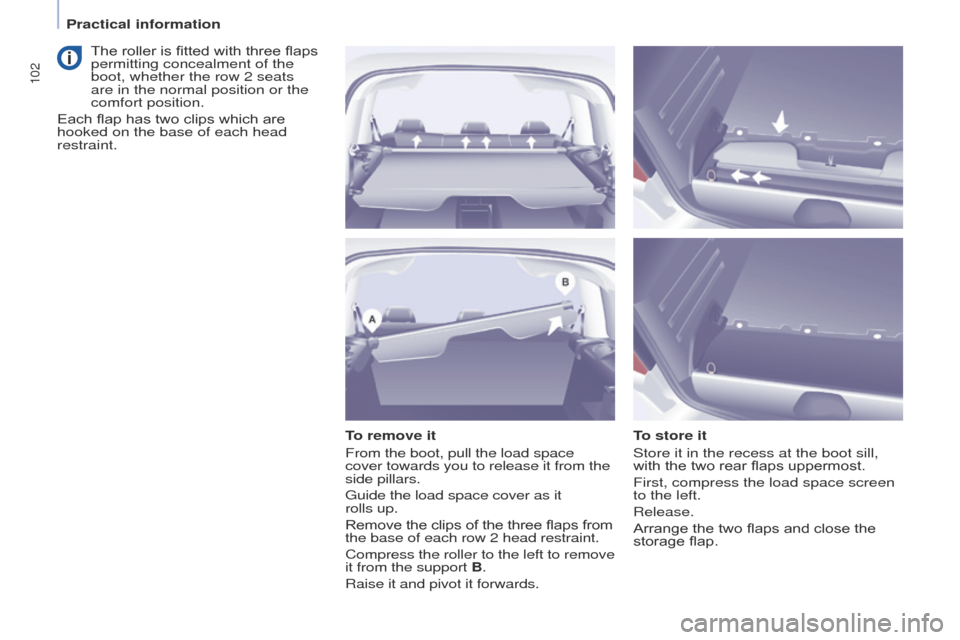
To remove it
From the boot, pull the load space
cover towards you to release it from the
side pillars.
g
uide the load space cover as it
rolls
up.
Remove the clips of the three flaps from
the base of each row 2 head restraint.
Compress the roller to the left to remove
it from the support B .
Raise it and pivot it forwards. To store it
Store it in the recess at the boot sill,
with the two rear flaps uppermost.
First, compress the load space screen
to the left.
Release.
Arrange the two flaps and close the
storage flap.
The roller is fitted with three flaps
permitting concealment of the
boot, whether the row 2 seats
are in the normal position or the
comfort position.
Each flap has two clips which are
hooked on the base of each head
restraint.
Practical information
Page 106 of 276
104
Partner_2_VP_en_Chap04_ergonomie_ed02-2014
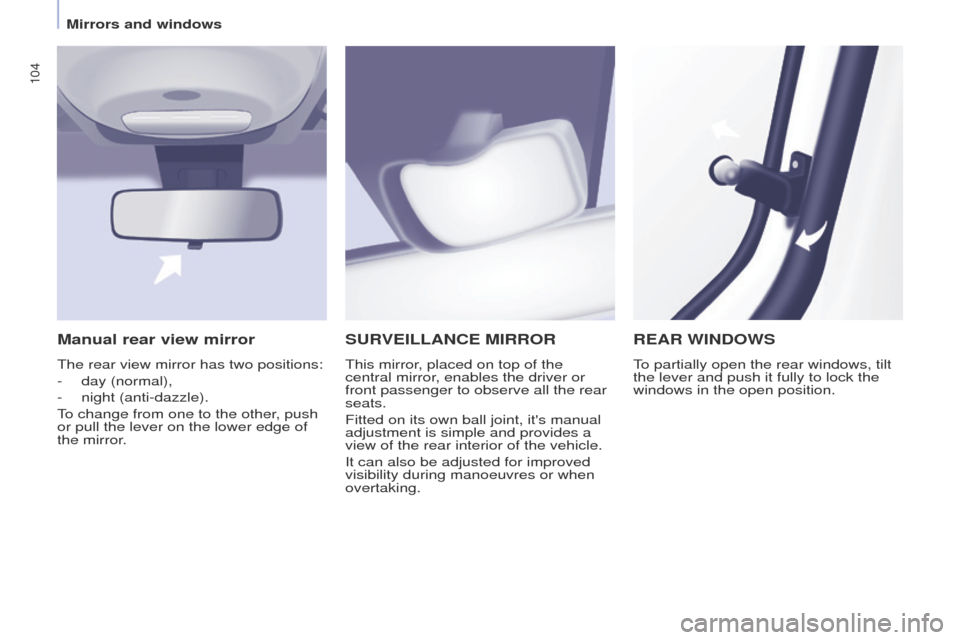
SURVEILLANCE MIRROR
this mirror, placed on top of the
central mirror , enables the driver or
front passenger to observe all the rear
seats.
Fitted on its own ball joint, it's manual
adjustment is simple and provides a
view of the rear interior of the vehicle.
It can also be adjusted for improved
visibility during manoeuvres or when
overtaking.
REAR WINDOWS
to partially open the rear windows, tilt
the lever and push it fully to lock the
windows in the open position.
Manual rear view mirror
the rear view mirror has two positions:
-
day (normal),
-
night (anti-dazzle).
to change from one to the other
, push
or pull the lever on the lower edge of
the mirror.
Mirrors and windows
Page 116 of 276
11 4
Partner_2_VP_en_Chap05_Securite_ed02-2014
Recommendations for children:
-
use a suitable child seat if the
passenger is less than 12 years old
or shorter than one metre fifty
,
-
never allow a child to travel on
your lap, even with the seat belt
fastened. For more information on child
seats, refer to the "Children on
board" section of chapter 5.
Clean the seat belt straps with
soapy water or a textile cleaning
product, sold by P
euge O t
dealers.
In accordance with current safety
regulations, your P
euge O t
dealer
can guarantee all work or any checks,
from testing to maintenance, on your
seat belt equipment.
Have the seat belts checked regularly
(even after a minor impact) by a
PEUGEOT
dealer or a qualified
workshop: they must not show any
signs of wear, cutting or fraying
and they must not be converted or
modified.t
he force limiter reduces the pressure
of the seat belt against the body of the
occupants.
t
he pretensioning seat belts are active
when the ignition is switched on.
The inertia reels are fitted with a device
which automatically locks the strap in
the event of a collision or emergency
braking or if the vehicle rolls over.
You can unfasten the seat belt by
pressing the red button on the buckle.
g
uide the seat belt after unfastening.
t
he airbag warning lamp comes on
if the pretensioners are deployed.
Contact a P
euge
O
t
dealer or a
qualified workshop.
In order to be ef
fective, a seat belt:
-
must restrain one person only
,
-
must not be twisted, check by
pullin
g in front of you with an even
movement,
-
must be tightened as close to the
body as possible.
t
he upper part of the seat belt should
be positioned in the hollow of the
shoulder.
t
he lap part should be placed as low
as possible on the pelvis.
Do not interchange the seat belt
buckles as they will not fulfil their role
completely. If the seats are fitted with
armrests, the lap part of the seat belt
should always pass under the armrest.
Check that the seat belt is fastened
correctly by pulling the strap firmly.Front seat belts
The front seats are fitted with
pretensioners and force limiters.
Rear seat belts
(5 seat version)
The rear seats are fitted with three-
point inertia reel seat belts.
Seat belts
Page 117 of 276
11 5
Partner_2_VP_en_Chap05_Securite_ed02-2014
Rear seat belts
(7 seat version)
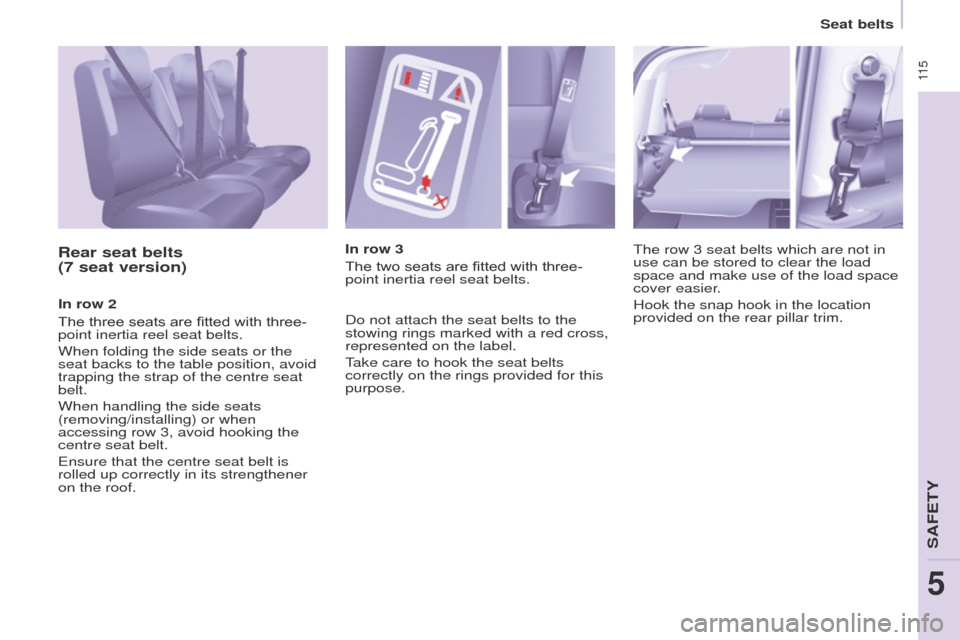
In row 2
The three seats are fitted with three-
point inertia reel seat belts.
When folding the side seats or the
seat backs to the table position, avoid
trapping the strap of the centre seat
belt.
When handling the side seats
(removing/installing) or when
accessing row 3, avoid hooking the
centre seat belt.
e
nsure that the centre seat belt is
rolled up correctly in its strengthener
on the roof. In row 3
The two seats are fitted with three-
point inertia reel seat belts.
Do not attach the seat belts to the
stowing rings marked with a red cross,
represented on the label.
take care to hook the seat belts
correctly on the rings provided for this
purpose.
t
he row 3 seat belts which are not in
use can be stored to clear the load
space and make use of the load space
cover easier.
Hook the snap hook in the location
provided on the rear pillar trim.
Seat belts
SAFetY
5