window Peugeot Partner Tepee 2017 Owner's Manual
[x] Cancel search | Manufacturer: PEUGEOT, Model Year: 2017, Model line: Partner Tepee, Model: Peugeot Partner Tepee 2017Pages: 292, PDF Size: 10.49 MB
Page 4 of 292
2
Partner2VP_en_Chap00a_Sommaire_ed02-2016
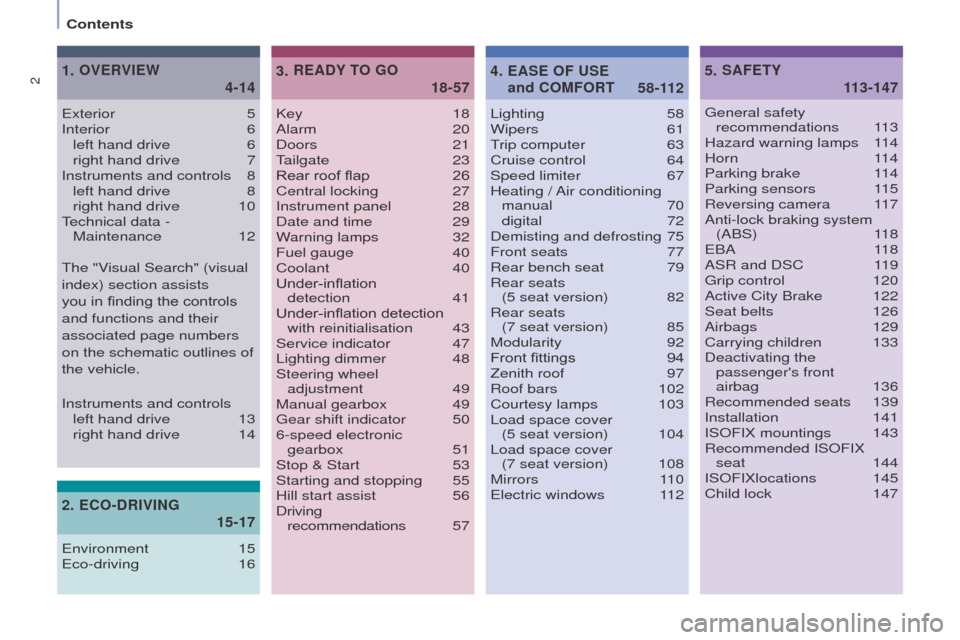
Key 18
Alarm 20
Doors
21
T
ailgate 23
Rear roof flap
26
Central locking
27
Instrument panel
28
Date and time
29
W
arning lamps
32
Fuel gauge
40
Coolant
40
Under-inflation detection
41
Under-inflation detection with reinitialisation
43
Service indicator
47
Lighting dimmer
48
Steering wheel
adjustment
49
Manual gearbox
49
Gear shift indicator
50
6-speed electronic
gearbox
51
Stop & Start
53
Starting and stopping
55
Hill start assist
56
Driving
recommendations
57Lighting
58
Wipers
61
Trip computer
63
Cruise control
64
Speed limiter
67
Heating /
Air conditioning
manual
70
digital
72
Demisting and defrosting
75
Front seats
77
Rear bench seat
79
Rear seats
(5 seat version)
82
Rear seats
(7 seat version)
85
Modularity
92
Front fittings
94
Zenith roof
97
Roof bars
102
Courtesy lamps
103
Load space cover
(5 seat version)
104
Load space cover
(7 seat version)
108
Mirrors
110
Electric windows
1
12
READY TO GO
3.
18-57 SAFETY
5.
1
13-147
Exterior 5
Interior 6
left hand drive
6 right hand drive
7
Instruments and controls
8 left hand drive
8 right hand drive
10
T
echnical data - Maintenance
12
OVERVIEW
1.
4-14
General safety recommendations 113
Hazard warning lamps
1
14
Horn
114
Parking brake
1
14
Parking sensors
1
15
Reversing camera
1
17
Anti-lock braking system (ABS)
118
EBA
118
ASR and DSC
1
19
Grip control
120
Active City Brake
122
Seat belts
126
Airbags
129
Carrying children
133
Deactivating the passenger's front
airbag
136
Recommended seats
139
Installation
141
ISOFIX mountings
143
Recommended ISOFIX
seat
144
ISOFIXlocations
145
Child lock
147
EASE OF USE
and COMFORT
4.
58-112
ECO-DRIVING
2.
15-17
Environment 15
Eco-driving 16
The "Visual Search" (visual
index) section assists
you in finding the controls
and functions and their
associated page numbers
on the schematic outlines of
the vehicle.
Instruments and controls
left hand drive
13 right hand drive
14
Contents
Page 8 of 292
6
Partner2VP_en_Chap01_vue-ensemble_ed02-2016
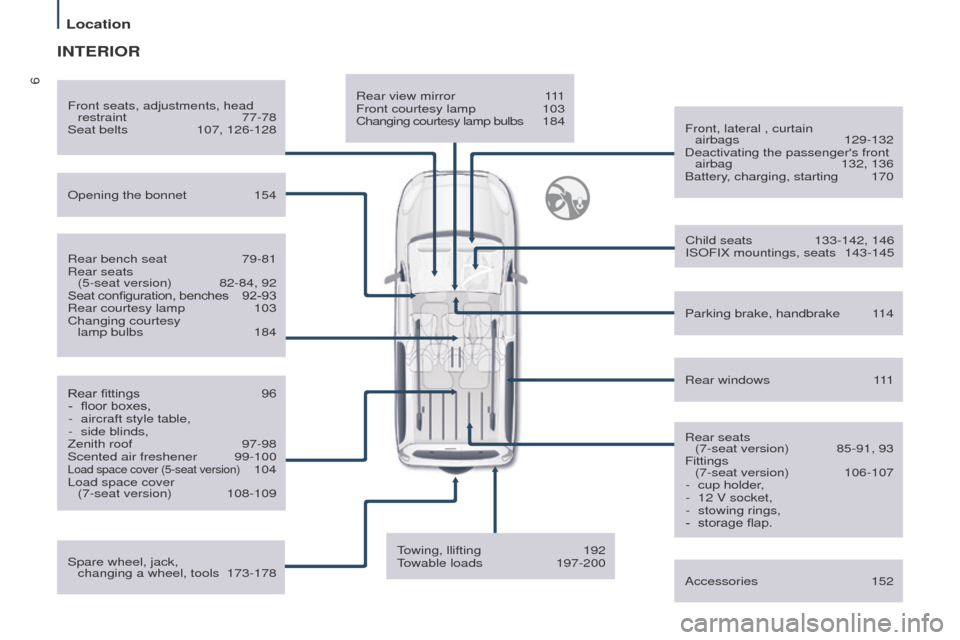
Rear view mirror 111
Front courtesy lamp 103
Changing courtesy lamp bulbs
1
84Front, lateral , curtain
airbags
129-132
Deactivating the passenger's front airbag
132, 136
Battery
, charging, starting
170
Opening the bonnet
154
Rear windows
1
11
Front seats, adjustments, head
restraint
77-78
Seat belts
107, 126-128
Accessories
152
INTERIOR
Rear bench seat 79-81
Rear seats
(5-seat version)
82-84, 92
Seat configuration, benches
9
2-93
Rear courtesy lamp
103
Changing courtesy
lamp bulbs
184
Rear fittings
96
-
floor boxes,
-
aircraft style table,
-
side blinds,
Zenith roof
97-98
Scented air freshener
99-100Load space cover (5-seat version) 104
Load space cover
(7-seat version)
108-109 Child seats
133-142, 146
ISOFIX mountings, seats
143-145
Parking brake, handbrake
1
14
Rear seats (7-seat version)
85-91, 93
Fittings
(7-seat version) 106-107
-
cup holder ,
-
12 V socket,
-
stowing rings,
-
storage flap.
T
owing, llifting
192
T
owable loads
197-200
Spare wheel, jack,
changing a wheel, tools
173-178
Location
Page 9 of 292
7
Partner2VP_en_Chap01_vue-ensemble_ed02-2016
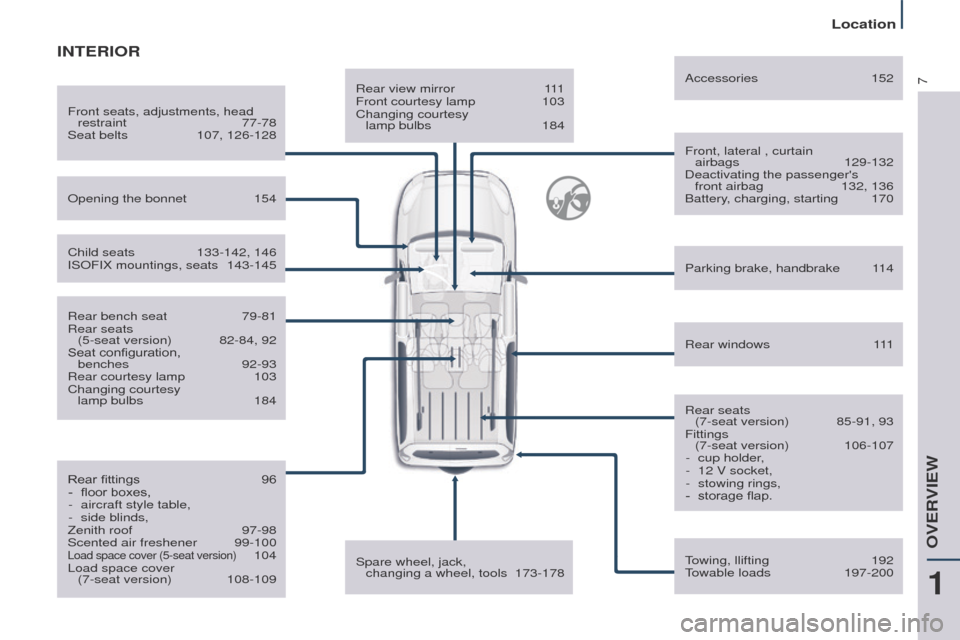
Rear view mirror 111
Front courtesy lamp 103
Changing courtesy
lamp bulbs
184 Front, lateral , curtain
airbags
129-132
Deactivating the passenger's front airbag
132, 136
Battery
, charging, starting
170
Opening the bonnet
154
Rear windows
1
11
Front seats, adjustments, head
restraint
77-78
Seat belts
107, 126-128 Accessories
152
INTERIOR
Rear bench seat 79-81
Rear seats
(5-seat version)
82-84, 92
Seat configuration,
benches
92-93
Rear courtesy lamp
103
Changing courtesy
lamp bulbs
184
Rear fittings
96
-
floor boxes,
-
aircraft style table,
-
side blinds,
Zenith roof
97-98
Scented air freshener
99-100Load space cover (5-seat version) 104
Load space cover
(7-seat version)
108-109
Child seats
133-142, 146
ISOFIX mountings, seats
143-145
Parking brake, handbrake
1
14
Rear seats (7-seat version)
85-91, 93
Fittings
(7-seat version)
106-107
-
cup holder
,
-
12 V socket,
-
stowing rings,
-
storage flap.
T
owing, llifting 192
T
owable loads
197-200
Spare wheel, jack,
changing a wheel, tools
173-178
1
OVERVIEW
Location
Page 11 of 292
9
Partner2VP_en_Chap01_vue-ensemble_ed02-2016
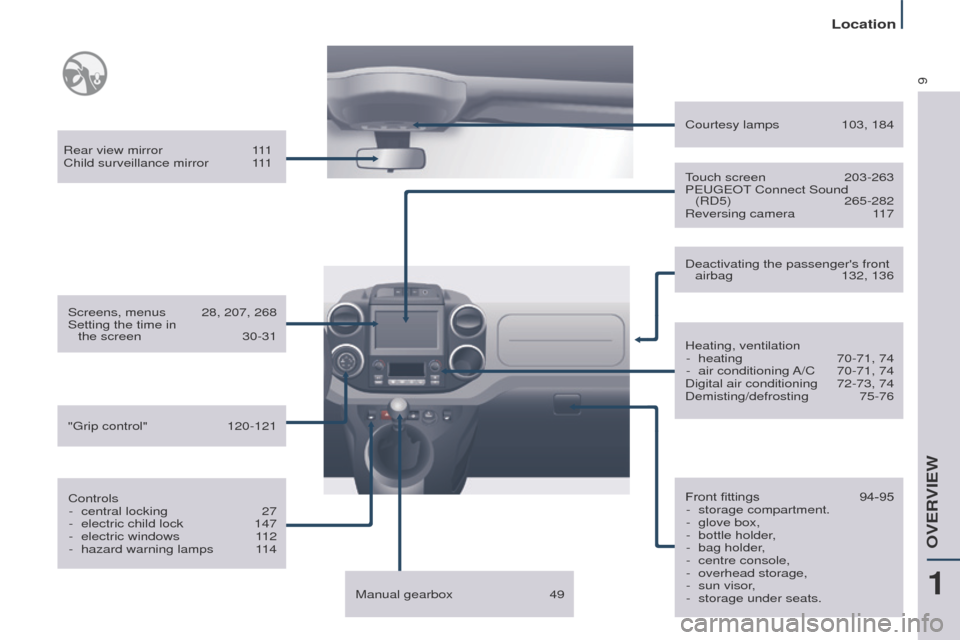
Rear view mirror 111
Child surveillance mirror 1 11
Screens, menus
28, 207, 268
Setting the time in
the screen
30-31
Controls -
central locking
27
-
electric child lock
147
-
electric windows
1
12
-
hazard warning lamps
1
14 Heating, ventilation
-
heating
70-71, 74
-
air conditioning
A/C
70-71, 74
Digital air conditioning
72-73, 74
Demisting/defrosting
75-76
Courtesy lamps
103, 184
Front fittings
94-95
-
storage compartment.
-
glove box,
-
bottle holder
,
-
bag holder
,
-
centre console,
-
overhead storage,
-
sun visor
,
-
storage under seats.
T
ouch screen
203-263
PEUGEOT
Connect Sound
(RD5)
265-282
Reversing camera
1
17
Deactivating the passenger's front airbag
132, 136
Manual gearbox
49
"Grip control"
120-121
1
OVERVIEW
Location
Page 12 of 292
10
Partner2VP_en_Chap01_vue-ensemble_ed02-2016
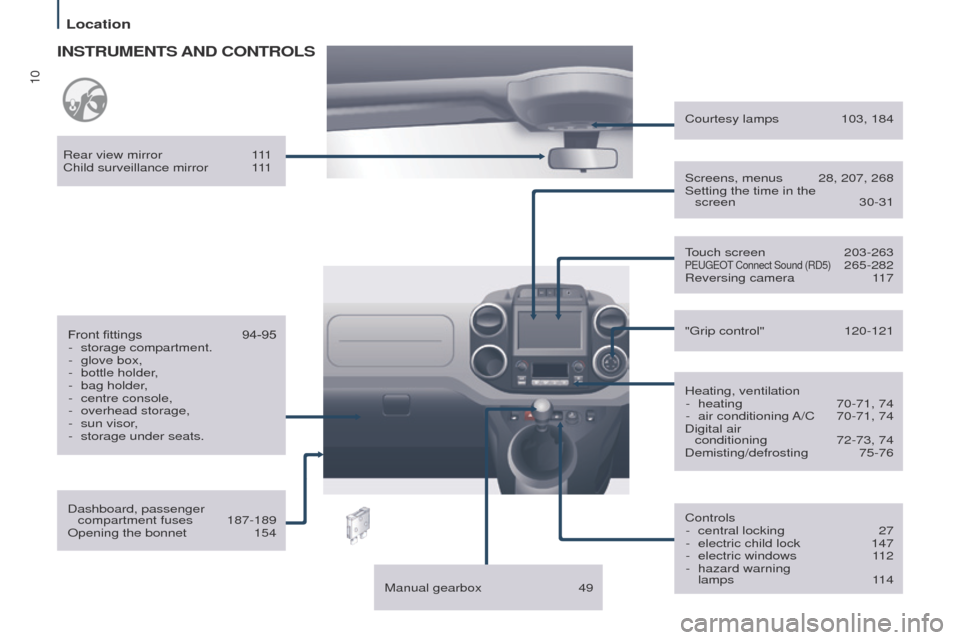
INSTRUMENTS AND CONTROLS
Dashboard, passenger compartment fuses 187-189
Opening the bonnet
154
Front fittings
94-95
-
storage compartment.
-
glove box,
-
bottle holder
,
-
bag holder
,
-
centre console,
-
overhead storage,
-
sun visor
,
-
storage under seats.
Rear view mirror
1
11
Child surveillance mirror
1
11
Manual gearbox
49T
ouch screen
203-263PEUGEOT Connect Sound (RD5) 265-282
Reversing camera
1 17
Controls -
central locking
27
-
electric child lock
147
-
electric windows
1
12
-
hazard warning
lamps
114
"Grip control"
120-121
Heating, ventilation -
heating
70-71, 74
-
air conditioning
A/C
70-71, 74
Digital air
conditioning
72-73, 74
Demisting/defrosting
75-76
Courtesy lamps
103, 184
Screens, menus
28, 207, 268
Setting the time in the
screen
30-31
Location
Page 15 of 292
13
Partner2VP_en_Chap01_vue-ensemble_ed02-2016
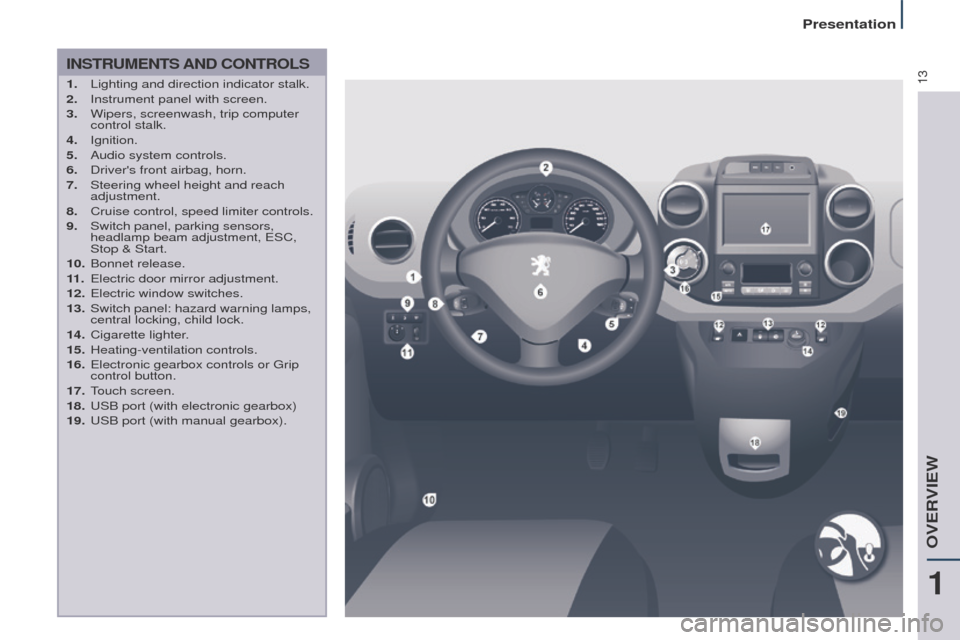
INSTRUMENTS AND CONTROLS
1. Lighting and direction indicator stalk.
2. Instrument panel with screen.
3.
Wipers, screenwash, trip computer
control stalk.
4.
Ignition.
5.
Audio system controls.
6.
Driver's front airbag, horn.
7.
Steering wheel height and reach
adjustment.
8.
Cruise control, speed limiter controls.
9.
Switch panel, parking sensors,
headlamp beam adjustment, ESC,
Stop & Start.
10.
Bonnet release.
11
.
Electric door mirror adjustment.
12.
Electric window switches.
13.
Switch panel: hazard warning lamps,
central locking, child lock.
14.
Cigarette lighter
.
15.
Heating-ventilation controls.
16.
Electronic gearbox controls or Grip
control button.
17.
T
ouch screen.
18.
USB port (with electronic gearbox)
19.
USB port (with manual gearbox).
1
OVERVIEW
Presentation
Page 16 of 292
14
Partner2VP_en_Chap01_vue-ensemble_ed02-2016
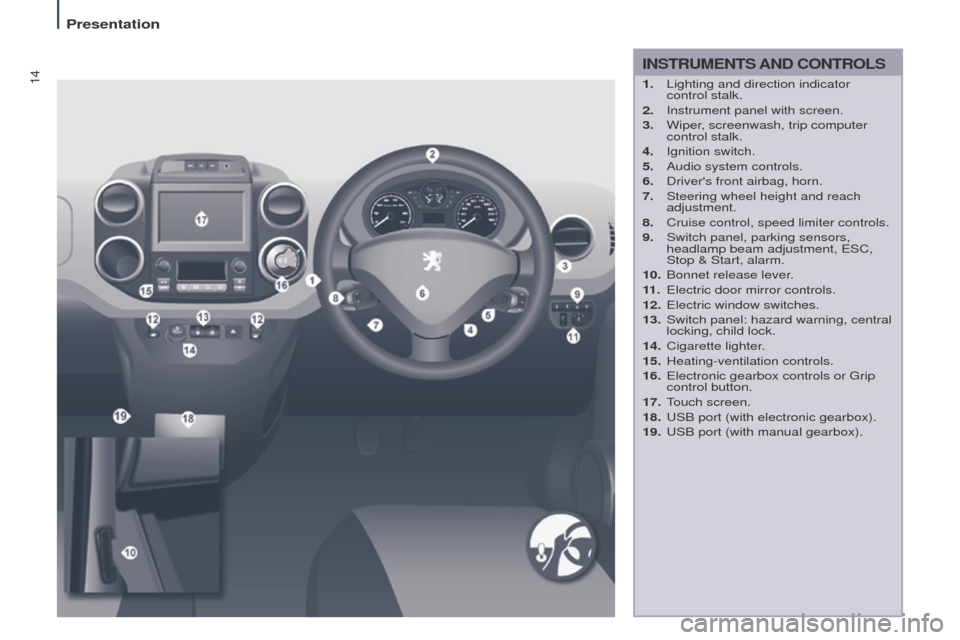
INSTRUMENTS AND CONTROLS
1. Lighting and direction indicator
control stalk.
2.
Instrument panel with screen.
3.
Wiper
, screenwash, trip computer
control stalk.
4.
Ignition switch.
5.
Audio system controls.
6.
Driver's front airbag, horn.
7.
Steering wheel height and reach
adjustment.
8.
Cruise control, speed limiter controls.
9.
Switch panel, parking sensors,
headlamp beam adjustment, ESC,
Stop & Start, alarm.
10.
Bonnet release lever
.
11 .
Electric door mirror controls.
12.
Electric window switches.
13.
Switch panel: hazard warning, central
locking, child lock.
14.
Cigarette lighter
.
15.
Heating-ventilation controls.
16.
Electronic gearbox controls or Grip
control button.
17.
T
ouch screen.
18.
USB port (with electronic gearbox).
19.
USB port (with manual gearbox).
Presentation
Page 18 of 292
16
Partner2VP_en_Chap02_eco-conduite_ed02-2016
Eco-driving is a range of everyday
practices that allow the motorist to
optimise their fuel consumption and
CO
2 emissions.
Eco-driving
Optimise the use of your
gearbox
With a manual gearbox, move off
gently and change up without waiting.
During acceleration change up early.
With an automatic or electronic
gearbox, give preference to automatic
mode and avoid pressing the
accelerator pedal heavily or suddenly.
The gear efficiency indicator invites
you to engage the most suitable gear:
as soon as the indication is displayed
in the instrument panel, follow it
straight away.
For vehicles fitted with an electronic
or automatic gearbox, this indicator
appears only in manual mode.
Drive smoothly
Maintain a safe distance between
vehicles, use engine braking rather
than the brake pedal, and press the
accelerator progressively. These
practices contribute towards a
reduction in fuel consumption and CO
2
emissions and also help to reduce the
background traffic noise.
If your vehicle has cruise control, make
use of the system at speeds above
25 mph (40 km/h) when the traffic is
flowing well.
Control the use of your
electrical equipment
Switch off the demisting and
defrosting controls, if not automatic.
Switch off the heated seat as soon as
possible.
Switch off the headlamps and front
foglamps when the level of light does
not require their use.
Avoid running the engine before
moving off, particularly in winter; your
vehicle will warm up much faster
while driving.
As a passenger, if you avoid
connecting your multimedia devices
(film, music, video game...), you
will contribute towards limiting the
consumption of electrical energy, and
so of fuel.
Disconnect your portable devices
before leaving the vehicle.
Before moving off, if the passenger
compartment is too warm, ventilate it
by opening the windows and air vents
before using the air conditioning.
Above 30 mph (50 km/h), close the
windows and leave the air vents open.
Remember to make use of equipment
that can help keep the temperature
in the passenger compartment down
(sunroof and window blinds...).
Switch off the air conditioning, unless
it has automatic regulation, as soon as
the desired temperature is attained.
Motoring & the Environment
Page 22 of 292
20
Partner2VP_en_Chap03_Pret-a-partir_ed02-2016
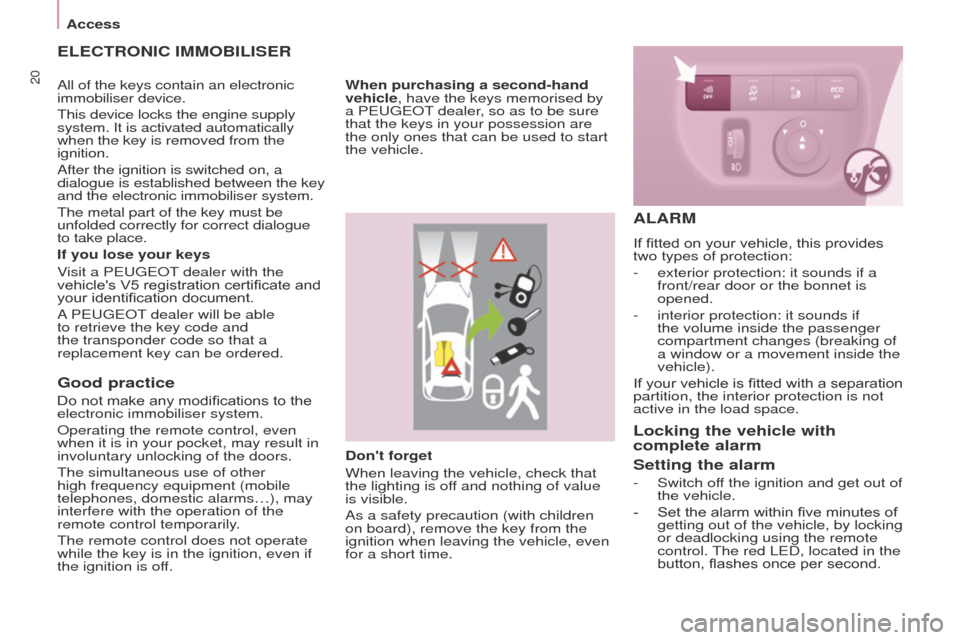
Don't forget
When leaving the vehicle, check that
the lighting is off and nothing of value
is visible.
As a safety precaution (with children
on board), remove the key from the
ignition when leaving the vehicle, even
for a short time.
Good practice
Do not make any modifications to the
electronic immobiliser system.
Operating the remote control, even
when it is in your pocket, may result in
involuntary unlocking of the doors.
The simultaneous use of other
high frequency equipment (mobile
telephones, domestic alarms…), may
interfere with the operation of the
remote control temporarily.
The remote control does not operate
while the key is in the ignition, even if
the ignition is off.
ELECTRONIC IMMOBILISER
If you lose your keys
Visit a PEUGEOT dealer with the
vehicle's V5 registration certificate and
your identification document.
A PEUGEOT dealer will be able
to retrieve the key code and
the transponder code so that a
replacement key can be ordered.When purchasing a second-hand
vehicle, have the keys memorised by
a PEUGEOT dealer, so as to be sure
that the keys in your possession are
the only ones that can be used to start
the vehicle.
ALARM
If fitted on your vehicle, this provides
two types of protection:
-
exterior protection: it sounds if a
front/rear door or the bonnet is
opened.
-
interior protection: it sounds if
the volume inside the passenger
compartment changes (breaking of
a window or a movement inside the
vehicle).
If
your vehicle is fitted with a separation
partition, the interior protection is not
active in the load space.
Locking the vehicle with
complete alarm
Setting the alarm
- Switch of f the ignition and get out of
the vehicle.
-
Set the alarm within five minutes of
getting out of the vehicle, by locking
or deadlocking using the remote
control.
The red LED, located in the
button, flashes once per second.
All of the keys contain an electronic
immobiliser device.
This device locks the engine supply
system. It is activated automatically
when the key is removed from the
ignition.
After the ignition is switched on, a
dialogue is established between the key
and the electronic immobiliser system.
The metal part of the key must be
unfolded correctly for correct dialogue
to take place.
Access
Page 23 of 292
21
Partner2VP_en_Chap03_Pret-a-partir_ed02-2016
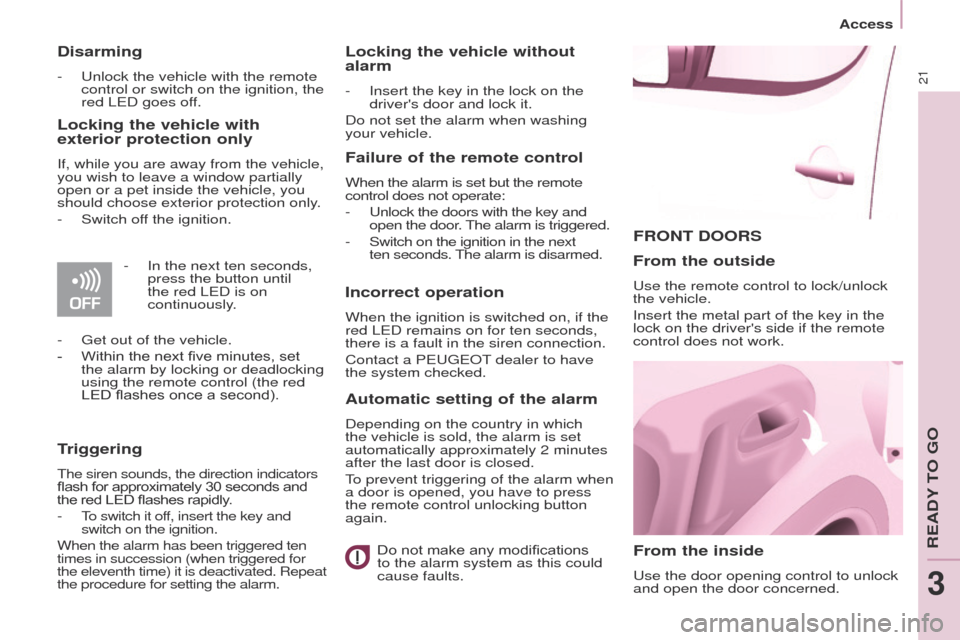
FRONT DOORS
From the inside
Use the door opening control to unlock
and open the door concerned.
From the outside
Use the remote control to lock/unlock
the vehicle.
Insert the metal part of the key in the
lock on the driver's side if the remote
control does not work.
Disarming
- Unlock the vehicle with the remote
control or switch on the ignition, the
red LED goes off.
Locking the vehicle with
exterior protection only
If, while you are away from the vehicle,
you wish to leave a window partially
open or a pet inside the vehicle, you
should choose exterior protection only.
-
Switch of
f the ignition.
-
In the next ten seconds,
press the button until
the red LED is on
continuously
.
-
Get out of the vehicle.
-
Within the next five minutes, set
the alarm by locking or deadlocking
using the remote control (the red
LED flashes once a second).
Triggering
The siren sounds, the direction indicators
flash for approximately 30 seconds and
the red LED flashes rapidly.
- To switch it off, insert the key and
switch on the ignition.
When the alarm has been triggered ten
times in succession (when triggered for
the eleventh time) it is deactivated. Repeat
the procedure for setting the alarm.
Locking the vehicle without
alarm
- Insert the key in the lock on the
driver's door and lock it.
Do not set the alarm when washing
your vehicle.
Failure of the remote control
When the alarm is set but the remote
control does not operate:
-
Unlock the doors with the key and
open the door. The alarm is triggered.
-
Switch on the ignition in the next
ten
seconds. The alarm is disarmed.
Incorrect operation
When the ignition is switched on, if the
red LED remains on for ten seconds,
there is a fault in the siren connection.
Contact a PEUGEOT dealer to have
the system checked.
Automatic setting of the alarm
Depending on the country in which
the vehicle is sold, the alarm is set
automatically approximately 2 minutes
after the last door is closed.
To prevent triggering of the alarm when
a door is opened, you have to press
the remote control unlocking button
again.Do not make any modifications
to the alarm system as this could
cause faults.
Access
READY TO GO
3