instrument panel PONTIAC BONNEVILLE 2003 User Guide
[x] Cancel search | Manufacturer: PONTIAC, Model Year: 2003, Model line: BONNEVILLE, Model: PONTIAC BONNEVILLE 2003Pages: 418, PDF Size: 20.24 MB
Page 81 of 418
Leaving Your Vehicle
If you are leaving the vehicle, take your keys, open
your door and set the locks from the inside. Then get out
and close the door.
You may also use the lock button
on the remote keyless entry transmitter after shutting
the doors.
If your vehicle has a theft-deterrent system, see
Universal Theft-Deterrent on page 2-21.
Trunk
L% CAUTION:
It can be dangerous to drive with the trunk lid
open because carbon monoxide (CO) gas can
come into your vehicle.
You can’t see or smell
CO.
It can cause unconsciousness and
even death.
CAUTION: (Continued) If
you must drive with the trunk lid open or if
electrical wiring
or other cable connections
must pass through the seal between the body
and the trunk
lid:
Make sure all other windows are shut.
Turn the fan on your heating or cooling
system to
its highest speed and select the
control setting that will force outside air
into your vehicle. See “Climate Controls”
in the Index.
instrument panel, open them all the way.
If you have air outlets on or under the
See “Engine Exhaust” in the Index.
Trunk Lock Release
To unlock the trunk from the outside, insert the master
key and turn it.
2-1 6
Page 91 of 418
OFF: This is the only position from which you can
remove the key. This position locks your ignition and
transaxle. It’s a theft-deterrent feature.
ACC (Accessory): In this position you can operate
your electrical accessories such as power windows,
sunroof (option), audio system and windshield wipers.
ON: This is the position the switch returns to after
you start your engine and release the switch. Even when
the engine is not running, you can use ON
to operate
your electrical accessories and to display some
instrument panel cluster warning lights. This is the
position for driving your vehicle.
START: This position starts the engine. When the
engine starts, release the key. The ignition switch will
return to
ON for normal driving.
Even
if the engine is not running, ACC and ON are
positions that allow you to operate your electrical
accessories.
Key Reminder Warning
If you leave your key in OFF you will hear a warning
tone when you open the driver’s door.
Retained Accessory Power (RAP)
After you turn the ignition off and remove the key, you
will still have power to such accessories as the
radio, sunroof (option) and power windows for up to
10 minutes. Power is turned off if you open a door.
Always leave your key in
OFF. If you leave your key in
any position other than
OFF, your battery will
discharge prematurely.
Starting Your Engine
Move your shift lever to PARK (P) or NEUTRAL (N).
Your engine won’t start in any other position - that’s a
safety feature. To restart when you’re already moving,
use NEUTRAL
(N) only.
Notice: Don’t try to shift to PARK (P) if your
vehicle
is moving. If you do, you could damage the
transaxle. Shift
to PARK (P) only when your
vehicle
is stopped.
1. With your foot off the accelerator pedal, turn your
ignition key to START. When the engine starts, let
go of the key. The idle speed will go down as
your engine gets warm.
2-26
Page 116 of 418
Section 3 Instrument Panel
Instrument Panel Overview ............................... 3.4
Hazard Warning Flashers
................................ 3.5
Other Warning Devises
................................... 3.6
Horn
............................................................. 3.6
Tilt Wheel
..................................................... 3.6
Turn SignaVMultifunction Lever
......................... 3.7
Exterior Lamps
............................................. 3.13
Interior Lamps
.............................................. 3.16
Head-Up Display (HUD)
................................. 3-21
Accessory Power Outlets
............................... 3.23
Ashtrays and Cigarette Lighter
........................ 3.24
Ciimate Controls ............................................ 3.25
Climate Control System ................................. 3.25
Automatic Climate Control System
................... 3.28
Outlet Adjustment
......................................... 3.32
Climate Controls Personalization
..................... 3.33
Warning Lights, Gages and Indicators ............. 3.34
Instrument Panel Cluster
................................ 3-35
Speedometer and Odometer
-8-38
Tachometer ................................................. 3.39
Safety Belt Reminder Light
............................. 3.39
. -- ..........................
Air Bag Readiness Light ............................. 3.40
Battery Warning bight
.................................... 3-41
Voltmeter Gage
............................................ 3-41
Brake System Warning Light
.......................... 3-42
Warning Light
........................................... 3-43
Traction Control System (TCS) Warning Light
...... 3-43
Low Traction Active Light ............................... 3-44
Engine Coolant Temperature Gage
.................. 3-45
Tire Pressure Light
....................................... 3-46
Anti-Lock
Brake System
Malfunction Indicator Lamp
....... ............... 3-46
Oil Pressure Gage
.................. ............... 3-49
Check Oil Level Light
J-50
Low Washer Fluid Warning Light ..................... 3-51
n ....................................
Security Light ............................................... 3-51
Check Gages Warning Light
........................... 3-51
Door Ajar Light
............................................. 3-52
Trunk Ajar Light
............................................ 3-52
............... 3-53
Fuel Gage
............................. ............... 3-53
Boost Gage
....................... ................... 3-54
Cnnrirn vu, Y . "1 \!nhirlo I . ..-.- Snnn - - - . lizht . ~
3- 1
Page 117 of 418
Section 3 Instrument Panel
Systems Monitor ............................................ 3.55
Driver Information Center (DIC) ....................... 3.57
DIC Controls and Displays
............................. 3.57
DIC Warnings and Messages
........................ -3-60
Driver Identifier DIC Display
........................... 3.61
DIC Vehicle Personalization
............................ 3.62
Center (SIC) ................................................ 3.68
Electronic Compass
...................................... 3.68
Audio System(s) ............................................. 3.71
Setting the Time
........................................... 3.71
Secondary Information
Radio with CD .............................................. 3.72
Radio with Cassette and CD
.......................... 3.82
Trunk-Mounted
CD Changer ........................... 3-94
Theft-Deterrent Feature
.................................. 3.98
Audio Steering Wheel Controls
....................... 3.98
Understanding Radio Reception
...................... 3.99
Care
of Your Cassette Tape Player ............... 3-100
Care of Your
CDs ....................................... 3.100
Care of Your CD Player ............................... 3.101
Diversity Antenna System
............................. 3.101
XM Satellite Radio Antenna System ............... 3.101
Chime Level Adjustment
............................... 3.101
3-2
Page 119 of 418
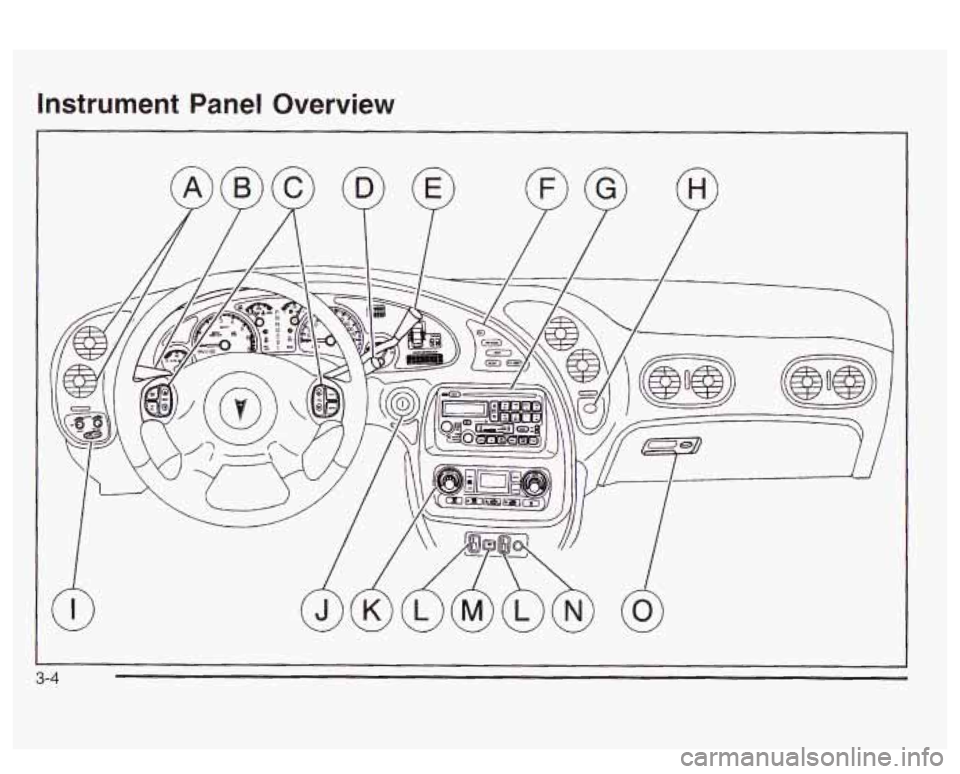
Instrument Panel Overview
Page 120 of 418
The main components of your instrument panel are the
following:
A. Air Outlets
B. Turn Signal/Multifunction Lever
C. Audio System Steering Wheel Controls (If Equipped)
D. Windshield Wiper Lever
E. Steering Column Shift Lever
F. Driver Information Center (DIC) Controls
G. Audio System
H. Hazard Warning Flashers Control
I. Twilight Sentinel@ Controls and Fog Lamps Button
J. Ignition Switch
K. Comfort Control System
L. Heated Seat Switches (Option)
M. Traction Control Button (If Equipped)
N. Cigarette Lighter
u. Giove Eox
(If Equipped)
Hazard Warning Flashers
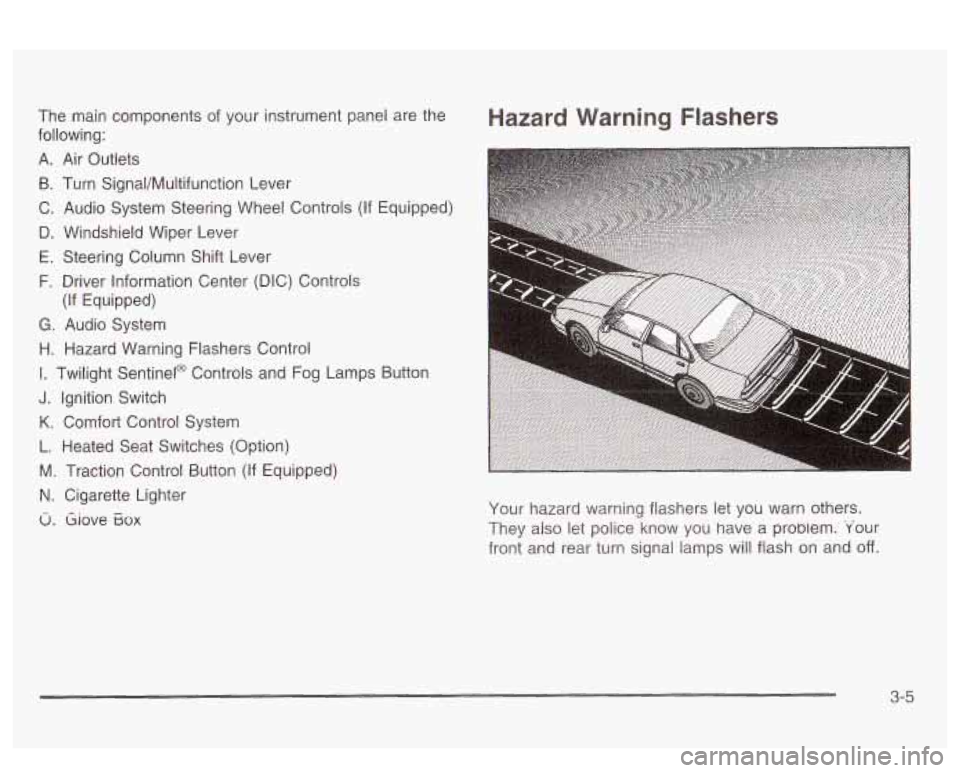
Your hazard warning flashers let you warn others.
They also let police know you have a probiem. 'Your
front and rear turn signal lamps will flash on and
off.
3-5
Page 121 of 418
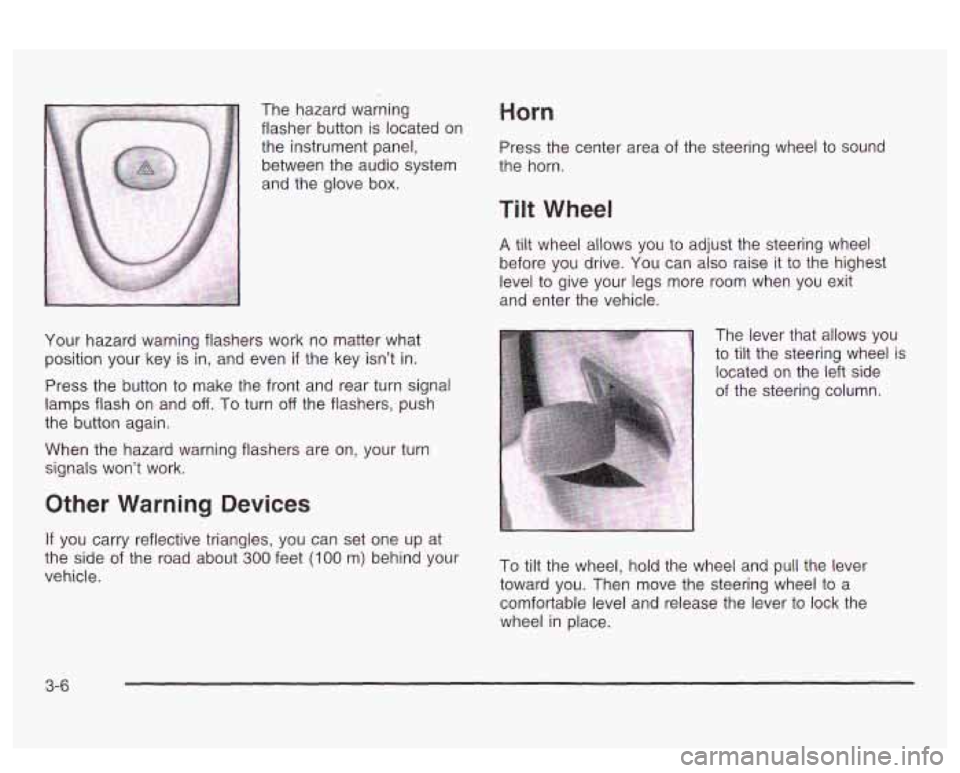
The hazard warning
flasher button is located on
the instrument panel,
between the audio system
and the glove box. Horn
Press the center area of the steering wheel to sound
the horn.
Tilt Wheel
A tilt wheel allows you to adjust the steering wheel
before you drive. You can
also raise it to the highest
level to give your legs more room when you exit
and enter the vehicle.
Your hazard warning flashers work no matter what
position your key is
in, and even if the key isn't in.
Press the button to make the front and rear turn signal
lamps flash on and off. To turn off the flashers, push
the button again.
When the hazard warning flashers are on, your turn
signals won't work. The lever that allows you
to
tilt the steering wheel is
located
on the left side
of the steering column.
Other Warning Devices
If you carry reflective triangles, you can set one up at
vehicle.
the side Of the road about 300 feet (loo m, behind your To tiit the wheel, hold the wheel and pull the lever
toward you. Then move the steering wheel to a
comfortable level and release the lever to lock the
wheel in place.
3-6
Page 122 of 418
Turn Signal/Nlultifunction Lever
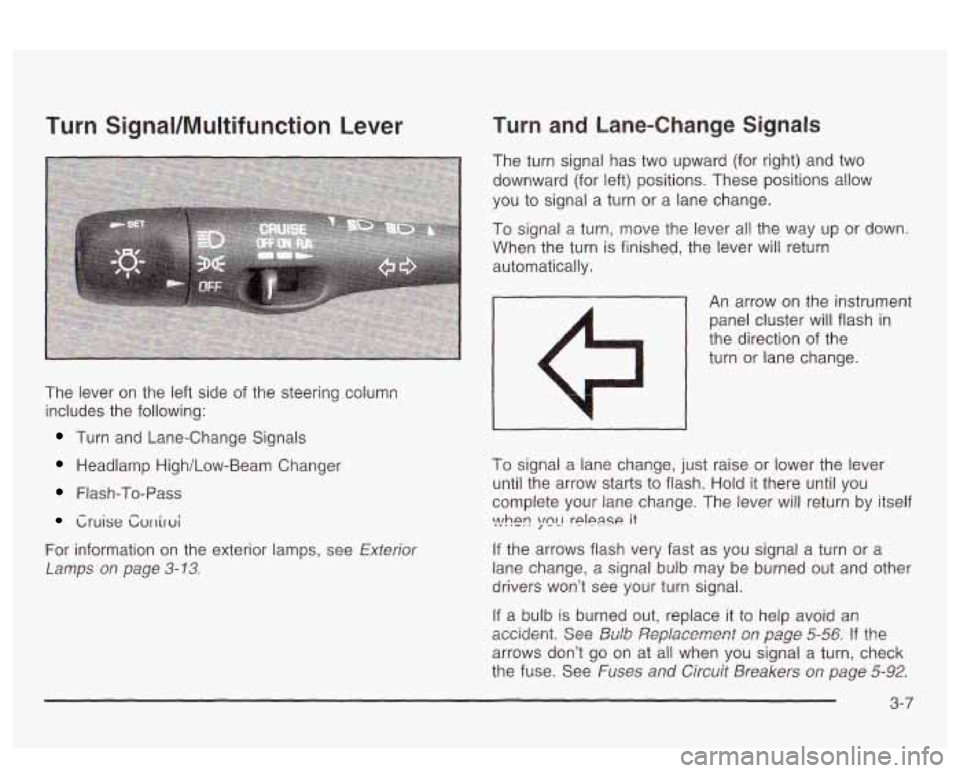
The lever on the left side of the steering column
includes the following:
Turn and Lane-Change Signals
Headlamp High/Low-Beam Changer
Flash-To-Pass
Cruise Cvrriroi
For information on the exterior lamps, see Exterior
Lamps
on page 3-13.
Turn and Lane-Change Signals
The turn signal has two upward (for right) and two
downward (for left) positions. These positions allow
you
to signal a turn or a lane change.
To signal a turn, move the lever all the way up or down.
When the turn is finished, the lever will return
automatically.
- An arrow on the instrument
panel cluster will flash in
the direction of the
turn or lane change.
I
To signal a lane change, just raise or lower the lever
until the arrow starts to flash. Hold
it there until you
complete your lane change. The lever will return by itself
If the arrows flash very fast as you signal a turn or a
lane change, a signal bulb may be burned out and other
drivers won’t see your turn signal.
If a bulb is burned out, replace it to help avoid an
accidmt. See &Ab ,%?pfaxment s,~ page 5-56 !? the
arrows don’t go on at all when you signal a turn, check
the fuse. See
Fuses and Circuit Breakers on page 5-92.
\>!hen ;mL! rplpase it
3-7
Page 123 of 418
Turn Signal On Chime
If your turn signal is left on for more than 3/4 of a mile
(1.2 km), a chime will sound at each flash of the
turn signal. To turn
off the chime, move the turn signal
lever
to the off position.
Headlamp High/Low-Beam Changer
To change the headlamps from low beam to high beam,
push the lever forward. To change from high beam
to
low beam, pull the turn signal lever toward you,
then release it.
When the high beams are
on, this light on the
instrument panel cluster
will also be on.
Headlamps On Reminder
If you open the driver’s door while leaving the
headlamps or parking lamps
on and the key is in OFF,
you will hear a warning chime.
Flash-To-Pass
This feature lets you use your high-beam headlamps to
signal a driver in front of you that you want to pass.
It works even
if your headlamps are off.
To use it, pull the turn signal lever toward you.
If your headlamps are off or on low beam, your
high-beam headlamps will turn on. They’ll stay on as
long as you hold the lever toward you and the
high-beam indicator on the instrument panel cluster will
come on. Release the lever
to turn the high-beam
headlamps
off.
3-8
Page 124 of 418
Windshield Wipers
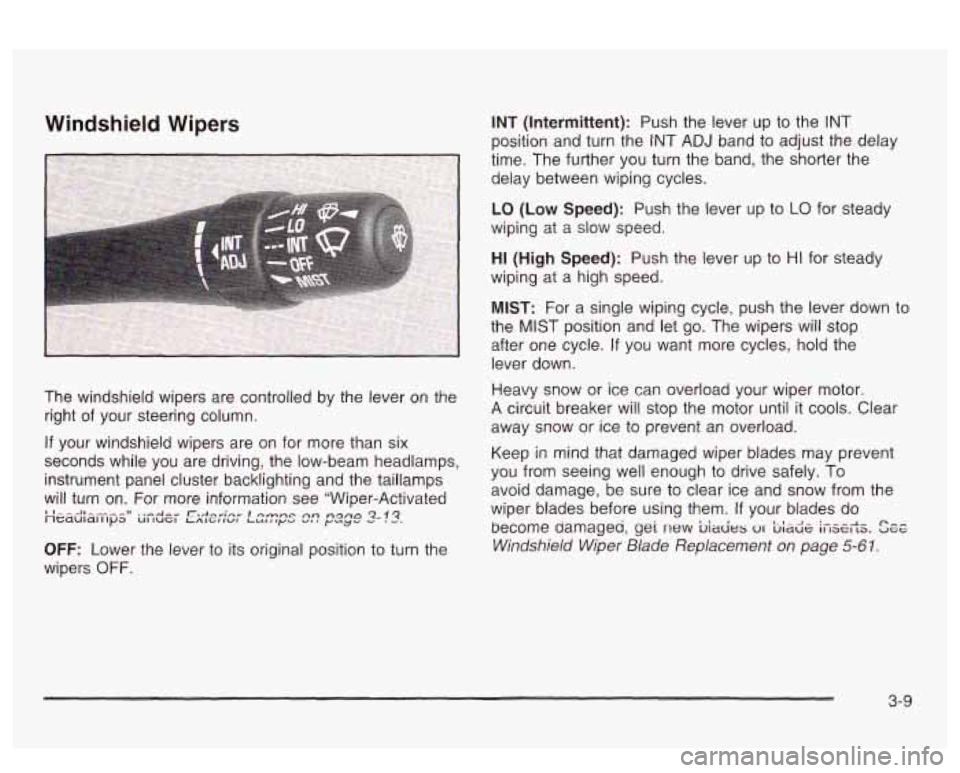
The windshield wipers are controlled by the lever on the
right of your steering column.
If your windshield wipers are on for more than six
seconds while you are driving, the low-beam headlamps,
instrument panel cluster backlighting and the taillamps
will turn on. For more information see "Wiper-Activated
''---Il----~~ ..-Am" r.,+...";nn. I0rn-c An ngfla 2-!3. neduldlllpa UI IUGI LALGIIWL LULlly.2 V. # y"y'
OFF: Lower the lever to its original position to turn the
wipers
OFF. INT
(Intermittent): Push the lever
up to the INT
position and turn the INT ADJ band to adjust the delay
time. The further you turn the band, the shorter the
delay between wiping cycles.
LO (Low Speed): Push the lever up to LO for steady
wiping at a slow speed.
HI (High Speed): Push the lever up to HI for steady
wiping at a high speed.
MIST: For a single wiping cycle, push the lever down to
the
MIST position and let go. The wipers will stop
after one cycle.
If you want more cycles, hold the
lever down.
Heavy snow or ice can overload your wiper motor.
A circuit breaker will stop the motor until it cools. Clear
away snow or ice to prevent an overload.
Keep in mind that damaged wiper blades may prevent
you from seeing well enough
to drive safely. To
avoid damage, be sure to clear ice and snow from the
wiper blades before using them.
If your blades do
become damageu,
gei new biacies 01 bia& ifiserts. See
Windshield Wiper Blade Replacement on page 5-61.
3-9