service PONTIAC G5 2010 User Guide
[x] Cancel search | Manufacturer: PONTIAC, Model Year: 2010, Model line: G5, Model: PONTIAC G5 2010Pages: 422, PDF Size: 2.22 MB
Page 101 of 422

Restraint System Check
Checking the Restraint Systems
Safety Belts
Now and then, check that the safety belt reminder light,
safety belts, buckles, latch plates, retractors, and
anchorages are all working properly.
Look for any other loose or damaged safety belt system
parts that might keep a safety belt system from doing
its job. See your dealer/retailer to have it repaired. Torn
or frayed safety belts may not protect you in a crash.
They can rip apart under impact forces. If a belt is torn
or frayed, get a new one right away.
Make sure the safety belt reminder light is working. See
Safety Belt Reminders on page 4-22for more
information.
Keep safety belts clean and dry. See Care of Safety
Belts on page 6-96.
Airbags
The airbag system does not need regularly scheduled
maintenance or replacement. Make sure the airbag
readiness light is working. See Airbag Readiness Light
on page 4-23 for more information.
Notice: If an airbag covering is damaged, opened,
or broken, the airbag may not work properly. Do
not open or break the airbag coverings. If there are
any opened or broken airbag covers, have the
airbag covering and/or airbag module replaced. For
the location of the airbag modules, see What
Makes an Airbag Inflate? on page 2-61 . See your
dealer/retailer for service.
2-71
Page 105 of 422

Remote Keyless Entry (RKE)
System
SeeRadio Frequency Statement on page 8-18 for
information regarding Part 15 of the Federal
Communications Commission (FCC) Rules and
RSS-210/211 of Industry and Science Canada.
Changes or modifications to this system by other than
an authorized service facility could void authorization to
use this equipment.
If there is a decrease in the RKE operating range,
try this:
•Check the distance. The transmitter may be too far
from the vehicle. Stand closer during rainy or
snowy weather.
•Check the location. Other vehicles or objects may
be blocking the signal. Take a few steps to the
left or right, hold the transmitter higher, and
try again.
•Check the transmitter’s battery. See “Battery
Replacement” later in this section.
•If the transmitter is still not working correctly, see
your dealer/retailer or a qualified technician for
service.
Remote Keyless Entry (RKE)
System Operation
The Remote Keyless Entry (RKE) transmitter functions
work up to 60 m (195 feet) away from the vehicle.
There are other conditions which can affect the
performance of the transmitter. See Remote Keyless
Entry (RKE) System on page 3-3 .
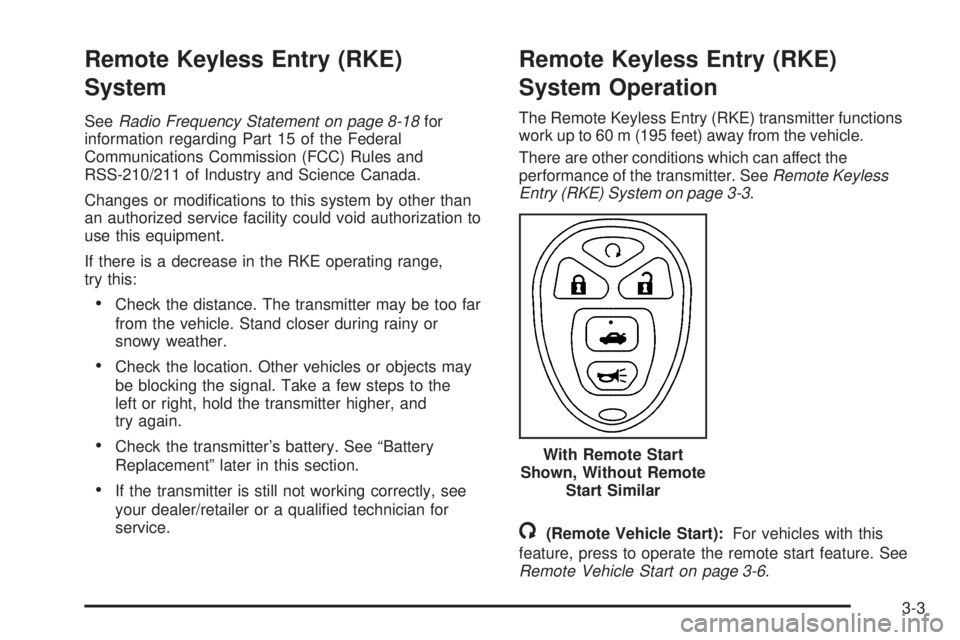
/(Remote Vehicle Start):For vehicles with this
feature, press to operate the remote start feature. See
Remote Vehicle Start on page 3-6 .
With Remote Start
Shown, Without Remote Start Similar
3-3
Page 120 of 422

If the engine still does not start, and the key appears to
be undamaged, try another ignition key. At this time,
you may also want to check the fuse, seeFuses
and Circuit Breakers on page 6-103 . If the engine still
does not start with the other key, your vehicle needs
service. If your vehicle does start, the first key may be
faulty. See your dealer/retailer who can service the
PASS-Key
®III+ to have a new key made. In an
emergency, contact Roadside Assistance. See Roadside
Assistance Program on page 8-7 , for more information.
It may be possible for the PASS-Key
®III+ decoder
to “learn” the transponder value of a new or replacement
key. Up to 10 keys may be programmed for the
vehicle. The following procedure is for programming
additional keys only. If all the currently programmed
keys are lost or do not operate, you must see your
dealer/retailer or a locksmith who can service
PASS-Key
®III+ to have keys made and programmed to
the system.
See your dealer/retailer or a locksmith who can service
PASS-Key
®III+ to get a new key blank that is cut
exactly as the ignition key that operates the system.
To program the new key:
1. Verify that the new key has a
1stamped on it.
2. Insert the already programmed key in the ignition and start the engine. If the engine will not start,
see your dealer/retailer for service. 3. After the engine has started, turn the key to
LOCK/OFF, and remove the key.
4. Insert the key to be programmed and turn it to the ON/RUN position within five seconds of the original
key being turned to the LOCK/OFF position.
The security light will turn off once the key has
been programmed.
5. Repeat Steps 1 through 4 if additional keys are to be programmed.
If you are ever driving and the security light comes on
and stays on, you may be able to restart your engine if
you turn it off. Your PASS-Key
®III+ system, however,
is not working properly and must be serviced by
your dealer/retailer. Your vehicle is not protected by the
PASS-Key
®III+ system at this time.
If you lose or damage your PASS-Key
®III+ key, see
your dealer/retailer or a locksmith who can service
PASS-Key
®III+ to have a new key made.
Do not leave the key or device that disarms or
deactivates the theft deterrent system in the vehicle.
3-18
Page 122 of 422

On vehicles with an automatic transmission, the shift
lever must be in P (Park) to turn the ignition switch
to LOCK/OFF.
On vehicles with a manual transmission, the ignition
switch can be turned to LOCK/OFF in any shift
lever position.
The steering can bind with the wheel turned off center.
If this happens, move it from right to left while turning
the key to ACC/ACCESSORY. If this does not
work, then the vehicle needs service.
{WARNING:
If you have a manual transmission removing the
key from the ignition switch will lock the steering
column and result in a loss of ability to steer the
vehicle. This could cause a collision. If you need
to turn the engine off while the vehicle is moving,
turn the key to ACC/ACCESSORY.ACC (ACC/ACCESSORY):
This position operates
some of the electrical accessories. It unlocks the
steering wheel and ignition.
R(ON/RUN): This is the position in which you can
operate the electrical accessories and to display some
instrument panel cluster warning and indicator lights.
The switch stays in this position when the engine
is running.
If you leave the key in the ACC/ACCESSORY or
ON/RUN position with the engine off, the battery could
be drained. You may not be able to start the vehicle
if the battery is allowed to drain for an extended period
of time.
/(START): This position starts the engine. When the
engine starts, release the key. The ignition switch will
return to ON/RUN for driving.
A warning tone will sound when the driver door is
opened, the ignition is in LOCK/OFF or
ACC/ACCESSORY and the key is in the ignition.
3-20
Page 123 of 422

Column Lock Release
For vehicles with an automatic transmission, the
following procedure allows the ignition to be turned to
LOCK/OFF and ignition key to be removed in case of a
dead battery or low voltage battery.1. Make sure the shift lever is in P (Park).
2. Remove the cover from the bottom of the steering column. 3. Locate the plunger.
4. Press and hold the plunger while turning the ignition
key to LOCK/OFF. Remove the key.
Have the vehicle serviced at your dealer/retailer as soon
as possible.
3-21
Page 134 of 422

If you still are unable to shift out of P (Park):1. Fully release the shift lever button.
2. While holding down the brake pedal, press the shift lever button again.
3. Move the shift lever to the desired position.
If you still cannot move the shift lever from P (Park),
consult your dealer/retailer or a professional towing
service.
Parking the Vehicle
(Manual Transmission)
Before leaving the vehicle, fully press the clutch pedal
down, move the shift lever into R (Reverse), and
firmly apply the parking brake. Once the shift lever has
been placed in R (Reverse) with the clutch pedal
pressed down, the ignition key can be turned to
LOCK/OFF, then remove the key and release the clutch
pedal. See Manual Transmission Operation on
page 3-27.
Parking Over Things That Burn
{WARNING:
Things that can burn could touch hot exhaust
parts under the vehicle and ignite. Do not park
over papers, leaves, dry grass, or other things that
can burn.
3-32
Page 137 of 422

Mirrors
Manual Rearview Mirror
Hold the inside rearview mirror in the center to move it
for a clearer view of behind your vehicle. Adjust the
mirror to avoid glare from the headlamps behind you.
Push the tab forward for daytime use and pull it for
nighttime use.
Vehicles with OnStar
®have three additional control
buttons located at the bottom of the mirror. See
your dealer/retailer for more information on the system
and how to subscribe to OnStar
®. See the OnStar®
owner’s guide for more information about the services
OnStar®provides.
If the vehicle has map lamps, press the buttons located
at the bottom of the mirror to turn them on or off.
Outside Remote Control Mirror
Adjust the driver outside mirror with the control lever
located on the driver door. Adjust the outside mirrors so
that the side of the vehicle can be seen.
Manually fold the mirrors inward to prevent damage when
going through an automatic car wash. To fold, pull the
mirror toward the vehicle. Push the mirror outward, to
return it to the original position.
Outside Power Mirrors
Controls for the outside
power mirrors are located
on the driver door
armrest.
To adjust the mirrors: 1. Move the selector switch located below the four-way control pad to the left or right to choose either the
driver or passenger side mirror.
2. Press one of the four arrows located on the control pad to move the mirror to the desired direction.
3. Adjust each outside mirror so that a little of the vehicle and the area behind it can be seen.
Keep the selector switch in the center position when not
adjusting either outside mirror.
Manually fold the mirrors inward to prevent damage when
going through an automatic car wash. To fold, pull the
mirror toward the vehicle. Push the mirror outward, to
return it to the original position.
3-35
Page 163 of 422

Airbag Readiness Light
The system checks the airbag’s electrical system for
possible malfunctions. If the light stays on it indicates
there is an electrical problem. The system check includes
the airbag sensor, the pretensioners, the airbag modules,
the wiring and the crash sensing and diagnostic module.
For more information on the airbag system, seeAirbag
System on page 2-55.
The airbag readiness light
flashes for a few seconds
when the engine is started.
If the light does not come
on then, have it fixed
immediately.{WARNING:
If the airbag readiness light stays on after the
vehicle is started or comes on while driving, it
means the airbag system might not be working
properly. The airbags in the vehicle might not
inflate in a crash, or they could even inflate
without a crash. To help avoid injury, have the
vehicle serviced right away.
If there is a problem with the airbag system, an airbag
Driver Information Center (DIC) message can also come
on. See DIC Warnings and Messages on page 4-38
for more information.
4-23
Page 164 of 422

Passenger Airbag Status Indicator
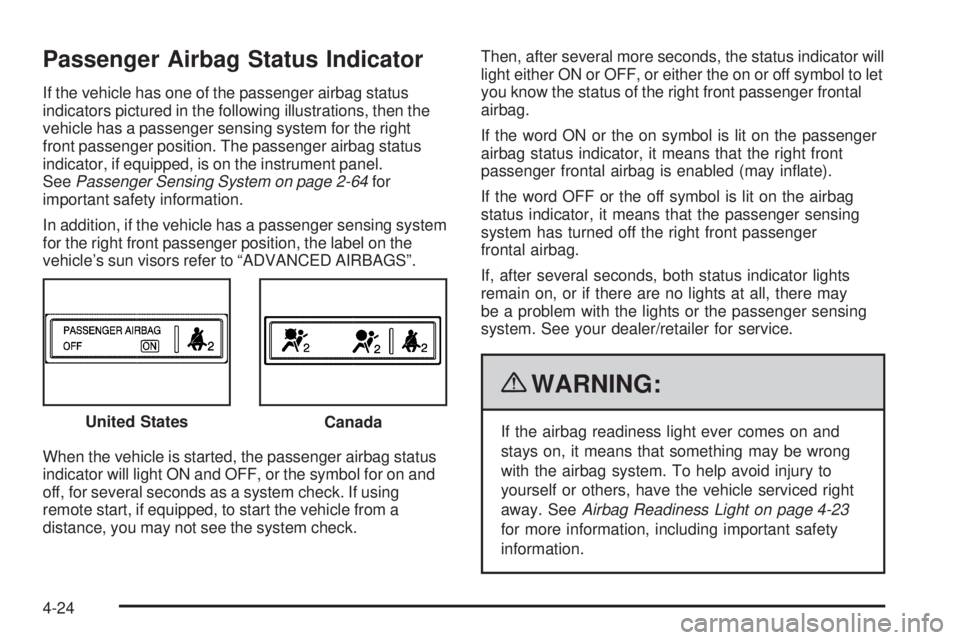
If the vehicle has one of the passenger airbag status
indicators pictured in the following illustrations, then the
vehicle has a passenger sensing system for the right
front passenger position. The passenger airbag status
indicator, if equipped, is on the instrument panel.
SeePassenger Sensing System on page 2-64 for
important safety information.
In addition, if the vehicle has a passenger sensing system
for the right front passenger position, the label on the
vehicle’s sun visors refer to “ADVANCED AIRBAGS”.
When the vehicle is started, the passenger airbag status
indicator will light ON and OFF, or the symbol for on and
off, for several seconds as a system check. If using
remote start, if equipped, to start the vehicle from a
distance, you may not see the system check. Then, after several more seconds, the status indicator will
light either ON or OFF, or either the on or off symbol to let
you know the status of the right front passenger frontal
airbag.
If the word ON or the on symbol is lit on the passenger
airbag status indicator, it means that the right front
passenger frontal airbag is enabled (may inflate).
If the word OFF or the off symbol is lit on the airbag
status indicator, it means that the passenger sensing
system has turned off the right front passenger
frontal airbag.
If, after several seconds, both status indicator lights
remain on, or if there are no lights at all, there may
be a problem with the lights or the passenger sensing
system. See your dealer/retailer for service.
{WARNING:
If the airbag readiness light ever comes on and
stays on, it means that something may be wrong
with the airbag system. To help avoid injury to
yourself or others, have the vehicle serviced right
away. See
Airbag Readiness Light on page 4-23
for more information, including important safety
information.
United StatesCanada
4-24
Page 165 of 422

Charging System Light
This light comes on briefly
when the ignition key is
turned to START, but
the engine is not running,
as a check to show it
is working.
If it does not, have the vehicle serviced by your
dealer/retailer.
The light should go out once the engine starts. If it stays
on, or comes on while driving, there could be a problem
with the charging system. A charging system message
in the Driver Information Center (DIC) can also appear.
See DIC Warnings and Messages on page 4-38 for more
information. This light could indicate that there are
problems with a generator drive belt, or that there is an
electrical problem. Have it checked right away. If the
vehicle must be driven a short distance with the light
on, turn off accessories, such as the radio and air
conditioner.
Up-Shift Light
The vehicle may have an
up-shift light.
When this light comes on, shift to the next higher gear if
weather, road, and traffic conditions allow.
See Manual Transmission Operation on page 3-27 for
more information.
4-25