ECO mode PONTIAC GRAND AM 2003 Owners Manual
[x] Cancel search | Manufacturer: PONTIAC, Model Year: 2003, Model line: GRAND AM, Model: PONTIAC GRAND AM 2003Pages: 354, PDF Size: 16.3 MB
Page 79 of 354
Before your vehicle was shipped from the factory it was
programmed in Mode
1. To determine the current
mode or
to change to a different mode, do the following:
1. Put an automatic transaxle in PARK (P) or a
manual transaxle
in REVERSE (R) with the parking
brake engaged and turn the ignition to
ON.
2. Press and hold LOCK on the power door lock
switch for
10 seconds. Release the switch when
you hear the chime.
3. Count the number of chimes you hear. The number
of chimes tells you which mode your vehicle is in.
You can change the mode by pressing and
holding LOCK on the power door lock switch (two
chimes for Mode
2, three chimes for Mode 3
and four chimes for Mode 4).
that matches the mode you want.
4. Repeat Step 2 until you hear the number of chimes
The mode you selected is now set.
Rear Door Security Locks
If your vehicle is a four-door model, it has rear door
security locks that help prevent passengers from
opening the rear doors from
the inside.
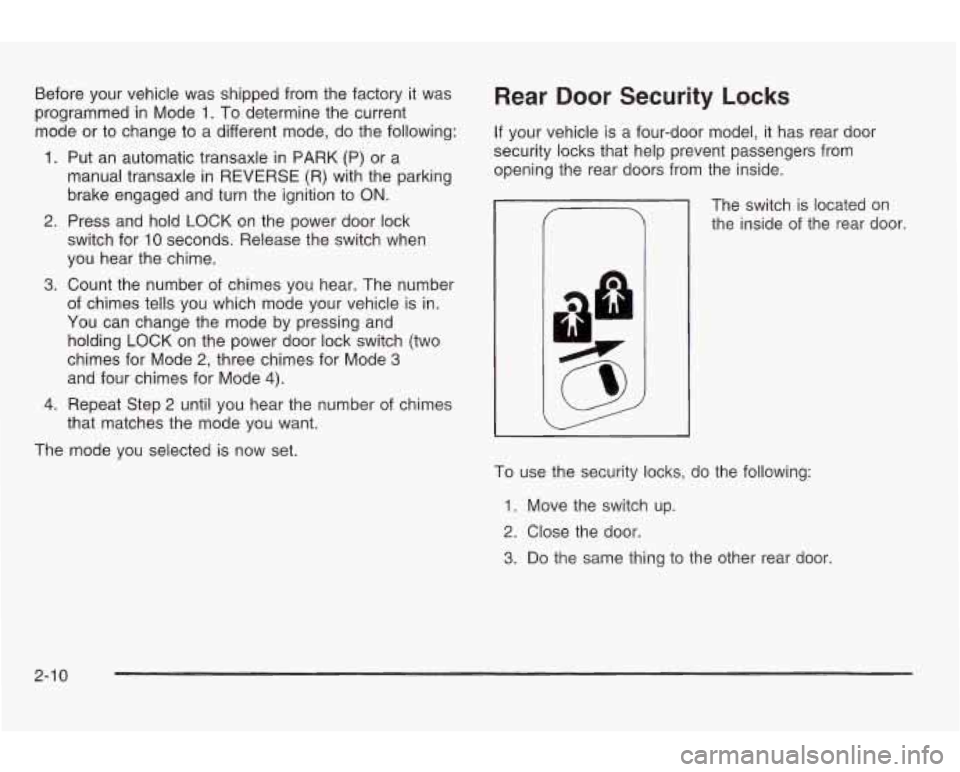
The switch is located
on
the inside of the rear door.
To use the security locks, do the following:
1. Move the switch up.
2. Close the door.
3. Do the same thing to the other rear door.
2-1 0
Page 125 of 354
Climate Controls
Climate Control System
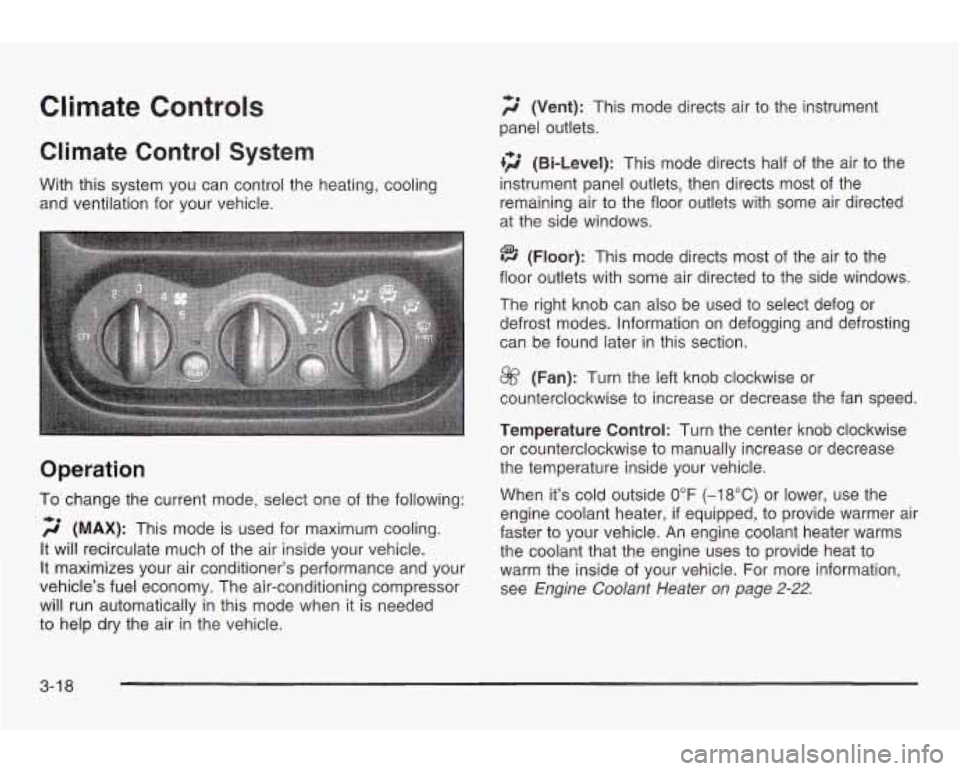
With this system you can control the heating, cooling
and ventilation for your vehicle.
Operation
To change the current mode, select one of the following:
f;’ (MAX): This mode is used for maximum cooling.
It will recirculate much of the air inside your vehicle.
It maximizes your air conditioner’s performance and your
vehicle’s fuel economy. The air-conditioning compressor
will run automatically in this mode when it is needed
to help dry the air in the vehicle.
2 (Vent): This mode directs air to the instrument
panel outlets.
tf;’ (Bi-Level): This mode directs half of the air to the
instrument panel outlets, then directs most of the
remaining air
to the floor outlets with some air directed
at the side windows.
@ (Floor): This mode directs most of the air to the
floor outlets with some air directed to the side windows.
The right knob can
also be used to select defog or
defrost modes. Information on defogging
and defrosting
can be found later in this section.
@ (Fan): Turn the left knob clockwise or
counterclockwise
to increase or decrease the fan speed.
Temperature Control: Turn the center knob clockwise
or counterclockwise to manually increase or decrease
the temperature inside your vehicle.
When it’s cold outside
0°F (-18°C) or lower, use the
engine coolant heater,
if equipped, to provide warmer air
faster to your vehicle. An engine coolant heater warms
the coolant that the engine uses
to provide heat to
warm the inside of your vehicle. For more information,
see Engine
Coolant Heater on page 2-22.
3-1 8
Page 126 of 354
A/C (Air Conditioning): Press this button to turn the
air-conditioning system on or off. When
NC is pressed,
an indicator light above the button will come on
to let
you know that air conditioning is activated. The fan knob
must be set
to a speed for the air conditioning to
operate.
On hot days, open the windows
to let hot inside air
escape; then close them. This helps
to reduce the time
it takes for your vehicle to cool down. It also helps
the system
to operate more efficiently.
For quick cool down on hot days:
1. Select the vent mode.
2. Select the highest fan speed.
3. Select NC.
4. Select the coolest temperature.
Using these settings together for long periods of time
may cause the air inside of your vehicle
to become
your vehicle has cooled, turn the recirculation mode off
tc
dry. Tc prevent
this frcl?? hsppenin& s!?er the 2i!- i!7
The air-conditioning system removes moisture from
the air,
so you may sometimes notice a small amount of
water dripping underneath your vehicle while idling or
after turning
Gf! the engine. This is nCx??ml.
Defogging and Defrosting
There are two modes to choose from to clear fog or
frost from your windshield. Use the defog mode to clear
the windows of fog or moisture and warm the
passengers. Use the defrost mode
to remove fog or
frost from the windshield more quickly.
Turn the right knob clockwise or counterclockwise
to
select defog or defrost mode.
+3 (Defog): This mode directs half of the air to the
windshield with most of the remaining air directed
to the
floor outlets and some air directed at the side windows.
When you select this mode, the system turns
off
recirculation automatically and runs the air-conditioning
compressor unless the outside temperature is at or
below freezing. The recirculation mode cannot be
selected while in the defog mode.
To help clear the side windows quickly while using air
conditioning, do the following:
1. Select the bi-level mode.
2. Select the highest fan speed.
3. Select NC.
4. Select the temperature.
3-1 9
Page 148 of 354
To adjust both tone controls and both speaker controls
to the middle position, first end out of audio mode
by pressing another button, causing the radio to perform
that function, or by waiting five seconds for the display
to return to time of day. Then press and hold the AUDIO
button for more than two seconds until you hear a
beep.
CEN will appear on the display.
Adjusting the Speakers (Balance/Fade)
AUDIO: To adjust the balance between the right
and the left speakers, press and release the AUDIO
button until
BAL appears on the display. Then press and
hold the up or the down arrow to move the sound
toward the right or the left speakers.
To adjust the fade between the front and rear speakers,
press and release the AUDIO button until FAD
appears on the display. Then press and hold the up or
the down arrow
to move the sound toward the front
or the rear speakers.
To adjust balance or fade to the middle position, select
than two seconds until you hear a beep.
L and a zero
or
F and a zero will appear on the display.
n A I rn n TI- -- -._-I I- -1-1 n I ~n~n I-.. DHL UI rnu. I II~II peas CAI IU I iuiu HWUIU IUI 111u1e
To adjust both tone controls and both speaker controls
to the middle position, first end out of audio mode
by pressing another button, causing the radio
to perform
that function, or by waiting five seconds for the display
to return to time of day. Then press and hold AUDIO for
more than two seconds until you hear a beep.
CEN
will appear on the display.
Radio Messages
CAL (Calibration): Your audio system has been
calibrated for your vehicle from the factory.
If CAL
appears on the display it means that your radio has not
been configured properly for your vehicle and must
be returned
to the dealership for service.
LOC (Locked): This message is displayed when the
THEFTLOCK@ system has locked up. You must return
to the dealership for service.
Playing a Compact Disc
Insert a disc partway into the slot, label side up. The
display will show CD. If you want
to insert a compact
disc with the ignition
off, first press RCL or the eject
button.
mInw,-.v 1.,;11 311 ;+ Thn A;nn ehnallA knmim .-~lo~t;mm Thn tJlCdy&l VVlll pull I1 II 1. I IIG U13b JIlVUlU UGYII I pluyll 13. I (IC.
If an error appears on the display, see ‘Compact Disc
Messages” later in this section.
3-4 1
Page 156 of 354
BAND (Alternate Frequency): Alternate frequency
allows the radio to switch to a stronger station with the
same programming. Press and hold BAND for two
seconds to turn alternate frequency on. AF ON
will appear on the display. The radio may switch to
stronger stations. Press and hold BAND again for two
seconds to turn alternate frequency off. AF OFF
will appear on the display. The radio will not switch to
other stations.
This function does not apply for
XMTM or DAB.
Setting Preset PTYs (RDS Only)
The six numbered pushbuttons let you return to your
favorite program types (PTYs). These pushbuttons
have factory PTY presets. You can set up to
12 PTYs
(six
1.
2.
3.
4.
5.
FMI and six FM2) by performing thefollowing steps:
Press BAND to select
FMI or FM2.
Press PROG TYPE to activate program type
select mode.
Turn the SELECT knob to select a PTY.
Press and hold one of the six numbered
pushbuttons until you hear a beep. Whenever you
press that numbered pushbutton, the PTY you
set will return.
Repeat the steps for each pushbutton.
RDS and DAB Messages
ALERT!: Alert warns of national or local emergencies.
When an alert announcement comes on the current
radio station, ALERT! will appear on the display. You will
hear the announcement, even
if the volume is muted
or a compact disc is playing.
If the compact disc player
is playing, play will stop during the announcement.
You will not be able to turn
off alert announcements.
ALERT! will not be affected by tests of the emergency
broadcast system. This feature is not supported by
all RDS stations.
INFO (Information):
If the current station has a
message, INFO will appear
on the display. Press this
button to see the message. The message may display
the artist and song title, call in phone numbers, etc.
If the whole message is not displayed, parts of it
will appear every three seconds.
To scroll through the
message at your own speed, press the INFO button
repeatedly. A new group of words will appear on
the ciispiay with each press. Once ine compieie
message has been displayed, INFO will disappear from
the display until another new message is received.
The old message can be displayed by pressing
the
INFO button until a new message is received or a
different station is tuned to.
3-49
Page 167 of 354
BAND (Alternate Frequency): Alternate frequency
allows the radio
to switch to a stronger station with the
same programming. Press and hold BAND for two
seconds to turn alternate frequency on. AF
ON
will appear on the display. The radio may switch to
stronger stations. Press and hold BAND again for two
seconds
to turn alternate frequency off. AF OFF
will appear on the display. The radio will not switch
to
other stations.
This function does not apply for XMTM or DAB.
Setting Preset PTYs (RDS Only)
The six numbered pushbuttons let you return to your
favorite program types (PTYs). These pushbuttons have factory PTY presets. You can set up
to 12 PTYs
(six FM1 and six FM2) by performing the following steps:
1. Press BAND
to select FM1 or FM2.
2. Press PROG TYPE to activate program type
3. Turn the SELECT knob to select a PTY.
select
mode.
4.
5.
Press and hold one of the six numbered
pushbuttons until you hear a beep. Whenever you
press that numbered pushbutton, the PTY you
set will return,
if program type select mode
is activated.
Repeat the steps for each pushbutton.
RDS and DAB Messages
ALERT!: Alert warns of local or national emergencies.
When an alert announcement comes on the current
radio station, ALERT! will appear on the display. You will
hear the announcement, even
if the volume is muted
or a cassette tape or a compact disc is playing. If
the cassette tape or compact disc player is playing, play
will stop during the announcement. You will not be
able to turn
off alert announcements.
ALERT! will not be affected by tests
of the emergency
broadcast system. This feature is not supported by
all RDS stations.
INFO (Information):
If the current station has a
message, INFO will appear on the display. Press this
button
to see the message. The message may display
the artist and song title, call in phone numbers, etc.
3-60
Page 265 of 354
Brake Pedal Travel
See your dealer if the brake pedal does not return to
normal height, or if there is a rapid increase in
pedal travel. This could be a sign
of brake trouble.
Brake Adjustment
Every time you make a moderate brake stop, your
disc brakes adjust for wear.
If you rarely make a
moderate or heavier stop, then your brakes might not
adjust correctly. If you drive in that way, then
- very
carefully
- make a few moderate brake stops about
every
1,000 miles (1 600 km), so your brakes will adjust
properly.
Replacing Brake System Parts
The braking system on a vehicle is complex. Its many
parts have
to be of top quality and work well together if
the vehicle is to have really good braking. Your
vehicle was designed and tested with top-quality
GM
brake parts. When you replace parts of your braking
system
- for example, when your brake linings
wear down and you need new ones put in
- be sure you
get new approved replacement parts. If you don’t,
your brakes may no longer work properly. For example,
if someone puts in brake linings that are wrong for
your vehicle, the balance between your front and rear
brakes can change
- for the worse. The braking
performance you’ve come
to expect can change in many
other ways
if someone puts in the wrong replacement
brake parts.
Battery
Your new vehicle comes with a maintenance free
ACDelco@ battery. When it’s time for a new battery, get
one that has the replacement number shown
on the
original battery’s label. We recommend an ACDelco@
battery. See
Engine Compartment Overview on
page
5- 12 for battery location.
Warning: Battery posts, terminals and related
accessories contain lead and lead compounds,
chemicals known
to the State of California to cause
cancer and reproductive harm. Wash hands after
handling.
5-42
Page 335 of 354
We have quick, easy access to telephone numbers of
the following additional services depending
on your
needs:
Hotels
Glass replacement
Tire repair facilities
Rental vehicle or taxis
Airports or train stations
Police, fire departments or hospitals
In many instances, mechanical failures are covered
under Pontiac’s comprehensive warranty. However,
when other services are utilized, our advisors will explain
any payment obligations you might incur.
For prompt and efficient assistance when calling, please
provide the following information
to give the advisor:
Location of vehicle
Telephone number of your location
Vehicle model, year and color
Mileage of vehicle
Vehicle Identification Number (VIN) Pontiac reserves the right to
limit services or
reimbursement
to an owner or driver when, in Pontiac’s
judgement, the claims become excessive in frequency
or type of occurrence.
While we hope you never have the occasion
to use our
service, it
is added security while traveling for you
and your family. Remember, we’re only a phone call
away. Pontiac Roadside Assistance:
1 -800-ROADSIDE
or 1-800-762-3743, text telephone
(TTY) users, call
1-888-889-2438.
Canadian Roadside Assistance
Vehicles purchased in Canada have an extensive
Roadside Assistance program accessible from anywhere
in Canada or the United States. Please refer
to the
Warranty and Owner Assistance Information book.
Courtesy Transportation
Pontiac has always exemplified quality and value in its
offering
of motor vehicles. To enhance your ownership
experience, we and our participating dealers are
proud
to offer Courtesy Transportation, a customer
support program for new vehicles.
0 Vehicle license plate number
7-6