light PONTIAC GRAND PRIX 2006 User Guide
[x] Cancel search | Manufacturer: PONTIAC, Model Year: 2006, Model line: GRAND PRIX, Model: PONTIAC GRAND PRIX 2006Pages: 472, PDF Size: 2.82 MB
Page 70 of 472
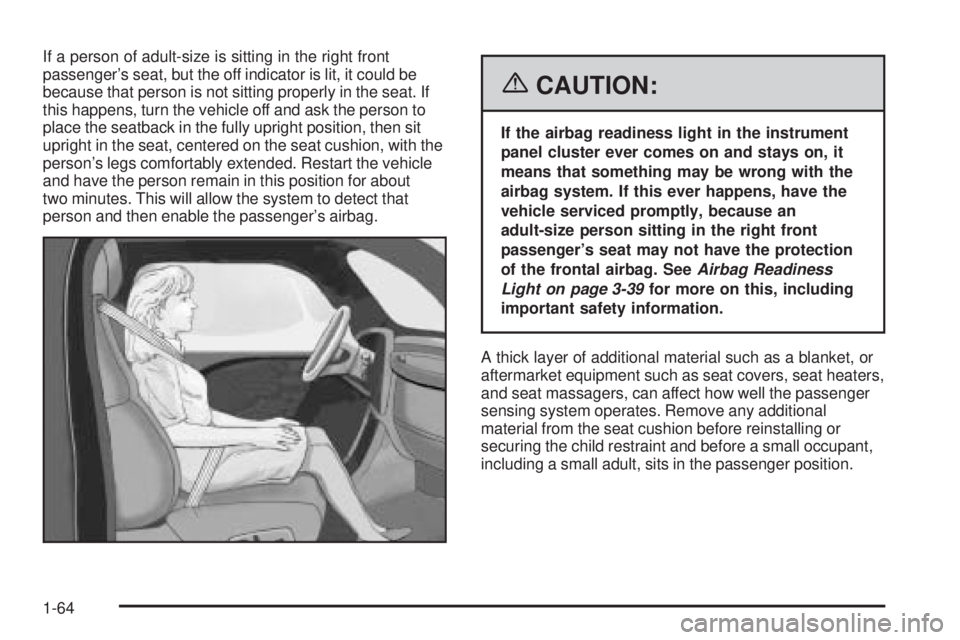
If a person of adult-size is sitting in the right front
passenger’s seat, but the off indicator is lit, it could be
because that person is not sitting properly in the seat. If
this happens, turn the vehicle off and ask the person to
place the seatback in the fully upright position, then sit
upright in the seat, centered on the seat cushion, with the
person’s legs comfortably extended. Restart the vehicle
and have the person remain in this position for about
two minutes. This will allow the system to detect that
person and then enable the passenger’s airbag.
{CAUTION:
If the airbag readiness light in the instrument
panel cluster ever comes on and stays on, it
means that something may be wrong with the
airbag system. If this ever happens, have the
vehicle serviced promptly, because an
adult-size person sitting in the right front
passenger’s seat may not have the protection
of the frontal airbag. SeeAirbag Readiness
Light on page 3-39for more on this, including
important safety information.
A thick layer of additional material such as a blanket, or
aftermarket equipment such as seat covers, seat heaters,
and seat massagers, can affect how well the passenger
sensing system operates. Remove any additional
material from the seat cushion before reinstalling or
securing the child restraint and before a small occupant,
including a small adult, sits in the passenger position.
1-64
Page 71 of 472
You may want to consider not using seat covers or other
aftermarket equipment if your vehicle has the passenger
sensing system. SeeAdding Equipment to Your
Airbag-Equipped Vehicle on page 1-66for more
information about modi�cations that can affect how the
system operates.
The passenger sensing system may suppress the
airbag deployment when liquid is soaked into the seat. If
this happens, the off indicator in the passenger airbag
status indicator and the airbag readiness light on
the instrument panel will be lit. The system should
resume normal operation after the seat is allowed to dry.
If the system operates incorrectly after the seat has
dried, have your dealer check the system.
{CAUTION:
Stowing of articles under the passenger’s seat
or between the passenger’s seat cushion and
seatback may interfere with the proper
operation of the passenger sensing system.
Servicing Your Airbag-Equipped
Vehicle
Airbags affect how your vehicle should be serviced.
There are parts of the airbag system in several places
around your vehicle. You do not want the system to
in�ate while someone is working on your vehicle. Your
dealer and the service manual have information
about servicing your vehicle and the airbag system. To
purchase a service manual, seeService Publications
Ordering Information on page 7-14.
{CAUTION:
For up to 10 seconds after the ignition key is
turned off and the battery is disconnected, an
airbag can still in�ate during improper service.
You can be injured if you are close to an
airbag when it in�ates. Avoid yellow
connectors. They are probably part of the
airbag system. Be sure to follow proper
service procedures, and make sure the person
performing work for you is quali�ed to do so.
The airbag system does not need regular maintenance.
1-65
Page 73 of 472
Restraint System Check
Checking the Restraint Systems
Now and then, make sure the safety belt reminder light
and all your belts, buckles, latch plates, retractors
and anchorages are working properly. Look for any other
loose or damaged safety belt system parts. If you see
anything that might keep a safety belt system from doing
its job, have it repaired.
Torn or frayed safety belts may not protect you in a
crash. They can rip apart under impact forces. If a belt
is torn or frayed, get a new one right away.
Also look for any opened or broken airbag covers, and
have them repaired or replaced. (The airbag system
does not need regular maintenance.)
Notice:If you damage the covering for the driver’s
or the right front passenger’s airbag, or the side
impact airbag covering (if equipped) on the ceiling
near the side windows, the airbag may not work
properly. You may have to replace the airbag
module in the steering wheel, both the airbag
module and the instrument panel for the right front
passenger’s airbag, or side impact airbag module
and ceiling covering for roof-mounted side impact
airbags (if equipped.) Do not open or break the
airbag coverings.
Replacing Restraint System Parts
After a Crash
{CAUTION:
A crash can damage the restraint systems in
your vehicle. A damaged restraint system may
not properly protect the person using it,
resulting in serious injury or even death in a
crash. To help make sure your restraint
systems are working properly after a crash,
have them inspected and any necessary
replacements made as soon as possible.
If you have had a crash, do you need new belts or
LATCH system parts?
After a very minor collision, nothing may be necessary.
But if the belts were stretched, as they would be if worn
during a more severe crash, then you need new parts.
1-67
Page 74 of 472
If the LATCH system was being used during a more
severe crash, you may need new LATCH system parts.
If belts are cut or damaged, replace them. Collision
damage also may mean you will need to have LATCH
system, safety belt or seat parts repaired or replaced.
New parts and repairs may be necessary even if the belt
or LATCH system was not being used at the time of
the collision.
If an airbag in�ates, you will need to replace airbag
system parts. See the part on the airbag system earlier
in this section.If the frontal airbags in�ate, you will also need to
replace the driver’s and right front passenger’s safety
belt buckle assembly. Be sure to do so. Then the
new buckle assembly will be there to help protect you in
a collision.
After a crash you may need to replace the driver and
front passenger’s safety belt buckle assemblies, even if
the frontal airbags have not deployed. The driver
and front passenger’s safety belt buckle assemblies
contain the safety belt pretensioners. Have your safety
belt pretensioners checked if your vehicle has been
in a collision, or if your airbag readiness light stays on
after you start your vehicle or while you are driving. See
Airbag Readiness Light on page 3-39.
1-68
Page 88 of 472
To open the trunk from the inside, use the power door
lock switch located on the driver’s or front passenger’s
door. See “Remote Trunk Release” following.
The vehicle must be in PARK (P) in order for the trunk
to open.
If the vehicle has lost power, you can open the trunk by
lowering the rear seat and pulling the emergency
trunk release handle located in the trunk. SeeSplit
Folding Rear Seat on page 1-9and “Emergency Trunk
Release Handle” following.
Remote Trunk Release
This feature is used to unlock the trunk from inside the
vehicle using the power door lock switch.
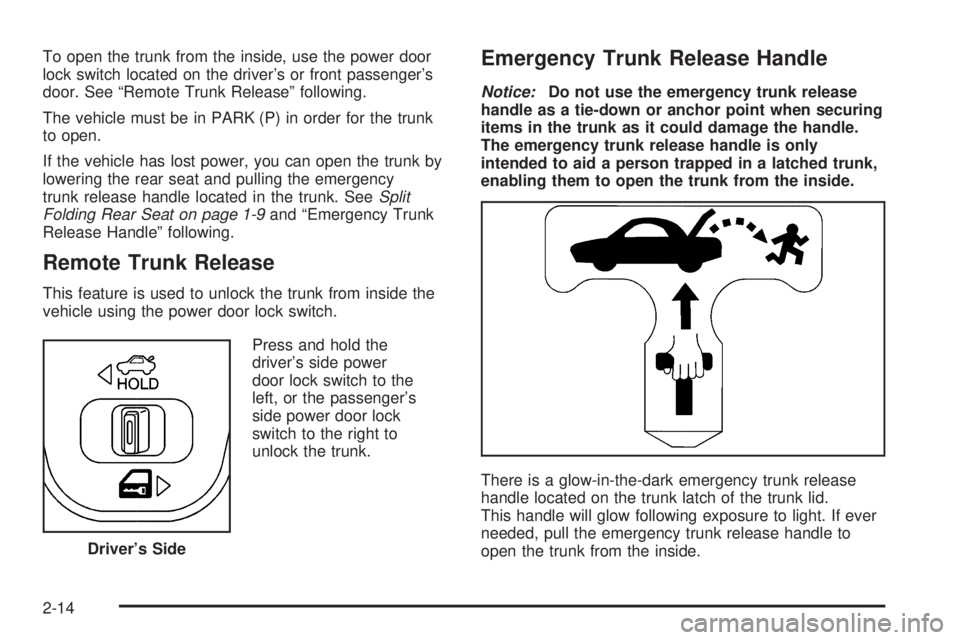
Press and hold the
driver’s side power
door lock switch to the
left, or the passenger’s
side power door lock
switch to the right to
unlock the trunk.
Emergency Trunk Release Handle
Notice:Do not use the emergency trunk release
handle as a tie-down or anchor point when securing
items in the trunk as it could damage the handle.
The emergency trunk release handle is only
intended to aid a person trapped in a latched trunk,
enabling them to open the trunk from the inside.
There is a glow-in-the-dark emergency trunk release
handle located on the trunk latch of the trunk lid.
This handle will glow following exposure to light. If ever
needed, pull the emergency trunk release handle to
open the trunk from the inside. Driver’s Side
2-14
Page 91 of 472
Sun Visors
To help block out glare, pull the sun visors down. Pull
on the inside edges of the sun visors to swing them from
the front windshield to the side window.
Visor Vanity Mirror
Raise the cover on the top of the sun visor to expose
the vanity mirror. If the vehicle has lighted vanity mirrors,
the lamps come on when the cover is opened.
Theft-Deterrent Systems
Vehicle theft is big business, especially in some cities.
Although your vehicle has a number of theft-deterrent
features, we know that nothing we put on it can make it
impossible to steal.
Content Theft-Deterrent
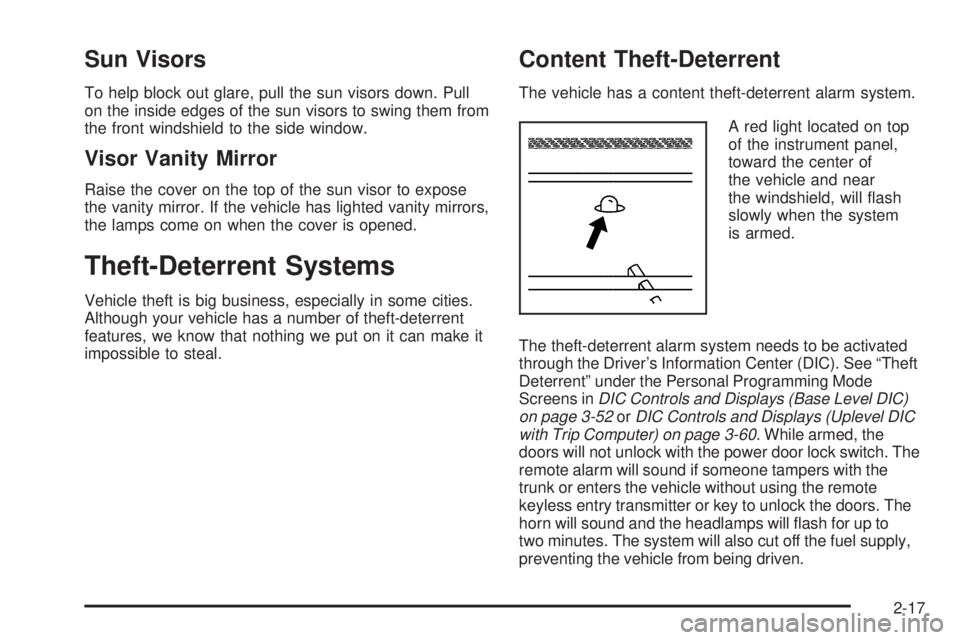
The vehicle has a content theft-deterrent alarm system.
A red light located on top
of the instrument panel,
toward the center of
the vehicle and near
the windshield, will �ash
slowly when the system
is armed.
The theft-deterrent alarm system needs to be activated
through the Driver’s Information Center (DIC). See “Theft
Deterrent” under the Personal Programming Mode
Screens inDIC Controls and Displays (Base Level DIC)
on page 3-52orDIC Controls and Displays (Uplevel DIC
with Trip Computer) on page 3-60. While armed, the
doors will not unlock with the power door lock switch. The
remote alarm will sound if someone tampers with the
trunk or enters the vehicle without using the remote
keyless entry transmitter or key to unlock the doors. The
horn will sound and the headlamps will �ash for up to
two minutes. The system will also cut off the fuel supply,
preventing the vehicle from being driven.
2-17
Page 92 of 472
Arming with the Power Lock Switch
The vehicle’s content theft-deterrent alarm system can
be activated when the key is removed from the ignition
and the power door lock switch of either the driver’s or
front passenger’s door is used to lock the vehicle. The
door needs to be in the open position when pressing the
power door lock switch. The alarm system will not
activate if the door is closed and the power door lock
switch is pressed. This system can be activated through
the Driver’s Information Center (DIC). See “Lock Switch
Arm” under the Personal Programming Mode Screens in
DIC Controls and Displays (Base Level DIC) on
page 3-52orDIC Controls and Displays (Uplevel DIC
with Trip Computer) on page 3-60.
When the doors are locked using the power door lock
switch of either front door, the red light, on top of the
instrument panel will start �ashing indicating that the
system is arming. After all the doors are closed there will
be a time delay and then the red light will begin to �ash at
a very slow rate indicating the system is armed.
Arming with the Remote Keyless
Entry Transmitter
The alarm system will arm when the remote keyless
entry transmitter is used to lock the doors after the key
is removed from the ignition. The red light will come
on to indicate that the system is arming. After all doors
are closed and locked, and after a time delay, the
red light will begin �ashing at a very slow rate to show
the system is armed.
Arming Con�rmation
A red light located on top of the instrument panel,
towards the center of the vehicle and near the
windshield, will �ash slowly to con�rm when the
system is armed.
2-18
Page 93 of 472
Disarming with the Remote Keyless
Entry Transmitter
The alarm system will disarm when the remote keyless
entry transmitter is used to unlock the doors. The
red light will go out to show that the system is disarmed.
Disarming with Your Key
The alarm system will disarm when the key is used to
unlock the doors. The red light will stop �ashing
when the system is disarmed. If you would like the key
to disarm the alarm system, see “Personal Programming
Mode Screens” underDIC Controls and Displays
(Base Level DIC) on page 3-52orDIC Controls and
Displays (Uplevel DIC with Trip Computer) on page 3-60
for more information.
PASS-Key®III
Your PASS-Key®III system operates on a radio
frequency subject to Federal Communications
Commission (FCC) Rules and with Industry Canada.This device complies with Part 15 of the FCC Rules.
Operation is subject to the following two conditions:
1. This device may not cause harmful interference.
2. This device must accept any interference received,
including interference that may cause undesired
operation.
This device complies with RSS-210 of Industry Canada.
Operation is subject to the following two conditions:
1. This device may not cause interference.
2. This device must accept any interference received,
including interference that may cause undesired
operation of the device.
Changes or modi�cations to this system by other than
an authorized service facility could void authorization to
use this equipment.
PASS-Key
®III uses a radio frequency transponder in
the key that matches a decoder in your vehicle.
2-19
Page 96 of 472
Ignition Positions
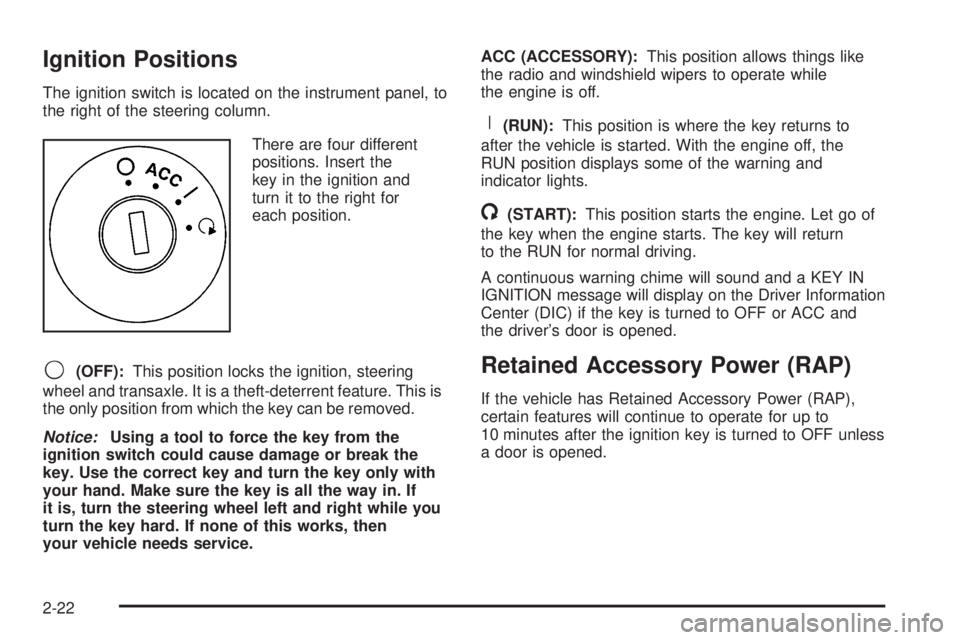
The ignition switch is located on the instrument panel, to
the right of the steering column.
There are four different
positions. Insert the
key in the ignition and
turn it to the right for
each position.
9(OFF):This position locks the ignition, steering
wheel and transaxle. It is a theft-deterrent feature. This is
the only position from which the key can be removed.
Notice:Using a tool to force the key from the
ignition switch could cause damage or break the
key. Use the correct key and turn the key only with
your hand. Make sure the key is all the way in. If
it is, turn the steering wheel left and right while you
turn the key hard. If none of this works, then
your vehicle needs service.ACC (ACCESSORY):This position allows things like
the radio and windshield wipers to operate while
the engine is off.
R(RUN):This position is where the key returns to
after the vehicle is started. With the engine off, the
RUN position displays some of the warning and
indicator lights.
/(START):This position starts the engine. Let go of
the key when the engine starts. The key will return
to the RUN for normal driving.
A continuous warning chime will sound and a KEY IN
IGNITION message will display on the Driver Information
Center (DIC) if the key is turned to OFF or ACC and
the driver’s door is opened.
Retained Accessory Power (RAP)
If the vehicle has Retained Accessory Power (RAP),
certain features will continue to operate for up to
10 minutes after the ignition key is turned to OFF unless
a door is opened.
2-22
Page 103 of 472
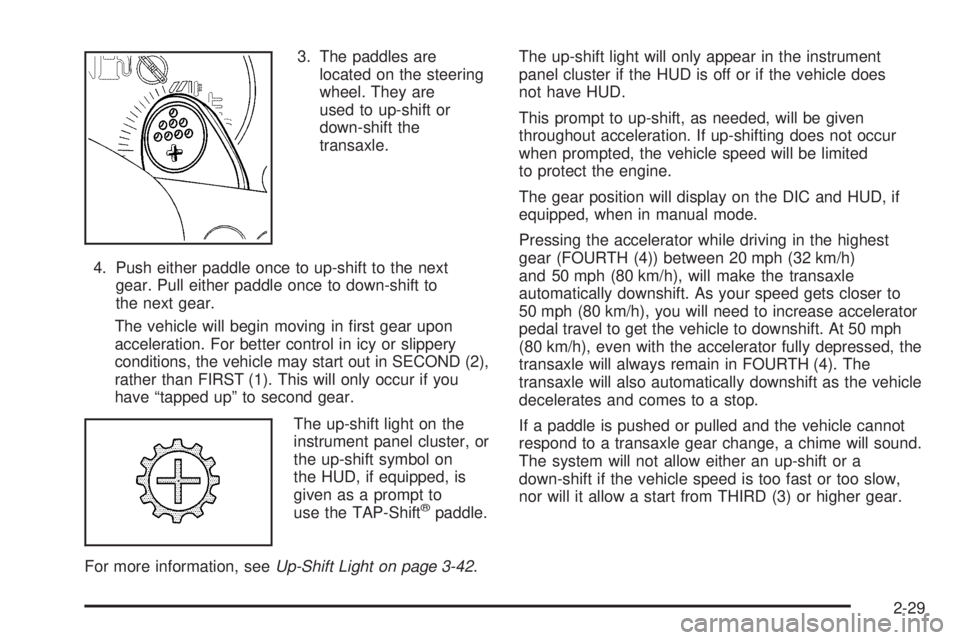
3. The paddles are
located on the steering
wheel. They are
used to up-shift or
down-shift the
transaxle.
4. Push either paddle once to up-shift to the next
gear. Pull either paddle once to down-shift to
the next gear.
The vehicle will begin moving in �rst gear upon
acceleration. For better control in icy or slippery
conditions, the vehicle may start out in SECOND (2),
rather than FIRST (1). This will only occur if you
have “tapped up” to second gear.
The up-shift light on the
instrument panel cluster, or
the up-shift symbol on
the HUD, if equipped, is
given as a prompt to
use the TAP-Shift
®paddle.
For more information, seeUp-Shift Light on page 3-42.The up-shift light will only appear in the instrument
panel cluster if the HUD is off or if the vehicle does
not have HUD.
This prompt to up-shift, as needed, will be given
throughout acceleration. If up-shifting does not occur
when prompted, the vehicle speed will be limited
to protect the engine.
The gear position will display on the DIC and HUD, if
equipped, when in manual mode.
Pressing the accelerator while driving in the highest
gear (FOURTH (4)) between 20 mph (32 km/h)
and 50 mph (80 km/h), will make the transaxle
automatically downshift. As your speed gets closer to
50 mph (80 km/h), you will need to increase accelerator
pedal travel to get the vehicle to downshift. At 50 mph
(80 km/h), even with the accelerator fully depressed, the
transaxle will always remain in FOURTH (4). The
transaxle will also automatically downshift as the vehicle
decelerates and comes to a stop.
If a paddle is pushed or pulled and the vehicle cannot
respond to a transaxle gear change, a chime will sound.
The system will not allow either an up-shift or a
down-shift if the vehicle speed is too fast or too slow,
nor will it allow a start from THIRD (3) or higher gear.
2-29